Loading ...
Loading ...
Loading ...

11
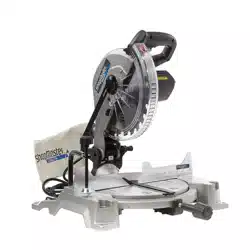
FIGURE 9
PREPARING YOUR SAW FOR USE
INSTALL/REPLACE THE BLADE
According to the markings on the saw a
10-inch blade is the maximum blade
capacity of the saw. Larger blades will come in contact with
the blade guards. Only use blades which are rated for at
least 5,500 RPM or higher. Only use blades with a maximum
kerf width of 2.7mm or less.
1. Make sure the saw is unplugged.
2. Raise the saw arm to the full upright position.
3. In Figure 10, Rotate the lower blade guard (C) up.
Slightly loosen the blade bolt cover screw (D) until you
can move the blade bolt cover (E) up to expose the
blade bolt (F).
Refer to Figure 11.
4. Press the spindle lock button (G).
5. If replacing the blade, carefully rotate the old blade until
the spindle locks in place.
6. Using the supplied blade wrench, remove the blade bolt
(F) by turning it clockwise.
NOTE: The blade bolt has left-hand threads.
7. Remove only the outer blade washer (H) and the blade
(I), leaving the inner blade washer on the spindle.
If inner blade washer has been removed,
replace it before placing blade on spindle.
Failure to do so could cause an accident since blade will not
tighten properly.
8. Carefully fit saw blade inside the lower blade guard and
guide it onto spindle, ensuring the teeth of the blade are
facing down at the front of the saw.
9. Align the double “D” flats on the blade washer with the
flats on the spindle and fit the washer onto the spindle.
10. Lock the spindle by depressing the spindle lock button.
Replace blade bolt, remembering to thread it counter
clockwise. Tighten blade bolt securely.
Always install the blade with the blade teeth and the arrow on the side of the blade pointing down at
the front of the saw. The direction of the blade rotation is also stamped with an arrow on the upper
blade guard.
FIGURE 10
1. The battery compartment (A) is located in the control
arm on the rear of the saw. See Figure 9.
2. Using the Phillips end of the supplied blade wrench,
remove the screw (B) securing the compartment
cover and lift off the cover.
3. Install two AAA batteries (supplied) as shown on the
diagram in the compartment.
4. Replace the cover and secure with the screw.
Laser radiation. Avoid direct eye contact
with light source.
INSTALL BATTERIES FOR LASER
A
B
C
D
F
E
ASSEMBLY
FIGURE 11
G
IH
Loading ...
Loading ...
Loading ...