

READ & UNDERSTAND INSTRUCTION MANUAL
Save all warnings and instructions for future reference.
2200W HIGH PRESSURE WASHER
Original Instructions
GB
EW U15E
Q1W-SP01-2175CA

2
V 1.0
3
A
B
1
2
3
4
5
6
7
8
9
10
11
12
a
b
e
g
h
i
j
f
c d
k
4
C
F
G
H
I
D
E
1
2
1
2
1
2
1
2
3
5
J
K
N
O
P Q
L
M
*
< 40 °C (104 °F)
1
2
1
2
6
R
S
7
Intended use 08
Safety 08
Symbols 15
Technical data 18
Description of product 19
Installation 20
Operation 21
Maintenance and storage 24
Troubleshooting 26
Declaration of conformity 28
Disposal 30
EW U15E Original Instructions
CONTENT

8
INTENDED USE
The washer is designed only for cleaning façades, patios, walkways,
garden tools, machines, vehicles, tools, etc. It is only intended for private
use and is not suitable for commercial use.
Use the washer only as described in this user manual. Any other use is
deemed improper and may result in damage to property or even personal
injury. The washer is not a children’s toy.
The manufacturer or vendor accepts no liability for damage caused by
improper or incorrect use.
SAFETY
The following signal words are used in this operating
manual.
WARNING
This signal symbol/word denotes a hazard with an
average risk level that could lead to death or severe injury
if it is not avoided.
NOTE
This signal word provides a warning about potential
material damage.
Safety notes
WARNING!
Risk of electric shock!
A faulty electrical installation or excessive mains voltage
may result in an electric shock.
- An experienced electrician must connect the device
to the mains and the connection must meet the
requirements of IEC 60364-1.
- It is recommended that the power supply for this
washer be supplied either via a fault-current circuit
breaker that interrupts the power supply as soon as

9
SAFETY
the leakage current to the earth exceeds 30 mA for 30
ms, or that it be equipped with an earth tester.
- Connect the washer only if the mains voltage of the
socket corresponds to the rating plate specification.
- Connect the washer only to an easily accessible
socket to allow the washer to be disconnected from
the mains quickly in the event of a fault.
- Do not operate the washer if it is visibly damaged or if
the mains cord or mains plug is defective.
- If the supply cord of the washer is damaged, to
avoid risks it must be replaced by the manufacturer
or its After Sales Support or by a person with similar
qualifications.
- Do not open the housing; instead, have a qualified
professional carry out the repairs. Contact a qualified
workshop for this. Liability and warranty claims are
waived in the event of repairs performed by the
user, improper connection of the device or incorrect
operation.
- Only parts that comply with the original device
information may be used for repairs. This washer
contains electrical and mechanical parts which are
essential for providing protection against sources of
danger.
- Do not operate the washer with an external timer or
separate telecontrol system.
- Do not immerse the washer or the mains cord or
mains plug in water or other liquids.
- Never touch the mains plug with damp hands.
- Never pull the mains plug out of the socket by the
mains cord; instead, always do so by taking hold of

10
the mains plug.
- Never use the mains cord as a carrying handle.
- Keep the washer, mains plug and mains cord away
from open flames and hot surfaces.
- Lay the mains cord so that it does not pose a tripping
hazard.
- Do not kink the mains cord and do not lay it over
sharp edges.
- Never store the washer such that there is a risk of it
falling into a tub or a basin.
- Attention! In a small power supply network, switching
on this equipment can cause momentary voltage
drops. This can influence other equipment, e. g.
flickering of a lamp). In a network with an impedance
z
max
<0.445 Ohm, such disturbances are not expected.
Please contact your local supplier for further
information.
WARNING!
Danger for children and persons with impaired physical,
sensory or mental capacities (e.g. partially disabled
persons, older persons with reduced physical and mental
capacities) or lack of experience and knowledge (e.g.
older children).
- This washer may be used by persons with impaired
physical, sensory or mental capacities or those lacking
experience and knowledge if they are supervised or
have been instructed in how to safely use the washer
and have understood the risks associated with
operating it.
SAFETY

11
- This washer must not be used by children. Children
must be supervised to ensure that they do not play
with the device.
- Do not leave the washer unattended during operation.
- Do not let children play with the packaging. Children
may get caught in it when playing and suffocate.
- Do not allow children to play with the cleaner. Children
could swallow small parts and choke.
WARNING!
Danger of explosion!
The spraying of flammable liquids can cause an explosion.
- Do not spray any flammable liquids and do not use
the washer in explosive environments.
WARNING!
Risk of electric shock!
Unsuitable extension cords may be dangerous and could
result in an electric shock.
- If an extension cord is used, the mains plug and
coupling
- must be water-tight and must never be placed in
water. Use a cord reel that keeps the socket at least
60 mm above the ground.
WARNING!
Risk of injury!
High-pressure jets may be dangerous if used improperly.
- The high-pressure jet must not be pointed at persons,
active electrical equipment or at the washer itself.
SAFETY

12
SAFETY
- Do not use the washer within range of other persons
unless they are wearing protective clothing.
- Do not point the washer at yourself or other persons
to clean clothing or footwear.
- Before first start-up, familiarise yourself with the
control elements and safety functions of the washer
and the spray gun.
- When operating the washer, wear suitable personal
protective equipment (PPE) such as safety footwear,
safety gloves, protective helmets with visor, ear
protection, etc.
- Before you begin any kind of cleaning, check the work
area for objects that could pose a risk. Remove all
objects that you could stumble over from the work
area, e.g. toys or garden furniture.
- Ensure that you have a stable stance, especially
considering the possibility of kickback when you
depress the trigger of the spray gun.
- Be particularly careful when cleaning tyres. Car tyres
and tyre valves could be damaged or pop if handled
improperly. Discolouration of the tyres indicates the
first signs of damage.
- Damaged vehicle tyres and tyre valves pose a risk to
life. Keep the high-pressure jet at a distance of at least
30 cm!
- The washer must not be used by children or untrained
persons.

13
SAFETY
WARNING!
Risk of injury!
Even if you use this washer in compliance with applicable
regulations, there are always residual risks. The following
risks associated with the construction and design of this
washer may occur:
- Injury to health attributed to hand and arm vibrations if
the washer is used over a prolonged period of time or
if it is not guided and maintained properly.
- Eye injury due to flying parts or particles of dirt blown
about by the high-pressure jet. Always wear suitable
eye protection when working with the washer.
- Skin injury from accidental contact with the high-
pressure jet or from flying parts or particles of dirt
blown about by it.
- Always wear suitable protective equipment, clothing
and firm footwear when working with the washer.
- Injury to hearing due to noise exposure. Wear suitable
ear protection to prevent damage to your hearing
when working with the washer.
- The device is equipped with a pressure switch. The
threshold is set below the maximum rated pressure.
When the water gun is closed, the internal pressure
quickly increases until the pressure switch turns off
the machine. Opening the water gun will cause the
pressure to drop and re-engage the motor.

14
NOTE!
Risk of damage!
Improper handling of the washer may result in damage to
the washer.
- Do not use the washer if a connection line or important
parts of the washer are damaged, e.g. safety
equipment, high pressure hoses, spray gun, etc.
- High-pressure hoses, fittings and couplings are
important for guaranteeing the safety of the device.
Only use high pressure hoses, fittings and couplings
recommended by the manufacturer.
- Only use original spare parts from the manufacturer or
approved by the manufacturer to guarantee the safety
of the device.
- This washer was developed to use the cleaners
delivered or recommended by the manufacturer. Using
other cleaners or chemicals can affect the safety of
the washer.
- Place the washer on a stable, level surface. Operate
it in an upright position only and never in a horizontal
position.
SAFETY
15
Safety symbols
The purpose of safety symbols is to attract your
attention to any possible dangers. The safety symbols
and their explanations deserve your careful attention
and full understanding. The symbol warnings do not, by
themselves, eliminate any danger. The instructions and
warnings they give are no substitute for proper accident
prevention measures.
WARNING:
Be sure to read and understand
all safety instructions within this operator’s
manual, including all safety alert symbols such as
“DANGER”
,
“WARNING”
, and
“CAUTION”
before
using this tool. Failure to follow all instructions
listed below may result in electric shock, fire and/or
serious personal injury.
SAFETY ALERT SYMBOLS:
Indicate
DANGER,
WARNING,
or
CAUTION.
May be used in conjunction
with other symbols or pictographs.
Symbol meanings
This page depicts and describes safety symbols that may
appear on this product. Read, fully understand and follow
all instructions on the appliance before attempting to
assemble and operate.
SYMBOLS

16
Caution! Read the user manual prior to start-up!
This symbol indicates that the mains plug
must be disconnected from the power supply
immediately if the cord is damaged, twisted or
knotted, if it has been severed, or if the washer
is left unsupervised, even for a short period of
time.
This symbol indicates that the high-
pressure jet must never be pointed directly
at persons, animals, the washer or the
electrical components.
This symbol indicates that the washer must
not be connected directly to the drinking
water network. If necessary, use it only with a
water backflow preventer or an inlet hose set
approved in accordance with
IEC 61770.
This symbol indicates that to wind up the
high-pressure hose the crank for the hose reel
may be turned only anticlockwise. Winding it
clockwise may damage the high-pressure hose
and the washer.
SYMBOLS
17
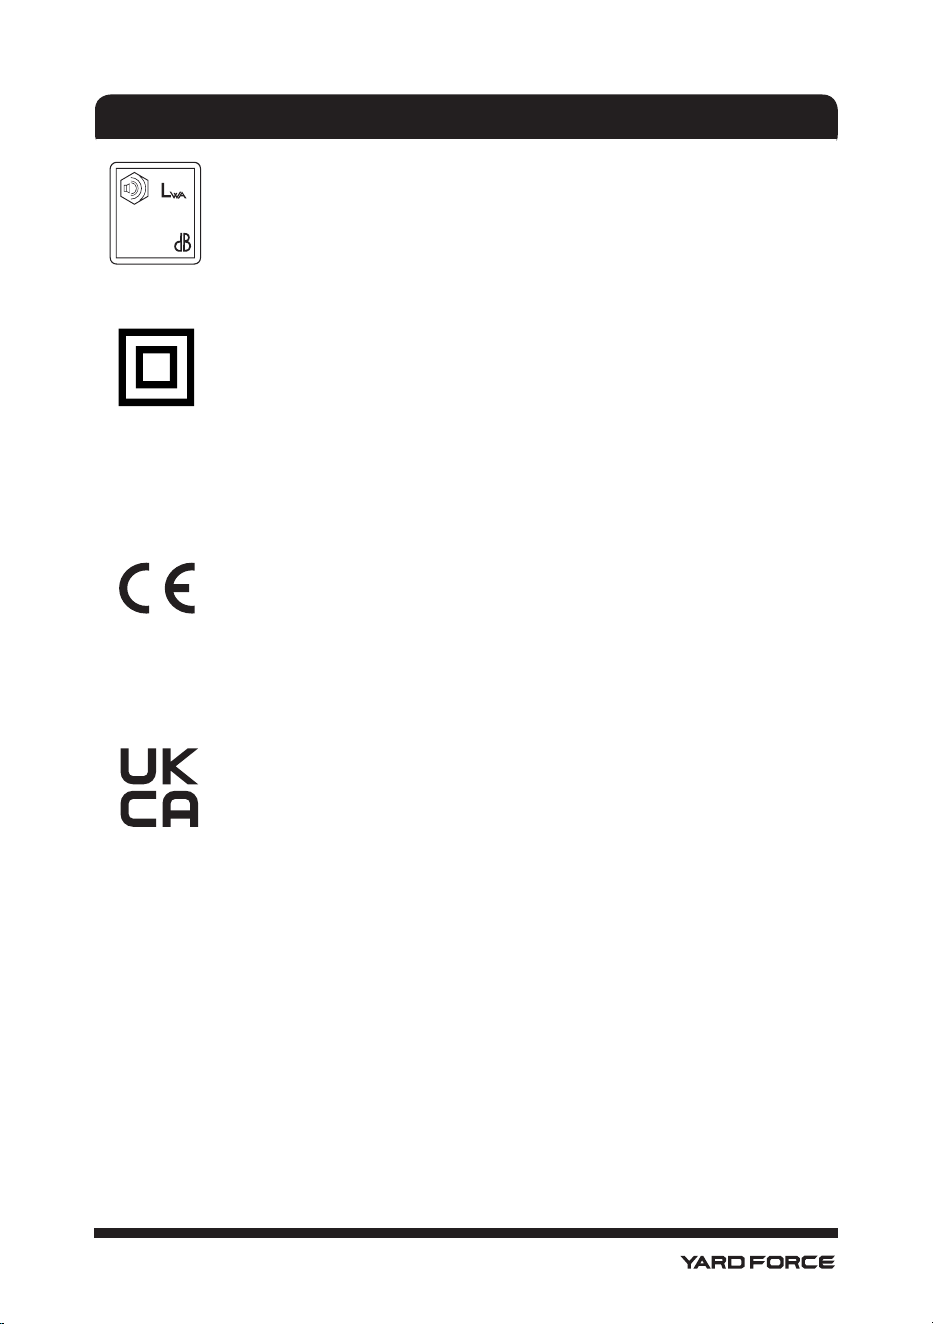
This symbol indicates the loudness of the
washer during operation.
This symbol indicates that the device complies
with the protection class II.
Protection against water jets from all directions
Declaration of conformity (see chapter
“Declaration of conformity”): Products marked
with this symbol meet all the applicable
Community regulations of the European
Economic Area.
Conforms to relevant UK regulatory
requirements.
SYMBOLS
IPX5
89
18
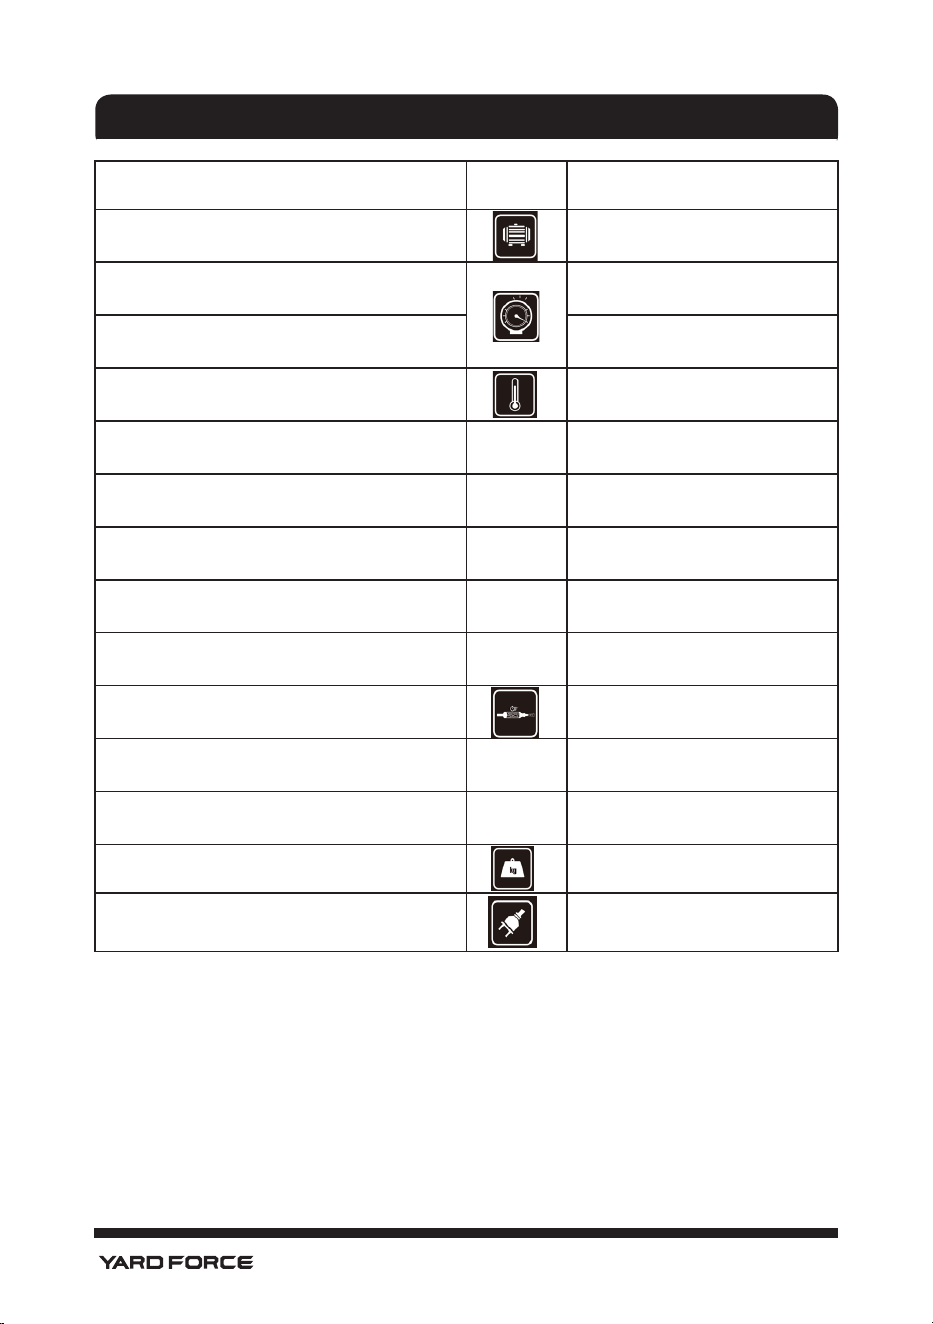
TECHNICAL DATA
Model EW U15E
Power consumption 2200W
Operating pressure: max. pressure
16.5 MPa (165 bar)
Nominal pressure: 11.5MPa (115 bar)
Input pressure/temperature max. 0,6 MPa (6 bar) / 40 °C
Sound power level L
wA
= 85 dB(A) K=1.88 dB(A)
Guaranteed sound power level L
wA
= 89 dB(A)
Sound pressure level L
pA
= 77 dB(A) K=3.0 dB(A)
Vario pressure nozzle < 2,5 m/s
2
Turbo nozzle < 2,5 m/s
2
Water consumption Max. 7.5 l/min
Protection class IPX5
Protection class II
Incl. accessories 9.9kg
Motor specication
Single-phase alternating current
motor, 230–240 V~/50 Hz
The values for noise and vibration emissions were determined in accordance with EN 60335-
2-79:2012.

19
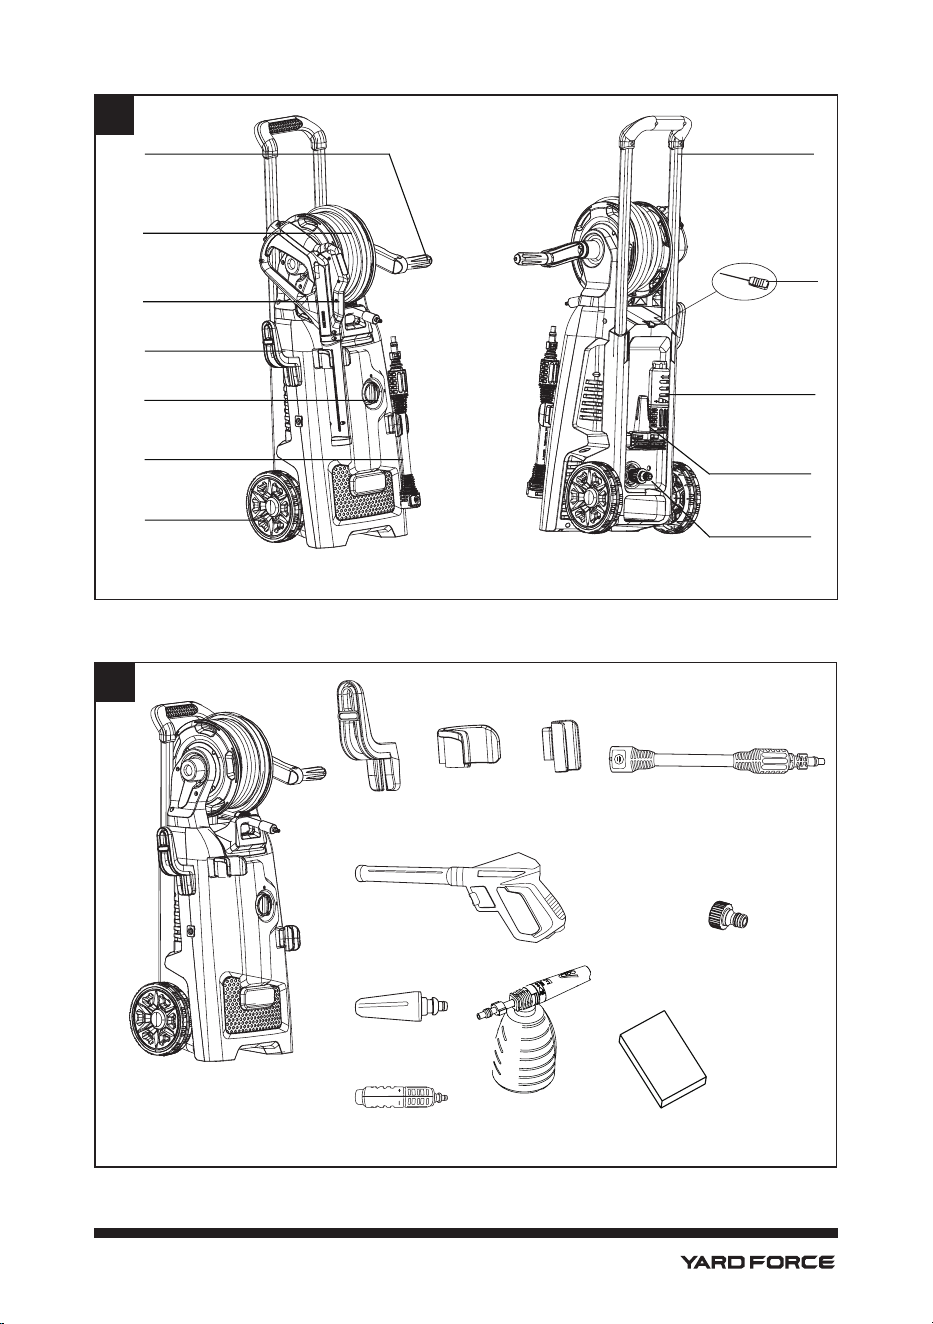
DESCRIPTION OF PRODUCT
Parts description (Fig. A)
1. Hand crank (foldable)
2. High-pressure hose
3. Spray gun
4. Cable hook
5. ON/ OFF switch
6. Extension tube
7. Wheels
8. Water inlet
9. Turbo nozzle
10. Vario pressure nozzle
11. Carry handle
12. Cleaning pin
Check the delivery parts (Fig. B)
Remove the appliance from its packaging carefully and make sure that all of the
following parts are present:
a. High pressure washer
b. Cord hook
c. Gun holder
d. Extension lance holder
e. Spray gun
f. Extension lance
g. Turbo nozzle
h. Vario pressure nozzle
i. From sprayer
j. Manual
k. Coupling element for water connection

20
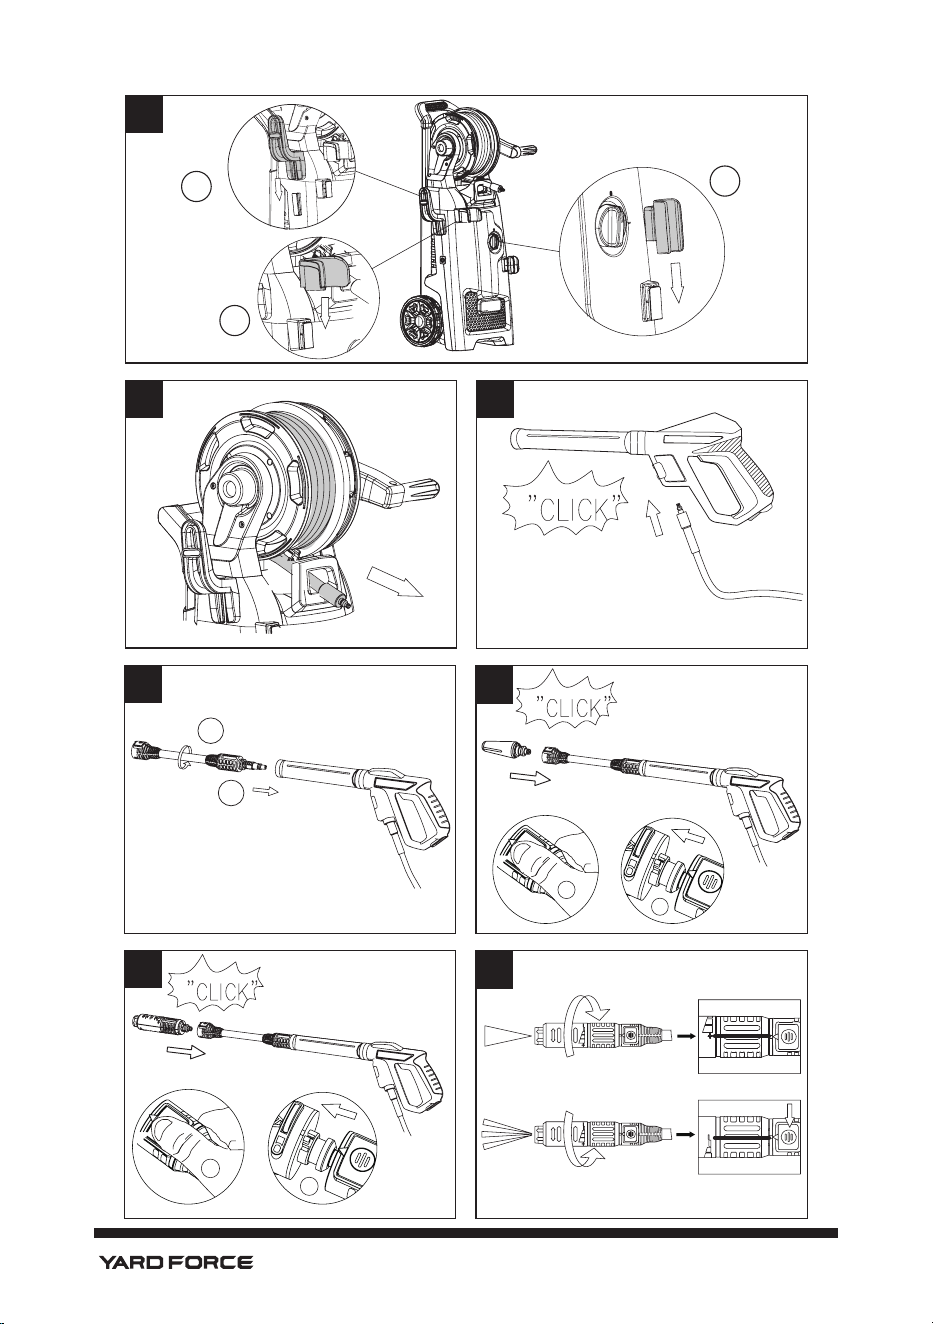
INSTALLATION
Assembly the accessories (Fig. C)
1. Install the cord hook onto the housing left side
2. Install the gun holder on the front housing.
3. Install the extension lance on the front decorating panel.
WARNING!
Rist of injury!
The washer could be inadvertently activated and cause injury.
- Ensure that the washer is disconnected from the mains before you assemble the washer.
WARNING!
Health hazard!
The washer must not be directly connected to the drinking water
network because the return flow of water poses a risk to the drinking
water.
- Use a water backflow preventer or an inlet hose set approved in accordance with IEC
61770.
- Cleaning car motors and other objects contaminated by oil and various lubricants is
permissible only on such areas where the waste water is diverted by an oil separator.
- Water that has flowed through the backflow preventer is considered unfit for drinking.
1. Insert the plug connection of the high-pressure hose in the connection on the handle of
the spray gun. (Fig. D&E)
2. Insert any given cleaning nozzle onto the spray gun. See chapter “Using the cleaning
attachments”.
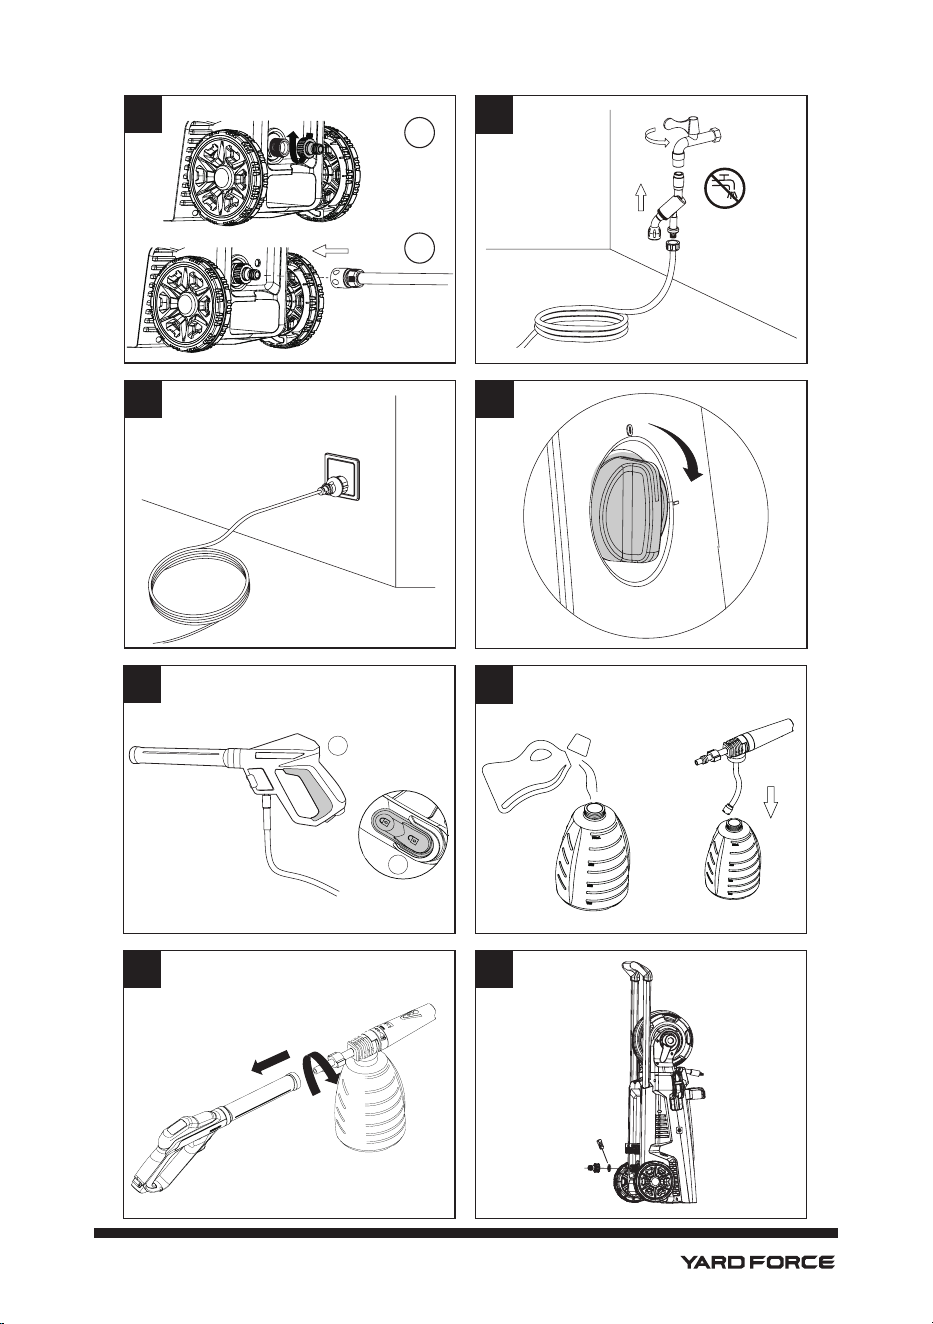
3. Connect a water inlet hose with a quick-lock coupling (not included in the package
contents) with the screw connection for the water inlet hose. The water temperature may
amount to no more than 40 °C. (Fig. J&K)
4. Insert the mains plug into a properly installed socket with an earthing contact and
alternating voltage in accordance with the washer’s rating plate. (Fig. L)
Starting the washer
NOTE!
Risk of damage!
Improper handling of the washer may result in damage to the washer.
- Familiarise yourself with all control elements before starting up the washer. Before each
use, make sure that the washer is functional.
- Ensure that all parts of the washer are securely attached.
- Ensure that the water connection and the high-pressure hose are not leaking.

21
NOTE!
Risk of damage!
Using the washer without water could result in damage to the washer.
- Never operate the washer without water, as dry operation could damage the pump. Use
a water filter if the supplied water is contaminated.
1. Fully open the water tap for the water intake.
2. To switch on the washer, move the ON/OFF switch to ON. The high-pressure pump
starts to run. (Fig. M)
3. Unlock the safety lock of the spray gun by pushing downwards. Press the trigger until a
steady stream of water is dispensed. Then let go of the trigger. (Fig. N)
4. To start the cleaning work, hold the spray gun tightly with both hands and press the
trigger again.
Stopping the washer
1. Release the trigger. The high-pressure pump will stop immediately.
2. Move the ON/OFF switch to OFF.
3. Close the water tap for the water inlet.
4. Push the trigger until the pressure in the washer has been released.
5. Lock the trigger by pushing downwards onto the safety lock.
Adjusting the handle (Fig. S)
The handle can be adjusted in two positions. The washer is supplied with a lowered handle.
1. Press the button for the height adjustment and pull the handle upwards until it locks into
place. The washer can be used and easily moved in this position.
2. Press the button again to lower the handle and push the handle downwards until it locks
into place.
Using a self-suctioning washer
Alternatively, you can also supply the washer from an open reservoir (water
butt, industrial water tank).
Use a suction hose with a suitable suction basket to protect the pump from
foreign bodies. We recommend using a high-quality suction hose made of
reinforced material, the diameter of which should be at least 13 mm and
the maximum length 3 m. You can achieve the best results by integrating a
non-return valve and filter in addition to the suction basket.
To connect the suction hose, please proceed as follows:
1. Place the washer in close proximity to the water source on a stable and level surface.
Observe the maximum recommended suction height of 0.5 m.
OPERATION

22
OPERATION
2. Fill the suction hose with water and allow all of the entrapped air to escape.
3. Connect the suction hose to the washer. Remove all attachments.
4. Switch on the washer and press the trigger until the washer discharges a steady stream
of water. If this is not achieved within 2 to 3 minutes, switch the washer off and check
the suction hose for entrapped air.
5. Switch off the washer and connect the desired attachment.
6. Operate the washer as usual. In addition, please refer to the user manual of the relevant
accessory part.
Using the cleaning attachments
Fitting the spray lance (Fig. F)
WARNING!
Risk of injury!
The high-pressure jet is very hard and can inflict injury.
- Start using the washer by working at a substantial distance and reduce this as needed.
The spray lance is equipped with a quick lock to assist in changing the
cleaning attachments.
1. Insert the spray lance into the spray gun in such a way that the end of the quick lock
points away from the spray gun.
2. To fix the spray lance, push it slightly downwards and turn it clockwise at the same time.
Removing the spray lance
1. Stop the washer and move the ON/OFF switch to OFF.
2. Push the trigger until the pressure in the washer has been released.
3. Push the spray lance slightly in the direction of the spray gun and turn the spray lance
anticlockwise at the same time.
4. Remove the spray lance.
Fitting the turbo nozzle (Fig. G)
NOTE!
Risk of damage!
When using the turbo nozzle, there is a very high risk of damaging
sensitive surfaces.
- Be very careful when using the turbo nozzle during cleaning.
- Start using the washer by working at a substantial distance and reduce this as needed.

23
The turbo nozzle produces a rotating high-pressure jet that can also get rid
of stubborn dirt.
1. Place the turbo nozzle on the quick lock of the spray lance in such a way that the small
rectangular elevation fits exactly into the rectangular recess in the spray lance.
2. Press the turbo nozzle down firmly on the spray lance. The orange button of the quick
lock clicks once the nozzle is positioned correctly.
Removing the turbo nozzle
1. Stop the washer and move the ON/OFF switch to OFF.
2. Push the trigger until the pressure in the washer has been released.
3. Press the yellow button of the quick lock on the spray lance and pull off the turbo nozzle.
Fitting the Vario pressure nozzle (Fig. H)
The Vario pressure nozzle produces a fan beam at a 30° angle.
1. Place the Vario pressure nozzle on the quick lock of the spray lance in such a way that
the small rectangular elevation fits exactly into the rectangular recess in the spray lance.
2. Press the Vario pressure nozzle down firmly on the spray lance. The yellow button of the
quick lock clicks if the Vario pressure nozzle is positioned correctly.
3. Turn the Vario pressure nozzle to set the desired water pressure. (Fig. I)
Removing the Vario pressure nozzle
1. Stop the washer and move the ON/OFF switch to OFF.
2. Push the trigger until the pressure in the washer has been released.
3. Press the yellow button of the quick lock on the spray lance and pull off the Vario
pressure nozzle.
Using the detergent bottle.
1. Stop the machine.
2. Add detergent to the bottle. (Fig. O)
3. Attach the detergent bottle onto the spray gun. (Fig. P)
OPERATION

24
MAINTENANCE AND STORAGE
WARNING!
Risk of electric shock!
Cleaning and maintenance of the washer while it is connected to the mains
may lead to an electric shock.
- Each time before cleaning or maintenance work, switch the washer off and disconnect it
from the mains.
- Do not clean the washer with a high-pressure jet.
NOTE!
Risk of damage!
Improper cleaning may damage the washer.
- Do not use any aggressive cleaners, brushes with metal or nylon bristles or sharp or
metallic cleaning utensils such as knives, metal sponges and the like. These can damage
the surfaces.
Cleaning the washer
1. Before cleaning, pull the mains plug out of the socket.
2. Wipe the washer and the accessories off with a slightly damp cloth.
Cleaning the dirt filter
(FIg. Q)
The washer is equipped with a dirt filter to protect the pump. If the dirt filter
is not kept clean, the flow of water to the washer will be restricted and the
pump could be damaged.
1. Check the dirt filter after each use.
2. Screw off the adapter on the screw connection for the water inlet hose and take out the
dirt filter.
3. Rinse out the dirt filter until it is free of dirt and deposits.
4. Insert the dirt filter again and screw the adapter on the screw connection for the water
inlet hose tightly.
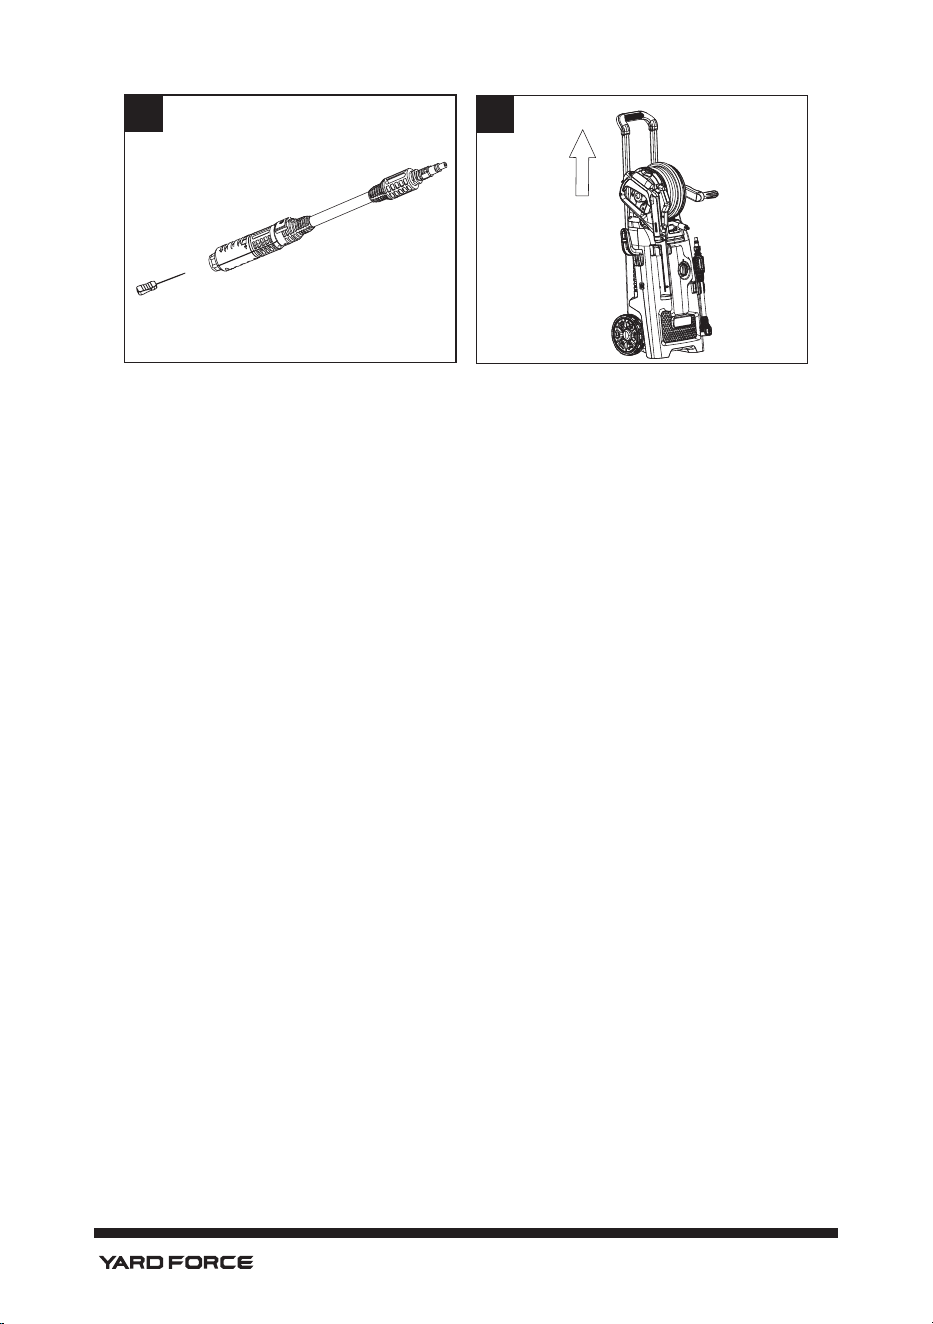
Cleaning the high-pressure nozzles
(FIg. R)
1. Remove the cleaning pin from the back of the washer.
2. Use the cleaning pin to clean the high-pressure nozzles of the cleaning attachments.
3. Re-insert the cleaning pin in the rear of the washer.

25
MAINTENANCE AND STORAGE
Storage
NOTE!
Risk of damage!
There is always some leftover water in the washer and the pump that could
result in damage to the washer.
- Do not store the washer at temperatures below the freezing point, as this may result in
frost damage.
- If you take the washer out of commission for a prolonged period of time, empty the
cleaner container and let the water drain out of the high-pressure hose.
- Store the washer upright in a dry, well ventilated location protected from access by
children.
- Pay attention to the high net weight of the machine during unpacking, transport and
storage.
- Wind the high-pressure hose using the hand crank anticlockwise onto the hose reel.
- Secure the end of the hose with the hose clamp.
- Wind the mains cord around the cord holder at the rear side of the device.
- Store the accessory parts in the compartments provided for this purpose (e.g. holder for
the spray gun) on the front and rear side of the washer.
26
TROUBLESHOOTING
WARNING!
Tampering with the washer could pose a risk to life from electric shock, damage the washer
and void warranty claims.
- Do not make any modifications to the washer.
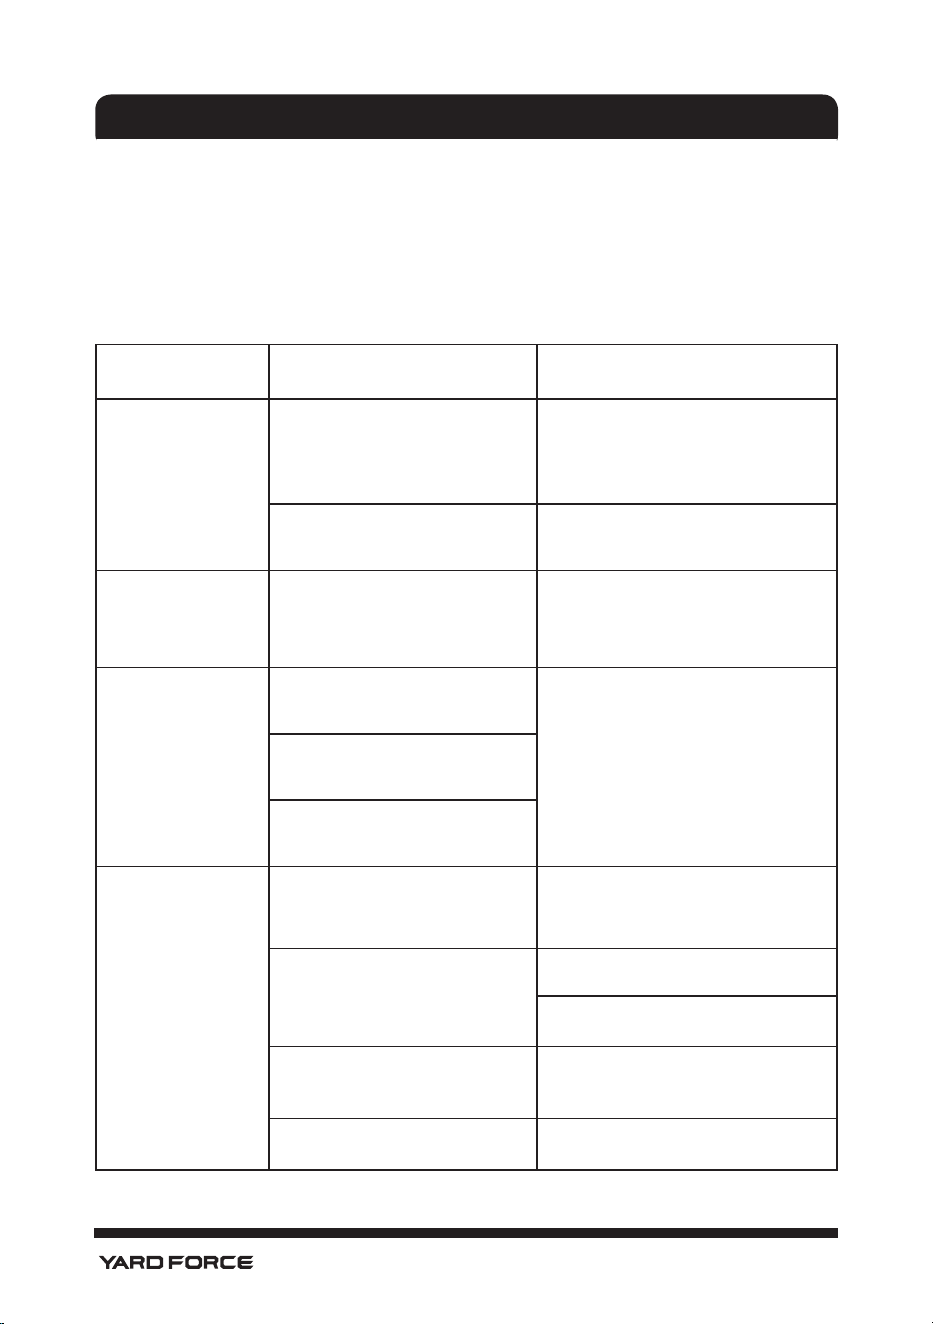
The following table provides assistance in the event of malfunctions. If the solutions provided
here are unsuccessful, contact the manufacturer or an authorised service centre at the service
address specified on the warranty card.
Fault/
malfunction
Cause Remedy
Device does not
work.
The power supply is interrupted.
Check the power connection,
mains cord and fuse; have repairs
performed by an electrician if
necessary.
The washer is switched off. Move the ON/OFF switch to ON.
Device does not
work.
Individual components are
defective.
Contact the manufacturer or an
authorised service centre at the
service address specified on the
warranty card.
Washer is working,
but keeps
cutting out.
The mains cord is damaged.
Contact the manufacturer or
an authorised service centre
at the service address
specied on the warranty
card.
An internal electrical connection
has become loose.
The ON/OFF switch is defective
No pressure or only
slight
pressure is built up.
There is air in the washer.
Operate the washer without con-
necting the spray gun until the water
is dispensed without bubbles.
There is no water or an
insufcient supply of water.
Check your water connection.
Check the water inlet hose for leaks
or blockage.
The dirt lter is clogged.
Clean the dirt lter; see chapter
“Cleaning the dirt lter”.
The washer draws in air.
Check for leaks in the water inlet
hose
27
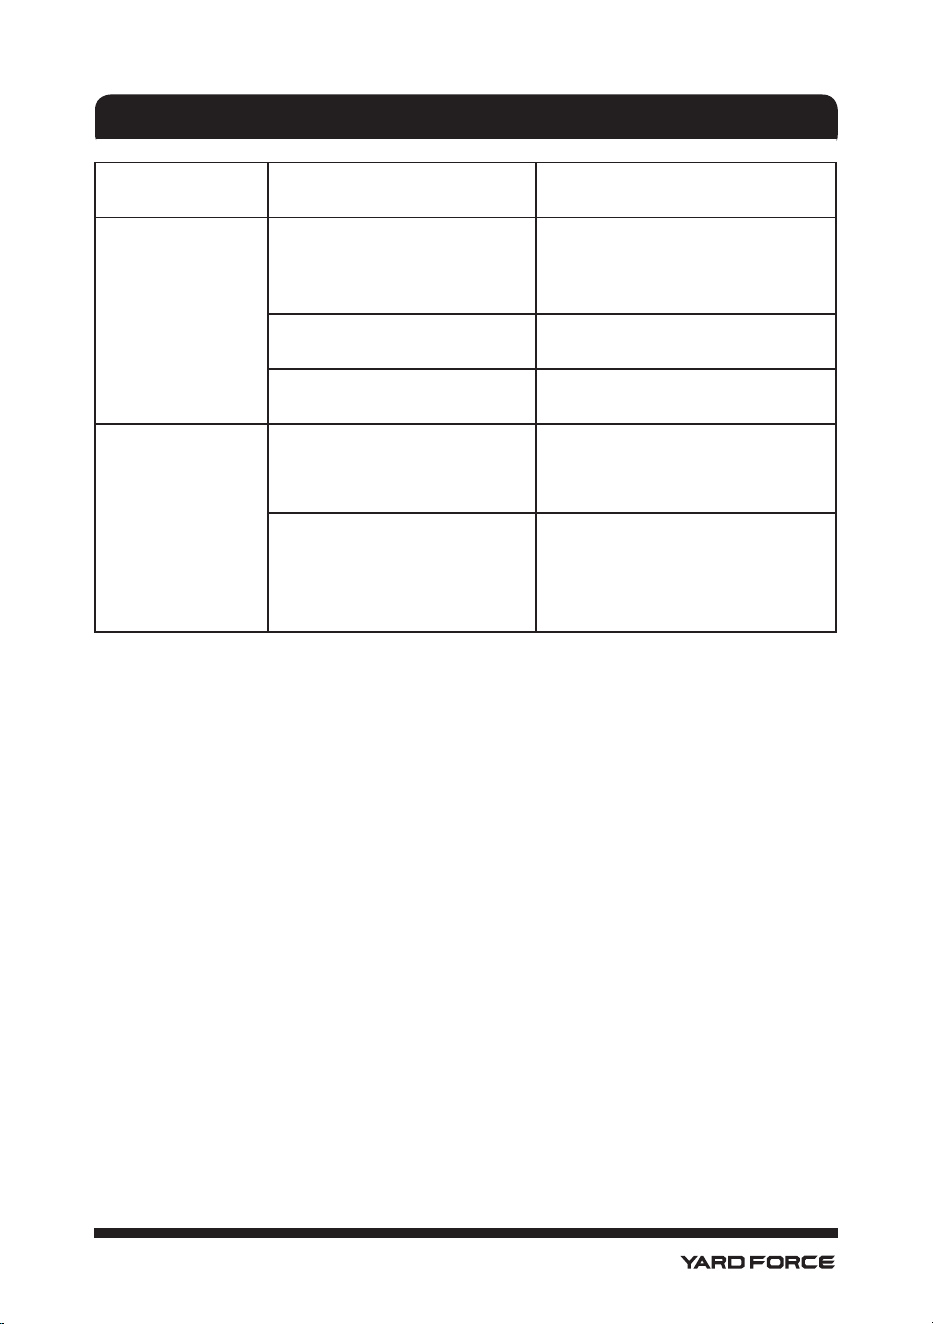
TROUBLESHOOTING
Fault/
malfunction
Cause Remedy
Large fluctuations in
pressure.
The high-pressure nozzle is
clogged.
Clean the high-pressure
nozzle; see chapter “Cleaning
the high-pressure nozzles”.
There is only insufcient
water pressure.
Check the water pressure.
The water inlet hose is
kinked.
Check the water inlet hose.
The washer has a
leak.
The connections of the water
inlet hose are loose.
Tighten the adapter on the screw
connection for the water inlet hose
and the screw connection on your
water tap until hand-tight.
The pump or the internal
connections have a leak.
Contact the manufacturer or
an authorised service centre
at the service address
specied on the warranty
card.
28
DECLARATION OF CONFORMITY
Declaration of Conformity
We
MEROTEC GmbH
Otto-Brenner-Str. 8, D-47877 Willich, Germany
Declare that the product:
Machine Description: High Pressure Water Cleaner
Model no.:EW U15E / Q1W-SP01-2175CA
Function: Clean the walls of building etc.
Complies with the following directives:
2006/42/EC Machinery Directive
2014/30/EU EMC Directive
2000/14/EC Noise Directive, amended by 2005/88/EC
conformity assessment procedure: 2000/14/EC Annex V
Measured sound power level L
wA
= 85 dB(A)
K=1.88 dB(A)
Declared Guaranteed sound power level L
wA
= 89 dB(A)
2011/65/EU RoHS
Applied harmonized standards:
EN 60335-1:2012+A11:2014+A13:2017+A1:2019+A14:2019+A2:2019+A15:2021
EN 60335-2-79:2012
EN IEC 55014-1:2021
EN IEC 55014-2:2021
EN 61000-3-11:2019
EN 61000-3-2:2019+A1:2021
MEROTEC GmbH
Otto-Brenner-Str. 8
D-47877 Willich
Place, date: Willich, 07.11.2023
Authorised Signature:
________________________
Ronald Menken
General Manager

29
DECLARATION OF CONFORMITY
To the provisions of Council Directives
We
SUMEC UK
Unit A&B Escrick Business Park Escrick, York YO19 6 FD/ United Kingdom
Declare that the product:
Machine Description: 2200W High Pressure Washer
Model no.:EW U15E / Q1W-SP01-2175CA
Function: Clean the walls of buildings etc.
Complies with the essential health and safety requirements of the following directives:
Supply of Machinery (Safety) Regulations 2008
Electromagnetic Compatibility Regulations 2016
The Restriction of the Use of Certain Hazardous Substances in Electrical and Electronic
Equipment Regulations 2012
Noise Emission in the Environment by Equipment for use Outdoors Regulations 2001
Measured sound power level L
wA
= 85 dB(A)
K=1.88 dB(A)
Declared Guaranteed sound power level L
wA
= 89 dB(A)
Standards and technical specification referred to :
EN 60335-1:2012+A11:2014+A13:2017+A1:2019+A14:2019+A2:2019+A15:2021
EN 60335-2-79:2012
EN IEC 55014-1:2021
EN IEC 55014-2:2021
EN 61000-3-11:2019
EN 61000-3-2:2019+A1:2021
Authorized Signatory
Date:
07.11.2023
Signature:________________________
Place: York
Name: Mariana Hall
General Manager
SUMEC UK
Unit A&B Escrick Business Park Escrick
York YO19 6 FD, United Kingdom
30
DISPOSAL
Disposing of packaging
Dispose of packaging according to type. Sort the paperboard and
cardboard as waste paper and the film as recyclable material.
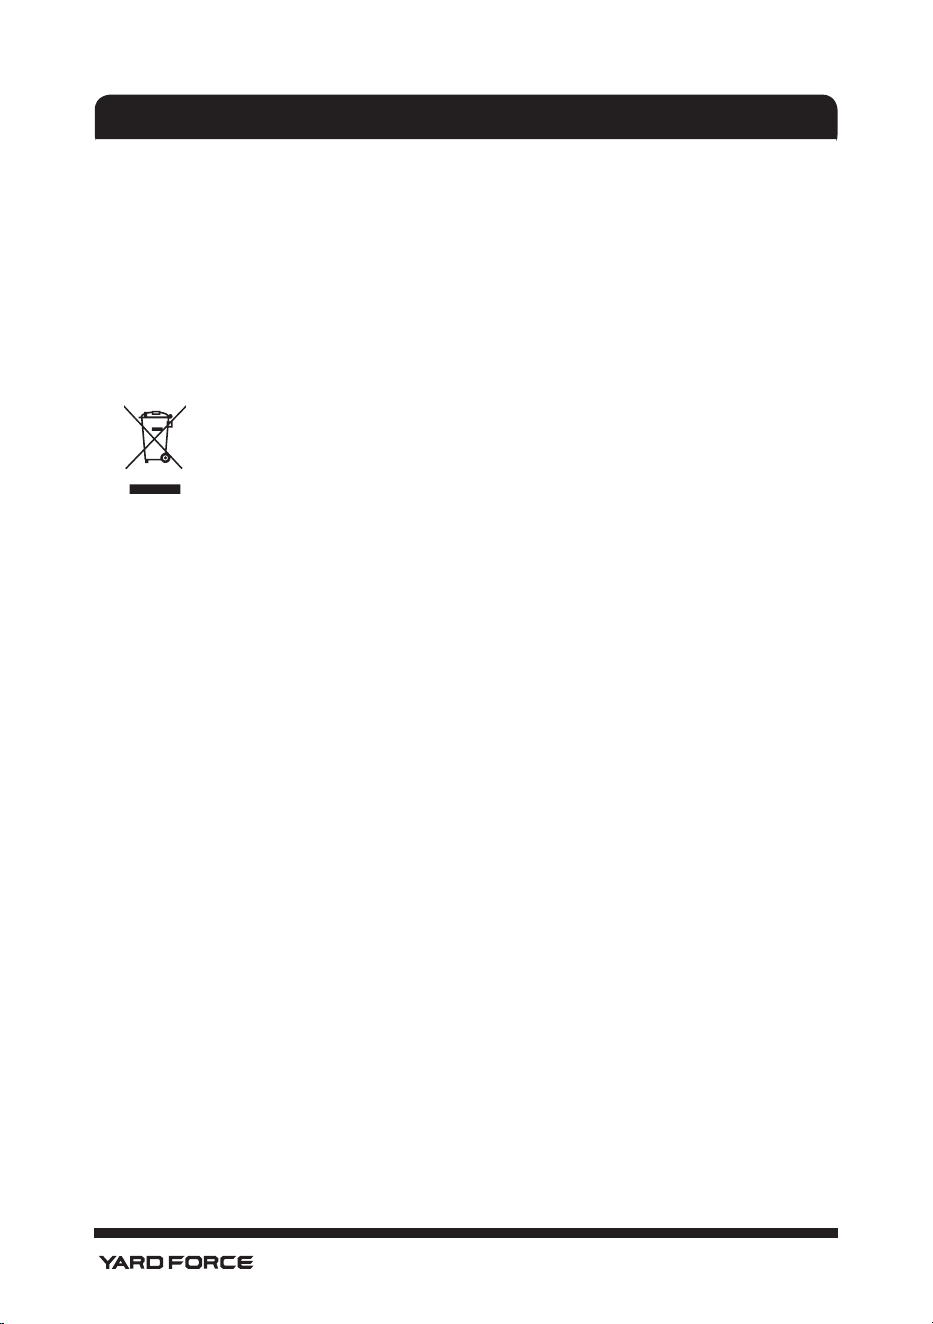
Disposing of the washer
Applicable in the European Union and other European countries with
systems for separate collections of recyclable waste.
This symbol indicates that this product may not be disposed
of together with domestic waste in compliance with the
(2012/19/EU) Regulation pertaining to waste electrical and
electronic devices (WEEE). This product must be handed in
at a collection point intended for the purpose. This can occur,
for example, by handing it in at an authorised collecting point
for the recycling of waste electrical and electronic equipment.
Owing to potentially hazardous substances that are frequently
contained in waste electronic equipment, incorrect handling
of waste equipment may have a negative impact on the
environment and on the health of human beings. By disposing
of this product correctly, you are also contributing towards an
efficient use of natural resources. Information on collecting
points for waste equipment can be obtained from your local
authority, an authorised institution for the disposal of waste
electrical and electronic equipment or the waste collection
services.
