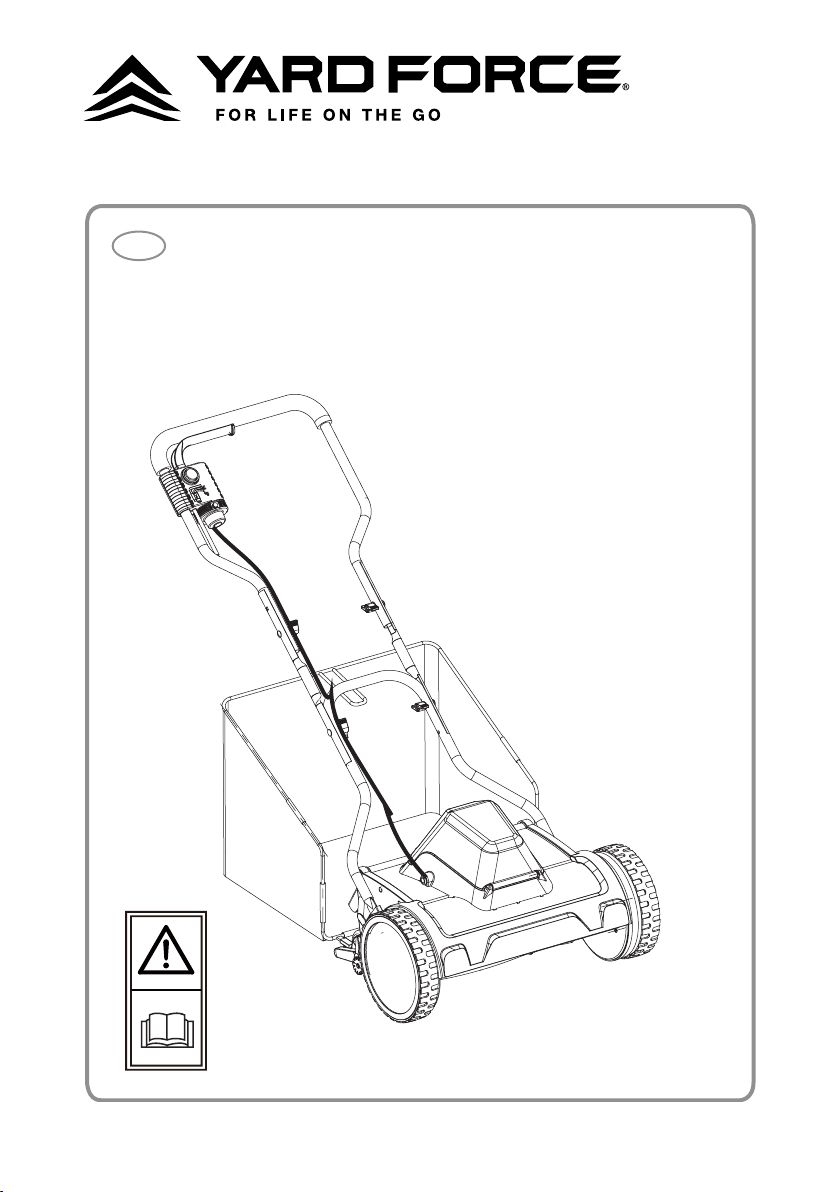
1
20V CORDLESS ROLLER LAWN MOWER
Original Instructions
GB
LM C38

2
Read this manual carefully prior to assembling and
operating the lawnmower. It is dangerous to operate this
product without being familiar with these instructions.
Keep this manual in a safe place and have it ready for
future reference.
3
A
1
2
3
4
5
6
7
8
9
10
11
12
13
14
15
R
R
B
a
b
c
d
e
f
g
i
h
j
4
C
E
G
F
H
D
I J
R
R
5
K
M
O
N
P
L
Q R
1
5
2
5
3
5
4
3
1
3
2

6
LM C38 Original Instructions
CONTENT
Intended use 07
General safety warnings 07
Product safety warnings 11
Symbols 16
Technical data 21
Description of product 22
Operation 23
Maintenance and storage 27
Troubleshooting 29
CE declaration 30

7
INTENDED USE
The powered cylinder mower is only intended for use outdoors.
The product is designed for domestic lawn mowing. Both wheels should touch the
ground while mowing. It is a pedestrian-controlled walk-behind mower designed to
be pushed by hand.
The product should never be operated with the wheels off the ground. It should not
be ridden on. It should not be pulled while powered by the battery. It should not be
used to cut anything other than domestic grass lawns.
Do not use the product for any other purpose.
GENERAL SAFETY WARNINGS
WARNING:
The product is capable of amputating hands
and feet, and throwing objects. Failure to observe all
safety instructions could result in serious injury.
WARNING:
When using the product, the safety rules
must be followed. For your own safety and that of
bystanders, please read these instructions before
operating the product. Please keep the instructions safe
for later use.
WARNING:
The product should only be operated with
the battery pack. When using battery- operated products,
basic safety precautions should always be followed to
reduce the risk
TRAINING
1. Read, understand, and follow all instructions on
the product and in this manual before operating the
product. Be thoroughly familiar with the controls and
the proper use of the product. Know how to stop the
product and disengage the controls quickly.
2. This appliance is not intended for use by persons
(including children) with reduced physical, sensory
or mental capabilities, or lack of experience and
knowledge, unless they have been given supervision

8
or instruction concerning use of the appliance by a
person responsible for their safety. Children should
be supervised to ensure that they do not play with the
appliance.
3. Keep bystanders, children and pets 15 m away from
the area of operation. Stop the product if anyone
enters the area.
4. Keep in mind that the operator or user is responsible
for accidents or hazards occurring to other people or
their property.
PREPARATION
1. While operating the product, always wear adequate
winter garments and non-skid safety footwear. Avoid
wearing clothing that is loose fitting or that has
hanging cords or ties; they can be caught in moving
parts.
2. Thoroughly inspect the area where the product is
to be used and remove all doormats, sleds, boards,
wires, and other foreign objects.
3. Blades coming in contact with a “live” wire may make
exposed metal parts of the product “live” and could
give the operator an electric shock.
4. Before use, always visually inspect to ensure blades,
blade bolts, and cutter assembly are not worn or
damaged. Replace worn or damaged blades and
bolts in sets to preserve balance. Bring the product to
an authorised service centre to replace damaged or
unreadable labels.
GENERAL SAFETY WARNINGS

9
5. Always wear safety glasses or eye shields during
operation or while performing an adjustment or repair
to protect eyes from foreign objects that may be
thrown from the product.
6. Never attempt to make any adjustments while the
product is running.
7. Secure long hair so it is above shoulder level to
prevent entanglement in moving parts.
8. Ensure before each use that all controls and safety
devices function correctly. Do not use the product if
the “off” switch does not stop the product.
BATTERY TOOLS USE AND CARE
1. Recharge only with the charger specified by the
manufacturer. A charger that is suitable for one type
of battery pack may create a risk of fire when used
with another battery pack.
2. Use power tools only with specifically designated
battery packs. Use of any other battery packs may
create a risk of injury and fire.
3. When battery pack is not in use, keep it away from
other metal objects, like paper clips, coins, keys,
nails, screws or other small metal objects, that can
make a connection from one terminal to another.
Shorting the battery terminals together may cause
burns or a fire.
4. Under abusive conditions, liquid may be ejected from
the battery; avoid contact. If contact accidentally
occurs, flush with water. If liquid contacts eyes,
GENERAL SAFETY WARNINGS

10
GENERAL SAFETY WARNINGS
additionally seek medical help. Liquid ejected from
the battery may cause irritation or burns.
5. Do not use a battery pack or tool that is damaged or
modified. Damaged or modified batteries may exhibit
unpredictable behaviour resulting in fire, explosion or
risk of injury.
6. Do not expose a battery pack or tool to fire
or excessive temperature. Exposure to fire or
temperature above 130°C may cause explosion.
7. Follow all charging instructions and do not charge the
battery pack or tool outside the temperature range
specified in the instructions. Charging improperly
or at temperatures outside the specified range may
damage the battery and increase the risk of fire.

11
PRODUCT SAFETY WARNINGS
CYLINDER MOWER SAFETY WARNINGS
1. Always use the product in the daylight or with good
artificial light.
2. Do not operate the product on wet grass or in the
rain.
3. Always be sure of your footing, and keep a firm hold
on the handles. Walk; never run.
4. Mow across the face of slopes, never up and down.
5. Exercise extreme caution when changing direction on
slopes.
6. Do not use the product near drop-offs, ditches,
excessively steep slopes, or embankments. Poor
footing could cause a slip-and-fall accident.
7. Use caution when reversing or pulling the product
towards you.
8. Turn off the product and allow the blade to stop
if the product has to be tilted for transportation
when crossing surfaces other than grass, and when
transporting the product to and from the work area.
9. Never use the product with defective guards or
shields, or without safety devices, for example,
deflectors and/ or grass collectors, in place.
10. Turn on the product carefully according to instructions
and keep hands and feet away from blades. Do not
put hands or feet near or under rotating parts.
11. Do not turn on the product when standing in front of
the discharge opening.
12. Do not put hands or feet near or under rotating parts.
Keep clear of the discharge opening at all times. Do
not put any objects into openings.

12
PRODUCT SAFETY WARNINGS
13. Do not transport the product while the power source
is running.
14. To reduce the risk of injury associated with contacting
rotating parts, always turn off the product and remove
the battery pack. Make sure all moving parts have
come to a complete stop:
• whenever leaving the product unattended
(including disposal of grass clippings)
• before checking, cleaning, or working on the
product
• before removing the grass catcher
• after striking a foreign object; inspectthe product
for damage and make repairs as necessary before
restarting and operating the product
• If the product starts to vibrate abnormally (check
immediately)
– inspect for damage, particularly the
blades
– replace or repair any damaged parts
– check for and tighten any loose parts
• Remove the safety key and keep it key away from
children when leaving the product unattended.
• Remove the safety key when maintaining or
transporting the product.
WARNING If the product is dropped, suffers heavy
impact or begins to vibrate abnormally, immediately stop
the product and inspect for damage or identify the cause
of the vibration. Any damage should be properly repaired
or replaced by an authorised service centre.

13
PRODUCT SAFETY WARNINGS
ADDITIONAL BATTERY SAFETY WARNINGS
WARNING
To reduce the risk of fire, personal injury, and product
damage due to a short circuit, never immerse your tool,
battery pack or as seawater, certain industrial chemicals,
and bleach or bleach-containing products, etc., can
cause a short circuit.
TRANSPORTATION AND STORAGE
1. Turn off the product and remove the battery pack.
Allow the product to cool down before storing or
transporting.
2. Clean all foreign material from the product. Store
it in a cool dry and well-ventilated place that is
inaccessible to children. Keep away from corrosive
agents such as garden chemicals and de-icing salts.
Do not store outdoors.
3. For transportation, secure the product against
movement or falling to prevent injury to persons or
damage to the product.
MAINTENANCE
WARNING Use only original manufacturer’s replacement
parts, accessories and attachments. Failure to do
so can cause possible injury, can contribute to poor
performance, and may void your warranty.

14
PRODUCT SAFETY WARNINGS
WARNING Servicing requires extreme care and
knowledge and should be performed only by and repairs,
have the product serviced by an authorised service centre
only. When servicing, use only original replacement parts.
1. You may make adjustments and repairs described
in this manual. For other repairs, have the product
serviced by an authorised service centre only.
2. After each use, clean the product with a soft, dry
cloth.
3. Check all nuts,bolts and screws at frequent intervals
for proper tightness to ensure the product is in safe
working condition. Any part that is damaged should
be properly repaired or replaced by an authorised
service centre.
4. Bring the product to an authorised service centre to
replace damaged or unreadable labels.
5. Check the grass catcher frequently for wear or
deterioration.
6. Be careful during adjustment of the product to
prevent entrapment of the fingers between moving
blades and fixed parts of the product.
7. When cleaning, repairing, or inspecting the product,
make sure all moving parts have come to a complete
stop. Remove the battery pack to prevent someone
from accidentally starting the product.
RESIDUAL RISKS
Even when the product is used as prescribed, it is still
impossible to completely eliminate certain residual risk
factors. The following hazards may arise during use, and

15
PRODUCT SAFETY WARNINGS
the operator should pay special attention to avoid the
following:
1. Injury caused by vibration. Always use the right tool
for the job. Use designated handles and restrict
working time and exposure.
2. Injury caused by noise. Exposure to noise can cause
hearing injury. Wear ear protection and limit exposure.
3. Injury from contact with the blades.
4. injury caused by thrown objects.
RISK REDUCTION
It has been reported that vibrations from handheld
tools may contribute to a condition called Raynaud’s
Syndrome. Symptoms may include tingling, numbness
and blanching of to cold. Hereditary factors, exposure to
cold and dampness, diet, smoking and work practices
are all thought to contribute to the development of these
symptoms. There are measures that can be taken by the
operator to possibly reduce the effects of vibration:
- Keep your body warm in cold weather. When
operating the product, wear gloves to keep the hands
and wrists warm. It is reported that cold weather is a
major factor contributing to Raynaud’s Syndrome.
- After each period of operation, exercise to increase
blood circulation.
- Take frequent work breaks. Limit the amount of
exposure per day.
If you experience any of the symptoms of this condition,
immediately discontinue use and see your physician.

16
SYMBOLS
Safety symbols
The purpose of safety symbols is to attract your attention
to possible dangers. The safety symbols and the
explanations with them require your careful attention
and full understanding. The symbol warnings do not, by
themselves, eliminate any danger. The instructions and
warnings they give are no substitutes for proper accident
prevention measures.
WARNING:
Be sure to read and understand all safety
instructions in this operator’s manual, including all safety
alert symbols such as “
DANGER
,” “
WARNING
,” and
“
CAUTION
” before using this tool. Failure to follow all
instructions listed below may result in electric shock, fire
and/or serious personal injury.
SAFETY ALERT SYMBOL
: Indicates
DANGER
,
WARNING
, or
CAUTION
. May be used in conjunction
with other symbols or pictographs.
Symbol meaning
This page depicts and describes safety symbols that may
appear on this product. Read, understand and follow
all instructions on the machine before attempting to
assemble and operate.

17
SYMBOLS
This symbol, before a safety comment, indicates
a precaution, a warning or a danger. Ignoring
this warning can lead to an accident for yourself
or for others. To limit the risk of injury, fire, or
electrocution always apply the recommendations
indicated.
To reduce the risk of injury, user must read the
instruction manual carefully.
Wear protective goggles.
Wear suitable protective gloves.
Wear ear protection
Wear a dust mask.
Wear foot protection
Protect against rain and wet.
Do not expose and operate the tool in rain.
18
SYMBOLS
Ensure that other people and pets remain at least
15m away from the line trimmer when it is in use.
Guaranteed sound power level value in 96 dB.
WEEE symbol. Waste electrical products should
not be disposed of with household waste. Please
recycle where facilities exist. Check with your
Local Authority or local store for recycling advice.
The product complies with the applicable
European directives and an evaluation method of
conformity for these directives was done.
Rotating blades, keep hands and feet away from
the opening while the machine is running.
Beware of sharp blades. Blades continue to rotate
after the motor is switched off. Remove disabling
device before performing any maintenance tasks.
96
19
SYMBOLS
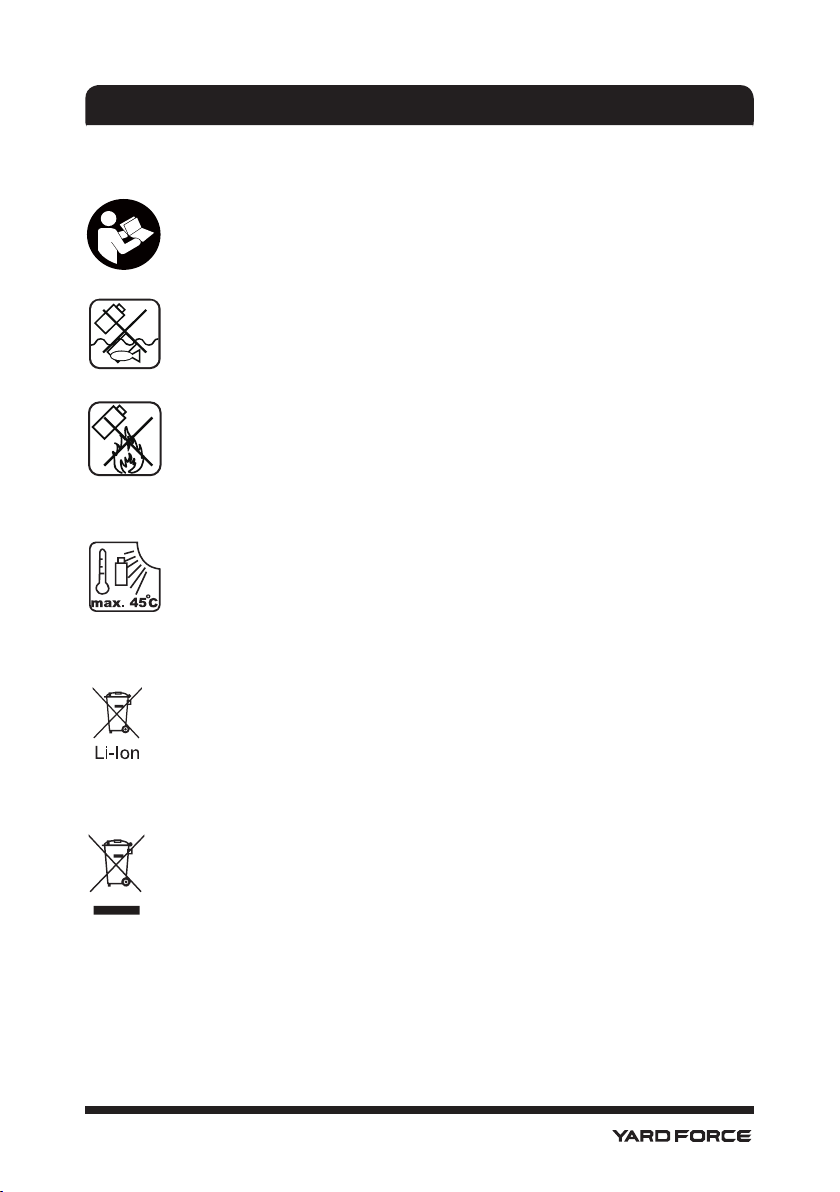
Warning symbols on the battery pack
To reduce the risk of injury, user must read the
instruction manual carefully.
Do not throw into water.
Do not throw to fire.
Do not subject the battery to strong sunlight over
long periods of time. Do not leave on a heater
(max.45
°
C).
Batteries contain Li-ion. Do not dispose of
waste batteries in domestic waste. Contact local
authority to find out how to dispose of batteries.
WEEE symbol. Waste electrical products should
not be disposed of with household waste. Please
recycle where facilities exist. Check with your
Local Authority or local store for recycling advice.
20
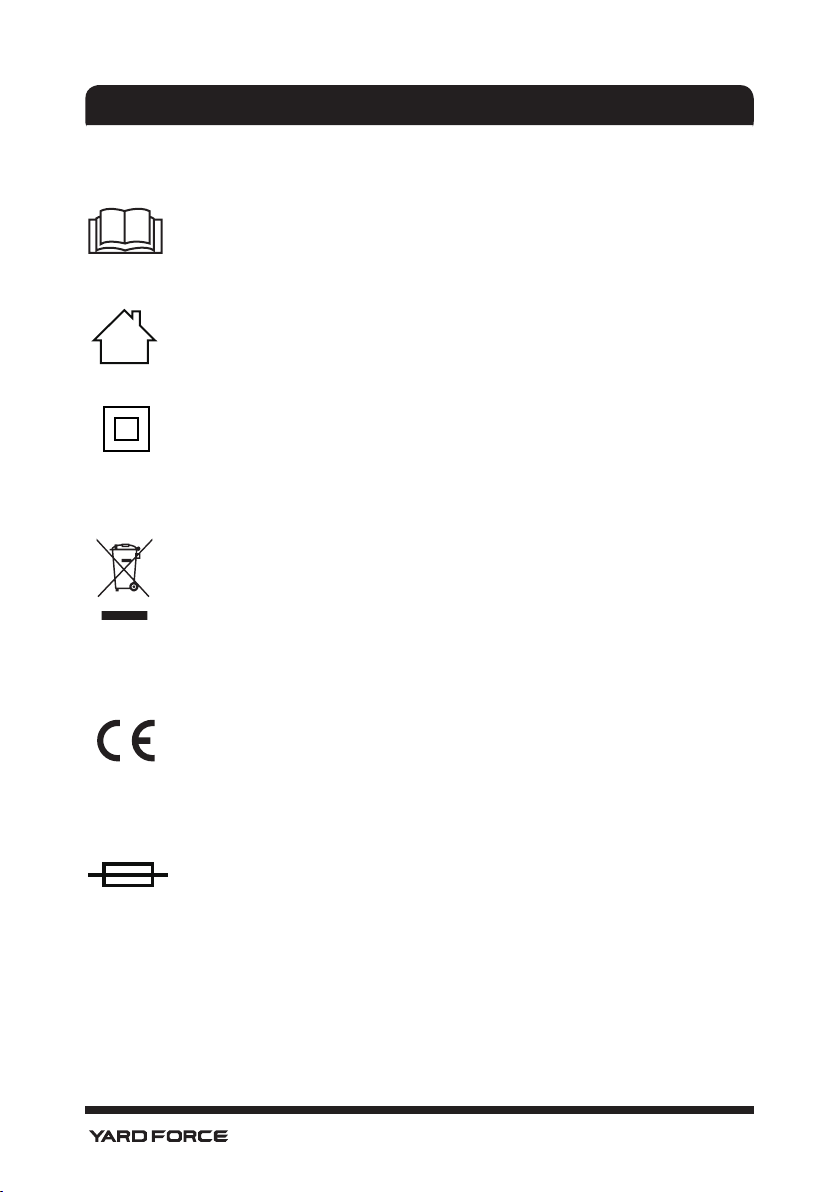
SYMBOLS
Warning symbols on the charger
To reduce the risk of injury, user must read the
instruction manual carefully.
The charger is for indoor use only.
Double insulation
WEEE symbol. Waste electrical products should
not be disposed of with household waste. Please
recycle where facilities exist. Check with your
Local Authority or local store for recycling advice.
The product complies with the applicable
European directives and an evaluation method of
conformity for these directives was done.
Protective 3.15 A limited
T 3.15A

21
TECHNICAL DATA
Model LM C38
Mains voltage 20 V
No load speed 1000 min
-1
Cutting width 38 cm
Sound power level: L
wA
88.29 dB(A) K=1.73 dB(A)
Guaranteed sound power level L
WA
(according to 2000/14/EC)
96 dB
Vibration front handle 2.6 m/s
2
K=1.5 m/s
2
Weight (with battery pack):
Weight (without battery pack):
14,2 kg
13,5 kg
Battery pack model B0P-SP06-20ZL
Capacity 20 V , 2.0 Ah
Charger model B0Q-SP06-20ZA
Input 220–240 V~, 50/60 Hz 65 W
Output: 21 V , 2.4 A
Protection class II
The declared vibration total value has been measured in accordance with a standard test
method and may be used for comparing one tool with another;
The declared vibration total value may also be used in a preliminary assessment of exposure.
NOTICE:
The vibration emission during actual use of the power tool can differ from the
declared value in which the tool is used. In order to protect the operator, user should wear
gloves and ear protectors in the actual conditions
of use.

22
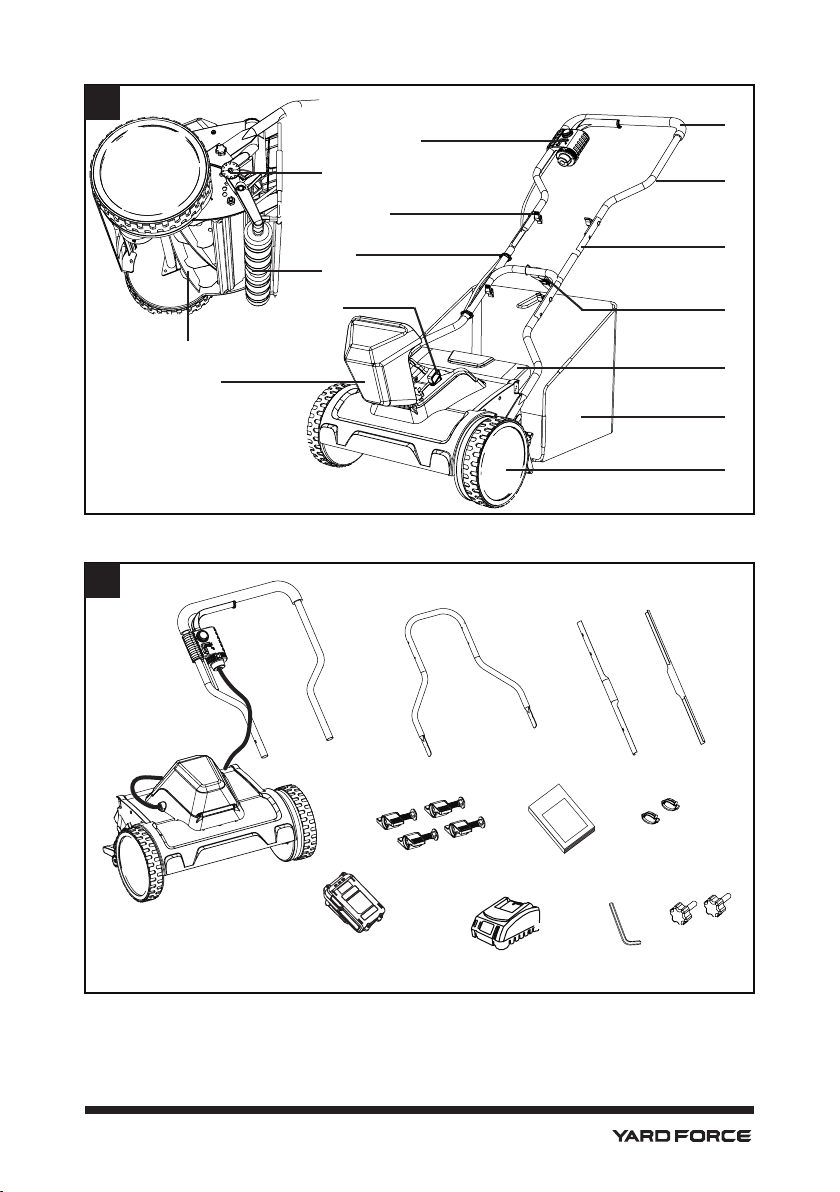
DESCRIPTION OF PRODUCT
Parts description (Fig. A)
1. Soft grip
2. Upper handle frame
3. Middle handle bars
4. Lower handle frame
5. Ejector flap
6. Grass collection bag
7. Wheel
8. Battery compartment cover
9. Safety key
10. Cable clip
11. Upper handle knob
12. Safety lock button
13. Height adjustment knobs
14. Roller bar
15. Cylinder blade
Delivery contents (Fig. B)
Carefully unpack the appliance and check that it is complete. Dispose of the packaging
material correctly.
a. Roller mower
b. Lower handle frame
c. Middle handle bars
d. Upper handle knob
e. Battery pack
f. Charger
g. Manual
h. Allen key
i. cable clip
j. bolt
WARNING:
If any parts are damaged or missing, do not operate this tool until these
parts are replaced. Failure to heed this warning could result in serious personal
injury.
NOTE:
Always recycle the packaging in accordance with local recycling guidelines.

23
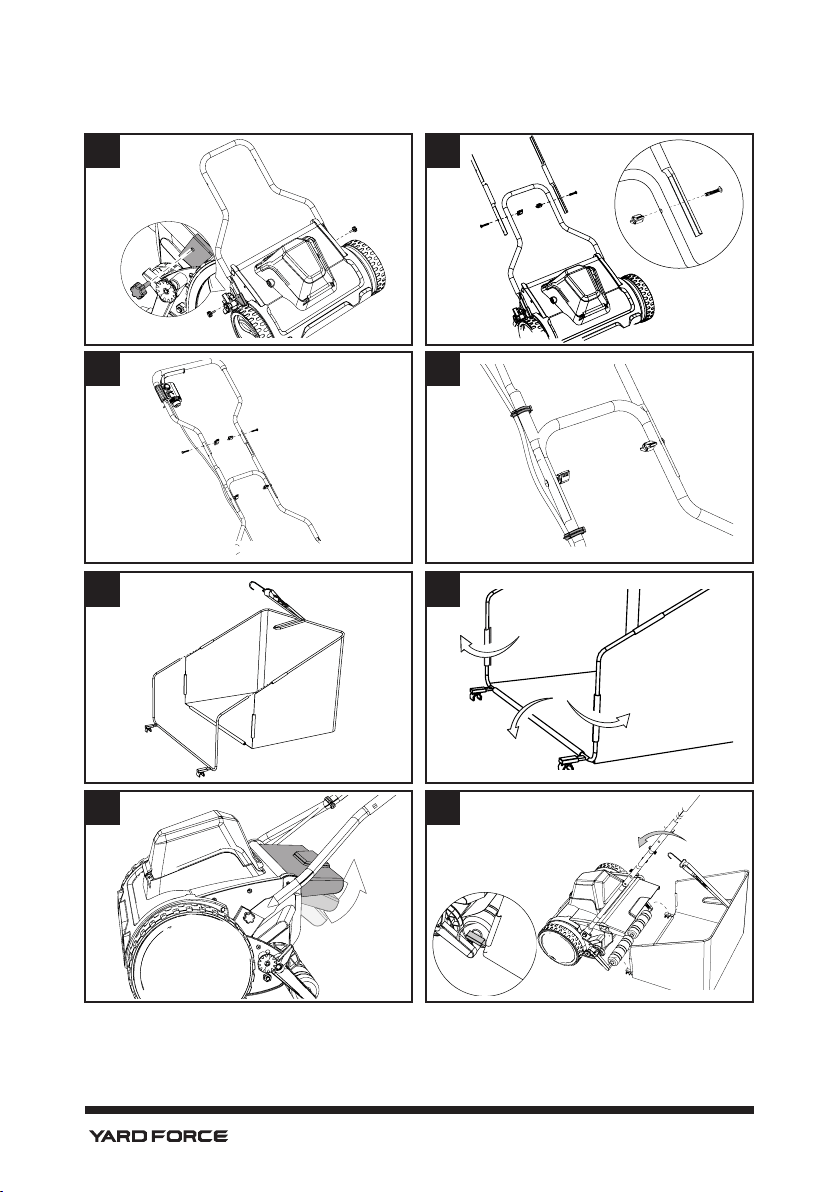
ASSEMBLY
WARNING:
Do not insert the battery and the safety key until assembly is complete. Failure to
comply could result in accidental starting and serious personal injury.
WARNING:
Before performing any maintenance, make sure the battery and the safety key are
removed from the unit. Failure to heed this warning could result in serious personal injury.
WARNING!
The product must be fully assembled before operation. Do not use a product that
is only partially assembled or assembled with damaged parts.
NOTE:
Before using the reel mower, follow these instructions to assemble the appliance.
Handle Assembly
1. Insert the ends of the lower handle frame into the sockets on both side of the mower
base. Lock with the lower handle knobs provided. (Fig. C)
2. Fit the middle handle bars on both sides of the lower handle frame, aligning the holes.
Secure with two sets of handle knobs and bolts. (Fig. D)
NOTE:
Each middle handle bar has 2 holes on the top and the bottom. Adjust the
handle assembly to the optimal position by aligning with the hole at the desired height.
3. Fit the upper handle frame on both the middle handle bars, as shown, aligning the holes.
Secure with the remaining two sets of handle knob and bolt. (Fig. E)
4. Secure the cable with the two cable clips, as shown. (Fig. F)
Grass Collection Bag Assembly + Fitting
The grass collecting bag prevents grass clippings being thrown across your
lawn as you mow.
1. Fit the grass collection bag support rod into the tube of the grass collection bag. (Fig. G)
2. Clip the protective leather profiles onto the support rod to secure the assembly (Fig. H).
3. Lift the ejector flap to the highest position, and assemble the grass collection bag onto
the mower by hooking the sockets to both ends of the roller bar shaft. (Fig. I)
4. Hook the strap hook of the grass collection bag on the center bar on the lower handle
frame. Adjust the strap to an appropriate height so that the grass collection bag does
not rub against the ground while mowing or transporting the unit. (Fig. J)
5. The mower can be used without the grass collection bag. When the grass collection
bag is not attached, adjust the ejector flap to a suitable position to shied flying grass
clippings.

24
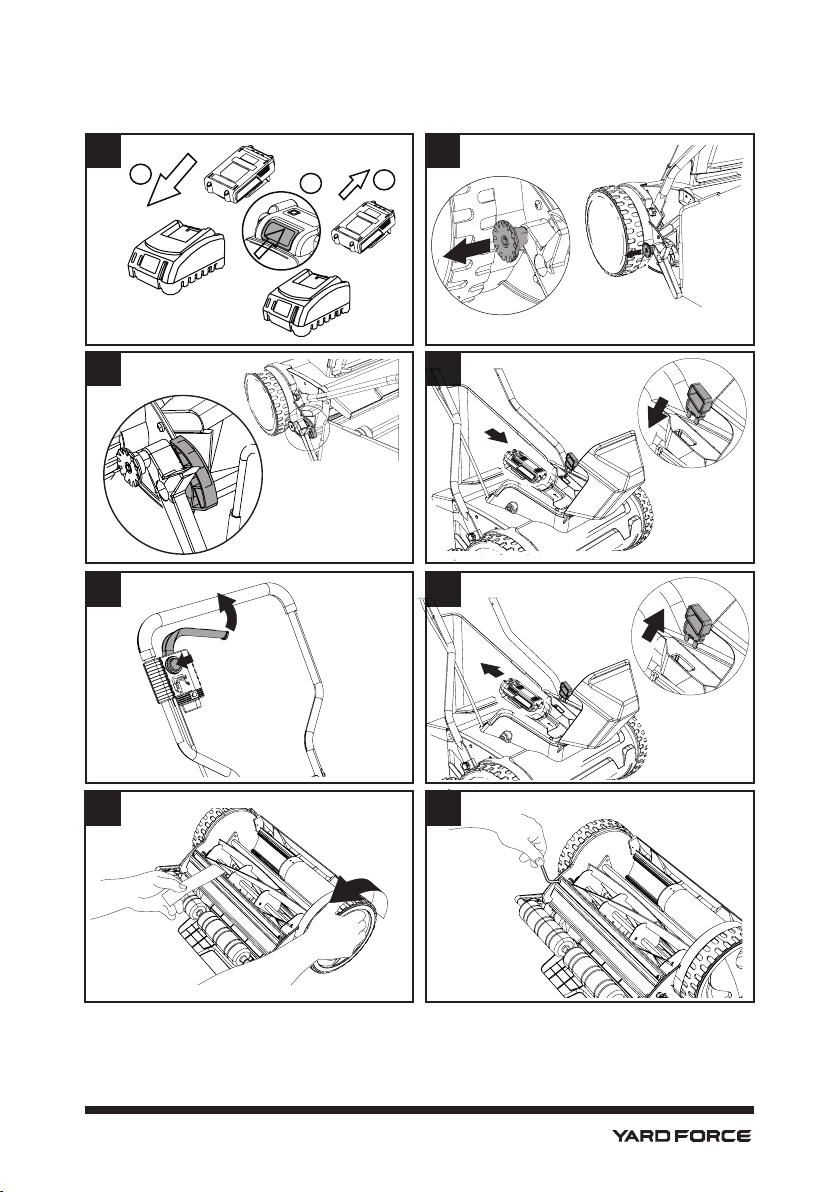
OPERATION
Charging the battery pack (Fig. K)
NOTE:
Remove the battery pack from the charger after it has been fully charged.
NOTE:
Battery should be fully charged before first use.
NOTE:
Make sure the mains voltage is the same as rating label which is located on the
charger.
1. Connect the charger to a power supply. Red LED will light up.
2. To insert the battery pack into the charger, align the raised ribs of the battery pack with
the grooves of the charger then push it in.
Power indicator
This Li-Ion battery pack is equipped with a power indicator which is used to show the battery
pack’s remaining charge. Press the power indicator button to check battery charge as picture
showed. The indicator will stay lit for approximately 4 seconds.
To obtain the best life from the battery
1. Never allow the battery to completely discharge before recharging. The battery pack
should be placed on the charger whenever the battery pack is noticeably running down
or the tool no longer performs a task it previously performed.
2. Avoid conducting short charges. Make sure that the battery is fully charged each time by
allowing the charger to complete its full charging cycle.
3. Avoid allowing loose items like screws or nails etc. to be stored with battery packs as
these or similar items can short battery packs and cause a fire or explosion.
4. Always unplug the charger when not in use and store in a dry and secure place.
5. Avoid charging or storing your battery in temperatures below 5°C and above 45°C.
6. After use, allow the battery pack to cool down for approximately 30 minutes before
attempting to recharge.
Adjusting the Cutting Height
This cordless reel mower is equipped with a 4-position height adjustment system to tailor
grass cutting heights from 15mm to 43mm. To change the cutting height of the grass, follow
the instructions below.
WARNING!
Before making these adjustments, remove the battery and the safety key from
the lawn mower and wait until the rotating blades have come to a complete standstill.
ALWAYS FOLLOW ALL SAFETY PRECAUTIONS AND RECOMMENDATIONS
LISTED PREVIOUSLY IN THIS MANUAL.
1. Power off the reel mower and remove the battery and the safety key.
2. To adjust the cutting height, pull out the height adjustment knobs on both sides of the
reel mower frame and insert the knobs to the desired setting. (Fig. L)
3. To adjust the reel to the highest cutting position, place the adjustment knobs through
the bottom hole located on the sides of the reel mower frame. To adjust the reel to the
lowest cutting position, place the adjustment knobs through the top hole located on the
sides of the frame. (Fig. M)
4. Other cutting heights are achieved by moving the adjustment knobs to the settings
between the highest and lowest positions. Refer to the mark beside the height
adjustment knobs when adjusting the cutting height.

25
Starting + Stopping
WARNING!
Before switching on the reel mower, make sure that it is not in contact with any
foreign objects. Keep your hands and feet a safe distance away from the rotating mower
blades and the ejector opening. Failure to comply with these warnings can result in severe
personal injury.
IMPORTANT:
Do not start the reel mower in tall grass.
1. Make sure the unit's On/Off switch lever is not squeezed on. Insert the battery and the
safety key in their slots. Close the battery compartment cover. (Fig. N)
2. To start the machine, press and hold the safety lock button, then pull the On/Off switch
lever toward you. Once the machine powers on, release the safety lock button and
proceed with operation. (Fig. O)
3. To stop the mower, release the On/Off switch lever. and take out the battery pack. (Fig. P)
WARNING!
The mower blade will continue to rotate for a brief period after the unit has been
switched off. Do not tilt or carry the unit while the motor is still running and do not touch the
blade while it is still rotating. Failure to comply could result in severe personal injury.
Mowing Tips
WARNING!
Inspect the area prior to mowing and remove all the stones, sticks, wires and
other foreign objects that could be picked up and thrown by the rotating blade. Failure to
comply not only will damage the mower blade, but can also lead to serious personal injury.
• Be sure to check the blades periodically for signs of wear and replace them at least once
per year, as described in the maintenance section.
NOTE:
Sharp blades will greatly enhance the performance of the reel mower, especially
when cutting tall grass.
• When cutting thick grass, reduce your walking speed in order to allow for a more
effective cut and a proper discharge of the clippings. For a healthy lawn, always cut
off one-third or less from the total length of the grass. The average lawn should be
approximately 3.8 cm to 5 cm in long during cool months, and more than 5 cm long
during hot months. If there is growth, the lawn should be cut in the fall.
• The lawn will look better if it is always cut to the same height and in alternate directions.
• When crossing any gravelled surfaces, release the On/ Off switch lever to turn off the
mower. The stones can be picked up and thrown by the rotating blade.
• Set the mower to the highest cutting height when mowing on uneven ground or in tall
weeds.
WARNING!
If you strike a foreign object, stop the motor and remove the battery. Thoroughly
inspect the mower and repair any damage before resuming work.
• Switch off the motor before emptying the grass collection bag. Always ensure that a safe
distance (provided by the length of the long handles) is maintained between the user
and the mower housing. Be especially careful when mowing and changing direction on
slopes and inclines.
OPERATION

26
OPERATION
• Maintain a solid footing and wear sturdy, non-slip footwear and long trousers. Always
mow across an incline (not up and down).
• Use special caution when backing up and pulling the reel mower towards you as such
maneuvering of the machine poses a tripping hazard.
• For effective mulching, do not cut wet grass; it tends to stick to the underside of the
deck, preventing the proper mulching of grass clippings. The best time to mow grass is
in the late afternoon, when the grass is dry and the newly cut area will not be exposed to
direct sunlight.
• For the best mulching performance, set the cutting height to remove approximately
one third of the grass length, ideally no more than 4 cm in. at one time. If the grass is
overgrown, it may be necessary to increase the cut height to make it easier to mow and
to prevent overloading the motor. Slow your cutting pace in tall or thick grass conditions.
For mulching extremely thick or tall grass, it is advisable to first cut at a high cut-height
setting, and then re-cut to the final cut height. Otherwise, make narrower cuts and mow
slowly. ALWAYS MAKE SURE THAT THE BLADE IS SHARP.

27
MAINTENANCE AND STORAGE
WARNING!
Before cleaning, repairing, or inspecting the reel mower, stop the machine,
disconnect the safety key and the battery. Verify that all moving parts have come to a
complete stop.
General
• Always keep the reel mower clean and free of grass, dirt, or other debris.
• Keep the handles dry, clean, and free of oil and grease.
• After each cutting session, remove accumulated grass clippings and debris using either
a dry cloth or hand brush. You may also clean the equipment with a damp cloth. Do
not use cleaning agents or harsh solvents as they may damage the equipment's plastic
components. Make sure that no water penetrates the equipment's interior as intake of
water can destroy the switch mechanism and the electric motor.
• Do not clean the reel mower with running water, particularly with high-pressure water.
• Check all nuts, bolts, and screws for proper tightness before each use.
• Frequently inspect the grass collection bag for signs of wear and replace immediately
with a genuine Yard force part if damage is found.
• Replace excessively worn or damaged parts immediately.
Lubrication
All of the bearings in this product are lubricated with a sufficient amount of high grade
lubricants for the life of the unit under normal operation conditions. Therefore, no further
lubrication of the bearings is needed.
Ensuring a clean cut
WARNING!
The steel blades are extremely sharp.
To avoid injury, do not touch the blades while making adjustments. Misalignment of the
blades can occur, which often results from blades that are either too loose or too tight. This
can cause an uneven cut or difficulty pushing the mower.
1. Place the mower on a flat surface. Remove the handles and the grass collection bag.
Turn the mower upside down to expose the blades and the cutting bar.
2. Insert a piece of paper between the steel blades and the cutting bar, then slowly turn the
wheel by hand
.
(Fig. Q)
3. All the blades should slice the paper evenly along the entire length of the cutting bar
while the wheel is turned smoothly. Repeat this testing on the other side of the mower.
4. If the mower cuts the paper intermittently, use the hex key wrench provided to tighten
the adjustment bolt closest to where the intermittent cut was observed. Tighten the bolt
on the appropriate end of the cutting bar by turning it clockwise approximately 1/8th of a
turn until the steel blade contacts the cutting bar. (Fig. R)
5. If it becomes too difficult to move the wheel by hand while adjusting the reel blades,
back off the adjustment bolt slightly by turning it counterclockwise. Test again with a
new piece of paper to verify proper cutting action.
6. Make the same adjustment at the other end of the cutting bar.
WARNING!
Both adjustment bolts should have tension on final adjustment. Do not
overtighten the adjustment bolts as this could damage the blades.

28
MAINTENANCE AND STORAGE
Cleaning and Storage
1. Clean the exterior of the machine thoroughly using a soft brush and cloth before storing.
Do not use water, solvents, or polishes.
2. Turn the mower on its side to clean the blade area.
WARNING!
Do not place your hands inside or near the cutting area. If grass cuttings
are compacted in the blade area, remove them using a wood or plastic cleaning tool
appropriate for blade cleaning.
3. Store the mower in a dry place. Do not place other objects on top of the mower during
storage.
Maintenance Tips
Reel mowers are relatively low maintenance. For consistent cutting, follow the below
instructions:
• Always keep the cutting blades properly adjusted. Refer to the instruction manual for
further directions.
• Regularly clean and lubricate cutting edges with light spray oil.
IMPORTANT!
Reel mowers have difficulty cutting tall weeds, such as dandelions, and will
often bend, rather than cut, such weeds. Cut often to prevent this.
Recycling + Disposal
The product comes in a package that protects it against damage during shipping. Keep the
package until you are sure that all parts have been delivered and the product is functioning
properly. Recycle the package afterwards or keep it for long-term storage.
WEEE symbol. Waste electrical products should not be disposed of with household waste.
Please recycle where facilities exist. Check with your local authority or local store for recycling
regulations.
WARNING!
To reduce the risk of injury or explosion, never burn or incinerate a battery
pack even if it is damaged, dead or completely discharged. When burned, toxic fumes and
materials are emitted into the surrounding atmosphere.
1. Batteries vary according to device. Consult your manual for specific information.
2. Install only new batteries of the same type in your product (where applicable).
3. Failure to insert the battery in the correct polarity, as indicated in the battery
compartment or manual, may shorten the life of the batteries or cause batteries to leak.
4. Do not mix old and new batteries.
5. Do not mix Alkaline, Standard (Carbon-Zinc) or Rechargeable (Nickel Cadmium, Nickel
Metal Hydride, or Lithium-Ion) batteries.
6. Do not dispose of batteries in fire.
7. Batteries should be recycled or disposed of as per state and local guidelines.

29
Fault Possible Cause Remedy
Mower fails to
start
The safety key is not inserted Insert the safety key
The battery is low Charge the battery
The battery is not inserted securely
Attach the battery pack to the
mower; press it until you hear a
click
The motor/blade control is
disengaged
Press safety lock button first, then
the On/Off switch lever
The mower deck is clogged with
grass or debris
Clean the mower deck. Make sure
the blade is free to move
The grass is too tall
Set the mower to a high cutting
height. Lift the front wheels
slightly by pressing down on the
handle bar.
Mower stops
while mowing
The battery is flat Charge the battery
The grass is too tall Reset the cutting height
The mower deck is clogged with
grass or debris
Clean the mower deck. Make sure
the blade is free to move
The battery or the mower circuity is
too hot
Cool down the battery and the
machine
The mower
cannot cut grass
evenly
The blade is not sharp enough Sharpen or replace the blade
The mower is diffi-
cult to push
The grass is too tall to cut Adjust cutting height higher
The blade or the mower rear is
dragged by heavy grass
Tighten the adjusting bolts
Too much tolerance between the
steel blades and the cylinder
The mower is
vibrating at high
speed
The motor shaft is bent
Stop the motor, remove the
battery, and inspect the damage.
Contact with a qualified repair
person
The blade is unbalanced
Balance the blade by grinding
each cutting edge equally or
replace a new one
The adjusting bolts are loose Tighten the adjusting bolts
TROUBLESHOOTING

30
To the provisions of Council Directives
We
MEROTEC GmbH,
Otto-Brenner-Straße 8,
47877 Willich/ Deutschland
Declare that the product:
Description: 20V Cordless roller lawn mower
Model No. LM C38
Function: cutting Grass
Complies with the essential health and safety requirements of the
following directives:
Machinery Directive 2006/42/EC
Electromagnetic Compatibility Directive 2014/30/EU
EC Directive 2011/65/EU and its amendment Directive (EU) 2015/863 (RoHS)
Outdoor Noise Directive 2000/14/EC & 2005/88/EC
Measured Sound Power Level: Impact knife
:
L
wA
= 88.29 dB(A) K=1.73 dB(A)
Guaranteed Sound Power Level: 96 dB(A).
Standards and technical specification referred to:
EN 60335-1:2012+A11:2014+A13:2017+A1:2019+A14:2019+A2:2019
EN 60335-2-77:2010
EN 55014-2:2015
EN 55014-1:2017
EN 62233:2008
EN 50581:2012
Authorized Signatory
Date: 23.01.2022
Signature:________________________
Place: Willich
Name:
Roland Menken
General Manager
MEROTEC GmbH,
Otto-Brenner-Straße 8,
47877 Willich/ Deutschland
CE DECLARATION