
Loading ...
Loading ...
Loading ...
INSTALLATION
ACCESSORIES
1x Remote control
1x Wire hanress
1x Hands-free microphone
Microphone mount kit
1x Sticker
1x Clip
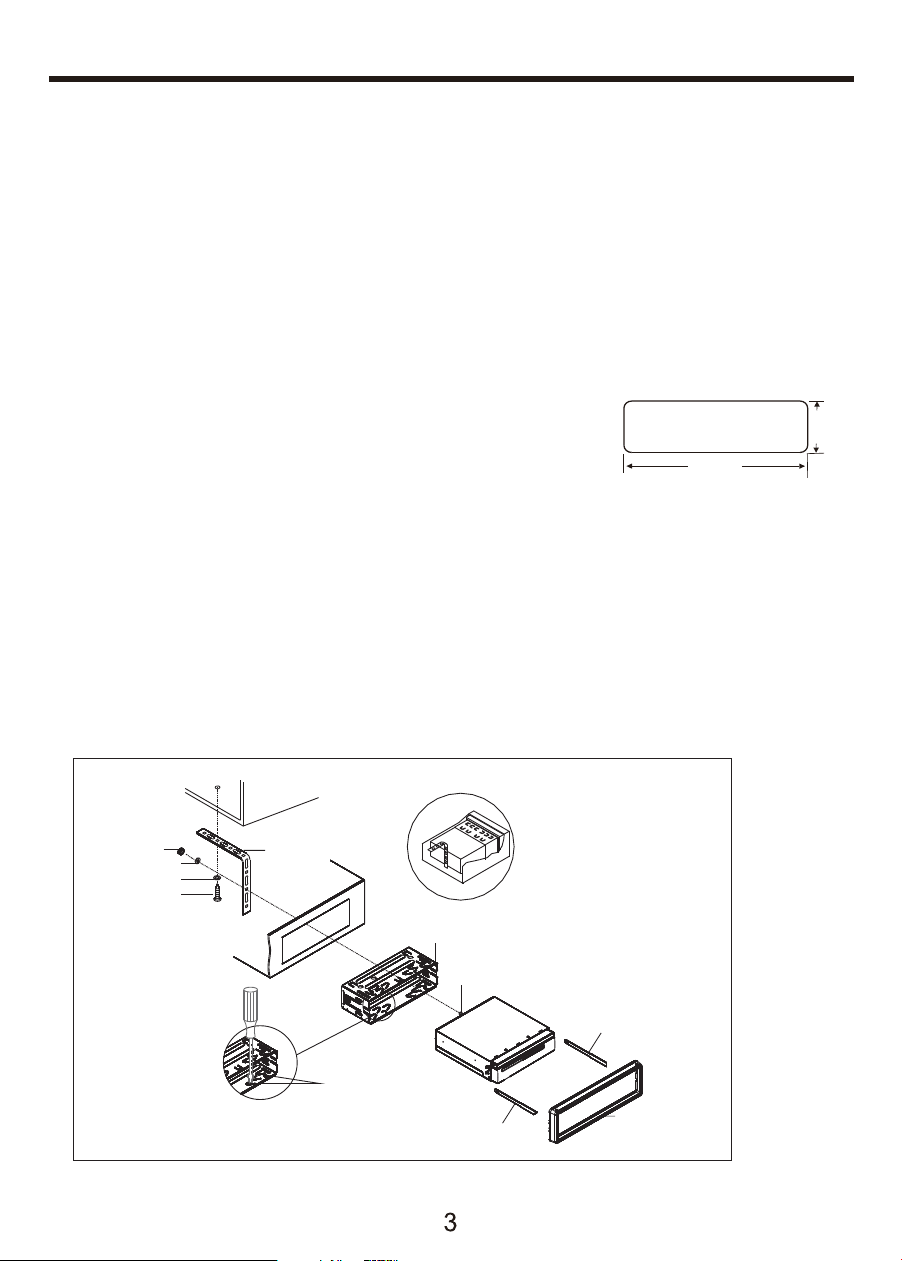
Make sure your dash opening has the correct size shown.
Disconnect the negative battery terminal of your vehicle.
Complete the electrical connections.
1x Plain washer
1x Spring washer
2x Release keys
Head unit mounting kit
1x Mounting sleeve
1x Mounting strap
1x Tapping screw
1x Hex bolt
1x Hex nut
Hex Bolt
Spring Washer
Plain Washer
Tapping Screw
Screwdriver
Tabs
Hex Nut
Dash Board
Release Key
Release Key
Plastic Trim Out
Metal Mounting Strap
Console
Mounting Sleeve
Before you start
1. Remove the plastic trim ring. Use a screwdriver to pry open the trim ring then pull it out.
2. Remove the mounting sleeve from the unit. Insert two supplied release keys into the
lock position on both sides of the mounting sleeve, then pull the sleeve out of the unit.
3. Correctly insert the mounting sleeve in the dash opening. Then bend the tabs on the
mounting sleeve with a screwdriver to secure the mounting sleeve.
4. Insert the unit into the dash opening/mounting sleeve.
5. Use the supplied mounting strap to secure the rear part of the unit.
6. Connect all wirings to the head unit. Replace the plastic trim ring.
Mount the unit
ACCESSORIES/INSTALLATION
2.05”
7.20”
Loading ...
Loading ...
Loading ...