
Loading ...
Loading ...
Loading ...
8
INSTALLATION
PREPARATION FOR INSTALLATION
Before starting the installation:
1. After unpacking the product, check that it has not
been damaged during transport and in the event of
problem, please contact the reseller or the customer
support service before installing it.
2. Check that the product is the right size for the installa-
tion area.
3. Check for accessories (e.g. bags containing screws,
warranty certificates, etc.) inside the packaging (pla-
ced there for transport reasons). Remove and keep
them safe, if present.
4. Also check that there is a power socket near the insta-
llation area.
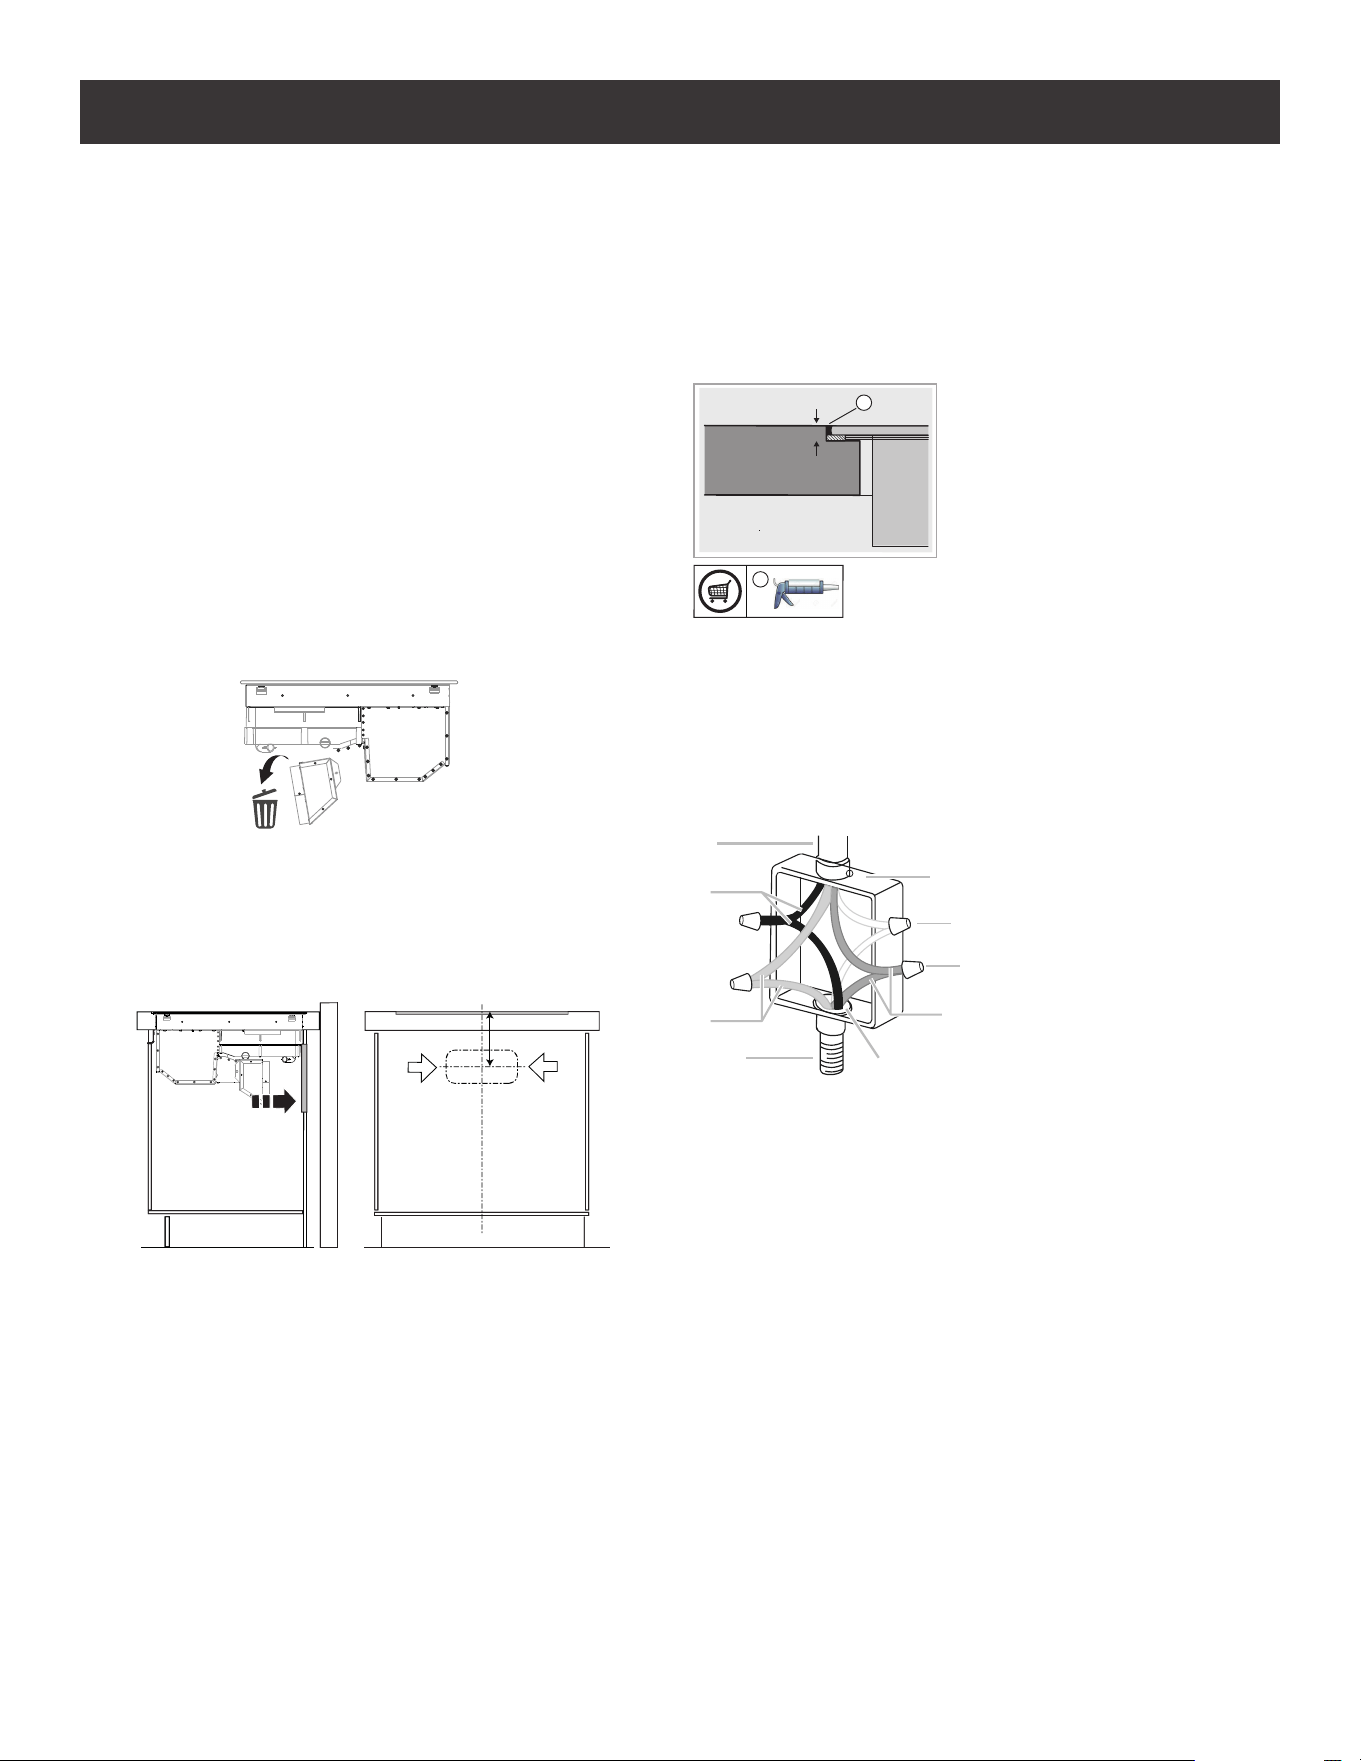
PREPARING THE CABINET FOR INSTALLATION:
• The product cannot be installed above cooling
appliances, dishwashers, heaters, ovens, washing ma-
chines and dryers.
• If your air exhaust is rectangular, throw away the round
transition.
IIMPORTANT
• Create the cut-outs in the cabinet before inserting the
hob and carefully remove any shavings or sawdust.
• For the air outlet of the round transition, a 6” cut must
be made in the cabinet, considering 12.95 cm from top
to the center of the grill outlet.
12.95 cm
• A cutout is required to make the connection through
the countertop, consider that the cable conduit mea-
surement is 1.5 m (4.9 ft) to reach the connection to
your electrical installation.
ICAUTION
Failure to install screws and fasteners in accordance with
these instructions may result in electrical hazards.
Note: to ensure the correct installation of the product, it
is recommended to tape the pipes using an adhesive with
the following characteristics:
• soft elastic PVC film, with an acrylic-based adhesive
• compliant with DIN EN 60454 regulations
• flame retardant
• excellent resistance to wear
• resistant to temperature fluctuations
• can be used at low temperatures
IIMPORTANT
Use a single-component adhesive sealant (S), which withs-
tands temperatures up to 250°; before installation, thoroughly
clean the surfaces to stick and eliminate any substance that
may compromise adhesion, (e.g. release agents, preservatives,
oil, dust, traces of old adhesives, etc.); the adhesive should
be uniformly spread all around the outside of the frame; after
sticking, leave the adhesive to dry for about 24 hours.
s
s
1/4”
4-WIRE CABLE FROM HOME POWER SUPPLY TO
4-WIRE CABLE FROM COOKTOP
IMPORTANT
Use the 4-wire cable from home power supply in the U.S.
where local codes do not allow grounding through homes
and campers, new construction, and in Canada.
A
B
E
C
D
I
G
H
F
A. Cable from home power supply
B. Black wires (phase)
C. Green or yellow-green ground wires (ground)
D. 4-wire cable from cooktop
E. Junction box.
F. White wires.
G. UL listed wire connector (not supplied)
H. Red wires (Phase).
I. UL listed or CSA approved conduit connector (not su-
pplied).
1. Connect the 2 black wires together using the UL listed
wire connectors.
2. Connect the 2 red wires together using the UL listed
wire connectors.
3. Connect the 2 white wires together using the UL listed
wire connectors.
4. Connect the green (or yellow-green) ground from the
cooktop cable ti the green (or yellow-green) ground wire
(in the junction box) using the UL listed wire connectors.
5. Install junction box cover.4-wire cable from home
power supply to 4-wire cable from Cooktop - U.S. Only.
Loading ...
Loading ...
Loading ...