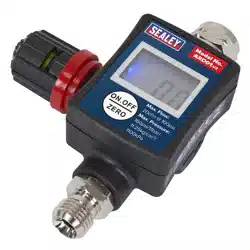
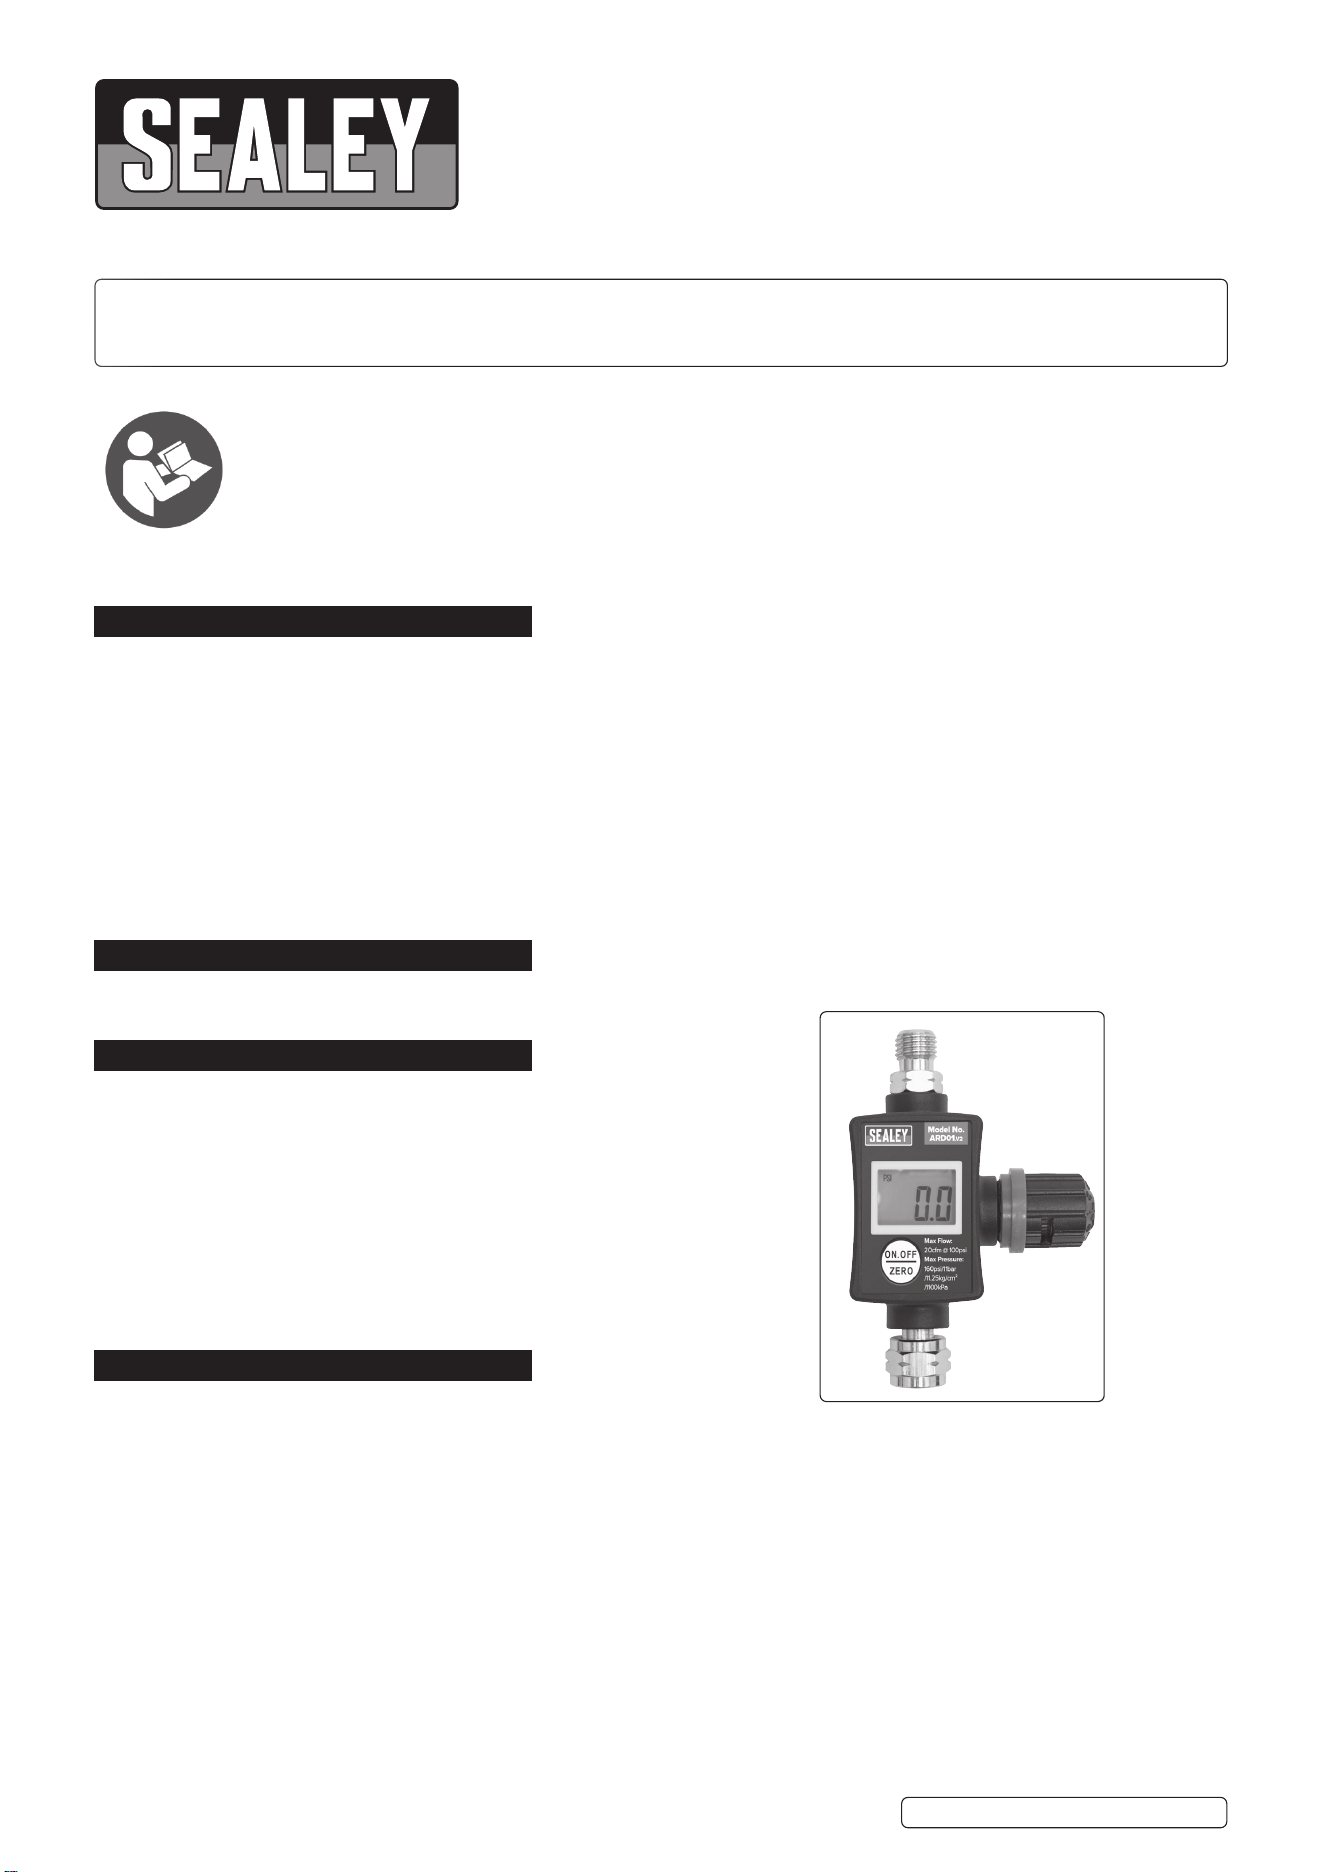
ON-GUN DIGITAL PRESSURE REGULATOR/
GAUGE
MODEL NO: ARD01.V2
Thank you for purchasing a Sealey product. Manufactured to a high standard, this product will, if used according to these
instructions, and properly maintained, give you years of trouble free performance.
IMPORTANT: PLEASE READ THESE INSTRUCTIONS CAREFULLY. NOTE THE SAFE OPERATIONAL REQUIREMENTS, WARNINGS & CAUTIONS. USE
THE PRODUCT CORRECTLY AND WITH CARE FOR THE PURPOSE FOR WHICH IT IS INTENDED. FAILURE TO DO SO MAY CAUSE DAMAGE AND/OR
PERSONAL INJURY AND WILL INVALIDATE THE WARRANTY. KEEP THESE INSTRUCTIONS SAFE FOR FUTURE USE.
1. SAFETY
WARNING! Ensure Health & Safety, local authority, and general workshop practice regulations are adhered to when using
this equipment.
WARNING! Disconnect the equipment from the air supply before changing accessories,servicing or performing any maintenance.
9 Keep the equipment clean and maintain it in good condition (use an authorised service agent).
9 Replace or repair damaged parts. Use genuine parts only. Unauthorised parts may be dangerous and will invalidate the warranty.
WARNING! Ensure that the correct air pressure is maintained and not exceeded.
9 Keep air hoses away from heat, oil and sharp edges. Check hoses for wear before each use and ensure that all
connections are secure.
8 DO NOT direct air from the air hose at yourself, others or animals.
8 DO NOT operate air tools when tired or under the influence of drugs, alcohol or intoxicating medication.
9 Drain the compressor air tank and the filter bowl daily. Water in the air line will damage your equipment.
9 When work is complete ensure that the air supply is turned off.
2. INTRODUCTION
On/Obuttonwithadjustableauto-ofunctionforextendedbatterylife.Smallandcompactwithcompositebody.Pressurecanbe
displayedinpsi,bar,kg/cm²orkPa.
3. SPECIFICATION
Model no.: ............................................................. ARD01.V2
MaximumPressure: ........160psi/11bar/11.25kg/cm
2
/1100kPa
Maximum Flow: ............................................ 20cfm @ 100psi
4. OPERATION
4.1. SETTINGS
NOTE: Unlesssetotherwise,thegaugeautomaticallyshutsoafter60seconds.Toincreasethistime,seesection4.3.
4.1.1. Presstheon/obuttononcetoswitchthegaugeonoro.
4.1.2. Additionally,theon/obuttonmaybeusedtoalterthethreefunctionsettings.
4.2. CHANGING THE FUNCTION SETTING
4.2.1. Ensure that the gauge is not under pressure.
4.2.2. Withthegaugeswitchedon,holdtheOnbuttonforabout3seconds,untilthedisplayshows‘---’thenreleasethebutton.
4.2.3. Thedisplaywillcyclebetween0,1,2,andE.
[-0-]moderesetsthegaugetozero.
[-1-]moderesetstheautomaticshut-omode.
[-2-]moderesetsthepressureunits.
[-E-]resettingiscompletedwhen“END”showsindisplay.
4.2.4. Pressthebuttontoenteroneofthemodes.
4.3. RESET TO ZERO
4.3.1. Ensure that the gauge is not under pressure.
4.3.2. Selectmode0andthedisplaywillshow00-.
4.3.5. Pressthebuttonagainandthedisplaywillshow000.
ARD01.V2 Issue 2 07/07/21
Original Language Version
© Jack Sealey Limited
Refer to
instructions
4.3.6. Pressthebuttonagainwithin3secondsandthegaugewillresettozero.
4.3.7. ‘End’willdisplayfor2secondsandtheunitwillswitchoffautomatically.
4.4. AUTOMATIC SHUT OFF MODE
4.4.1. Thedefaultautomaticshutotimeis60seconds.
4.4.2. Tochangetheautomaticshutotime,selectmode1asperinstructionsasat4.2.2and4.2.3.
4.4.3. Thedisplaywillcyclebetween30,60120and180seconds.
4.4.4. Pressthebuttontoselecttherequiredautomaticshutotime.
4.4.5. Theselectedtimewillash3timesand‘end’willdisplaybeforetheunitswitcheso.
4.5. PRESSURE UNIT SELECTION MODE
4.5.1. Thedefaultpressureunitsettingispsi.
4.5.2. Tochangethepressureunits,selectmode2asat4.2.2.and4.2.3.
4.5.3. After selecting mode 2 a dash will appear at the bottom of the display, corresponding to the units displayed (psi, bar, kg/cm
2
orkPa).
4.5.4. When the screen corresponds to the required setting, press the button to select.
4.5.5. Theselectedunitwillash3times.Aftershowing‘End’,theunitwillswitcho.
5. OPERATION
5.1. Mount the regulator/gauge in a convenient location in the air inlet circuit, ensuring that all connections are tight.
5.2. Toadjustthepressure,turntheadjustingknobclockwisetoreduceandanticlockwisetoincrease.
6. BATTERY REPLACEMENT
NOTE:ReplacementbatteryisCR20323Vbuttoncell.
6.1. Laytheunitfacedownonaat,drysurfaceandcarefullyremovethe4crossheadscrewsholdingtheunittogether.
6.2. Carefullylifttherearotheunit,takingcaretoNOTdisturbthescreenarrangementinthefrontsection.
6.3. Slide the battery out from under the spring restraint and replace with clean fully charged battery.
Original Language Version
© Jack Sealey Limited
Sealey Group, Kempson Way, Suffolk Business Park, Bury St Edmunds, Suffolk. IP32 7AR
01284 757500 01284 703534 sales@sealey.co.uk www.sealey.co.uk
ENVIRONMENT PROTECTION
Recycle unwanted materials instead of disposing of them as waste. All tools, accessories and packaging should be sorted, taken to
a recycling centre and disposed of in a manner which is compatible with the environment. When the product becomes completely
unserviceable and requires disposal, drain any fluids (if applicable) into approved containers and dispose of the product and fluids
according to local regulations.
WEEE REGULATIONS
Dispose of this product at the end of its working life in compliance with the EU Directive on Waste Electrical and Electronic Equipment
(WEEE). When the product is no longer required, it must be disposed of in an environmentally protective way. Contact your local solid
waste authority for recycling information.
BATTERY REMOVAL
Under the Waste Batteries and Accumulators Regulations 2009, Jack Sealey Ltd are required to inform potential purchasers of products
containingbatteries(asdefinedwithintheseregulations),thattheyareregisteredwithValpak’sregisteredcompliancescheme.Jack
SealeyLtdBatteriesProducerRegistrationNumber(BPRN)isBPRN00705.
Note: It is our policy to continually improve products and as such we reserve the right to alter data, specifications and component parts without prior
notice. Pleasenotethatotherversionsofthisproductareavailable.Ifyourequiredocumentationforalternativeversions,pleaseemailorcall
ourtechnicalteamontechnical@sealey.co.ukor01284757505.
Important: No Liability is accepted for incorrect use of this product.
Warranty: Guarantee is 12 months from purchase date, proof of which is required for any claim.
ARD01.V2 Issue 2 07/07/21