
Loading ...
Loading ...
Loading ...
7
AXIS P1346/-E/AXIS P1347/-E - Product Description
Replacing the lens
Note:
This chapter applies to AXIS P1347/-E; and to AXIS P1346/-E when the firmware supports it. This may apply to other
cameras that support P-iris in the future.
There are optional lenses for AXIS P1347/-E. To replace the lens in the camera:
1. Disconnect the iris cable.
2. Unscrew the standard lens; attach and screw on the new lens.
Note: There is no need to restart the camera after changing the lens. The camera
must however be restarted if you are interchanging between a P-iris, DC-Iris
or fixed/manual iris lens.
In order to set the focus and position the lens, the camera must be connected
to the network. For instructions, please refer to the Installation Guide
supplied with the camera.
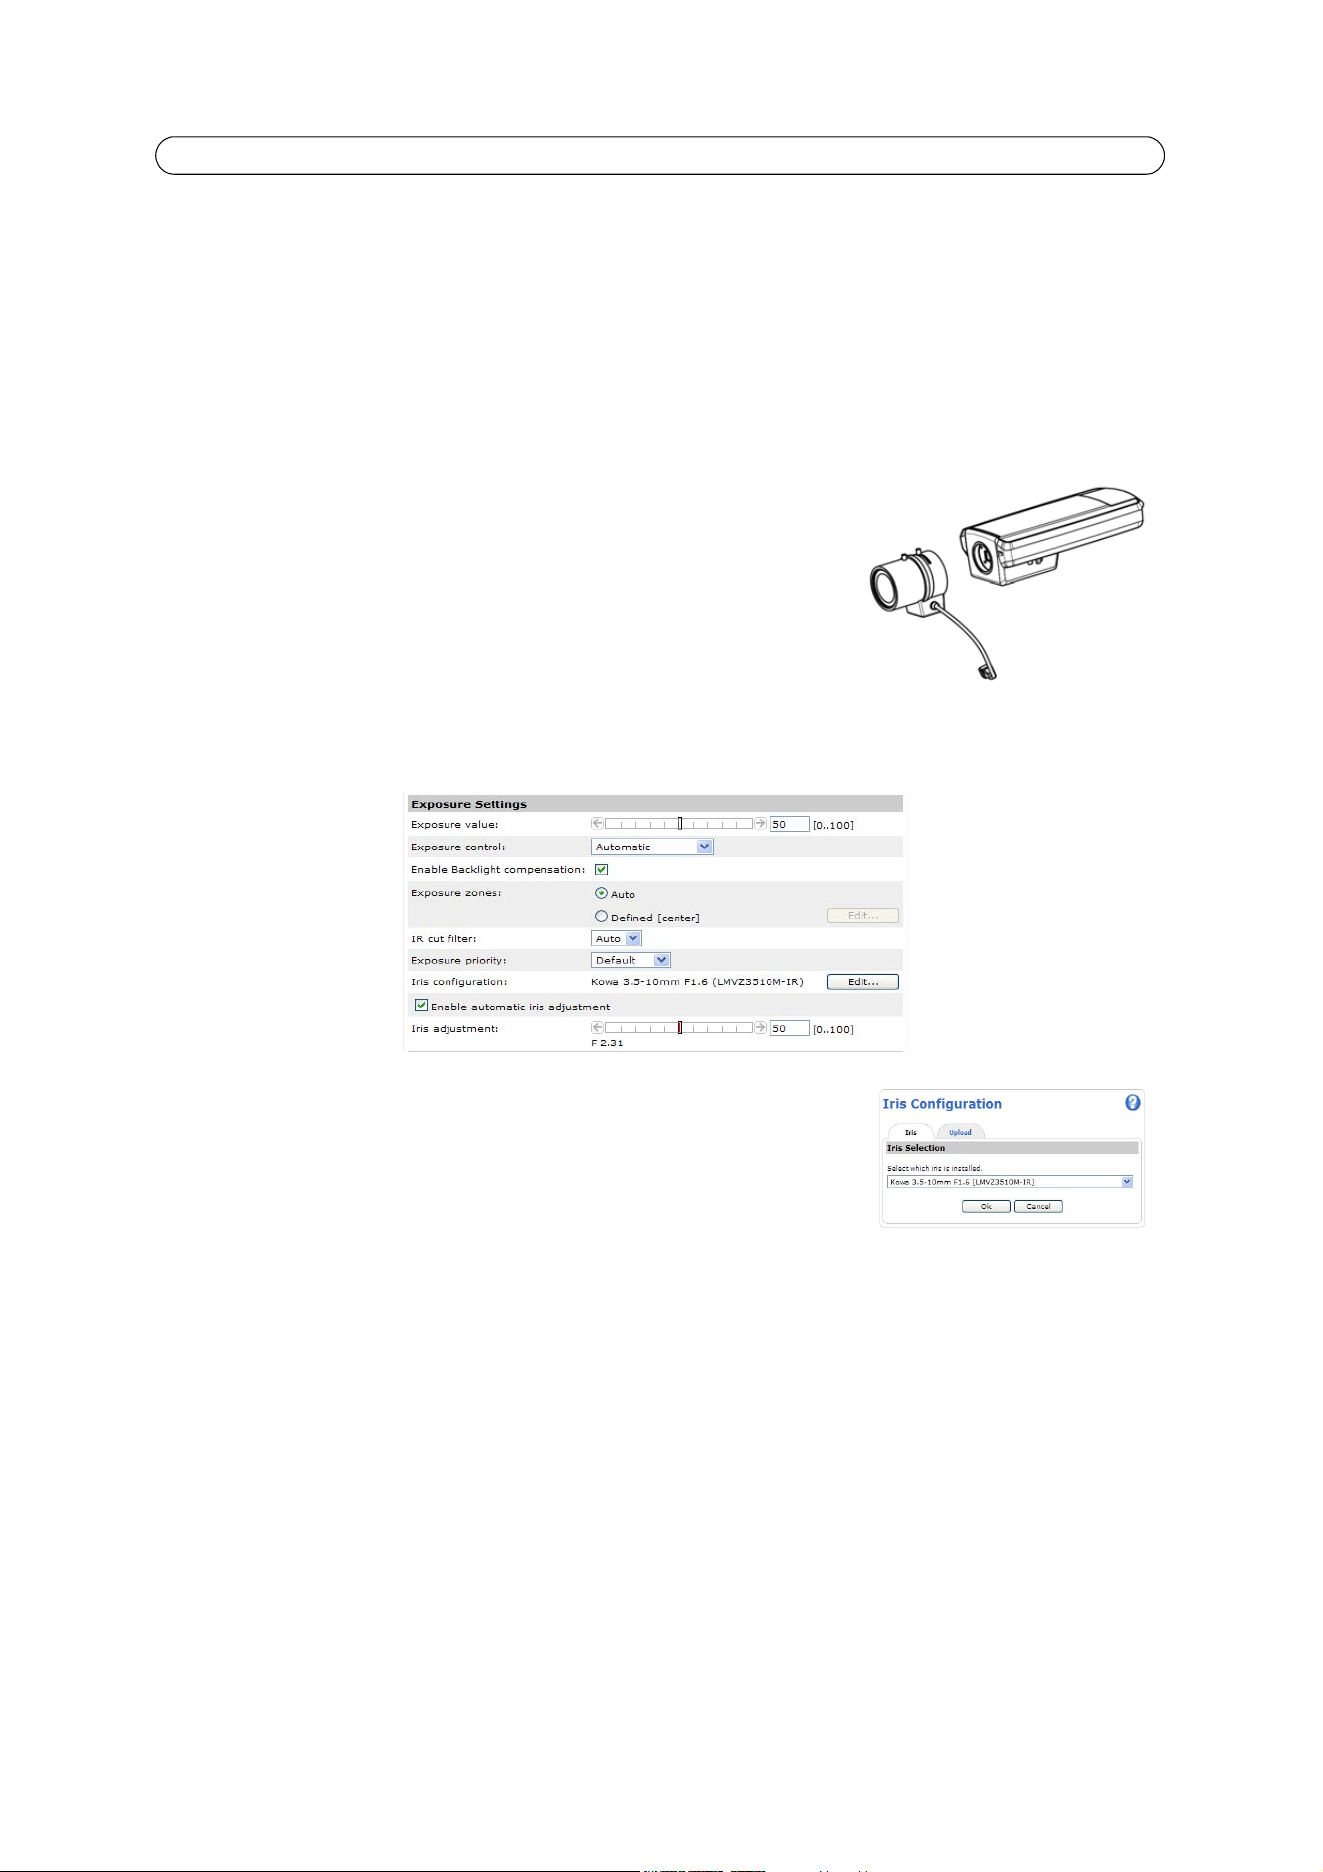
Select the iris configuration
1. Go to Video and Audio > Camera Settings from the Setup link in the camera’s webpage.
2. Click Edit... against Iris configuration:. In the dialog that appears, choose the iris
that corresponds to the camera’s lens from the drop-down list and click Ok.
Note: For P-Iris lenses not listed in the drop-down list, download the iris configuration
file from www.axis.com. To do this click the Upload tab, browse to the file and
click Upload. After the file has been uploaded, select the iris from the drop-down
list and press Ok.
In case you select a DC iris configuration for a P-iris lens, an error message appears against Iris configuration in the
Camera Settings page.
Loading ...
Loading ...
Loading ...