
Loading ...
Loading ...
Loading ...
(5)
IMPORTANT: Observe all governing codes and ordinances.
Tank
must be
mounted
vertically
Quick- connector fittings
connects to cold water
supply line.
See step 4 of installation for optional
connections and instructions
Faucet may be installed in spray hose opening in sink or drilled hole. If drilling another hole is needed, the
13⁄8"/35mm maximum diameter hole is required.
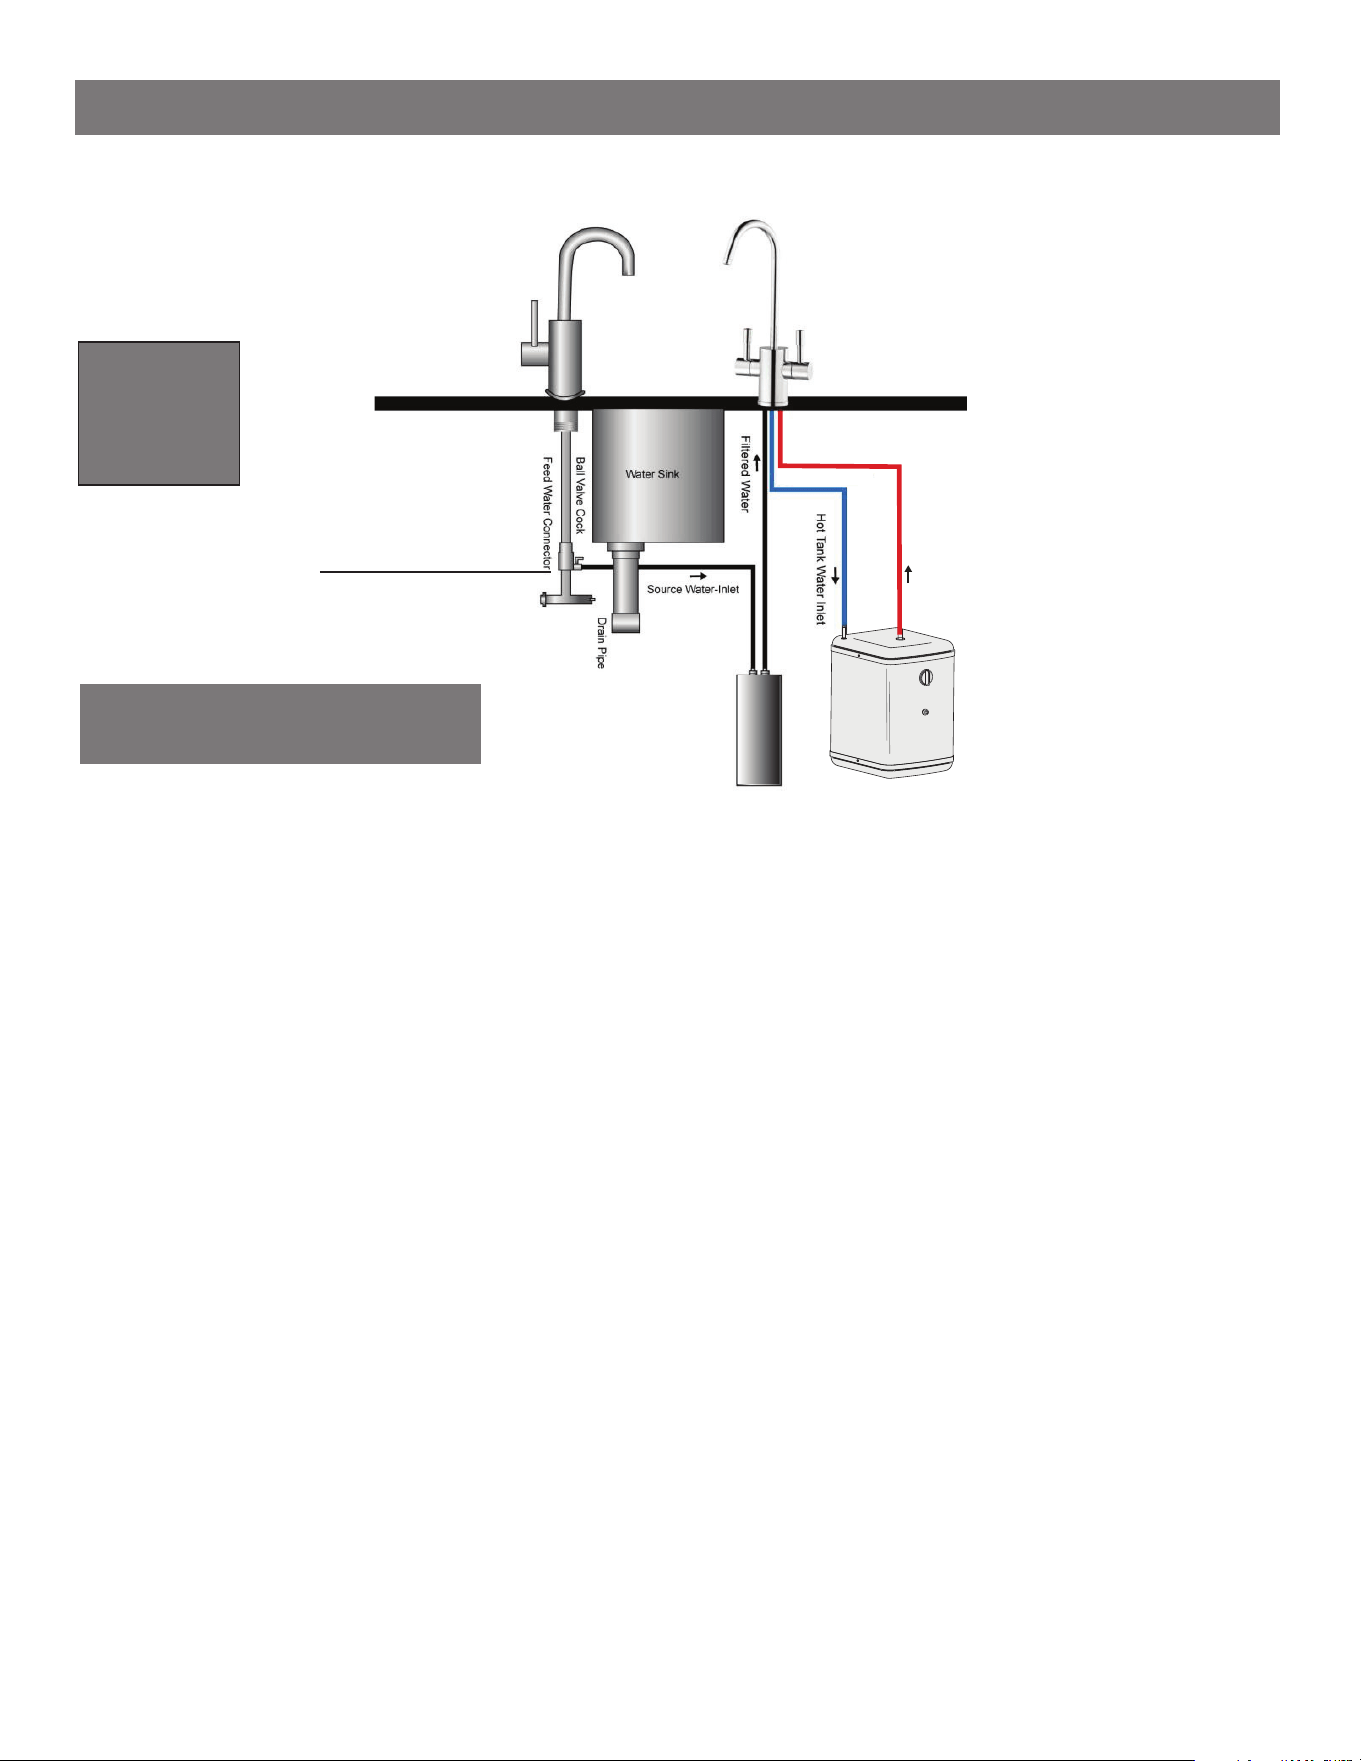
Hot Water
(Silicone Tube)
Hot Water Dispenser
Water Filter
with Scale Inhibitor
STEP 1 - Mounting Tank
Position tank vertically beneath faucet so fl exible tube from the faucet reaches the center faucet supply tube on
the tank. Keep the tank .4” (10mm) away from the wall.
NOTE: The tank must be positioned so the hose to the faucet does not twist or kink.
STEP 2 - Faucet Installation
Install a faucet as the manual of faucet instructs.
STEP 3 - Connect Faucet to Tank ( Refer to diagram on page #6).
Connect 1/4”/6.35mm faucet inlet line to the rear tube at the top corner of the tank with the quick-connect fi tting
supplied with the appliance. Push line straight into quick-connect fi tting as far as possible for both connections.
Connect silicone tube to the center outlet tube on top of tank. Use cable ties to fi x the connection tightly. It will
create a secure connection when properly installed.
Be sure the hose is not twisted or kinked. Hose may be shortened if necessary.
NOTE: DO NOT lengthen the hose - dispenser performance will be impaired and warranty will be void.
BE SURE DIAL
IS IN OFF
POSITION DURING
INSTALLATION.
Red & blue color represents water temperature, not actual
tubing color.
Loading ...
Loading ...
Loading ...