2
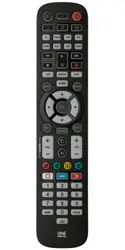
Thank you for purchasing the One For All Essential 6 Device Universal
Remote Control. The remote can be used to control up to 6 Audio
Video Devices such as a TV, Set Top Box, Blu-ray Player or Sound Bar.
The remote also features a backlight for easy control in a darkened
room, as well as antimicrobial protection.
This manual will help you to set up the Essential 6 to control all of your
devices.
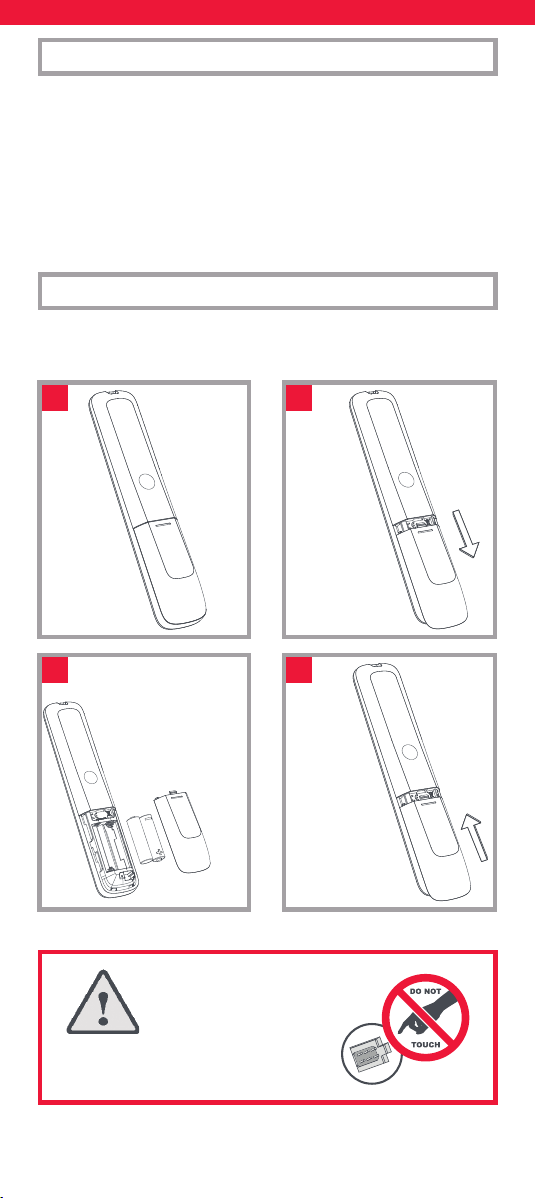
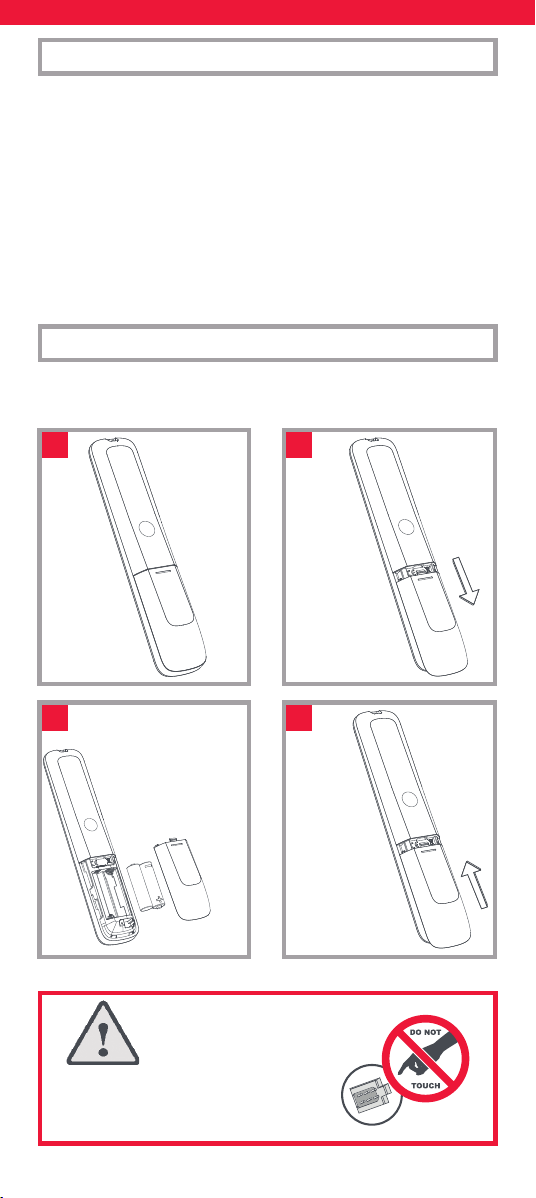
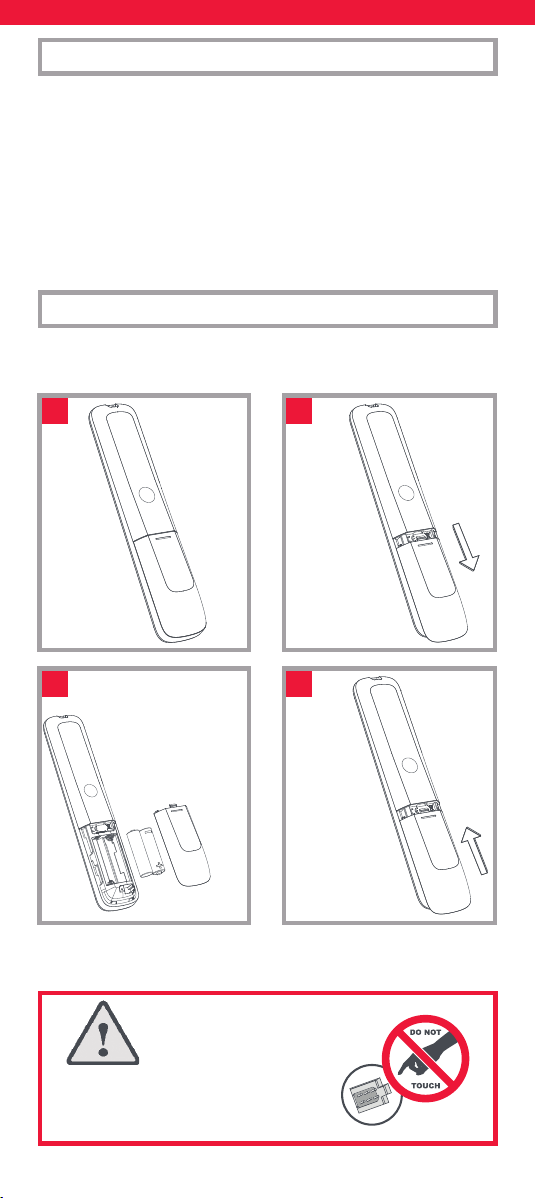
Your remote requires 2 x AA / LR06 batteries. Please insert them as
shown below. Alkaline batteries are recommended.
INTRODUCTION
BATTERIES
2x AA
1
3
2
4
CAUTION: Risk of explosion if battery is
replaced by an incorrect type. Use quality
Alkaline batteries.

3
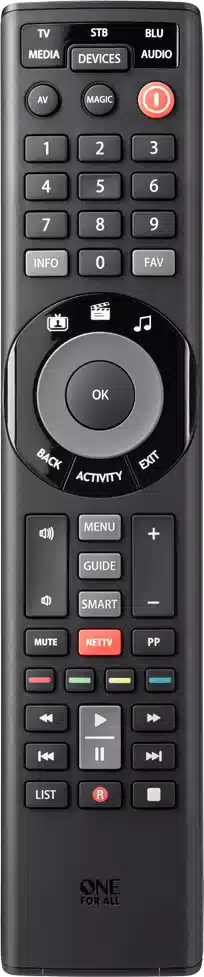
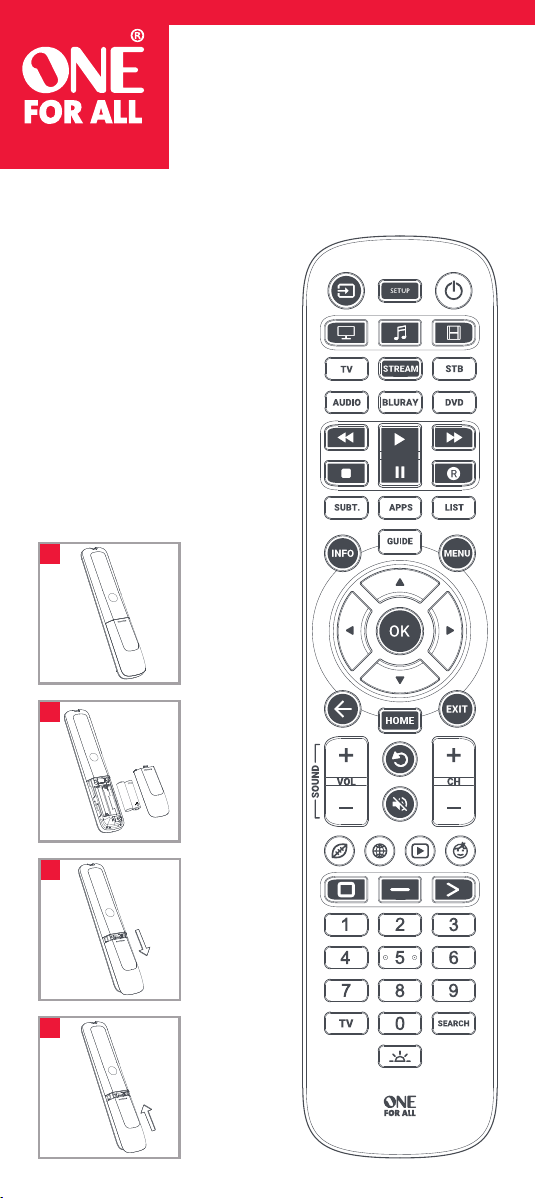
KEY DESCRIPTIONS
7
10
11
13
14
18
21
22
24
26
17
6
4
23
3 1
5
2
8
9
12
16
20
19
25
15

4
1
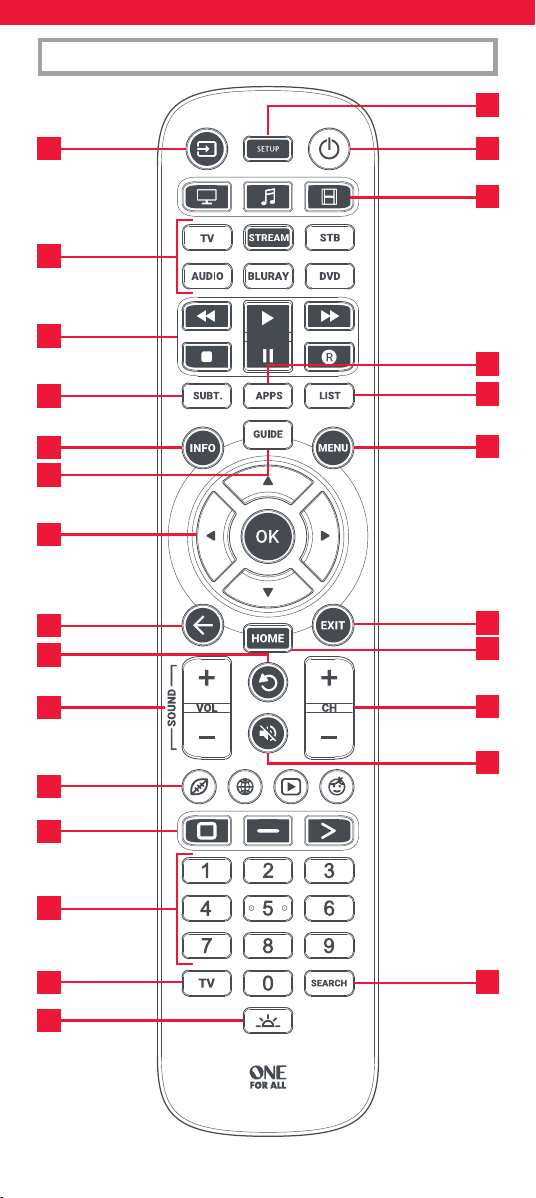
Power Switches your devices on and o.
2
Setup This key is used to set up the Essential remote.
3
Input Used to select Input on devices.
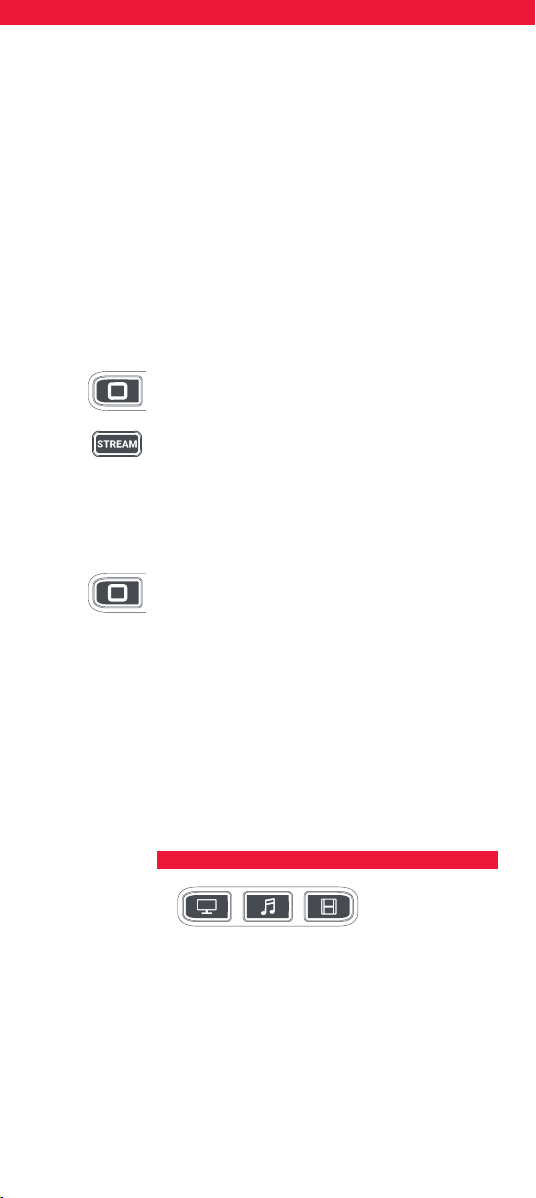
4
Device keys These keys are used to select which device the Essential 6
currently controls. After pressing the TV key, the remote
will control your TV. To switch to controlling another
device, simply press the appropriate key. The devices that
can be programmed to each key are as follows:
TV: All televisions such as LED, LCD , Plasma, OLED etc.
STREAM: Streaming devices such as an Apple TV, Roku
Box, Foxtel Now etc. Also works Xbox 360 and Xbox One.
STB:
Set Top Boxes, including Satellite, Cable and Freeview.
AUDIO: Audio devices including Sound Bars, AV
Receivers and Hi-Fi.
BLURAY: Blu-ray Players and DVD Players / Recorders
DVD: DVD Players / Recorders and Blu-ray Players.
5
Activities Control up to 3 of your devices in one mode, Watch TV,
Listen To Music and Watch Movie – See “Activities” for
how to set up and use.
6
Playback Keys Control the playback of movies, music and TV.
7
Subtitle Display subtitles.
8
Apps Brings up the Applications menu on Smart Devices such
as Smart TVs or Streaming boxes.
9
List Displays a list of recorded programmes.
10
Info Displays information about the current programmes or
channel.
11
Guide TV Guide.
12
Menu Access the installation menu of the current device.
13
Menu Directions and OK
Control the menu of the current device.
14
Back Back one step in the Menu.
15
Home Displays the Home Menu.
16
Exit Exits the menu.
17
Volume Up and Down
Control the volume of the current device. You can also
set up these keys to always control one device. For details
see the Volume Lock feature.
18
Last Channel Changes to the last channel viewed.
19
Mute Mutes the volume of the current device. You can also set
up this key to always control one device. For details see
the Volume Lock feature.
20
Channel Up & Down
Change channels on the current device.
21
RGYB keys
Quick access buttons for the menu of the current device.
22
App Shortcut Keys
Keys for starting streaming apps. See the App Shortcut
Keys section for details.
23
Digits Select channels on the current device. On Audio devices,
these keys will select individual inputs.
24
TV Return to live TV.
25
Search Search for media.
26
Backlight On / O
Turns the backlight on or o. When on, any key press will
activate the backlight for 10 seconds. Press this key to
turn the backlight o and again to turn back on.
KEY DESCRIPTIONS

5
The Essential 6 remote is pre-programmed to control some of the most
popular devices out of the box. If you have one of the following devices
try the putting the batteries in and pressing the device key, and then
press a few keys to see if the remote works your device:
Device Key To Press Device controlled
TV Samsung TV
STREAM Roku Streaming Box
STB Sky Q Box (UK and Italy only)
AUDIO Onkyo Receiver
BLURAY Samsung Blu-ray Player
DVD Sony DVD Player
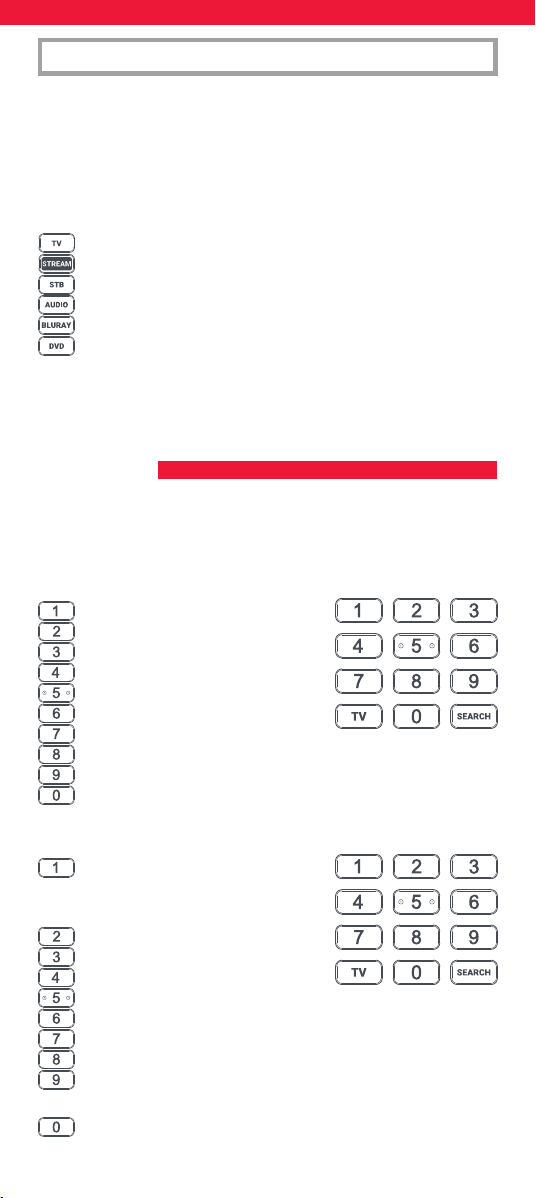
If your device is not one of those listed above, or you have extra
devices to set up, there are 2 ways to do this. The easiest is SimpleSet
which is used for the common brands and devices.
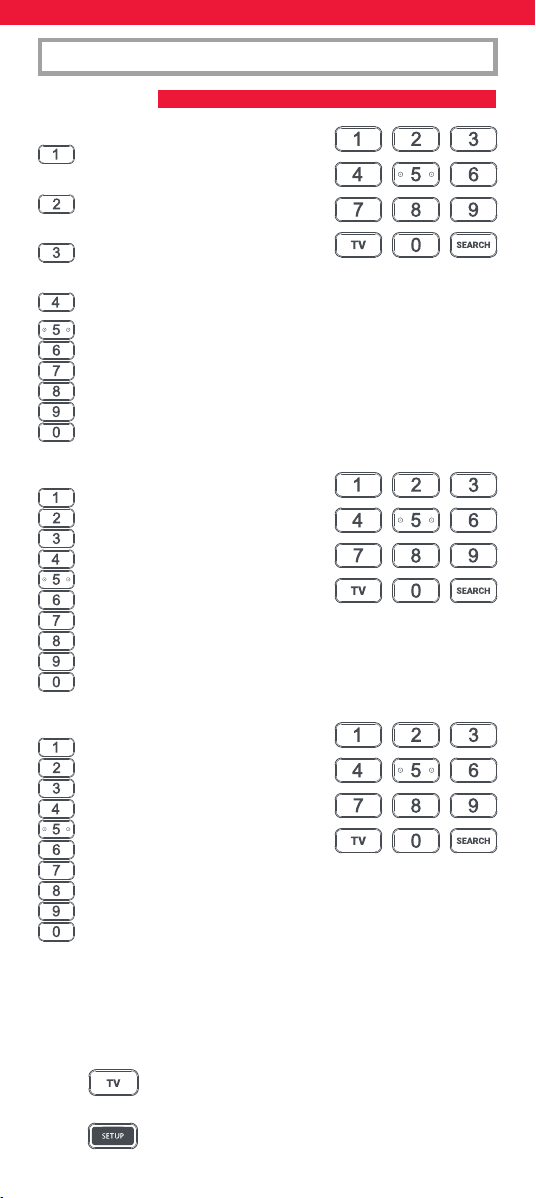
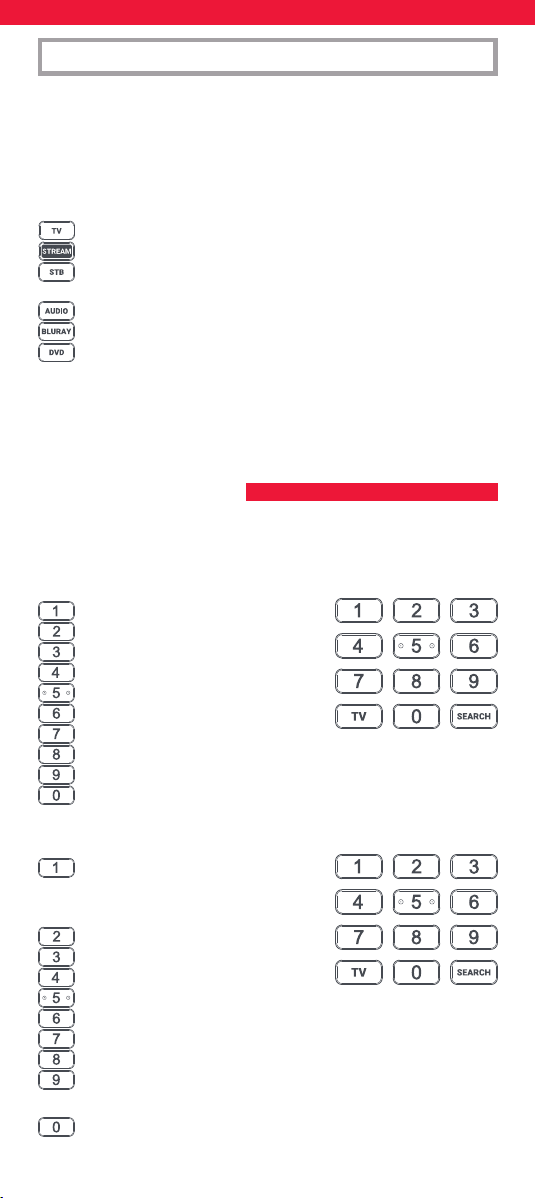
If the brand of your device is shown in the SimpleSet picture pointing
to a key, you can use the SimpleSet system described in this section,
please locate the brand of your device and note the key associated
with it.
TV
Bush
Grundig
JVC
LG
Panasonic
Philips
Samsung
Sharp
Sony
Toshiba
STREAM
A.C.Ryan / DVICO / Eminent /
Evolve / Ferguson / GigaTV /
iconBIT / Woxter
Apple
ASRock / Asus / Dell / HP / Sony
Dune
Fantec / HiMedia
Iomega / Western Digital
iRIS / ISTAR / Popcorn Hour / Redline
Microsoft / Xbox
Now TV by Sky / Roku / Sky Deutschland /
Sky Ireland / Sky Italia/ Sky Österreich / Sky UK / Telstra
NVIDIA
SETUP
SIMPLESET

6
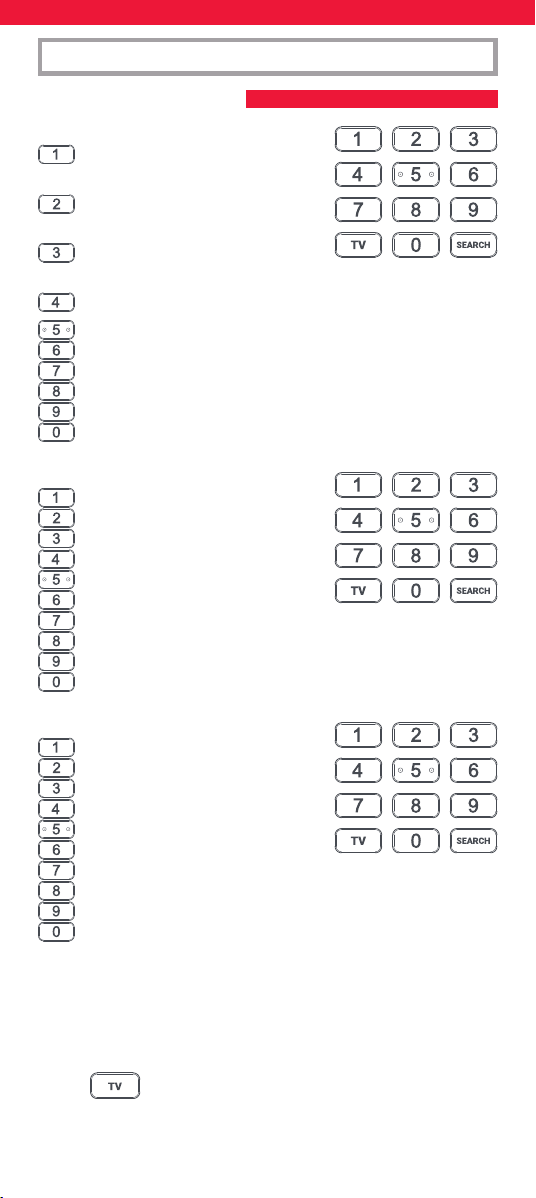
STB
BT / Humax / TalkTalk / Tricolor TV
/ YouView
Canal+ / CanalSat / Deutsche
Telekom / Movistar / T-Home
DStv / Foxtel / Multichoice /
Sky New Zealand
Freebox / Sky Deutschland / Sky Österreich / TechniSat
Kabel Deutschland / Vodafone
KPN / Sagemcom / SFR
Orange / Samsung
Sky Ireland / Sky Italia / Sky UK
Strong / Vu+
Telenet / UPC / UPC Cablecom / Virgin Media / Ziggo
AUDIO
Bose
Denon
Harman/Kardon / JBL / Samsung
JVC / LG
Marantz / Philips
Onkyo
Panasonic / Technics
Pioneer
Sony
Yamaha
DVD and BLURAY
Denon / Onkyo
JVC
LG
Panasonic
Philips
Pioneer
Samsung
Sony
Toshiba
Yamaha
SETUP
SIMPLESET
To set up your device:
1. Turn on your device (not on standby) and point the Essential
remote towards it. If you are setting up a Streaming device,
make sure a movie or TV show is playing.
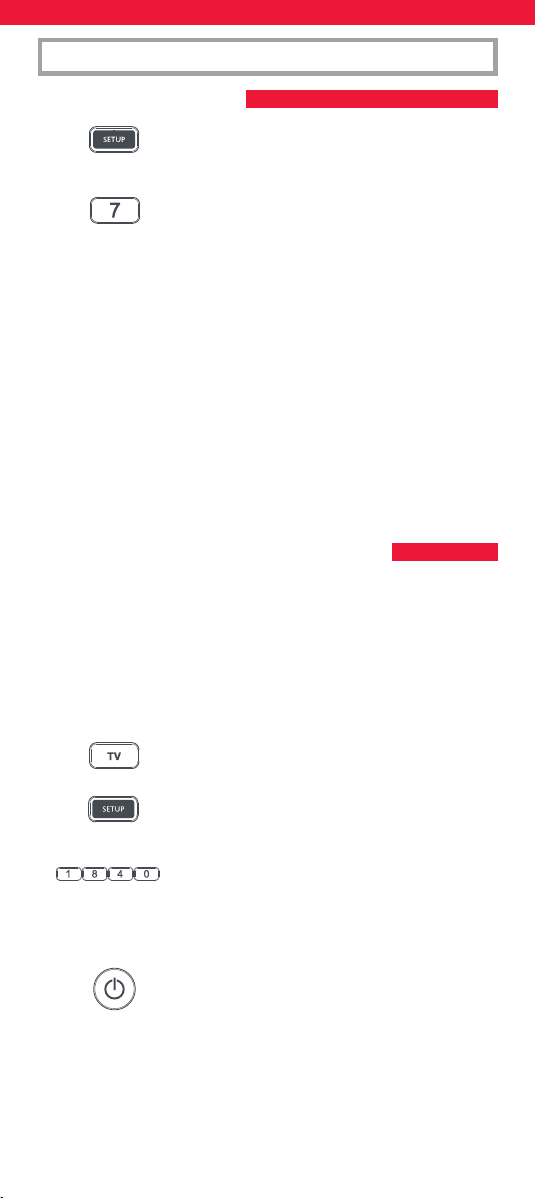
2. Press the Device key you wish to set up (for
example TV).
3. Hold down the Setup key until the LED under the
Device key blinks twice.
7
SETUP
SIMPLESET
SETUP BY CODE
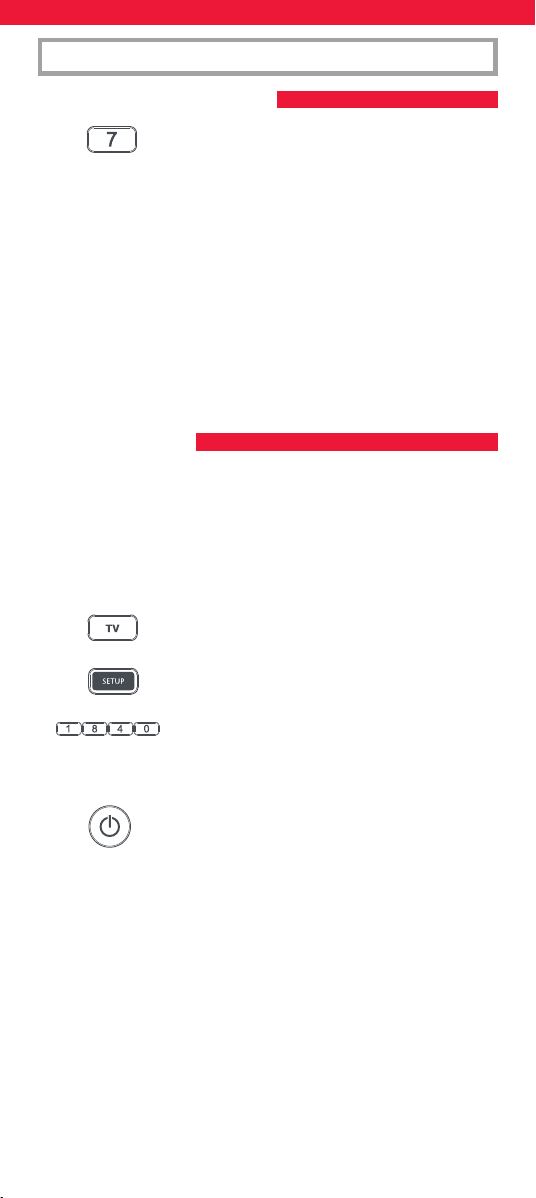
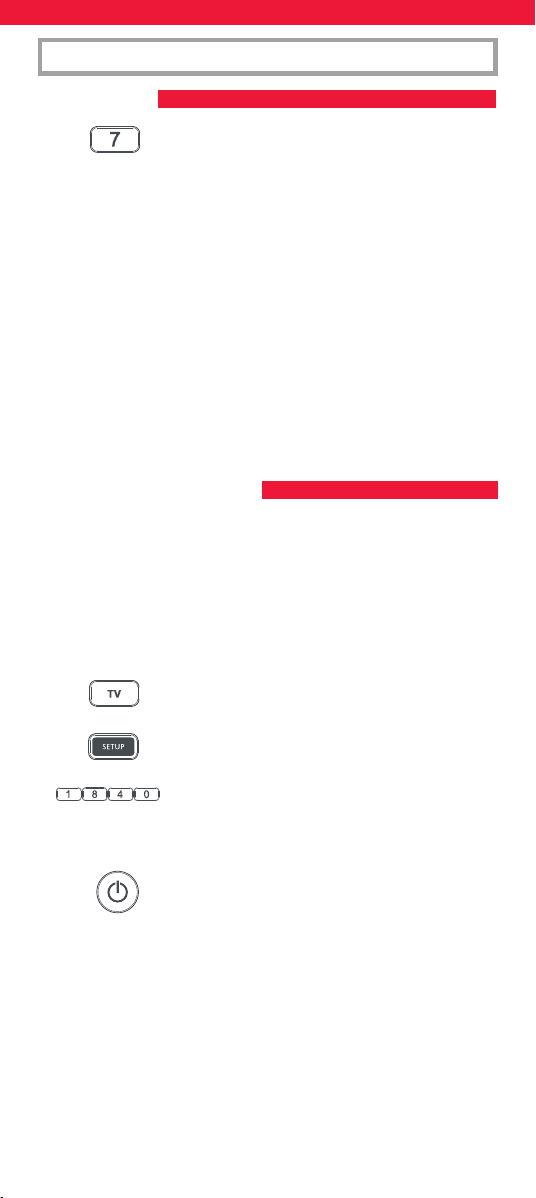
4. Hold down the digit for your brand and device as
listed in the tables above - e.g. 7 for a Samsung TV.
5. For all devices except Stream the remote will send the Power
key every 3 seconds, for a streaming box the remote will send
the Play/Pause function.
6. As soon as your device reacts by turning o or Pausing
(Streaming box only) release the digit.
7. The LED will blink twice and the remote should now operate
your device.
• If you nd one or more keys do not work as you expect, start again at
step 2 – the remote will start with the next code in the memory.
If the brand of your device is not listed in the SimpleSet feature, you
can set up by trying codes individually. To do this rstly locate your
brand in the Code List. Codes are listed by brand and device, and in
order of popularity.
1. Turn on your device (not on standby) and point the Essential
remote towards it.
2. Press the Device key you wish to set up (for
example TV).
3. Hold down the Setup key until the LED under the
Device key blinks twice.
4. Enter the rst 4 digit code listed for your brand
(e.g. 1840 for LG).
5. The LED will blink twice on the last digit of the code.
6. Now aim the remote towards your device and press
the Power key.*
7. If the device turns o your remote is ready to use. If not, repeat
steps 2-6 with the next code in the list.
* Note: If your original remote did not have a Power key, try testing
with a dierent key at step 6. For example try pressing Play or Pause
when setting up a streaming box and see if the box responds.
8
SETUP
LEARNING
Your Essential remote control can learn any function from any other
working remote control. This is a quick and easy one-time setup that
allows to control any infrared controlled device you have in your living
room. It also allows you to add a key or keys that may be missing to a
spare key on the Essential.
To do this, rstly make sure you have all your original remote controls
to hand, and that they have working batteries in.
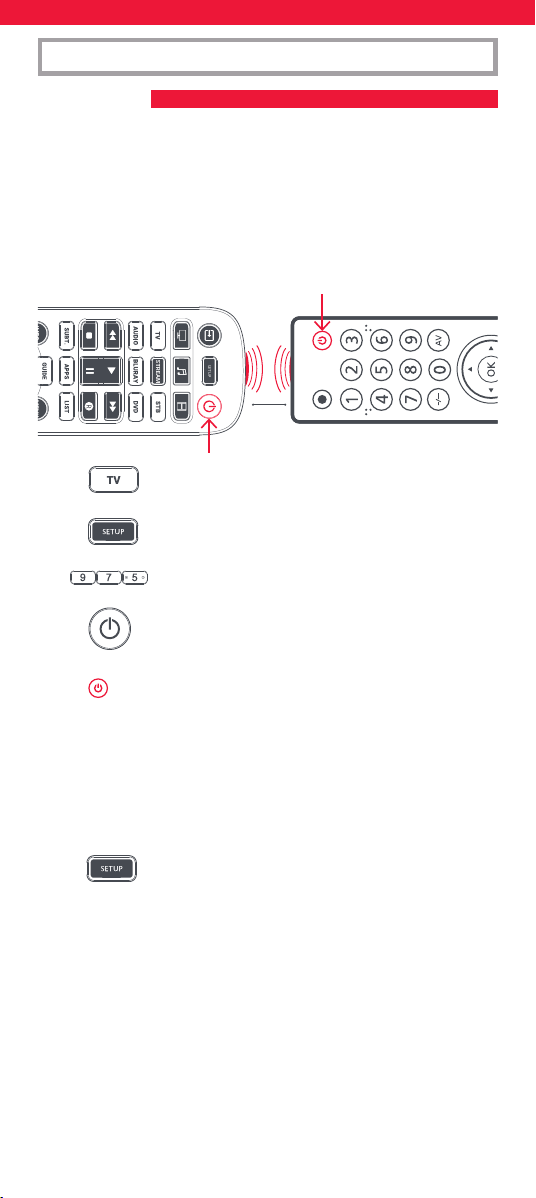
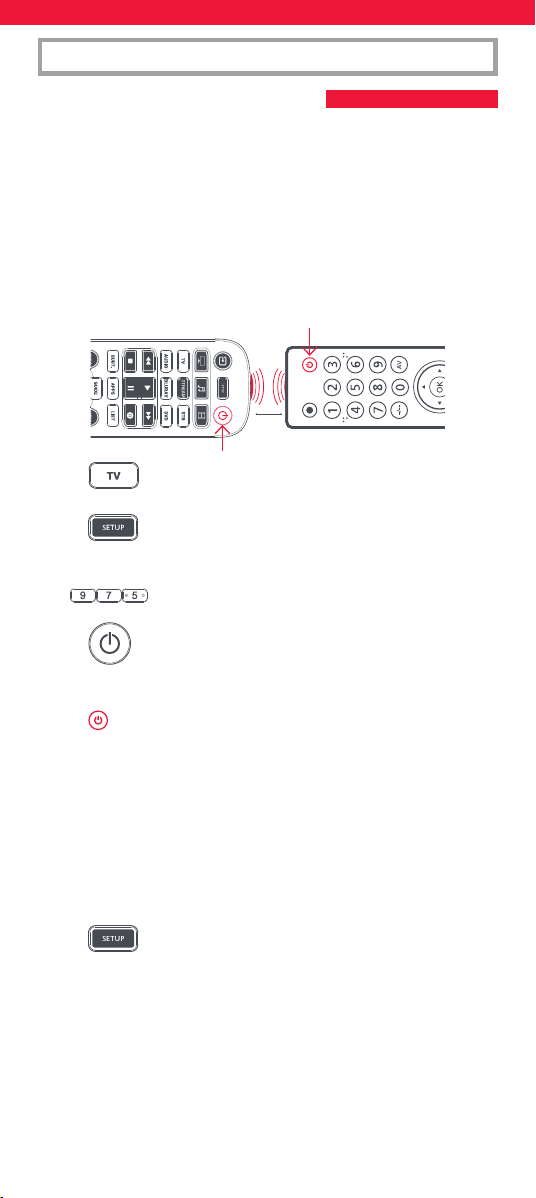
To learn functions, the original remote should be approximately 3cm
from the Essential remote, pointing towards it:
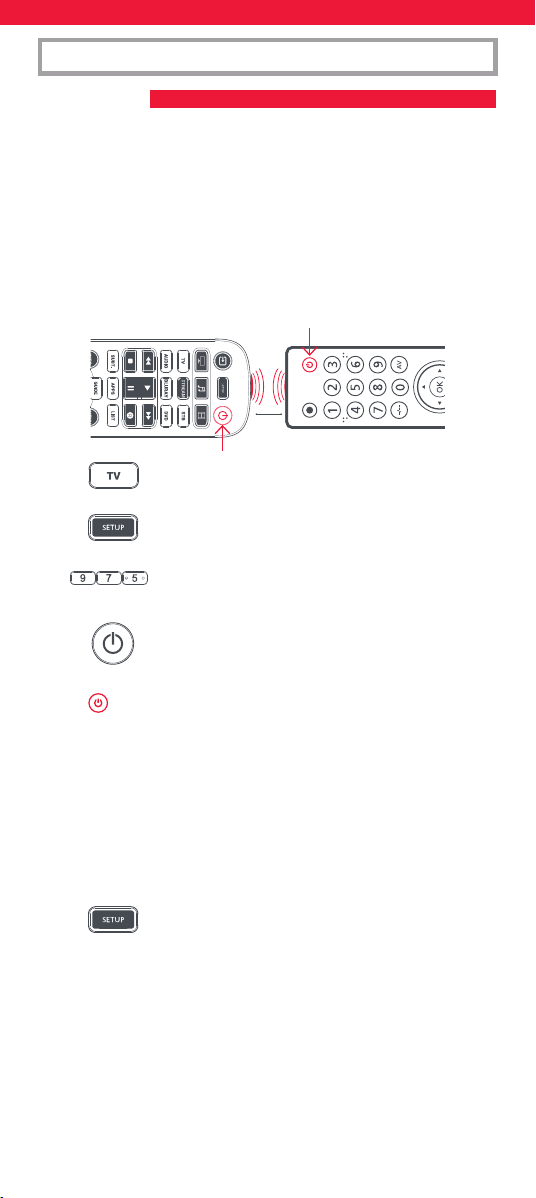
1. Press the Device key for the device you want to
learn functions onto.
2. Hold down the Setup key until the LED under the
Device key blinks twice.
3. Press 975 – the LED should blink twice.
4. Press and release the key you want to learn a
function onto (for example the TV Power key) –
the LED will begin to ash rapidly.
5. Press and release* the corresponding key on the
original remote, for example Power.
6. The LED will blink twice to indicate the key has been learned
correctly.
7. Repeat steps 4 and 5 for each key you want to learn –
remember you can learn from multiple remotes, but only one
function per key.
8. When you have learned all the functions you
require, press and hold Setup key until the LED
blinks twice.
* Some remotes send commands dierently. If you nd a function
cannot be learned, try holding down the key on the original remote
instead of pressing and releasing.
Hints:
• If the LED shows one long blink at step 5, the function was not
learned correctly, please try again from step 4.
• If you nd one or more keys don’t work properly after set up,
you can re-enter the learning mode at any time by repeating the
procedure from step 1.
• If one or more of your original remotes aren’t working, you can still
set up the Essential remote by SimpleSet or Code Set Up.
2 - 5 CM
9
SETUP
VOLUME LOCK
CHANNEL SHORTCUT MACROS
If you primarily use one device for controlling volume, for example
a Sound Bar or Audio Video Receiver, it’s possible to program your
Essential remote to only control that device when you use the Volume
Up, Down and Mute keys. To do this:
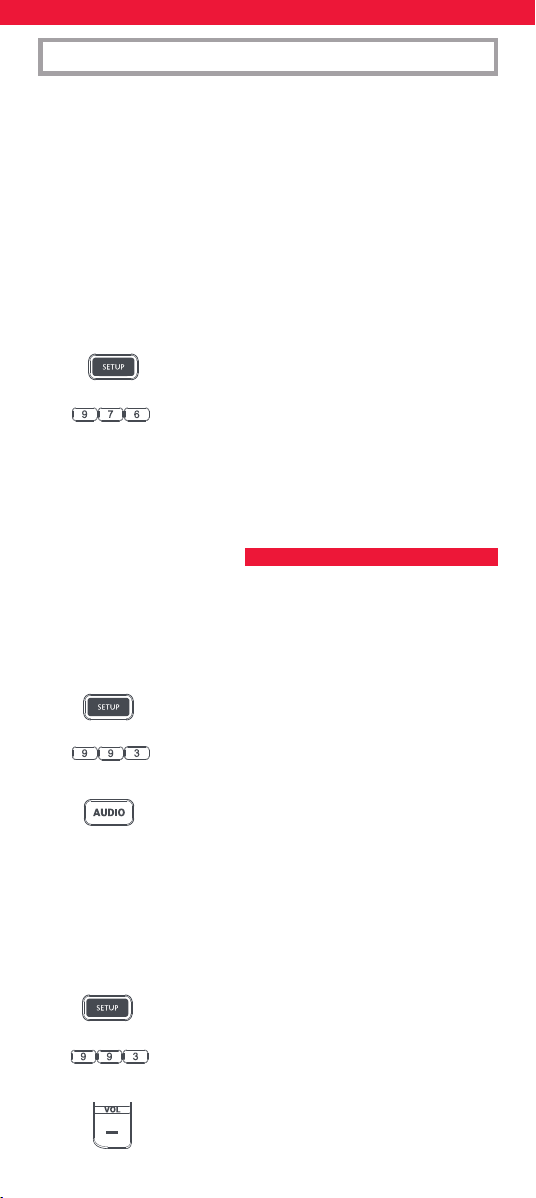
1. Hold down the Setup key until the LED under the
Device key blinks twice.
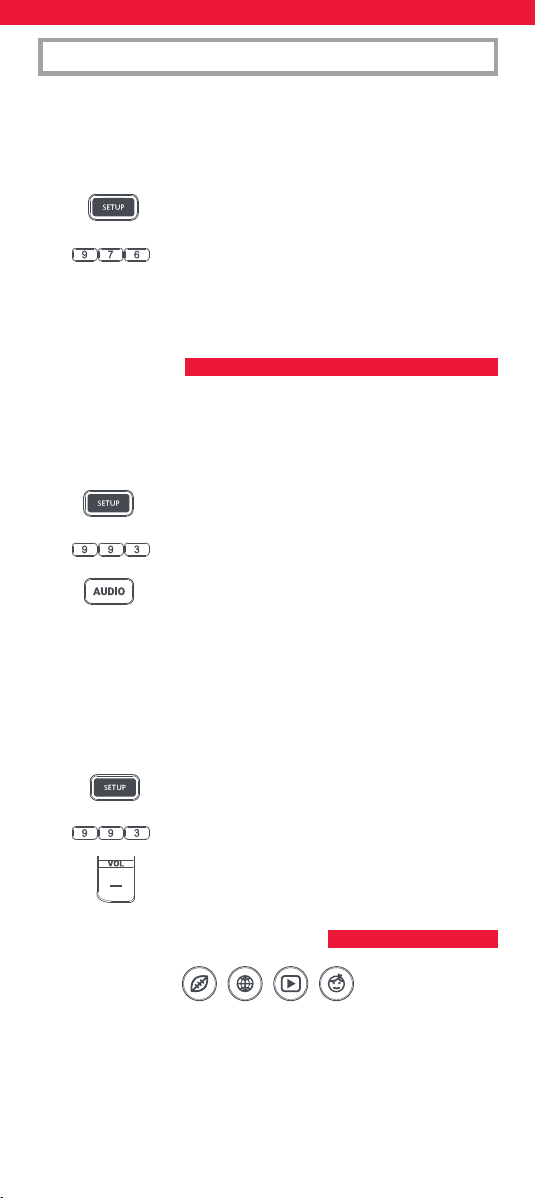
2. Press 993 – the LED should blink twice.
3. Press the device key for the device to always control
volume – for example Audio.
4. The LED will blink twice.
From now on, pressing the Volume Up, Down or Mute keys will always
control the Audio device, no matter what device you are controlling.
To unlock the volume, and return the remote to controlling each
device’s volume individually, the procedure is:
1. Hold down the Setup key until the LED under the
Device key blinks twice
2. Press 993 – the LED should blink twice
3. Press VOLUME DOWN – the LED will blink four
times and Volume is now unlocked.
As well as their normal functionality, the Red, Green, Yellow and Blue
keys can be reprogrammed to select your favourite channels by genre.
If you press and release each of these keys, they will perform exactly
the same function as your original remote.
However they can be reprogrammed so that when they are held down
for 3 seconds they will send a channel number, then when held down
again for 3 seconds, they will send a dierent channel number. You can
group these channels by genre such as Sports, News, Movies and Kids.
Deleting a learned function
If you want to delete a learned function and return that keys to its
original state, you can use the following procedure:
1.
Press the Device key for the device you want to learn functions onto.
2. Hold down the Setup key until the LED under the
Device key blinks twice.
3. Press 976 – the LED should blink twice
4. Press the key you want to reset twice – the LED should blink
twice and the learned function has been deleted.
10
APP SHORTCUT KEYS
The procedure to program is as follows: Say for example, the rst
3 Sports channels are on channels 200, 201 and 239, you can assign
shortcuts to these channels on the Red (Sports) key. To do this:
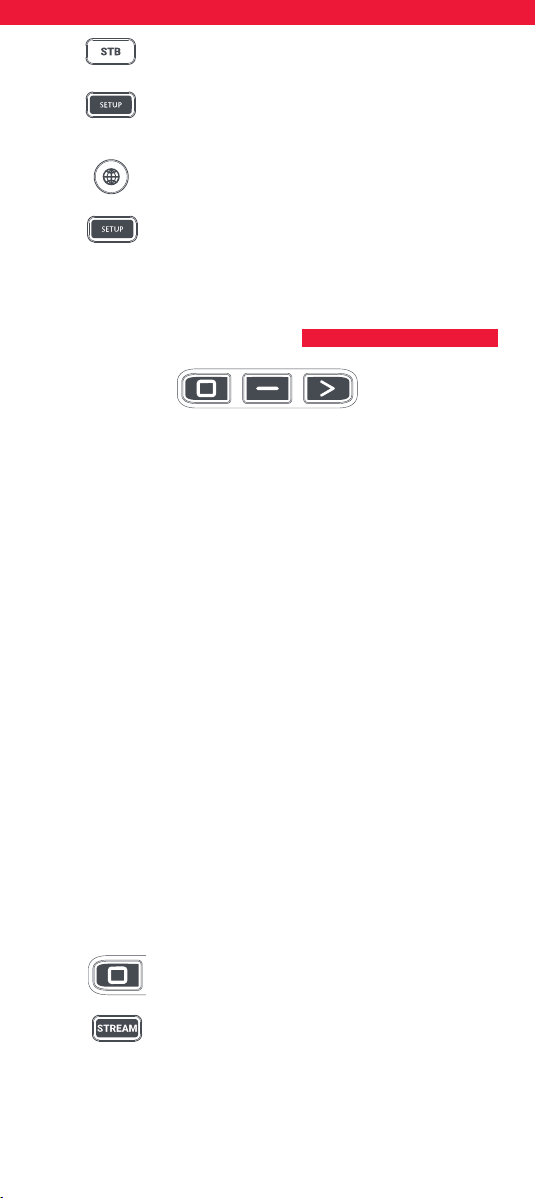
Firstly select the device you use to watch live TV. For example if you are
a Sky subscriber and you have set up your Set Top Box on the STB key,
press STB. Now you can program the channel shortcuts.
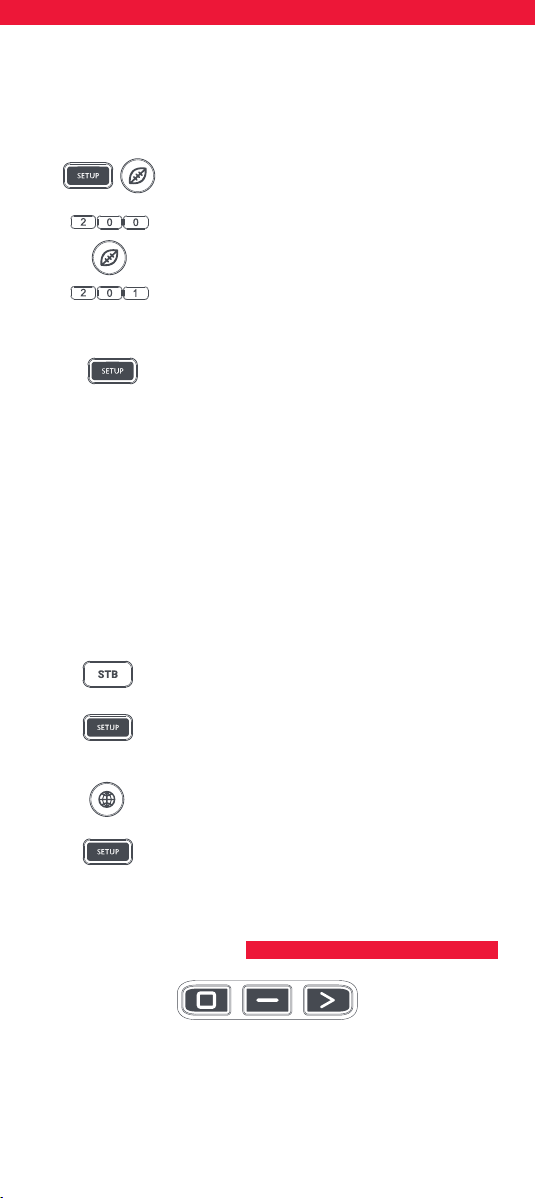
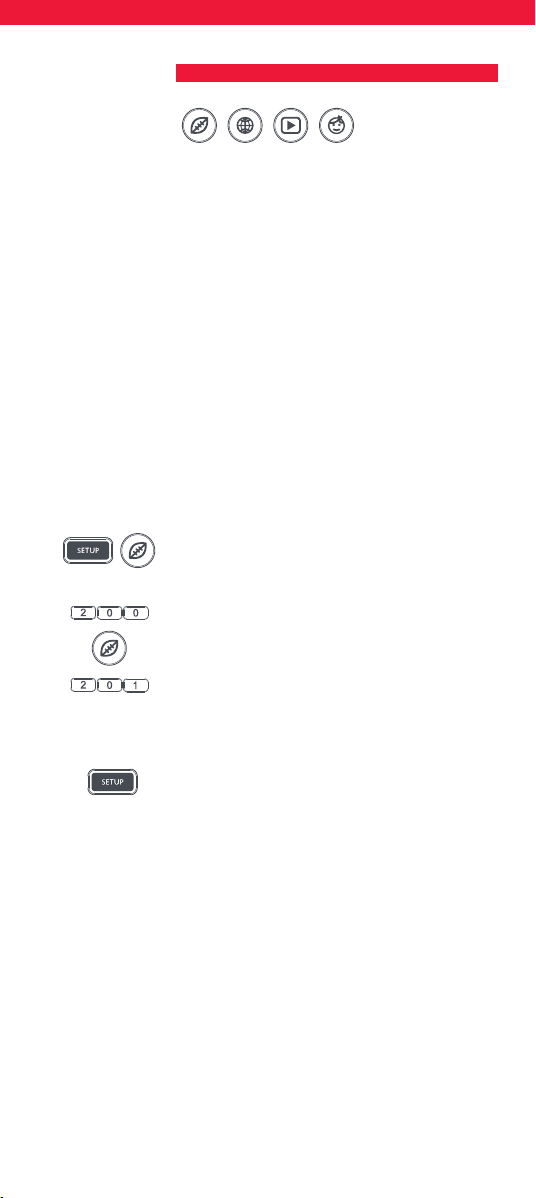
1. Hold down the Setup key and the Red key until the
LED blinks twice.
2. Enter the rst channel number (200).
3. Press and release the Red key.
4.
Enter the next channel number (in this example 201)
5.
Repeat Steps 3 and 4 for each channel shortcut you want to add.
6. After entering the last channel number you want,
press and hold the Setup key.
The LED will blink twice and the shortcuts are now programmed. When
watching live TV, simply hold down the Red key for 3 seconds, and
the rst Channel Shortcut will be sent (in this example channel 200).
The next time you hold down the Red Key, the shortcut for the next
Channel Shortcut will be sent (in this case channel 201).
You can reprogram each of the dierent colour keys with dierent lists
of channel numbers, by holding down the Setup key and a dierent
coloured key at step 1, and pressing and releasing the same key at
step 3. Each coloured key has a dierent name to help you remember
the channels that you have stored there. You can program up to 10
dierent channel numbers per key.
If you wish to reset the key to default, the procedure is as follows:
1. Press the device key you have programmed the
shortcuts on (for example STB).
2. Hold down the Setup key and the key you wish
to reset (for example the Green key) until the LED
blinks twice.
3. Press and release the key to reset (for example the
Green key).
4. Hold down the Setup key until the light blinks
twice.
The key is now reset.
The Essential features three App Shortcut Keys which can be used to
open apps on your Smart Devices. If your original remote control has
a Netlx, Amazon Prime Video or YouTube key, these keys will perform
the same function.
11
ACTIVITIES
However if you did not have a key like this, but still had the ability
to watch a streaming service, you can use this key as a shortcut by
programming a macro on it. Most AV devices which are connected to
the internet, such as Smart TVs or streaming Set Top Boxes have one or
more applications they can run to access TV viewing via the internet.
Examples of these would be Netix, YouTube, Amazon Prime or similar.
To program the macro, you rst need to know the device you use to
access the service, and then the sequence of keys you need to press to
always bring up the service you prefer, For example, some Panasonic
TVs will start Netix by pressing the Apps key, then Menu Down Twice,
and nally the OK key. Or on an Apple TV, the sequence is Menu, Menu
Down and OK.
Once you have determined the sequence for your device, follow these
steps:
1. Sit in front of your device with It switched on (not on standby).
2. Hold down the App Shortcut key until the LED
blinks twice and stays lit.
3. Press the device key for the device you want to use
for the macro (e.g. Stream).
4.
Now perform the sequence of keys exactly as would normally.
The remote will operate your device and the macro is recorded in
real time - so if it normally takes a few seconds for your device to
react don’t worry.
5. One you have nished the sequence - and the
Streaming Service has started on your device - hold
down the App Shortcut key until the LED blinks
twice and goes out. The macro is now stored.
Tips
• Make sure the Essential remote Is operating the device in question
before programming.
• If you nd the Macro doesn’t work as expected, you can just repeat
the same sequence to reprogram.
• When programming, wait for your device to respond rst, the
remote will remember the timing.
• The App Shortcut macro is tied to one device, remember to make
sure you are watching the correct device.
An Activity is a combination of devices. On a standard universal
remote control if you want to control dierent devices you need to
swap between them using the device keys. So you wanted to control
the input of your TV, the channels and guide of your Sky box and the
volume of your sound bar, you would need to swap between these by
pressing the TV, STB and Audio keys.
On the Essential remotes these devices can be grouped into one
Activity mode, so after pressing watch TV, the Input key will control the
TV, the Volume Up, Down and Mute will control the Sound Bar and the
other keys will control the Set Top Box.
12
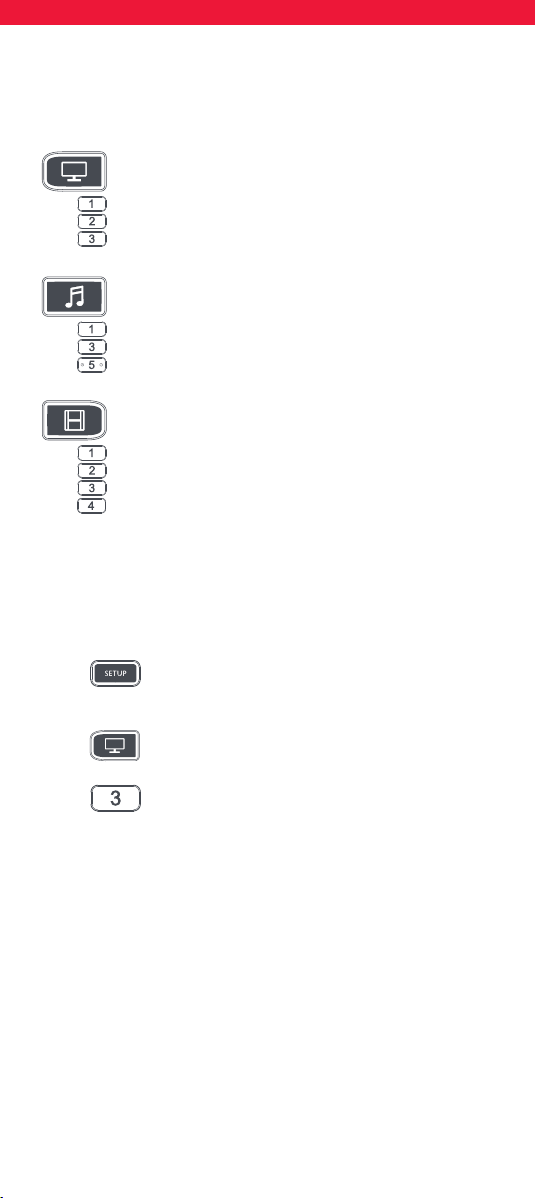
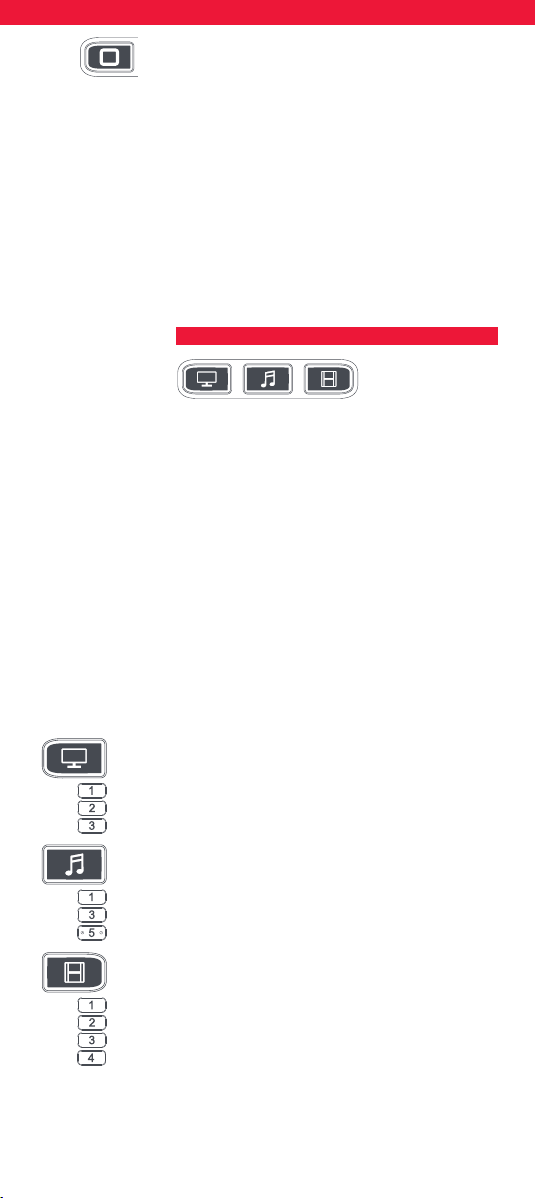
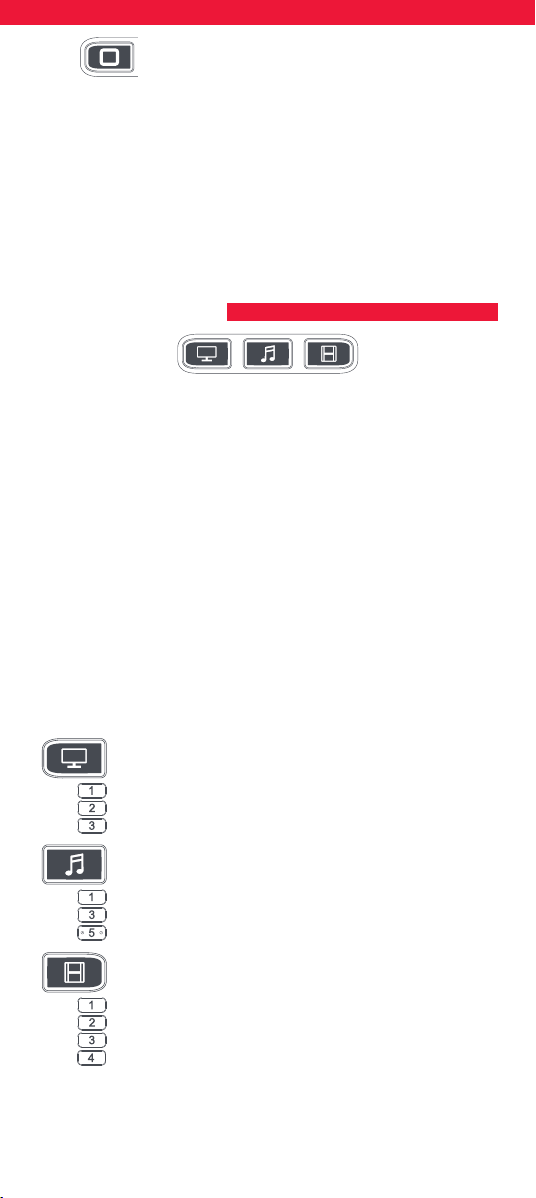
The Essential remote has 3 Activity modes,
specically Watch TV, Listen To Music and Watch Movie.
Each of these modes has a choice of devices to combine.
These are:
Watch TV
Combination 1 – TV + STB + AUDIO (default)
Combination 2 – TV + STB
Combination 3 – TV + AUDIO
Listen To Music
Combination 1 – TV + BLU + AUDIO (default)
Combination 3 – TV + STREAM + AUDIO
Combination 5 – AUDIO only
Watch Movie
Combination 1 – TV + STREAM + AUDIO (default)
Combination 2 – TV + STREAM
Combination 3 – TV + BLU
Combination 4 – TV + BLU + AUDIO
If you set the default devices for any Activity on the remote (for
example a TV, STB and Audio for Watch TV) that Activity will be set up
automatically on the remote.
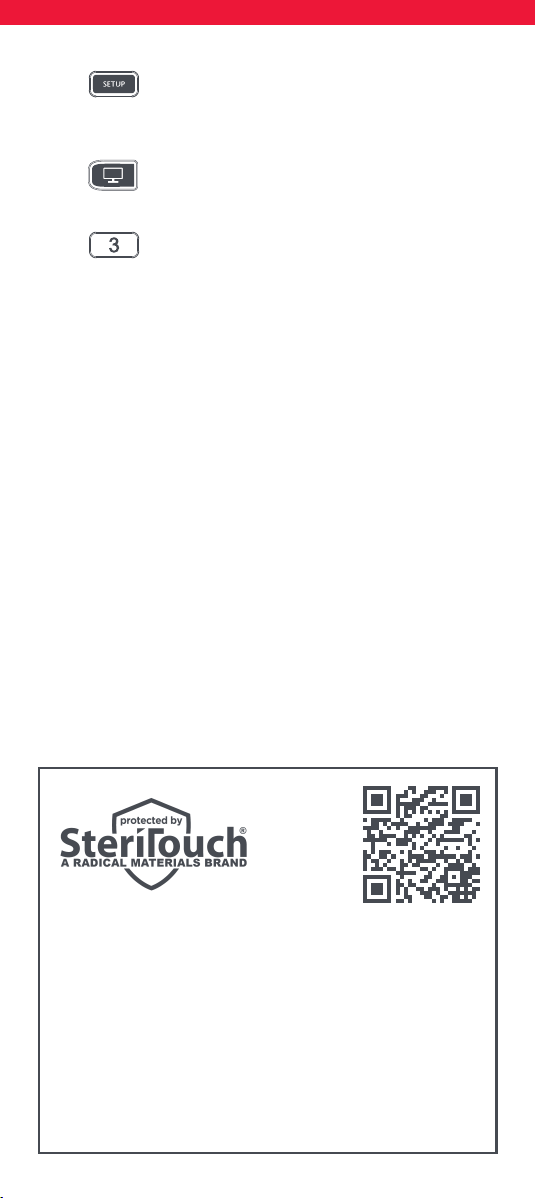
If you would like to change to a dierent combination, the procedure
is as follows:
1. Hold down Setup key until the LED under the
device blinks twice. The LED under the current
device will stay lit.
2. Press the Activity key you want to set up (e.g.
Watch TV).
3. Press the number of the combination you want
to set – e.g 3 For TV + AUD in Watch TV.
4. The LED will blink twice and go out.
To access the Activities, simply press the ACTIVITY key. You can return
to controlling by device by using any Device key.

13
AV SHIFT
POWER MACRO
As the AV key is intended to select the input on your TV and most TVs
use a menu to select from a list of inputs, when the AV key is pressed
in an Activity, the Menu Up, Down, Left, Right and OK keys temporarily
control the TV. If the OK key is pressed, or no key is pressed for ten
seconds, these keys will revert to controlling the relevant device for
the Activity (e.g. STB in Watch TV Mode).
If you hold down the Power key for 2 seconds in any Activity, the
remote will send the Power function for each device contained within
that Activity. So for example, holding Power in the default setting for
Watch TV will turn both the TV and Set Top Box on or o
facebook.com/ @oneforall.worldwide linkedin.com/ youtube.com/
oneforallworldwide company/one-for-all-worldwide/ user/oneforallproducts
Connect with us
This Remote contains SteriTouch®. It will be protected from
the growth of bacteria, fungi and mold for its usable lifetime.
Please scan the QR c
ode or visit www.oneforall.com/antimicrobial
for more information on antimicrobial protection and SteriTouch
silver ion t
echnology.
This product contains silver phosphate glass, a biocidal product
which controls the growth of micro-organisms on
the product surface.
This product does not contain nanomaterials.
The inclusion of a biocidal product does not negate the need
for normal cleaning.

14
Vielen Dank, dass Sie sich für die One For All Essential 6 Universal-
Fernbedienung entschieden haben. Die Fernbedienung kann
verwendet werden, um bis zu sechs Audio-Video-Geräte wie TV,
Set-Top-Box, Blu-Ray-Player oder Soundbar zu steuern.
Die Fernbedienung verfügt über eine Hintergrundbeleuchtung zur
einfachen Bedienung in einem dunklen Raum sowie einen antimikro-
biellen Schutz.
In dieser Bedienungsanleitung erfahren Sie, wie die Essential-6-
Fernbedienung eingerichtet wird, um Ihre Geräte zu steuern.
Für die Fernbedienung sind zwei Batterien vom Typ AA/LR06 erforder-
lich. Bitte legen Sie diese wie abgebildet ein. Es werden Alkalibatterien
empfohlen.
DEUTSCH EINFÜHRUNG
BATTERIEN
2x AA
1
3
2
4
VORSICHT: Wenn die Batterie durch eine
Batterie eines anderen Typs ausgetauscht
wird, besteht Explosionsgefahr. Verwenden
Sie hochwertige Alkalibatterien.

15
TASTENBESCHREIBUNG
7
10
11
13
14
18
21
22
24
26
17
6
4
23
3 1
5
2
8
9
12
16
20
19
25
15

16
1
Power Zum Ein- und Ausschalten der Geräte.
2
Setup Mit dieser Taste wird die Fernbedienung eingerichtet.
3
Eingang Zur Auswahl des Eingangs an Geräten.
4
Gerätetasten Mit diesen Tasten kann ausgewählt werden, welches Gerät
die Essential-6-Fernbedienung steuern soll. Nach Drücken der TV-Taste
steuert die Fernbedienung Ihren Fernseher. Um ein anderes Gerät zu
steuern, drücken Sie auf der Fernbedienung auf die entsprechende Taste.
Folgende Geräte können für die jeweiligen Tasten programmiert werden:
TV: Alle Fernseher wie LED, LCD, Plasma, OLED usw.
STREAM: Streaming-Geräte wie Apple TV, Roku Box, Foxtel Now usw.
Funktioniert ebenfalls mit Xbox 360 und Xbox One.
STB: Set-Top-Boxen einschließlich Satellit, Kabel und Freeview
AUDIO: Audiogeräte einschließlich Soundbars, AV-Receiver und Hi-Fi.
BLURAY: Blu-Ray-Player und DVD-Player/-Recorder.
DVD: DVD-Player/-Recorder und Blu-Ray-Player
5
Aktivitäten Zur Steuerung von bis zu drei Geräten in einem Modus:
„TV sehen“, „Musik hören“ und „Film ansehen“. Siehe „Aktivitäten“ für
Einstellungen und Verwendung.
6
Wiedergabetasten
Zur Steuerung der Wiedergabe von Filmen, Musik und TV.
7
Untertitel Zur Anzeige von Untertiteln.
8
Apps Zur Anzeige des App-Menüs auf Smart-Geräten wie Smart-TVs oder
Streaming-Boxen.
9
Liste Zur Anzeige einer Liste aufgenommener Sendungen.
10
Info Zur Anzeige von Informationen über die aktuellen Programme oder
Kanäle.
11
Guide TV Guide
12
MENÜ Zugri auf das Installationsmenü des aktuellen Geräts.
13
Richtungsmenü und OK Zur Steuerung des Menüs des aktuellen Geräts.
14
Zurück Einen Schritt zurück im Menü.
15
Home Zur Anzeige des Home-Menüs.
16
Verlassen Zum Verlassen des Menüs.
17
Lauter/Leiser Zur Steuerung der Lautstärke des aktuellen Geräts.
Die Tasten können auch so eingestellt werden, dass immer ein
bestimmtes Gerät gesteuert wird. Details nden Sie unter der Funktion zur
Lautstärkesperre.
18
Letzter Sender Für den Wechsel zum zuletzt angesehenen Sender.
19
Stumm Schaltet die Lautstärke des aktuellen Geräts stumm. Die Taste kann
auch so eingestellt werden, dass immer ein bestimmtes Gerät gesteuert
wird. Details nden Sie unter der Funktion zur Lautstärkesperre.
20
Kanal aufwärts/abwärts Zum Wechseln der Kanäle auf dem aktuellen
Gerät.
21
RGYB-Tasten Schnellzugristasten für das Menü des aktuellen Geräts.
22
App-Schnelltasten Tasten zum Starten von Streaming-Apps. Details
nden Sie im Abschnitt für App-Schnelltasten.
23
Ziern Zur Auswahl der Kanäle auf dem aktuellen Gerät. Bei Audiogeräten
werden mit diesen Tasten individuelle Eingänge ausgewählt.
24
TV Für den Wechsel zum Live-TV.
25
Suchen Für die Suche nach Medien.
26
Hintergrundbeleuchtung ein/aus Schaltet die Hintergrundbeleuchtung
ein oder aus. Wenn die Funktion eingeschaltet ist, wird beim Drücken einer
Taste die Hintergrundbeleuchtung für 10 Sekunden eingeschaltet. Drücken
Sie diese Taste, um die Hintergrundbeleuchtung auszuschalten, und erneut,
um sie einzuschalten.
TASTENBESCHREIBUNG

17
Die Essential-6-Fernbedienung ist so vorprogrammiert, dass einige der
gängigsten Geräte direkt gesteuert werden können. Wenn Sie über eines
der folgenden Geräte verfügen, legen Sie Batterien ein und drücken Sie
die entsprechende Gerätetaste. Drücken Sie dann einige Tasten,
um festzustellen, ob die Fernbedienung mit dem Gerät funktioniert:
Gerätetaste Gesteuertes Gerät
TV Samsung TV
STREAM Roku Streaming Box
STB Sky Q Box (nur GB und Italien)
AUDIO Onkyo Receiver
BLURAY Samsung-Blu-Ray-Player
DVD Sony-DVD-Player
Wenn Sie nicht über eines der aufgeführten Geräte verfügen oder
weitere Geräte einrichten möchten, gibt es dafür zwei Möglichkeiten.
Die einfachste Möglichkeit ist mit der SimpleSet-Funktion, die für
gängige Marken und Geräte verwendet werden kann.
Wenn die Marke Ihres Geräts in der SimpleSet-Abbildung mit einer
Taste aufgeführt ist, können Sie das in diesem Abschnitt beschriebene
SimpleSet-System verwenden. Ermitteln Sie dazu die Marke Ihres
Geräts und die entsprechende Taste.
TV
Bush
Grundig
JVC
LG
Panasonic
Philips
Samsung
Sharp
Sony
Toshiba
STREAM
A.C.Ryan / DVICO / Eminent /
Evolve / Ferguson / GigaTV /
iconBIT / Woxter
Apple
ASRock / Asus / Dell / HP / Sony
Dune
Fantec / HiMedia
Iomega / Western Digital
iRIS / ISTAR / Popcorn Hour / Redline
Microsoft / Xbox
Now TV by Sky / Roku / Sky Deutschland /
Sky Ireland / Sky Italia/ Sky Österreich / Sky UK / Telstra
NVIDIA
EINRICHTUNG
SIMPLESET
18
STB
BT / Humax / TalkTalk / Tricolor TV
/ YouView
Canal+ / CanalSat / Deutsche
Telekom / Movistar / T-Home
DStv / Foxtel / Multichoice /
Sky New Zealand
Freebox / Sky Deutschland / Sky Österreich / TechniSat
Kabel Deutschland / Vodafone
KPN / Sagemcom / SFR
Orange / Samsung
Sky Ireland / Sky Italia / Sky UK
Strong / Vu+
Telenet / UPC / UPC Cablecom / Virgin Media / Ziggo
AUDIO
Bose
Denon
Harman/Kardon / JBL / Samsung
JVC / LG
Marantz / Philips
Onkyo
Panasonic / Technics
Pioneer
Sony
Yamaha
DVD and BLURAY
Denon / Onkyo
JVC
LG
Panasonic
Philips
Pioneer
Samsung
Sony
Toshiba
Yamaha
EINRICHTUNG
SIMPLESET
So richten Sie Ihr Gerät ein:
1. Schalten Sie das Gerät ein (kein Standby) und richten Sie
die Essential-Fernbedienung auf das Gerät. Achten Sie beim
Einrichten eines Streaming-Geräts darauf, dass ein Film oder
eine Fernsehsendung läuft.
2. Drücken Sie die Gerätetaste, die Sie einrichten
möchten (z. B. TV).
3. Halten Sie die Setup-Taste gedrückt, bis die LED
unter der Gerätetaste zweimal blinkt.
19
SIMPLESET
EINRICHTUNG
EINRICHTEN MIT CODE
4. Halten Sie die Taste mit der für Ihre Marke und Ihr
Gerät aufgeführten Zier gedrückt (siehe Tabellen
oben, z. B. 7 für Samsung TV).
5. Bei allen Geräten außer bei Streaming-Geräten übermittelt
die Fernbedienung alle drei Sekunden das Power-Signal. Bei
einer Streaming-Box übermittelt die Fernbedienung das Play-/
Pause-Signal.
6. Wenn sich das Gerät ausschaltet oder in den Pausenmodus
übergeht (nur Streaming-Box), lassen Sie die Zierntaste los.
7. Die LED blinkt zweimal und Ihr Gerät sollte sich nun mit der
Fernbedienung steuern lassen.
• Wenn Sie feststellen, dass eine oder mehrere Tasten nicht wie erwartet
funktionieren, führen Sie den Vorgang ab Schritt 2 erneut durch. Die
Fernbedienung beginnt dann mit dem nächsten Code im Speicher.
Wenn die Marke Ihres Geräts nicht in der SimpleSet-Funktion
aufgeführt ist, können Sie das Gerät einrichten, indem Sie einzelne
Codes ausprobieren. Ermitteln Sie zuerst Ihre Marke in der Codeliste.
Codes sind nach Marke und Gerät sowie in Reihenfolge der Beliebtheit
aufgeführt.
1. Schalten Sie das Gerät ein (kein Standby) und richten Sie
die Essential-Fernbedienung auf das Gerät.
2. Drücken Sie die Gerätetaste, die Sie einrichten
möchten (z. B. TV).
3. Halten Sie die Setup-Taste gedrückt, bis die LED
unter der Gerätetaste zweimal blinkt.
4. Geben Sie den ersten vierstelligen Code ein,
der für Ihre Marke aufgeführt ist (z. B. 1840 für LG).
5. Die LED blinkt bei der letzten Zier des Codes zweimal.
6. Halten Sie die Fernbedienung nun in Richtung
Ihres Geräts und drücken Sie die Power-Taste*.
7. Wenn das Gerät ausgeschaltet wird, ist die Fernbedienung
einsatzbereit. Falls nicht, wiederholen Sie die Schritte 2 bis 6
mit dem nächsten Code in der Liste.
* Hinweis: Wenn Ihre Originalfernbedienung keine Power-Taste hat,
versuchen Sie es in Schritt 6 mit einer anderen Taste. Drücken Sie
beispielsweise die Play- oder Pause-Taste beim Einrichten einer
Streaming-Box und prüfen Sie, ob die Box reagiert.
20
EINRICHTUNG
KOPIEREN
Die Essential-Fernbedienung kann jede beliebige Funktion einer
anderen funktionierenden Fernbedienung kopieren. Durch eine
schnelle und einmalige Einrichtung wird die Steuerung jedes
infrarotgesteuerten Geräts in Ihrem Wohnzimmer möglich. Sie können
auf der Essential-Fernbedienung auf einer Ersatztaste auch eine
fehlende Taste oder mehrere fehlende Tasten hinzufügen.
Stellen Sie dafür zunächst sicher, dass Sie alle Originalfernbedienungen
zur Hand haben und funktionierende Batterien eingelegt sind.
Zum Kopieren von Funktionen sollte die Originalfernbedienung etwa
3 cm von der Essential-Fernbedienung entfernt sein und in deren
Richtung zeigen:
1. Drücken Sie die Gerätetaste für das Gerät, für das
Sie Funktionen kopieren möchten.
2. Halten Sie die Setup-Taste gedrückt, bis die LED
unter der Gerätetaste zweimal blinkt.
3. Drücken Sie die 975 – die LED sollte zweimal
aueuchten.
4. Drücken und lassen Sie die Taste los, für die eine
Funktion kopiert werden soll (z. B. die TV-Power-
Taste) – die LED beginnt schnell zu blinken.
5. Drücken Sie die entsprechende Taste auf der
Originalfernbedienung und lassen Sie sie los*, z. B.
die Power-Taste.
6. Die LED blinkt zweimal, wodurch angezeigt wird, dass die
Funktion ordnungsgemäß auf der Taste hinterlegt wurde.
7. Wiederholen Sie die Schritte 4 und 5 für jede Taste, die
kopiert werden soll. Denken Sie daran, dass von mehreren
Fernbedienungen kopiert werden kann, jedoch nur eine
Funktion pro Taste.
8. Wenn Sie alle benötigten Funktionen kopiert
haben, halten Sie die Setup-Taste gedrückt, bis die
LED zweimal blinkt.
* Bei einigen Fernbedienungen werden Befehle auf verschiedene Art
und Weise übermittelt. Wenn Sie feststellen, dass eine Funktion nicht
kopiert werden kann, versuchen Sie stattdessen, die Taste auf der
Originalfernbedienung gedrückt zu halten, anstatt sie zu drücken
und loszulassen.
Hinweise:
• Wenn die LED bei Schritt 5 einmal lange aueuchtet, wurde die
Funktion nicht richtig kopiert. Starten Sie dann erneut bei Schritt 4.
2 - 5 CM
21
EINRICHTUNG
LAUTSTÄRKESPERRE
Wenn Sie vorrangig ein Gerät zum Einstellen der Lautstärke
verwenden, z. B. eine Soundbar oder einen Audio-Video-Receiver,
können Sie die Essential-Fernbedienung so programmieren, dass nur
dieses Gerät angesprochen wird, wenn Sie die Lautstärke-Tasten und
die Taste zum Stummschalten verwenden. Vorgehensweise:
1. Halten Sie die Setup-Taste gedrückt, bis die LED
unter der Gerätetaste zweimal blinkt.
2. Drücken Sie die 993 – die LED sollte zweimal
aueuchten.
3.
Drücken Sie die Gerätetaste für das Gerät, für das
permanent die Lautstärke gesteuert werden soll, z. B. Audio.
4. In diesem Fall leuchtet die LED zweimal auf.
Nun steuern die Lautstärketasten oder die Taste zum Stummschalten
immer dieses Audiogerät, unabhängig davon, welches Gerät Sie steuern.
Um die Sperre aufzuheben und die Lautstärke von Geräten wieder
individuell zu regeln, führen Sie folgende Schritte aus:
1. Halten Sie die Setup-Taste gedrückt, bis die LED
unter der Gerätetaste zweimal blinkt.
2. Drücken Sie die 993 – die LED sollte zweimal
aueuchten.
3. Drücken Sie die Taste zum Verringern der
Lautstärke – die LED blinkt viermal und die
Lautstärkesperre ist jetzt aufgehoben.
• Wenn Sie feststellen, dass eine oder mehrere Tasten nach
der Einrichtung nicht richtig funktionieren, können Sie den
Kopiermodus jederzeit erneut starten, indem Sie den Vorgang ab
Schritt 1 wiederholen.
• Wenn eine oder mehrere Ihrer Originalfernbedienungen nicht
funktionieren, können Sie die Essential-Fernbedienung per
SimpleSet oder per Code einrichten.
Löschen einer kopierten Funktion
Wenn Sie eine kopierte Funktion löschen und die Tasten wieder in den
ursprünglichen Zustand versetzen möchten, führen Sie folgende Schritte aus:
1.
Drücken Sie die Gerätetaste für das Gerät, für das Sie Funktionen
kopieren möchten.
2. Halten Sie die Setup-Taste gedrückt, bis die LED
unter der Gerätetaste zweimal blinkt.
3. Drücken Sie die 976 – die LED sollte zweimal
aueuchten.
4. Drücken Sie die Taste, deren Funktion Sie löschen möchten,
zweimal. Die LED blinkt zweimal und die gelernte Funktion
wurde gelöscht.

22
Neben ihrer normalen Funktionalität kann die rote, grüne, gelbe und blaue
Taste so programmiert werden, dass Ihre Lieblingssender nach Genre
ausgewählt werden. Wenn Sie die Tasten drücken und loslassen, werden
dieselben Funktionen wie bei Ihrer Originalfernbedienung ausgeführt.
Die Tasten können jedoch auch so programmiert werden, dass eine
Taste, wenn sie drei Sekunden lang gedrückt wird, eine Sendernummer
übermittelt. Wenn die Taste dann erneut für drei Sekunden gedrückt
wird, wird eine andere Sendernummer übermittelt. Diese Sender
können nach Genre gruppiert werden, z. B. Sport, Nachrichten, Filme
und Kinderprogramme.
Die Tasten werden folgendermaßen programmiert: Wenn
beispielsweise die ersten drei Sportsender auf Kanal 200, 201 und 239
liegen, können Sie Schnelltasten für diese Sender auf der roten Taste
(Sport) hinterlegen. Vorgehensweise: Wählen Sie zuerst das Gerät aus,
das Sie zum Ansehen von Live-TV verwenden. Wenn Sie beispielsweise
ein Sky-Abonnement haben und Sie Ihre Set-Top-Box auf der STB-Taste
eingerichtet haben, drücken Sie die STB-Taste. Jetzt können Sie die
Schnelltasten für Kanäle programmieren.
1. Halten Sie die Setup-Taste und die rote Taste
gedrückt, bis die LED zweimal blinkt.
2. Geben Sie die erste Sendernummer (200) ein.
3. Drücken Sie die rote Taste und lassen Sie sie los.
4.
Geben Sie die nächste Sendernummer ein (201 in
diesem Beispiel).
5.
Wiederholen Sie die Schritte 3 und 4 für alle Sender, die auf der
Schnelltaste hinterlegt werden sollen.
6. Wenn Sie die letzte Sendernummer eingegeben
haben, drücken und halten Sie die Setup-Taste.
Die LED blinkt zweimal und die Schnelltasten sind jetzt programmiert.
Wenn Sie beim Fernsehen nun die rote Taste für drei Sekunden
drücken, wird der erste Sender, der auf der Schnelltaste hinterlegt
ist, aufgerufen (200 in diesem Beispiel). Wenn Sie erneut auf die rote
Taste drücken, wird der zweite gespeicherte Sender eingestellt (201 in
diesem Fall).
Auf diese Weise können alle Tasten mit den verschiedenen Farben mit
Senderlisten programmiert werden. Drücken Sie dafür einfach auf
die Setup-Taste und eine Taste mit einer anderen Farbe bei Schritt 1
und Schritt 3. Jede farbige Taste hat einen anderen Namen, damit die
gespeicherten Sender besser zu merken sind. Pro Taste können bis zu
zehn verschiedene Sender hinterlegt werden.
Wenn Sie eine Taste auf die Standardbelegung zurücksetzen möchten,
gehen Sie folgendermaßen vor:
MAKROS FÜR KANAL-SCHNELLTASTEN
23
SCHNELLTASTEN FÜR APPS
1. Drücken Sie die Gerätetaste, für die Sie
Schnelltasten programmiert haben, z. B. STB.
2. Halten Sie die Setup-Taste und die Taste gedrückt,
die Sie zurücksetzen möchten (z. B. die grüne
Taste), bis die LED zweimal blinkt.
3. Drücken und halten Sie die Taste, die Sie
zurücksetzen möchten, z. B. die grüne Taste.
4. Halten Sie die Setup-Taste gedrückt, bis die rote
Leuchte zweimal blinkt.
Die Taste ist jetzt zurückgesetzt.
Die Essential-Fernbedienung verfügt über drei App-Schnelltasten, mit
denen Sie Anwendungen auf Ihren Smart-Geräten önen können.
Wenn Ihre Originalfernbedienung über eine Taste für Netix, Amazon
Prime oder YouTube Video verfügt, führen diese Tasten die gleiche
Funktion aus.
Wenn die Fernbedienung keine Tasten dafür hatte, es aber trotzdem
die Möglichkeit gab, einen Streamingdienst zu nutzen, können Sie
diese Taste als Schnelltaste verwenden, um darauf ein Makro zu
programmieren. Die meisten AV-Geräte, die mit dem Internet verbun-
den sind, z. B. Smart-TVs oder Streaming-Set-Top-Boxen, verfügen über
eine oder mehrere Anwendungen, die ausgeführt werden können, um
per Internet auf das Fernsehprogramm zuzugreifen. Einige Beispiele
hierfür sind Netix, YouTube, Amazon Prime usw.
Um das Marko zu programmieren, müssen Sie wissen, welches Gerät
Sie verwenden, um auf den Dienst zuzugreifen. Dann müssen Sie die
Reihenfolge der Tasten kennen, die Sie betätigen müssen, um diesen
Dienst aufzurufen. Beispielsweise wird bei einigen TVs von Panasonic
Netix gestartet, indem zuerst die Apps-Taste, dann zweimal die
Nach-unten-Menütaste und schließlich die OK-Taste gedrückt wird.
Bei einem Apple-TV ist die Reihenfolge der Tasten beispielsweise:
Menü-Taste, Nach-unten-Menütaste und OK-Taste.
Wenn Sie die Reihenfolge für das Gerät kennen, befolgen Sie diese
Schritte:
1. Schalten Sie das Gerät ein (kein Standby) und setzen Sie sich
vor das Gerät.
2. Halten Sie die Schnelltaste für die App gedrückt, bis
die LED zweimal blinkt und dauerhaft leuchtet.
3. Drücken Sie die Gerätetaste für das Gerät, das für
ein Makro verwendet werden soll (z. B. Stream).
4.
Führen Sie die Tastenfolge nun wie gewohnt aus. Die
Fernbedienung steuert Ihr Gerät und das Makro wird in Echtzeit
aufgezeichnet. Falls Ihr Gerät also normalerweise erst nach
einigen Sekunden reagiert, ist dies völlig normal.
24
5. Nachdem Sie die Tastenfolge eingegeben haben
und der Streamingdienst auf dem Gerät gestartet
wurde, halten Sie die Schnelltaste für die App
gedrückt, bis die LED zweimal blinkt und erlischt.
Das Makro ist nun gespeichert.
Tipps
• Achten Sie vor der Programmierung darauf, dass die Essential-
Fernbedienung das entsprechende Gerät steuert.
• Falls das Makro nicht wie erwartet funktioniert, wiederholen
Sie die Programmierung mit derselben Tastenfolge.
• Warten Sie beim Programmieren, bis das Gerät reagiert. Die
Fernbedienung „merkt“ sich die entsprechende Zeit.
• Das Makro für die App-Schnelltaste ist an ein Gerät gebunden,
achten Sie also darauf, dass Sie das richtige Gerät verwenden.
Eine Aktivität ist eine Kombination von Geräten. Auf einer standard-
mäßigen Universalfernbedienung müssen Sie die Gerätetasten zum
Umschalten v
erwenden, um verschiedene Geräte zu steuern. Wenn
Sie also den Eingang Ihres TV-Geräts, die Sender Ihrer Sky-Box und die
Lautstärke Ihrer Soundbar steuern möchten, müssen Sie zwischen diesen
Geräten wechseln, indem Sie die TV-, STB- und Audio-Taste betätigen.
Auf der Essential-Fernbedienung können diese Geräte in einem
Aktivitätsmodus gruppiert werden. Wenn Sie also „TV sehen“ gedrückt
haben, steuert die Eingangstaste den Fernseher. Die Tasten für die
Lautstärke und die Taste zum Stummschalten steuern die Soundbar
und die anderen Tasten steuern die Set-Top-Box.
Die Essential-Fernbedienung verfügt über drei Aktivitätsmodi: „TV
sehen“, „Musik hören“ und „Film ansehen“.
In jedem dieser Modi können verschiedene Geräte miteinander
kombiniert werden: Diese sind:
TV sehen
Kombination 1 – TV + STB + AUDIO (Standard)
Kombination 2 – TV + STB
Kombination 3 – TV + AUDIO
Musik hören
Kombination 1 – TV + BLU + AUDIO (Standard)
Kombination 3 – TV + STREAM + AUDIO
Kombination 5 – AUDIO only
Film ansehen
Kombination 1 – TV + STREAM + AUDIO (Standard)
Kombination 2 – TV + STREAM
Kombination 3 – TV + BLU
Kombination 4 – TV + BLU + AUDIO
Wenn Sie die Standardgeräte für eine Aktivität auf der Fernbedienung
eingestellt haben (z. B. TV, STB und Audio für „TV sehen“), wird diese
Aktivität automatisch auf der Fernbedienung eingerichtet.
AKTIVITÄTEN

25
AV-VERSTELLUNG
POWER MACRO
Wenn Sie zu einer anderen Kombination wechseln möchten, gehen Sie
folgendermaßen vor:
1. Halten Sie die Setup-Taste gedrückt, bis die LED
unter dem Gerät zweimal blinkt. Die LED unter dem
aktuellen Gerät leuchtet weiterhin.
2. Wählen Sie die Aktivitätstaste, die Sie einrichten
möchten (z. B. „TV sehen“).
3.
Drücken Sie die Nummer der Kombination, die Sie
einstellen möchten, z. B. 3 für TV + AUDIO in „TV sehen“.
4. Die LED leuchtet zweimal auf und erlischt danach.
Um auf die Aktivitäten zuzugreifen, drücken Sie auf die Aktivitätstaste.
Sie können wieder zur Gerätesteuerung zurückkehren, indem Sie auf
eine beliebige Gerätetaste drücken.
Da die AV-Taste für die Auswahl des Eingangs an Ihrem Fernseher
vorgesehen ist und bei den meisten Fernsehern ein Menü für die
Auswahl aus einer Liste mit Eingängen verwendet wird, werden beim
Drücken der AV-Taste in einer Aktivität die Menütasten „Nach oben“,
„Nach unten“, „Nach links“, „Nach rechts“ und „OK“ vorübergehend zum
Steuern des TV-Geräts verwendet. Wenn die OK-Taste gedrückt oder
10 Sekunden lang keine Taste gedrückt wird, kann mit diesen Tasten
wieder das relevante Gerät für die Aktivität (z. B. die Set-Top-Box im
Modus „TV sehen“) gesteuert werden.
Wenn Sie die POWER-Taste in jeder Aktivität für 2 Sekunden gedrückt
halten, sendet die Fernbedienung das Ein-/Aus-Signal an jedes Gerät,
das in der Aktivität enthalten ist. Wenn Sie also beispielsweise im
Modus „TV sehen“ die Power-Taste gedrückt halten, wird sowohl das
TV-Gerät als auch die Set-Top-Box ein- bzw. ausgeschaltet.
Diese Fernbedienung verwendet SteriTouch®. Sie ist dadurch
vor dem Wachstum von Bakterien, Pilzen und Schimmel geschützt.
Für w
eitere Informationen zum antimikrobiellen Schutz und zur
Silberionen-Technologie von SteriTouch scannen Sie den QR-Code
oder rufen Sie die Seite www.oneforall.com/antimicrobial auf.
Dieses Produkt enthält Silberphosphatglas, ein Biozidprodukt,
welches das Wachstum von Mikroorganismen auf der
Produktoberäche hemmt.
Dieses Produkt enthält keine Nanomaterialien.
Die Verwendung eines Biozidprodukts ersetzt nicht
die Notwendigkeit einer normalen Reinigung.
26
Nous vous remercions d’avoir fait l’acquisition de la télécommande
universelle Essential 6 de One For All. Celle-ci peut être utilisée pour
contrôler jusqu’à six appareils audio et vidéo, comme un téléviseur, un
décodeur, un lecteur Blu-Ray ou une barre de son.
Dotée d’un système de rétroéclairage qui facilite son emploi
dans les pièces sombres, elle prote également d’une protection
antimicrobienne.
Ce manuel vous explique comment congurer la télécommande
Essential 6 an que vous puissiez en faire usage avec tous vos
équipements.
La télécommande fonctionne avec deux piles AA/LR06. Insérez celles-ci
comme illustré ci-dessous. Des piles alcalines sont recommandées.
FRANÇAIS INTRODUCTION
PILES
2x AA
1
3
2
4
ATTENTION : il existe des risques
d’explosion si les piles ne sont pas
remplacées par le type approprié. Utilisez
des piles alcalines de qualité.
27
DESCRIPTION DES BOUTONS
7
10
11
13
14
18
21
22
24
26
17
6
4
23
3 1
5
2
8
9
12
16
20
19
25
15

28
DESCRIPTION DES BOUTONS
1
Alimentation Permet d’allumer et d’éteindre vos appareils.
2
SETUP Permet de congurer la télécommande Essential 6.
3
Entrée Permet de sélectionner une entrée sur vos appareils.
4
Boutons associés aux appareils
Permettent de sélectionner l’appareil
contrôlé actuellement par la télécommande Essential 6. Par exemple, si vous
appuyez sur le bouton TV, la télécommande contrôlera votre téléviseur. Pour
contrôler un autre appareil, appuyez simplement sur le bouton adéquat.
Les appareils suivants peuvent être associés à chacun des boutons dédiés :
TV: tous les téléviseurs (LCD, Plasma, OLED, etc.)
STREAM: les appareils de streaming de type Apple TV, Roku et Foxtel Now,
entre autres, et les consoles Xbox 360 et Xbox One
STB: les décodeurs, y compris de type Câble, Satellite et Freeview
AUDIO: les périphériques audio tels que les barres de son, les récepteurs
A/V et les systèmes hi-
BLURAY: les lecteurs Blu-ray et les lecteurs/enregistreurs DVD
DVD: les lecteurs/enregistreurs DVD et les lecteurs Blu-ray
5
Modes d’activité
Permet de contrôler jusqu’à trois de vos appareils dans un
mode donné : Watch TV (Regarder la TV), Listen to Music (Écouter de la musique)
ou Watch Movie (Regarder un lm). Reportez-vous à la section « Modes d’activité
» pour savoir comment congurer et utiliser cette fonctionnalité.
6
Boutons de lecture
Permettent de contrôler la lecture de lms, de contenu
musical et de contenu télévisuel.
7
SUBT. Permet d’acher les sous-titres.
8
Apps Permet d’acher le menu Applications sur des appareils intelligents,
comme les smart TV ou les dispositifs de streaming.
9
LIST Permet d’acher la liste des programmes enregistrés.
10
Info Permet d’acher des informations au sujet des programmes ou
de la chaîne actuellement visionnés.
11
GUIDE Permet d’accéder au programme TV.
12
MENU
Permet d’accéder au menu d’installation de l’appareil actuellement contrôlé.
13
Boutons échés et bouton OK Permettent d’interagir avec le menu
correspondant à l’appareil actuellement contrôlé.
14
Retour Permet de revenir à l’étape précédente dans le menu.
15
HOME Permet d’acher le menu d’accueil.
16
EXIT Permet de quitter un menu.
17
Augmentation et diminution du volume Permettent d’ajuster le volume
de l’appareil actuellement contrôlé. Vous pouvez également faire en sorte
que ces boutons soient associés à un seul appareil uniquement. Pour
obtenir des détails, consultez la section « Verrouillage de la fonctionnalité
de contrôle du volume ».
18
Dernière chaîne Permet de basculer sur la dernière chaîne visionnée.
19
Mode Muet Permet de désactiver le volume de l’appareil actuellement
contrôlé. Vous pouvez également faire en sorte qu’il soit associé à un
seul appareil uniquement. Pour obtenir des détails, consultez la section «
Verrouillage de la fonctionnalité de contrôle du volume ».
20
Parcours des chaînes Permettent de parcourir les chaînes sur l’appareil
actuellement contrôlé.
21
Boutons rouge, vert, jaune et bleu Permettent d’accéder rapidement
au menu de l’appareil actuellement contrôlé.
22
Raccourcis permettant d’accéder à des applications Permettent de
démarrer des applications de streaming. Pour obtenir des détails, consultez
la section « Raccourcis permettant d’accéder à des applications ».
23
Chires Permettent de sélectionner des chaînes sur l’appareil actuelle-
ment contrôlé. Avec des périphériques audio, ces boutons permettent de
sélectionner des entrées distinctes.
24
TV Permet de revenir en mode Télévision.
25
SEARCH Permet de rechercher du contenu multimédia.
26
Bouton d’activation/de désactivation du système de rétroéclairage
Permet d’activer ou de désactiver le système de rétroéclairage. Lorsque ce
système est activé, il s’enclenche pendant 10 secondes dès qu’un bouton
est actionné. Si vous souhaitez le désactiver, appuyez une nouvelle fois sur
le bouton. Procédez de même si vous souhaitez le réactiver ensuite.
29
La télécommande Essential 6, préprogrammée, permet de contrôler
directement certains des appareils les plus populaires. Si vous disposez
de l’un des appareils suivants, insérez les piles dans la télécommande,
appuyez sur le bouton correspondant à l’appareil en question, puis
actionnez d’autres boutons an de vérier si la télécommande
fonctionne avec l’appareil :
Bouton à actionner Appareil contrôlé
TV Téléviseur Samsung
STREAM Appareil de streaming Roku
STB Décodeur Sky Q (Royaume-Uni et Italie
uniquement)
AUDIO Récepteur Onkyo
BLURAY Lecteur Blu-Ray Samsung
DVD Lecteur DVD Sony
Si votre appareil n’est pas listé ci-dessus, ou si vous souhaitez
congurer d’autres appareils, vous pouvez procéder de deux façons.
L’alternative la plus simple consiste à utiliser le système SimpleSet,
compatible avec les marques et appareils courants.
Si la marque de votre appareil est listée ci-dessous, vous pouvez
utiliser le système SimpleSet décrit dans cette section. Assurez-vous de
prendre note du bouton associé à la marque de votre appareil.
TV
Bush
Grundig
JVC
LG
Panasonic
Philips
Samsung
Sharp
Sony
Toshiba
STREAM
A.C.Ryan / DVICO / Eminent /
Evolve / Ferguson / GigaTV /
iconBIT / Woxter
Apple
ASRock / Asus / Dell / HP / Sony
Dune
Fantec / HiMedia
Iomega / Western Digital
iRIS / ISTAR / Popcorn Hour / Redline
Microsoft / Xbox
Now TV by Sky / Roku / Sky Deutschland /
Sky Ireland / Sky Italia/ Sky Österreich / Sky UK / Telstra
NVIDIA
CONFIGURATION
SYSTÈME SIMPLESET
30
STB
BT / Humax / TalkTalk / Tricolor TV
/ YouView
Canal+ / CanalSat / Deutsche
Telekom / Movistar / T-Home
DStv / Foxtel / Multichoice /
Sky New Zealand
Freebox / Sky Deutschland / Sky Österreich / TechniSat
Kabel Deutschland / Vodafone
KPN / Sagemcom / SFR
Orange / Samsung
Sky Ireland / Sky Italia / Sky UK
Strong / Vu+
Telenet / UPC / UPC Cablecom / Virgin Media / Ziggo
AUDIO
Bose
Denon
Harman/Kardon / JBL / Samsung
JVC / LG
Marantz / Philips
Onkyo
Panasonic / Technics
Pioneer
Sony
Yamaha
DVD and BLURAY
Denon / Onkyo
JVC
LG
Panasonic
Philips
Pioneer
Samsung
Sony
Toshiba
Yamaha
CONFIGURATION
SYSTÈME SIMPLESET
Pour congurer votre appareil :
1. Allumez votre appareil, puis pointez la télécommande Essential
en direction de ce dernier (il ne doit pas être en veille). Si vous
congurez un appareil de streaming, assurez-vous qu’un lm
ou une émission de télévision est en cours de lecture.
2. Appuyez sur le bouton que vous souhaitez
programmer (par exemple, le bouton TV).
31
SYSTÈME SIMPLESET
CONFIGURATION
CONFIGURATION À L’AIDE D’UN CODE
3. Maintenez le bouton SETUP enfoncé jusqu’à ce que
le voyant situé sous le bouton associé à l’appareil
clignote deux fois.
4. Maintenez le bouton adéquat enfoncé, conformé-
ment aux indications précédentes (par exemple, le
bouton 7 s’il s’agit d’un téléviseur Samsung).
5. Avec tous les appareils, à l’exception de ceux listés sous «
STREAM » ci-dessus, un signal est émis par la télécommande
toutes les trois secondes. Les appareils de streaming, pour leur
part, sont allumés ou mis en pause.
6. Dès que votre appareil s’éteint, ou se met en pause (dans le cas
des appareils de streaming uniquement), relâchez le bouton.
7. Le voyant clignote deux fois. La télécommande devrait
désormais permettre de contrôler l’appareil.
• Si un ou plusieurs boutons ne fonctionnent pas comme prévu,
reprenez la procédure à partir de l’étape 2. Le dernier code enregistré
sera utilisé.
Si la marque de votre appareil n’est pas listée dans la section « SYSTÈME
SIMPLESET » ci-dessus, vous pouvez procéder à la conguration à
l’aide d’un code. Pour ce faire, commencez par localiser la marque de
votre appareil dans la liste des codes. Ces derniers sont répertoriés par
marque, appareil et ordre de popularité.
1. Allumez votre appareil, puis pointez la télécommande Essential
en direction de ce dernier (il ne doit pas être en veille).
2. Appuyez sur le bouton que vous souhaitez
programmer (par exemple, le bouton TV).
3. Maintenez le bouton SETUP enfoncé jusqu’à ce que
le voyant situé sous le bouton associé à l’appareil
clignote deux fois.
4. Saisissez le premier code à quatre chires indiqué
pour votre marque (par exemple, 1840 pour LG).
5. Le voyant clignote deux fois lorsque vous saisissez le dernier
chire du code.
6. Dirigez la télécommande vers l’appareil et appuyez
sur le bouton d’alimentation*.
7. Si l’appareil s’éteint, votre télécommande est prête à l’emploi.
Sinon, répétez les étapes 2 à 6 avec le code suivant dans la liste.
* Remarque : si votre télécommande d’origine ne comportait pas de
bouton d’alimentation, essayez d’utiliser un autre bouton à l’étape 6.
Par exemple, appuyez sur le bouton de lecture ou de mise en pause
lorsque vous congurez un appareil de streaming, puis vériez si ce
dernier réagit.
32
CONFIGURATION
FONCTION D’APPRENTISSAGE
Il est possible de copier les fonctions d’une autre télécommande sur
votre télécommande Essential. Cette opération, rapide, simple et à
n’eectuer qu’une seule fois, permet de contrôler n’importe quel appareil
à fonctionnement à infrarouge se trouvant dans votre salon. Grâce à cela,
vous pouvez également assigner, à un bouton non utilisé, des fonctions
non présentes sur la télécommande Essential.
Pour ce faire, assurez-vous au préalable de disposer de toutes les
télécommandes d’origine, et que celles-ci comportent des piles chargées.
An que des fonctions puissent être ajoutées, une télécommande
d’origine doit se trouver approximativement à trois centimètres de la
télécommande Essential et être dirigée vers celle-ci :
1. Appuyez sur le bouton associé à l’appareil pour
lequel vous souhaitez ajouter des fonctions.
2. Maintenez le bouton SETUP enfoncé jusqu’à ce que
le voyant situé sous le bouton associé à l’appareil
clignote deux fois.
3. Appuyez sur 975. Le voyant clignote alors deux fois.
4. Appuyez brièvement sur le bouton auquel vous
souhaitez associer la fonction (par exemple, le
bouton d’alimentation). Le voyant clignote alors
rapidement.
5. Appuyez brièvement* sur le bouton correspondant
de la télécommande d’origine (ici, le bouton
d’alimentation).
6. Le voyant clignote deux fois an d’indiquer que la copie a été
menée à bien.
7. Répétez les étapes 4 à 5 pour chacun des boutons à
programmer. Vous pouvez transférer des fonctions à partir de
diérentes télécommandes, mais un bouton donné ne peut
être associé qu’à une seule fonction.
8. Une fois toutes les fonctions de votre choix copiées,
maintenez le bouton SETUP enfoncé jusqu’à ce que
le voyant clignote deux fois.
* Le fonctionnement des télécommandes peut varier d’un modèle à
l’autre. Si vous ne parvenez pas à copier une fonction, essayez de
maintenir le bouton de la télécommande d’origine enfoncé, plutôt
que d’eectuer un appui bref.
Remarques :
• Si le voyant émet un clignotement long lors de l’étape 5, la fonction
n’a pas été correctement transférée. Reprenez la procédure à partir
de l’étape 4.
2 - 5 CM
33
CONFIGURATION
VERROUILLAGE DE LA FONCTIONNALITÉ
DE CONTRÔLE DU VOLUME
Si vous utilisez un appareil principalement pour ajuster le volume (par
exemple, une barre de son ou un récepteur audio/vidéo), vous pouvez
faire en sorte que votre télécommande Essential contrôle uniquement
ce même appareil lorsque vous employez les boutons de réglage du
volume et le bouton Muet. Procédez comme suit :
1. Maintenez le bouton SETUP enfoncé jusqu’à ce que
le voyant situé sous le bouton associé à l’appareil
clignote deux fois.
2. Appuyez sur 993. Le voyant clignote alors deux fois.
3. Appuyez sur le bouton associé à l’appareil sur
lequel le volume doit toujours être contrôlé (par
exemple, le bouton AUDIO).
4. Le voyant clignote deux fois.
Désormais, les boutons de réglage du volume ou le bouton Muet
permettront uniquement d’ajuster le volume sur l’appareil associé au
bouton AUDIO, quel que soit son type.
Pour déverrouiller la fonction de réglage du volume an que le
volume puisse être contrôlé individuellement sur chaque appareil,
procédez comme suit :
1. Maintenez le bouton SETUP enfoncé jusqu’à ce que
le voyant situé sous le bouton associé à l’appareil
clignote deux fois.
2. Appuyez sur 993. Le voyant clignote alors deux fois.
3.
Appuyez sur le bouton de réduction du volume.
Le voyant clignote quatre fois et le verrouillage de la
fonc
tionnalité de contrôle du volume est alors désactivé.
• Si l’un des boutons ne fonctionne pas correctement une fois la
conguration terminée, vous pouvez repasser en mode d’apprentis-
sage à tout moment en reprenant la procédure depuis l’étape 1.
• Si une ou plusieurs de vos télécommandes d’origine ne fonction-
nent plus, vous pouvez programmer votre télécommande Essential
à l’aide du système SimpleSet ou d’un code.
Suppression d’une fonction copiée
Si vous souhaitez supprimer une fonction copiée et rétablir le fonction-
nement d’origine d’un bouton, vous pouvez procéder comme suit :
1. Appuyez sur le bouton associé à l’appareil pour lequel vous
souhaitez ajouter des fonctions.
2. Maintenez le bouton SETUP enfoncé jusqu’à ce que
le voyant situé sous le bouton associé à l’appareil
clignote deux fois.
3. Appuyez sur 976. Le voyant clignote alors deux fois.
4. Appuyez deux fois sur le bouton que vous souhaitez
réinitialiser. Le voyant clignote alors deux fois et la fonction est
désormais supprimée.
34
Il est possible de reprogrammer les boutons rouge, vert, jaune et bleu
de la télécommande pour y assigner de nouvelles fonctions. Ainsi, si vous
appuyez br
ièvement sur chacun d’eux, vous obtiendrez exactement le
même résultat qu’avec votre télécommande d’origine.
Par ailleurs, vous pouvez également les reprogrammer an que des
chaînes d’un genre spécique s’achent lorsque vous maintenez votre
doigt sur ceux-ci pendant trois secondes (pour basculer entre les chaînes,
maintenez à chaque fois le bouton enfoncé pendant cette même durée).
Ces chaînes peuvent être regroupées par genre (Sports, Actualités, Films et
Programmes pour enfants, par exemple).
Procédez comme suit : Admettons que trois chaînes sportives se
trouvent sur les canaux 200, 201 et 239. Vous pouvez les regrouper et
les associer au bouton rouge qui fera dès lors oce de raccourci pour
les chaînes de ce type. Pour ce faire, commencez par sélectionner
l’appareil que vous souhaitez utiliser pour regarder la télévision
(par exemple, si vous êtes abonné à Free et que votre Freebox a été
associée au bouton STB, appuyez sur ce dernier). Vous pouvez ensuite
passer à la programmation des chaînes.
1. Maintenez le bouton SETUP et le bouton rouge
enfoncés jusqu’à ce que le voyant clignote deux
fois.
2. Saisissez le premier numéro de chaîne, 200.
3. Appuyez brièvement sur le bouton rouge.
4.
Saisissez le numéro de chaîne suivant, 201.
5.
Répétez les étapes 3 et 4 pour chacune des chaînes à
programmer.
6. Une fois le dernier numéro de chaîne saisi,
maintenez le bouton SETUP enfoncé.
Le voyant clignote deux fois et les raccourcis sont désormais
programmés. Lorsque vous regardez la télévision, il vous sut de
maintenir le bouton rouge enfoncé pendant trois secondes an que
la première chaîne de la série s’ache (dans notre exemple, la chaîne
200). Si vous souhaitez acher la chaîne suivante (dans notre exemple,
la chaîne 201), maintenez une nouvelle fois le bouton rouge enfoncé.
Vous pouvez reprogrammer chacun des boutons colorés en y
associant des chaînes diérentes. Pour cela, maintenez enfoncés le
bouton SETUP et un bouton coloré diérent à l’étape 1, puis appuyez
brièvement sur ce dernier à l’étape 3. Chaque bouton coloré est
nommé diéremment an que vous puissiez aisément vous souvenir
des chaînes qui y sont associées. Jusqu’à 10 chaînes diérentes
peuvent être programmées pour chaque bouton.
Si vous souhaitez rétablir le fonctionnement d’origine des boutons,
procédez comme suit :
RACCOURCIS PERMETTANT D’ACCÉDER À
DES CHAÎNES

35
RACCOURCIS PERMETTANT D’ACCÉDER À
DES APPLICATIONS
1. Appuyez sur le bouton auquel vous avez associé à
des chaînes (par exemple, le bouton STB).
2. Maintenez enfoncés le bouton SETUP et le bouton
que vous souhaitez réinitialiser (par exemple,
le bouton vert) jusqu’à ce que le voyant clignote
deux fois.
3. Appuyez brièvement sur le bouton concerné (ici, le
bouton vert).
4. Maintenez le bouton SETUP enfoncé jusqu’à ce que
le voyant clignote deux fois.
Le bouton est désormais réinitialisé.
La télécommande Essential comprend trois boutons de raccourcis
permettant d’ouvrir des applications sur vos appareils intelligents. Si
votre télécommande d’origine était dotée d’un bouton Netix, Amazon
Prime Video ou YouTube, le bouton de raccourci correspondant
fonctionnera de la même manière sur la télécommande Essential.
Si ce n’est pas le cas, vous pouvez tout de même programmer un
raccourci an d’accéder, dorénavant, plus rapidement au service de
streaming qui a votre préférence. La plupart des appareils audiovisuels
connectés, comme les smart TV ou les décodeurs, comprennent une
ou plusieurs applications via lesquelles il est possible de regarder
la télévision par Internet (Netix, YouTube et Amazon Prime Video,
notamment).
Pour programmer un bouton, vous devez tout d’abord identier
l’appareil utilisé pour accéder au service de streaming, ainsi que
la combinaison de touches permettant de démarrer celui-ci. Avec
certains téléviseurs Panasonic, par exemple, Netix doit être démarré
en appuyant une fois sur le bouton APPS, deux fois sur le bouton Bas,
puis une fois sur le bouton OK. Avec une Apple TV, il est nécessaire
d’appuyer une fois sur le bouton MENU, une fois sur le bouton Bas, puis
une fois sur le bouton OK.
Une fois que vous avez identié la combinaison applicable à votre
appareil, procédez comme suit :
1. Placez-vous devant votre appareil allumé (il ne doit pas être en
veille).
2. Maintenez le bouton de raccourci enfoncé jusqu’à
ce que le voyant clignote deux fois et reste ensuite
allumé.
3. Appuyez sur le bouton que vous souhaitez
programmer (par exemple, le bouton STREAM).
4.
Appuyez sur la combinaison de touches applicable. La
télécommande commence alors à contrôler votre appareil et la
programmation s’eectue en temps réel. De ce fait, il est possible
que votre appareil ne réagisse pas pendant quelques secondes.
36
5. Une fois la combinaison de touches eectuée et le
service de streaming démarré, maintenez le bouton
de raccourci enfoncé jusqu’à ce que le voyant
clignote deux fois, puis s’éteigne. Le nouveau
bouton est désormais programmé.
Conseils
• Assurez-vous que la télécommande Essential contrôle l’appareil
avant de procéder à la programmation.
• Si un bouton ne fonctionne pas comme prévu, reprogrammez-le.
• Lors de la programmation, attendez que l’appareil réponde en
premier. La télécommande mémorisera la durée écoulée.
• Un bouton programmé étant associé à un seul appareil, n’oubliez
pas de vous assurer que vous utilisez le bon appareil.
Un « mode d’activité » est associé à une combinaison d’appareils. Sur
une télécommande universelle standard, si vous souhaitez contrôler
des appareils diérents, vous devez basculer entre ceux-ci à l’aide des
boutons dédiés. Ainsi, si vous souhaitez contrôler l’entrée de votre
téléviseur, les chaînes et le programme de votre Freebox, ainsi que le
volume de votre barre de son, vous devez successivement appuyer sur
les boutons TV, STB et Audio.
Sur une télécommande Essential, de tels appareils peuvent être
regroupés dans un mode d’activité. De cette façon, une fois que vous
aurez activé le mode « Watch TV » (Regarder la TV), le bouton Entrée
permettra de contrôler le téléviseur, les boutons de réglage du volume
et le bouton Muet contrôleront la barre de son, et les autres boutons
serviront à contrôler le décodeur.
La télécommande Essential s’accompagne de trois modes
d’activité : Watch TV (Regarder la TV), Listen to Music (Écouter de
la musique) et Watch Movie (Regarder un lm).
Pour chacun de ces modes, il est possible de combiner des appareils d’une
certaine manière. Les combinaisons en question sont les suivantes :
Watch TV (Regarder la TV)
Combinaison 1 – TV + STB + AUDIO (par défaut)
Combinaison 2 – TV + STB
Combinaison 3 – TV + AUDIO
Listen To Music (Écouter de la musique)
Combinaison 1 – TV + BLU + AUDIO (par défaut)
Combinaison 3 – TV + STREAM + AUDIO
Combinaison 5 – AUDIO uniquement
Watch Movie (Regarder un lm)
Combinaison 1 – TV + STREAM + AUDIO (par défaut)
Combinaison 2 – TV + STREAM
Combinaison 3 – TV + BLU
Combinaison 4 – TV + BLU + AUDIO
Lorsque vous congurez les appareils par défaut d’un mode d’activité
via la télécommande (par exemple, si vous associez un téléviseur, un
décodeur et un périphérique audio au mode Watch TV [Regarder la
TV]), ce mode est automatiquement activé.
MODES D’ACTIVITÉ
37
CHANGEMENT DE L’ASSIGNATION DU BOUTON AV
MACRO ASSOCIÉE AU BOUTON D’ALIMENTATION
Si vous souhaitez passer à une autre combinaison, procédez comme suit :
1. Maintenez le bouton SETUP enfoncé jusqu’à ce que
le voyant situé sous le bouton associé à l’appareil
concerné clignote deux fois. Le voyant associé à
l’appareil actuel reste allumé.
2.
Appuyez sur le bouton correspondant au mode que
vous souhaitez congurer (par exemple, le bouton
associé au mode Watch TV [Regarder la TV]).
3.
Saisissez le chire correspondant à la combinaison (par
exemple, « 3 » pour le mode incluant un téléviseur et un
périphérique audio en mode Watch TV [Regarder la TV]).
4. Le voyant clignote deux fois, puis s’éteint.
Pour accéder aux modes, appuyez simplement sur le bouton Modes
d’activité. Si vous souhaitez revenir au mode de contrôle par appareil,
appuyez sur n’importe quel bouton associé à un appareil.
L’entrée appropriée peut être sélectionnée grâce au bouton AV.
La plupart des téléviseurs comprennent un menu via lequel il est
possible de parcourir les diverses entrées proposées. Ainsi, lorsque ce
même bouton est actionné lors de l’exécution d’un mode d’activité,
les boutons Haut, Bas, Gauche et Droite, ainsi que le bouton OK,
permettent de contrôler temporairement le téléviseur. Si vous appuyez
sur le bouton OK, ou sur aucun bouton pendant dix secondes, ces
boutons sont à nouveau associés à l’appareil applicable (par exemple,
le décodeur en mode Watch TV [Regarder la TV]).
Si vous maintenez le bouton d’alimentation enfoncé pendant deux
secondes lors de l’exécution d’un mode d’activité, un signal est émis
par la télécommande, en direction de chaque appareil constituant
ce mode. Ainsi, le fait d’appuyer sur le bouton d’alimentation lors
de l’exécution du mode d’activité Watch TV (Regarder la TV) permet
d’activer ou de désactiver le téléviseur et le décodeur.
Cette télécommande contient du SteriTouch®. Ainsi, elle est protégée
contre la propagation des bactéries, champignons et moisissures
pendant toute sa durée de vie. Scannez le code QR ou rendez-vous
à l’adresse www.oneforall.com/antimicrobial pour obtenir des
informations supplémentaires sur la protection antimicrobienne
et la technologie aux ions argent de SteriTouch.
Ce pr
oduit comporte du verre au phosphate d’argent, un matériau
à eet biocide qui permet de freiner la propagation
de microorganismes sur sa surface.
I
l ne c
omporte pas de nanomatériaux.
L’emploi d’un produit à eet biocide ne dispense pas
de procéder à un nettoyage normal.
38
Gracias por adquirir el mando a distancia universal One For All Essential
6 Device. El mando a distancia puede utilizarse para controlar hasta 6
dispositivos de audio y vídeo, como un televisor, un descodicador, un
reproductor de Blu-Ray o una barra de sonido.
El mando también cuenta con retroiluminación para facilitar el control
en una habitación oscura, así como con protección antimicrobiana.
Este manual le ayudará a congurar el Essential 6 para controlar todos
sus dispositivos.
El mando necesita 2 pilas AA/LR06. Colóquelas según se indica a conti-
nuación. Se recomienda utilizar pilas alcalinas.
ESPAÑOL INTRODUCCIÓN
PILAS
2x AA
1
3
2
4
PRECAUCIÓN: Existe un riesgo de
explosión si se sustituyen las pilas por
otras que no sean del tipo adecuado.
Utilice pilas alcalinas de calidad.

39
DESCRIPCIÓN DE LOS BOTONES
7
10
11
13
14
18
21
22
24
26
17
6
4
23
3 1
5
2
8
9
12
16
20
19
25
15

40
1
Encendido Enciende y apaga sus dispositivos.
2
Setup Este botón se utiliza para congurar el mando a distancia Essential.
3
Entrada Se utiliza para seleccionar la entrada en los dispositivos.
4
Botones de dispositivos Estos botones se utilizan para seleccionar qué
dispositivo controla actualmente el Essential 6. Tras pulsar los botones de
TV, el mando a distancia controlará su televisor. Para pasar a controlar otro
dispositivo, basta con pulsar el botón correspondiente. Los dispositivos que
se pueden programar en cada botón son los siguientes:
TV: Todos los televisores como LED, LCD, Plasma, OLED, etc.
STREAM: Dispositivos de streaming como Apple TV, Roku Box, Foxtel Now,
etc. También funciona con Xbox 360 y Xbox One.
STB: Descodicadores, incluidos los de televisión por satélite, por cable y
gratuita.
AUDIO: Dispositivos de audio, incluyendo barras de sonido, receptores AV y
Hi-Fi.
BLURAY: Reproductores de Blu-Ray y reproductores/grabadores de DVD.
DVD: Reproductores de DVD/grabadores y reproductores de Blu-Ray.
5
Actividades Controle hasta 3 de sus dispositivos en un modo para ver
la televisión, escuchar música y ver películas. Consulte «Actividades» para
saber cómo congurarlo y utilizarlo.
6
Botones de reproducción
Controla la reproducción de películas, música y
televisión.
7
Subt. Muestra los subtítulos.
8
Apps Abre el menú de aplicaciones en los dispositivos inteligentes, como
los televisores inteligentes o las cajas de streaming.
9
List Muestra una lista de los programas grabados.
10
Info Muestra información sobre los programas o el canal actual.
11
Guide Guía de televisión.
12
Menu Permite acceder al menú de instalación del dispositivo actual.
13
Direcciones del menú y OK Controla el menú del dispositivo actual
14
Atrás Retrocede un paso en el menú.
15
Home Muestra el menú principal.
16
Exit Sale del menú.
17
Subir/bajar volumen Controla el volumen del dispositivo actual. También
puede congurar estos botones para controlar siempre un dispositivo. Para
obtener más información, consulte la función de bloqueo de volumen.
18
Último canal Cambia al último canal visualizado.
19
Silenciar Silencia el volumen del dispositivo actual. También puede
congurar este botón para controlar siempre un dispositivo. Para obtener
más información, consulte la función de bloqueo de volumen.
20
Canal arriba/abajo Cambia de canal en el dispositivo actual.
21
Botones RGYB Botones de acceso rápido al menú del dispositivo actual.
22
Botones de acceso directo a aplicaciones Botones para iniciar las
aplicaciones de streaming. Consulte la sección Botones de acceso directo a
aplicaciones para obtener más información.
23
Dígitos Selecciona el canal en el dispositivo actual. En los dispositivos de
audio, estos botones seleccionarán entradas individuales.
24
TV Volver a la TV en directo.
25
Search Busca medios.
26
Retroiluminación activada/desactivada Enciende o apaga la
retroiluminación. Cuando está encendida, cualquier pulsación de un botón
activa la retroiluminación durante 10 segundos. Pulse este botón para
apagar la retroiluminación y volver a encenderla.
DESCRIPCIÓN DE LOS BOTONES
41
El mando a distancia Essential 6 está preprogramado para controlar los
dispositivos más populares nada más sacarlo de la caja. Si tiene uno de
los siguientes dispositivos, pruebe a poner las pilas y a pulsar el botón
del dispositivo, y luego pulse algunos botones para ver si el mando
funciona con su dispositivo:
Botón del dispositivo
que debe pulsar Dispositivo controlado
TV Samsung TV
STREAM Roku Streaming Box
STB Sky Q Box (solo para Reino Unido e Italia)
AUDIO Receptor Onkyo
BLURAY Reproductor de Blu-Ray de Samsung
DVD Reproductor de DVD de Sony
Si su dispositivo no es uno de los enumerados anteriormente, o desea
congurar dispositivos adicionales, existen dos maneras de hacerlo. La
más sencilla es SimpleSet, que se utiliza para las marcas y dispositivos
más comunes.
Si la marca de su dispositivo aparece en la imagen de SimpleSet
acompañada de un botón, puede utilizar el sistema SimpleSet descrito
en esta sección, para lo cual deberá localizar la marca de su dispositivo
y anotar el botón asociado a ella.
TV
Bush
Grundig
JVC
LG
Panasonic
Philips
Samsung
Sharp
Sony
Toshiba
STREAM
A.C.Ryan / DVICO / Eminent /
Evolve / Ferguson / GigaTV /
iconBIT / Woxter
Apple
ASRock / Asus / Dell / HP / Sony
Dune
Fantec / HiMedia
Iomega / Western Digital
iRIS / ISTAR / Popcorn Hour / Redline
Microsoft / Xbox
Now TV by Sky / Roku / Sky Deutschland /
Sky Ireland / Sky Italia/ Sky Österreich / Sky UK / Telstra
NVIDIA
CONFIGURACIÓN
SIMPLESET

42
STB
BT / Humax / TalkTalk / Tricolor TV
/ YouView
Canal+ / CanalSat / Deutsche
Telekom / Movistar / T-Home
DStv / Foxtel / Multichoice /
Sky New Zealand
Freebox / Sky Deutschland / Sky Österreich / TechniSat
Kabel Deutschland / Vodafone
KPN / Sagemcom / SFR
Orange / Samsung
Sky Ireland / Sky Italia / Sky UK
Strong / Vu+
Telenet / UPC / UPC Cablecom / Virgin Media / Ziggo
AUDIO
Bose
Denon
Harman/Kardon / JBL / Samsung
JVC / LG
Marantz / Philips
Onkyo
Panasonic / Technics
Pioneer
Sony
Yamaha
DVD y BLURAY
Denon / Onkyo
JVC
LG
Panasonic
Philips
Pioneer
Samsung
Sony
Toshiba
Yamaha
CONFIGURACIÓN
SIMPLESET
Cómo congurar su dispositivo:
1. Encienda el dispositivo (no en modo de espera) y apunte el
mando Essential hacia este. Si está congurando un dispositivo
de Streaming, asegúrese de que se está reproduciendo una
película o un programa de televisión.
2. Pulse el botón del dispositivo que desee congurar
(por ejemplo, TV).
3. Mantenga pulsado el botón Setup hasta que el LED
bajo el dispositivo parpadee dos veces.
43
SIMPLESET
CONFIGURACIÓN
CONFIGURACIÓN POR CÓDIGO
4. Mantenga pulsado el dígito correspondiente a
su marca y dispositivo de acuerdo con las tablas
anteriores (p. ej., 7 para un televisor Samsung).
5. Para todos los dispositivos, con excepción de Stream, el mando
a distancia enviará el botón de encendido cada 3 segundos;
y para una caja de streaming el mando a distancia enviará
la función de reproducción/pausa.
6. Tan pronto como su dispositivo reaccione apagándose o
poniéndose en pausa (solo en el caso de la caja de streaming)
suelte el botón de dígito.
7. El LED parpadeará dos veces y el mando a distancia ya debería
controlar su dispositivo.
• Si observa que uno o más botones no funcionan como es debido,
repita el proceso desde el paso 2; el mando empezará a buscar por
el siguiente código de la memoria.
Si la marca de su dispositivo no aparece en la función SimpleSet, puede
congurarlo probando los códigos individualmente. Para ello, localice
primero su marca en la lista de códigos. Los códigos aparecen por
marca y dispositivo, y por orden de popularidad.
1. Encienda el dispositivo (no en modo de espera) y apunte
el mando Essential hacia este.
2. Pulse el botón del dispositivo que desee congurar
(por ejemplo, TV).
3. Mantenga pulsado el botón Setup hasta que el LED
bajo el dispositivo parpadee dos veces.
4. Introduzca el primer código de 4 dígitos de su
marca (por ej., 1840 para la marca LG).
5. El LED parpadeará dos veces en el último dígito del código.
6. Oriente el mando hacia su dispositivo y pulse
el botón de encendido (Power)*.
7. Si el dispositivo se apaga, ya puede usar el mando.
De lo contrario, repita los pasos 2-6 con el siguiente código
de la lista.
* Nota: Si su mando original no tiene un botón de encendido, pruebe
con un botón diferente en el paso 6. Por ejemplo, pruebe a pulsar
Play o Pause cuando congure una caja de streaming y compruebe
si la caja responde.
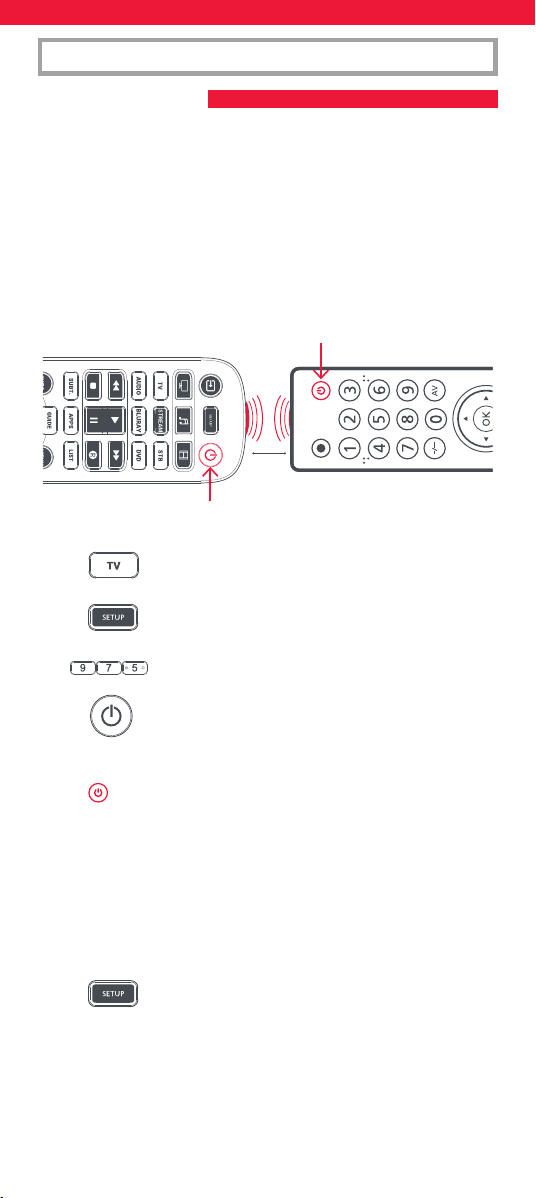
44
CONFIGURACIÓN
PROGRAMACIÓN
Su mando a distancia Essential se puede programar con cualquier
función de otros mandos. Esta es una conguración rápida y sencilla
que permite controlar cualquier dispositivo controlado por infrarrojos
que tenga en su salón. También permite añadir uno o varios botones
que puedan faltar a un botón de repuesto en el Essential.
Para ello, debe tener a mano todos los mandos a distancia originales y
asegurarse de que tienen pilas.
Para programar las funciones, el mando original debe estar a unos 3 m
del mando Essential, apuntado hacia este:
1. Pulse el botón Device en el dispositivo del que
desea aprender las funciones.
2. Mantenga pulsado el botón Setup hasta que el LED
bajo el dispositivo parpadee dos veces.
3. Pulse 975: el LED debería parpadear dos veces.
4. Pulse y suelte el botón en el que desea aprender
una función (por ejemplo, el botón de encendido
del televisor): el LED comenzará a parpadear
rápidamente.
5. Pulse y suelte* el botón correspondiente en
el mando a distancia original, p. ej., Power
(encendido).
6. El LED parpadeará dos veces para indicar que la función se ha
programado correctamente.
7. Repita los pasos 4 y 5 con cada botón que quiera programar
en el mando (recuerde que puede programar funciones de
distintos mandos, pero solo una función por botón).
8. Cuando haya aprendido todas las funciones que
necesita, mantenga pulsado el botón Setup hasta
que el LED parpadee dos veces.
* Algunos mandos envían los comandos de un modo distinto. Si alguna
de las funciones no se puede programar, pruebe a mantener pulsado
el botón en el mando a distancia original en lugar de pulsar y soltar.
2 - 5 CM
45
CONFIGURACIÓN
BLOQUEO DE VOLUMEN
Si utiliza principalmente un dispositivo para controlar el volumen, por
ejemplo una barra de sonido o un receptor de audio y vídeo, es posible
programar su mando a distancia Essential para que solo controle ese
dispositivo cuando utilice los botones de subir, bajar y silenciar el
volumen. Para ello:
1. Mantenga pulsado el botón Setup hasta que el LED
bajo el dispositivo parpadee dos veces.
2. Pulse 993: el LED debería parpadear dos veces.
3. Pulse el botón del dispositivo para controlar
siempre el volumen, por ejemplo, Audio.
4. El LED parpadeará dos veces.
De ahora en adelante, al pulsar los botones de subir, bajar o silenciar el
volumen siempre se controlará el dispositivo de audio, independiente-
mente del dispositivo que esté controlando.
Para desbloquear el volumen y que el mando a distancia vuelva
a controlar el volumen de cada aparato de forma individual, el
procedimiento es el siguiente:
1. Mantenga pulsado el botón Setup hasta que el LED
bajo el dispositivo parpadee dos veces.
2. Pulse 993: el LED debería parpadear dos veces.
3. Pulse BAJAR VOLUMEN: el LED parpadeará cuatro
veces y el volumen ya estará desbloqueado.
Consejos:
• Si el indicador LED emite un parpadeo largo en el paso 5, el mando
no ha programado la función correctamente; empiece de nuevo
desde el paso 4.
•
Si observa que uno o más botones no funcionan correctamente después
de la conguración, puede acceder de nuevo al modo de programación
en cualquier momento y repetir el proceso desde el paso 1.
• Si alguno de sus mandos originales no funciona, aun así puede
congurar el mando Essential con SimpleSet o la Conguración
por código.
Eliminar una función programada
Si desea eliminar una función programada y devolver los botones a su
estado original, puede seguir el siguiente procedimiento:
1.
Pulse el botón Device en el dispositivo del que desea aprender
las funciones.
2. Mantenga pulsado el botón Setup hasta que el LED
bajo el dispositivo parpadee dos veces.
3. Pulse 976: el LED debería parpadear dos veces.
4.
Pulse dos veces el botón que desea restablecer: el LED debe
parpadear dos veces y la función programada se habrá eliminado.

46
Además de su funcionalidad normal, los botones rojo, verde, amarillo
y azul pueden reprogramarse para seleccionar sus canales favoritos
por género. Si pulsa y suelta cada uno de estos botones, realizarán
exactamente la misma función que su mando original.
Sin embargo, se pueden reprogramar para que cuando se mantengan
pulsados durante 3 segundos cambien a un número de canal, y cuando
se vuelvan a mantener pulsados durante 3 segundos, cambien a un
número de canal diferente. Puede agrupar estos canales por género, como
Deportes, Noticias, Películas e Infantil.
El procedimiento de programación es el siguiente:
Digamos,
por ejemplo, que los 3 primeros canales de deportes están en los
canales 200, 201 y 239. Puede asignar accesos directos a estos canales
en el botón rojo (deportes). Para ello: En primer lugar, seleccione el
dispositivo que utiliza para ver la televisión en directo. Por ejemplo, si
está abonado a Sky y ha congurado su descodicador en el botón STB,
pulse STB. Ahora puede programar los accesos directos a los canales.
1. Mantenga pulsado el botón de conguración
y el botón rojo hasta que el LED parpadee
dos veces.
2. Introduzca el primer número de canal (200).
3. Pulse y suelte el botón rojo.
4.
Introduzca el siguiente número de canal (en este
ejemplo, 201)
5.
Repita los pasos 3 y 4 para cada acceso directo de canal que
desee añadir.
6. Tras introducir el último número de canal que
desee, mantenga pulsado el botón Setup.
El LED parpadeará dos veces y los accesos directos ya estarán
programados. Cuando vea la televisión en directo, solo tiene que
mantener pulsado el botón rojo durante 3 segundos y se enviará
el primer acceso directo al canal (en este ejemplo, el canal 200). La
próxima vez que mantenga pulsado el botón rojo, se enviará el acceso
directo del siguiente canal (en este caso, el canal 201).
Puede reprogramar cada uno de los botones de colores con distintas
listas de números de canales, manteniendo pulsado el botón de
conguración y un botón de color diferente en el paso 1, y pulsando
y soltando el mismo botón en el paso 3. Cada botón de color tiene
un nombre diferente para ayudarle a recordar los canales que ha
almacenado. Puede programar hasta 10 números de canal diferentes
por botón.
Si desea restablecer un botón a los valores predeterminados, el
procedimiento es el siguiente:
MACROS DE ACCESO DIRECTO A CANALES
47
BOTONES DE ACCESO DIRECTO A APLICACIONES
1.
Pulse el botón del dispositivo en el que haya
programado los accesos directos (por ejemplo, STB).
2. Mantenga pulsado el botón Setup y el botón que
desee restablecer (por ejemplo, el botón verde)
hasta que el LED parpadee dos veces.
3. Pulse y suelte el botón que desee restablecer (por
ejemplo, el botón verde).
4. Mantenga pulsado el botón Setup hasta que la luz
parpadee dos veces.
Habrá terminado de restablecer el botón.
El Essential cuenta con tres botones de acceso directo a aplicaciones
que pueden utilizarse para abrir aplicaciones en sus dispositivos
inteligentes. Si su mando a distancia original tiene un botón de Netix,
Amazon Prime Video o YouTube, estos botones realizarán la misma
función.
Sin embargo, si no dispone de tal botón, pero puede ver un servicio de
streaming, puede utilizar este botón como un atajo programando una
macro. La mayoría de los dispositivos audiovisuales que se conectan
a Internet, como las Smart TV o los descodicadores de streaming,
tienen una o varias aplicaciones que pueden ejecutar para acceder a
la visualización de la televisión a través de Internet. Algunos ejemplos
serían Netix, YouTube, Amazon Prime o similares.
Para programar la macro, primero debe conocer el dispositivo que
utiliza para acceder al servicio y, a continuación, la secuencia de
botones que debe pulsar para que aparezca siempre el servicio que
preere. Por ejemplo, algunos televisores Panasonic iniciarán Netix
pulsando Apps, luego Menú abajo dos veces y, nalmente, OK. O en un
Apple TV, la secuencia es Menú, Menú Abajo y OK.
Una vez que haya determinado la secuencia para su dispositivo, siga
estos pasos:
1. Siéntese frente a su dispositivo que debe estar encendido (no
en espera).
2. Mantenga pulsado el botón de acceso directo a la
aplicación hasta que el LED parpadee dos veces y
permanezca encendido.
3. Pulse el botón del dispositivo que desee utilizar
para la macro (por ejemplo, Stream).
4.
Ahora realice la secuencia de botones exactamente como lo haría
normalmente. El mando a distancia controlará su dispositivo y
la macro se grabará en tiempo real, por lo que si su dispositivo
tarda unos segundos en reaccionar, no se preocupe.
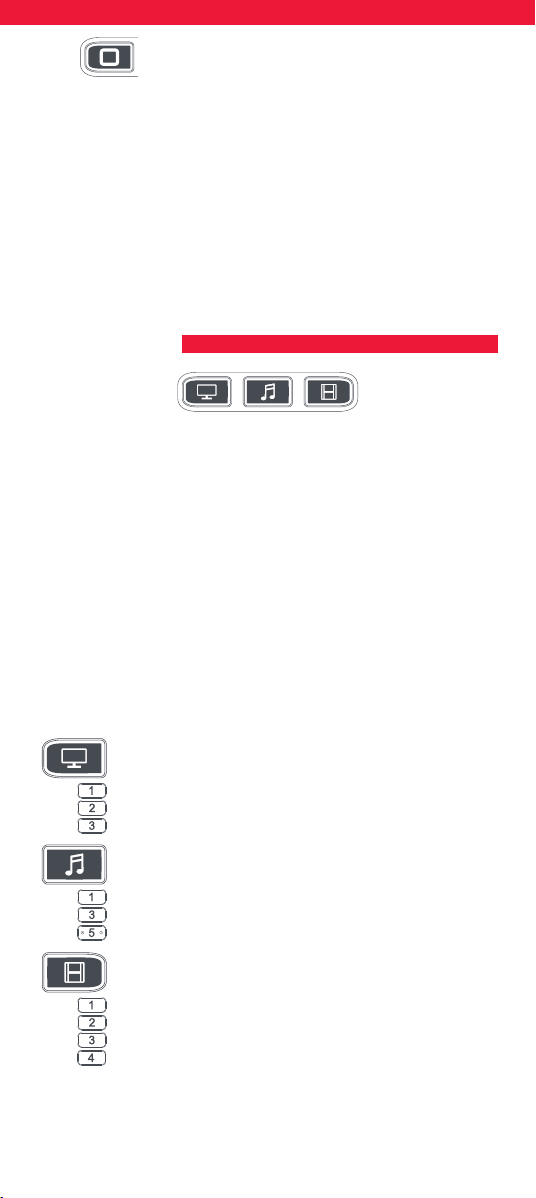
48
5.
Una vez que haya nalizado la secuencia y el servicio
de transmisión haya comenzado en su dispositivo,
mantenga pulsado el botón de acceso directo a la
aplicación hasta que el LED parpadee dos veces y se
apague. Ahora, la macro está almacenada.
Sugerencias
• Asegúrese de que el mando a distancia Essential está controlando el
dispositivo en cuestión antes de programarlo.
• Si la macro no funciona según lo previsto, puede repetir la misma
secuencia para volver a programarla.
• Al programar, espere a que su dispositivo responda primero, el
mando a distancia recordará el tiempo.
•
La macro de acceso directo a aplicaciones está vinculada a un dispositivo,
recuerde asegurarse de que está viendo el dispositivo correcto.
Una actividad es una combinación de dispositivos. En un mando a
distancia universal estándar, si quiere controlar diferentes dispositivos,
debe cambiar entre ellos utilizando los botones de dispositivo. Así, si
quisiera controlar la entrada de su televisor, los canales y la guía de su
caja Sky box y el volumen de su barra de sonido, tendría que alternar
entre ellos pulsando los botones TV, STB y Audio.
En los mandos a distancia Essential, estos dispositivos pueden agruparse en
un modo de actividad, de modo que tras pulsar ver la televisión, el botón de
entrada controlará el televisor, la de subir y bajar el volumen y la de silenciar
la barra de sonido y los demás botones controlarán el descodicador.
El mando a distancia Essential dispone de 3 modos de actividad:
ver la televisión, escuchar música y ver películas.
Cada uno de estos modos tiene una combinación de dispositivos para
combinar. Estos son:
Ver la televisión
Combinación 1 – TV + STB + AUDIO (por defecto)
Combinación 2 – TV + STB
Combinación 3 – TV + AUDIO
Escuchar música
Combinación 1 – TV + BLU + AUDIO (por defecto)
Combinación 3 – TV + STREAM + AUDIO
Combinación 5 – AUDIO only
Ver películas
Combinación 1 – TV + STREAM + AUDIO (por defecto)
Combinación 2 – TV + STREAM
Combinación 3 – TV + BLU
Combinación 4 – TV + BLU + AUDIO
Si congura los dispositivos predeterminados para cualquier actividad
en el mando a distancia (por ejemplo, TV, STB y Audio para Ver
la televisión), esa actividad se congurará de forma automática en
el mando.
ACTIVIDADES

49
CAMBIO DE AV
MACRO DE ENCENDIDO
Para cambiar a una combinación distinta, el procedimiento es el siguiente:
1. Mantenga pulsado el botón Setup hasta que el LED
bajo el dispositivo parpadee dos veces. El LED que
se encuentra bajo el dispositivo actual
se mantendrá encendido.
2. Pulse el botón de actividad que desea congurar
(por ej. Ver la televisión).
3.
Pulse el número de la combinación que desea denir,
por ejemplo, 3 para TV + AUD en Ver la televisión.
4. El LED parpadeará dos veces y se apagará.
Si desea acceder a las actividades, basta con pulsar el botón ACTIVITY.
Puede volver al control por dispositivo utilizando cualquier botón de
dispositivo.
Dado que el botón AV sirve para seleccionar la entrada de su televisor,
y que la mayoría de televisores usan un menú para seleccionar en
una lista las entradas, cuando pulsa el botón AV en una actividad, los
botones del menú Arriba, Abajo, Izquierda, Derecha y OK controlarán
el televisor de manera temporal. Si pulsa el botón OK, o si no pulsa
ningún botón durante 10 segundos, estos botones volverán a controlar
el dispositivo relevante de acuerdo con la actividad (por ejemplo, STB
en modo Ver la televisión).
Si mantiene pulsado el botón de encendido durante dos segundos
en cualquier actividad, el mando enviará la función de encendido a
todos los dispositivos que formen parte de la actividad. Es decir, si
mantiene pulsado el botón de encendido en el modo predeterminado
Ver la televisión, este apagará o encenderá tanto el televisor como el
descodicador.
Este mando contiene SteriTouch®. Estará protegido contra
la proliferación de bacterias, hongos y moho durante toda
su vida útil. Escanee el código QR o visite
www.oneforall.com/antimicrobial para obtener
más información sobre la protección antimicrobiana y
la tecnología de iones de plata SteriTouch.
E
st
e producto contiene cristal de fosfato de plata, un producto
biocida que controla la proliferación de microorganismos en
la supercie del producto.
Est
e producto no contiene nanomateriales.
La inclusión de un producto biocida no anula la necesidad de una
limpieza normal.
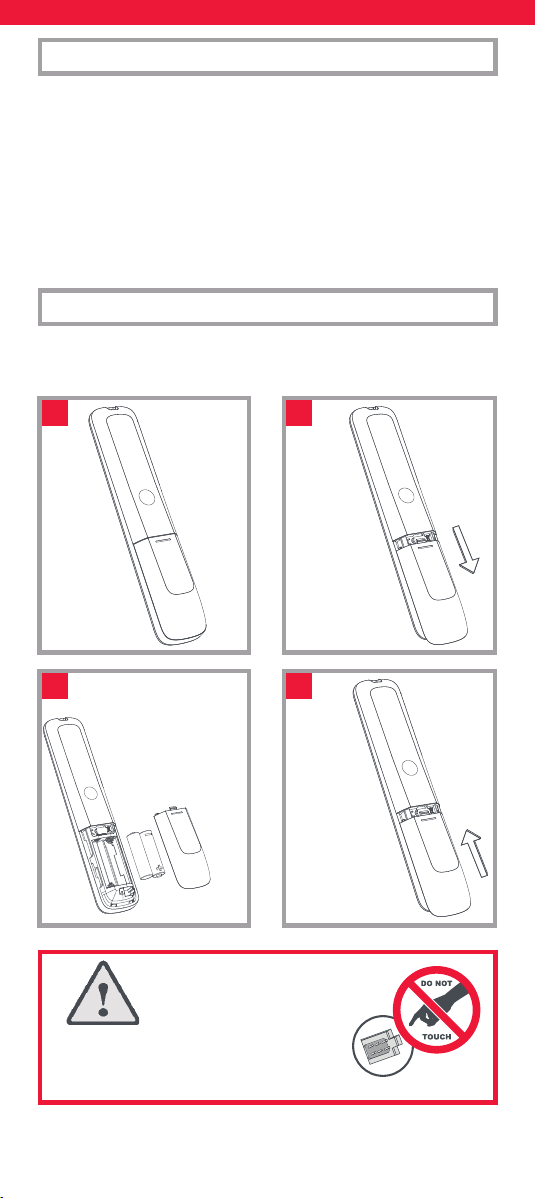
50
Grazie per aver acquistato il telecomando universale One For All
Essential per 6 dispositivi. Può essere utilizzato per controllare no a 6
dispositivi audio/video come TV, set-top-box, lettore Blu-ray o sound bar.
Il telecomando dispone anche della retroilluminazione, che ne facilita
l’uso quando si è al buio, e della protezione antimicrobica.
Questo manuale aiuterà a congurare il telecomando Essential 6 per
controllare tutti i dispositivi che si utilizzano.
Il telecomando richiede 2 batterie AA/LR06. Inserirle come illustrato
di seguito. Si consigliano batterie alcaline.
ITALIANO INTRODUZIONE
BATTERIE
2x AA
1
3
2
4
ATTENZIONE: sussiste il rischio di esplosione
se la batteria viene sostituita con una di tipo
non corretto. Utilizzare batterie alcaline
di qualità.

51
DESCRIZIONI DEI TASTI
7
10
11
13
14
18
21
22
24
26
17
6
4
23
3 1
5
2
8
9
12
16
20
19
25
15

52
1
Accensione// spegnimento Accende e spegne i dispositivi.
2
Setup (Congurazione) Questo tasto serve per impostare il telecomando
Essential.
3
Ingresso Serve per selezionare i dispositivi di ingresso.
4
Tasti dei dispositivi Questi tasti servono per selezionare il dispositivo
controllato da Essential 6. Una volta premuto il tasto TV, ad esempio, il
telecomando controllerà il televisore. Per passare al controllo di un altro
dispositivo, è suciente premere il tasto appropriato. I dispositivi che
possono essere programmati per ogni tasto sono:
TV: tutti i televisori a LED, LCD, plasma, OLED, ecc.
STREAM: dispositivi di streaming come Apple TV, Roku Box, Foxtel Now,
ecc. Funziona anche con Xbox 360 e Xbox One.
STB:
set-top-box tra cui satellitari, via cavo e Freeview.
AUDIO: dispositivi audio tra cui sound bar, ricevitori AV e Hi-Fi.
BLURAY: lettori Blu-ray e lettori/registratori DVD.
DVD: lettori/registratori DVD e lettori Blu-ray.
5
Attività Consentono di controllare no a 3 dispositivi in una delle modalità
disponibili: Guarda TV, Ascolta musica e Guarda lm. Vedere “Attività” per
informazioni sulla modalità di congurazione e sull’utilizzo.
6
Tasti di riproduzione Permettono di controllare la riproduzione di lm,
musica e TV.
7
SUBT. (Sottotitoli) Consente di vedere i sottotitoli.
8
APPS (Applicazioni) Apre il menu Applicazioni sui dispositivi intelligenti
come le Smart TV o le streaming box.
9
LIST (Elenco) Permette di visualizzare un elenco dei programmi registrati.
10
INFO (Informazioni) Consente di visualizzare informazioni sui programmi
o canali correnti.
11
GUIDE (Guida) Mostra la Guida della TV.
12
MENU Permette di accedere al menu d’installazione del dispositivo
corrente.
13
Direzioni di menu e OK Serve per controllare il menu del dispositivo
corrente.
14
Indietro Torna indietro di un passaggio nel menu.
15
HOME Consente di visualizzare il menu Home.
16
EXIT Permette di uscire dal menu.
17
VOL + e - (Volume su e giù) Serve per controllare il volume del dispositivo
corrente. È anche possibile impostare questi tasti per controllare sempre
un dispositivo. Per i dettagli vedere la funzione Blocco del volume.
18
Ultimo canale Permette di passare all’ultimo canale visualizzato.
19
Muto Serve per disattivare il volume del dispositivo corrente. Questi tasti
possono essere congurati anche per controllare sempre un dispositivo.
Per i dettagli vedere la funzione Blocco del volume.
20
CH + e - (Canale successivo e precedente) Consente di cambiare i canali
sul dispositivo corrente.
21
Tasti RGYB Forniscono l’accesso rapido al menu del dispositivo corrente.
22
Tasti di scelta rapida per le app Sono i tasti per avviare le app
di streaming. Vedere la sezione Tasti di scelta rapida per le app per
informazioni dettagliate.
23
Numeri Consentono di scegliere i canali sul dispositivo corrente. Sui
dispositivi audio, questi tasti selezioneranno i singoli ingressi.
24
TV Permette di tornare alla TV.
25
SEARCH (Ricerca) Consente di cercare i contenuti multimediali.
26
Accensione/spegnimento retroilluminazione
Permette di accendere o
spegnere la retroilluminazione. Quando è accesa, qualsiasi tasto premuto
attiverà la retroilluminazione per 10 secondi. Premere questo tasto per
spegnere e riaccendere la retroilluminazione.
DESCRIZIONI DEI TASTI

53
Il telecomando Essential 6 è già programmato per controllare alcuni
dei dispositivi più diusi. Se si dispone di uno dei seguenti dispositivi,
provare a inserire le batterie e a premere il tasto del dispositivo, quindi
premere alcuni tasti per vedere se il telecomando aziona il dispositivo:
Tasto del dispositivo Dispositivo controllato
da premere
TV TV Samsung
STREAM Streaming box Roku
STB Sky Q (solo Regno Unito e Italia)
AUDIO Ricevitore Onkyo
BLURAY Lettore Blu-ray Samsung
DVD Lettore DVD Sony
Se il dispositivo non è uno di quelli sopra elencati o si dispone di altri
dispositivi da impostare, ci sono due modi per farlo. Il più semplice è
SimpleSet che viene utilizzato per le marche e i dispositivi più comuni.
Se la marca del dispositivo compare nell’immagine SimpleSet
puntando a un tasto, è possibile utilizzare il sistema SimpleSet descritto
in questa sezione; individuare la marca del dispositivo e prendere nota
del tasto ad esso associata.
TV
Bush
Grundig
JVC
LG
Panasonic
Philips
Samsung
Sharp
Sony
Toshiba
STREAM
A.C.Ryan / DVICO / Eminent /
Evolve / Ferguson / GigaTV /
iconBIT / Woxter
Apple
ASRock / Asus / Dell / HP / Sony
Dune
Fantec / HiMedia
Iomega / Western Digital
iRIS / ISTAR / Popcorn Hour / Redline
Microsoft / Xbox
Now TV by Sky / Roku / Sky Deutschland /
Sky Ireland / Sky Italia/ Sky Österreich / Sky UK / Telstra
NVIDIA
SETUP
SIMPLESET
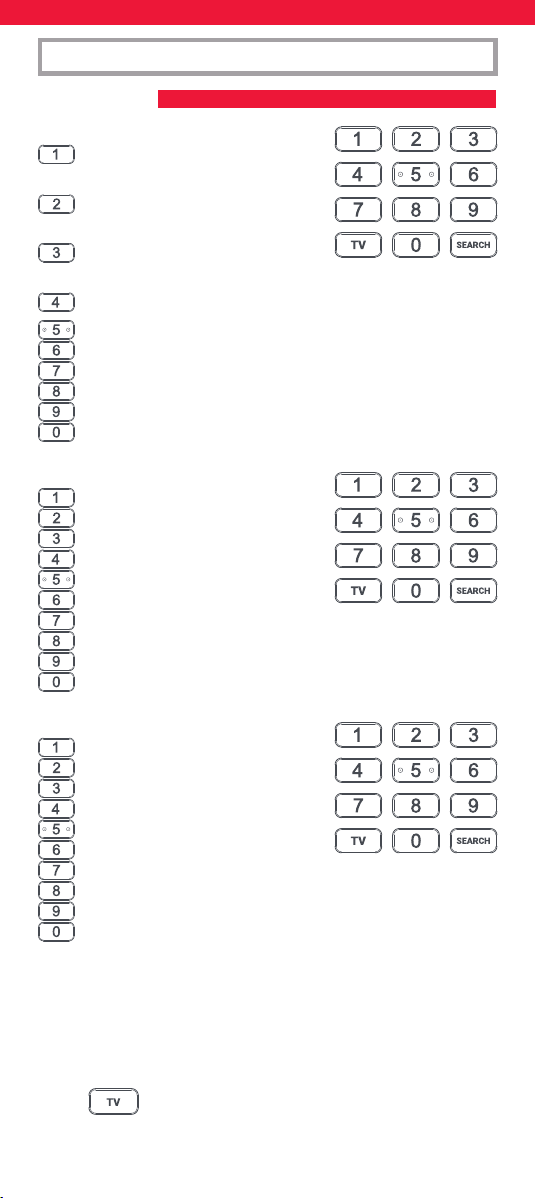
54
STB
BT / Humax / TalkTalk / Tricolor TV
/ YouView
Canal+ / CanalSat / Deutsche
Telekom / Movistar / T-Home
DStv / Foxtel / Multichoice /
Sky New Zealand
Freebox / Sky Deutschland / Sky Österreich / TechniSat
Kabel Deutschland / Vodafone
KPN / Sagemcom / SFR
Orange / Samsung
Sky Ireland / Sky Italia / Sky UK
Strong / Vu+
Telenet / UPC / UPC Cablecom / Virgin Media / Ziggo
AUDIO
Bose
Denon
Harman/Kardon / JBL / Samsung
JVC / LG
Marantz / Philips
Onkyo
Panasonic / Technics
Pioneer
Sony
Yamaha
DVD and BLURAY
Denon / Onkyo
JVC
LG
Panasonic
Philips
Pioneer
Samsung
Sony
Toshiba
Yamaha
SETUP
SIMPLESET
Per congurare il dispositivo:
1. Attivare il dispositivo (non in standby) e rivolgere il telecoman-
do Essential verso di esso. Se si sta congurando un dispositivo
di streaming, assicurarsi che un lm o un programma TV sia in
riproduzione.
2. Premere il tasto del dispositivo che si desidera
congurare (ad esempio il televisore).
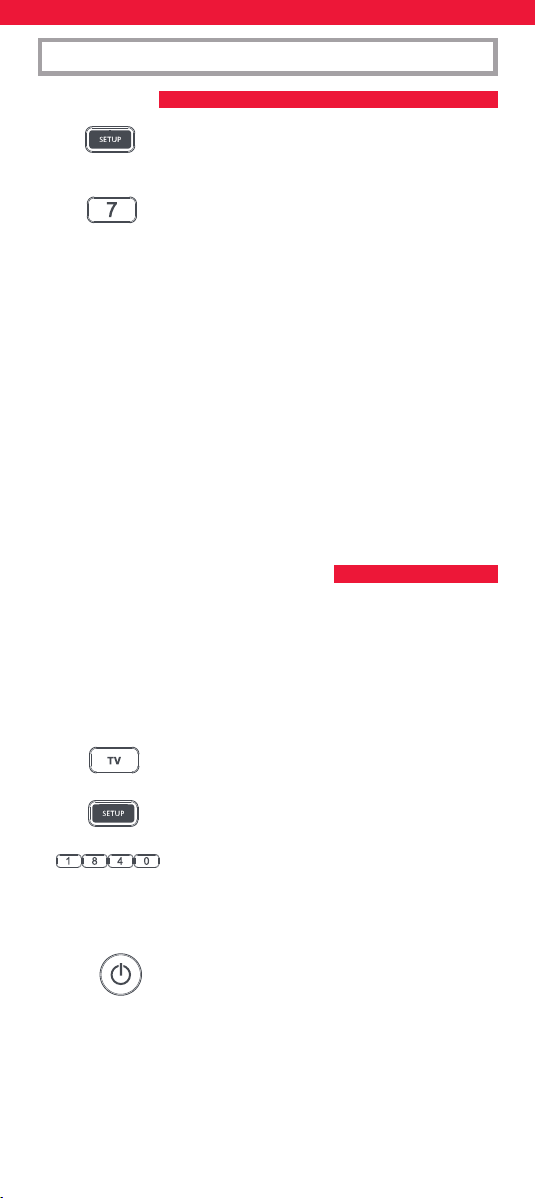
55
SETUP
SIMPLESET
CONFIGURAZIONE PER CODICE
3. Tenere premuto il tasto SETUP no a quando il LED
sotto il tasto del dispositivo non lampeggia due
volte.
4. Tenere premuto il numero corrispondente alla
marca e al dispositivo come elencati nelle tabelle
sopra riportate, ad esempio 7 per un televisore
Samsung.
5. Per tutti i dispositivi eccetto quelli di streaming, il telecomando
invierà il comando del tasto di accensione/spengimento ogni 3
secondi, per una streaming box invierà la funzione Riproduci/
Pausa.
6. Non appena il dispositivo reagisce spegnendosi o andando in
pausa (solo streaming box), rilasciare il numero.
7. Il LED lampeggerà due volte e il telecomando dovrebbe adesso
poter controllare il dispositivo.
• Se uno o più tasti non funzionano come previsto, iniziare nuovamente
la procedura a partire dal passaggio 2. Il telecomando utilizzerà il
codice successivo presente in memoria.
Se la marca del dispositivo non è elencata in SimpleSet, è possibile
eettuare l’impostazione provando i codici singolarmente. Per fare
questo, innanzitutto individuare la marca nell’elenco dei codici. I codici
sono elencati per marca e dispositivo e in ordine di popolarità.
1. Attivare il dispositivo (non in standby) e rivolgere il telecoman-
do Essential verso di esso.
2. Premere il tasto del dispositivo che si desidera
congurare (ad esempio il televisore).
3.
Tenere premuto il tasto SETUP no a quando il LED
sotto il tasto del dispositivo non lampeggia due volte.
4. Immettere il primo codice a 4 cifre elencato per
la marca (ad esempio 1840 per LG).
5. Il LED lampeggerà due volte una volta inserita l’ultima cifra
del codice.
6. Rivolgere adesso il telecomando verso il dispositivo
e premere il tasto di accensione/spegnimento.*
7. Se il dispositivo si spegne, il telecomando è pronto all’uso.
In caso contrario, ripetere i passaggi dal 2 al 6 con il codice
successivo presente nell’elenco.
* Nota: Se il telecomando originale non aveva un tasto di accensione/
spegnimento, provare con un altro tasto al punto 6. Ad esempio,
premere Riproduci o Pausa quando si congura una streaming box e
vedere se la box risponde.
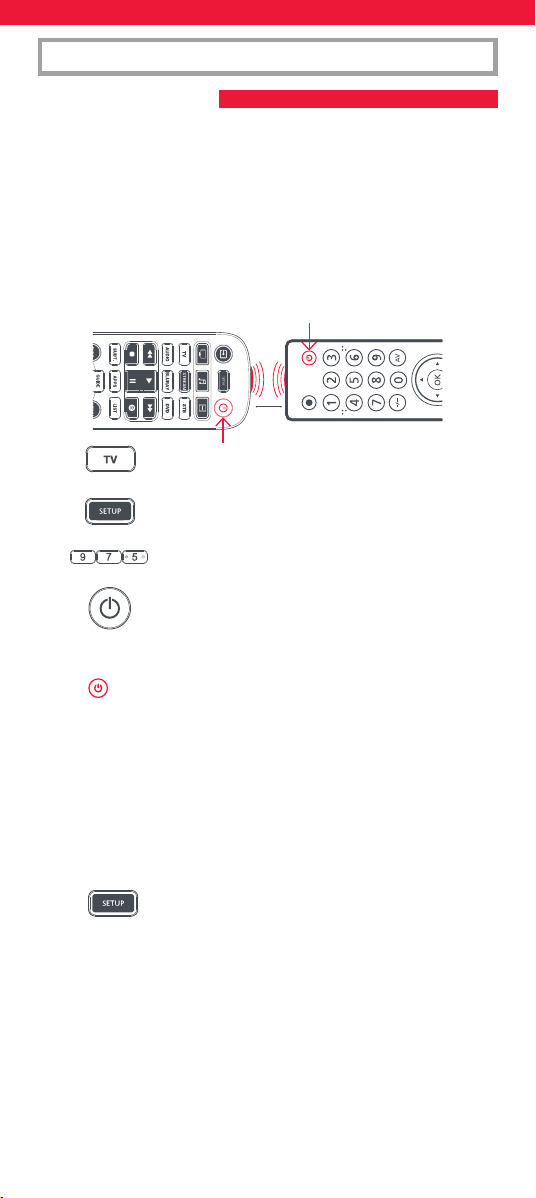
56
SETUP
APPRENDIMENTO
È possibile associare al telecomando Essential qualsiasi funzione di
qualunque altro telecomando funzionante. Si tratta di una congurazi-
one semplice e veloce che permette di controllare qualsiasi dispositivo
a infrarossi che si trova nel soggiorno di casa, ad esempio. Permette
anche di aggiungere una o più funzioni mancanti ad un tasto di riserva
su Essential.
Per svolgere questa operazione, è necessario innanzitutto assicurarsi
di disporre di tutti i telecomandi originali e vericare che questi ultimi
siano dotati di batterie funzionanti.
Per apprendere le funzioni, è necessario che il telecomando originale si
trovi a circa 3 cm dal telecomando Essential e venga puntato verso di esso:
1. Premere il tasto del dispositivo di cui si desidera
apprendere le funzioni.
2.
Tenere premuto il tasto SETUP no a quando il LED
sotto il tasto del dispositivo non lampeggia due volte.
3.
Premere 975: il LED dovrebbe lampeggiare due volte.
4. Premere e rilasciare il tasto a cui si desidera
associare una funzione (ad esempio il tasto di
accensione/spegnimento del televisore). Il LED
inizierà a lampeggiare rapidamente.
5. Premere e rilasciare* il tasto corrispondente sul
telecomando originale, ad esempio il tasto di
accensione/spegnimento.
6. Il LED lampeggerà due volte per indicare che la funzione è stata
associata correttamente al tasto.
7. Ripetere i passaggi 4 e 5 per tutti i tasti da congurare. Tenere
presente che è possibile associare le funzioni a partire da
diversi telecomandi, ma che a ogni tasto può corrispondere
una sola funzione.
8. Una volta apprese tutte le funzioni necessarie,
tenere premuto il tasto SETUP nché il LED non
lampeggia due volte.
* Alcuni telecomandi inviano i comandi in maniera dierente. Se una
funzione non viene appresa, provare a tenere premuto il tasto sul
telecomando originale, anziché premerlo e rilasciarlo.
Suggerimenti:
• Se il LED lampeggia una volta in maniera prolungata al passaggio
5, la funzione non è stata associata correttamente. Ripetere la
procedura a partire dal passaggio 4.
• Se uno o più tasti non funzionano correttamente dopo la con-
gurazione, è possibile riattivare la modalità di apprendimento in
qualsiasi momento ripetendo la procedura a partire dal passaggio 1.
2 - 5 CM
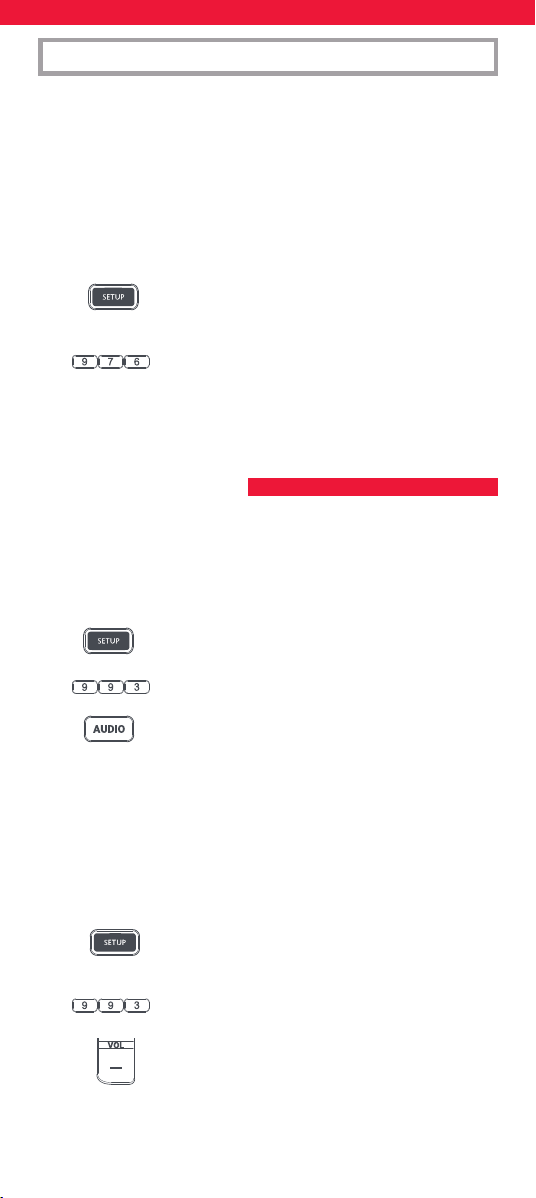
57
SETUP
BLOCCO DEL VOLUME
Se si utilizza principalmente un dispositivo per il controllo del volume,
ad esempio una sound bar o un ricevitore audio/video, è possibile
programmare il telecomando Essential per controllare solo quel
dispositivo quando si utilizzano i tasti Volume su, Volume giù e Muto.
Per svolgere questa operazione:
1.
Tenere premuto il tasto SETUP no a quando il LED
sotto il tasto del dispositivo non lampeggia due volte.
2.
Premere 993: il LED dovrebbe lampeggiare due volte.
3. Premere il tasto del dispositivo di cui si desidera
controllare sempre il volume, ad esempio Audio.
4. Il LED lampeggerà 2 volte.
D’ora in poi, premendo i tasti Volume su, Volume giù o Muto si
controllerà sempre il dispositivo Audio, indipendentemente dal
dispositivo che si sta utilizzando.
La procedura per sbloccare il volume e riportare il telecomando a
controllare il volume di ciascun dispositivo singolarmente è:
1. Tenere premuto il tasto SETUP no a quando il LED
sotto il tasto del dispositivo non lampeggia due
volte.
2.
Premere 993: il LED dovrebbe lampeggiare due volte.
3. Premere VOL - : il LED lampeggerà quattro volte e il
volume sarà sbloccato.
• Se uno o più telecomandi originali non funzionano, è possibile
comunque congurare il telecomando Essential tramite SimpleSet
oppure un codice.
Eliminazione di una funzione appresa
Se si desidera eliminare una funzione appresa e riportare i tasti allo
stato originale, è possibile utilizzare la seguente procedura:
1. Premere il tasto del dispositivo di cui si desidera congurare
le funzioni.
2. Tenere premuto il tasto SETUP no a quando il LED
sotto il tasto del dispositivo non lampeggia due
volte.
3.
Premere 976: il LED dovrebbe lampeggiare due volte.
4. Premere due volte il tasto che si desidera ripristinare: il LED
dovrebbe lampeggiare due volte e la funzione appresa
dovrebbe essere eliminata.

58
Oltre alla loro normale funzionalità, i tasti rosso, verde, giallo e blu o
RGYB (Red, Green, Yellow, Blue) possono essere riprogrammati per
selezionare i canali preferiti per genere. Questi tasti, se premuti e
rilasciati uno alla volta, eseguiranno esattamente la stessa funzione del
telecomando originale.
Tuttavia possono essere riprogrammati in modo che quando sono
tenuti premuti per 3 secondi trasmettano un numero di canale e, se
tenuti premuti ancora per 3 secondi, trasmettano un numero di canale
dierente. È possibile raggruppare questi canali per genere come
Sport, Notizie, Film e Bambini.
La procedura per programmare è la seguente. Se i primi 3 canali
sportivi sono, ad esempio, sui canali 200, 201 e 239, è possibile
assegnare collegamenti di scelta rapida a questi canali sul tasto rosso
(Sport). Per svolgere questa operazione, in primo luogo selezionare il
dispositivo utilizzato per guardare la TV. Ad esempio, se si è abbonati
a Sky e il set-top-box è congurato sul tasto STB, premere STB. Ora è
possibile programmare le scelte rapide dei canali.
1. Tenere premuto il tasto SETUP e il tasto rosso no a
quando il LED non lampeggia due volte.
2. Immettere il numero del primo canale (200).
3. Premere e rilasciare il pulsante rosso.
4.
Immettere il numero del canale successivo (in
questo esempio 201).
5.
Ripetere i passaggi 3 e 4 per ogni canale a scelta rapida che si
desidera aggiungere.
6.
Dopo aver immesso il numero dell’ultimo canale
desiderato, premere e tenere premuto il tasto SETUP.
Il LED lampeggia due volte e le scelte rapide sono ora programmate.
Quando si guarderà la TV, sarà suciente tenere premuto il tasto rosso
per 3 secondi: il primo canale a scelta rapida verrà inviato (in questo
esempio il canale 200). La prossima volta che si tiene premuto il tasto
rosso, verrà inviata la scelta rapida per il canale successivo (in questo
caso il canale 201).
È possibile riprogrammare ciascuno dei diversi tasti colorati con diversi
elenchi di numeri di canali tenendo premuto il tasto SETUP e un tasto
colorato diverso al punto 1, quindi premendo e rilasciando lo stesso
tasto al punto 3. Ogni tasto colorato ha un nome diverso per aiutare
a ricordare i canali che vi sono memorizzati. È possibile programmare
no a 10 diversi numeri di canali per tasto.
Se si desidera ripristinare il tasto predenito, la procedura è la seguente:
1. Premere il tasto del dispositivo su cui sono state
programmate le scelte rapide (ad esempio STB).
2. Tenere premuto il tasto SETUP e il tasto che si
desidera ripristinare (ad esempio il tasto verde) no
a quando il LED non lampeggia due volte.
MACRO DI SCELTA RAPIDA DEI CANALI
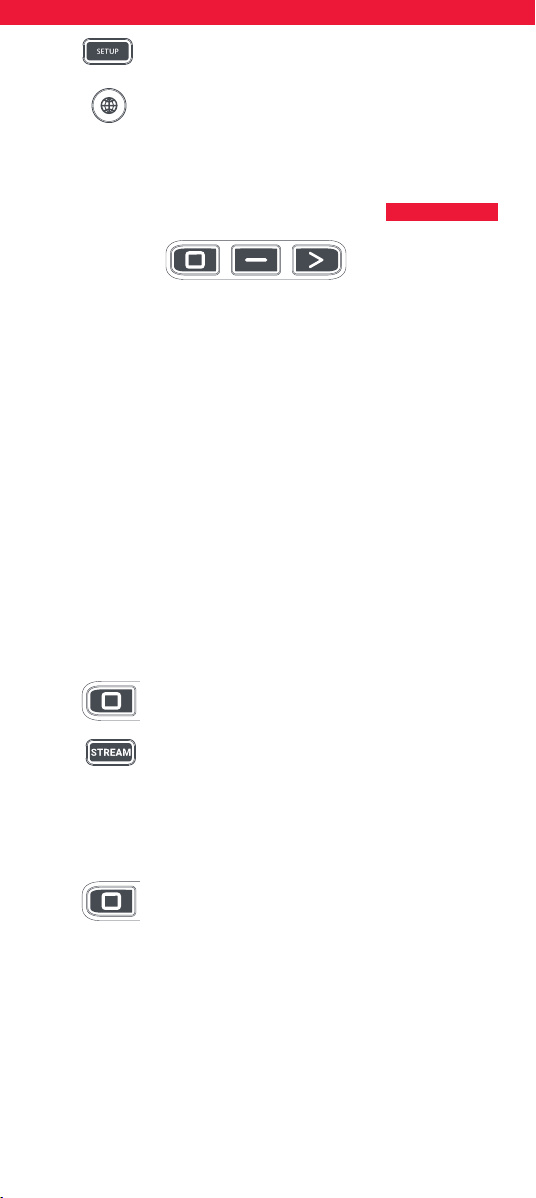
59
TASTI DI SCELTA RAPIDA PER LE APP
3. Premere e rilasciare il tasto per eettuare il
ripristino (ad esempio il tasto verde).
4. Tenere premuto il pulsante SETUP nché il LED
non lampeggia due volte.
Adesso il tasto è ripristinato.
Il telecomando Essential dispone di tre tasti di scelta rapida utilizzabili
per aprire le app sui dispositivi intelligenti. Se il telecomando originale
ha un tasto Netix, Amazon Prime Video o YouTube, questi tasti
svolgeranno la stessa funzione.
Se, invece, non si disponeva di un tasto come questo, ma si aveva
comunque la possibilità di guardare un servizio in streaming, è possibile
utilizzare questo tasto come scelta rapida programmandovi una macro.
La maggior parte dei dispositivi AV collegati a Internet, come Smart TV o
set-top-box di streaming hanno una o più applicazioni che possono essere
eseguite per consentire di vedere la TV via Internet. Alcuni esempi di questi
servizi potrebbero essere Netix, YouTube, Amazon Prime o simili.
Per programmare la macro, è necessario prima conoscere il dispositivo
utilizzato per accedere al servizio e poi la sequenza di tasti che è
necessario premere per richiamare sempre il servizio preferito. Ad
esempio, alcuni televisori Panasonic avviano Netix se si preme il tasto
APPS, quindi Menu giù due volte e, inne, OK. Su Apple TV, invece, la
sequenza è MENU, Menu giù e OK.
Una volta determinata la sequenza per il dispositivo, seguire questi passaggi:
1. Sedersi di fronte al dispositivo acceso (non in standby).
2.
Tenere premuto il tasto di scelta rapida dell’app nché
il LED non lampeggia due volte e rimane acceso.
3. Premere il tasto del dispositivo che si desidera
utilizzare per la macro (ad esempio STREAM).
4. Ora eseguire la sequenza dei tasti come si farebbe normal-
mente. Il telecomando controllerà il dispositivo e la macro sarà
registrata in tempo reale; pertanto, il dispositivo impiegherà
alcuni secondi a reagire.
5. Una volta terminata la sequenza (e dopo che il
servizio di streaming si sarà avviato sul dispositivo),
tenere premuto il tasto di scelta rapida dell’app
nché il LED non lampeggerà due volte e si
spegnerà. Ora la macro è stata salvata.
Suggerimenti
• Assicurarsi che il telecomando Essential stia controllando il
dispositivo in questione prima della programmazione.
• Se la macro non funziona come previsto, ripetere gli stessi passaggi
per riprogrammarla.
• Durante la programmazione, attendere prima la risposta del
televisore; il telecomando ricorderà la tempistica.
• La macro di scelta rapida per le app è legata a un dispositivo;
assicurarsi sempre di utilizzare il dispositivo corretto.
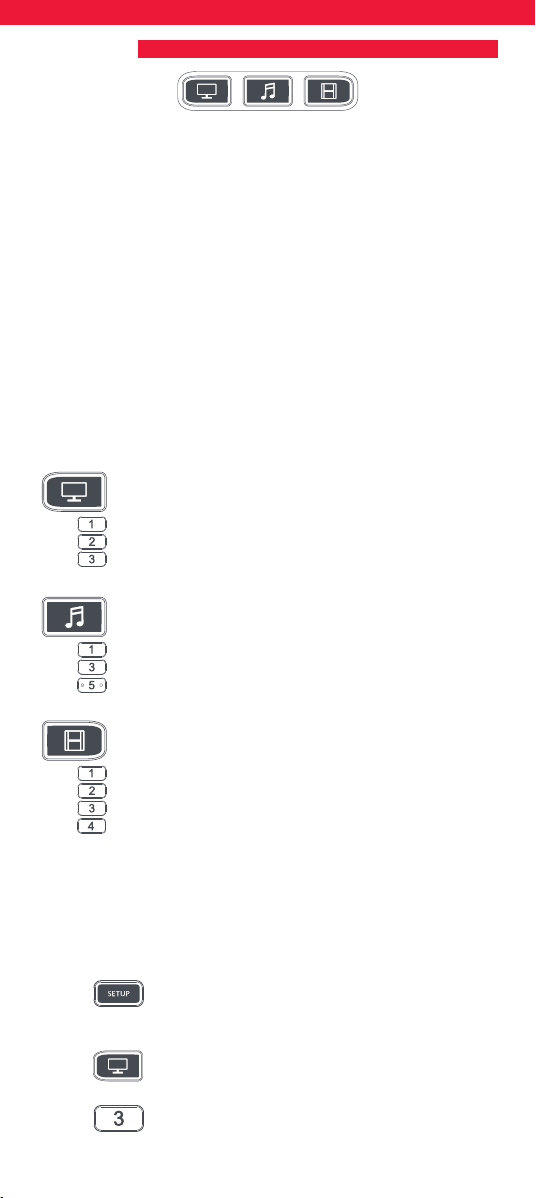
60
ATTIVITÀ
Un’attività prevede una combinazione di dispositivi. Su un telecoman-
do universale standard se si desidera controllare diversi dispositivi è
necessario passare da uno all’altro utilizzando i tasti dei dispositivi. Così
se si desidera controllare l’ingresso della TV, i canali e la guida della
Sky box e il volume della sound bar, è necessario spostarsi tra questi
dispositivi premendo i tasti TV, STB e Audio.
Sui telecomandi Essential questi dispositivi possono essere raggruppati
in una modalità Attività, per cui dopo aver premuto Guarda TV, il tasto
Ingresso controllerà la TV, i tasti del livello del volume e Muto controlle-
ranno la sound bar e gli altri tasti controlleranno il set-top-box.
Il telecomando Essential ha 3 modalità Attività: Guarda TV, Ascolta
musica e Guarda lm.
A ciascuna di queste modalità possono essere combinati diversi
dispositivi.
Queste sono le modalità:
Guarda TV
Combinazione 1 – TV + STB + AUDIO (predenita)
Combinazione 2 – TV + STB
Combinazione 3 – TV + AUDIO
Ascolta musica
Combinazione 1 – TV + BLU + AUDIO (predenita)
Combinazione 3 – TV + STREAM + AUDIO
Combinazione 5 – AUDIO only
Guarda lm
Combinazione 1 – TV + STREAM + AUDIO (predenita)
Combinazione 2 – TV + STREAM
Combinazione 3 – TV + BLU
Combinazione 4 – TV + BLU + AUDIO
Se si congurano i dispositivi predeniti per qualsiasi attività sul
telecomando (ad esempio un televisore, una STB e un dispositivo audio
per Guarda TV), tale attività sarà congurata automaticamente sul
telecomando.
Questa è la procedura per cambiare la combinazione:
1. Tenere premuto il tasto SETUP nché il LED sotto il
dispositivo non lampeggia due volte. Il LED sotto il
dispositivo corrente resterà illuminato.
2. Premere il tasto dell’attività che si desidera
congurare (ad esempio, Guarda TV).
3. Premere il numero corrispondente alla combina-
zione da impostare, ad esempio 3 per TV + AUD n
Guarda TV.

61
AV IN MODALITÀ SHIFT
MACRO DI ACCENSIONE/SPEGNIMENTO
4. Il LED lampeggerà due volte e si spegnerà.
Per accedere alle attività è suciente premere il tasto Attività. Per
tornare al controllo del dispositivo, utilizzare il tasto del dispositivo.
Dal momento che il tasto AV è destinato alla selezione dell’ingresso sul
televisore e che la maggior parte dei televisori fornisce un menu per la
selezione da un elenco di ingressi, quando il tasto AV viene premuto in
un’attività, i tasti Menu su, Menu giù, Menu sinistra, Menu destra e OK
controllano temporaneamente il televisore. Se viene premuto il tasto
OK oppure se non viene premuto alcun tasto per dieci secondi, questi
tasti torneranno a controllare il dispositivo corrispondente all’attività
(ad esempio STB in modalità Guarda TV).
Se si tiene premuto il tasto di accensione/spegnimento per 2 secondi
in qualsiasi attività, il telecomando invierà la funzione di accensione/
spegnimento a tutti i dispositivi contenuti in tale attività. Ad esempio,
tenendo premuto il tasto di accensione/spegnimento nell’imposta-
zione predenita per Guarda TV, si accendono o si spengono sia il
televisore che il set-top-box.
facebook.com/ @oneforall.worldwide linkedin.com/ youtube.com/
oneforallworldwide company/one-for-all-worldwide/ user/oneforallproducts
Connect with us
Il presente telecomando contiene SteriTouch®, un materiale che
lo proteggerà dalla crescita di batteri, funghi e mue per tutta
la sua durata. Eseguire la scansione del codice QR code oppure
visitare w
ww.oneforall.com/antimicrobial per ulteriori informazioni
sulla protezione antimicrobica e la tecnologia agli ioni di argento
SteriTouch.
Questo prodotto contiene vetro al fosfato d’argento, un biocida che
controlla la crescita dei microrganismi sulla supercie del prodotto.
Questo prodotto non contiene nanomateriali.
L’inclusione di un biocida non nega la necessità di una normale
pulizia.
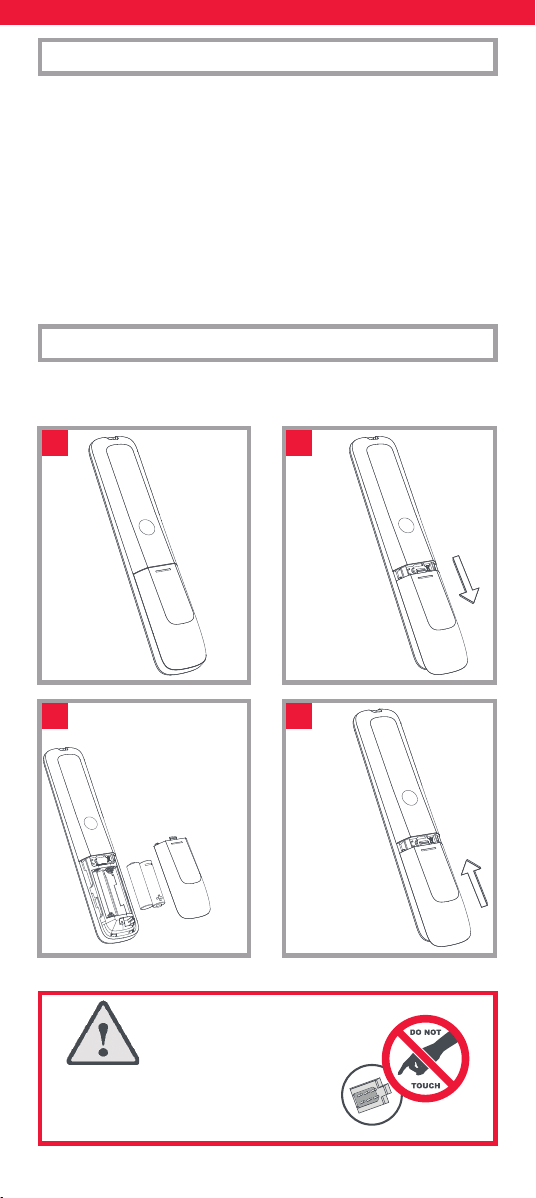
62
Obrigado por adquirir o One For All Essential 6 Device Universal
Remote Control. O comando pode ser utilizado para controlar até 6
dispositivos de áudio e vídeo, tais como televisões, Set-top boxes,
leitores de Blu-ray ou barras de som.
O comando possui igualmente uma retroiluminação para facilitar
o controlo em ambientes escurecidos, bem como uma proteção
antimicrobiana.
Este manual irá ajudá-lo a congurar o Essential 6 para controlar todos
os seus dispositivos.
O comando necessita de 2 pilhas AA/LR06. Insira-as como mostrado a
seguir. Recomenda-se utilizar pilhas alcalinas.
PORTUGUESE INTRODUÇÃO
PILHAS
2x AA
1
3
2
4
CUIDADO: Risco de explosão se as
pilhas forem substituídas por pilhas do
tipo incorreto. Utilize pilhas alcalinas de
qualidade.

63
DESCRIÇÕES DAS TECLAS
7
10
11
13
14
18
21
22
24
26
17
6
4
23
3 1
5
2
8
9
12
16
20
19
25
15

64
1
Alimentação Liga e desliga os seus dispositivos
2
Conguração Esta tecla é utilizada para congurar o comando Essential
3
Entrada Usada para selecionar a entrada nos dispositivos
4
Teclas Dispositivo Estas teclas são utilizadas para selecionar o dispositivo
que está a ser atualmente controlado pelo Essential 6. Após pressionar as
teclas de TV, o comando irá controlar a sua TV. Para mudar para o controlo
de outro dispositivo, basta premir a tecla apropriada. Os dispositivos que
podem ser programados para cada tecla são os seguintes:
TV: Todas as televisões como LED, LCD, Plasma, OLED, etc.
STREAM: Dispositivos de streaming tais como Apple TV, Roku Box, Foxtel
Now, etc. Também funciona com a Xbox 360 e Xbox One.
STB: Set-top Boxes incluindo Satélite, Cabo e Freeview.
AUDIO: Dispositivos de áudio incluindo barras de som, recetores AV e
aparelhagens
BLURAY: Leitores Blu-ray e leitores/gravadores de DVD
DVD: Leitores/Gravadores de DVD e leitores de Blu-ray
5
Atividades Controle até 3 dos seus dispositivos num modo Ver TV, Ouvir
música e Ver um lme - Consulte “Atividades” para saber como congurar e
utilizar
6
Teclas Reprodução
Controlar a reprodução de lmes, música e TV
7
Legendas Mostrar legendas
8
Aplicações Exibe o menu das aplicações nos dispositivos inteligentes,
como Smart TVs ou caixas de streaming
9
Lista Apresenta uma lista de programas gravados
10
Info Mostra informação sobre os programas ou o canal atuais
11
Guia Guia de TV
12
Menu Aceder ao menu de instalação do dispositivo atual
13
Menu Directions (Instruções) e OK Controlar o menu do dispositivo atual
14
Voltar Voltar atrás um passo no Menu
15
Início Apresenta o menu de Início
16
Sair Sai do menu
17
Aumentar e reduzir o volume Controlar o volume do dispositivo atual.
Também pode congurar estas teclas para controlar sempre um dispositivo.
Para obter mais informações, consulte a funcionalidade Bloqueio do
volume
18
Último canal Mudar para o último canal visualizado.
19
Sem som Silenciar o volume do dispositivo atual. Também pode
congurar esta tecla para controlar sempre um dispositivo. Para obter mais
informações, consulte a funcionalidade Bloqueio do volume.
20
Canal acima e abaixo Mudar os canais no dispositivo atual.
21
Teclas RGYB Botões de acesso rápido para o menu do dispositivo atual.
22
Teclas de atalho da aplicação Teclas para iniciar aplicações de
streaming. Consulte a secção Teclas de atalho da aplicação para obter mais
informações.
23
Dígitos Selecionar os canais no dispositivo atual. Em dispositivos de áudio,
estas teclas irão selecionar entradas individuais.
24
TV Regressar à TV em direto
25
Procurar Procurar suportes multimédia
26
Ligar/desligar retroiluminação Liga ou desliga a retroiluminação.
Quando estiver ligada, se premir qualquer tecla irá ativar a retroiluminação
durante 10 segundos. Prima esta tecla para desligar a retroiluminação e
novamente para voltar a ligar.
DESCRIÇÕES DAS TECLAS

65
O comando Essential 6 está pré-programado para controlar instan-
taneamente alguns dos dispositivos mais populares. Se tiver um dos
dispositivos a seguir indicados
, tente colocar as pilhas e premir a tecla
do dispositivo; em seguida, prima algumas teclas para ver se o comando
controla o seu dispositivo:
Tecla do dispositivo a pressionar Controlado pelo dispositivo
TV Samsung TV
STREAM Roku Streaming Box
STB Sky Q Box
(Apenas Reino Unido e Itália)
AUDIO Recetor Onkyo
BLURAY Leitor Blu-ray Samsung
DVD Leitor DVD Sony
Se o seu dispositivo não for um dos acima indicados, ou se tiver
dispositivos extra para congurar, existem 2 formas de o fazer. A mais
simples é o SimpleSet, que é usado para as marcas e dispositivos
comuns.
Se a marca do seu dispositivo for mostrada na imagem SimpleSet a
apontar para uma tecla, pode usar o sistema SimpleSet descrito nesta
secção; localize a marca do seu dispositivo e anote a tecla associada ao
mesmo.
TV
Bush
Grundig
JVC
LG
Panasonic
Philips
Samsung
Sharp
Sony
Toshiba
STREAM
A.C.Ryan / DVICO / Eminent /
Evolve / Ferguson / GigaTV /
iconBIT / Woxter
Apple
ASRock / Asus / Dell / HP / Sony
Dune
Fantec / HiMedia
Iomega / Western Digital
iRIS / ISTAR / Popcorn Hour / Redline
Microsoft / Xbox
Now TV by Sky / Roku / Sky Deutschland /
Sky Ireland / Sky Italia/ Sky Österreich / Sky UK / Telstra
NVIDIA
CONFIGURAÇÃO
SIMPLESET

66
STB
BT / Humax / TalkTalk / Tricolor TV
/ YouView
Canal+ / CanalSat / Deutsche
Telekom / Movistar / T-Home
DStv / Foxtel / Multichoice /
Sky New Zealand
Freebox / Sky Deutschland / Sky Österreich / TechniSat
Kabel Deutschland / Vodafone
KPN / Sagemcom / SFR
Orange / Samsung
Sky Ireland / Sky Italia / Sky UK
Strong / Vu+
Telenet / UPC / UPC Cablecom / Virgin Media / Ziggo
AUDIO
Bose
Denon
Harman/Kardon / JBL / Samsung
JVC / LG
Marantz / Philips
Onkyo
Panasonic / Technics
Pioneer
Sony
Yamaha
DVD e BLURAY
Denon / Onkyo
JVC
LG
Panasonic
Philips
Pioneer
Samsung
Sony
Toshiba
Yamaha
CONFIGURAÇÃO
SIMPLESET
Para congurar o dispositivo:
1. Ligue o dispositivo (não o coloque em standby) e aponte o
comando Essential para o dispositivo. Se estiver a congurar
um dispositivo de Streaming, certique-se de que está a ser
reproduzido um lme ou um programa de TV.
2. Prima a tecla do dispositivo que pretende
congurar (por exemplo TV).
3. Mantenha premida a tecla de Conguração até o
LED sob a tecla do Dispositivo piscar duas vezes.
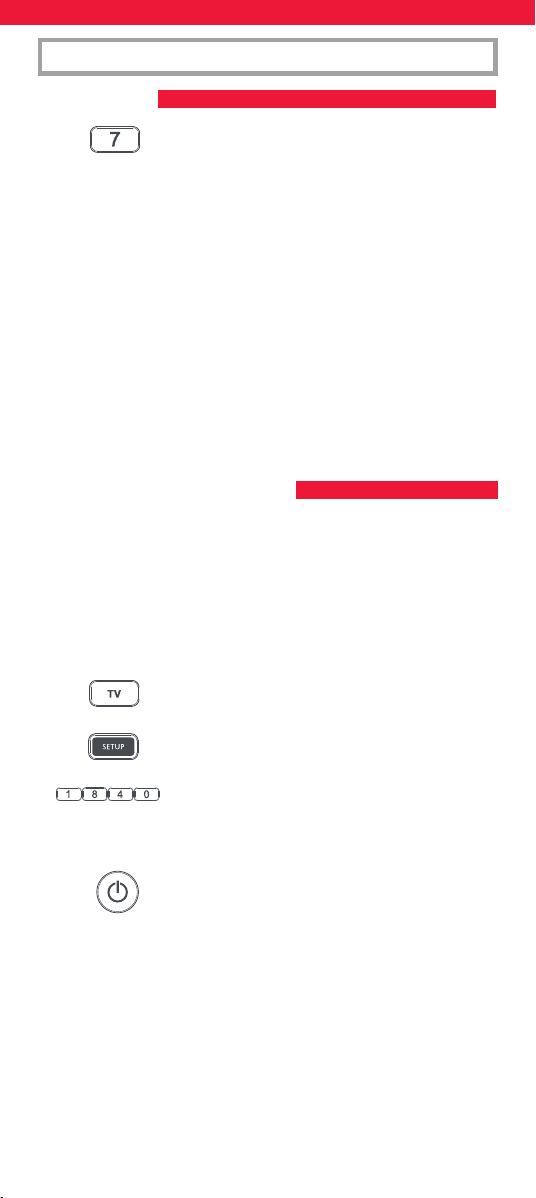
67
SIMPLESET
CONFIGURAÇÃO
CONFIGURAR POR CÓDIGO
4. Mantenha premido o número para a sua marca e
dispositivo, conforme indicado acima: por ex., 7
para uma TV Samsung.
5. Para todos os dispositivos exceto Stream, o comando irá enviar
a tecla Alimentação a cada 3 segundos; para uma caixa de
streaming, o comando irá enviar a função Reproduzir/Pausa.
6. Depois de o dispositivo reagir ao desligá-lo ou colocá-lo em
pausa (apenas caixa de streaming), liberte o número.
7. O LED pisca duas vezes e o comando deverá agora controlar o
seu dispositivo.
• Se notar que um ou mais botões não funcionam da forma esperada,
volte ao passo 2 – o comando será iniciado com o código seguinte
em memória.
Se a marca do seu dispositivo não estiver indicada na funcionali-
dade SimpleSet, pode efetuar a conguração ao tentar os códigos
individualmente. Para o fazer, localize primeiro a marca na Lista de
código. Os códigos estão apresentados por marca e dispositivo, bem
como por ordem de popularidade.
1. Ligue o dispositivo (não o coloque em standby) e aponte o
comando Essential para o dispositivo.
2. Prima a tecla do dispositivo que pretende
congurar (por exemplo TV).
3. Mantenha premida a tecla de Conguração até o
LED sob a tecla do Dispositivo piscar duas vezes.
4. Insira o primeiro código de 4 dígitos da sua marca
(por ex., 1840 para LG).
5. O LED irá piscar duas vezes no último dígito do código.
6. Aponte o comando para o dispositivo e prima a
tecla de alimentação*.
7. Se o dispositivo se desligar, o seu comando está pronto a ser
utilizado. Se isso não acontecer, repita os passos 2-6 com o
código seguinte na lista.
* Nota: Se o comando original não tiver uma tecla de alimentação,
tente com uma tecla diferente no passo 6. Por exemplo,
experimente premir Reproduzir ou Pausa quando congurar uma box
de streaming e veja se a caixa responde.

68
CONFIGURAÇÃO
PROGRAMAR
Pode programar qualquer função de qualquer outro comando
funcional no seu comando Essential. Esta é uma conguração única,
rápida e fácil que permite controlar qualquer dispositivo controlado
por infravermelhos que possua na sala de estar. Também permite
adicionar uma tecla ou teclas que possa(m) estar em falta para uma
tecla de substituição no Essential.
Para o fazer, certique-se de que tem todos os seus comandos originais
à mão e que estes possuem pilhas a funcionar.
Para programar funções, o comando original deve estar a aproximada-
mente 3 cm do comando Essential, virado para o mesmo:
1. Prima a tecla Dispositivo para o dispositivo onde
pretende programar funções.
2. Mantenha premida a tecla de Conguração até o
LED sob a tecla do Dispositivo piscar duas vezes.
3. Prima 975 – o LED deve piscar duas vezes.
4. Prima e solte a tecla cuja função deseja programar
(por exemplo, a tecla de alimentação da TV) – O
LED começará a piscar rapidamente.
5. Prima e solte* a tecla correspondente no comando
original, por exemplo Alimentação.
6. O LED irá piscar duas vezes para indicar que a tecla foi
programada corretamente.
7. Repita os passos 4 e 5 para cada tecla que pretende programar.
Lembre-se que pode programar a partir de vários comandos,
mas que só pode programar uma função por tecla.
8. Quando tiver programado todas as funções de que
precisa, mantenha a tecla de alimentação da TV
premida até que o LED pisque duas vezes.
* Alguns telecomandos emitem comandos de forma diferente. Se
perceber que não é possível programar uma função, tente manter
o botão premido no comando original, ao invés de premir e soltar o
botão.
Dicas:
• Se os LED piscarem prolongadamente no passo 5, a função não foi
programada corretamente. Volte a tentar a partir do passo 4.
• Se perceber que um ou mais botões não funcionam corretamente
após a conguração, pode voltar a entrar no modo de programação
a qualquer altura repetindo o processo a partir do passo 1.
2 - 5 CM
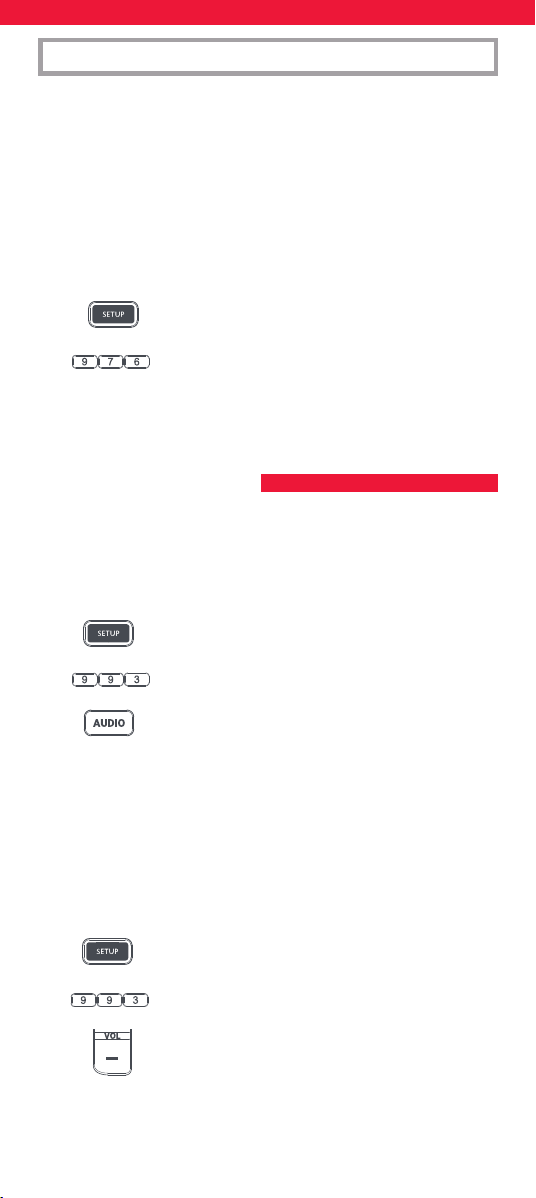
69
EINRICHTUNG
BLOQUEIO DE VOLUME
Se utilizar um dispositivo principalmente para controlar o volume,
por exemplo uma barra de som ou recetor de áudio/vídeo, é possível
programar o comando Essential para apenas controlar esse dispositivo
quando usar as teclas de Aumentar volume, Diminuir volume e Sem
som. Para tal:
1. Mantenha premida a tecla de Conguração até o
LED sob a tecla do Dispositivo piscar duas vezes.
2. Prima 993 – o LED deve piscar duas vezes.
3. Prima a tecla do dispositivo para o dispositivo
controlar sempre o volume - por exemplo Áudio.
4. O LED piscará duas vezes.
A partir de agora, quando premir as teclas Aumentar volume, Diminuir
volume ou Sem som irá sempre controlar o dispositivo de áudio,
independentemente do dispositivo que estiver a controlar.
Para desbloquear o volume e voltar a colocar o comando a controlar
o volume de cada dispositivo individualmente, o procedimento é:
1. Mantenha premida a tecla de Conguração até o
LED sob a tecla do Dispositivo piscar duas vezes
2. Prima 993 – o LED deve piscar duas vezes
3. Prima DIMINUIR VOLUME – o LED irá piscar quatro
vezes e o volume está desbloqueado.
• Se um ou mais dos seus comandos originais não estiverem a
funcionar, ainda é possível congurar o comando Essential através
do SimpleSet ou da Conguração por código.
Eliminar uma função programada
Se quiser eliminar uma função programada e repor essas teclas no
estado original, pode fazer o seguinte:
1. Prima a tecla Dispositivo para o dispositivo onde pretende
programar funções.
2. Mantenha premida a tecla de Conguração até o
LED sob a tecla do Dispositivo piscar duas vezes.
3. Prima 976 – o LED deve piscar duas vezes.
4. Prima duas vezes a tecla que pretende repor - o LED deve
piscar duas vezes e a função programada foi eliminada.

70
Para além da funcionalidade normal, as teclas Vermelho, Verde,
Amarelo e Azul podem ser reprogramadas para selecionar os canais
favoritos por género. Se premir e libertar cada uma destas teclas, elas
irão desempenhar exatamente a mesma função que o seu comando
original.
No entanto, podem ser reprogramadas de modo que, quando forem
premidas continuamente durante 3 segundos, enviem um número de
canal; depois, quando forem novamente premidas durante 3 segundos,
enviem um número de canal diferente. Pode agrupar estes canais por
género, como Desporto, Notícias, Filmes e Crianças.
O procedimento para programar é o seguinte: Digamos, por
exemplo, que os 3 primeiros canais de desporto estão nos canais 200,
201 e 239; pode atribuir atalhos para estes canais na tecla vermelha
(Desporto). Para tal: Selecione primeiro o dispositivo que usa para ver
TV em direto. Por exemplo, se assinar a Sky e tiver congurado a sua
Set Top Box na tecla STB, prima STB. Agora, pode programar os atalhos
do canal.
1. Prima continuamente a tecla Conguração e a tecla
vermelha até o LED vermelho piscar duas vezes.
2. Introduza o primeiro número do canal (200).
3. Prima e solte a tecla vermelha.
4. Introduza o número do canal seguinte (neste
exemplo 201)
5. Repita os passos 3 e 4 para cada atalho do canal que pretende
adicionar.
6. Depois de introduzir o último número do canal,
prima continuamente a tecla Conguração.
O LED vermelho irá piscar duas vezes e os atalhos estão agora
programados. Quando estiver a ver TV em direto, basta premir
continuamente a tecla vermelha durante 3 segundos e será enviado
o primeiro Atalho do canal (neste exemplo, o canal 200). Na próxima
vez que premir continuamente a tecla vermelha, será enviado o atalho
para o próximo Atalho do canal (neste caso, o canal 201).
Pode reprogramar cada uma das diferentes teclas coloridas com
diferentes listas de números de canal, premindo continuamente a tecla
Conguração e uma tecla colorida diferente no passo 1 e premindo e
libertando a mesma tecla no passo 3. Cada tecla colorida possui um
nome diferente para ajudá-lo a lembrar-se dos canais que guardou lá.
Pode programar até 10 números de canal diferentes por tecla.
Se desejar repor a tecla para o estado predenido, o procedimento é
o seguinte:
MACROS DE ATALHO DO CANAL
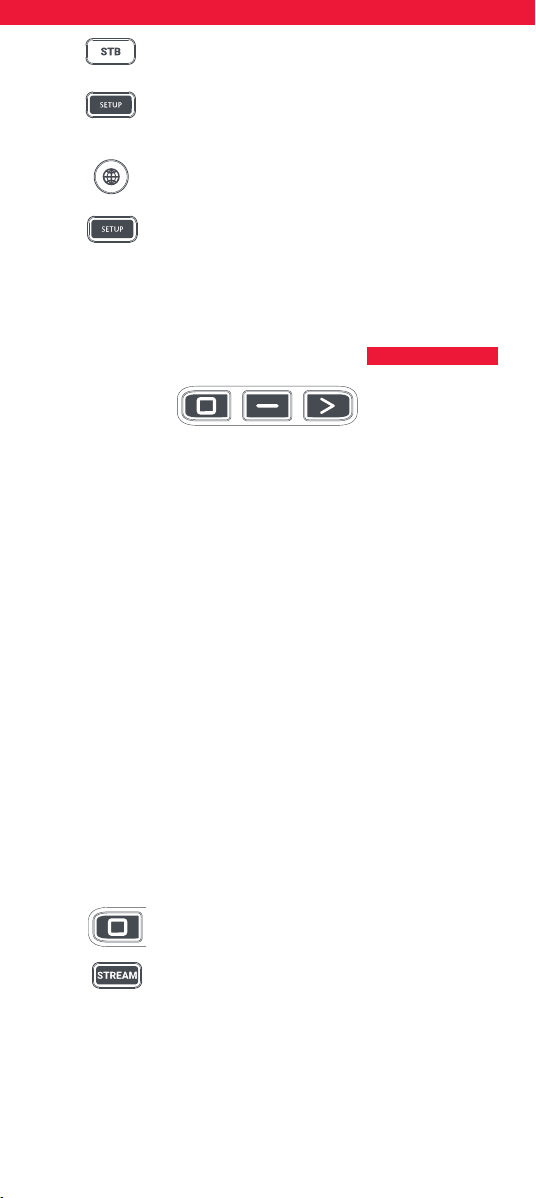
71
TECLAS DE ATALHO DA APLICAÇÃO
1. Prima a tecla do dispositivo em que programou os
atalhos (por exemplo STB).
2. Prima continuamente a tecla Conguração e a tecla
que pretende repor (por exemplo a tecla Verde) até
o LED vermelho piscar duas vezes.
3. Pressione e liberte a tecla para repor (por exemplo
a tecla Verde).
4. Prima continuamente a tecla Conguração até a luz
vermelha piscar duas vezes.
A tecla está agora reposta.
O comando Essential possui três teclas de atalho de aplicação,
que podem ser usados para abrir aplicações nos seus dispositivos
inteligentes. Se o seu comando original tiver uma tecla para Netix,
Amazon Prime Video ou YouTube, estas teclas terão a mesma função.
No entanto, se não tiver uma tecla como esta, mas ainda assim
conseguir visualizar um serviço em streaming, pode usar esta tecla
como atalho através da programação de uma macro na mesma. A
maioria dos dispositivos AV ligados à Internet, como Smart TVs ou
Set Top Boxes de streaming, possuem uma ou mais aplicações que
conseguem executar para aceder à visualização de TV através da
Internet. Alguns exemplos seriam Netix, YouTube, Amazon Prime ou
outro semelhante.
Para programar a macro, deverá ter conhecimento primeiro do
dispositivo que usa para aceder ao serviço e depois da sequência de
teclas que precisa de premir para exibir o serviço da sua preferência.
Por exemplo, algumas TVs Panasonic iniciam a Netix premindo a tecla
Apps, depois Menu para baixo duas vezes e, nalmente, a tecla OK. Ou
numa TV Apple, a sequência é Menu, Menu para baixo e OK.
Quando tiver determinado a sequência para o seu dispositivo, siga
estas indicações:
1. Sente-se em frente ao dispositivo ligado (não em standby).
2. Mantenha pressionado o botão de atalho de
aplicações até o LED piscar duas vezes e car aceso.
3. Prima a tecla Dispositivo para o dispositivo onde
pretende usar a macro (por ex., Stream).
4. Agora pressione os botões pela sequência normal. O comando
opera o dispositivo e a macro é gravada em tempo real, pelo
que se o dispositivo demorar alguns segundos a reagir, isso é
perfeitamente normal.

72
5. Depois de terminar a sequência e o serviço de
streaming começar a ser mostrado no dispositivo,
mantenha pressionada a tecla de atalho de
aplicações até o LED piscar duas vezes e se apagar.
A macro está gravada.
Dicas
• Certique-se de que o comando Essential está a operar o dispositivo
em questão antes de programar.
• Se a macro não funcionar como o esperado, pode repetir a mesma
sequência para reprogramar.
• Ao programar, aguarde primeiro que o dispositivo reaja, o comando
lembrar-se-á da sincronização.
• A macro Atalho da aplicação está associada a um dispositivo,
certique-se de que está a ver o dispositivo correto.
Uma Atividade é uma combinação de dispositivos. Num telecomando
universal normal, se quiser controlar diferentes dispositivos deverá trocar
entre os mesmos utilizando as teclas do dispositivo. Por isso, se quisesse
controlar a entrada da TV, os canais e a programação da caixa Sky e o
volume da barra de som, teria de trocar entre os mesmos premindo as
teclas TV, STB e Áudio.
Nos comandos Essential estes dispositivos podem ser agrupados num
modo Atividade; por isso, após premir Ver TV, a tecla de entrada irá
controlar a TV, as teclas Aumentar volume, Diminuir volume e Sem som
irão controlar a barra de som e as outras teclas irão controlar a Set Top
Box.
O comando Essential possui 3 modos de Atividade, especicamen-
te Ver TV, Ouvir música e Ver lme.
Cada um destes modos possui uma seleção de dispositivos para
combinar: São:
Ver TV
Combinação 1 - TV + STB + AUDIO (predenido)
Combinação 2 - TV + STB
Combinação 3 - TV + AUDIO
Ouvir música
Combinação 1 - TV + BLU + AUDIO (predenido)
Combinação 3 - TV + STREAM + AUDIO
Combinação 5 - apenas AUDIO
Ver lme
Combinação 1 - TV + STREAM + AUDIO (predenido)
Combinação 2 - TV + STREAM
Combinação 3 - TV + BLU
Combinação 4 - TV + BLU + AUDIO
Se congurar os dispositivos predenidos para qualquer atividade
no comando (por exemplo, uma TV, STB e Áudio para Ver TV), essa
atividade será congurada automaticamente no comando.
ATIVIDADES
73
AV SHIFT
POWER MACRO
Se desejar alterar para uma combinação diferente, o procedimento é
o seguinte:
1. Mantenha premida a tecla Conguração até que o
LED sob o dispositivo pisque duas vezes. O LED sob
o dispositivo atual permanecerá aceso.
2. Prima a tecla Atividade que deseja congurar (por
exemplo, Ver TV).
3. Prima o número da combinação que pretende
congurar – por ex., 3 para TV + AUD em Ver TV.
4. O LED piscará duas vezes e depois apaga-se.
Para aceder às Atividades, basta premir a tecla ATIVIDADE. Pode voltar
ao controlo por dispositivo utilizando qualquer tecla Dispositivo.
Uma vez que o botão AV se destina a selecionar a entrada na sua TV
e grande parte das TV utilizam um menu para selecionar a partir de
uma lista de entradas, quando a tela AV é premida numa atividade,
os botões Menu para cima, Menu para baixo, Esquerda, Direita e
OK controlam temporariamente a TV. Se o botão OK for premido,
ou nenhum botão for premido durante dez segundos, estes botões
voltarão a controlar o dispositivo relevante para a atividade (por ex.,
box de TV em modo Ver TV).
Wenn Sie die POWER-Taste in jeder Aktivität für 2 Sekunden gedrückt
halten, sendet die Fernbedienung das Ein-/Aus-Signal an jedes Gerät,
das in der Aktivität enthalten ist. Wenn Sie also beispielsweise im
Modus „TV sehen“ die Power-Taste gedrückt halten, wird sowohl das
TV-Gerät als auch die Set-Top-Box ein- bzw. ausgeschaltet.
Este comando contém SteriTouch®. Estará protegido contra o
crescimento de bactérias, fungos e bolor durante a sua vida útil. Faça
a leitura do código QR () ou visite www.oneforall.com/antimicrobial
para obter mais informações sobre a proteção antimicrobiana e a
tecnologia de iões de prata SteriTouch.
Este produto contém vidro de fosfato de prata, um produto biocida
que controla o crescimento de microrganismos na superfície do
produto.
Este produto não contém nanomateriais.
A inclusão do produto biocida não invalida a necessidade de uma
limpeza normal.

74
Bedankt dat u de One For All Essential 6 Device universele afstandsbe-
diening hebt aangeschaft. De afstandsbediening kan worden gebruikt
om tot 6 audio-videoapparaten als tv, settopbox, blu-rayspeler of
soundbar te bedienen.
De afstandsbediening beschikt ook over achtergrondverlichting
voor eenvoudige bediening in een donkere kamer. Bovendien is het
apparaat antimicrobieel beschermd.
Deze handleiding helpt u de Essential 6 zo te installeren dat u er al uw
apparaten mee kunt bedienen.
Voor uw afstandsbediening zijn 2 x AA/LR06-batterijen nodig. Plaats
deze zoals hieronder getoond. Het gebruik van alkalinebatterijen wordt
aanbevolen.
NEDERLANDS INLEIDING
BATTERIJEN
2x AA
1
3
2
4
LET OP: Ontplongsgevaar indien
de batterij wordt vervangen door een
onjuist type. Gebruik hoogwaardige
alkalinebatterijen.

75
BESCHRIJVING KNOPPEN
7
10
11
13
14
18
21
22
24
26
17
6
4
23
3 1
5
2
8
9
12
16
20
19
25
15

76
1
Aan/uit Schakelt uw apparaten in of uit
2
Instellen Met deze knop installeert u de Essential-afstandsbediening
3
Invoer Wordt gebruikt voor invoer op apparaten
4
Apparaatknoppen Met deze knoppen kiest u welk apparaat u op dit
moment met de Essential 6 bedient. Drukt u op de tv-knop, dan werkt de
afstandbediening op uw tv. Om een ander apparaat te bedienen, drukt u
eenvoudigweg op de desbetreende knop. De apparaten die u aan iedere
knop kunt toewijzen zijn:
TV: Alle televisies zoals led, LCD, plasma, OLED, etc.
STREAM: Streamingapparaten zoals Apple TV, Roku Box, Foxtel Now, etc.
Werkt ook met Xbox 360 en Xbox One.
STB: Settopboxen, inclusief satelliet, kabel en Freeview.
AUDIO: Audioapparatuur waaronder soundbars, AV-receivers en Hi-Fi
BLURAY: Blu-ray en dvd-spelers/-recorders
DVD: Dvd-spelers/-recorders en blu-rayspelers
5
Activiteiten Bedien tot wel drie van uw apparaten in één modus: Tv-kijken,
Muziek luisteren en Film kijken - zie “Activiteiten” hoe u dit instelt en
gebruikt
6
Playback-knoppen
Besturen het afspelen van lms, muziek en tv
7
Ondertiteling Toon ondertiteling
8
Apps Brengt het applicatiemenu tevoorschijn op smart apparaten, zoals
smart-tv’s of streamingkastjes
9
Lijst Geeft een lijst met opgenomen programma’s weer
10
Info Toont informatie over het huidige programma of kanaal
11
Gids TV-gids
12
Menu Geeft toegang tot het installatiemenu van het apparaat in gebruik
13
Menuaanwijzingen en OK Bestuurt het menu van het apparaat in gebruik
14
Vorige Een stap terug in het menu
15
Home Toont het Home-menu
16
Exit Verlaat het menu
17
Volume omhoog en omlaag Bepaal het volume van het apparaat in
gebruik. Deze knoppen kunt u ook instellen om altijd één apparaat mee te
bedienen. Zie voor details de functie Volume vergrendelen.
18
Laatst bekeken kanaal Für den Wechsel zum zuletzt angesehenen Sender.
19
Geluid dempen Dempt het volume van het apparaat in gebruik. Deze
knop kunt u ook instellen om altijd één apparaat mee te bedienen. Zie voor
details de functie Volume vergrendelen.
20
Kanaal omhoog/omlaag Verander van kanaal op het apparaat in gebruik.
21
RGYB-knoppen Snelkoppelingsknoppen voor het menu van het apparaat
in gebruik.
22
App-snelkoppelingsknoppen Knoppen om streamingapps mee op te
starten. Zie het hoofdstuk App-snelkoppelingsknoppen voor details.
23
Cijfers Selecteer een kanaal op het apparaat in gebruik. Op audio-appara-
ten zullen deze knoppen individuele invoer selecteren.
24
TV Terug naar live-tv
25
Zoeken Zoeken naar media
26
Achtergrondverlichting aan/uit Schakelt de achtergrondverlichting aan
of uit. Staat de achtergrondverlichting aan, dan zal het aanraken van een
knop de verlichting 10 seconden lang activeren. Druk op deze knop om
de achtergrondverlichting uit te zetten en nogmaals om haar weer aan te
zetten.
BESCHRIJVING KNOPPEN
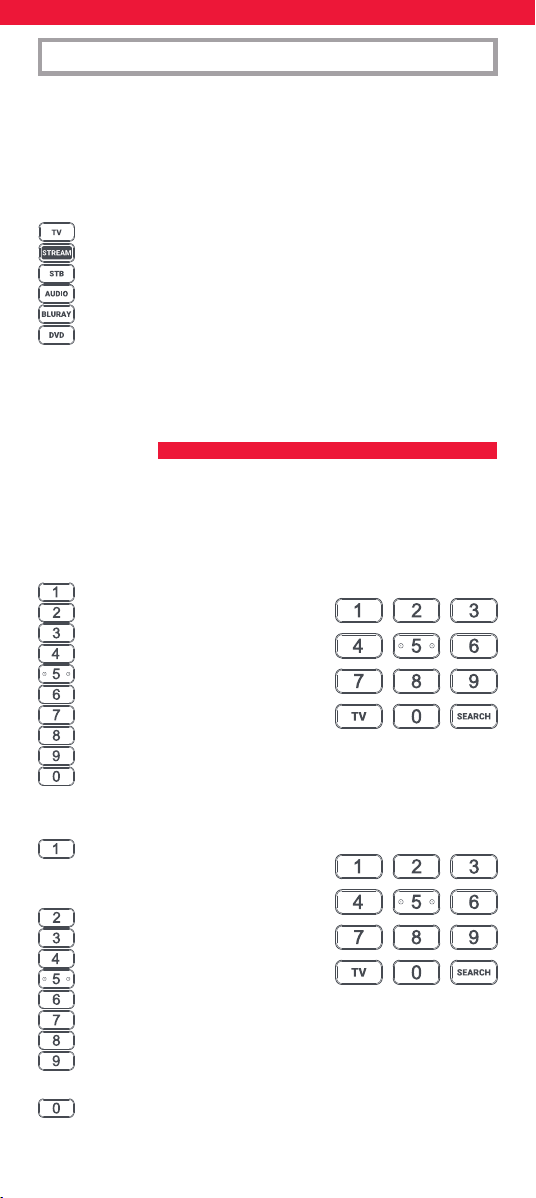
77
De Essential 6-afstandsbediening is voorgeprogrammeerd om enkele
van de meest populaire apparaten direct te kunnen bedienen. Als u een
van onderstaande apparaten hebt en de batterijen zijn geplaatst, druk
dan eens op de apparaatknop en vervolgens op enkele knoppen om te
zien of de afstandsbediening werkt op uw apparaat:
Apparaatknop die u moet indrukken Apparaat dat wordt bestuurd
TV Samsung-tv
STREAM Roku-streamingkastje
STB Sky Q Box
(uitsluitend VK en Italië)
AUDIO Onkyo-receiver
BLURAY Samsung blu-rayspeler
DVD Sony dvd-speler
Staat uw apparaat niet in bovenstaande lijst of wilt u andere apparaten
instellen, dan kan dat op twee manieren. Het eenvoudigst is SimpleSet,
dat gebruikt wordt voor de bekendste merken en apparaten.
Als het merk van uw apparaat wordt getoond in het SimpleSet-
pictogram dat naar een knop wijst, dan kunt u het SimpleSet-systeem
gebruiken zoals in dit hoofdstuk beschreven. Zoek het merk van uw
apparaat en kijk welke knop daaraan is gekoppeld.
TV
Bush
Grundig
JVC
LG
Panasonic
Philips
Samsung
Sharp
Sony
Toshiba
STREAM
A.C.Ryan / DVICO / Eminent /
Evolve / Ferguson / GigaTV /
iconBIT / Woxter
Apple
ASRock / Asus / Dell / HP / Sony
Dune
Fantec / HiMedia
Iomega / Western Digital
iRIS / ISTAR / Popcorn Hour / Redline
Microsoft / Xbox
Now TV by Sky / Roku / Sky Deutschland /
Sky Ireland / Sky Italia/ Sky Österreich / Sky UK / Telstra
NVIDIA
INSTELLEN
SIMPLESET

78
STB
BT / Humax / TalkTalk / Tricolor TV
/ YouView
Canal+ / CanalSat / Deutsche
Telekom / Movistar / T-Home
DStv / Foxtel / Multichoice /
Sky New Zealand
Freebox / Sky Deutschland / Sky Österreich / TechniSat
Kabel Deutschland / Vodafone
KPN / Sagemcom / SFR
Orange / Samsung
Sky Ireland / Sky Italia / Sky UK
Strong / Vu+
Telenet / UPC / UPC Cablecom / Virgin Media / Ziggo
AUDIO
Bose
Denon
Harman/Kardon / JBL / Samsung
JVC / LG
Marantz / Philips
Onkyo
Panasonic / Technics
Pioneer
Sony
Yamaha
DVD en BLURAY
Denon / Onkyo
JVC
LG
Panasonic
Philips
Pioneer
Samsung
Sony
Toshiba
Yamaha
INSTELLEN
SIMPLESET
Uw apparaat instellen:
1. Schakel uw apparaat in (niet in stand-by) en richt de
Essential-afstandsbediening op het apparaat. Als u een
streamingapparaat wilt instellen, zorg er dan voor dat er een
lm of serie wordt afgespeeld.
2. Druk op de Apparaatknop die u wilt instellen (bijv.
TV).
3. Houd de knop Setup ingedrukt tot de led onder de
apparaatknop twee keer knippert.

79
SIMPLESET
INSTELLEN
INSTELLEN MET CODE
4. Houd het cijfer voor uw merk en het apparaat zoals
weergegeven in de tabel hierboven ingedrukt -
bijvoorbeeld 7 voor een Samsung-tv.
5. Voor alle apparaten, uitgezonderd Stream, zal de afstands-
bediening de aan-uit knop iedere 3 seconden zenden. Voor
een streamingkastje zal de afstandsbediening de Afspelen/
Pauzeren-functie zenden.
6. Laat het cijfer los zodra uw apparaat reageert door uit te
schakelen of te pauzeren (uitsluitend streamingkastje).
7. Het rode lampje knippert twee keer en u moet uw apparaat nu
met de afstandsbediening kunnen bedienen.
• Als een of meer knoppen niet werken zoals u verwacht, begint u
opnieuw bij stap 2. De afstandsbediening start met de volgende code
in het geheugen.
Als het merk van uw apparaat niet wordt weergegeven in de
SimpleSet-functie, kunt u proberen in te stellen met gebruik van
individuele codes. Zoek hiervoor eerst uw merk in de codelijst.
Codes worden weergegeven per merk en apparaat, in volgorde van
populariteit.
1. Schakel uw apparaat in (niet in stand-by) en richt de Essential-
afstandsbediening op het apparaat.
2. Druk op de Apparaatknop die u wilt instellen
(bijv. TV).
3. Houd de knop Setup ingedrukt tot de led onder de
apparaatknop twee keer knippert.
4. Voer de eerste 4-cijferige code zoals weergegeven
voor uw merk in (bijvoorbeeld 1840 voor LG).
5. De led knippert twee keer bij het laatste cijfer van de code.
6. Richt de afstandsbediening vervolgens op uw
apparaat en druk op de aan-uit knop.
7. Als het apparaat wordt uitgeschakeld, kunt u uw
afstandsbediening gebruiken. Als dit niet het geval is,
herhaalt u stap 2 t/m 6 met de volgende code in de lijst.
* Opmerking: Had uw originele afstandsbediening geen aan-uit knop,
test dan met een andere knop in stap 6. Druk bijvoorbeeld op
Afspelen of Pauzeren wanneer u een streamingkastje instelt en kijk of
de box reageert.
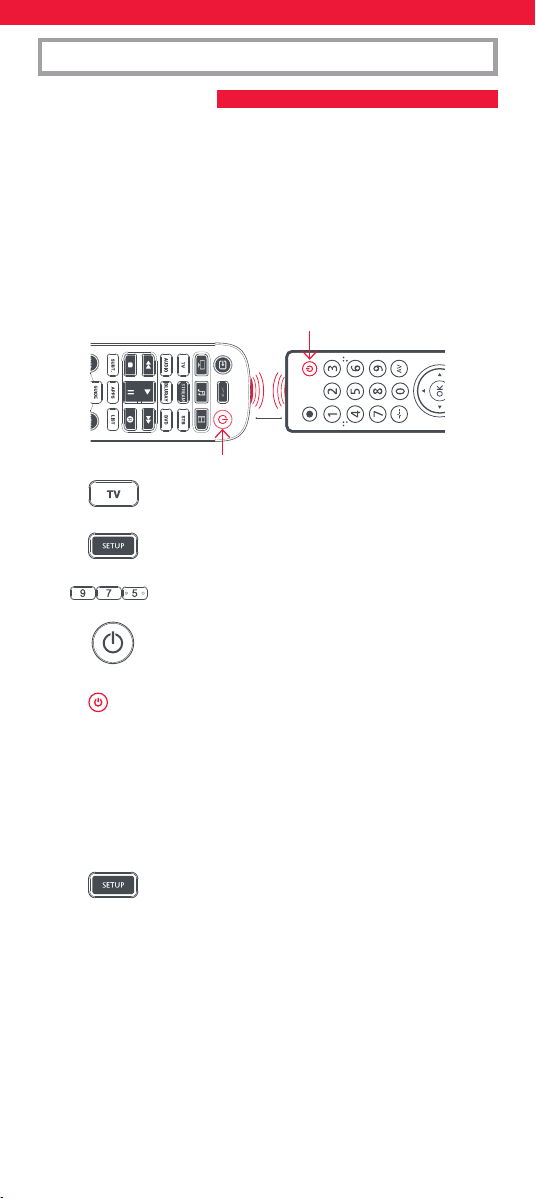
80
INSTELLEN
PROGRAMMEREN
U kunt op uw Essential-afstandsbediening elke functie van elke
andere werkende afstandsbediening programmeren. Dit is een snelle
en eenvoudige eenmalige instelling waarmee ieder via infrarood
aangestuurd apparaat in uw woonkamer kan worden bediend. U kunt
ook eventueel ontbrekende knoppen aan een reserveknop op de
Essential toewijzen.
Dit doet u als volgt. Zorg er allereerst voor dat u alle originele
afstandsbedieningen bij de hand hebt en dat deze van batterijen zijn
voorzien.
Houd, om functies te programmeren, de originele afstandsbediening
op ongeveer 3 cm afstand op de Essential-afstandsbediening gericht:
1. Druk op de Apparaatknop voor het apparaat
waarvan u functies wilt programmeren.
2. Houd de knop Setup ingedrukt tot de led onder de
apparaatknop twee keer knippert.
3. Toets 975 in. De led moet nu twee keer knipperen.
4. Druk kort op de knop waaronder u een functie wilt
programmeren (bijvoorbeeld de aan-uit knop van
de tv). De led begint snel te knipperen..
5. Druk kort* op de bijbehorende knop van de
originele afstandsbediening, bijvoorbeeld Aan/uit.
6. De led knippert twee keer om aan te geven dat de knop correct
is geprogrammeerd.
7. Herhaal stap 4 en 5 voor elke knop die u wilt programmeren.
Onthoud dat u knoppen van meerdere afstandsbedieningen
kunt programmeren, maar slechts één functie per knop.
8. Wanneer u alle functies die u wilt gebruiken
hebt geprogrammeerd, houdt u de knop Setup
ingedrukt totdat de led twee keer knippert.
* Sommige afstandsbedieningen verzenden opdrachten op een andere
manier. Als een functie niet kan worden geprogrammeerd, probeert
u het door de knop op de originele afstandsbediening ingedrukt te
houden in plaats van deze in te drukken en los te laten.
Tips:
• Als de led bij stap 5 één keer lang knippert, is de functie niet juist
geprogrammeerd. Begin opnieuw bij stap 4.
• Als een of meerdere knoppen na het instellen niet goed werken,
kunt u de knoppen altijd opnieuw programmeren door de
procedure vanaf stap 1 te herhalen.
2 - 5 CM
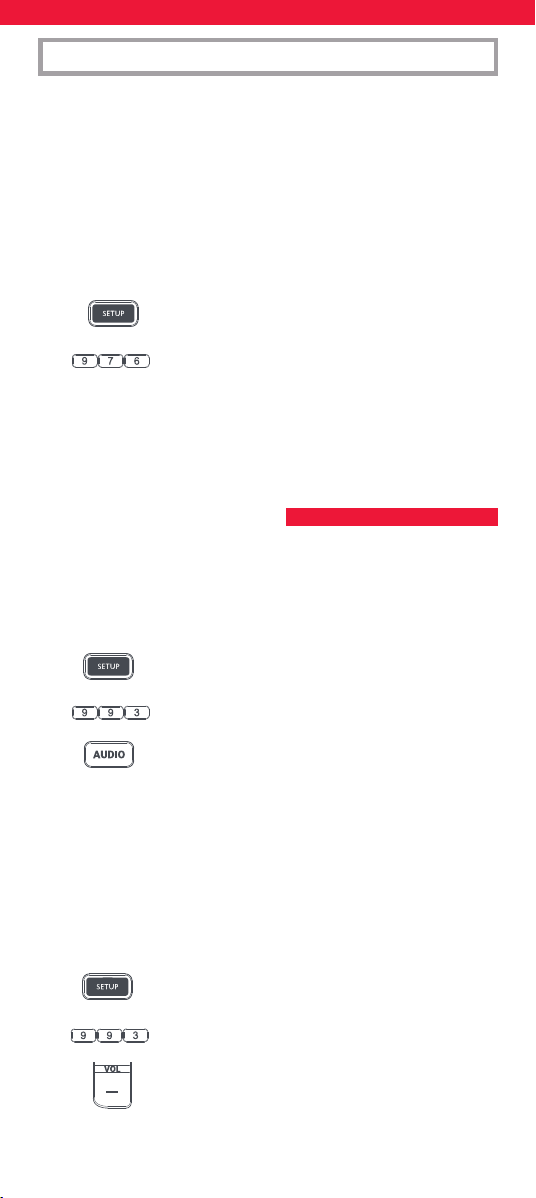
81
INSTELLEN
VOLUME VERGRENDELEN
Als u voornamelijk één apparaat gebruikt voor geluid, zoals een
soundbar of een audio-videoreceiver, dan kunt u uw Essential-
afstandsbediening programmeren om alleen dát apparaat aan te
sturen wanneer u het volume harder of zachter zet of dempt. Dit doet
u als volgt:
1. Houd de knop Setup ingedrukt tot de led onder de
apparaatknop twee keer knippert.
2. Toets 993 in. De led moet nu twee keer knipperen.
3. Druk op de apparaatknop voor het apparaat
dat altijd het volume zal bedienen - Audio
bijvoorbeeld.
4. De led knippert twee keer.
Vanaf nu bedient u met de knoppen Volume omhoog/omlaag/dempen
altijd het audio-apparaat, welk apparaat u op dat moment ook bedient.
De procedure om het volume te ontgrendelen en met de
afstandsbediening weer het volume van ieder afzonderlijk apparaat te
bedienen, is:
1. Houd de knop Setup ingedrukt tot de led onder de
apparaatknop twee keer knippert
2. Toets 993 in. De led moet nu twee keer knipperen
3. Druk op VOLUME OMLAAG – de led knippert vier
keer en het volume is nu ontgrendeld.
• Als een of meerdere originele afstandsbedieningen niet werken,
kunt u de Essential-afstandsbediening toch instellen met behulp
van SimpleSet of Code Set Up.
Een geprogrammeerde functie wissen
Gebruik onderstaande procedure om een geprogrammeerde functie te
wissen en terug te keren naar de originele functie van de betreende
knop:
1. Druk op de Apparaatknop voor het apparaat waarvan u
functies wilt programmeren.
2. Houd de knop Setup ingedrukt tot de led onder de
apparaatknop twee keer knippert.
3. Toets 976 in. De led moet nu twee keer knipperen
4. Druk twee keer op de knop die u wilt resetten. De led moet
nu twee keer knipperen en de geprogrammeerde functie is
gewist.
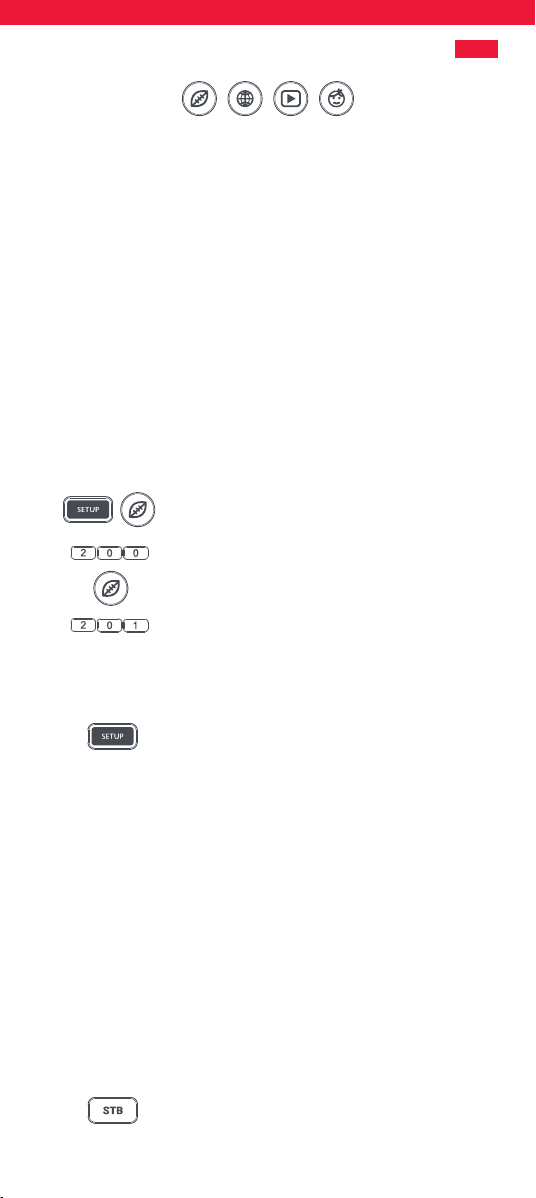
82
De rode, groene, gele en blauwe knoppen kunnen naast hun normale
functionaliteit ook worden geprogrammeerd om uw favoriete (genre)
programma’s te selecteren. Als u deze knoppen kort indrukt, voeren ze
exact dezelfde functie uit als op uw originele afstandsbediening.
Ze kunnen echter opnieuw worden geprogrammeerd zodat ze een
kanaalnummer versturen wanneer ze 3 seconden ingedrukt worden
gehouden en een ander kanaalnummer versturen wanneer ze
nog eens 3 seconden ingedrukt worden gehouden. Deze kanalen
kunt u groeperen per genre. Denk aan sport, nieuws, lms en
kinderprogramma’s.
De procedure om te programmeren is als volgt: Stel, bijvoorbeeld,
dat de kanalen 200, 201 en 239 de eerste 3 sportkanalen zijn. U kunt
dan snelkoppelingen naar deze kanalen toewijzen aan de rode (sport)
knop. Dit doet u als volgt: Kies eerst het apparaat dat u gebruikt om
live televisie te kijken. Als u bijvoorbeeld Sky-abonnee bent en u hebt
uw settopbox ingesteld onder STB, druk dan op deze knop. Nu kunt u
de kanaalsnelkoppelingen programmeren.
1. Houd de knop Setup en de rode knop ingedrukt tot
de rode led twee keer knippert.
2. Voer het eerste kanaalnummer in (200).
3. Druk kort op de rode knop.
4. Voer het volgende kanaalnummer in (201 in dit
voorbeeld)
5. Herhaal stap 3 en 4 voor elke kanaalsnelkoppeling die u wenst
toe te voegen.
6. Houd de knop Setup ingedrukt na invoeren van het
laatste gewenste kanaalnummer.
De rode led zal twee keer knipperen en de snelkoppelingen zijn
nu geprogrammeerd. Als u live tv kijkt, houdt dan de rode knop 3
seconden lang ingedrukt en de eerste kanaalsnelkoppeling wordt
verstuurd (in dit voorbeeld kanaal 200). De volgende keer dat u de
rode knop ingedrukt houdt, wordt de volgende kanaalsnelkoppeling
verstuurd (in dit geval kanaal 201).
U kunt ieder van de anders gekleurde knoppen herprogrammeren met
een andere lijst met kanaalnummers door de knop Setup ingedrukt te
houden samen met een anders gekleurde knop in stap 1 en dezelfde
knop in te drukken en los te laten in stap 3. Elke gekleurde knop heeft
een andere naam zodat u kunt onthouden welke kanalen u eronder
hebt opgeslagen. U kunt maximaal 10 verschillende kanaalnummers
per knop programmeren.
Mocht u de knop naar standaard willen resetten, dan is de procedure
als volgt:
1. Druk op de apparaatknop waaronder u de
snelkoppelingen hebt geprogrammeerd (STB
bijvoorbeeld).
MACRO’S VOOR KANAALSNELKOPPELINGEN
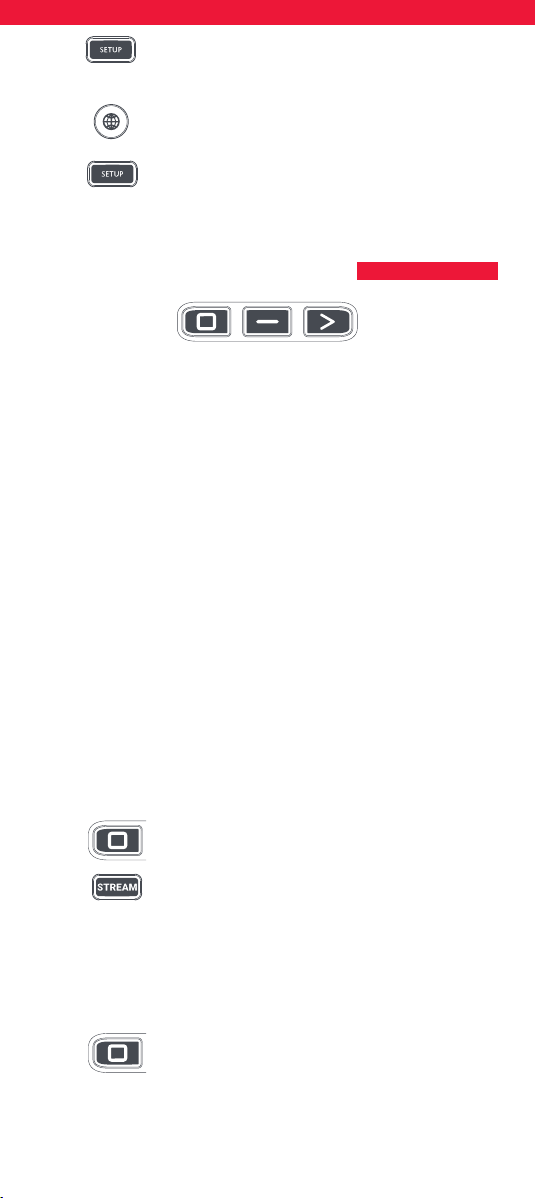
83
APP-SNELKOPPELINGSKNOPPEN
2. Houd de knop Setup en de knop die u wilt resetten
(bijvoorbeeld de groene knop) ingedrukt tot de
rode led twee keer knippert.
3. Druk kort op de knop die u wilt resetten
(bijvoorbeeld de groene toets).
4. Houd de knop Setup ingedrukt tot het rode lampje
twee keer knippert.
De knop is nu gereset.
De Essential beschikt over drie app-snelkoppelingsknoppen waarmee
u apps op uw smart-apparaten kunt openen. Als uw oorspronkelijke
afstandsbediening beschikt over een knop voor Netix, Amazon Prime
Video of YouTube, dan nemen deze knoppen dezelfde functionaliteit over.
Mocht u een dergelijke knop echter niet hebben en toch naar een
streamingdienst kunnen kijken, dan kunt u deze knop gebruiken als
een snelkoppeling door er een macro onder te programmeren. De
meeste AV-apparaten die met internet verbonden zijn, zoals smart-tv’s
of streaming-settopboxen, hebben een of meer applicaties die ze
kunnen uitvoeren om via internet tv te kunnen kijken. Voorbeelden
hiervan zijn Netix, YouTube, Amazon Prime en dergelijke.
Om de macro te programmeren, moet u eerst weten via welk apparaat
u gebruikmaakt van de dienst en welke volgorde van knoppen u
moet indrukken om altijd de dienst van uw voorkeur te activeren.
Zo starten sommige Panasonic-tv’s bijvoorbeeld Netix wanneer u
achtereenvolgens op de apps-knop, twee keer op menu omlaag en
ten slotte op OK drukt. Op een Apple-tv, bijvoorbeeld, is de volgorde
menu, menu omlaag en OK.
Doe het volgende zodra u de volgorde voor uw apparaat hebt bepaald
1. Ga voor het apparaat zitten terwijl het is ingeschakeld (niet op
stand-by).
2. Houd de app-snelkoppelingsknop ingedrukt tot de
led twee keer knippert en dan blijft branden
3. Druk op de apparaatknop voor het apparaat
dat u wilt gebruiken voor de macro (Stream
bijvoorbeeld).
4. Gebruik nu de knoppenvolgorde zoals u dit normaal ook zou
doen. De afstandsbediening bedient de televisie en de macro
wordt in realtime opgenomen. Dus maak u geen zorgen als het
enkele seconden duurt voordat uw apparaat reageert.
5. Zodra u de opeenvolgende stappen hebt
beëindigd en de streamingdienst op het apparaat
is gestart, houdt u de app-snelkoppelingsknop
ingedrukt tot de led twee keer knippert en dan uit
gaat. De macro is nu opgeslagen.
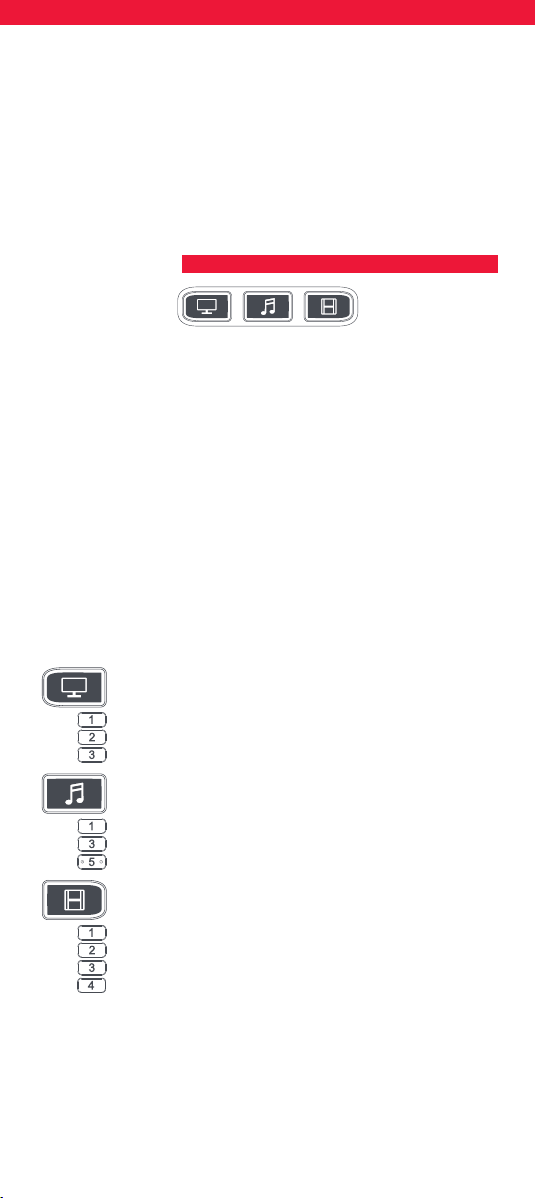
84
Tips
• Zorg er wel voor dat de Essential-afstandsbediening het
desbetreende apparaat bedient voordat u dit programmeert.
• Als u ontdekt dat de macro niet naar verwachting werkt, herhaalt
u eenvoudigweg dezelfde knoppenvolgorde om opnieuw te
programmeren.
• Wacht bij het programmeren tot het apparaat reageert; de
afstandsbediening onthoudt de timing.
• De app-snelkoppelingsmacro is gekoppeld aan één apparaat, zorg
ervoor dat u via het juiste apparaat aan het kijken bent.
Een activiteit is een combinatie van apparaten. Op een standaard
universele afstandsbediening moet u, wanneer u verschillende
apparaten wilt bedienen, tussen deze apparaten switchen met behulp
van de apparaatknoppen. Dus als u de invoer voor uw tv, de kanalen
en gids van uw Sky-box én het volume van uw soundbar wil regelen,
dan moet u hier steeds tussen switchen door op de TV-, STB- en
Audio-knoppen te drukken.
Op de Essential-afstandsbedieningen kunnen deze apparaten worden
gegroepeerd in een Activiteitsmodus. Dus nadat u op Tv-kijken hebt
gedrukt, zal de invoerknop de tv bedienen en zullen de knoppen
volume hoger/lager/dempen de soundbar bedienen terwijl de andere
knoppen de settopbox zullen aansturen.
De Essential-afstandsbediening heeft 3 activiteitsmodi, namelijk
Tv-kijken, Muziek luisteren en Film kijken.
Voor elk van deze modi kunnen verschillende apparaten worden
gecombineerd. Dit zijn:
Tv-kijken
Combinatie 1 - TV + STB + AUDIO (standaard)
Combinatie 2 - TV + STB
Combinatie 3 - TV + AUDIO
Muziek luisteren
Combinatie 1 - TV + BLU + AUDIO (standaard)
Combinatie 3 - TV + STREAM + AUDIO
Combinatie 5 - uitsluitend AUDIO
Film kijken
Combinatie 1 - TV + STREAM + AUDIO (standaard)
Combinatie 2 - TV + STREAM
Combinatie 3 - TV + BLU
Combinatie 4 - TV + BLU + AUDIO
Als u de standaardapparaten instelt voor een willekeurige activiteit
op de afstandsbediening (bijvoorbeeld een tv en een settopbox
voor Tv-kijken), wordt die activiteit automatisch ingesteld op de
afstandsbediening.
ACTIVITEITEN

85
AV-KEUZE
MACRO VOOR DE AAN-UITKNOP
Als u een andere combinatie wilt gebruiken, volgt u deze procedure:
1. Houd de Setup-knop ingedrukt tot de led onder de
apparaatknop twee keer knippert. De led onder het
apparaat in gebruik blijft branden.
2. Druk op de Activiteitsknop die u wilt instellen
(bijvoorbeeld Tv-kijken)
3. Druk op het nummer van de combinatie die u wilt
instellen, bijvoorbeeld 3 voor TV + AUD in Tv-kijken.
4. De led knippert twee keer en gaat vervolgens uit.
Druk op de Activiteitenknop als u de activiteiten wilt openen. U kunt
met elke willekeurige apparaatknop teruggaan naar de bediening per
apparaat.
De AV-knop is bedoeld om de invoer op uw tv te selecteren. De meeste
tv’s maken gebruik van een menu waarin u de invoer in een lijst kunt
selecteren. Daarom bedient u de tv tijdelijk met de knoppen voor
menu omhoog, omlaag, links en rechts en de knop OK, wanneer u
de AV-knop hebt ingedrukt in een activiteit. Als de knop OK wordt
ingedrukt of als er gedurende tien seconden geen knop wordt
ingedrukt, keren deze knoppen terug naar het bedienen van het
relevante apparaat voor de activiteit (bijvoorbeeld STB in de modus
Tv-kijken).
Als u de aan-uitknop 2 seconden ingedrukt houdt in een activiteit,
stuurt de afstandsbediening het aan-uitsignaal naar elk apparaat
binnen die activiteit. Als u dus bijvoorbeeld de aan-uitknop ingedrukt
houdt in de standaardinstelling voor Tv-kijken, worden zowel de tv als
de settopbox in- of uitgeschakeld.
Deze afstandsbediening bevat SteriTouch®. De afstandsbediening
is gedurende haar gehele bruikbare levensduur beschermd tegen
het ontstaan/de ontwikkeling van bacteriën en schimmels. Scan
de QR-code () of ga naar www.oneforall.com/antimicrobial voor
meer informatie over antimicrobiële bescherming en SteriTouch
zilveriontechnologie.
Dit product bevat zilverfosfaatglas, een biocide die de ontwikkeling
van micro-organismen op het productoppervlak reguleert.
Dit product bevat geen nanomaterialen.
De aanwezigheid van een biocide sluit een regelmatige
reiniging van het product niet uit.

86
ENGLISH
PRODUCT DISPOSAL
(EUROPEAN DIRECTIVE 2012/19/EU)
The crossed out wheeled bin symbol on this product ensures that this product is manufactured using
high quality components that can be recycled and reused according European Directive 2012/19/EU.
Please do not dispose of this product with your normal household waste, refer to local regulations for
the proper collection or disposal of electrical and electronic products. This will help this will help in
preventing negative eects on the environment and/or human health.
BATTERY DISPOSAL
(EUROPEAN DIRECTIVE 2006/66/EC)
Please do not dispose of your batteries with your normal household waste, refer to local regulations for the proper
collection or disposal. This will help preventing potential negative eects on the environment and/or human health.
GUARANTEE TERMS AND CONDITIONS UNIVERSAL ELECTRONICS warrants to the original purchaser that this
product will be free from defects in materials and workmanship under normal and correct use for a period of two (2)
years from the date of original purchase. This product will be repaired or if necessary, replaced free of charge if it has
been proven to be defective within the two(2) year warranty period. The forwarding costs are on the account of the
owner; the costs of returning the product are on the account of UNIVERSAL ELECTRONICS.
This warranty does not cover damage or failures caused by products or services not supplied by UNIVERSAL
ELECTRONICS, or which result from not mounting the product according to manual instructions. This also applies
when the product has been modied / repaired by others than UNIVERSAL ELECTRONICS or if a fault is the result of
accident, misuse, abuse, neglect, mishandling, misapplication, faulty installation, improper maintenance, alteration,
modications, re, water, lightning, natural disasters, wrong use or carelessness.
To obtain warranty service during the warranty period contact […], and please note that we need your original purcha-
se receipt so that we may establish your eligibility for service. If you have bought this product for purposes which are
not related to your trade, business or profession, you may have legal rights under your national legislation governing
the sale of consumer goods. This guarantee does not aect those rights. www.oneforall.com
DEUTSCH
PRODUKT-ENTSORGUNG
(EU-RICHTLINIE 2012/19/EU)
Das Symbol “durchgestrichene Mülltonne” auf diesem Produkt bedeutet, dass dieses Produkt mit hoch-
wertigen Komponenten gefertigt wurde, die gemäß der EU-Richtlinie 2012/19/EU wiederverwertet
und wiederverwendet werden können. Bitte entsorgen Sie dieses Produkt nicht mit dem normalen
Hausmüll, sondern beachten Sie die örtlichen Vorschriften für die ordnungsgemäße Sammlung
oder Entsorgung von elektrischen und elektronischen Produkten. Dies trägt dazu bei, negative
Auswirkungen auf Gesundheit und/oder Umwelt zu vermeiden.
BATTERIE-ENTSORGUNG
(EU-RICHTLINIE 2006/66/EC).
Bitte entsorgen Sie Batterien nicht mit dem normalen Hausmüll, sondern beachten Sie die örtlichen Vorschriften für die
ordnungsgemäße Sammlung oder Entsorgung. Dies trägt dazu bei, mögliche Gesundheits-und/oder Umweltschäden
zu vermeiden.
GARANTIEBEDINGUNGEN UNIVERSAL ELECTRONICS garantiert dem Originalkäufer für den Zeitraum von zwei
Jahren, ab dem Datum des Originalkaufs, die Material- und Mängelfreiheit dieses Produkts bei üblicher und korrekter
Benutzung. Dieses Produkt wird kostenlos repariert oder, falls erforderlich, ersetzt, wenn es sich nachweislich innerhalb
der Garantiefrist von zwei (2) Jahren als defekt erwiesen hat. Die Versandkosten gehen zu Lasten des Eigentümers,die
Kosten für die Rücksendung des Produkts gehen zu Lasten von UNIVERSAL ELECTRONICS. Die Garantieabdeckung
erstreckt sich geographisch auf alle Staaten, in denen wir dieses Produkt anbieten.
Diese Garantie deckt keine Schäden oder Fehler ab, die verursacht sind von Produkten oder Leistungen,
die nicht von UNIVERSAL ELECTRONICS geliefert wurden, oder die daraus resultieren, dass das Produkt
nicht gemäß der Bedienungsanweisungen montiert wurde. Dies gilt auch, wenn das Produkt von
anderen als UNIVERSAL ELECTRONICS modi¬ziert / repariert wurde, oder wenn ein Defekt die Folge
eines Unfalls, Missbrauchs, falscher Benutzung, Fahrlässigkeit, falscher Anwendung, falscher Installation,
unsachgemäßer Wartung,Änderung, Feuer, Wasser, Blitzschlag, Naturkatastrophen oder Unachtsamkeit ist.
Bitte nehmen Sie zur Kenntnis, dass Sie uns für den Erhalt der Garantieleistung während der
Garantiefrist Ihre Originalkaufquittung vorlegen müssen,damit wir Ihren Anspruch auf die Leistung
überprüfen können. Wenn Sie dieses Produkt nicht für einen Zweck gekauft haben, der mit Ihrem
Handel,Geschäft oder Beruf zusammenhängt, beachten Sie bitte, dass Ihnen möglicherweise
gesetzliche Rechte als Verbraucher zustehen, die den Verkauf der Verbrauchsgüter betreen. Die Garantie beeinusst
diese Rechte nicht. Wenn Sie diese Garantie in Anspruch nehmen wollen, kontaktieren Sie bitte www.oneforall.com
FRANÇAIS
MISE AU REBUT DU PRODUIT
(DIRECTIVE EUROPÉENNE 2012/19/EU)
Le symbole représentant une poubelle sur roues marquée d’une croix apposé sur ce produit garantit
qu’il a été fabriqué à l’aide de composants de haute qualité pouvant être recyclés et réutilisés confor-
mément à la Directive européenne 2012/19/UE. Vous ne devez pas jeter ce produit avec les déchets
ménagers courants. Reportez-vous aux réglementations locales pour connaître les procédures de
collecte spéciques aux équipements électroniques et électriques. Celles-ci ont pour objectif de
minimiser les eets nocifs sur l’environnement et/ou la santé humaine.
MISE AU REBUT DES BATTERIES/PILES
(DIRECTIVE EUROPÉENNE 2006/66/CE)
Vous ne devez pas jeter vos batteries/piles avec les déchets ménagers courants. Reportez-vous aux réglementations
locales pour connaître les procédures de collecte spéciques. Celles-ci ont pour objectif de minimiser les eets nocifs
sur l’environnement et/ou la santé humaine.
CONDITIONS GENERALES DE GARANTIE UNIVERSAL ELECTRONICS / ONE FOR ALL garantit à l’acheteur initial que ce
produit, dans des conditions normales et correctes d’utilisation, sera dépourvu de dysfonctionnement matériel et de
vice de fabrication pendant une période de deux (2) ans à compter de la date d’achat originale du produit.
Si, pendant cette période de garantie de deux (2) ans, il devait s’avérer que le produit était défectueux, ce produit
sera réparé ou, si nécessaire, remplacé gratuitement. Les frais d’expédition seront à la charge du propriétaire ; les
frais de réexpédition seront à la charge de UNIVERSAL ELECTRONICS. Cette garantie ne couvre pas les dommages ou
les dysfonctionnements provoqués par des produits ou par des services non fournis par UNIVERSAL ELECTRONICS,
ou résultant d’un montage non conforme du produit à ce qui est indiqué dans le manuel d’instructions. Cette règle
s’applique également si le produit a été réparé et / ou modié par d’autres que UNIVERSAL ELECTRONICS ou si le
dysfonctionnement résulte d’un accident, d’une utilisation incorrecte, d’un usage abusif, d’une négligence, d’une
mauvaise manipulation, d’une application incorrecte, d’une installation incorrecte, d’une maintenance inadaptée,
d’une altération, de modications, de dommages provoqués par le feu, par l’eau, par un éclair, par une catastrophe
naturelle, par une utilisation inadaptée ou par une absence d’entretien. Pour être en mesure d’obtenir le service de
garantie pendant la période de garantie contactez UNIVERSAL ELECTRONICS: www.oneforall.com, et veuillez noter qu’il
nous faut votre bon d’achat (facture) original an que nous puissions établir si vous pouvez eectivement bénécier
du service de la garantie.
Si vous avez acheté ce produit sans raison commerciale ni professionnelle, veuillez noter qu’il est possible que la
législation de protection des consommateurs de votre pays vous donne certains droits. Cette garantie n’aectera pas
ces droits. www.oneforall.com

87
ESPAÑOL
ELIMINACIÓN DEL PRODUCTO
(DIRECTIVA EUROPEA 2012/19/EU)
El símbolo de contenedor de basura tachado en este producto garantiza que este producto está
fabricado utilizando componentes de alta calidad que pueden reciclarse y reutilizarse según la directiva
europea 2012/19/UE. No deseche este producto con los residuos domésticos normales, consulte las
regulaciones locales sobre la recogida o eliminación adecuada de productos eléctricos y electrónicos.
De esta forma se evitarán los posibles efectos negativos sobre el medio ambiente y la salud.
ELIMINACIÓN DE PILAS
(DIRECTIVA EUROPEA 2006/66/CE)
No deseche las pilas con los residuos domésticos normales, consulte las regulaciones locales sobre la recogida o
eliminación adecuada. De esta forma se evitarán los posibles efectos negativos sobre el medio ambiente y la salud.
TÉRMINOS DE LA GARANTÍA UNIVERSAL ELECTRONICS / ONE FOR ALL garantiza al comprador que este producto
estará libre de defectos materiales o de fabricación, al menos durante dos (2) años desde la fecha del tique o factura
de compra, o del albarán si la entrega es posterior, y en caso de que siempre y cuando se utilice de un modo normal y
correcto. El producto será reparado o reemplazado en caso necesario gratuitamente si se demuestra que era defectuoso
dentro del periodo de garantía de dos (2) años. El coste de remitir el producto será a cargo del propietario; el coste de
devolvérselo la devolución será a cargo de UNIVERSAL ELECTRONICS / ONE FOR ALL.
Si el comprador goza de la condición de consumidor, habiendo adquirido este producto con propósitos que no
estén relacionados con su comercio, negocio o profesión, UNIVERSAL ELECTRONICS garantiza al comprador que este
producto estará libre de defectos materiales o de fabricación, al menos durante dos (2) años desde la fecha del tique o
factura de compra, o del albarán si la entrega es posterior, y en caso de que se utilice de un modo normal y correcto. El
producto será reparado, o reemplazado en caso necesario, gratuitamente si se demuestra que era defectuoso dentro
del periodo de garantía de dos (2) años, sin que el comprador que goce de la condición de consumidor deba abonar
ningún coste relativo al envío o devolución del producto. Esta garantía no afecta a los derechos legales del consumidor
y usuario ante la falta de conformidad de los productos con el contrato.
Esta garantía no cubre daños ni pérdidas causados por productos o servicios no suministrados por UNIVERSAL
ELECTRONICS o que hayan sido resultado de no montar el producto de acuerdo con las instrucciones del manual. Esto
se aplica igualmente a los casos en que el producto haya sido modicado / reparado por terceros no pertenecientes a
UNIVERSAL ELECTRONICS o en caso de que el fallo sea resultado de accidente, mal uso, abuso, negligencia, manejo o
empleo incorrectos, instalación defectuosa, mantenimiento inapropiado, alteración, modicaciones, incendio, acción
del agua, rayo, desastres naturales, uso inapropiado o descuido.
Para acceder al servicio de garantía durante el periodo de garantía, tenga por favor en cuenta que necesitamos su
recibo de compra original para poder establecer su derecho al servicio.
Para acceder al servicio de garantía, póngase en contacto con el distribuidor del que haya adquirido el producto o con
el servicio de atención al cliente de UNIVERSAL ELECTRONICS: www.oneforall.com
ITALIANO
SMALTIMENTO DEL PRODOTTO
(DIRETTIVA EUROPEA 2012/19/EU)
Il simbolo del cestino con le ruote barrato assicura che questo prodotto è realizzato utilizzando com-
ponenti di alta qualità che possono essere riciclati e riutilizzati in base alla Direttiva europea 2012/19/
UE. Non smaltire questo prodotto con i normali riuti domestici, fare riferimento alle normative locali
per la corretta raccolta o il corretto smaltimento dei prodotti elettrici ed elettronici. In questo modo si
eviteranno gli eetti negativi sull’ambiente e/o sulla salute delle persone.
SMALTIMENTO DELLE BATTERIE
(DIRETTIVA EUROPEA 2006/66/CE)
Non smaltire le batterie con i normali riuti domestici, fare riferimento alle normative locali per la corretta raccolta o
il corretto smaltimento. In questo modo si eviteranno i potenziali eetti negativi sull’ambiente e/o sulla salute delle
persone.
TERMINI E CONDIZIONI DI GARANZIA UNIVERSAL ELECTRONICS garantisce all’acquirente originale che questo
prodotto sarà privo di difetti di materiale e di realizzazione se sottoposto ad un utilizzo normale e corretto per un
periodo due (2) anni dalla data del primo acquisto. Questo prodotto sarà riparato o, se necessario, sostituito senza alcun
addebito se verrà dimostrato essere difettoso entro il periodo di garanzia due (2) anni. I costi di spedizione sono a carico
del possessore; i costi di restituzione del prodotto sono a carico della UNIVERSAL ELECTRONICS.
Questa garanzia non copre danni o guasti causati da altri prodotti o servizi non forniti dalla UNIVERSAL ELECTRONICS,
o conseguenti ad un montaggio del prodotto non conforme a quanto descritto nel manuale di istruzioni. Questo vale
anche se il prodotto è stato modicato / riparato da altra parte diversa da UNIVERSAL ELECTRONICS, o se un guasto
risulta essere conseguenza di incidente, uso scorretto, abuso, negligenza, maneggiamento scorretto, utilizzo scorretto,
installazione errata, manutenzione impropria, alterazione, modiche, incendio, acqua, fulmine, disastri naturali, uso
sbagliato o incuria.
Per ottenere l’assistenza in garanzia durante il periodo coperto da garanzia contattare UNIVERSAL ELECTRONICS: www.
oneforall.com. È necessario esibire la ricevuta d’acquisto originale, in modo tale da confermare il proprio diritto al
servizio. Se ha acquistato questo prodotto per scopi che non si riferiscono al suo mestiere, azienda oppure professione,
per favore prenda atto che potrebbe avere diritti legali previsti dalla sua legislazione nazionale che determina la vendita
di beni di consumo. Questa garanzia non inuisce su questi diritti. www.oneforall.com
PORTUGUÊS
ELIMINAÇÃO DO PRODUTO
(DIRECTIVA EUROPEIA 2012/19/EU)
O símbolo de um contentor de lixo barrado com uma cruz constante deste produto garante que este
produto é fabricado com componentes de alta qualidade que podem ser reciclados e reutilizados em
conformidade com a Diretiva Europeia 2012/19/UE. Não elimine este produto com o seu lixo doméstico
normal, consulte os regulamentos locais para se informar sobre a recolha ou eliminação corretas de
produtos elétricos e eletrónicos. Isto ajudará a prevenir efeitos negativos no ambiente e/ou na saúde
humana.
ELIMINAÇÃO DA BATERIA (DIRECTIVA EUROPEIA 2006/66/CE)
Não elimine as baterias com o seu lixo doméstico normal, consulte os regulamentos locais para se informar sobre a recolha
ou eliminação corretas. Isto ajudará a prevenir potenciais efeitos negativos no meio-ambiente e/ou na saúde humana.
A UNIVERSAL ELECTRONICS INC/ONE FOR ALL garante ao cliente a proteção deste produto no que respeita a
defeitos de fabrico de material, dentro de um período de uso correto e normal de 1 ano a partir da data da compra
do mesmo. Este produto será substituído sem qualquer encargo no caso de ter sido comprovada qualquer
avaria dentro do período de 1ano e após o seu retorno (custos de envio da responsabilidade do consumidor)
dentro deste mesmo prazo. Esta garantia não cobre embalagens de cartão, caixas , pilhas, ou outros itens usados
em conjunto com este produto. Qualquer outra obrigação para além daquela acima descrita não será tida em
consideração. Por favor tome nota que ser-lhe á pedido o comprovativo de compra de forma a que possamos
conrmar a sua legitimidade para nosso serviço. Se você comprou este produto para propósitos que não estejam
relacionados ao seu negócio ou prossão, por favor tenha em conta que você pode ter direitos legais verique
a sua legislação nacional que governa a venda de produtos de consumidores. Esta garantia não afeta esses direitos.
Esotérico | 800 831397 | www.oneforall.com

88
NEDERLANDS
PRODUCT VERWIJDEREN
(EUROPESE RICHTLIJN 2012/19/EU)
Met het symbool van een doorgestreepte container op dit product wordt gegarandeerd dat het
product is vervaardigd met onderdelen van hoge kwaliteit die kunnen worden gerecycled en
hergebruikt volgens de Europese richtlijn 2012/19/EU. Gooi dit product niet weg bij uw normale huis-
afval. Raadpleeg de lokale regelgeving voor de juiste verzameling of vernietiging van elektrische en
elektronische producten. Dit help negatieve eecten te voorkomen op het milieu en/of de menselijke
gezondheid.
BATTERIJ VERWIJDEREN
(EUROPESE RICHTLIJN 2006/66/EC)
Gooi uw batterijen niet weg bij uw normale huisafval. Raadpleeg de lokale regelgeving voor de juiste verzameling of
vernietiging. U voorkomt hierdoor mogelijke schade aan de omgeving en/of volksgezondheid.
ALGEMENE GARANTIEVOORWAARDEN UNIVERSAL ELECTRONICS garandeert de oorspronkelijke koper dat
dit product bij normaal en correct gebruik vrij zal zijn van materiaal- en fabricage fouten, gedurende een periode van
twee (2) jaar vanaf de datum van oorspronkelijke aankoop. Dit product zal kosteloos worden gerepareerd of indien
nodig vervangen worden, wanneer het binnen de garantieperiode van twee (2) jaar defect blijkt te zijn. De kosten voor
het opsturen van het product zijn voor rekening van de eigenaar; de kosten voor het terugzenden van het product zijn
voor rekening van UNIVERSAL ELECTRONICS.
Deze garantie dekt geen schade of storingen veroorzaakt door producten of diensten die niet door UNIVERSAL
ELECTRONICS zijn geleverd, of die een gevolg zijn van het installeren van het product op een andere wijze dan in
de handleiding is voorgeschreven. Dit is ook van toepassing indien het product is gemodiceerd/gerepareerd
door anderen dan UNIVERSAL ELECTRONICS of indien een defect het gevolg is van een ongeluk, misbruik, onjuiste
behandeling, verwaarlozing, veronachtzaming, onjuiste toepassing, foutieve installatie, onjuist onderhoud, wijziging,
modicaties, brand, water, blikseminslag, natuurrampen, verkeerd gebruik of slordigheid.
Om voor bovenstaande garantie in aanmerking te komen dient u een origineel aankoopbewijs te overleggen en
contact op te nemen met uw distributeur of UNIVERSAL ELECTRONICS : www.oneforall.com. Indien u dit product
gekocht heeft voor doeleinden anders dan in uitvoering van uw vak, bedrijf of beroep, let er dan op dat u eventueel
gebruik kunt maken van het consumentenrecht die, ten aanzien van consumptiegoederen, onder uw nationale
wetgeving vallen. Deze garantie heeft geen eect op die rechten. www.oneforall.com

89
TV
A.R. Systems 0556
Acer 3539, 3630, 2530
Acoustic Solutions 1585, 1523, 2676
Acronn 2561
Adcom 0625
AEG 2530, 2457, 2197,
1585
Agfaphoto 2719
Airis 2561
Aiwa 4542, 3512, 3434
Akai 2676, 3611, 1523,
3528, 3512, 3067,
3719, 0714, 1585,
3810, 4022, 0556,
2197, 3434, 3983,
4136
Akira 2457, 2530
Akura 0714, 1585, 2676,
1983
Alba 2676, 3587, 3810,
1585, 0714, 3005,
3067, 2214, 4132,
1523, 2561, 3589,
3964
Allview 3611
Altius 3611
Altus 0714, 2663
Amoi 3047
AmTRAN 2127
Andersson 2676, 1585, 3719
Ankaro 3528
Antarion 3719, 2676
AOC 2214, 0625
Arcelik 3433
Arçelik 4212, 3433, 2663
Ardem 0714
Arena 2676, 0714
Arielli 3528
Arise 4136
Aristona 0556
Art Mito 1585
AS 1585, 1523, 2676
Asano 4022
Audiosonic 0714, 3067, 1983
Audio-Technica 0653
Aukera 3572
Autovox 2676, 1585
Awa 3296, 2530, 2457,
3090
Axdia 2719, 2530, 3512,
2457
Axxion 4155
Axxon 0714
Aya 2676, 3719, 1585
B & O 5295
Baird 3090
Bang & Olufsen 5295
Barco 0556
Basic Line 0556
Bauer 2197
Bauhn 3611
Baur 0195
BBK 2530, 1523
Beko 0714, 4212, 2125,
3433, 2663
Belson 3296
BenQ 1523
Berthen 0556
Betfred 2676, 3719
Blaupunkt 3810, 2426, 0195,
3611, 4843
Blu:sens 4059
Blue Sky 0714, 0556, 0625
BlueDiamond 2426
Bluesky 0714, 0556, 0625
Bluetech 2561
bogo 2561, 3512, 3528
BPL 4136, 4539
Brandt 0625, 2676, 3296,
1585, 4542, 3434,
3611, 0714, 3528,
3983
BuBuGao 2530, 1523
Bush 2676, 3810, 3719,
2214, 3964, 3005,
3589, 0714, 2530,
2888, 4132, 5201,
3983, 2673, 1585,
3587, 3820, 4346,
1983, 0556, 2125,
1523, 2457, 2719,
4136, 2127
Cabletech 3296
Caixun 3528
Cameron 1523
Canox 3611
Caratec 3067
Celcus 2676, 3719, 1585
cello 3820, 2673
Changhong 3434, 3296
Chimei 1852, 1666
CHL 3067
Chromex 1585
Clatronic 0714
Clayton 3719, 2676
CMX 3296, 3067
Condor 4136
Conia 1523
Conrad 3719
Continental Edison 2676, 3719, 4022,
2530, 3983, 2457,
3512, 1585, 3528,
4132
CPTEC 0625
Cranker 3719
Crown 0714, 2676, 0653,
3434, 3719
Currys Essentials 2486
Daewoo 2275, 0556, 2125
Daewoo Display 2275
Dantax 2676, 0714
Days 2561
Denver 3067, 2197, 3515,
4155
DEXP 3528, 3434, 3572,
4539, 4348, 4136
Dgtec 2457
CODE LIST

90
Dick Smith
Electronics 3296, 2457, 2530,
3572
Dicra 3528
Diero 2676
Digatron 2890
Digihome 3719, 2676, 3983,
4501, 5201, 1585
Digitrex 3067
Dikom 2676, 2561, 3719,
3528
diVision 2197
DMTech 2676
DNS 3572, 3528, 3434,
4136
Doer 3528, 4539, 4348,
3434
Donghai 3611, 3528, 3067,
3296
DSE 3296, 2457, 2530,
3572
Dual 3719, 2197, 2676,
1585, 3067, 3611,
3820, 0714
Durabase 2676, 3719
Durabrand 1595, 0714
D-Vision 2197, 0556
DW Display 2275
DX Antenna 1817
Dyon 3512, 3525, 2457,
2530
Easy Living 1666, 2005
ECG 2197, 2125, 3528,
3296, 0714, 3067,
3434
Eco-Star 3572
EGL 3611
Elbe 2676, 0556
Elect 3067
Electriq 3719, 5201
Electrolux 1585
Electronia 2676, 3719
Element 4398
Elenberg 3512
Eletra 3719
Elite 1457
Emerson 1595, 0714
e-motion 2426, 3810, 2106
Engel 3512
Enox. 2673, 3820
Envision 1506
Epworth 4542, 3512, 3434
Erisson 4542, 3528, 3047,
3434, 4136
ESA 1595
Essentials 2486
Essentiel b 2676, 4306
e-Star 3528
Eternity 3810, 2426
Everest 3528
Everline 3512, 3528
Evesham Technology 1248
Evotel 2561, 3589
Express Luck 3528
F&U 2530, 2676, 3719
FairTec 1585, 2676, 2561
Favi 2676
Fedders Lloyd 4136, 4539
Felson 3719, 2676
Ferguson 0625, 2676, 3005,
0653, 2426, 0195,
1585, 3874
FFalcon 3047, 4259
Finlux 3719, 2676, 3983,
1585, 0714, 0556,
5201, 1248
Firstline 0714, 0556
Fisher 1585
Fox 3528
Fujicom 3719, 2676
Fujitsu Siemens 1666, 1248
Funai 1817, 1595, 3719,
1666, 0714
Funai United 2530, 2676, 3719
Fusion 3047, 3528
Futronic 1585
Futura 3296
Galatec 3528
GE 0625
Gelhard 3719
General Electric 0625
Godrej 1585
GoGen 3719, 2676, 1585
GoldStar 3047, 0714, 3512,
4542, 3434, 3572
Goodmans 3820, 1585, 2393,
1523, 1983, 2223,
2676, 0714, 2125,
2127, 0556, 0625,
2005, 2426, 2214
Gorenje 1585, 2676
Gradiente 0653
Graetz 1585, 3528, 0714,
4542
Gran Prix 2197
Grandin 3434, 2676, 0714,
3719, 4306, 0556,
1585, 2125, 3983
Grundig 4212, 0195, 3433,
1223, 2890, 2663,
2125, 3296, 0556,
2127, 1523, 3067,
2676, 2561
Grunkel 3528, 2676, 3512,
1523
GVA 3611, 3296, 2561,
3067
Haier 2888, 1983, 2214,
2530, 3719, 4398,
2457
Handic 2676
Hannspree 2786
Hanseatic 0714, 0625, 0556
Hantarex 2197
Harper 4542, 3512, 3528
Harrow 3719, 1585, 2676
HB 0714
HB Ingelen 0714
Helix 3528
Heran 1852
Hightong 4542
Hikona 1983
TV

91
Hi-Level 3719
Hisawa 0714
Hisense 4539, 2399, 4348,
4136, 4728, 0556,
5370, 4398, 2197,
3296
Hitachi 2676, 1576, 2207,
3719, 5201, 1585,
1484, 4398, 2214,
3611, 2005, 3512,
2127, 3983
HKC 3512
Höher 2676, 0714, 2125,
3434
Horizon 3719, 3528, 2676
Horizont 0714
Hugoson 1666
Hypson 0714, 0556
Hyundai 2676, 3719, 1585,
3434, 3528, 4136,
1523, 3512, 3611
iFFALCON 4259
i-INN 3528
i-Joy 3528, 3512, 3067,
1523
Inniton 3528
Ingelen 0714
Inno Hit 2676, 1585, 3528
Insignia 1423
Internal 0556
Inves 3528, 3512
Isis 2676
ITT 3719, 0714, 2399,
2675, 2125, 2676,
1523
Izumi 3434, 3528
Jay-tech 3611, 3067
Jinxing 0556
JMB 2676, 3810, 3719,
0556, 2426, 1585
JTC 3611, 3067
Jubilee 0556
JVC 0653, 2118, 1818,
3719, 2676, 3874,
3802, 2005, 3296,
4398, 3047, 3983,
4244, 3572
Kaisui 3528
Karcher 2125, 0714
Kathrein 0556
Kendo 3719, 1585, 2676
Kenmark 2393
Kennex 3296
Kenstar 2548
Kioto 0556
Kneissel 0556
Kogan 3572, 3296, 4291,
3528, 2888, 3434
Koncar 3719
Konka 3572, 0714
Krüger&Matz 3296, 3802
Kunft 3434, 3719
Küppersbusch 2676
L&S Electronic 0714
Laurus 2676
Lava 2197
Lazer 3719
Leiker 2676
Lenco 3515, 4155, 4346,
1983, 2676
LG 1840, 1860, 4397,
1423, 2182, 5168,
0714, 4398, 0556,
1576
Liberton 2675, 3047
Lifetec 0714
Linden 3296, 3528
Linetech 2676
Linsar 2676, 3719, 3611,
1585
Listo 4306, 2676, 3719,
4155, 4542
Lloyd 4136, 4539
Loewe 1884
Logik 3831, 3005, 3802,
2486, 3719, 2673,
1585, 5201, 2530
Luxor 2676, 3719, 3983,
1585, 5201
M&S 2673
Magnavox 1506, 1887, 2800,
2676, 4398
Magnum 0714
Majestic 3611, 3512
Manata 3512
Manhattan 2676, 3719
Manta 3528, 3512
Marantz 0556
Mark 0714
Marks & Spencer 2673
Mascom 2125, 2197, 2663
Master 4022
Mastro 0653
Matsui 0195, 2486, 2676,
1585, 1666, 0714,
0556, 2561
Mediator 0556
Medion 2676, 4447, 4155,
2719, 1248, 0714,
1585, 3067, 3983,
0556, 3515
Meile 3047
Melectronic 0195, 0714
Melody 3047
Memory 1983
Metronic 0625
Metz 1533, 4289, 0195
Micromax 3572
Micromaxx 0714
Miia 3512
Mikomi 1585
Minerva 1248, 0195
Mirai 1666, 1852
Mitchell & Brown 3719
Mitsai 2676, 2106, 3434,
1585
Mitsubishi 0556
Mitsubishi Electric 0556
Mitsun 4136
Mivar 0609
Mobile Tv 3719
Moserbaer 1585
TV

92
mp man 3067, 3296
MTlogic 0714
Murphy 2676, 2426, 2673,
2005, 1585
Mx Onda 1983
My TV 3090
Myrica 1666
Myryad 0556
Mystery 3296, 2530, 3047,
3528
Nabo 3719
Navon 3719
Naxoo 3515
NEC 0653, 2461, 1852
Neckermann 0556
NEI 3611, 3983
NEO 2676, 3528, 3719
Neon 2673, 3820
Nesons 3528
Neufunk 0556, 0714
Nevir 3528, 2676, 3719
New Tech 0556
Next 2676
Nikkei 2676, 1585, 2197,
3719, 0714, 5201
Nordmende 2676, 2548, 3512,
0195, 1585, 3528,
0714
Novex 1523
Novita 1585
NPG 3434
Nu-Tec 3090
Ocean 3434
Oceanic 4022, 3719, 3611
Odys 2719, 2530, 3512,
2457
OK. 3802, 2676, 3434,
3810, 3719, 3047
Okano 3168
Okeah 3434
OKI 2676, 1585, 2125,
3434, 2947
Onida 0653
Onimax 0714
Onn 4398, 2125, 1585
Opera 0714
Opticum 3611
Orava 3719, 3296, 3528,
3512
Orima 3719
Orion 4346, 2005, 3874,
2676, 2108, 0714,
0556, 3512, 2197,
3434, 4136, 4542
Osaki 0556
Otic 1983
Otto Versand 0556, 0195
Pacic 0714, 0556
Packard Bell 3630
Palladium 0714, 0556
Palsonic 2461, 3067, 4155,
4291
Panasonic 1636, 3825, 4501,
0653, 3719
Panavideo 3825
Pendo 3434, 4291
Philips 0556, 2800, 3614,
4209, 1887, 1506,
4398
Philips Magnavox 1887
Phocus 0714
Phonola 0556
Pioneer 1260, 1457, 1636
PJ 1506
Playsonic 0714
Polar 2197, 3067
Polaroid 1523, 3296, 2676,
2125, 3611, 4132,
5201, 3719, 4542,
3512, 3589
Powerpoint 3296
Prima 2461
Princeton 3719, 3983
Pro Vision 0556, 0714, 2197
ProCaster 3719
ProLine 3434, 0625, 1585,
2676, 2223, 2393,
3528
Proscan 3512, 2561
Prosonic 2676, 0714, 2426,
2125, 3719, 2197,
2663, 1523, 1585,
2106
Pulier 3611
Pye 0556
Q.Bell 2561
Q.Media 3515
Qilive 3719
QONIX 3067
Quadro 2561, 2676, 3719,
3434, 1585, 2197
Quelle 0195
Radiola 0556
Radionette 0714
RCA 0625, 4398
ReeXion 3067, 4155
Relisys 1585
Reoc 0714, 2197
Roadstar 0714
Roku 4398
Rolsen 4136, 3067, 3434
Romsat 3719
Rowa 3047
Rubin 3528
Saba 0625, 2676, 3434,
1585, 2005, 3528,
3719, 0714, 2947
Saga 2197
Salora 2676, 2197, 3983,
3719, 3067, 2125
Samsung 2051, 3131, 3970,
4096, 0556, 0625
Samus 3434
Sandstrøm 3802, 2399, 3047,
2197
Sansui 0714, 1248
Sanyo 1585, 2461, 2676,
3096
Saturn 3067
SBR 0556
ScanSonic 2676
TV

93
Schaub Lorenz 4022, 2676, 0714,
2125, 1585, 3719,
2197
Schneider 2676, 0714, 0556,
1585, 3528, 3611,
4501
Schneider Electric 2676, 0714, 0556,
1585, 3528, 3611,
4501
Schöntech 1585, 2676
Scott 3090, 1983
Seeltech 4022, 3067
Seelver 0556
SEG 2673, 2125, 1523,
3434, 2719, 3067,
3719
Seiki 4346, 4132, 3964
Seizo 4132, 4346
Selecline 3719, 3296, 3528
Sencor 2125, 4132, 4542,
3067, 3296, 2197,
3572, 3434, 0714,
3512
Sharp 1659, 2951, 3810,
3983, 2676, 4843,
2214, 3719, 0653,
4398, 1423
Shinelco 2530
Shivaki 2197, 3528, 3067,
2561
Siemens 0195
Siera 0556
Silva Schneider 3719, 2197, 2125,
3067
SilverCrest 2676, 1585
Sinotec 4542
Sinudyne 2676
Skantic 3719
Skyworth 4542
Smart Tech 3528
Snow 1585
Sogo 3067, 4155, 3611,
3512
Sonic 3168
Soniq 3168, 3572, 3005
Sontech 1983
Sony 2778, 1825, 4396,
0653
Soundmax 3528
Soundwave 2673
Sphere 3067
Stan Line 3611
Starlight 3528, 3296
Straus 3434
Strazus 3434
Strong 4542
Sunfeel 2676
Sungoo 1248
Sungpo 1659, 2951, 3810,
3983, 2676, 4843,
2214, 3719, 0653,
4398, 1423
Sunkai 1523
Sunstech 2676, 3719, 3515,
2530, 3528
Superior 1585
SuperTech 0556
Supra 3512, 2947, 3434,
3047, 4542, 4348,
4136
Supratech 3067
Svan 3719
Swisstec 2106
Sylvania 1595, 1817
Symphonic 1595, 1817
Tatung 1248
Tauras 2197, 3067
TCL 3047, 4259, 4398,
2675, 2530
TCM 0714
TD Systems 3719, 2676, 3512
Teac 3158, 2168, 0714,
3005, 3572, 1983,
1248, 2457, 3067
Tech Line 1585, 2676, 1636
Technica 2106, 2168, 2426,
2676
Technical 2676, 3719, 3983
Technics 0556
Technika 2426, 3810, 2106,
2168, 2676, 2197,
1585, 1983, 3005,
3067, 2125, 2719
TechniSat 0556
Technisson 0714
Techno 1585
Technosonic 0556, 0625
Techwood 2676, 3719, 1585,
3983, 5201
Tecnimagen 0556
Teco 0653, 1523
TELE System 2125, 2676, 3434,
2530, 1585
Telefunken 3719, 2676, 0625,
3528, 3983, 4542,
3296, 1585, 3047,
3434, 0714, 3067,
3589
Telestar 0556
Teletech 2676
Terra 2888
Terris 2530, 3296
Tesco 2426
Tesla 4542, 0556, 0714
Tevion 0714, 1248, 2426,
2125, 2530, 0556,
1523, 1585, 2197,
2461
Thes 2947
Thomas 0625
Thomas America 0625
Thomson 0625, 3047, 4259,
2675, 0556
Tokai 3611, 3528, 3067,
3296
Toshiba 1508, 2775, 2676,
4213, 2732, 3296,
2108, 0195
Tosonic 1508
TRANS-continents 0556
Transonic 3528
Trevi 3528
TV

94
Triad 0556
Trio 1248
Tristan Auron 3528
Triumph 0556
Tucson 2676, 3719
TV Star 3528, 3512
TVE 3589
TVTEXT 95 0556
Ultravox 1585
U-max 3434, 3296
UMC 2106, 2426, 2168
Uniden 2676, 1585, 3047
United 3434, 3515, 0714,
3296, 2530, 3512,
4542, 2663, 0556,
1523, 1585, 1983,
2125
Universal 0714
Universum 0195, 1585
Utok 4542
V7 Videoseven 1666
VD-Tech 3067
Veltech 4132, 3820
Venturer 3005
VEON 3528, 3296, 3611
Vestel 3719, 2676, 3983,
1585
Victor 0653
Videocon 2548, 3296
Videoseven 1666
Vigilant 4136
VisionPlus 2426, 2106
Visitech 2676, 3719
Visual Innovations 2106
Vito 1852
Vityas 3067
Vivax 3296, 4348
Vivid 3611
VNPT Technology 3090
Vortex 3528
Vortex View 3528
VOX 3719, 2676
Voxson 2197
VR 3067
VU 4539, 4136, 2399
Walker 2676, 1585, 3719
Waltham 2676, 3719
Watson 0714, 1248
Watsvision 2676
WeCube 1860
Wellington 3719, 2676, 1585
Welltech 0714
Westinghouse 3067, 3964, 4132
Westline 3719, 2676
Westwood 1585
Wharfedale 1983, 2676, 0556
Wilson 0556
Windsor 2676, 3719, 3983,
1585
Windy Sam 0556
Wintel 0714
XCanvas 1840
XD 3719
Xenius 1585, 2676
Xiahua 2461
Xiron 1983
Xoceco 2461
Xomax 3067, 3515
Xoro 3067
Xpeer 2051
Yamaha 1576
Yuntu 3611
Zanussi 3434, 3528
Zenith 1423
Zephir 3611
Zepto 1585
Ziggo 1818
STREAM
3Q 3350
A.C.Ryan 3350
ABS 1272
Acer 1272
Alienware 1272
Apple 2615
ASRock 1272
Asus 1272
Asustek 1272
BSkyB 3061
Ceton 1272
Claritas 1272
Cloud Media 2260
CyberPower 1272
Daily Media 1272
Dell 1272
Digitech 2260
Digma 3350, 4170
Dune 3230
DVICO 3350
DXtreme 3350
Econet 3061
Econet Media 3061
Elonex 1272
Eminent 3350, 2260
Evolve 3350
Fantec 3350, 4170
Ferguson 3350
Foxtel Now 5517
Fujitsu Siemens 1272
Gateway 1272
GigaTV 3350
Gmini 3350
Hewlett Packard 1272
hFX 1272
HiMedia 4170
Howard Computers 1272
HP 1272
Hush 1272
iBUYPOWER 1272
iconBIT 3350, 2260
ICY Box 3350
iNext 3350
Iomega 2558
iRIS 4848
ISTAR 2260, 4848
JadooTV 2260
Kartina TV 3230
KD Links 3350
KdLinks 3350
Kwesé 3061
Lenovo 1272
TV | STREAM

95
Linksys 1272
Mango Hi Q 4170
Mede8er 3355
Media Center PC 1272
Microsoft 4000, 1272, 2049,
1805
Mind 1272
NiveusMedia 1272
Northgate 1272
Now TV by Sky 3061
NVIDIA 4918
Orion Telekom 3230
Packard Bell 1272
Philips 1272, 2558
PopBox 2260
Popcorn Hour 2260
Qwerty 3230
Redline 4848
Ricavision 1272
Roku 3061
Rombica 4170
Sky Austria 3061
Sky Deutschland 3061
Sky Ireland 3061
Sky Italia 3061
Sky Österreich 3061
Sky UK 3061
Sony 1272
Stack 9 1272
Systemax 1272
Tagar Systems 1272
Telstra 3061
Toshiba 1272
Touch 1272
Trust 1272
Uebo 3350
VIA Technologies 1272
Viewsonic 1272
Voodoo 1272
Western Digital 2558
Woxter 3350
Xbox 4000, 2049, 1805,
1272
ZT Group 1272
STB
@Sky 1334
1&1 3270
1TV 3464
4ife 3833
AB 3191
AB-COM 3191
Acoustic Solutions 1284
ADB 2737, 4291, 1585,
2367, 3799, 3148,
3691
AEG 2738, 2813
Agora 2034, 1284
Airis 2813
AirTies 3290
Akai 3148, 3833
Akira 2738
Akta 4294
Akura 2034, 2418
Aland 2030, 2437
Alands
Datakommunikation 2030, 2437
Alba 1284, 3601, 2034
Alcom 2030, 2437
Alcom
Cable Television 2030, 2437
Alcor 5377
Alice 3455, 1585
AllTele 2957
Allvision 1334, 1232, 5315
Altech UEC 4210, 2059, 3517
Altibox 3691, 2030, 2437
Amiko 4197, 3191, 3649
AmiNet 1615
Amino 1615, 1898
Amstrad 1662, 0847, 1175,
1693, 2467, 5315
AMTC 2738, 2813
Anadol 4227, 5377
Ansonic 2418
Apollo 3833
Arcadyan 2952
Arcadyan Technology 2952
Arris 6076, 2437, 6174,
3723, 1582, 1585,
6264, 2952
AS 1284
ASA 0740
ASCI 1334
ASDA 1284
AstaNet 3855, 4291
Astrell 4294, 5259, 2418,
3417
Astro 2026, 1100, 1351,
2928
AT&T 0099
Atemio 2928
Atevio 2928
Atlanta 2418, 3320
Atom 1631
Audiola 2418
Audiosonic 5212
August 5552
Aurora 0879
AusIPTV 3698
Austar 0879
Austriasat 1195, 1197, 3190,
2957, 1232, 1561,
1631, 2631
Auvisio 2738, 2813
Avanit 3365, 1631, 4665
Awa 2418, 2813
AX 5328, 4826, 5038
Axil 2418, 3148, 1413,
2738, 2813, 3424
AZ America 1631
B@ytronic 0740
Baltcom 3191
Balticum 1195, 1197, 4294
Bel Digital 2513
Belgacom TV 2047
Belson 2418
BENsat 2957, 4657
Best 3749
Best Buy 3417, 5552
Bevcomm 1898, 1615
STREAM | STB

96
STB
BGTCO 1898
BIOSTEK 2738
BiS Télévisions 1232, 4294
BiS TV 1232, 4294
Black Diamond 1284
blade 3749
Blow 3148
Blue Valley
Telecommunications 1898
Boca 2026, 2458, 2797,
1232, 2813
Bonus 3190
Boshmann 1413, 1631
Botech 2738, 2418, 2813,
3749
Bouygues Telecom 3185, 3007
Boxer 2443, 1692, 2429,
4583
Brandt 2813, 3833
Brantley Telephone
Company 1898
Bredbandsbolaget 4031
Breitband.ch 1195, 3440
British Telecom 4031
Brooke Telecom 1898
BSkyB 1662, 1175, 0847,
4662
BT 4031
BT TV 4031
BT Vision 4031
Bulltech 2738
Burke’s Garden
Telephone Company 1898
Burlington Telecom 1615
Bush 2376, 3652, 1935,
2034, 2813, 1284,
2738, 3601, 2418,
3735, 3827, 4204
Butler Bremer
Mutual Telephone 1898
Cablecom 1582, 2513, 1195,
1197
CableLink 2513, 4665
Cabletech 3148
Cabovisão 2436
Cahors 3688
Caiway 2443, 2015, 2942
Canal Digitaal 2631, 4853, 2466,
2957
Canal Digital 2030, 1334, 4031
Canal+ 2657, 4294, 5761,
1195, 1197, 2429
CanalSat 2657, 5761
CDE Lightband 1615
CGV 5145, 2034, 3751,
1232, 1413, 3190,
3753, 4294
Chequamegon
Telephone Cooperative 1898, 1615
Chess 2026, 1334
Cignal 1631
Cisco 2047, 2401, 2589,
1582, 3337, 3265,
3270, 2742, 3451
Citycable 3451, 3477
CityCom 1232, 2957, 4665
Clarke-Tech 3320
Classic 1284
Clatronic 1413, 2738
Cloud-IBox 4015
CMX 2205
Cobra 4294, 5552
ColbaNet 3698
Com Hem 3662, 4926, 2357,
2942, 1915, 4031,
2015
Comag 2797, 2026, 2458,
2813, 1232, 3993,
4795, 5752, 0740,
1413, 2738, 3855,
4227, 5552
Comfort TV 3698, 4860
Comsat 1413
ComSpan
Communications 1898
Connect TV 2957
Consolidated
Communications 1898
Continent 3855, 4294
CoolStream 2863
CoopTel 1898, 1615
Cosmo Sat 2540
Cosmote TV 3615
CP-Tel 1615, 1898
Cristor 2257
Croner 2813
Crown 1284
Crypto 5212, 5552
css4you 4665
CST 2863
Cyfra+ 1409, 3799
Cyfrowy Polsat 3829
D@tacom 2813, 1413, 1631,
2738
Darty Box 2436
Dautkom 2638, 4197
D-Color 3833
DCR 3517
Delcambre
Communications 1898
Delta 2443, 2015, 2942
Denver 2418, 2738
Deutsche Telekabel 1197, 1195
Deutsche Telekom 3270, 1692
DEXP 3833
Dgtec 1631, 2418
Dick Smith Electronics 2813, 2418
Dicra 2738, 4294
Digenius 0740
DIGI 1195, 1197, 2443,
2026
Digiality 1334, 2813
Digihome 2034, 1284, 1935
DigiLogic 1284, 2034
DigiQuest 2738, 4227, 3833,
5552, 1631, 3148,
4331, 2813
DigiSat 1232
Digital 1334
DigitAlb 1197, 1195, 1232
DigitalBox 3419, 1631, 2540,
3674, 1100

97
Digiturk 3517
Digiwave 1631
Dilog 2957
Dion 3069
DIRECTV 0099
Dish TV Technologies 5831, 2738
DishTV 2738, 2813, 5831
Diveo 4853
Diverse
Communications 1898
Di-Way 1631, 2957
DMTech 2738
Dmyco 3109
DNA 2357, 3917, 2144,
2030
DNS 3833
Doer 5212
DragonSat 2928
Dream 1237
Dream Multimedia 1237, 3628, 1652,
1923
Dreambox 1237, 3628, 1652,
1923
DSE 2813, 2418
DStv 4210, 5103, 2059,
2060, 0879
DTK Deutsche Telekabel 1197, 1195
DTVS 3073
du 2401
Dual 1232, 2034
Durabrand 1284, 2034
DVICO 5552
Dynavision 4197
Dyon 2738, 2813, 3688,
3417
e Vision 3637
Easy-One 3688, 4331
ECG 2813, 2738
Echolink 2513
Echostar 2955, 1409
Eco-Star 1413
Edision 5210, 1631, 5141,
3191, 4197
Eir 3637
Elap 1413, 3190, 5212,
5552, 2458
Elbe 2418
eLife TV 2443
Elion 3916, 1615
Elisa 3637
Elless 0740
Elta 2738
Eltax 3833
Eltrona 1195, 1197, 3440,
3441
Emily Coop Telephone 1615
Empire Access 1898
Energy Sistem 2418, 1631, 2813
Engel 3749, 3148, 5142,
2418, 2813, 5212
Entertain 3270, 1692
Entone 1615, 1898
Ergo 3833
esoSAT 2797
Essentiel b 2813, 4657, 2738,
3905
Etisalat 2443
Europhon 1334
Europsat 1413
Eurosky 0740
Eutra 0740, 4665
Evesham Technology 2034
EVO 4197
Evo TV 4657
Evolveo 3148
F&U 5552, 3833
Ferguson 2638, 2034, 1935
Fetch TV 5593
Fiber.nl 1615, 2631
Finlux 1232, 2034
Finnet 2357, 2030
FinnSat 4572, 0740, 1195,
1197, 1351
FlexBox 3148
FMD 1413
FoneStar 3148
Formuler 5038
Fortec Star 1631
Foxtel 1356, 0879, 6264,
5517, 2211
Fransat 2443, 5259, 3190,
4657, 4294
Free 1976, 3455, 6224
Freebox 1976, 3455, 6224
freenet TV 5052
Freesat 1692, 4204, 2928,
3827, 2376, 3735,
4294
Freesat+ 2443, 3827
freeview 4204
Fte Maximal 1631, 3148, 5212
Fuba 2750, 3726, 4294,
1195
Fuji Onkyo 5212, 1631
Fulan 3649
Funai United 5552, 3833
Gala 2437, 2030
Galaxis 0879
Galaxy 4294
Galaxy Innovations 3191, 3649, 4197,
2928, 2799, 3458,
4826
Garant 3698, 4860
General Satellite 4626
Geser 1631, 2738
Get 2494
Gi 3191, 3649, 4197,
2928, 2799, 3458,
4826
GigaBlue 3663
GigaTV 2738, 3148
Glandorf Telephone 1615, 1898
Glashart Media 1615, 1898
Globo 3855, 2026, 1334,
0740, 1429, 2957,
3191
GM Germany 3191, 3649, 4197
Go SAT 3190
Godigital 5212
GoGen 2738
Gold Vision 1631
Golden Interstar 3749, 3191
STB

98
Golden Media 3191, 3649, 4197
GoldMaster 4294, 1334, 2928,
3148
Goodmans 1284, 2376, 3652,
2034, 2738, 3601
Gran Prix 0740, 4665
Grocos 1409
Grundig 0847, 2376, 2367,
2034, 1284, 2813,
2738, 3424, 0879,
1429
GTel 1898
GVA 2813
Haier 2418
Hailo 1631
Hanseatic 1100, 1351
Harper 5552
HD Box 2928
HD+ 2443, 2797, 1429,
2569, 3095, 5052
HD-Line 5315
HDThunder 4291
Hevet 1334
HickoryTech 1898
Hightong 1631, 4657
Hills 1232
Hirschmann 1232, 3190, 2026,
4665, 0740, 2513
Hitachi 2034, 1284
HNE 1232
Homebase 2030, 2437
Huawei 2994, 2995
Humax 2443, 4031, 2357,
2754, 4662, 1915,
1808, 2144, 1981,
1983, 3517, 2889,
3514, 5614, 1631,
1232
HuronTel 1898
Hybroad 5593
Hyro 4331
Hyundai 3833, 2418, 2738,
2813
ibox 1652
i-CAN 2737, 2367, 3691,
3148, 5212, 1585
IceCrypt 3191, 2928, 3649,
4197, 2838
ID Digital 4294
ID Sat 1631, 1334
Illusion 2257, 1631
Illusion Sat 2257
iM 4860, 3698
Imagin 1195, 1197, 3440,
3441
Imperial 1195, 1197, 1334,
1429, 3419
Inea 4291, 1195, 1197
iNETBOX 1652, 1237
Infomir 4860, 3698
Innova 0099
Innovative Systems 1898
Inotel 2437
Interstar 3749, 3191
Interzet 3698
Inverto 3095, 1334
inVion 2418
Invitel 2437
InviTV 2437
iotronic 1413
IQ 2813, 5552
IQ Prism 2813, 5552
Irradio 3726
i-SET 4331, 3417
ITT 2418
Jaeger 2797, 1334
Jambox 3464, 2030, 3698,
4860
Jameson 2813
JP PTT 1615
JVC 1284
Kabel Deutschland 3514, 1981, 1983,
3688, 2443, 1195,
1197, 1915, 2754
KabelBW 2889, 1915, 1981,
1983, 3451, 3477,
1195, 1197, 1429
KabelNoord 2015, 2443
Kablo TV 4763, 3190
Kamosonic 2738
Kaon 2821, 2494, 2889,
3615, 4853, 2631
Kaon Media 2821, 2494, 2889,
3615, 4853, 2631
Kathrein 1561, 2569, 4795
Kendo 1232
Kiss 3270
Kogan 3148
Kolin 1334
König 1631
KPN 2952, 2437, 4294,
1545
KPU
Telecommunications 1615, 1898
Kreatel 2030
Kyostar 2026
L&S Electronic 1334
Labgear 3424
Lake Connections 1898
Lans 3833
LaSAT 0740
Laser 5552
Lattelecom 2030, 2437
Lava 1631
Lazer 2738
Lemon 1334
Lenson 4657
LG 3916, 5761
Libertview 3109
Linden 2813
Line@TECH 2813
LinkBox 2957
Linsar 1284
Listo 4657, 2738, 2813
lmt 5517
Locus 3833
Lodos 1284
Logik 2034, 1284, 3652,
3735, 4204
LogiSat 2797, 2026, 2813,
2458
LPC Connect 1898
STB

99
Lumax 4294
Luxor 1935, 2034
M7 2631, 4853, 2957,
3190, 1195, 1197,
1615, 2466, 2928,
1232, 1545, 1561,
2443, 1631, 4294,
4657
Macedonian Telecom 3270, 2401
MAG 4860, 3698
Magnet 1615
Magyar Telekom 1692, 2367
Majestic 2738
Makedonski Telekom 3270, 2401
Manhattan 4204, 3827, 3735
Manta 3833
Maplin 2034
Marubox 3833
Marusys 2799, 3543, 3458,
3544
Mascom 2738, 2205, 2813
Maskatel 1898
Matsui 1284
MaxDigital 4015
Maximum 1334, 2813, 2957,
4294
MAXplus 2928
Maxview 2797
Mediascape 1631
Mediaset 2750, 4294, 2367
Medion 1232, 2797, 0740,
2026, 1334
MegaSat 4665, 1631, 5262,
2813, 2034, 2418,
0740, 5315, 2738
Meo 2401, 2466
Metronic 2738, 4294, 5259,
2418, 1334, 1631,
1413, 1935, 2026,
2443, 3726, 5552
Micro 2797, 2458, 2813
Micro electronic 2458, 2797, 2813
Mid Century Telecom 1615
Miraclebox 2928
Mirage 3365
Mitsai 2738
MK Digital 4015
Morgan 1232, 2026
Morgan’s 1232, 2026
Motorola 2437, 2030, 2952,
3464, 3691, 3723,
3692, 4926, 2401,
3916, 1585
Movistar 1585, 1692
Mtel 3855
MTS 1615, 1898
Multichoice 0879, 2059, 2060,
5103, 4210
Multimedia Polska 4291
Murphy 2034
Mut@nt 5328
Mysat 2738, 2797
MySky Italia 2467
MySky New Zealand 1356, 2211
Mystery 2813
Nabo 4665
NanoXX 2513, 1631
Naxa 3833
NC+ 3799, 1409
NEMR Telecom 1898
NEO 3833
NEOTION 1334
NET 2466
Net+ 3637
netBox 3637
Netgem 3637
Netia 3637
Netsat 0099
NetTV.Plus 2437, 3464, 3698
Neuling 2458, 1232, 2026
New Line 3688
NexPRO 1631, 3191, 3148
Next 4763
NextGen
Communications 3191
NKTelco 1615, 1898
Noos 2436
Northeast Nebraska
Telephone Company 1898
NOS 2437, 2160
Not Only TV 5212
Nova 2475, 0879
Nowo 2436
NPG 1631, 1413
NTL 3265
NTV Plus 2443, 1692, 3190,
2928
Numericable 2436
Octagon 2928, 5038, 4015,
4976
Olin 1631
One Box Home 3833
OnLime 2821
Online.nl 2631, 4853
Onn 2034, 1284
Ono 3337
Open IPTV 1615
Openbox 2928, 3109, 3833
OpenFox 3833
Opensat 2957
Opentech 3190
Opentel 1232
Optex 1232, 1413, 2418,
2813, 5259, 5315
Optibox 3190, 2928, 2957
Opticum 3855, 2957, 3688,
3191, 4227, 2928,
4665, 2797, 4331,
3417, 4795, 5038,
5212
Optimus Clix 2437
Optimuss 3191
Optus 1356, 0879
Orange 2407, 3290
Orbis 1232, 1334
Orbitech 1195, 1100, 1197,
1351, 1334
Orchid 1631
Oriel 5552, 5212
Orion Express 3855, 4294
Orton 3191, 3855, 2957
Osio 5552
STB

100
OteTV 3615
P&T Luxembourg 3637
P/Sat 1232
Pace 0847, 1356, 2754,
1682, 1175, 1693,
2475, 2467, 2211,
2466, 2631, 2657,
1582, 1662, 2059,
2060, 2494, 2401,
3451, 3477, 2160,
2443
Pacic 1284
Palcom 1409
Palsonic 2813
Panasat 0879
Panasonic 3494, 3504, 0847
peeKTon 2418
Penki TV 2030
Petrus 3855, 1195, 1197
Philex 1409
Philips 0099, 2561, 1582,
2466, 1692, 5377,
2631, 4657, 2211,
3615
Phoenix 2418
PHOENIX Apollo 3833
Pineland Telephone
Cooperative 1898, 1615
Pino 1334
Pioneer Long Distance 1898
PLDT 1631
Pollin 4665
Polsat 3829
Portugal Telecom 2401, 2466
Post Luxembourg 3637
PostTV 3637
Pr telecom 4197
Preisner 2458
Premier 1429
Premiere 1429, 2754, 1195,
1197
Primacom 2889, 1195, 1197,
2443
Primestar 2030
PrimeTel 2030, 2437
PrimeTV 2030
Pro Video Instruments 3698
Project Mutual
Telephone 1898, 2436
ProLine 1284
Promax 4291
Protek 4826
Proximus TV 2047
PSI 3190
PT 2401, 2466
PVI 3698
Pÿur 2889, 1195, 1197,
2443
Qviart 4795
Qwerty 1898, 1615
Qwerty.TV 1898
Raduga TV 2957, 4294
Ravo 5552
Rebox 2928
Renkforce 4387
Revez 4795
RiksTV 2367, 1692, 2429
RIO Media 2030
Rollmaster 1413
Rolsen 5212, 5552
Ross 2540
Rostelecom 2821
Roxxs 2799
SAB 4197, 1631, 3649,
3749
Saba 0740, 2205
Sagem 1692, 2429, 2407,
2436
Sagemcom 1692, 3514, 2436,
2407, 2429, 5286,
3799, 3007, 3185,
4583
Saivod 2418
Salora 1232
Samsat 3191
Samsung 3063, 2942, 1682,
5052, 2407, 2015,
3451, 2467, 3477,
2955, 3662, 2610,
2889, 1662, 4853,
3265, 3514, 2589,
3185, 1693
Sansui 1545
Sappa 2957
Sasag 2821, 3440, 4665
SAT+ 1409
Satcom 3833
Satelco 1232
SatFilm 1195, 1197, 3855
SatHawk 3109
Satplus 1100
SAT-TN 5315
SatyCon 1631
Scarlet 1615, 1898
Schaub Lorenz 2034, 2418
Schwaiger 0740, 2813, 2928,
1429, 4665, 1631,
2458, 2797, 5752,
3688, 1195, 1334,
2957, 3417, 3749,
3993
Schwaiger CS 1631
Scientic Atlanta 2401, 2047, 2436
Scott 2738
SCS 0740
SCTV 2821
Sedea 5212
Sedea Electronique 5212
SEG 1284, 4665, 3688,
0740, 2034, 4331
Selecline 2813
Sencor 2738, 2813
Servimat 5259
Set-One 3688, 4331
SFR 2436
Shark 1631
Sharp 1935, 2034
Sherwood 1409
Shinelco 2738
Showbox 3165
Siemens 2418, 1429, 2737,
1334
STB

101
Sigmatek 2418, 2813, 2738
Signal 3833
Silva Schneider 0740
SilverCrest 2026, 2458, 2797
SIMAX 3833
SimpliTV 4498, 4657
SiOL 3637
SKT 4665
Sky Austria 2754, 2443, 4662,
1429, 2357, 1915,
1195, 1197
Sky Brasil 0099
Sky Deutschland 2754, 2443, 4662,
1429, 2357, 1915,
1195, 1197
Sky Ireland 1662, 1175, 0847,
4662
Sky Italia 1693, 2467, 4662
Sky New Zealand 2211, 1356, 5286
Sky Österreich 2754, 2443, 4662,
1429, 2357, 1915,
1195, 1197
Sky Q 4662
Sky UK 1662, 1175, 0847,
4662
SkyCable 1631
Skylink 2957, 3190, 2928,
1545, 2443, 4853,
1195, 1197, 4294,
4657
Skymaster 1409, 2205, 3855,
1545, 1334, 3165
Skymax 1413
Skynet 2437, 2030
Skypex 0740
Skyplus 1334, 2026, 0740,
1175, 1232
SkySat 1100
Skytec 2928
Skytech 5552
Skyvision 2797, 4657, 1334
SkyWay 2928
Skyworth 1631, 4657
SL 0740, 2026, 4665
SM Electronic 1409
Smallworld Cable 2837
Smallworld Fibre 2837
Smart 1631, 3365, 3095,
1413, 0740, 4665,
1232, 4227
Smile Content 2437
Sogno 2957
Sogo 5552
Solid 3749
Solomend 3109
Sonera 3723, 2144, 2030
Sony 0847, 3202
SPC 3148, 5212
SPCinternet 3148, 5212
Star Track 3191
Starcom 5259
Starman 2821
Starmax 2638
Steinner 2738
Stipte 1615, 1898
Stofa 3692, 2015
Strong 3905, 1409, 4657,
2813, 2418, 0879,
3424, 4498, 5110,
2738, 1284, 1682,
3833, 5212
Sungpo 1935, 2034
Sunny 3165
Sunray 2799
Sunsat 3190
Sunstech 2738
Supra 5212
Supratech 1413
Sven 3833
Sveon 5552
SVT World 2957
Swisscom 4445
Sydantenn 2957
Synaps 3191, 4197
Synoq 3749
Systec 1334
Sytech 2418
TalkTalk 2994, 2995
Tattelecom 2429
Tatung 3270
TBoston 2418
Teac 4386, 2813
Technicolor 5517, 3514, 3185,
5761, 2994, 2995,
3615, 3799
Technika 2034, 1284
TechniSat 1195, 1197, 1100,
3440, 3441, 1351,
2540, 2813
Technotrend 1429
Techwood 1284, 2034, 1935
Tecsat 4294, 5259
TEKCOMM 2738, 3905
Telasat 2466
TELE System 2750, 3726, 1409,
2813, 2738, 4294
Tele2 2144, 1195, 1197
Telecifra 3833
TeleColumbus 2889
Teledigital 3833
Teledünya 4763, 3190
Telefonica 1585, 1692
Telefunken 3833, 3674, 5212
Telekarta 3855, 4294
Telekom Deutschland 3270, 1692
Telekom MK 3270, 2401
Telekom Slovenije 3637
Telenet 1582, 3451, 3477
TéléSAT 2631, 2466, 4853
Telestar 1100, 2540, 1351,
4387, 1334, 1195,
1197, 3419
Televes 1334
Telewire 1232
Telfort 2952, 1615
Telia 3723, 6076, 2030,
3916, 1615
TeliaSonera 6076
Telset 4197
Telsey 2738
TelSKY 2540
Telstra 3637, 1356
Tempo 5315
STB

102
TeNeT 1898
Teo 2437, 2030
Tesler 3833, 5212
Tevion 2205, 1409, 2026,
2813
T-Home 3270, 1692
Thomson 1582, 1935, 4657,
1662, 0847, 1175,
1981, 1983, 3905,
3007, 2160, 2407,
1693, 5110
Thurcom 3494, 2821
Tiger 3109
Titan 2205
Tiviar 2928
Tividi 1429
TiVo 3662, 3265, 3337
TivùSat 2737, 4294, 3726,
4031, 2750, 2367
T-Mobile 2631, 1615, 2443,
3190, 1545
TNT SAT 4657, 3190, 4294,
2443, 1195, 1692,
2429, 5259, 1197
Tonna 3190, 2458
Topeld 4294, 1545, 2837,
2838
Toppro 2838
Topsham
Communications 1898
Toshiba 1284, 2955, 3688,
1195, 1429
TP 2407
Transonic 4362
TrekStor 2738
Triax 4665, 3190, 4657,
2443, 4294, 1351,
1413, 1631, 2513
Tricolor TV 4626, 1915
TT-micro 1429
Türksat Kablo 4763, 3190
TV Cabo 2160
TV Star 3191, 3649
TV Vlaanderen 2631, 4853, 2466
TVA Digital 1692
TVB 1615
TViX 5552
UEC 1356, 0879
UfaNet 4294
UltraPlus 2928
UNE 1692
United 2418
UniTV 3833
UnityDigital TV 2955, 1429, 2610,
1915, 2513, 2889,
3451, 3477
Unitymedia 2955, 1429, 2610,
1915, 2513, 2889,
3451, 3477
Universum 0740, 1351
Univision 4227, 5212
Unixbox 1652
UPC 1582, 3451, 2821,
3477, 2443
UPC Cablecom 1582, 3451, 3477,
2513, 1195, 1197
UPC Direct 2443
UTStarcom 1232
ValueLine 2813
Vantage 2513, 2797, 5552,
3855, 5752
VEA 2418
Vector 2030
Vectra 4291, 1195, 1197
Venus Telephone
Cooperative 1898
VEON 5831
Vestel 1284, 2034, 3517
Vianet TV 1898
Viasat 1682, 1197, 2030,
1195
Videofutur 3637
Vietnam Television
Corporation 1413, 1631, 2443
ViewSat 1232
Viken Fibernett 2030, 2437, 3691
Viola Digital 1195, 1197
Virgin Media 3265, 6174, 3451,
3477
Vision Technology 3419
VisionNet 1631, 3191, 3649
Visiosat 1413
Vistron 4665, 0740
Vitecom 1413
VivaCom 2429
Vivax 2418, 2813, 5212,
5552
Vivo 1692
Vodafone 3514, 2401, 5286,
1615, 1981, 1983,
5517, 3337
Vodafone Iceland 1615, 3917
Vodafone Kabel
Deutschland 3514, 1981, 1983,
3688, 2443, 1195,
1197, 1915, 2754
Volcasat 2418
Voo 2742
VTC 1413, 1631, 2443
VTC Digital 1413, 1631, 2443
VTVcab 2443
Vu+ 3458, 3543, 3544,
2799
Wabash Mutual
Telephone Company 1615, 1898
Walker 2034
Wavelength 1413, 1232
WayteQ 1631
Wbox 3917, 2357
Welho 2357, 3917
Wharfedale 1935, 2034, 1284
Wightman 1898
Winbox 3726
Wisi 4665, 0740, 1232,
3190, 2957, 4572,
4294, 5259
World Vision 3191, 3833, 3688,
3148
Woxter 2418, 2813
WWiO 5111
Xcruiser 2928, 4197
XDome 4294
XeoBox 2928
STB

103
Xoro 5111, 3688, 3501,
2813, 3993, 2738,
3165, 2957, 4331
XS4ALL 2952
Xsarius 2957
Xtreamer 3148
Xtrend 4826, 3794, 3320
Yakumo 1413
YouSee 5614
Youview 2994, 2995, 4031
ZapMaster 0740
Zehnder 1334, 1631, 1413,
3417, 3419, 3424,
2034, 0740, 1232
ZGemma 5101, 4015
Ziggo 2443, 2589, 2015,
3477, 1582, 3451,
2942, 2401
Zircon 2957
Zodiac 3726
Zon 2160
Zon Optimus 2160
ZTE 2952
ZyXEL 1585
BLU / DVD
3D LAB 0539
Accurian 0675
Acoustic Solutions 2966, 0713
Admiral 3076
AEG 0675
Aiwa 0533
Akai 2966, 0675
Akira 3076
Akura 2966
Alba 2966, 0713, 3177,
0081, 0539
Allstar 0081
Amphion MediaWorks 0872
Amstrad 0713
AMTC 3076
AMW 0872
Andersson 2966
Ansonic 0831
Antarion 2966
Arcam 0732
Arena 2966
Aristona 0081, 0539, 0646
AS 2966, 0713
ASA 0081
Asuka 0081
Audiolab 0081
Audio-Technica 0059
Audiovox 0675
Audix 0713
Autovox 0713
Avol 3076
Awa 1663, 0872
Axxion 3076
Aya 2966
Basic Line 0713
Beko 0831
Bel Canto Design 1571
Black Diamond 0713, 1663
Blaupunkt 2624, 0081
Blue Parade 1531
Blue Sky 0713
BlueDiamond 2624
Bluesky 0713
Bose 2023
Brandt 2966, 0503
Bush 2966, 0713, 3177,
0081, 0831
Byd:sign 0872
California Audio Labs 0490
Carena 0081
Carver 0081
Celcus 2966
Centrum 0713, 0675
Changhong 0081, 0627
Cinea 0831
Cinetec 0713, 0872
Clatronic 0675
Clayton 0713, 2966
CME 0081
CMX 3076
Continental Edison 2966, 0831, 0872
Craig 0831
Crosley 0081
Crown 0713, 2966
Cybercom 0831
Cyrus 0081
Daenyx 0872
Daewoo 1663, 0872, 0490,
1906
Dantax 2966, 0713, 0539
Daytek 0872
Dayton Audio 0872
DCE 0831
De Graaf 0081
Decca 0081
Denon 1634, 0490, 0059
Dewo 1634
Dgtec 3076
Dick Smith Electronics 0675
Diero 2966
Digihome 2966, 0713
DigiLogic 0713, 1663
DiK 0831
Dikom 2966
Disney 0675, 0831
DK Digital 0831
DMTech 3154
Dragon 0831
DSE 0675
Dual 0831, 0081, 0713,
2966
Dumont 0081
Durabrand 0675, 0713, 0831,
1663
Dyon 3076
Electrocompaniet 2545
Elfunk 0713
Emerson 0675
e-motion 2624
Epworth 0533
Essentiel b 2966
Eternity 2624
EuroLine 0675
FairTec 2966
Favi 2966
STB | BLU / DVD

104
Felson 2966
Ferguson 2966, 3177, 2624,
0713
Finlandia 0081
Finlux 2966, 0081, 0741
Firstline 0713
Fujicom 2966
Funai 0675
GE 0522
GEC 0081
General Electric 0522
GFM 0675
Go Video 0741
GoGen 2966, 3076
Goldmund 2545, 1571
GoldStar 0741
Goodmans 0081, 0713, 2966
GPX 0741
Gran Prix 0831
Granada 0081
Grandin 2966, 0713
Grundig 0081, 0539, 2966,
0059, 0713
Grunkel 0831, 2966
H & B 0713
Hanseatic 0081, 0741
Harman/Kardon 0702, 0081, 3402
Harrow 2966
Hello Kitty 0831
Henß 0713
Hitachi 0573, 2966, 0081,
0675, 0713
Höher 0713, 0831, 2966
Hornyphon 0081
Humax 0646
Hyundai 2966, 1663
Inno Hit 2966, 0713
Insignia 0675, 0741
Integra 0627, 1634, 1531,
3787
Interfunk 0081
International 1663
Irradio 0081, 0646
Isis 2966
JBL 0702
JMB 2966
JVC 0623, 1602, 2966,
0081
jWin 0831, 3076
Karcher 0081, 1663
Kendo 0713, 0831
Kennex 0713
Kenwood 0490, 1906
König 0081
Küppersbusch 2966
L&S Electronic 1663
Laurus 2966
Leiker 2966, 0872
Lenco 3076, 0713, 2966
Lexicon 2545
LG 0741, 2811, 3951,
1602, 1906, 2407
Lifetec 0831
Linetech 2966
Linsar 2966
Listo 2966
Lodos 0713
Loewe 0081, 0741, 0539
Logik 3681, 3177, 0713
Lumatron 0713, 0741
Lunatron 0741
Luxman 0573
Luxor 2966, 0713
Magnavox 0675, 1354, 0081,
0503, 0646, 1846,
1506, 0539, 0713,
2966
Magnum 1663
Manesth 0081
Manhattan 2966, 0713
Marantz 0539, 0081
Mark 0713
Matsui 2966, 0713
Maxim 0713, 0872
MDS 0713
Mediator 0081
Medion 2966, 0831, 2407,
0741
Memorex 0831
Metronic 0081
Metz 0713, 0081, 1531
Micromedia 0503, 0539
Micromega 0539
Microsoft 2083, 0522
Microstar 0831
Minax 0713
Mitsubishi 0081, 0059, 0713
Mitsubishi Electric 0081, 0059, 0713
Murphy 2966, 2624
Myryad 0081
Mystral 0831
NAD 0741, 0059
Nagsmi 0059
NEC 0741, 1602
Neckermann 0081
NEO 2966
Nevir 0831, 2966
New Acoustic
Dimension 0741, 0059
Next 2966
Nikai 1663
Noblex 3076
Nokia 0081
Norcent 0872
Nordmende 2966, 0831
Oceanic 0081
OK. 3076, 2966
OKI 2966
Onkyo 0627, 3787, 0503
Oppo 2545
Optimus 0059, 1531
Orava 0713
Orbit 0872
Orion 2966, 0713, 1663
Ormond 0713
Otto Versand 0081
Pacic 0831, 0713
Packard Bell 0831
Palladium 1906, 0713
BLU / DVD

105
Panasonic 0490, 1641, 3580,
1579, 3901, 1834,
3641, 3584, 2918,
2584, 0503
Philco 0675
Philips 0081, 2789, 2056,
3353, 2371, 1354,
1846, 0539, 0646,
3594, 1506, 1813,
0675, 2334, 0503,
0713
Philips Magnavox 0503, 0675
Phonola 0081
Pioneer 1571, 1531, 0059,
0631, 1965, 2442,
2847, 0081
Polaroid 2966
Polk Audio 0539, 0081
Powerpoint 0872
Presidian 0675
Prinz 0831
Prism 0831
Protronic 0081
ProLine 2966
Proscan 0522
Proson 0713
Prosonic 2966, 2624
Protech 0081
Pye 0081, 0675, 0539,
0646
Quelle 0081
Radialva 0081
Radiola 0081
Radionette 0741, 1906
Radiotone 0713
Ranser 3154
RCA 0522, 1531, 1965
REC 0490
Roadstar 0713, 0081
Ronin 0872
Rotel 0623
Rowa 0872
S&V 1663
Saba 2966
Saivod 0831
Salora 2966, 0741
Samsung 0573, 0199, 2951,
0298, 1635, 2113,
2886, 3195, 2329,
2269, 2942, 2833,
4108, 0490
Sansui 1663
Sanyo 2966, 0675, 0713,
1663
Satforce 3154
SBR 0081
ScanSonic 2966
Schneider 0081, 2966, 0539,
0646, 0831, 0713
Schneider Electric 0081, 2966, 0539,
0646, 0831, 0713
Schöntech 0713, 2966
Scientic Labs 3076
SEG 0713, 0872, 0081,
1663
SEI 0081
Sei-Sinudyne 0081
Selecline 3076
Semp 0503
Semp Toshiba 0503
Sharp 0713, 2966, 0675
Sherwood 0741, 3320
Shinsonic 0533
Shivaki 1663
Siemens 0081
Siera 0081
Silva 0741
Silva Schneider 0831, 0741
SilverCrest 2966
Sinudyne 0081
Skantic 0713, 0539
Smart 0713
Sonashi 0831
Soniq 3177, 0831
Sony 1633, 1516, 0533,
3964, 2132, 2861,
1536, 0772, 1981
Soundwave 0713
Spectra 0872
SR Standard 0831
Strong 0713
Sunfeel 2966
Sungpo 0713, 2966, 0675
Sunstech 2966, 0831
Superior 3076
SV2000 0675
Sylvania 0675, 0081
Symphonic 0675
Sytech 0831
Tandberg 0713
Targa 0741, 1906
Tashiko 0081
Tatung 0081
Tchibo 0741
TCM 0741
Teac 3177, 1531, 3154,
0675, 0741, 1663
Tech Line 1663
Technica 0713
Technical 2966
Technics 0490, 0081
Technika 2624, 2966, 3177,
0831
Techwood 2966, 0713
Tedelex 1663
TELE System 2966, 3076
Telefunken 2966, 3076, 0059,
1663
Teletech 0713, 2966
Tesco 2624
Tesla 0081
Tevion 2407, 1663, 2624,
3154
Theta Digital 1531
Thomson 0522, 0831
Thurcom 3580
Tosaki 2006
Toshiba 0503, 2006, 2966,
2705, 2682, 0081
Tradex 0081
TRANS-continents 0831, 0872
Trevi 0831
BLU / DVD

106
TruTech 0675
Tucson 2966
TVE 0713
U-max 0081, 0627
UMC 2624
United 0713, 0675
Universum 0081, 0713, 0741
Urban Concepts 0503
VDiGi 3076
Venturer 3177
Vestel 0713, 2966
Visa 0081
VisionPlus 2624
Visitech 2966
Vitek 0831
Voxson 0831
Walker 2966
Waltham 2966, 0713
Wards 0059, 0081
Watson 0081
Welkin 0831
Wellington 2966, 0713
Weltstar 0713
Westline 2966
Wharfedale 0713
Wilson 0831
Windsor 2966, 0713
Windy Sam 0573
Xbox 2083, 0522
Xenius 2966
Xiron 0713
Yamada 0872
Yamaha 0539, 0490, 1354,
3320, 0646
Yamakawa 0872
YBA 0872
Zenith 0741, 1906, 0503
AUDIO
A.V.International 0157
AH! 0157
Aiwa 0121, 1827, 0157,
0159
Akai 0609, 1989
Anam 0609
Arcam 0157, 1189
Argos 4122
Atoll 0157
Atoll Electronique 0157
Audio Research 0157
Audiolab 0157, 1189
Audiomeca 0157
Audioton 0157
Audiotronic 1189
AVI 0157
Awa 1827
B & O 0799
Balanced Audio
Technology 0157
Bang & Olufsen 0799
BAT 0157
Bose 3708, 4024, 3832,
5163
Bush 4122
Cairn 0157
Cambridge 0157, 1189
Cambridge Audio 1730, 1647, 0157
Canton 3000
Carver 0157, 0121, 1189
CCE 0157
Celcus 4146
Cyrus 0157
Denon 0004, 1360, 2857,
3347, 0771, 0272,
2516, 3642, 2820,
3380, 3639, 4111,
4551
DIKE 5070
DKK 0000
DMX Electronics 0157
Dual 0004
Dutch Originals 5070
Dynaco 0157
Epworth 0121, 1827, 0157,
0159
Fine Arts 1189
Fonmix 1360
Genexxa 0000
Goldmund 0157
Goodmans 4146, 0609, 2151
Grundig 0157, 1189
Harman/Kardon 1304, 0110, 3320,
2443, 0157, 3756,
1189
HIFIAkademie 0157
Hitachi 4590, 3050, 5130
Insten 2151
Integra 1805, 3860, 1320,
0135
Jay-tech 4146
JBL 3756, 0110, 5070,
1304
JTC 4146
JVC 0074, 4411
Kenwood 1570, 1027, 0157,
0712
Krell 0157
LG 3217, 4043
Linn 0157
Loewe 0157
Logitech 2436, 1408, 3561
Magnat 4485
Magnavox 0157, 1269, 3282,
1189
Majority 4146
Marantz 0157, 2114, 2138,
4121, 1189, 1269,
3347
Matsui 0157
Maxell 3997
Melectronic 0609
Meridian 0157
Micromega 0157, 1189
Miro 0000
Mission 0157
Musical Fidelity 0688
Myryad 0157, 1189
NAD 0320, 1989, 1093,
0609, 0000
Naim 0157
New Acoustic
BLU / DVD | AUDIO

107
Dimension 0320, 1989, 1093,
0609, 0000
Nikko 0609
NSM 0157
Nubert 4331
Onkyo 1805, 0135, 1320,
3860, 3050, 4533
Optimus 0823, 0000
Orbitsound 4098
Panasonic 3323, 1518, 1308
Philips 1269, 0157, 4105,
1189, 3282
Pioneer 1935, 1123, 4560,
0823
Polk Audio 0157
Primare 0157
Procient 0609
Proson 0609
Proton 0157
QED 0157
Quad 0157
Radiola 0157
RCA 1123, 0823
Restek 0157
Revox 0157
Rotel 0793, 0157
SAE 0157
Samsung 2660, 3320, 2137,
1304
Samsung
Harman/Kardon 3320
Sansui 0609, 0157
Sanyo 3282
SAST 0157
Schneider 0110
Schneider Electric 0110
Sentra 0688
Sharp 5070, 0771
Siemens 0157, 0609
Silsonic 0176
Simaudio 0157
Sonic Frontiers 0157
Sonos 3919
Sony 0000, 0159, 1827,
1058, 1759, 1441,
1758, 1158, 3700,
1454
Soundwave 0609
Sungpo 5070, 0771
Sylvania 0157
T+A 2302
TAG McLaren 0157, 1189
TAG McLaren Audio 0157, 1189
TCstar 5070
Teac 0609, 3860, 0110
Technics 1308, 1518
TechniSat 4486
Techwood 0609
Teufel 3574, 4159, 4460
The Gryphon 0157
Thorens 1189, 0157
Thule Audio 0157
Toshiba 3627, 5070, 1123
Universum 0157, 0609
Victor 0074
Wards 0000, 0157
Wharfedale 0609
Yamaha 0176, 1276, 3580,
2116, 2061, 2467,
0712, 3433, 0376,
0354, 0848, 1776,
1949, 3602, 2021
Zonda 0157
AUDIO

108
facebook.com/ @oneforall.worldwide linkedin.com/ youtube.com/
oneforallworldwide company/one-for-all-worldwide/ user/oneforallproducts
Connect with us
713142
RDN1291121
Universal Electronics BV –
Europe & International
P.O. Box 3332, 7500 DH Enschede
The Netherlands