

EF11 User's Guide


3
Contents
EF11 User's Guide....................................................................................................................................... 9
Introduction to Your Projector ................................................................................................................. 10
Projector Features.............................................................................................................................. 10
Product Box Contents.................................................................................................................... 11
Additional Components ................................................................................................................ 12
Optional Equipment and Replacement Parts................................................................................. 12
Warranty and Registration Information (U.S. and Canada) ........................................................... 13
Warranty and Registration Information (Latin America)................................................................. 14
Notations Used in the Documentation ................................................................................................ 14
Where to Go for Additional Information .............................................................................................. 14
Projector Part Locations ..................................................................................................................... 14
Projector Parts - Front/Top ............................................................................................................ 15
Projector Parts - Rear.................................................................................................................... 16
Projector Parts - Base.................................................................................................................... 17
Projector Parts - Remote Control................................................................................................... 18
Setting Up the Projector ........................................................................................................................... 20
Projector Placement........................................................................................................................... 20
Projector Setup and Installation Options ....................................................................................... 20
Projection Distance........................................................................................................................ 23
Installing the Projector in a Mount or Tripod .................................................................................. 26
Projector Connections........................................................................................................................ 30
Connecting to an HDMI Video Source ........................................................................................... 31
Connecting to a USB Device ......................................................................................................... 31
Connecting Headphones............................................................................................................... 32
Installing Batteries in the Remote Control .......................................................................................... 33
Using Basic Projector Features ............................................................................................................... 35
Turning On the Projector .................................................................................................................... 35
Turning Off the Projector .................................................................................................................... 36
Remote Control Operation ................................................................................................................. 38
Selecting the Language for the Projector Menus................................................................................ 38

4
Projection Modes ............................................................................................................................... 39
Changing the Projection Mode Using the Menus........................................................................... 40
Adjusting the Image Height ................................................................................................................ 40
Image Shape...................................................................................................................................... 41
Correcting Image Shape with H/V Keystone.................................................................................. 41
Correcting Image Shape with Quick Corner .................................................................................. 43
Focusing the Image Using the Focus Lever ....................................................................................... 45
Resizing the Image Using Zoom ........................................................................................................ 46
Selecting an Image Source ................................................................................................................ 46
Color Mode......................................................................................................................................... 47
Changing the Color Mode.............................................................................................................. 47
Available Color Modes................................................................................................................... 48
Turning On Automatic Luminance Adjustment ................................................................................... 48
Adjusting Light Output (Brightness).................................................................................................... 49
Adjusting Image Sharpness ............................................................................................................... 50
Using Advanced Image Adjustment Features .................................................................................... 52
Adjusting the Color Temperature................................................................................................... 52
Adjusting the RGB Offset and Gain ............................................................................................... 53
Adjusting the Hue, Saturation, and Brightness .............................................................................. 54
Adjusting Gamma.......................................................................................................................... 56
Saving Settings to Memory and Using Saved Settings ...................................................................... 58
Controlling the Volume with the Volume Buttons................................................................................ 59
Changing the Sound Mode................................................................................................................. 59
Available Sound Modes................................................................................................................. 60
Adjusting Projector Features ................................................................................................................... 62
Operating Connected Devices Using the HDMI Link Features........................................................... 62
Projecting a PC Free Presentation ..................................................................................................... 64
PC Free Precautions ..................................................................................................................... 64
Supported PC Free File Types ...................................................................................................... 65
Starting a PC Free Slideshow........................................................................................................ 66
Starting a PC Free Movie Presentation ......................................................................................... 68
PC Free Display Options ............................................................................................................... 70
Wireless Network Projection from a Mobile Device (Screen Mirroring) .............................................. 71

5
Screen Mirroring Restrictions ........................................................................................................ 71
Selecting Screen Mirroring Settings .............................................................................................. 72
Connecting for Screen Mirroring with Miracast .............................................................................. 73
Connecting for Screen Mirroring with a Windows 8.x/Windows 10 Computer ............................... 74
Shutting Off the Picture and Sound Temporarily ................................................................................ 74
Installing a Security Cable.................................................................................................................. 75
Copying Menu Settings Between Projectors ...................................................................................... 75
Saving Settings to a USB Flash Drive............................................................................................ 75
Transferring Settings from a USB Flash Drive............................................................................... 76
Saving Settings to a Computer ...................................................................................................... 77
Transferring Settings from a Computer ......................................................................................... 78
Adjusting the Menu Settings .................................................................................................................... 80
Using the Projector's Menus............................................................................................................... 80
Image Quality Settings - Image Menu ................................................................................................ 81
Projector Feature Settings - Settings Menu........................................................................................ 84
Projector Information Display - Info Menu .......................................................................................... 88
Projector Reset Options - Reset Menu............................................................................................... 89
Maintaining and Transporting the Projector ........................................................................................... 91
Projector Maintenance ....................................................................................................................... 91
Cleaning the Lens.......................................................................................................................... 91
Cleaning the Projector Case.......................................................................................................... 92
Air Filter and Vent Maintenance ......................................................................................................... 92
Cleaning the Air Filter and Vents ................................................................................................... 93
Replacing the Air Filter .................................................................................................................. 94
Replacing the Remote Control Batteries ............................................................................................ 96
Transporting the Projector.................................................................................................................. 98
Solving Problems ...................................................................................................................................... 99
Projection Problem Tips ..................................................................................................................... 99
Projector Light Status ....................................................................................................................... 100
Solving Image or Sound Problems ................................................................................................... 101
Solutions When No Image Appears............................................................................................. 102
Solutions When "No Signal" Message Appears........................................................................... 103
Displaying From a PC Laptop ................................................................................................. 104

6
Displaying From a Mac Laptop ............................................................................................... 104
Solutions When the Image is Not Rectangular ............................................................................ 104
Solutions When Only a Partial Image Appears............................................................................ 105
Solutions When the Image Contains Noise or Static ................................................................... 105
Solutions When the Image is Fuzzy or Blurry .............................................................................. 106
Solutions When the Image Brightness or Colors are Incorrect .................................................... 106
Solutions to Sound Problems ...................................................................................................... 107
Solving Projector or Remote Control Operation Problems ............................................................... 108
Solutions to Projector Power or Shut-Off Problems..................................................................... 108
Solutions to Remote Control Problems........................................................................................ 109
Solutions to HDMI Link Problems..................................................................................................... 109
Solutions When You Cannot Connect Using Screen Mirroring......................................................... 110
Solutions When the Image or Sound Contains Static During Screen Mirroring ................................ 111
Where to Get Help (U.S. and Canada) ............................................................................................. 111
Where to Get Help (Latin America)................................................................................................... 112
Technical Specifications ........................................................................................................................ 115
General Projector Specifications ...................................................................................................... 115
Projector Light Source Specifications............................................................................................... 116
Remote Control Specifications ......................................................................................................... 117
Projector Dimension Specifications.................................................................................................. 117
Projector Electrical Specifications .................................................................................................... 117
Projector Environmental Specifications............................................................................................ 118
Projector Safety and Approvals Specifications................................................................................. 118
Safety and Approvals Specifications for Latin America .................................................................... 118
Supported Video Display Formats.................................................................................................... 119
Notices ..................................................................................................................................................... 121
Recycling (U.S. and Canada)........................................................................................................... 121
Important Safety Information ............................................................................................................ 121
Laser Safety Information .................................................................................................................. 122
Important Safety Instructions............................................................................................................ 124
Restriction of Use ........................................................................................................................ 128
List of Safety Symbols...................................................................................................................... 128
FCC Compliance Statement............................................................................................................. 133

7
Binding Arbitration and Class Waiver ............................................................................................... 134
Trademarks...................................................................................................................................... 137
Copyright Notice............................................................................................................................... 137
A Note Concerning Responsible Use of Copyrighted Materials................................................... 138
Copyright Attribution.................................................................................................................... 138


9
EF11 User's Guide
Welcome to the EF11 User's Guide.
For a printable PDF copy of this guide, click here.

10
Introduction to Your Projector
Refer to these sections to learn more about your projector and this manual.
Projector Features
Notations Used in the Documentation
Where to Go for Additional Information
Projector Part Locations
Projector Features
The EF11 projector includes these special features:
Bright, high-resolution projection system
• Up to 1000 lumens of color brightness (color light output) and white brightness (white light output)
Note: Color brightness (color light output) and white brightness (white light output) will vary depending
on usage conditions. Color light output measured in accordance with IDMS 15.4; white light output
measured in accordance with ISO 21118.
• High-definition micro cinema lens
• Advanced 3LCD technology
• Epson microlaser array projection technology
• Up to 150 inches (13 ft) projected image size (no screen required)
Flexible connectivity
• HDMI port for video sources or streaming devices
• Small and portable, allows you to project without wires or extra cables
• Audio out port for connecting headphones
• PC Free projection from external USB devices
• Miracast screen mirroring support
Innovative display and operation features
• Long-life laser light source
• 200,000:1 contrast ratio and Dynamic Contrast control for sharp, detailed images
11
• Automatic vertical keystone adjustment
Product Box Contents
Additional Components
Optional Equipment and Replacement Parts
Warranty and Registration Information (U.S. and Canada)
Warranty and Registration Information (Latin America)
Parent topic: Introduction to Your Projector
Related concepts
Wireless Network Projection from a Mobile Device (Screen Mirroring)
Related topics
Projecting a PC Free Presentation
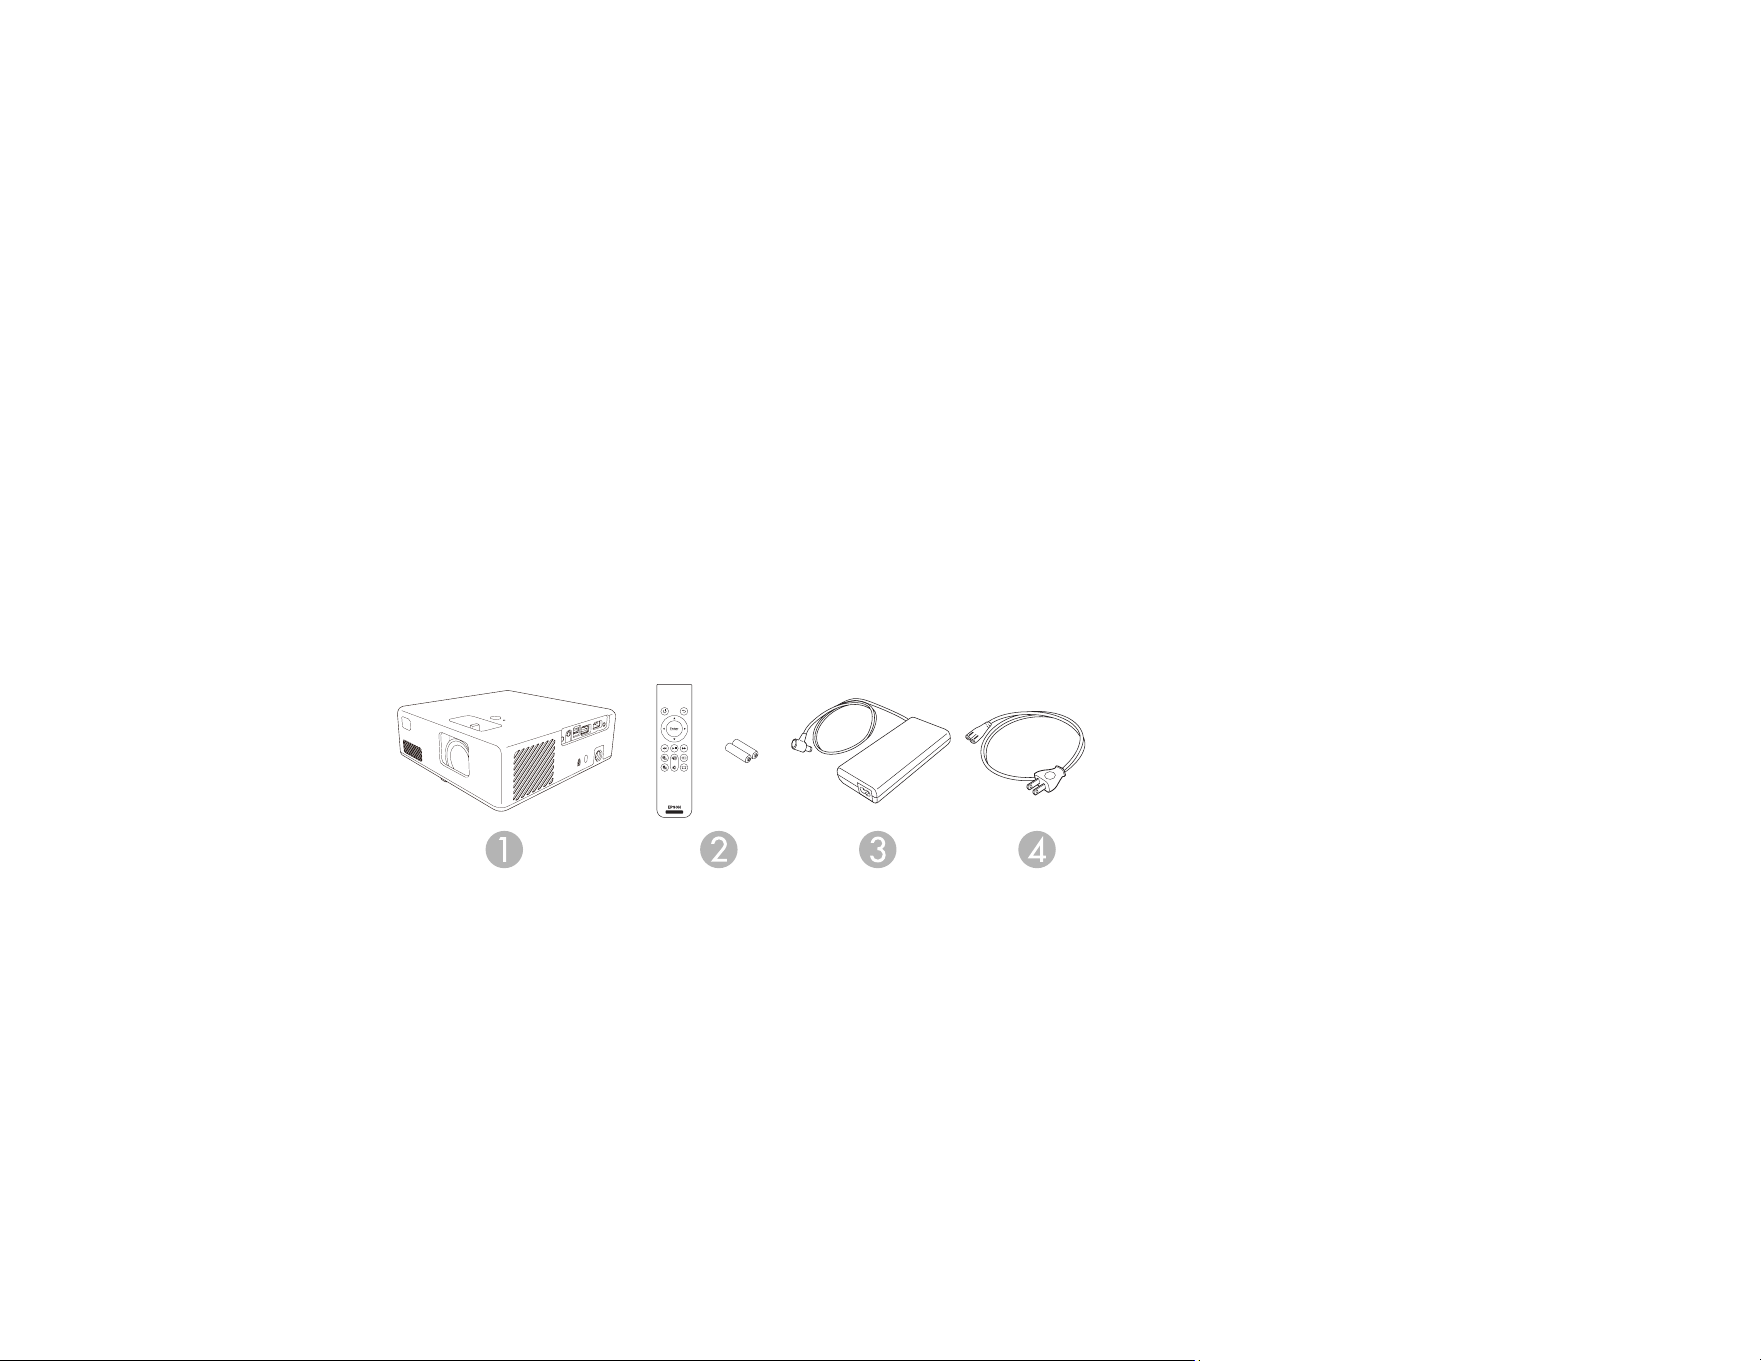
Product Box Contents
Save all the packaging in case you need to ship the projector. Always use the original packaging (or
equivalent) when shipping.
Make sure your projector box included all of these parts:
1 Projector
2 Remote control and 2 AAA batteries
3 AC adapter
4 Power cord
Parent topic: Projector Features

12
Additional Components
Depending on how you plan to use the projector, you may need to obtain additional components.
Note: To connect a Mac that does not include a compatible HDMI output port, you need to obtain an
adapter that allows you to connect to the HDMI port on the projector. Contact Apple for compatible HDMI
adapter options. To connect a smartphone or tablet, you may need to obtain an adapter that allows you
to connect to the projector. This allows you to mirror your smartphone or tablet screens, watch movies,
and more. Contact your device manufacturer for compatible adapter options.
Note: The projector's HDMI port does not support MHL.
Unless listed as available from Epson in this table, see your local computer or electronics dealer for
purchase information.
Signal or connection
type
Additional component necessary
HDMI Compatible HDMI cable
U.S. and Canada: Available for purchase from Epson or an authorized
Epson reseller.
Latin America: Available for purchase from an authorized Epson reseller.
Note: Older Mac computers (2009 and earlier) may not support HDMI
audio.
USB Compatible USB cable
Audio out Commercially available 3.5 mm mini jack stereo cable
Parent topic: Projector Features
Optional Equipment and Replacement Parts
U.S. and Canada: You can purchase screens, other optional accessories, and replacement parts from
an Epson authorized reseller. To find the nearest reseller, call 800-GO-EPSON (800-463-7766) in the
U.S. or 800-807-7766 in Canada. Or you can purchase online at epsonstore.com (U.S. sales) or
epsonstore.ca (Canadian sales).
Latin America: You can purchase screens, other optional accessories, and replacement parts from an
Epson authorized reseller. To find the nearest reseller, go to latin.epson.com. Or you can click the
"Where to Get Help" link below to contact your nearest sales office.
13
Note: Availability of accessories varies by country.
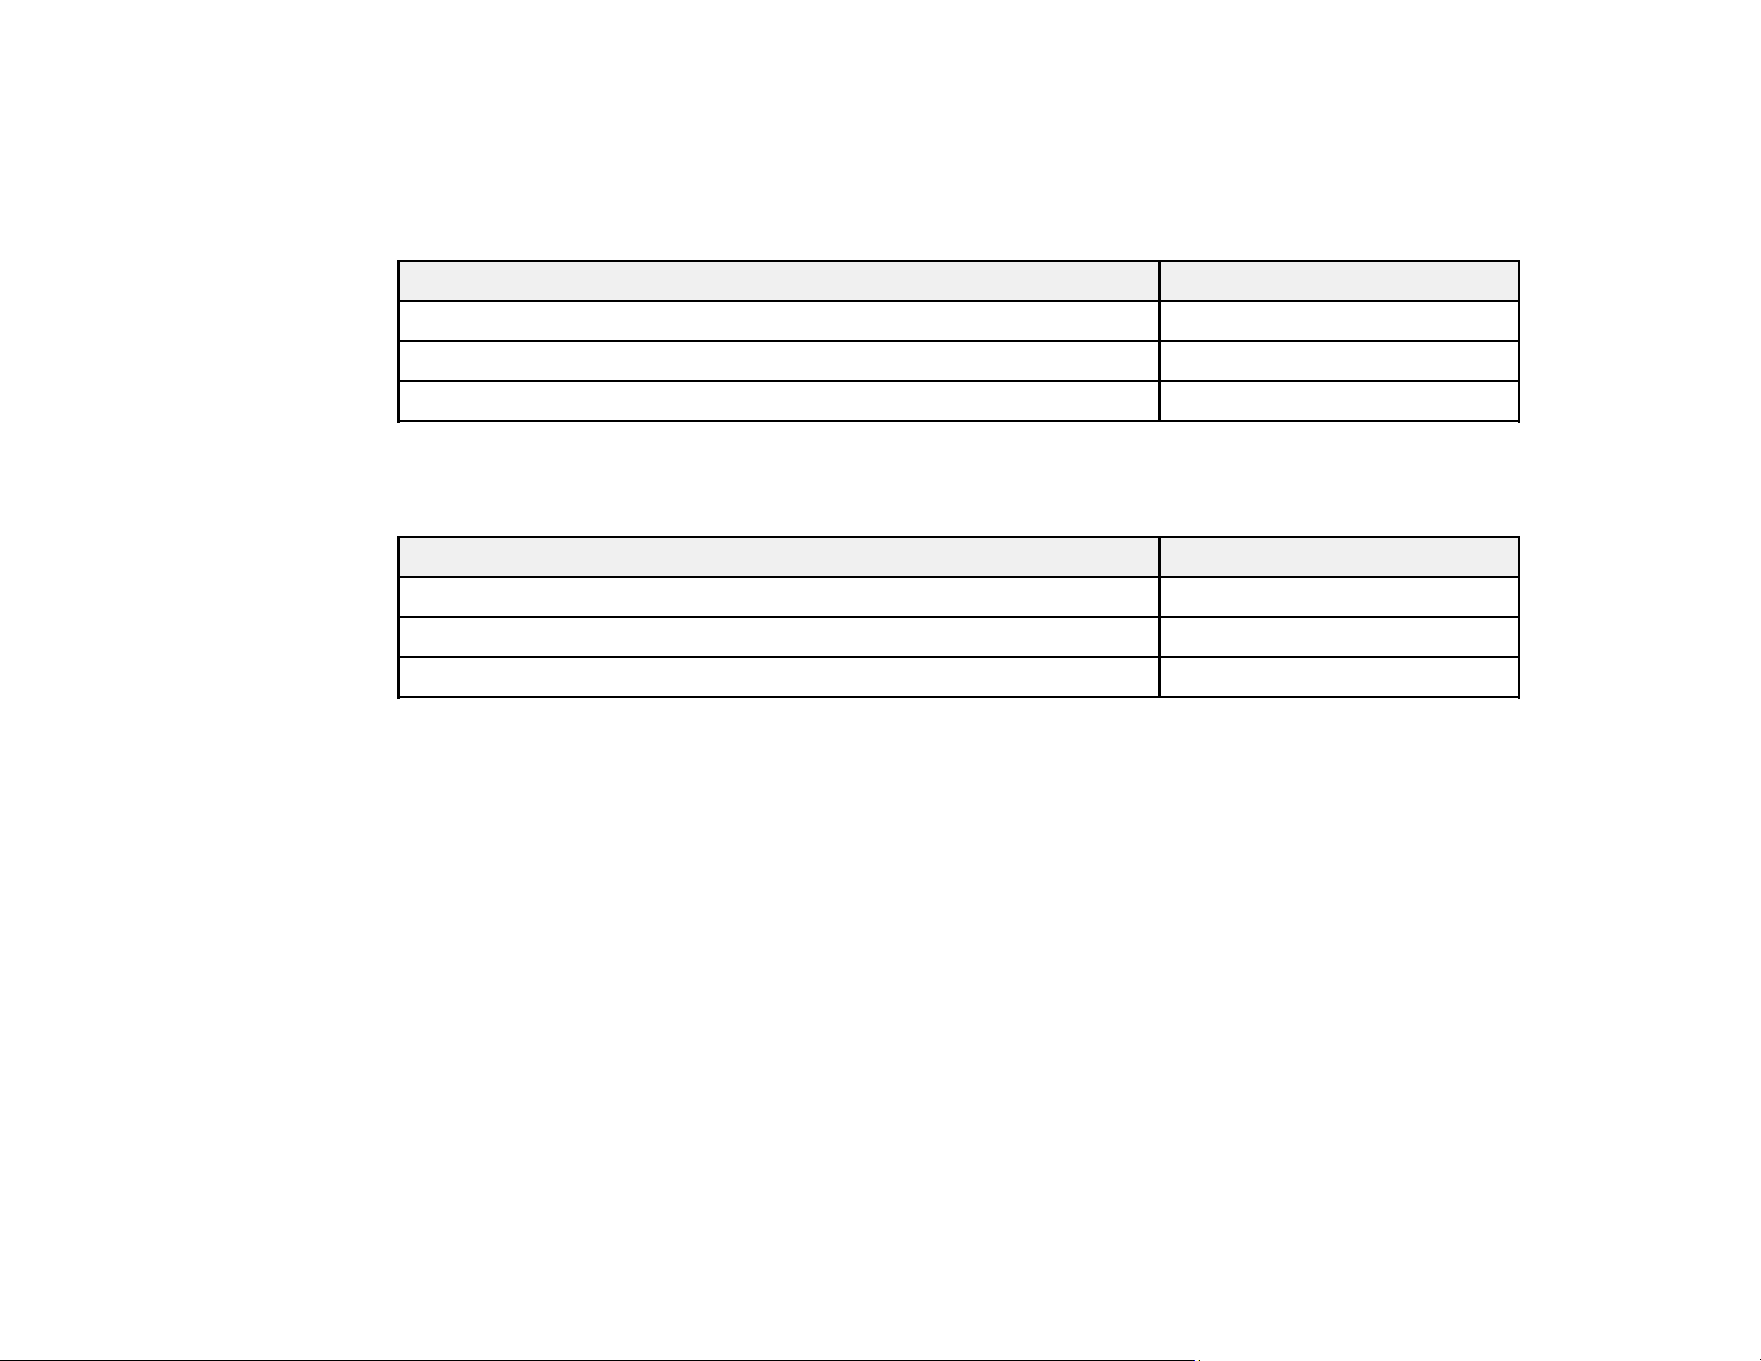
Epson offers the following optional accessories and replacement parts for your projector:
U.S. and Canada:
Option or part Part number
Mounting plate (ELPMB65) V12HA40AA0
Safety wire set (ELPWR01) V12H003W01
Air filter set (ELPAF61) V13H134AA0
In addition to the accessories listed above, a 1-year extended service plan is available.
Latin America:
Option or part Part number
Mounting plate (ELPMB65) V12HA40AA0
Safety wire set (ELPWR01) V12H003W01
Air filter set (ELPAF61) V13H134AA0
Parent topic: Projector Features
Related references
Where to Get Help (U.S. and Canada)
Where to Get Help (Latin America)
Warranty and Registration Information (U.S. and Canada)
Your projector comes with a basic warranty that lets you project with confidence. For details, see the
warranty brochure that came with your projector.
Register your product online at this site: epson.com/webreg
Registering also lets you receive special updates on new accessories, products, and services.
Parent topic: Projector Features

14
Warranty and Registration Information (Latin America)
Your projector comes with a basic warranty that lets you project with confidence. For details, see the
warranty that came with your projector.
Register your product online at latin.epson.com/support, search for your product, and select Register.
Registering also lets you receive special updates on new accessories, products, and services.
Parent topic: Projector Features
Notations Used in the Documentation
Follow the guidelines in these notations as you read your documentation:
• Warnings must be followed carefully to avoid bodily injury.
• Cautions must be observed to avoid damage to your equipment.
• Notes contain important information about your projector.
• Tips contain additional projection information.
Parent topic: Introduction to Your Projector
Where to Go for Additional Information
Need quick help on using your projector? Here's where to look for help:
• epson.com/support (U.S.), epson.ca/support (Canada), or latin.epson.com/support (Caribbean)
View FAQs (frequently asked questions) and e-mail your questions to Epson technical support 24
hours a day.
• If you still need help after checking this manual and any other sources listed here, you can use the
Epson PrivateLine Support service to get help fast (U.S. and Canada only). For details, see "Where to
Get Help."
Parent topic: Introduction to Your Projector
Projector Part Locations
Check the projector part illustrations to learn about the parts on your projector.
Projector Parts - Front/Top
Projector Parts - Rear
Projector Parts - Base
Projector Parts - Remote Control
16
Parent topic: Projector Part Locations
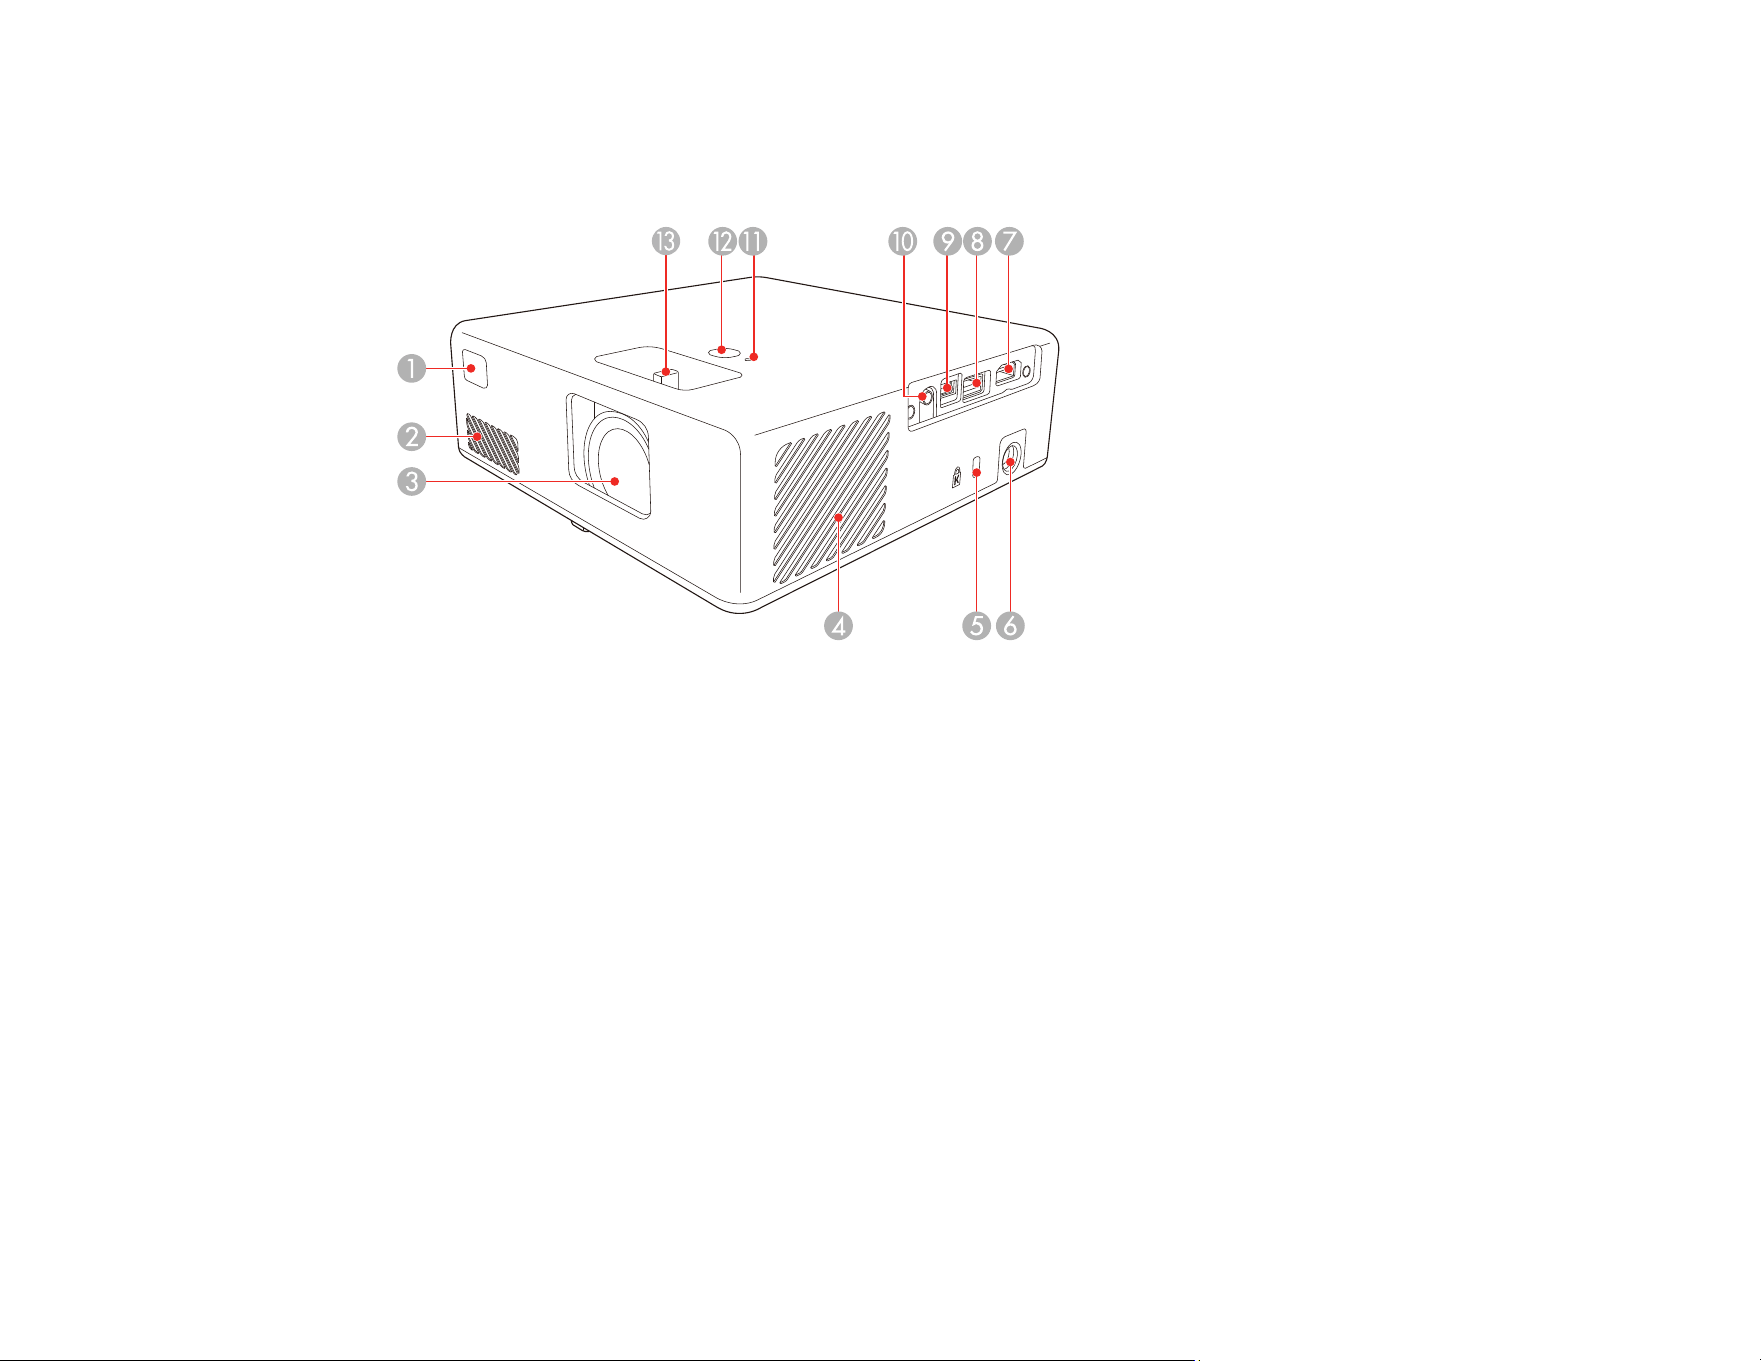
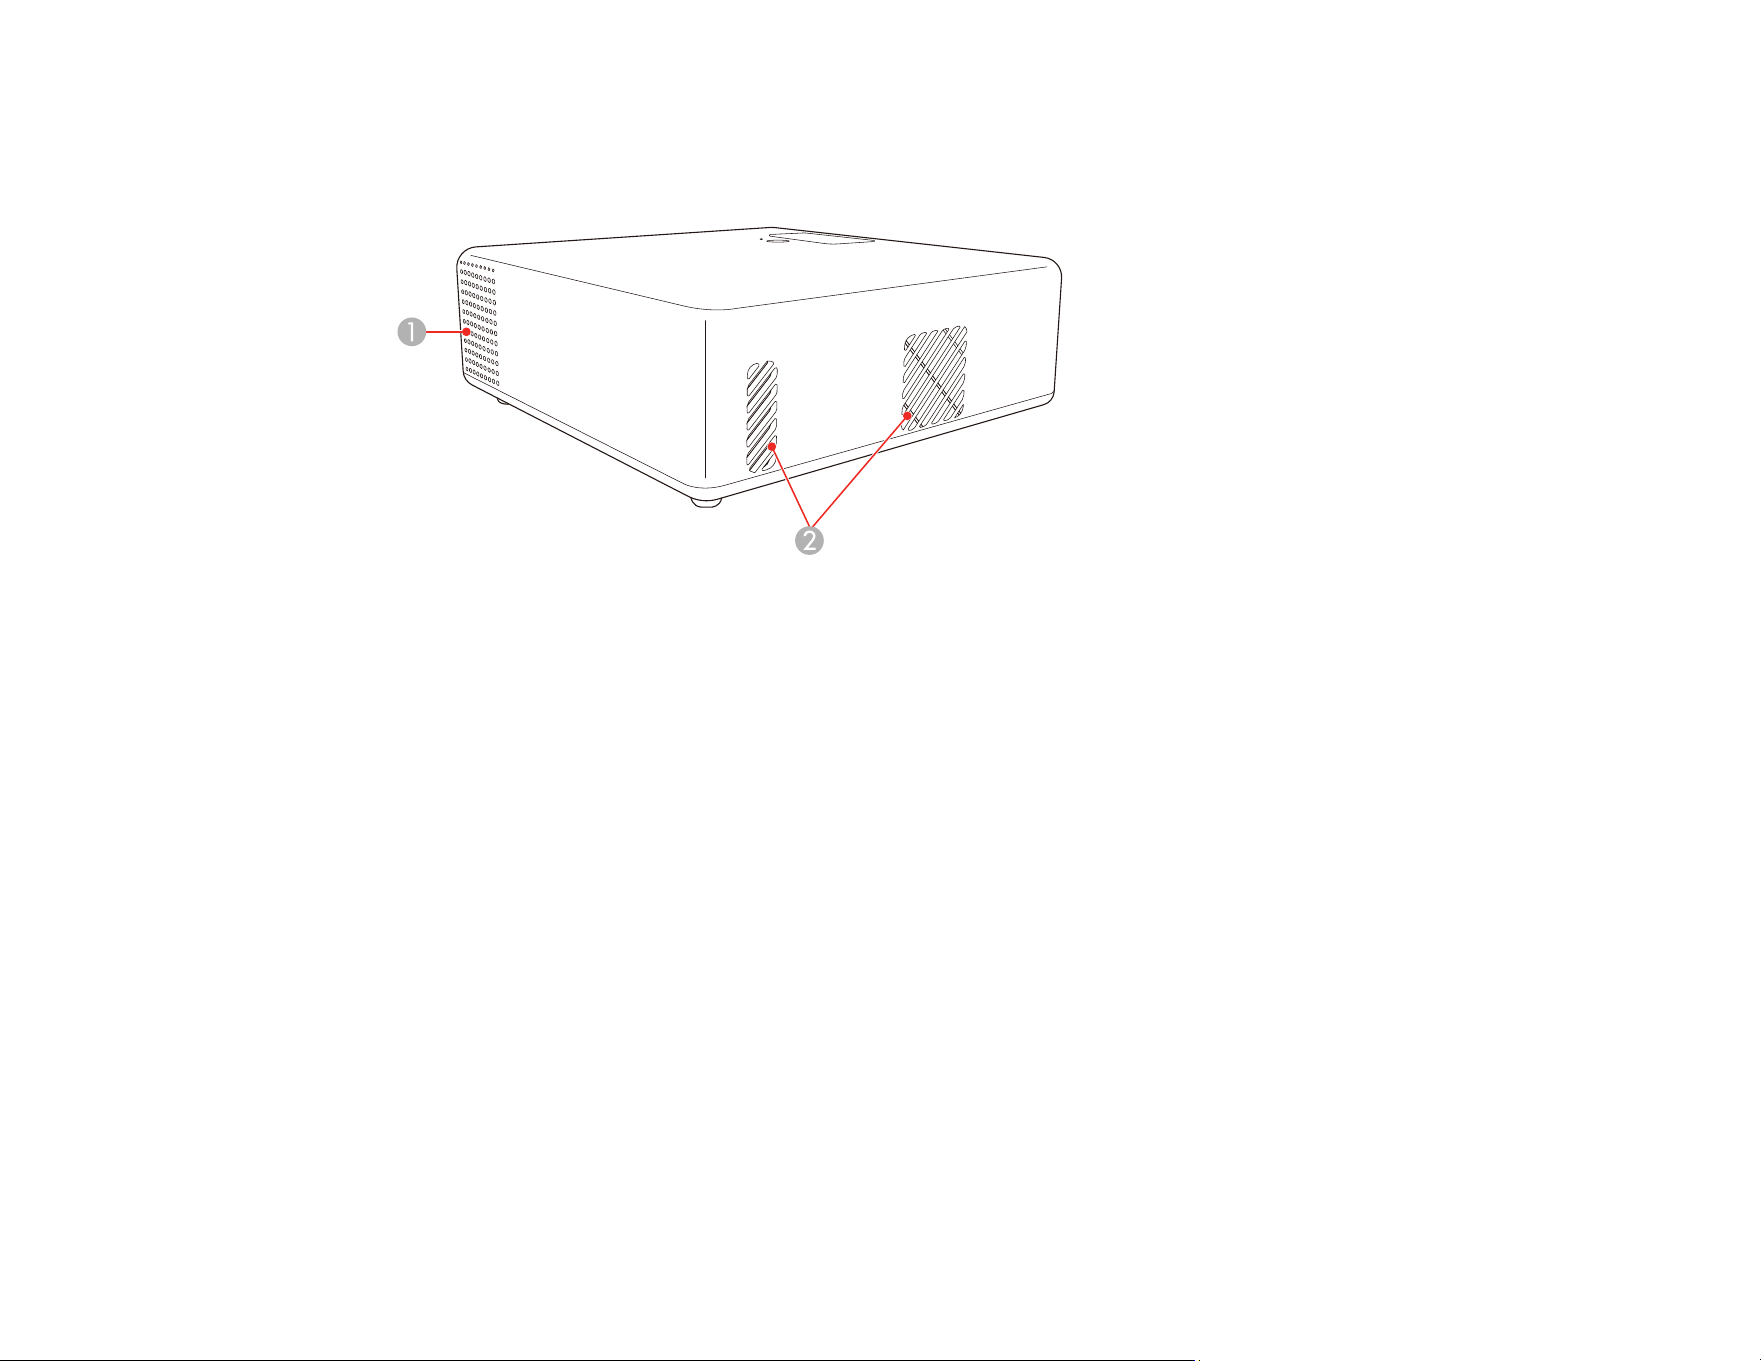
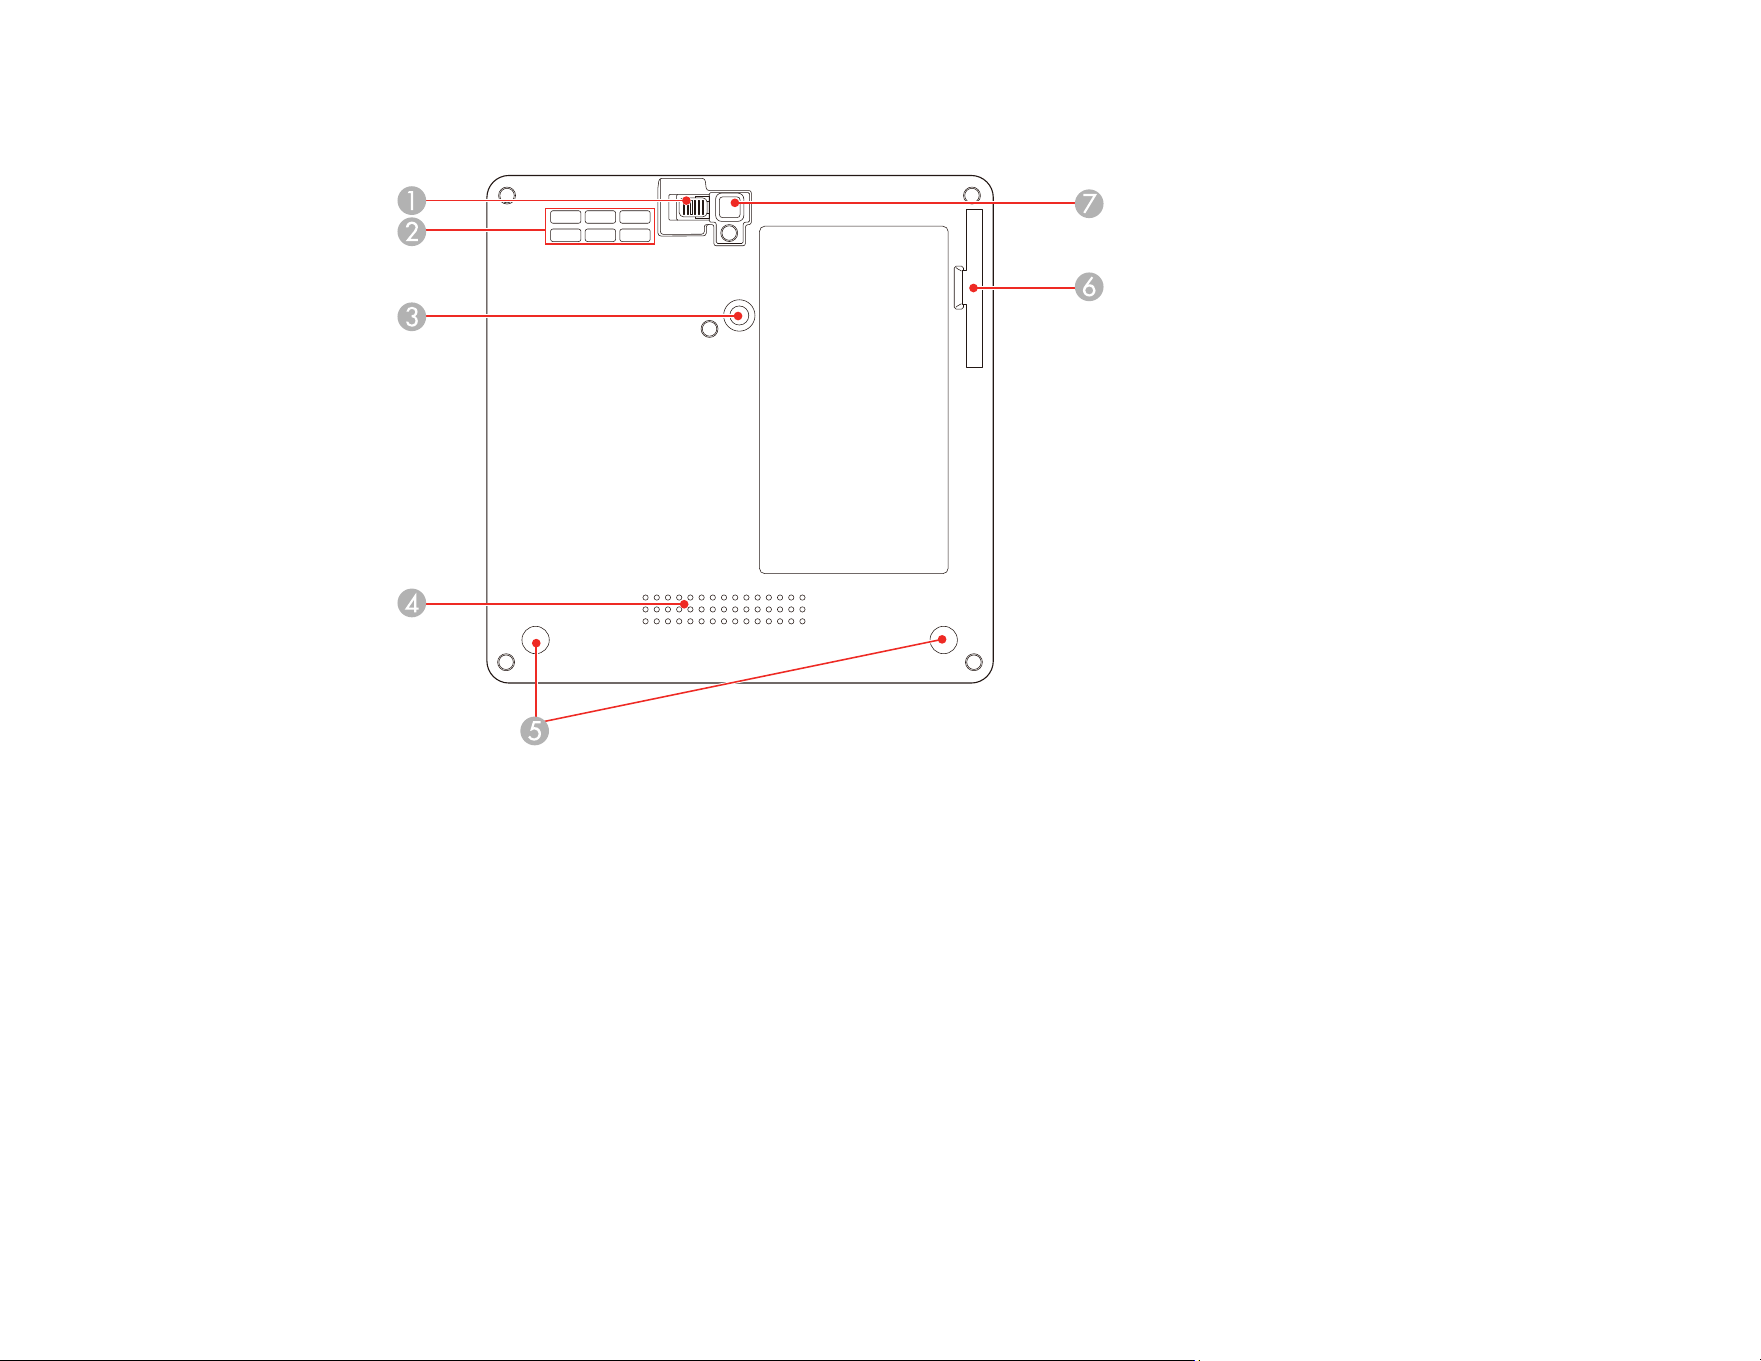
Projector Parts - Rear
1 Speaker
2 Air exhaust vents
Warning: While projecting, do not put your face or hands near the air exhaust vents, and do not place
objects that may become warped or damaged by heat near the vents. Hot air from the air exhaust vents
could cause burns or other injuries, or warping of projector parts.
Parent topic: Projector Part Locations
18
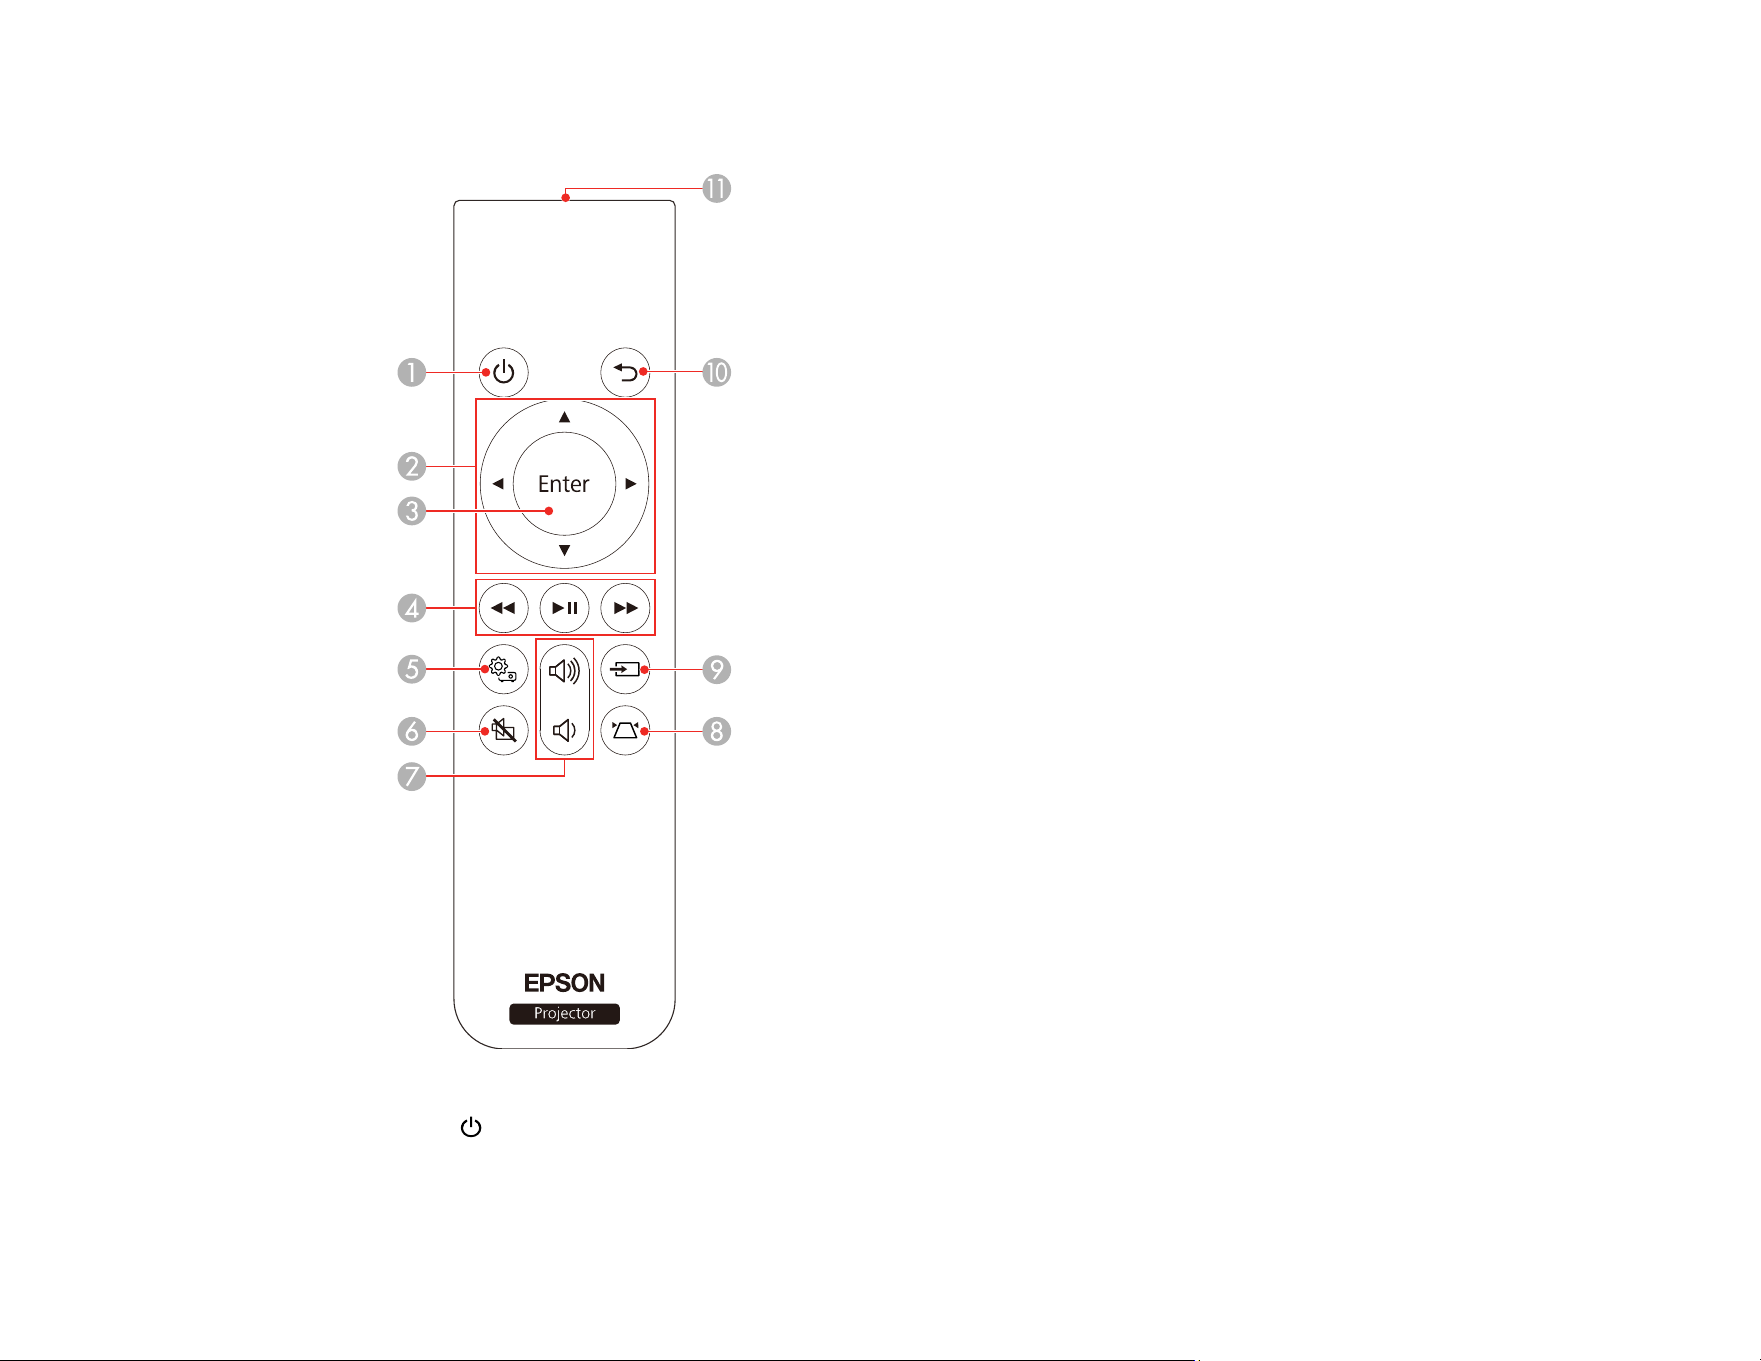
Projector Parts - Remote Control
1
power button
2 Arrow buttons (move through on-screen options)
19
3 Enter button (selects options)
4
rewind, play/pause, and fast forward buttons (control connected streaming device)
5
Settings button (accesses projector menus)
6
A/V mute button (turns off picture and sound)
7
volume up and volume down buttons
8 keystone button (corrects image distortion)
9 Source Search button (changes active source)
10 Esc button (cancels/exits function)
11 Remote control emitter
Parent topic: Projector Part Locations

20
Setting Up the Projector
Follow the instructions in these sections to set up your projector for use.
Projector Placement
Projector Connections
Installing Batteries in the Remote Control
Projector Placement
You can place the projector on almost any flat surface to project an image.
You can also install the projector in a ceiling mount if you want to use it in a fixed location. A mounting
plate is required when installing the projector on a VESA-compliant mount.
There is no vertical or horizontal limit to how the projector can be installed.
Keep these considerations in mind as you select a projector location:
• Place the projector on a sturdy, level surface or install it using a compatible mount.
• Place the projector parallel to the screen.
• Leave plenty of space around and under the projector for ventilation, and do not place it on top of or
next to anything that could block the vents.
• Position the projector within reach of a grounded electrical outlet or extension cord.
Make sure you read the safety instructions when placing or mounting your projector. See the link below.
Projector Setup and Installation Options
Projection Distance
Installing the Projector in a Mount or Tripod
Parent topic: Setting Up the Projector
Related references
Important Safety Instructions
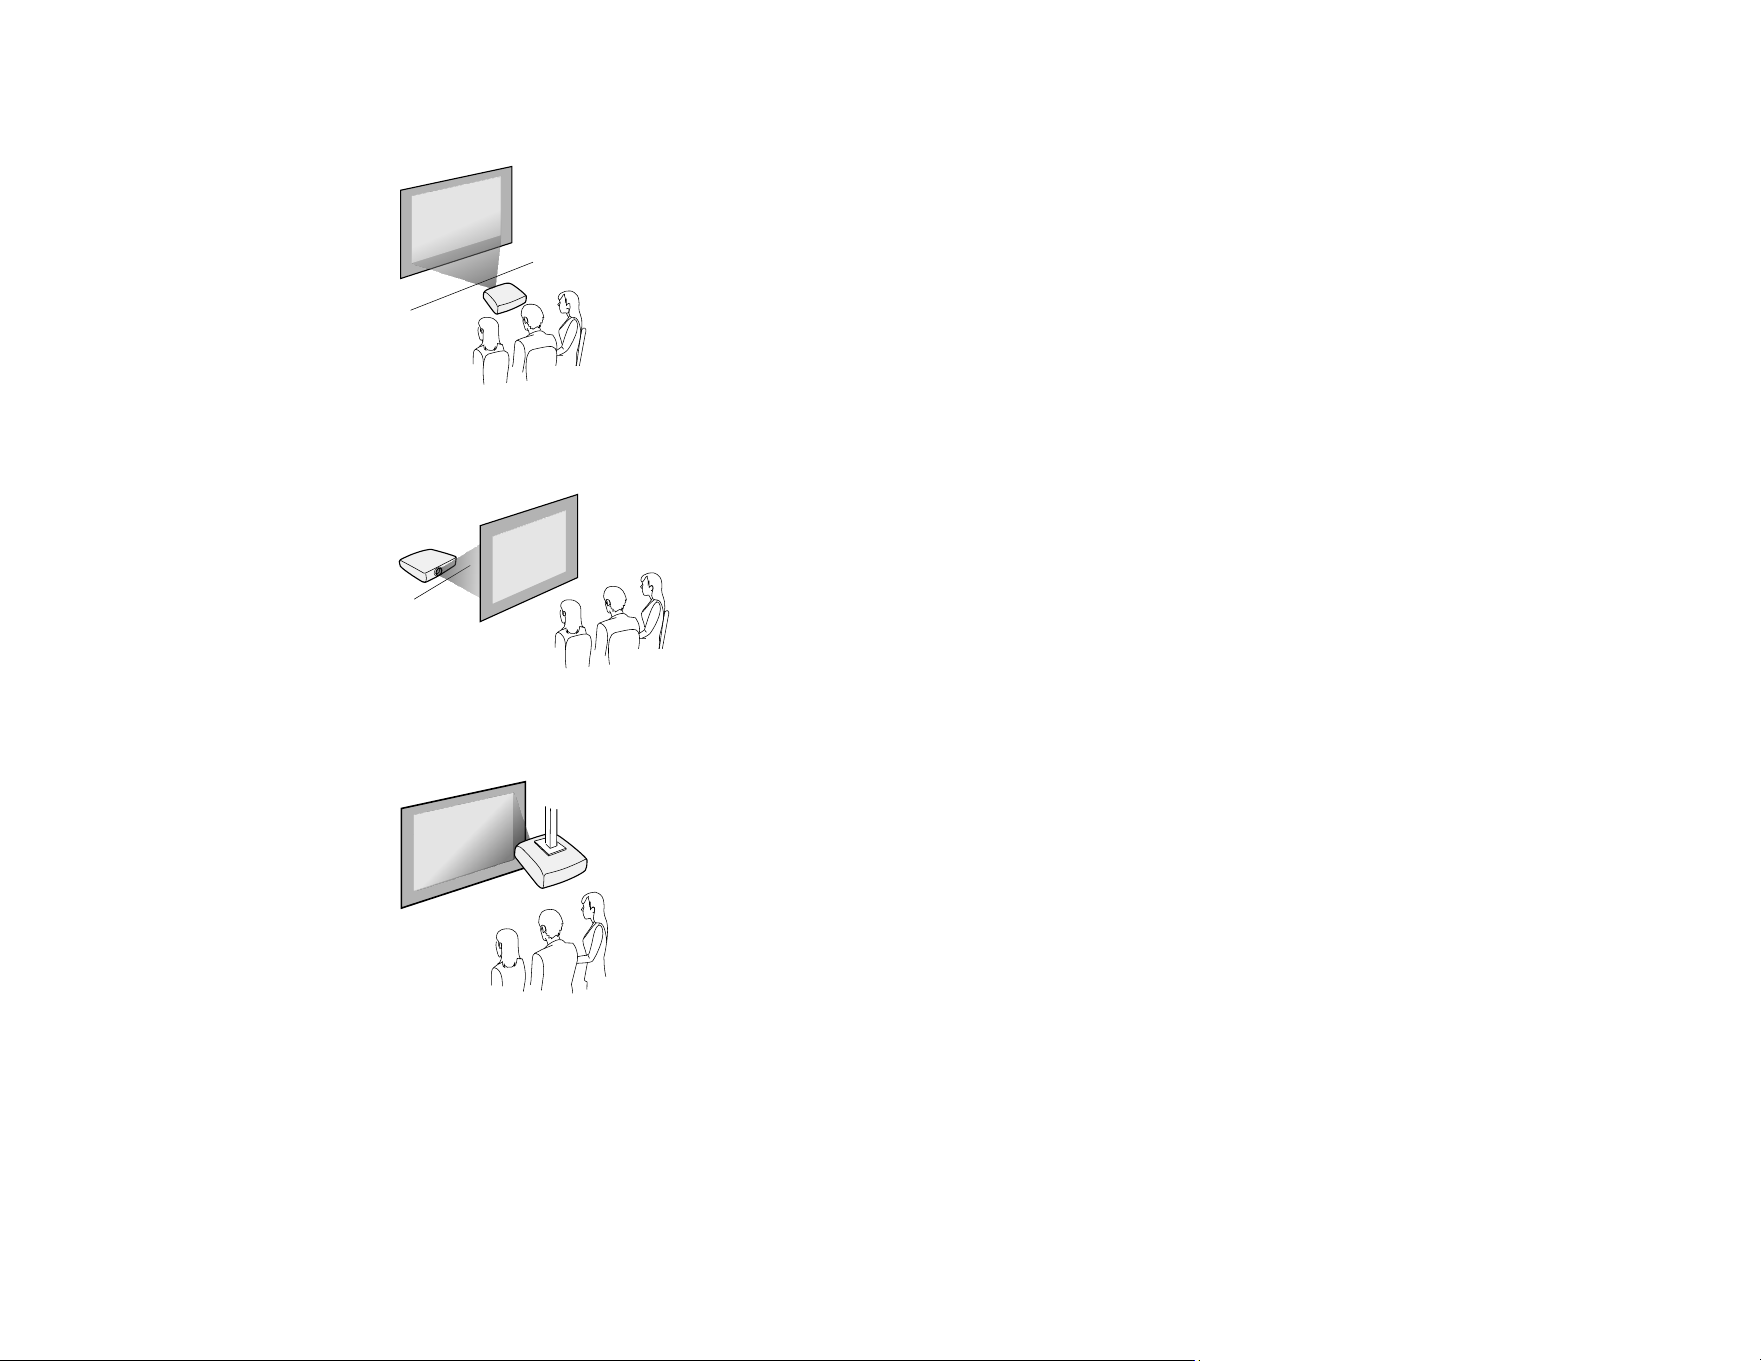
Projector Setup and Installation Options
You can set up or install your projector in the following ways:
21
Front
Rear
Front ceiling
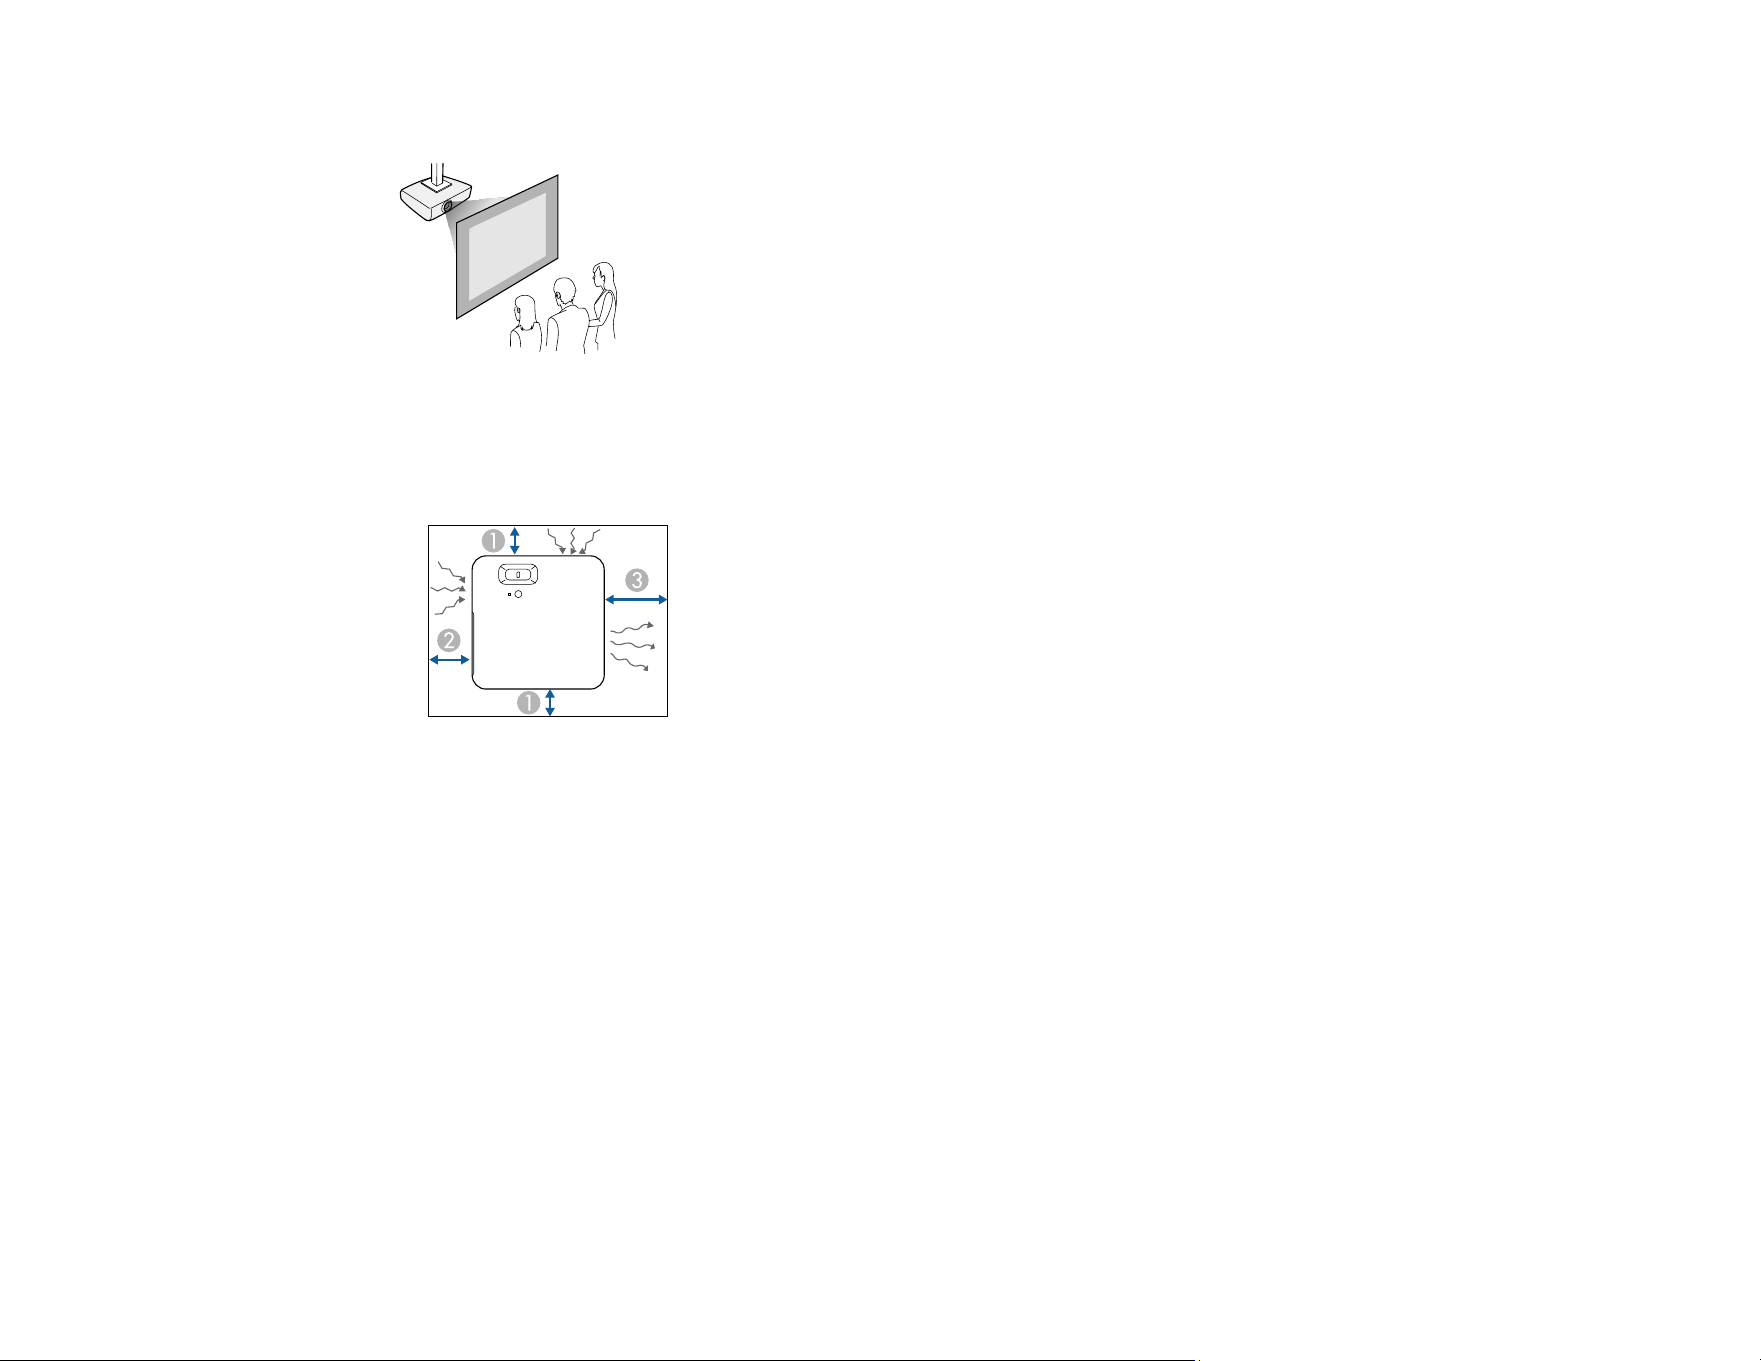
22
Rear ceiling
Note: Be sure to leave the following amount of space around the projector to avoid blocking the air
exhaust and intake vents.
1 3.94 inches (10 cm)
2 7.87 inches (20 cm)
3 11.81 inches (30 cm)
Caution: Install the AC adapter more than 11.8 inches (30 cm) away from the projector. If the
temperature of the AC adapter rises due to heat from the projector, the projector may not operate
properly.
If you project from the ceiling or from the rear, be sure to select the correct Projection setting in the
Settings menu. If necessary, adjust the OSD Rotation setting in the Settings > Installation menu.
Parent topic: Projector Placement
23
Related references
Projector Feature Settings - Settings Menu
Related tasks
Installing the Projector in a Mount or Tripod
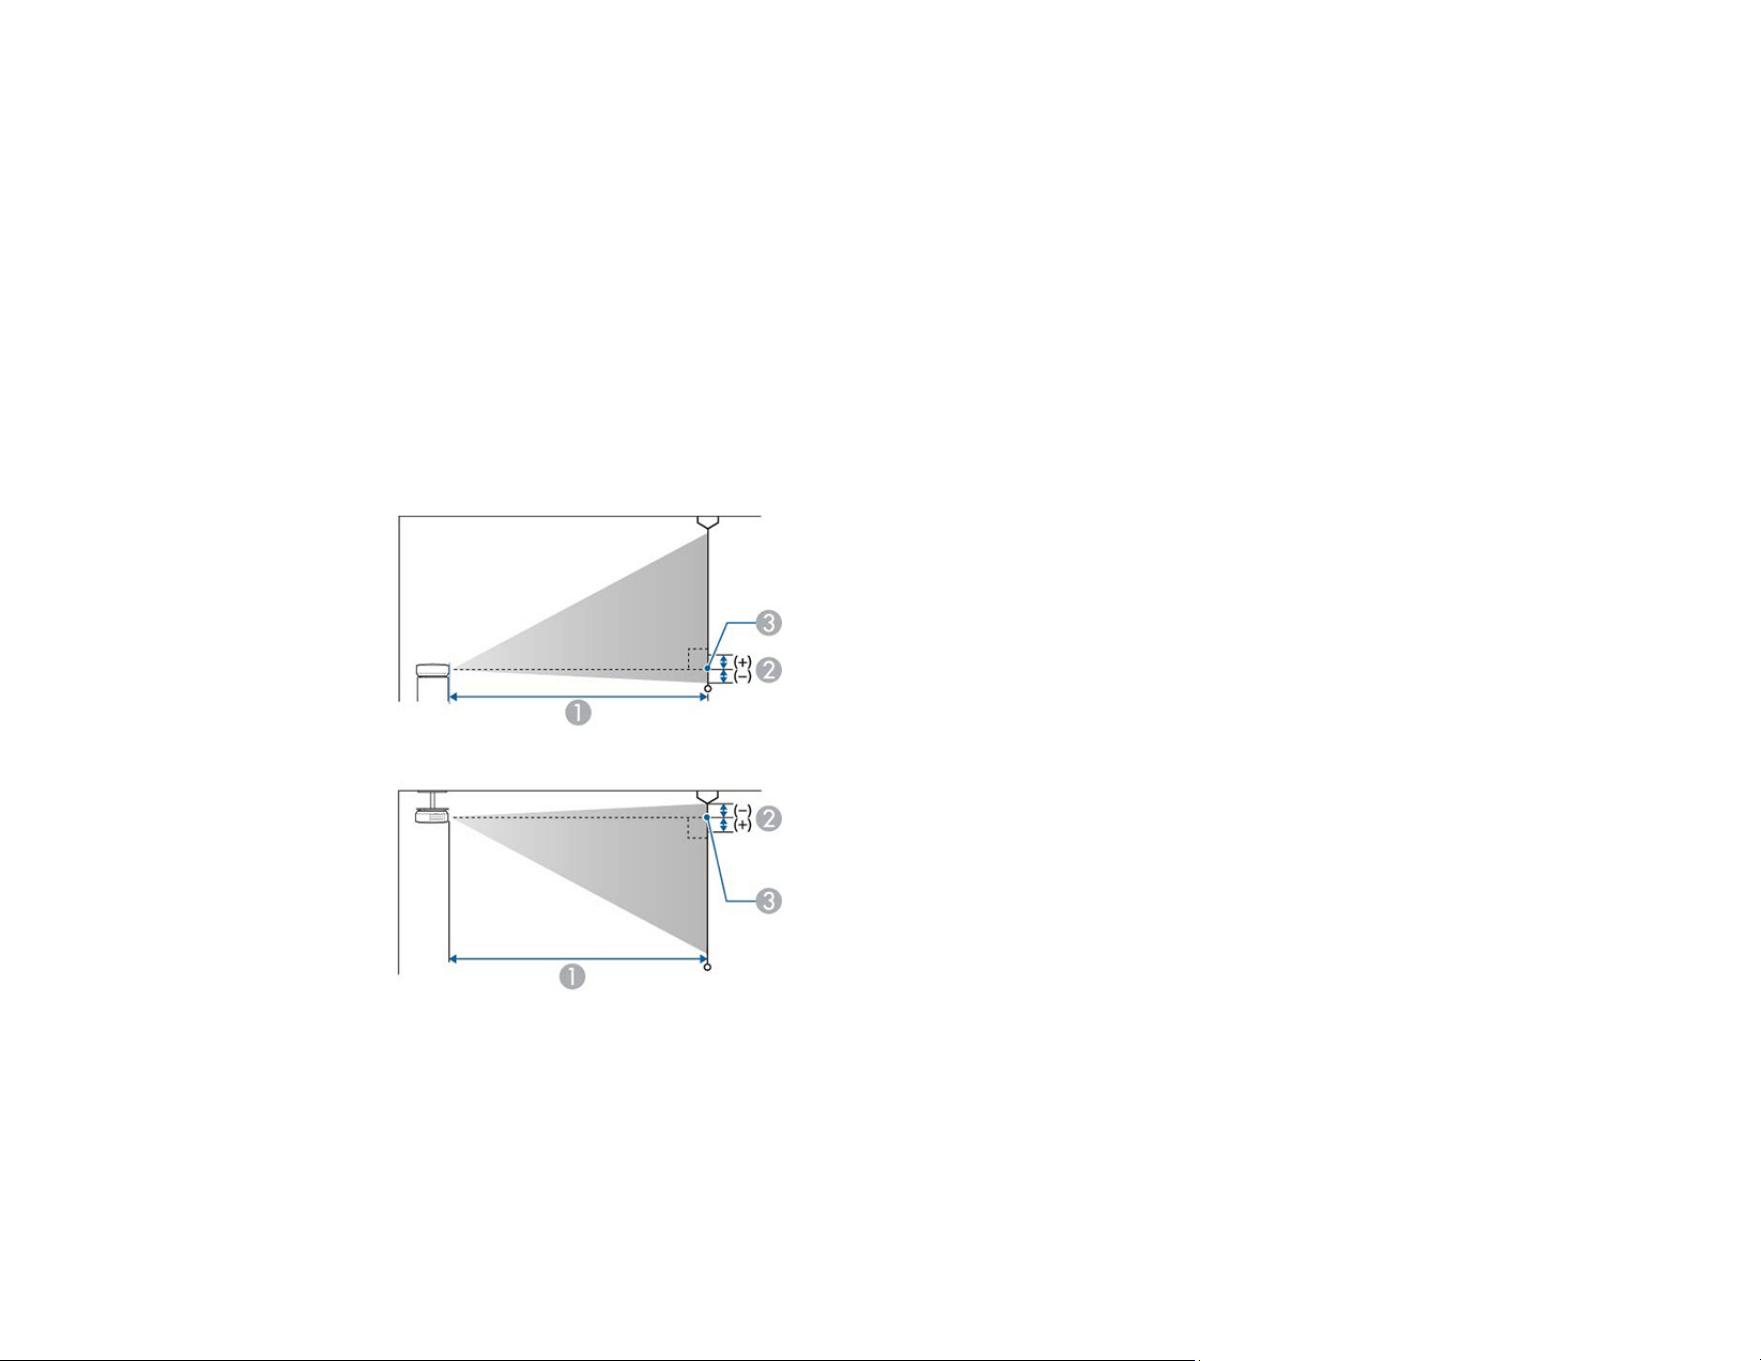
Projection Distance
The distance at which you place the projector from the screen determines the approximate size of the
image. The image size increases the farther the projector is from the screen, but can vary depending on
the zoom factor, aspect ratio, and other settings.
Use the tables here to determine approximately how far to place the projector from the screen based on
the size of the projected image. (Conversion figures may have been rounded up or down.) You can also
use the Projection Distance Calculator here (U.S.), here (Canada), or here (Caribbean).
1 Projection distance
2 Distance from the center of the lens to the base of the screen
24
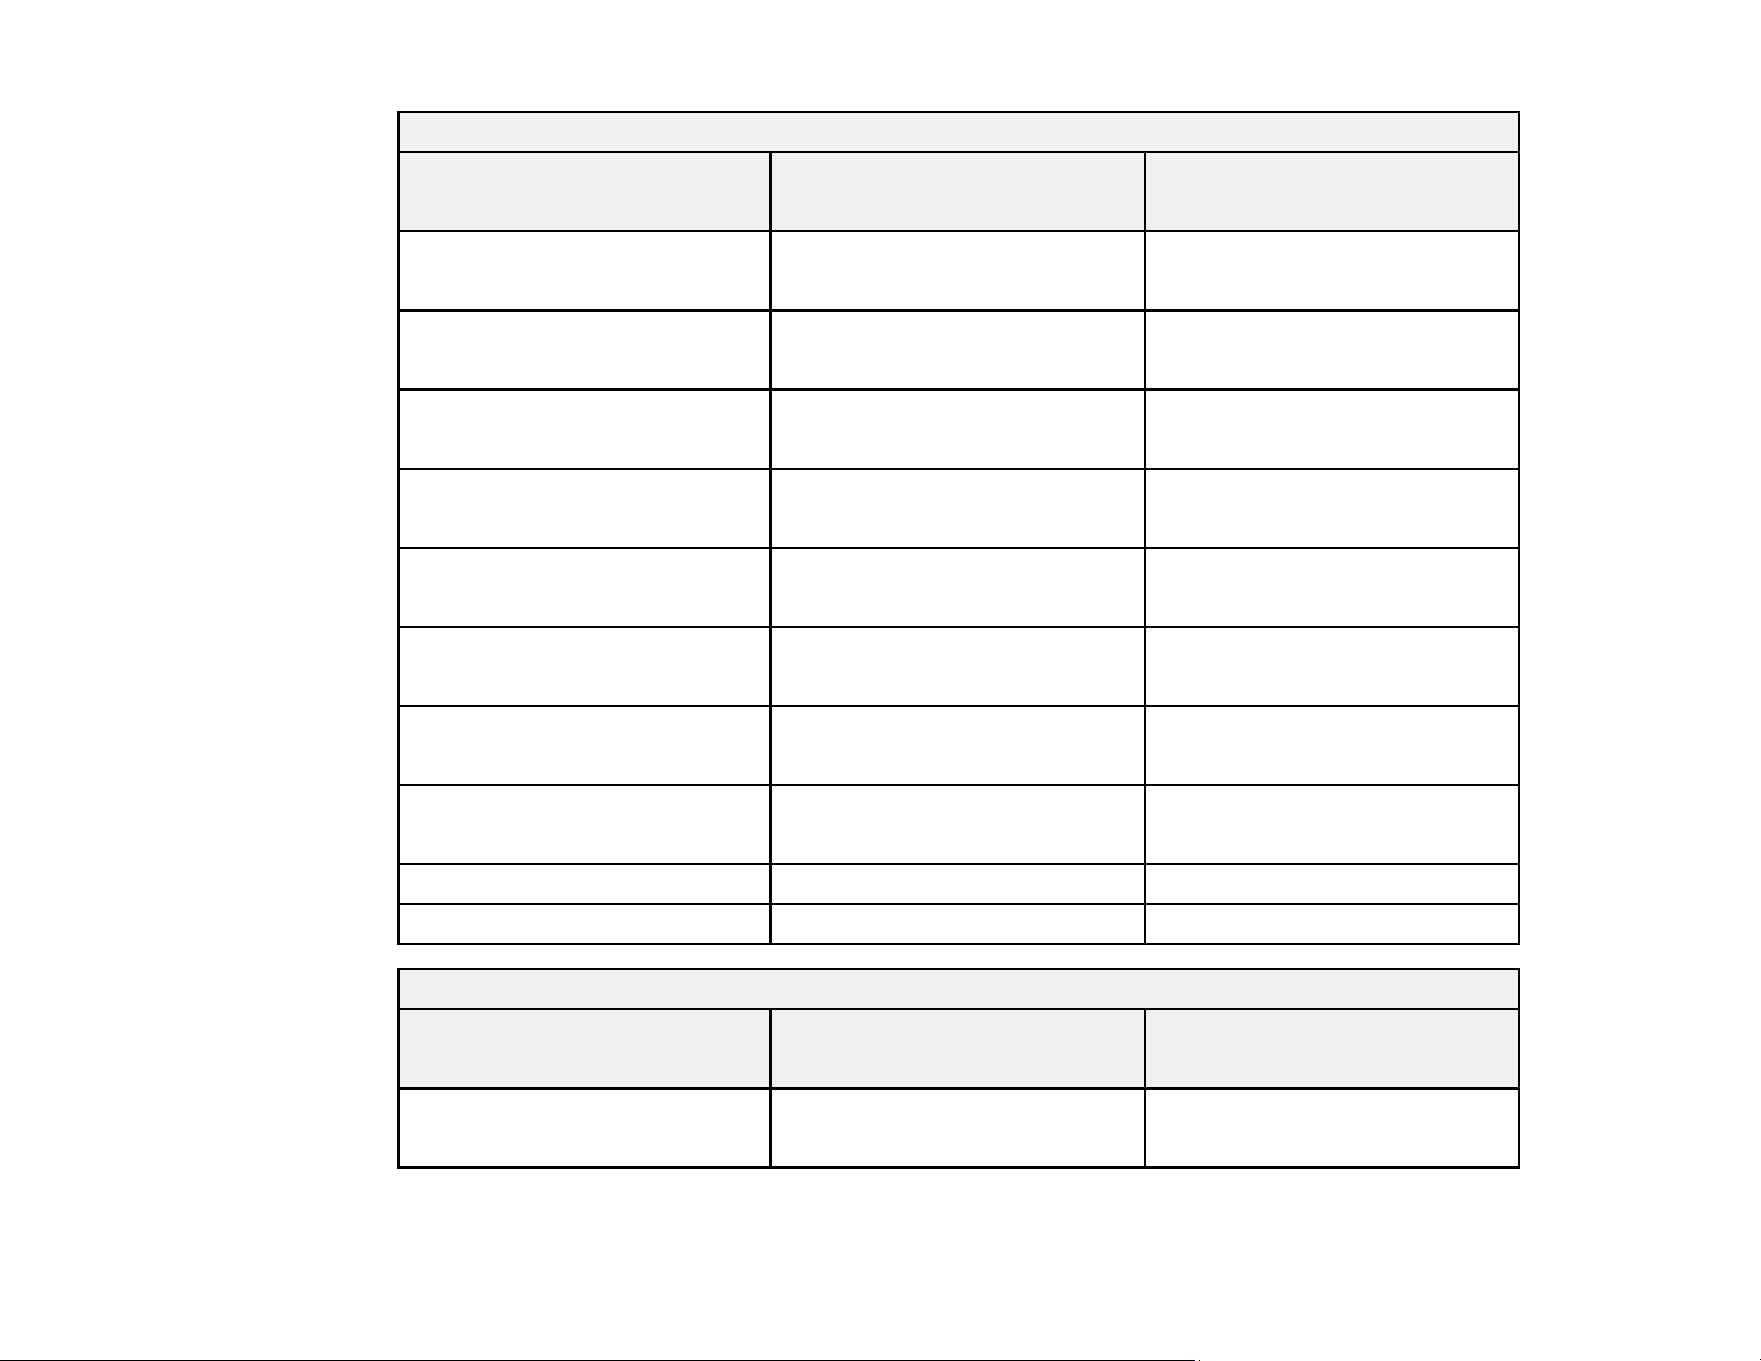
16:9 Aspect Ratio Image or Screen
Screen or image size Projection distance (1)
Wide to Tele
Distance from center of lens to
base of screen (2)
30 inches 26 to 35 inches
(65 to 89 cm)
0 inches (0 cm)
40 inches 35 to 47 inches
(88 to 120 cm)
0 inches (0 cm)
50 inches 43 to 59 inches
(110 to 150 cm)
0 inches (0 cm)
60 inches 52 to 71 inches
(133 to 181 cm)
0 inches (0 cm)
70 inches 61 to 83 inches
(156 to 212 cm)
0 inches (0 cm)
80 inches 70 to 95 inches
(179 to 243 cm)
0 inches (0 cm)
90 inches 79 to 108 inches
(202 to 273 cm)
0 inches (0 cm)
100 inches 88 to 120 inches
(224 to 304 cm)
0 inches (0 cm)
120 inches 106 inches (270 cm) 0 inches (0 cm)
150 inches 133 inches (338 cm) 0 inches (0 cm)
16:10 Aspect Ratio Image or Screen
Screen or image size Projection distance (1)
Wide to Tele
Distance from center of lens to
base of screen (2)
30 inches 28 to 38 inches
(70 to 96 cm)
0 inches (0 cm)

25
16:10 Aspect Ratio Image or Screen
Screen or image size Projection distance (1)
Wide to Tele
Distance from center of lens to
base of screen (2)
40 inches 37 to 51 inches
(95 to 130 cm)
0 inches (0 cm)
50 inches 47 to 64 inches
(120 to 163 cm)
0 inches (0 cm)
60 inches 57 to 77 inches
(144 to 196 cm)
0 inches (0 cm)
70 inches 66 to 90 inches
(169 to 229 cm)
0 inches (0 cm)
80 inches 76 to 103 inches
(194 to 262 cm)
0 inches (0 cm)
90 inches 86 to 116 inches
(218 to 296 cm)
0 inches (0 cm)
100 inches 96 to 130 inches
(243 to 329 cm)
0 inches (0 cm)
120 inches 115 inches
(292 cm)
0 inches (0 cm)
130 inches 125 inches
(317 cm)
0 inches (0 cm)
140 inches 134 inches
(341 cm)
0 inches (0 cm)

26
4:3 Aspect Ratio Image or Screen
Screen or image size Projection distance (1)
Wide to Tele
Distance from center of lens to
base of screen (2)
30 inches 32 to 43 inches
(80 to 109 cm)
0 inches (0 cm)
40 inches 43 to 58 inches
(108 to 147 cm)
0 inches (0 cm)
50 inches 54 to 73 inches
(136 to 185 cm)
0 inches (0 cm)
60 inches 64 to 88 inches
(164 to 222 cm)
0 inches (0 cm)
70 inches 75 to 102 inches
(192 to 260 cm)
0 inches (0 cm)
80 inches 86 to 117 inches
(220 to 298 cm)
0 inches (0 cm)
90 inches 97 to 132 inches
(247 to 335 cm)
0 inches (0 cm)
100 inches 108 inches
(275 cm)
0 inches (0 cm)
120 inches 130 inches
(331 cm)
0 inches (0 cm)
Parent topic: Projector Placement
Installing the Projector in a Mount or Tripod
When installing the projector in an optional mount, follow these guidelines:
Note: You will require the optional mounting plate (ELPMB65) to install the projector in a mount.
• You can install the projector on VESA-compliant (75 × 75 mm) mounting hardware.
27
• You can install the projector on a tripod that uses 1/4-20UNC size fixed screws
• When installing the projector in a high place, be sure to install the optional security wire set
(ELPWR01) for safety purposes
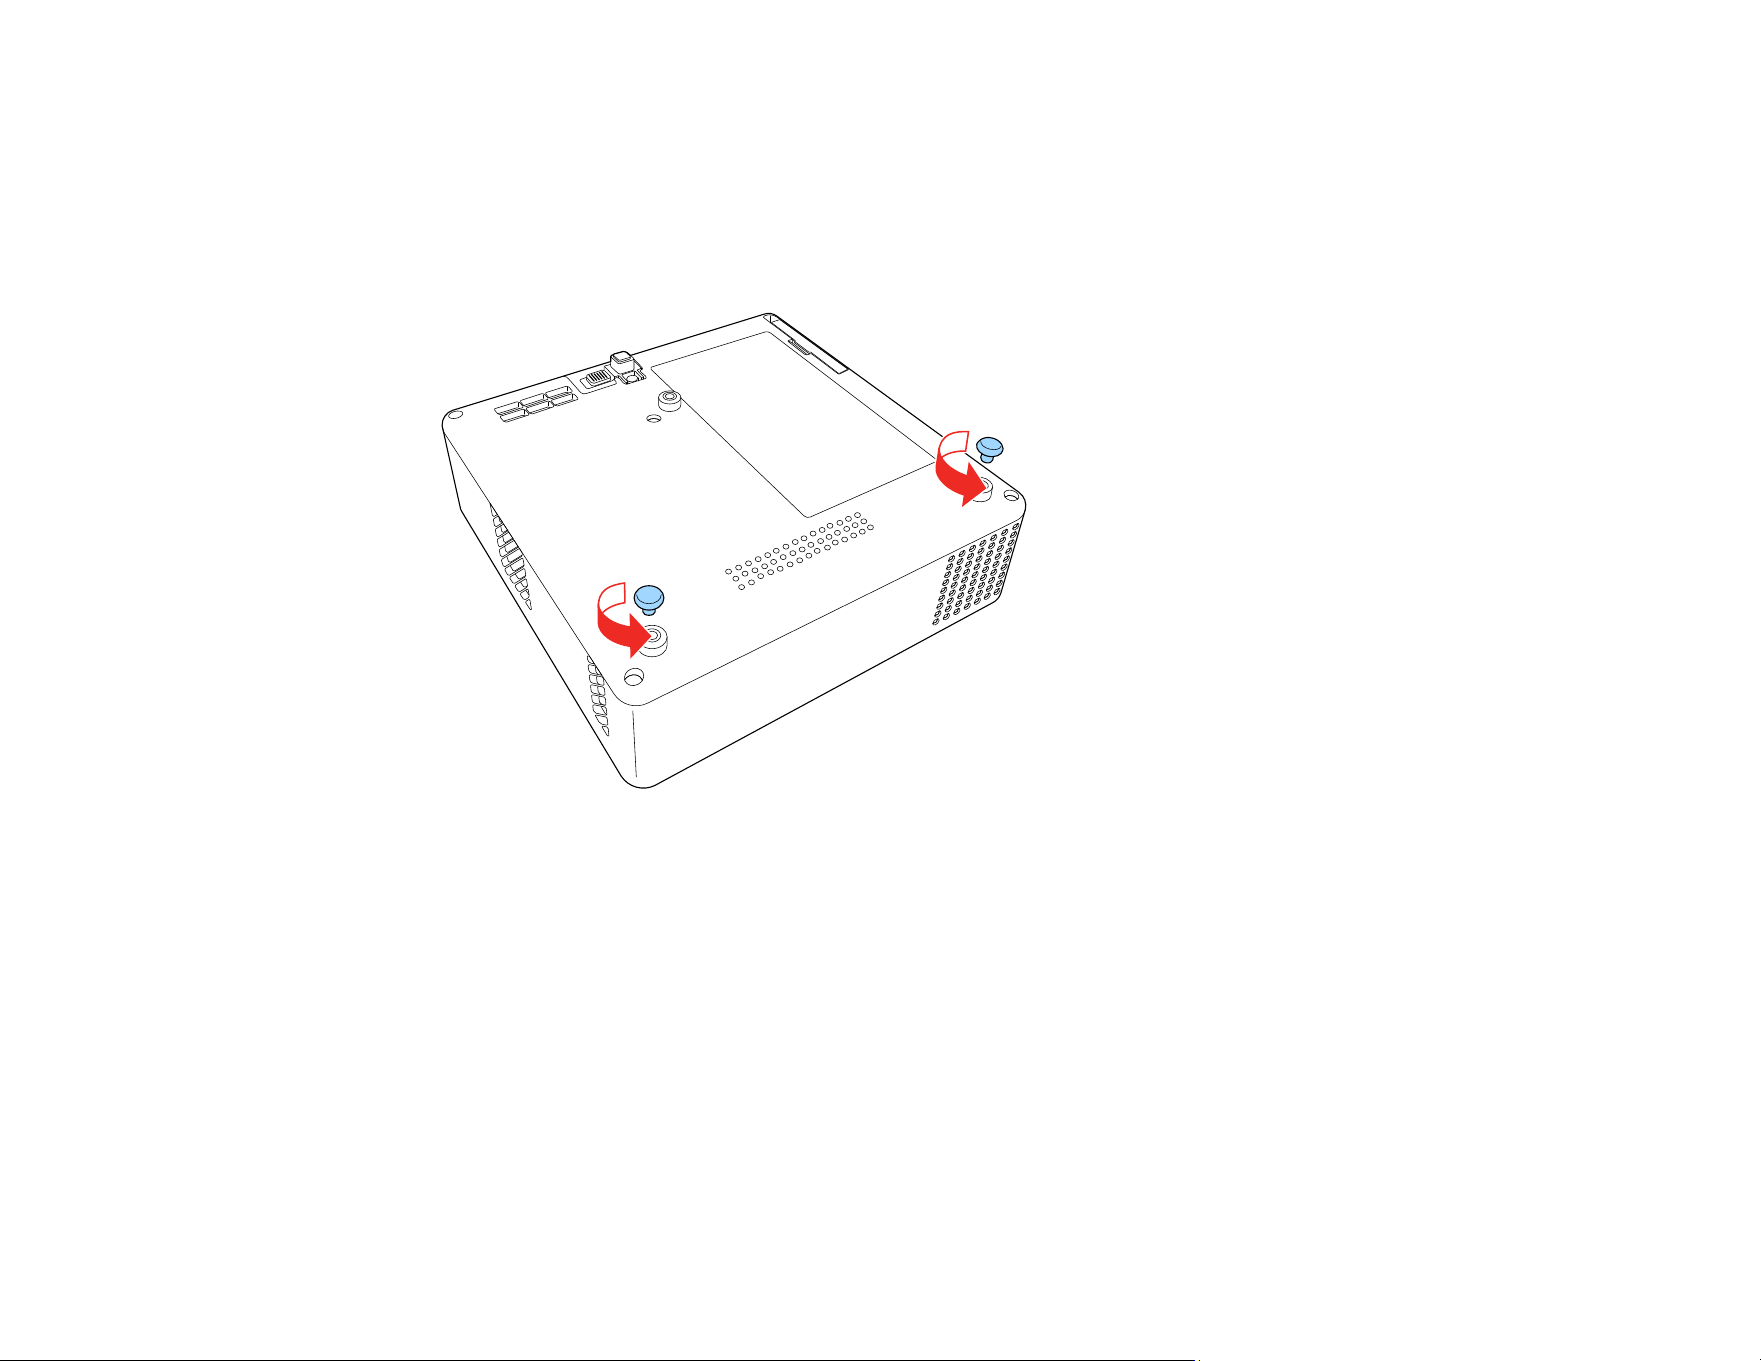
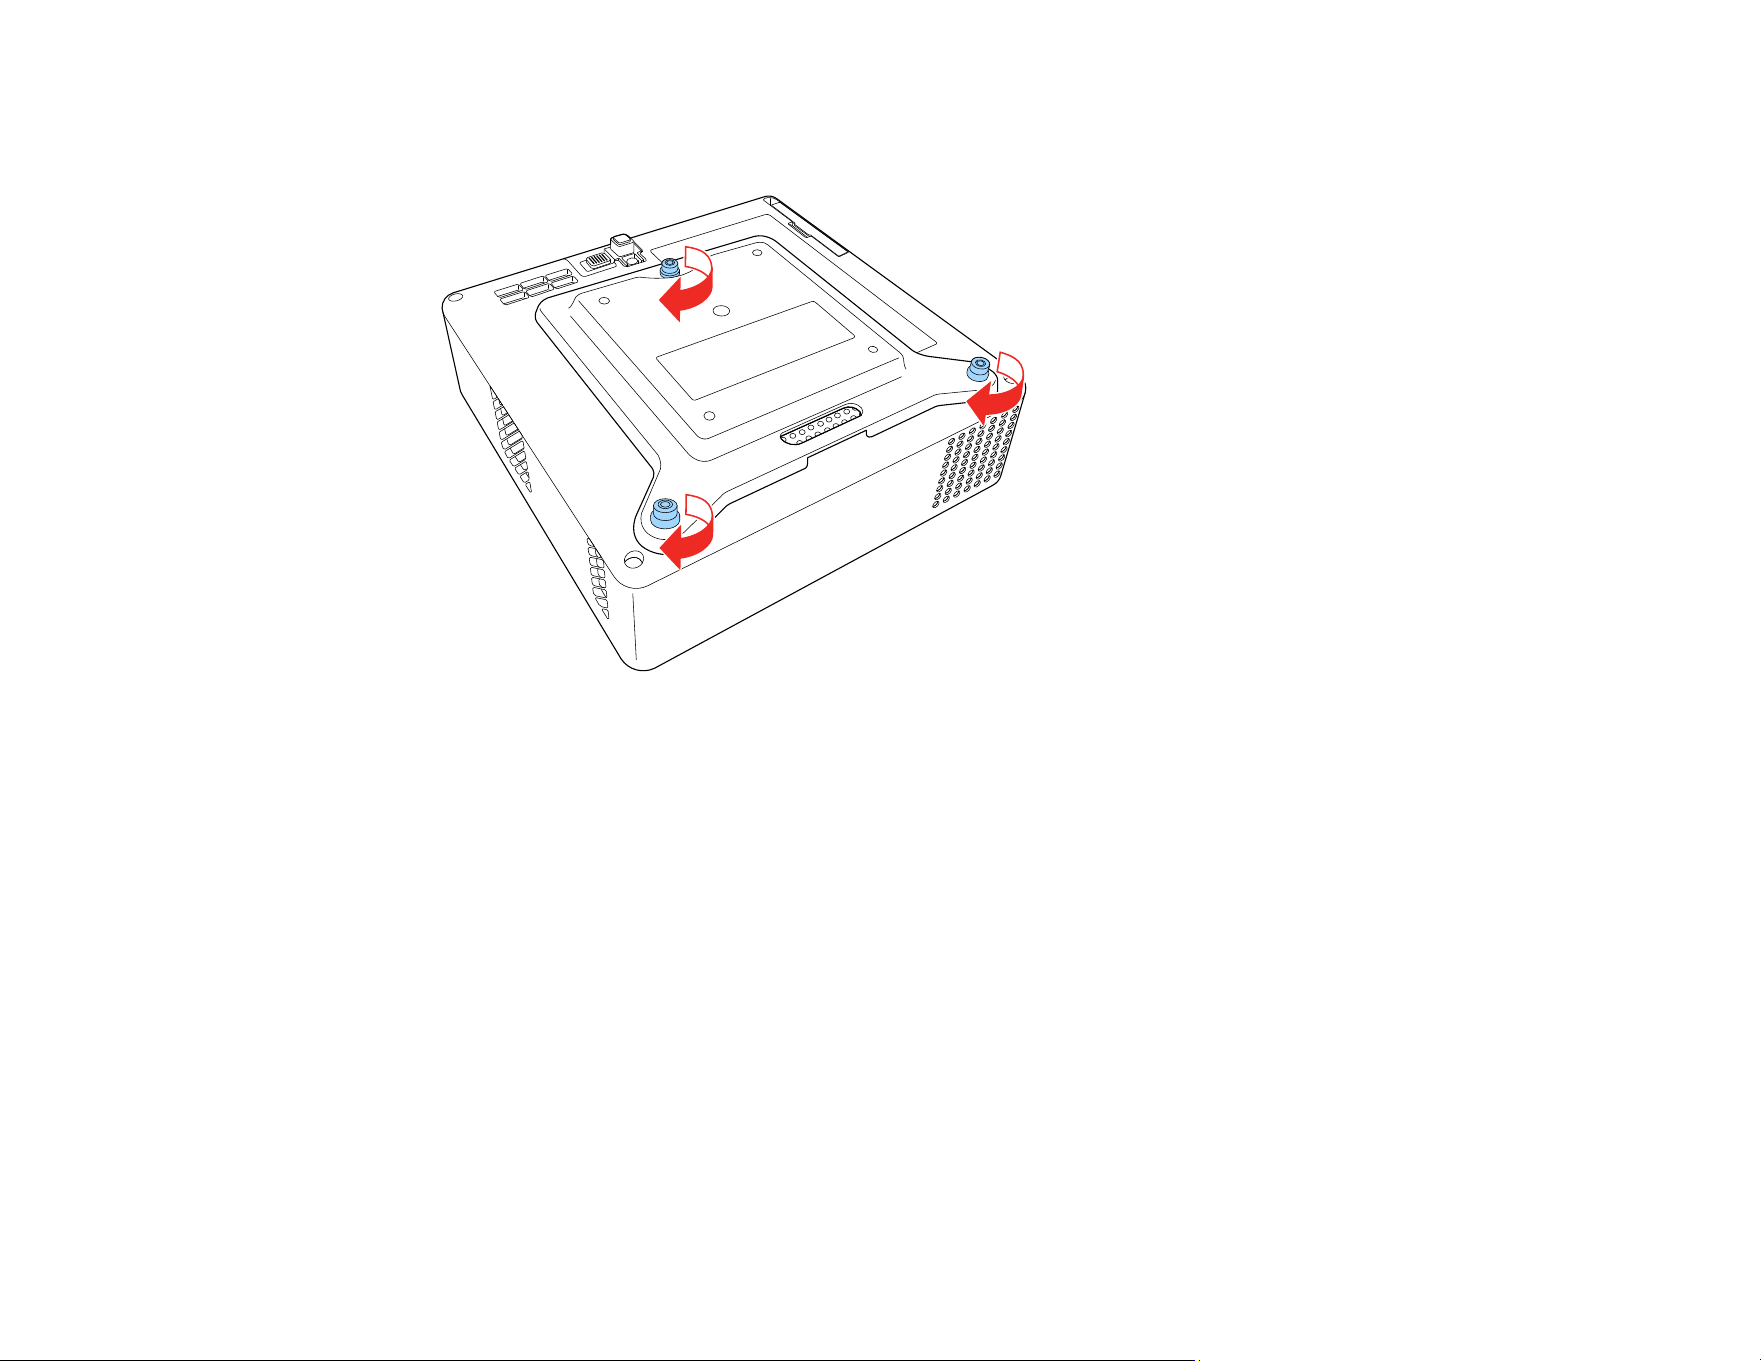
1. Turn the projector upside down.
2. Remove the rear feet by turning them clockwise.

28
3. When installing the projector in a high place, thread the optional security wire set (ELPWR01)
through the mount plate.
29
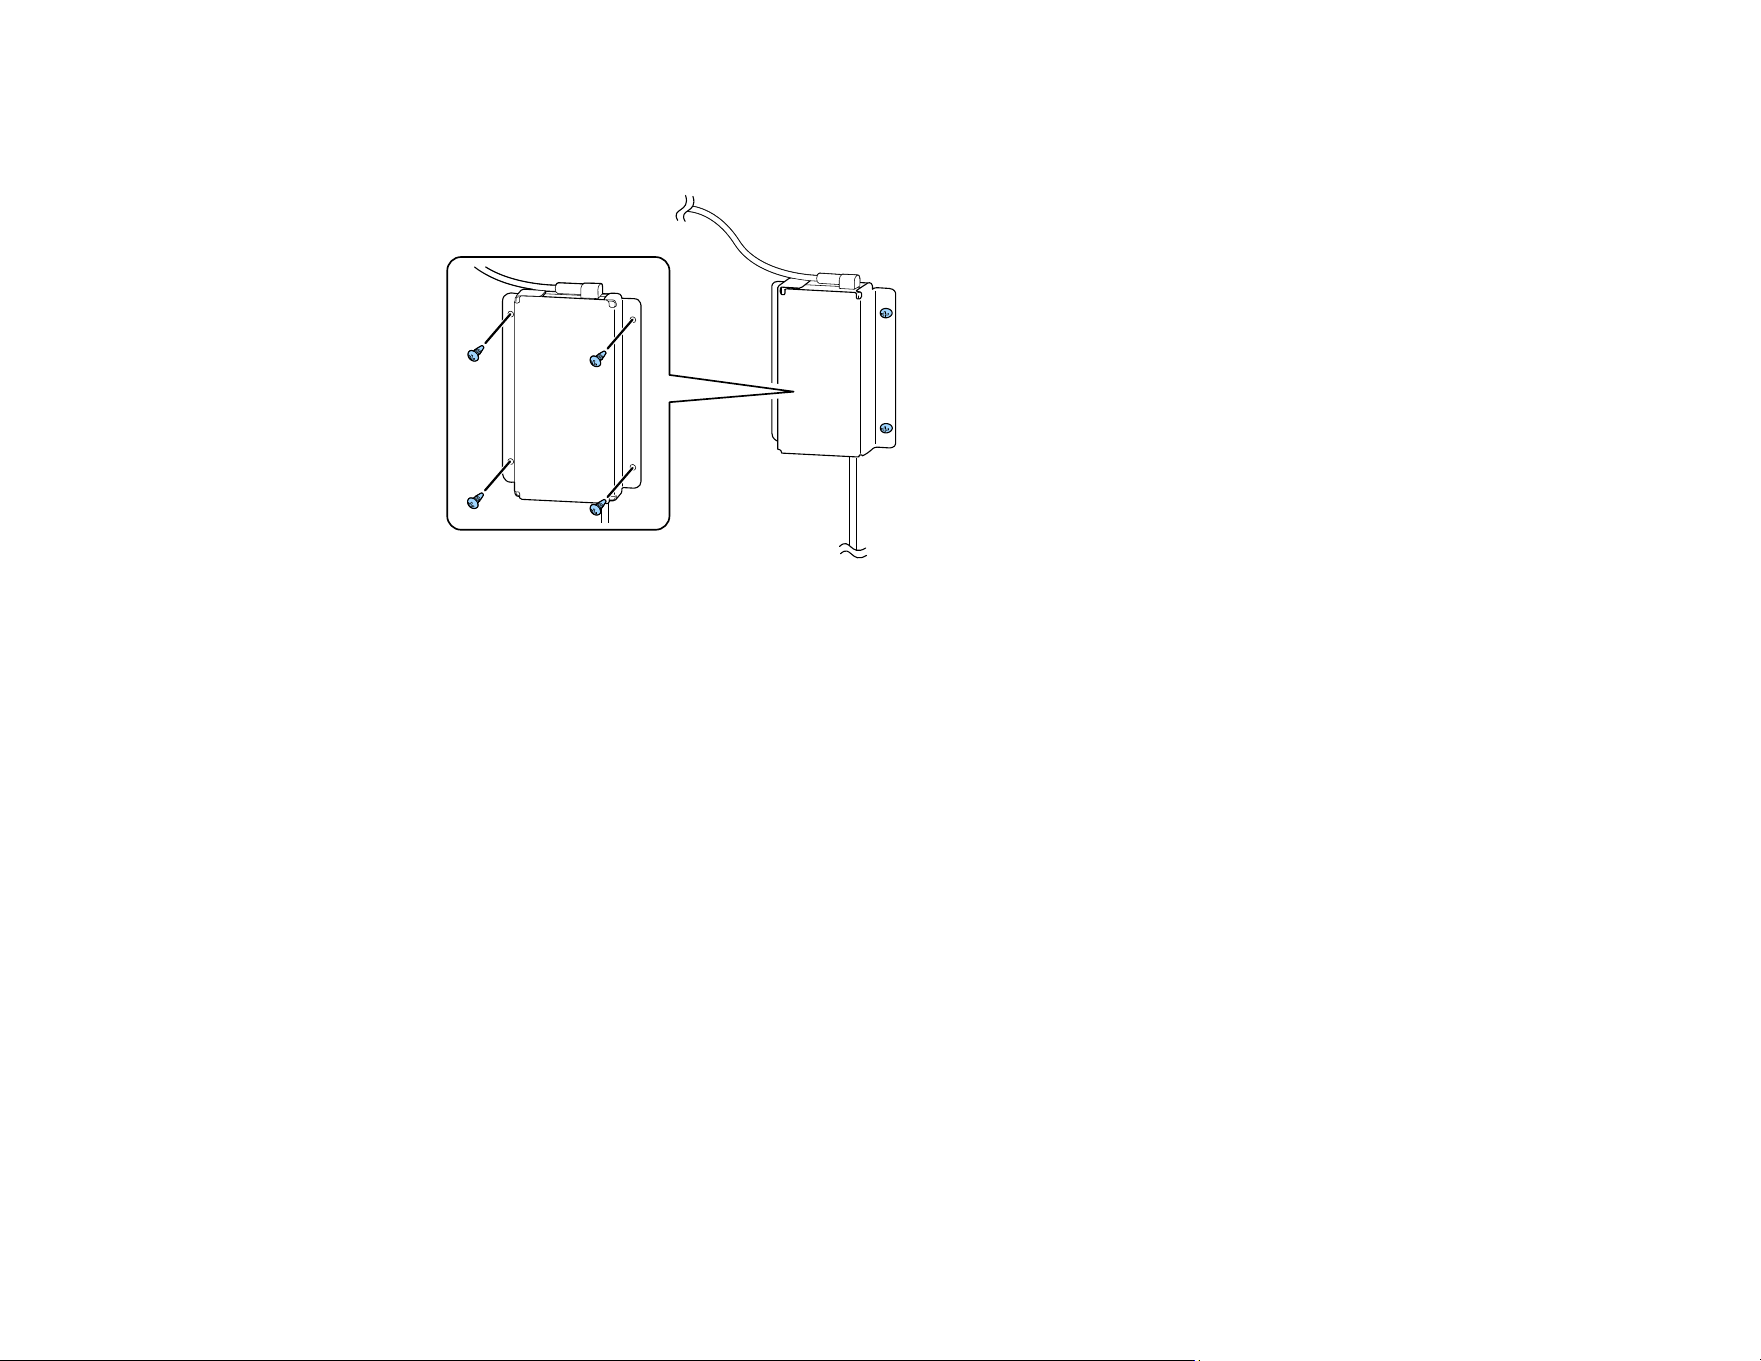
4. Attach the mounting plate to the projector and secure it in place with the screws that came with the
mounting plate.
Caution: Do not use the feet you removed in step 2 to attach the mounting plate. They could loosen
and cause the projector to fall. Use the screws supplied with the mount plate (M4 × 6 mm max.
depth).
5. Install the projector onto the mounting hardware or a tripod. For details, see the documentation
supplied with the mount or tripod.
Caution: When installing the projector on the mount or tripod, make sure you tighten the screws
securely. If you place the projector upside down, the screws could loosen and the projector could
fall.
When installing the projector in a high location using the safety wire set, make sure you attach the
carabiner to a point that is strong enough to support the weight of the projector and mounting
hardware.
30
6. If necessary, mount the AC adapter on the wall or ceiling using the AC adapter holder that is
included with the mounting plate.
Caution: Install the AC adapter at least 11.8 inches (30 cm) away from the projector. If the
temperature of the AC adapter rises due to heat from the projector, the projector may not operate
properly.
Note: When mounting the AC adapter on the wall or ceiling, use screws suitable for the material of
the wall or ceiling. If you are unsure what screws to use, consult a professional.
Parent topic: Projector Placement
Related references
Optional Equipment and Replacement Parts
Projector Connections
See these sections to connect the projector to a variety of projection sources.
Caution: Check the shape and orientation of the connectors on any cable you plan to connect. Do not
force a connector into a port if it does not fit. The device or your projector could be damaged or could
malfunction.
Connecting to an HDMI Video Source
Connecting to a USB Device
31
Connecting Headphones
Parent topic: Setting Up the Projector
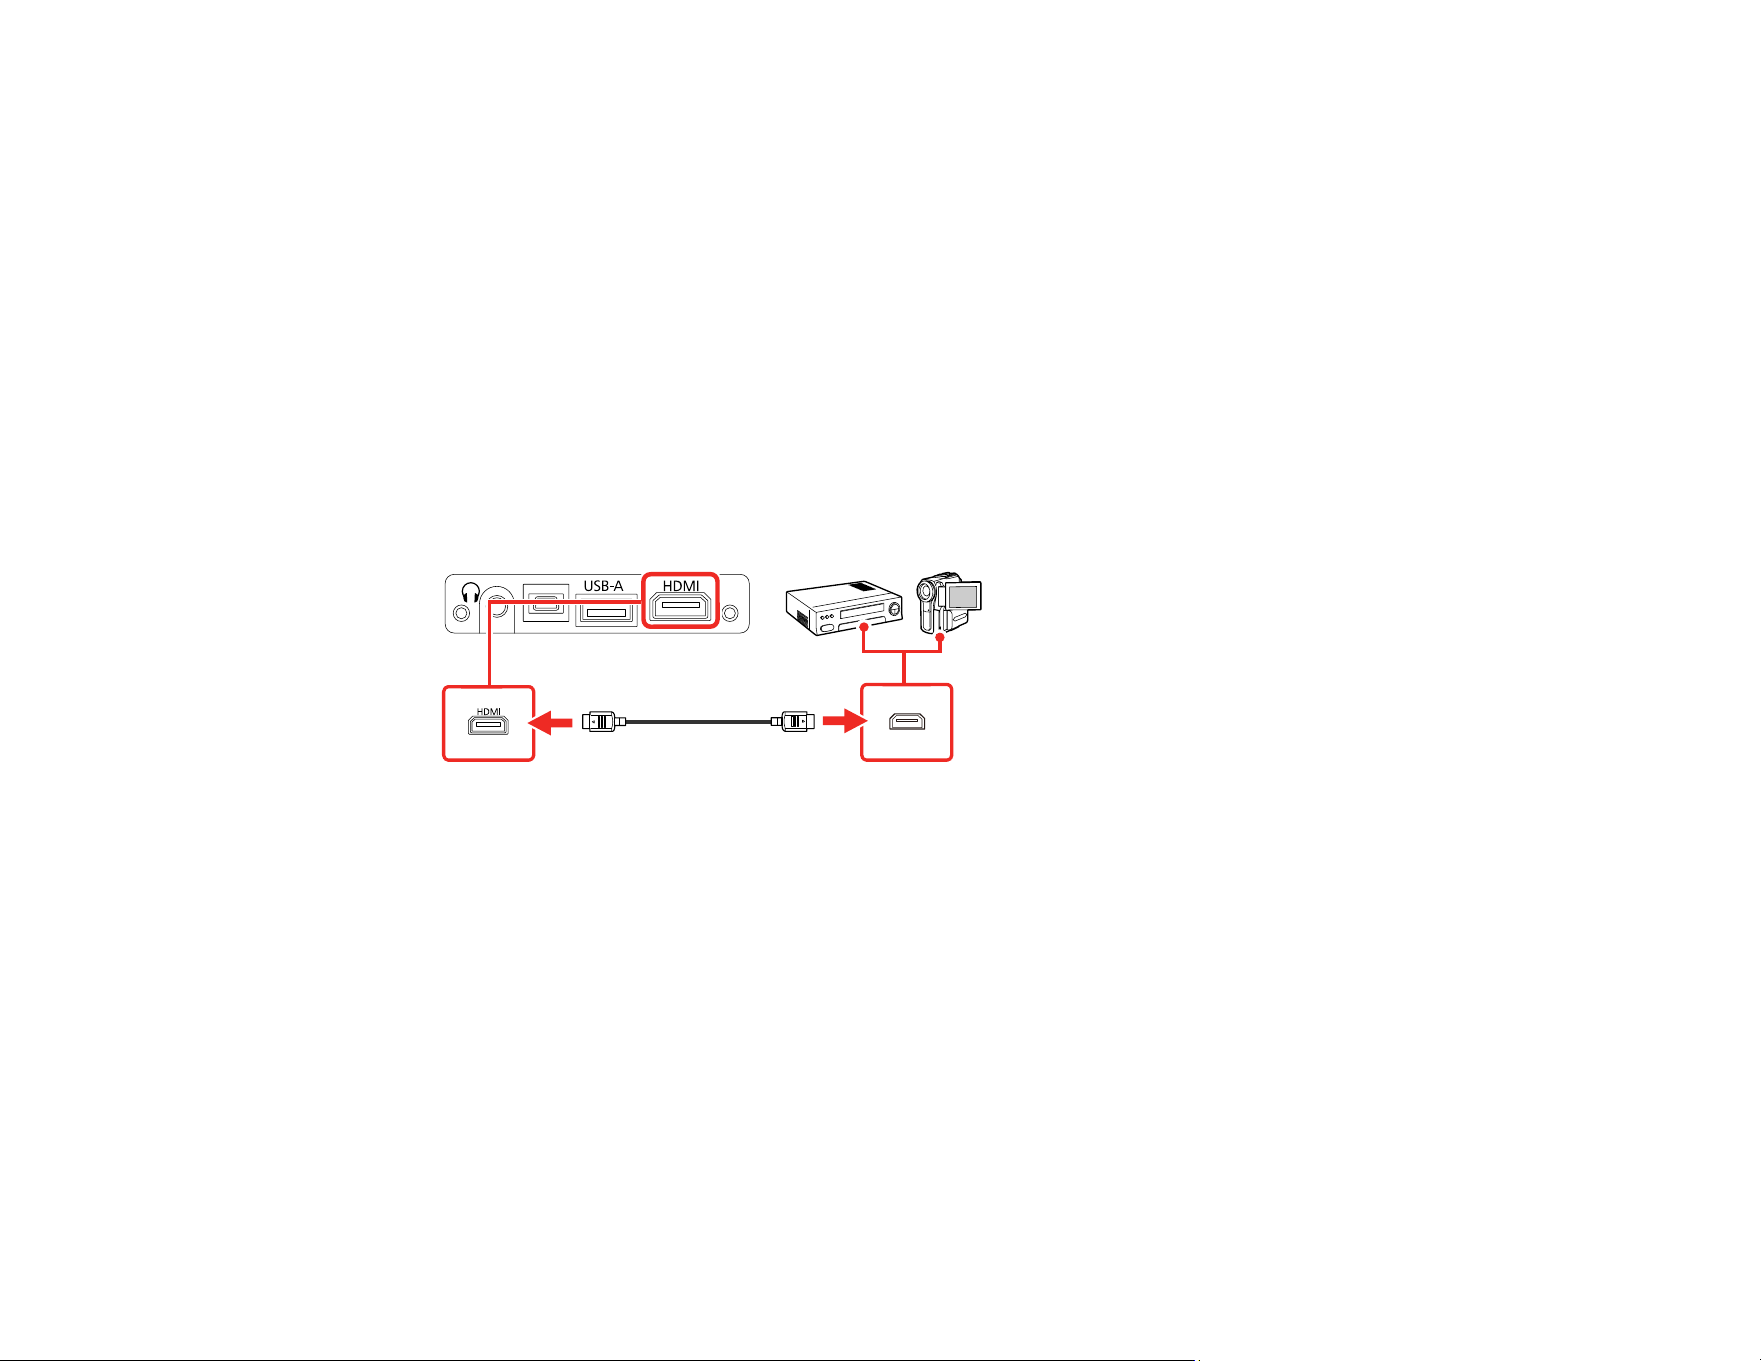
Connecting to an HDMI Video Source
If your video source has an HDMI port, you can connect it to the projector using an HDMI cable. The
video source's sound is output to the projector's speaker.
Note: You can also connect a computer or laptop to the projector using an HDMI cable.
Caution: Do not turn on the video source before connecting it to the projector; otherwise, you may
damage the projector.
1. Connect one end of an HDMI cable to your video source's HDMI port.
2. Connect the other end of the HDMI cable to the projector's HDMI port.
Parent topic: Projector Connections
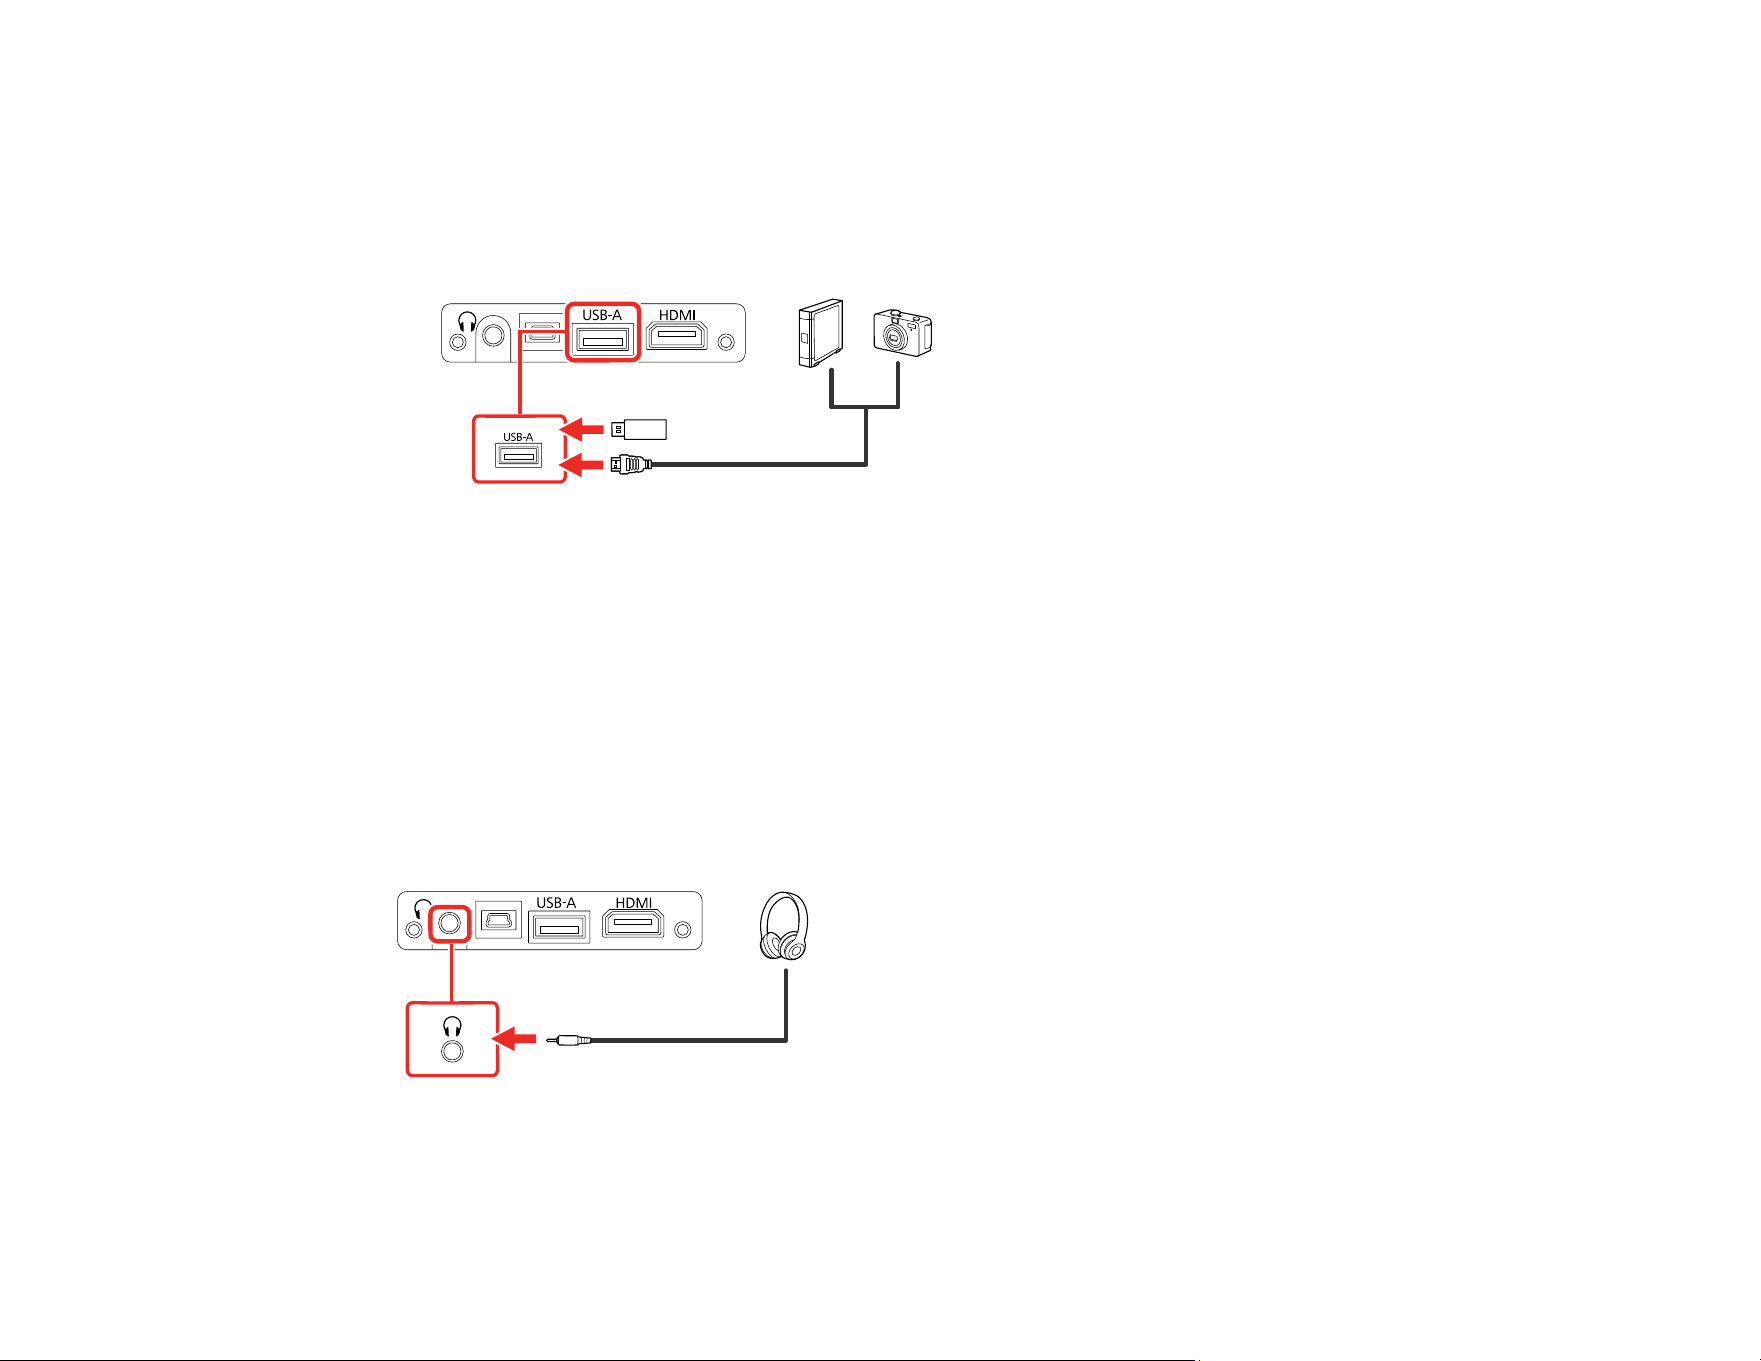
Connecting to a USB Device
You can connect a USB device or cable to the projector's USB-A port to project images from the device.
Use the USB cable supplied with the device.
Note: Do not connect a USB hub or a USB cable longer than 9.8 feet (3 m), or the device may not
operate correctly.
Make sure the USB device meets the following requirements:
• The device must be a USB flash drive, USB hard drive, or a digital camera or smartphone
• Digital cameras and smartphones must be USB-mounted devices (not TWAIN-compliant) and must be
USB Mass Storage Unit compliant.
32
• USB hard drives must be USB Mass Storage Class compliant (not all compliant devices are
supported); formatted in FAT16/32; self-powered by their own AC power supplies (bus powered drives
are not recommended); and should not have mulitple partitions.
1. If your USB device came with an AC adapter, plug the device into an electrical outlet.
2. Connect the USB device or cable to the projector's USB-A port.
3. If you connected a USB cable, connect the other end to the USB device as necessary.
The projector displays images stored on the USB device.
Parent topic: Projector Connections
Connecting Headphones
You can connect headphones to the projector's audio out port. You can control the volume using the
projector remote control.
Note: The projector's audio out port only supports 3-pin stereo headphones. If you use any other type of
headphones, audio may not be output normally.
Parent topic: Projector Connections
33
Installing Batteries in the Remote Control
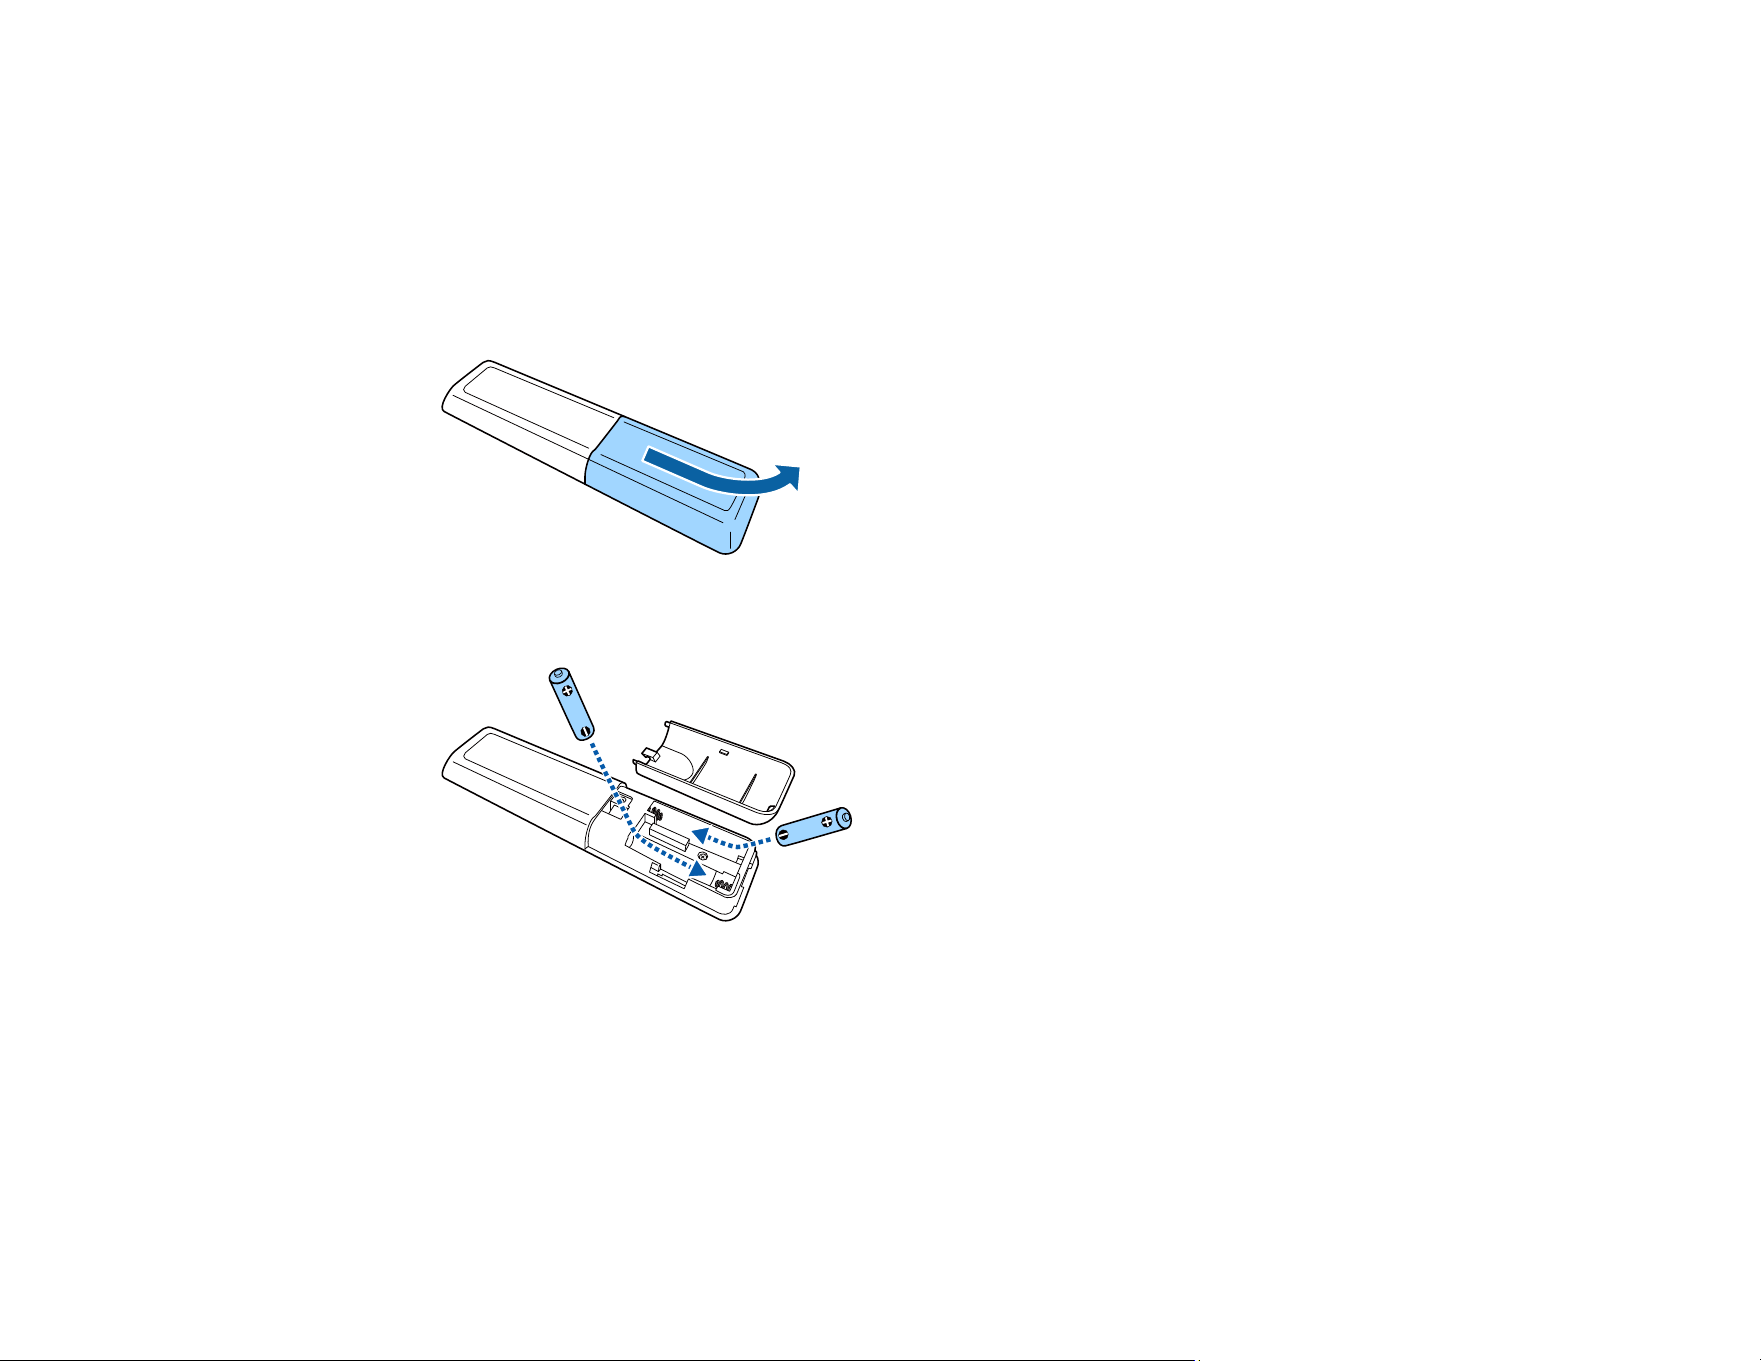
The remote control uses the two AAA batteries that came with the projector.
Caution: Use only the type of batteries specified in this manual. Do not install batteries of different types,
or mix new and old batteries.
1. Remove the battery cover.
2. Insert the batteries with the + and – ends facing as shown.
Warning: Make sure the batteries are inserted in the correct positions. If the batteries are not
inserted correctly, they could explode or leak, causing a fire, injury, or damage to the product.

34
3. Replace the battery cover and press it down until it clicks into place.
Warning: Dispose of used batteries according to local regulations. Do not expose batteries to heat
or flame. Keep batteries out of the reach of children; they are choking hazards and are very
dangerous if swallowed.
Parent topic: Setting Up the Projector

35
Using Basic Projector Features
Follow the instructions in these sections to use your projector's basic features.
Turning On the Projector
Turning Off the Projector
Remote Control Operation
Selecting the Language for the Projector Menus
Projection Modes
Adjusting the Image Height
Image Shape
Focusing the Image Using the Focus Lever
Resizing the Image Using Zoom
Selecting an Image Source
Color Mode
Turning On Automatic Luminance Adjustment
Adjusting Light Output (Brightness)
Adjusting Image Sharpness
Using Advanced Image Adjustment Features
Saving Settings to Memory and Using Saved Settings
Controlling the Volume with the Volume Buttons
Changing the Sound Mode
Turning On the Projector
Turn on the projector before you turn on the video source you want to use.
Caution: Do not turn on the video source before connecting it to the projector; otherwise, you may
damage the projector.
36
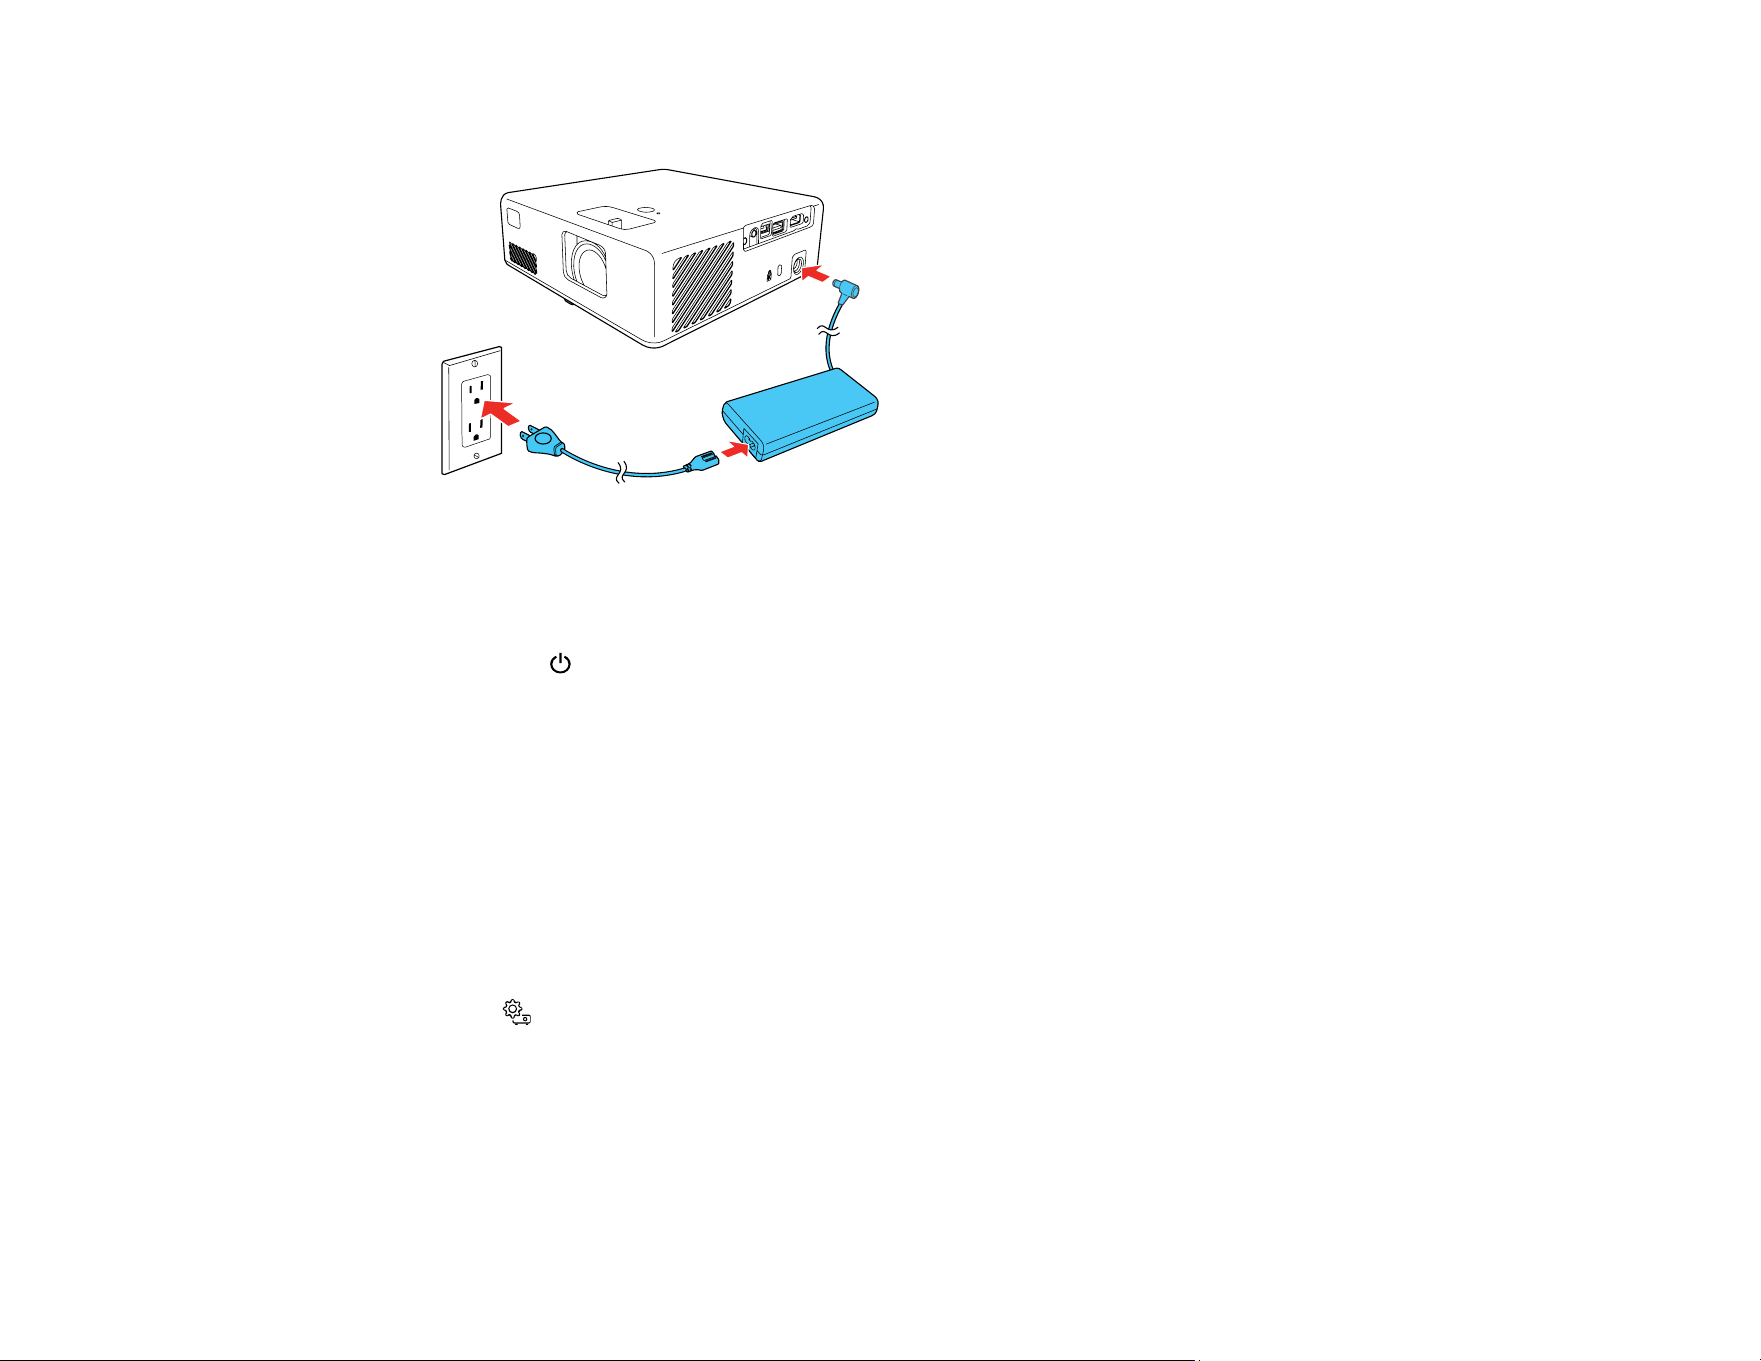
1. Connect the AC adapter to the projector's power inlet.
2. Plug the power cord into an electrical outlet and connect it to the AC adapter
The projector enters standby mode. This indicates that the projector is receiving power, but is not
turned on.
3. Press the power button on the projector or the projector remote control to turn on the projector.
The status light flashes blue as the projector warms up. After the projector is warmed up, the status
light stops flashing and turns blue.
Warning: Never look into the projector lens when the light is on. The light can damage your eyes
and is especially dangerous for children and pets.
Caution: Make sure no objects are blocking the light from the projector lens. Objects blocking the
lens for an extended time can melt and light that is reflected back into the lens can cause the
projector to malfunction.
The Welcome Guide is displayed the first time you turn on the projector. To display the guide again,
press the Settings button on the projector remote control and select Settings > Display > Welcome
Guide.
Parent topic: Using Basic Projector Features
Turning Off the Projector
Turn off the projector after use.
37
Note: Turn off this product when not in use to prolong the life of the projector. Laser life will vary
depending upon mode selected, environmental conditions, and usage. Brightness decreases over time.
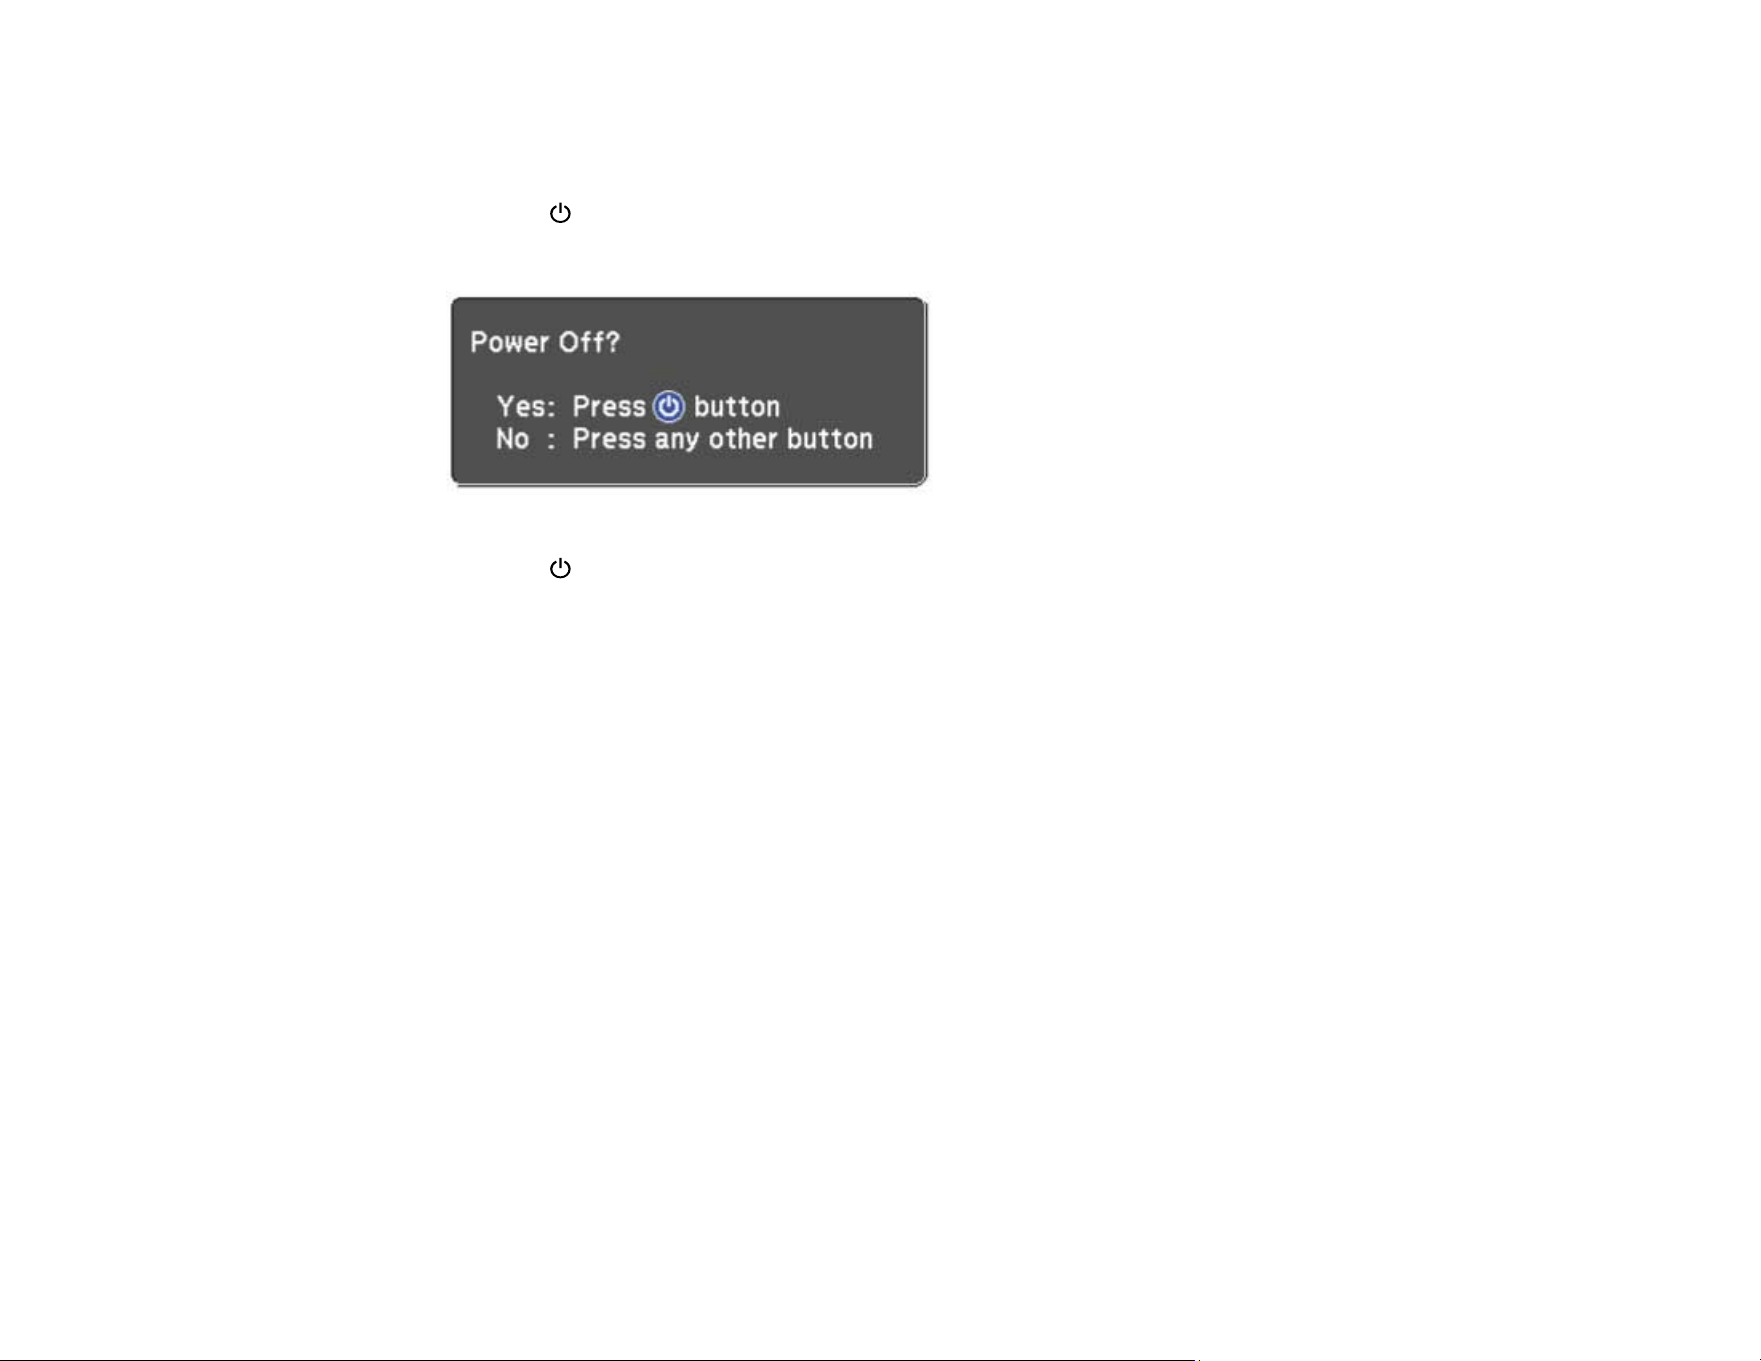
1. Press the power button on the projector or the projector remote control.
The projector displays a shutdown confirmation screen.
2. Press the power button again. (To leave it on, press any other button.)
The laser turns off and all lights turn off.
Caution: Do not turn the projector on immediately after turning it off. Turning the projector on and off
frequently may shorten the life of the laser.
3. To transport or store the projector, make sure the status indicator light is off, then unplug the power
cord.
Parent topic: Using Basic Projector Features
38
Remote Control Operation
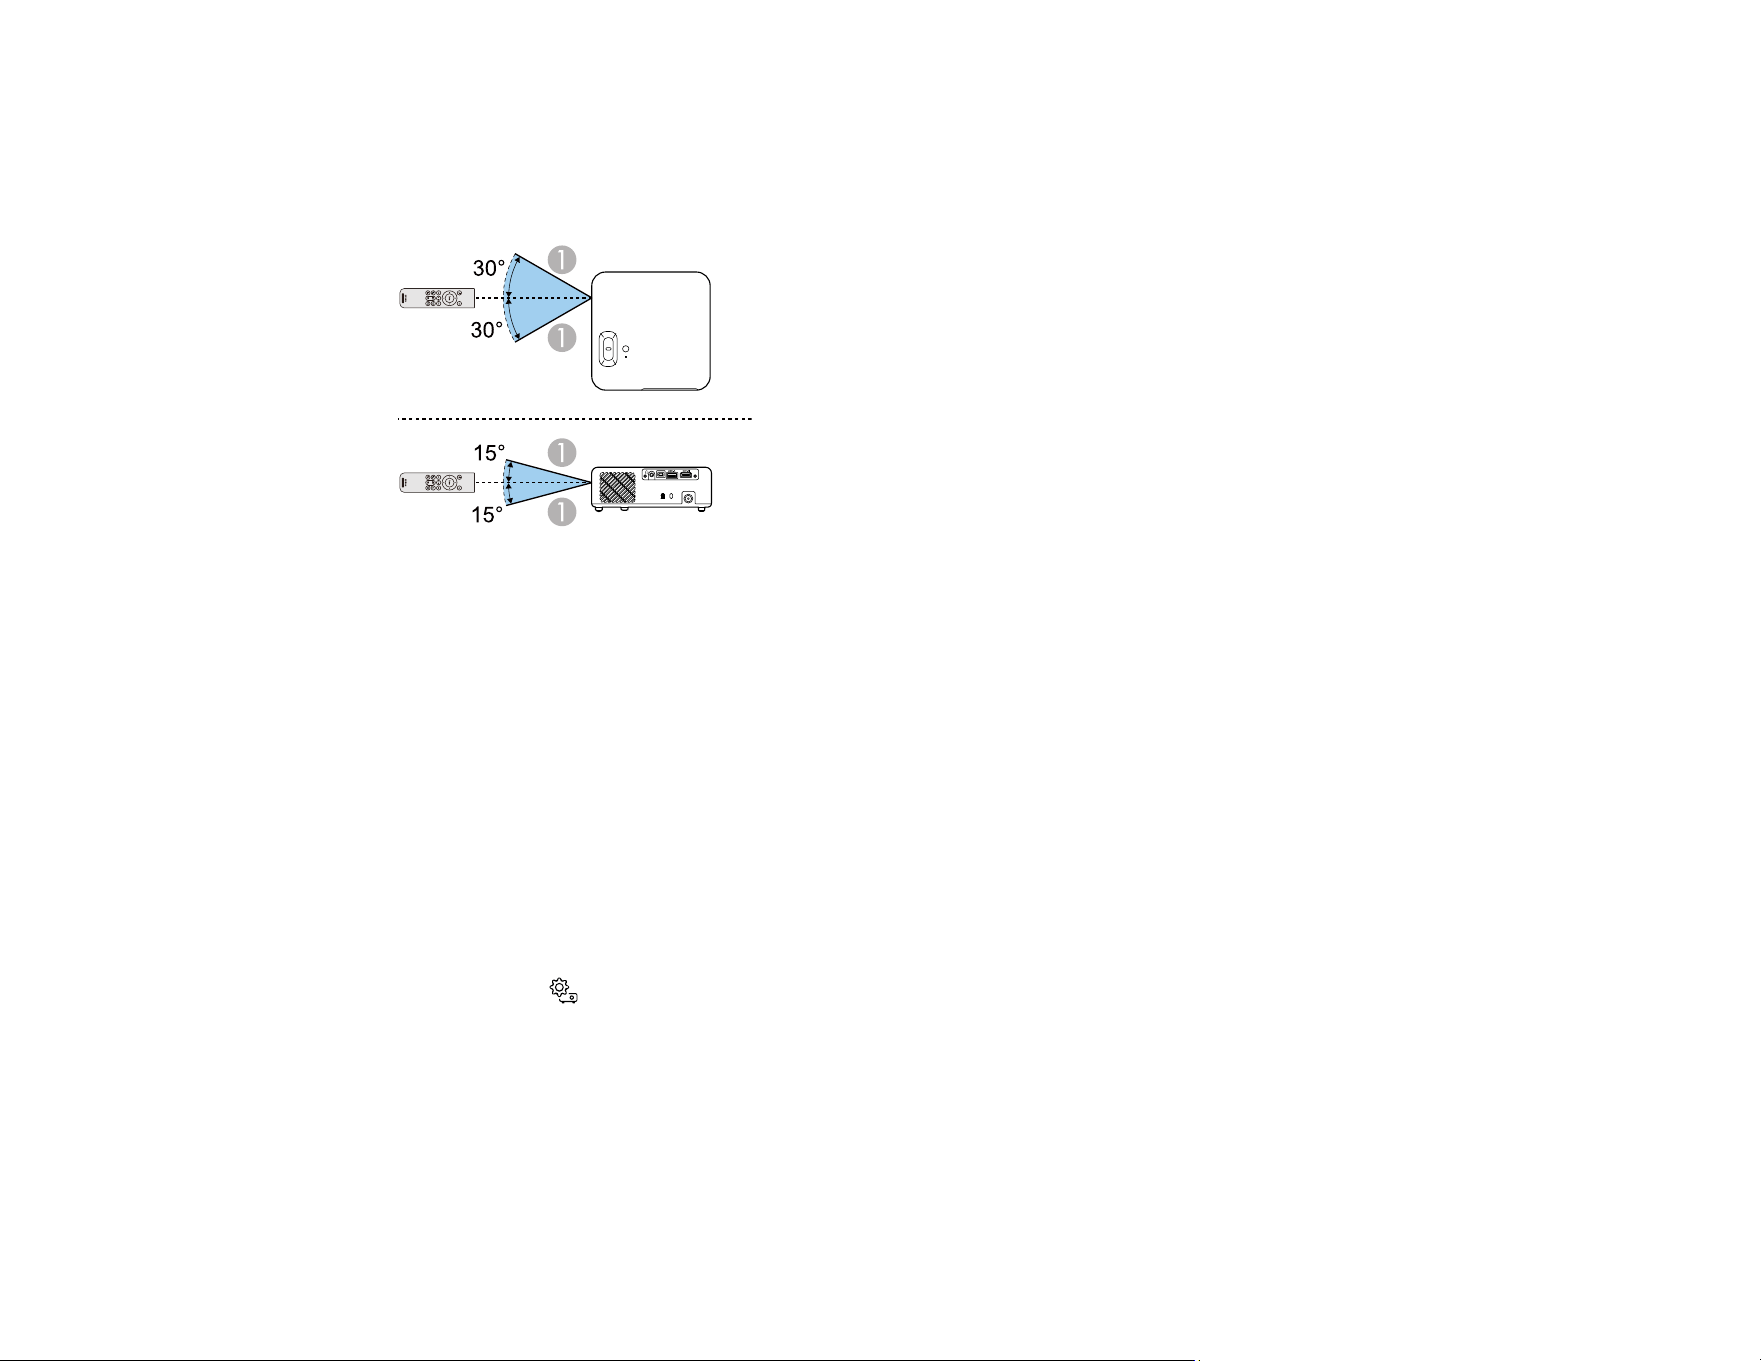
The remote control lets you control the projector from almost anywhere in the room, up to 16.4 feet (5 m)
away. You can point it at the front or back of the projector.
1 16.4 feet (5 m)
Note: Avoid using the remote control in conditions with bright fluorescent lights or in direct sunlight, or
the projector may not respond to commands. If you will not use the remote control for a long time,
remove the batteries.
Parent topic: Using Basic Projector Features
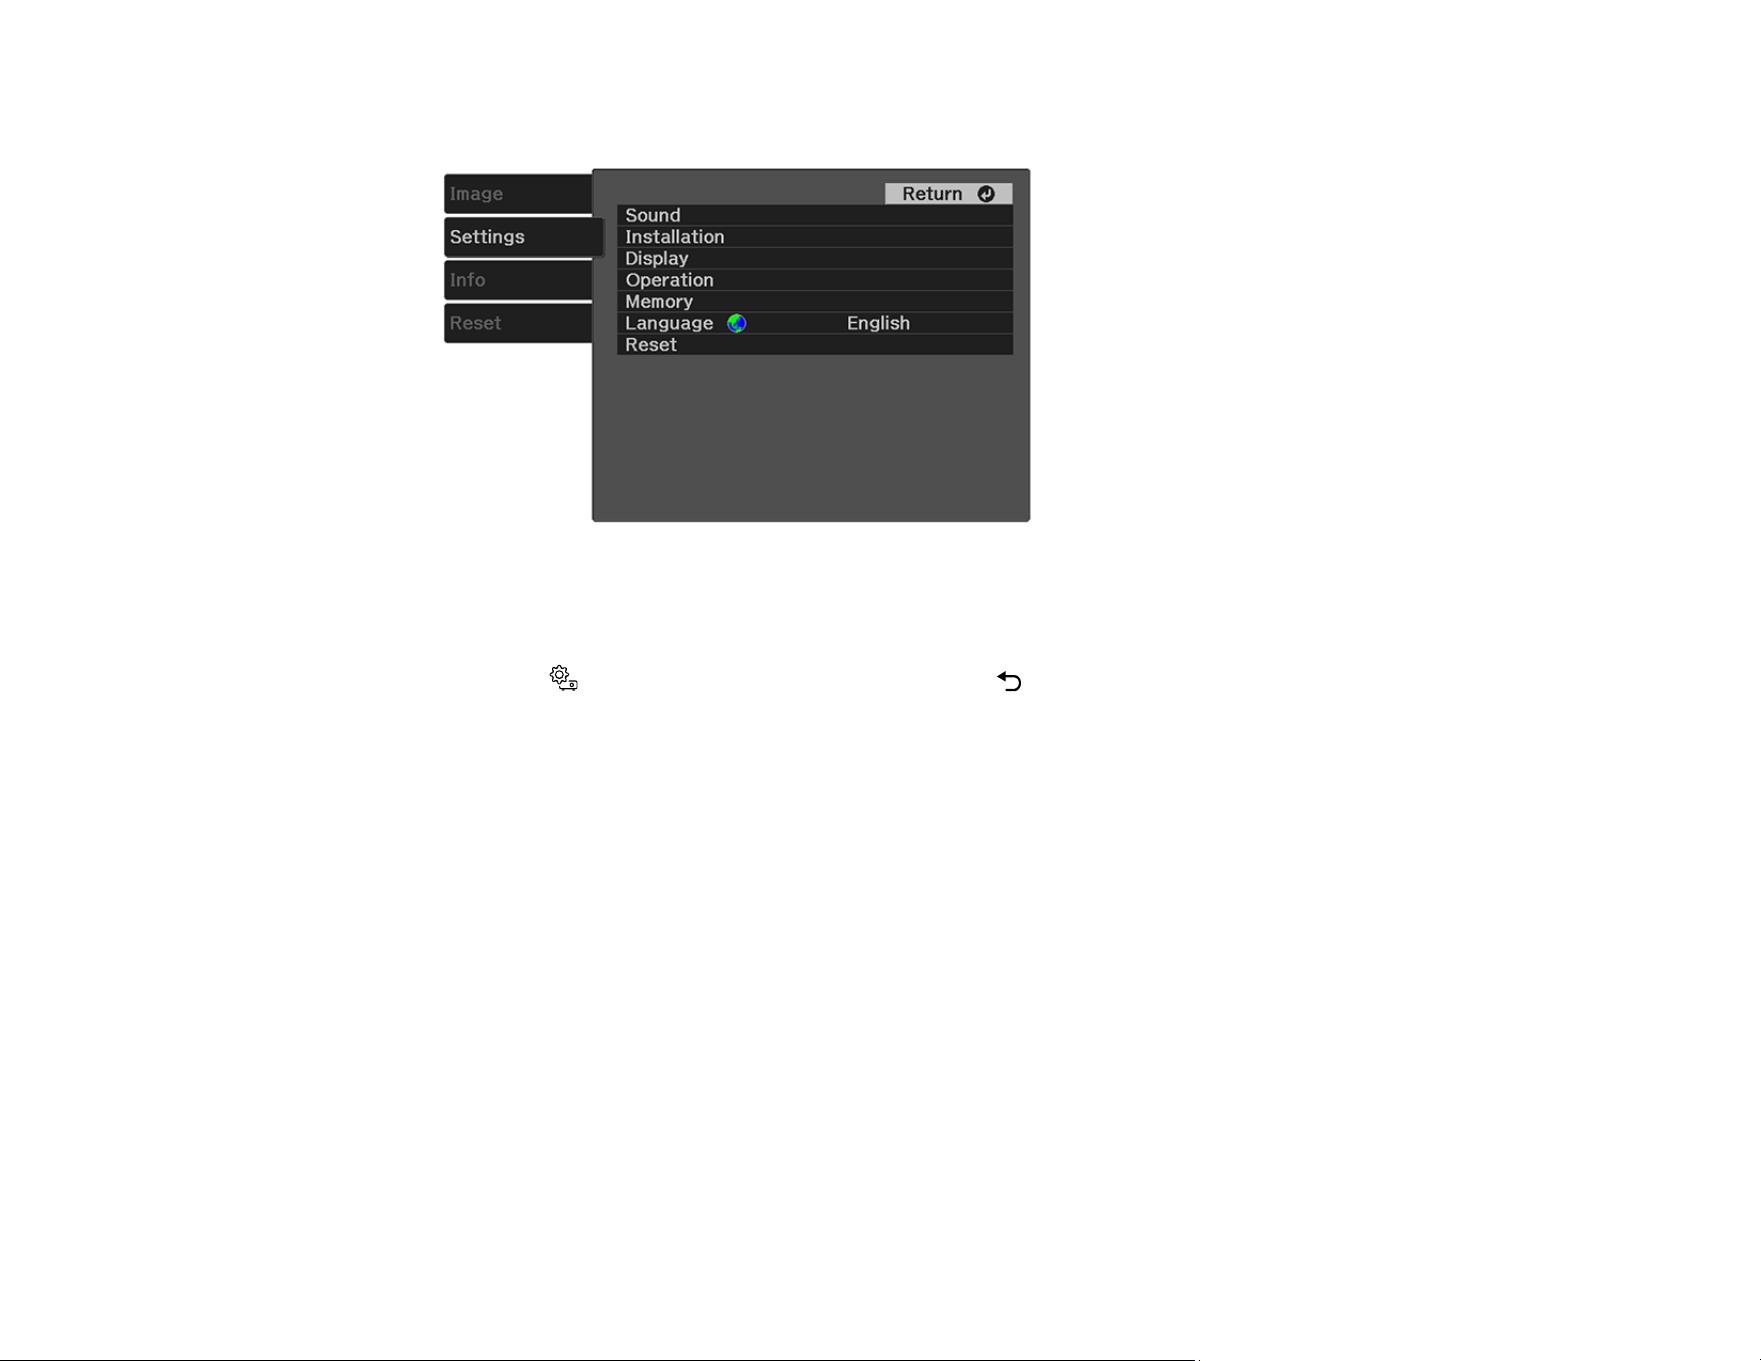
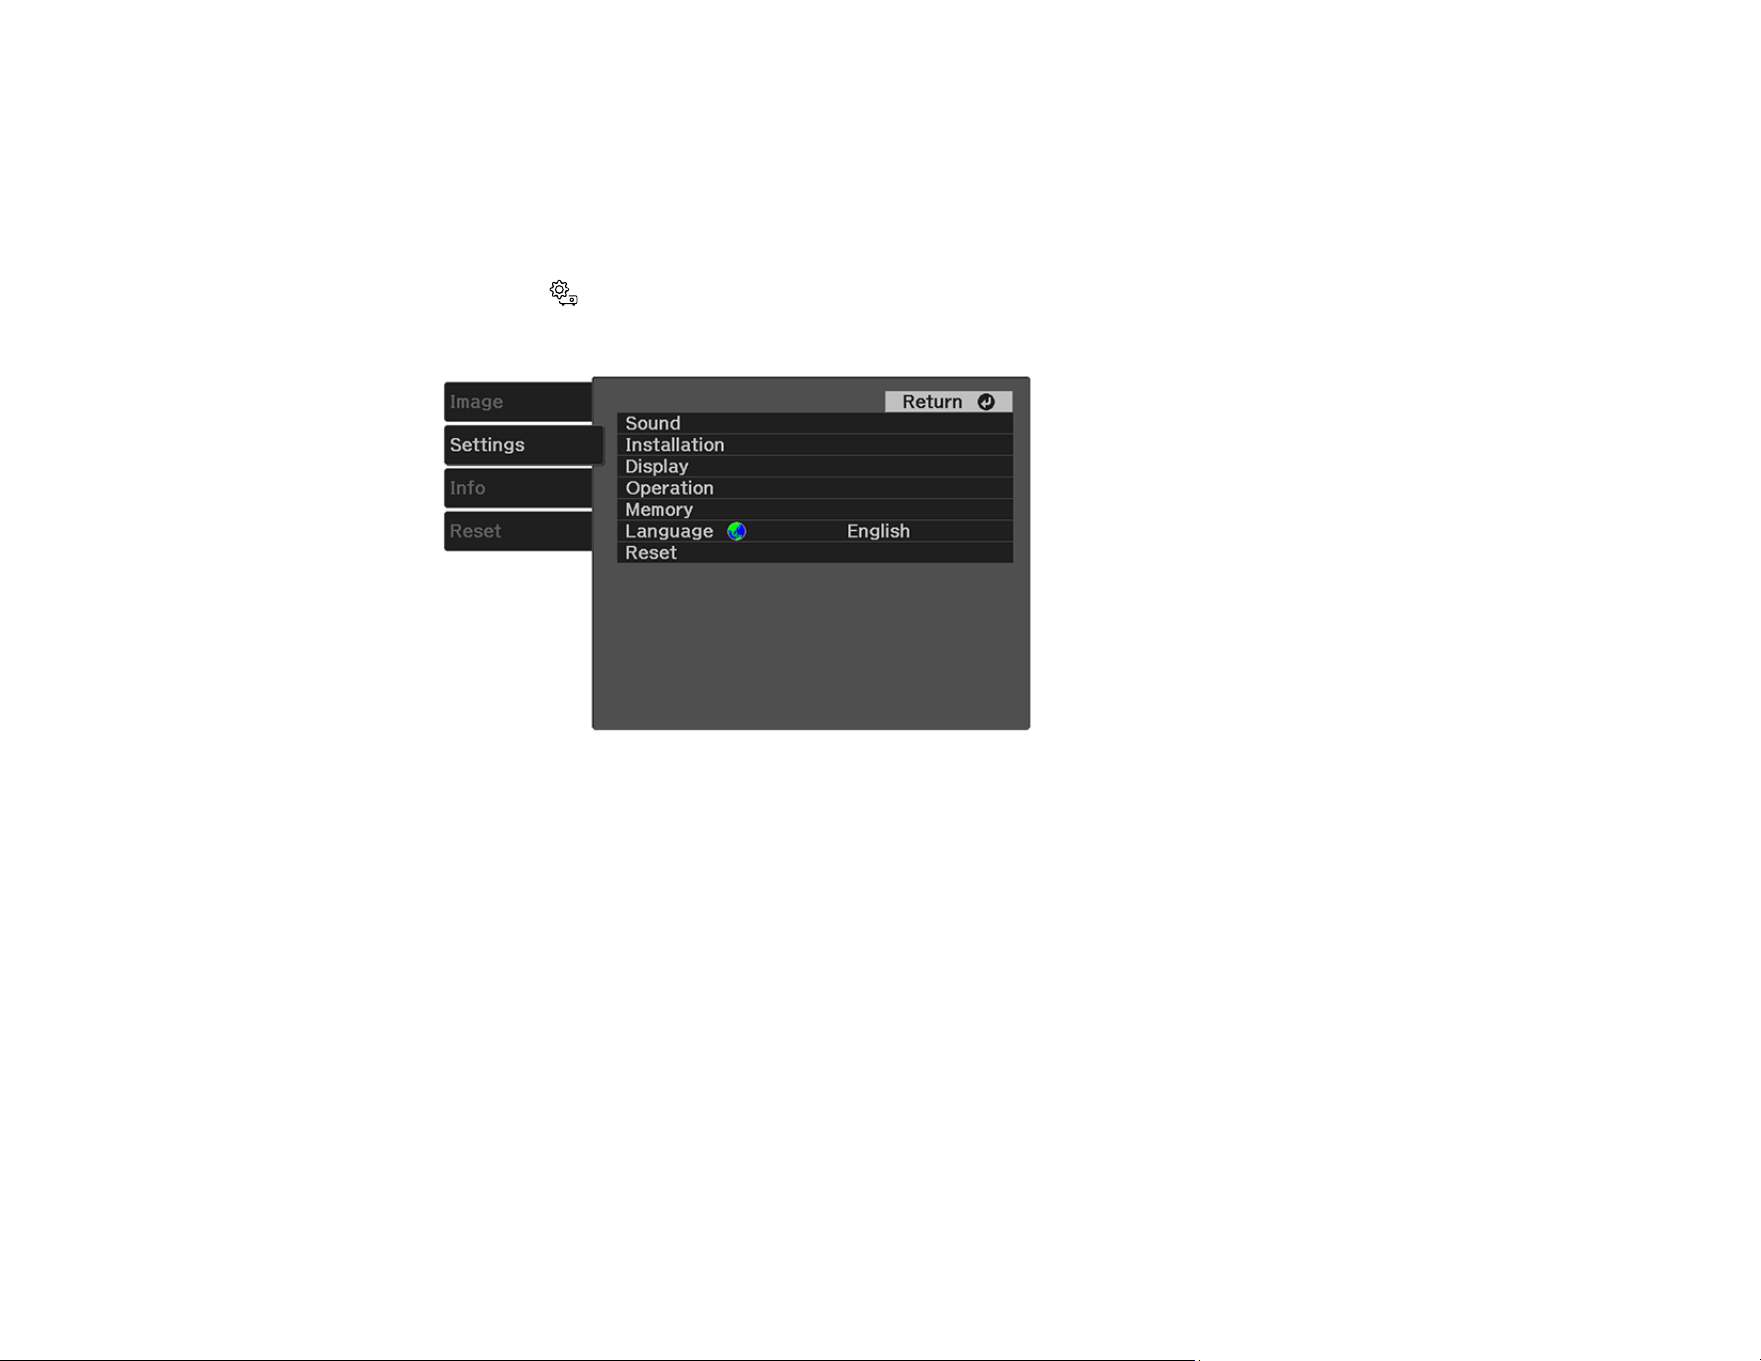
Selecting the Language for the Projector Menus
If you want to view the projector's menus and messages in another language, you can change the
Language setting.
1. Turn on the projector.
2. Press the Settings button on the projector remote control.
39
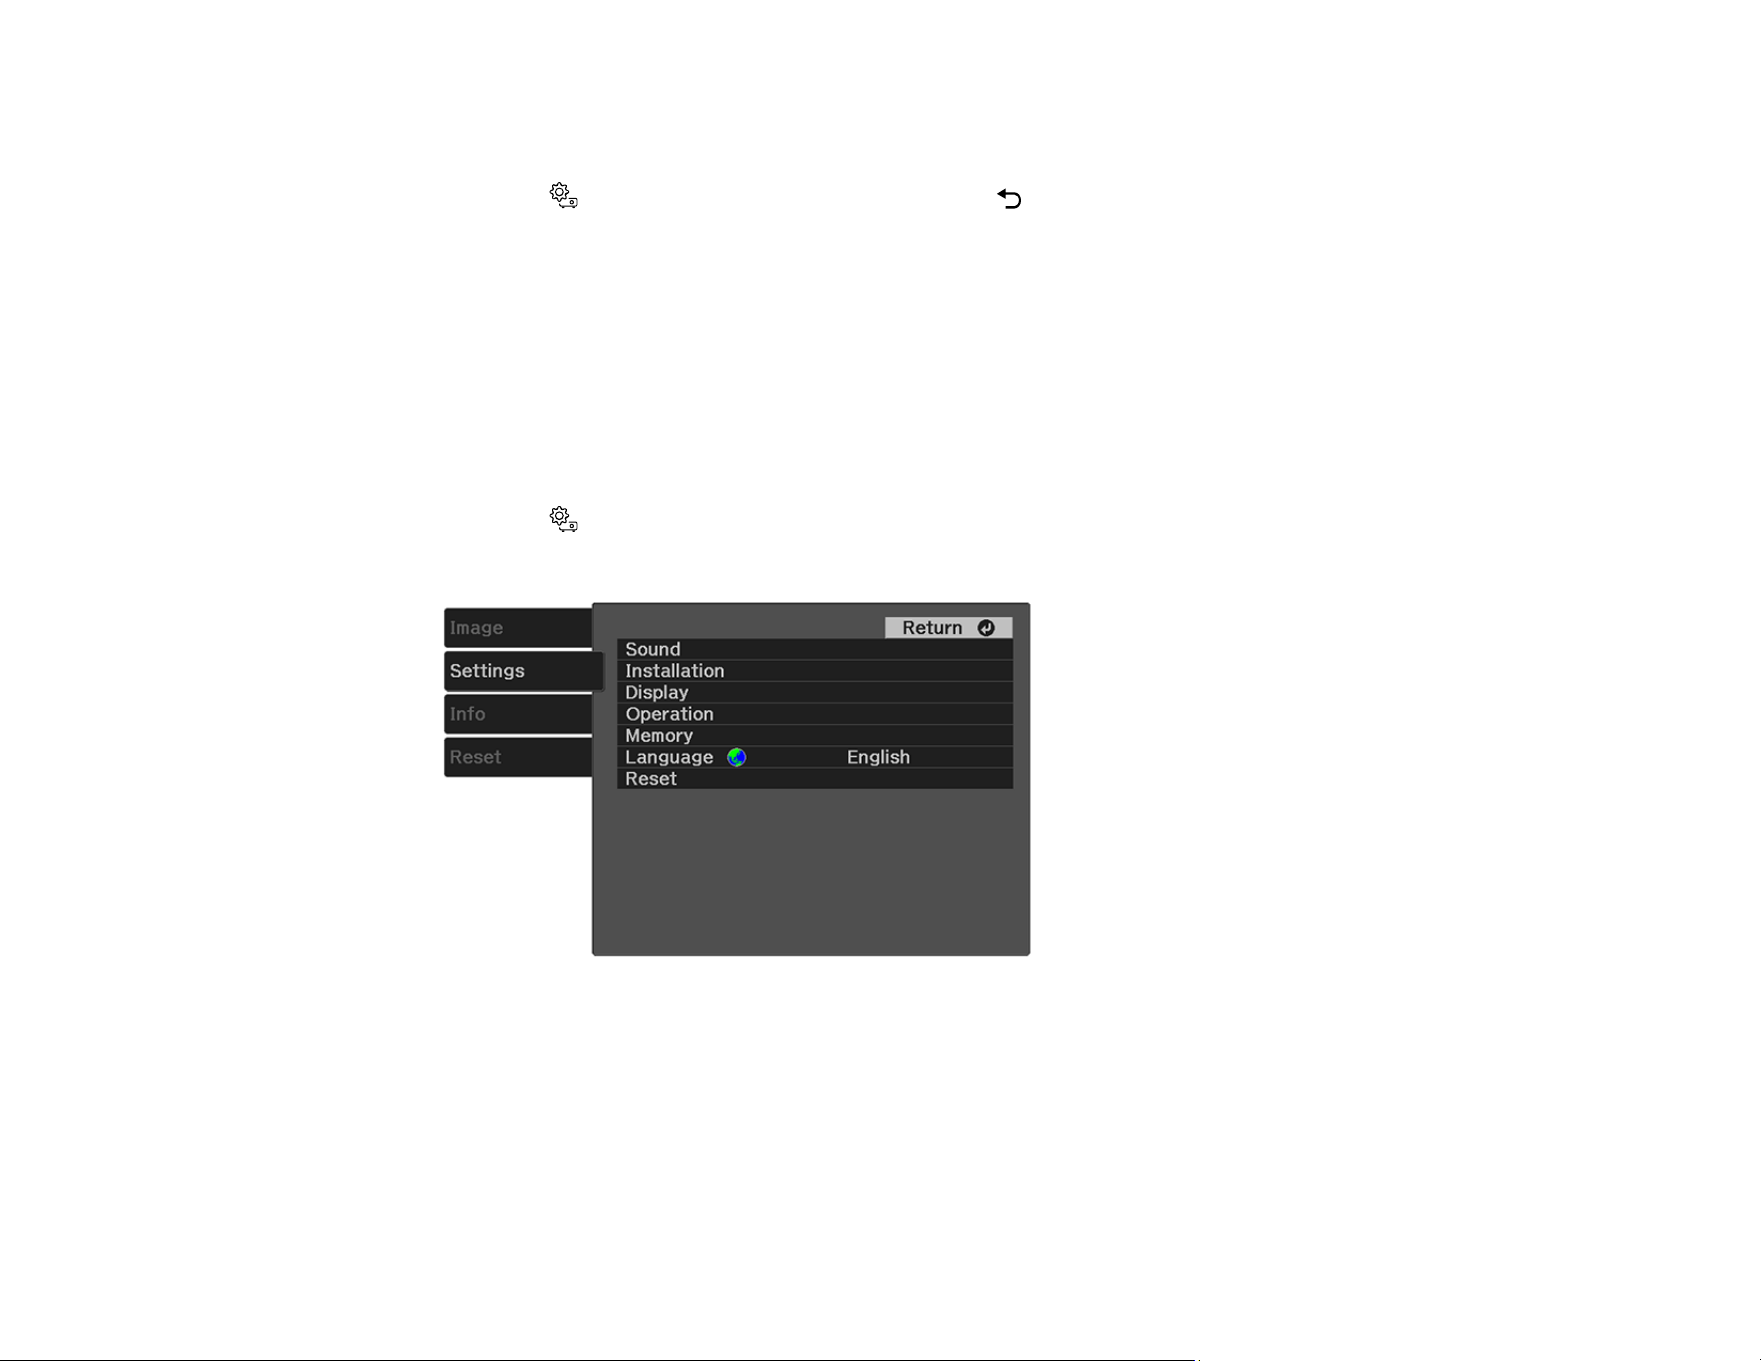
3. Press the arrow buttons to select the Settings menu and press Enter.
4. Select the Language setting and press Enter.
5. Select the language you want to use and press Enter.
6. Press the Settings button to exit the menu or the Esc button to return to the previous screen.
Parent topic: Using Basic Projector Features
Projection Modes
Depending on how you positioned the projector, you may need to change the projection mode so your
images project correctly.
• Front (default setting) lets you project from a table in front of the screen or onto the ceiling.
• Front/Upside Down flips the image over top-to-bottom to project upside-down from a ceiling or wall
mount.
• Rear flips the image horizontally to project from behind a translucent screen.
• Rear/Upside Down flips the image over top-to-bottom and horizontally to project from the ceiling and
behind a translucent screen.
Changing the Projection Mode Using the Menus
Parent topic: Using Basic Projector Features
40
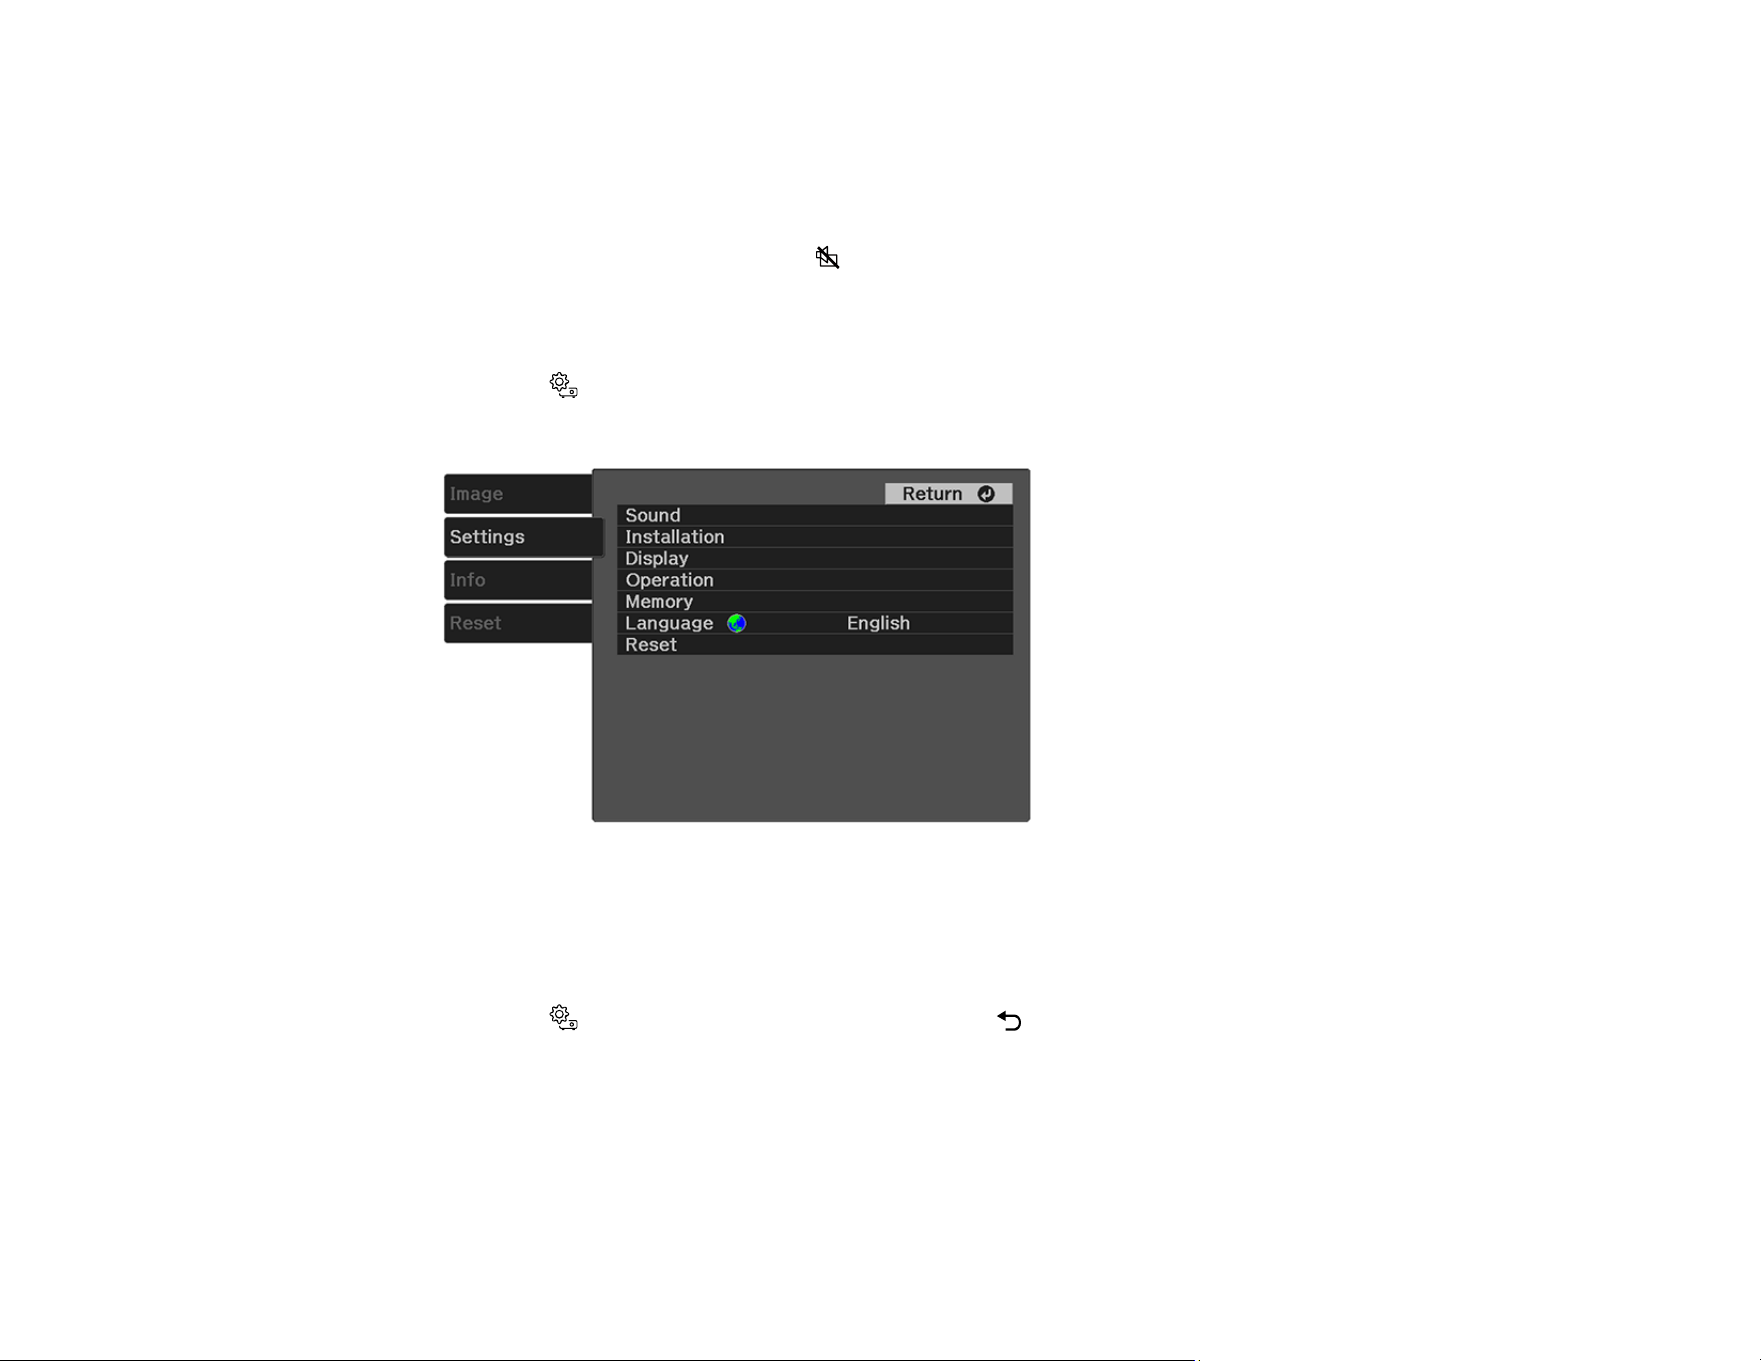
Changing the Projection Mode Using the Menus
You can change the projection mode to flip the image over top-to-bottom and/or left-to-right using the
projector menus.
Note: You can also press and hold the A/V mute button on the projector remote control for about 6
seconds to flip the image upside-down.
1. Turn on the projector and display an image.
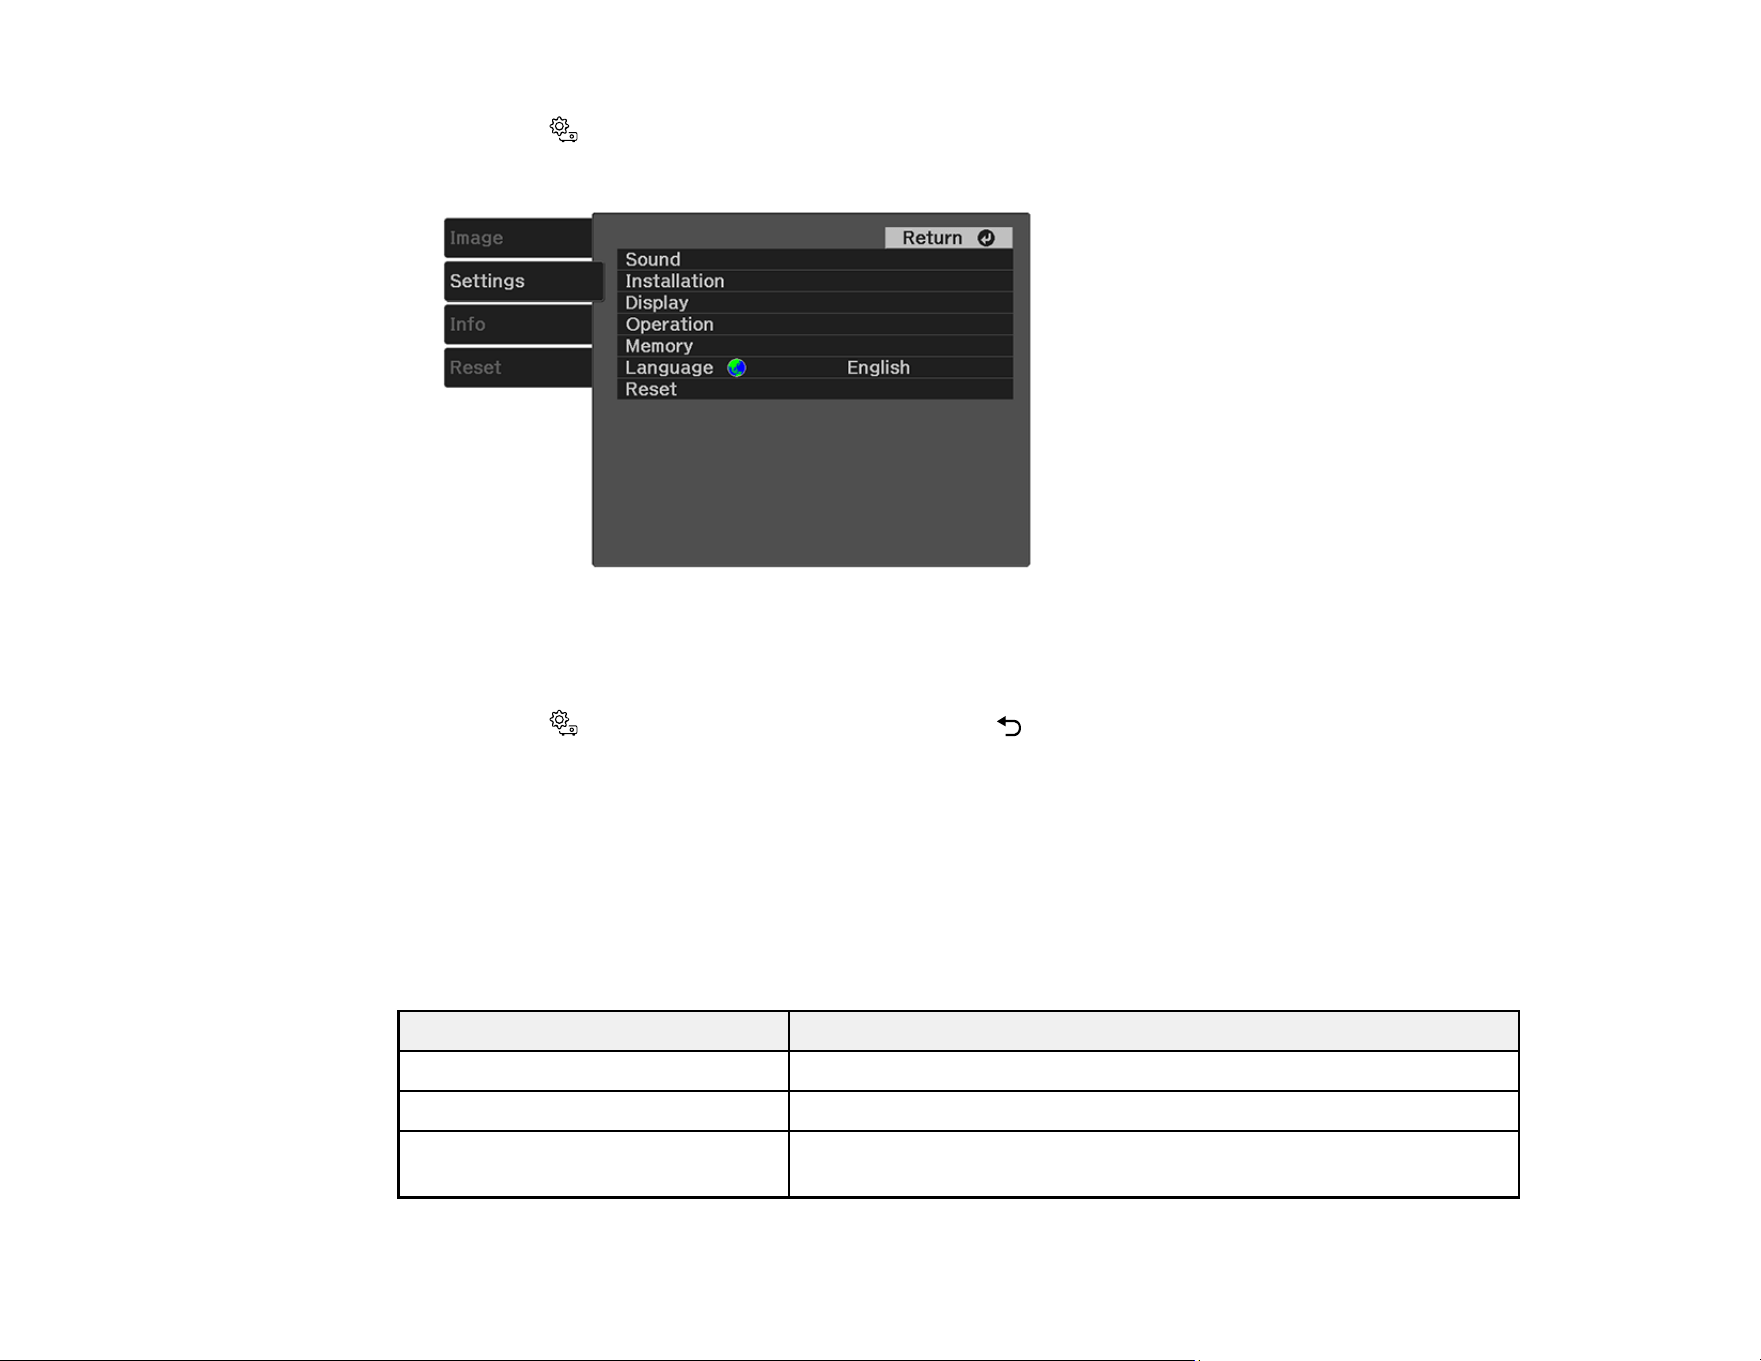
2. Press the Settings button on the projector remote control.
3. Press the arrow buttons to select the Settings menu and press Enter.
4. Select the Installation setting and press Enter.
5. Select the Projection setting and press Enter.
6. Select the projection mode you want to use and press Enter.
7. Press the Settings button to exit the menu or the Esc button to return to the previous screen.
Parent topic: Projection Modes
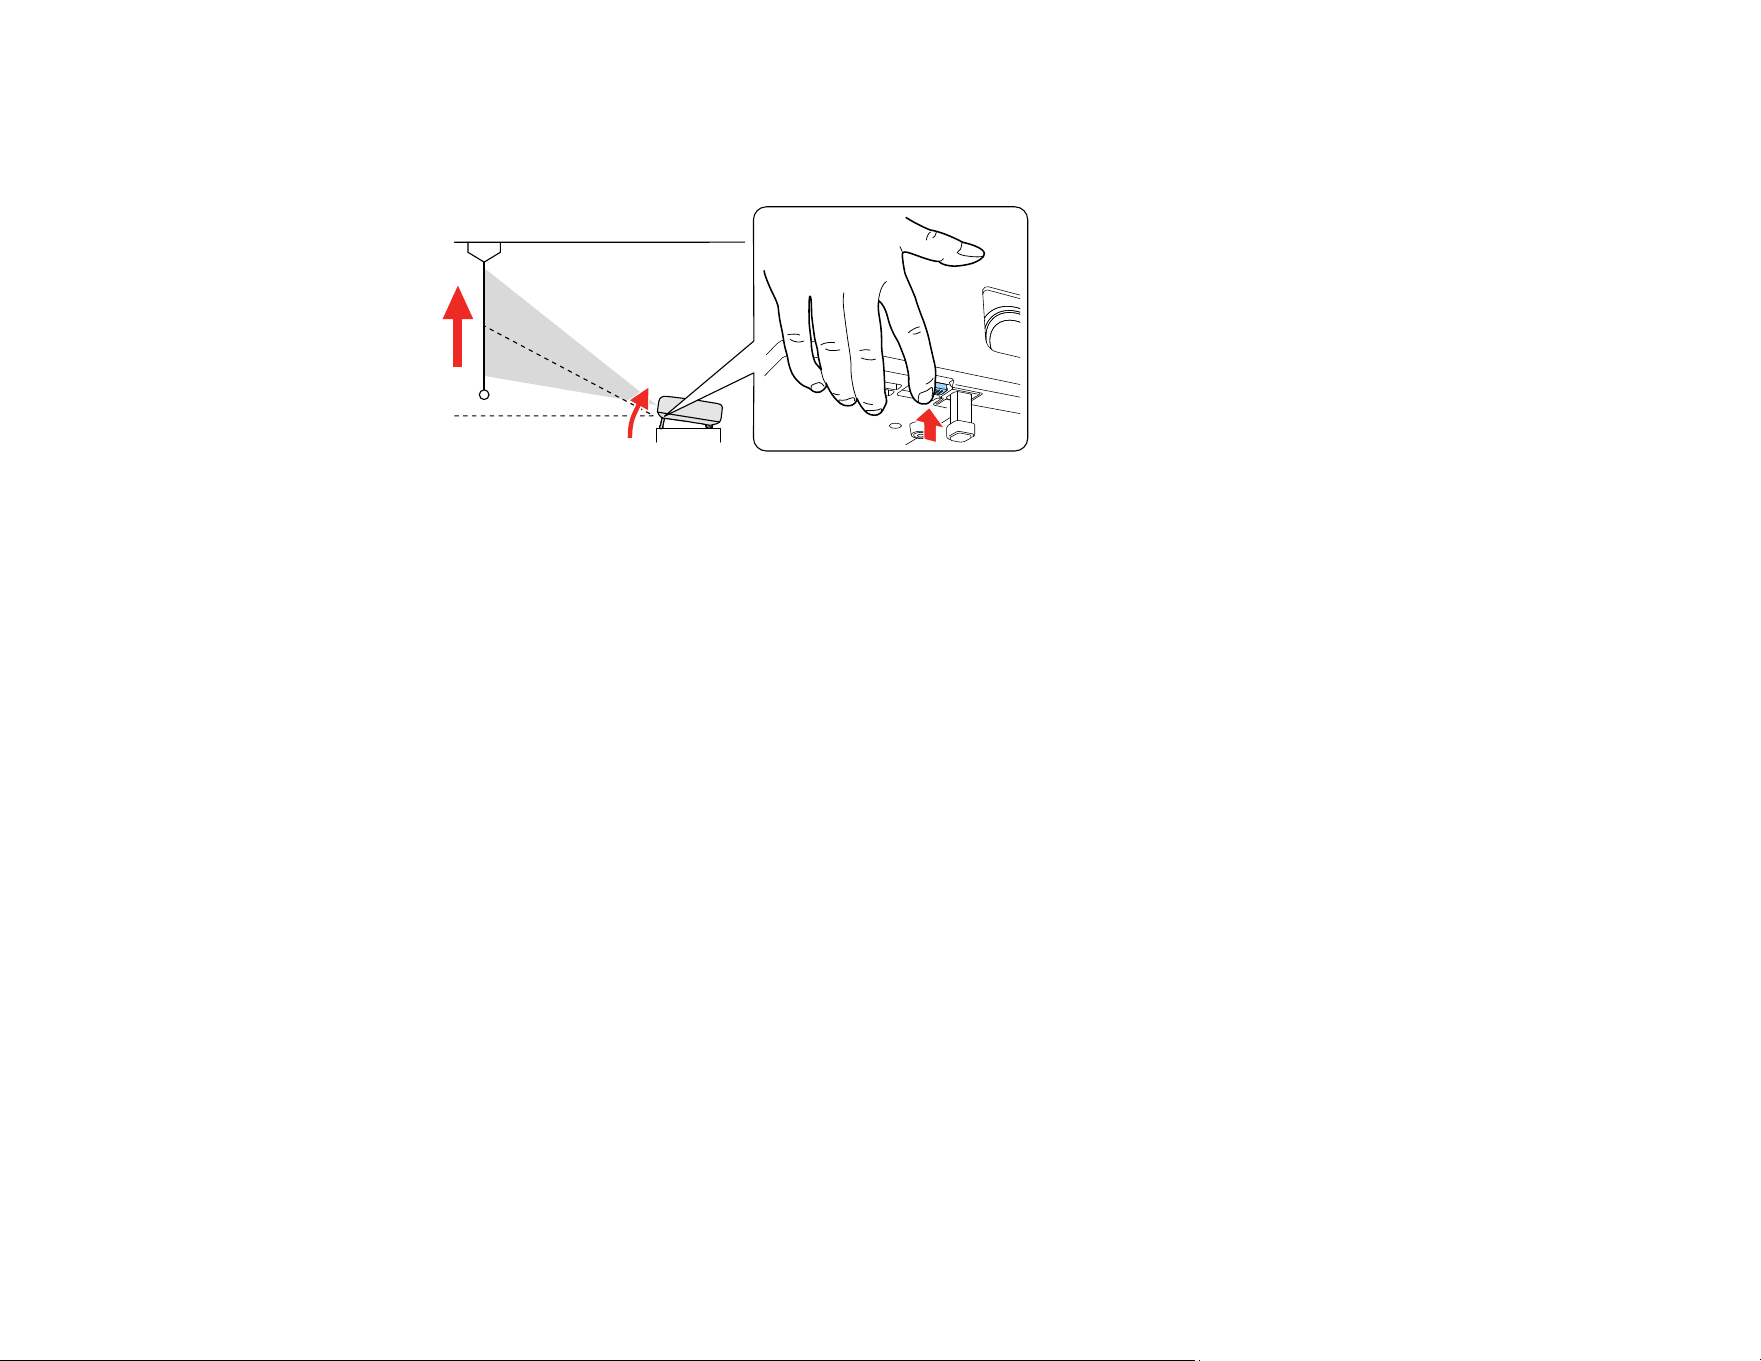
Adjusting the Image Height
If you are projecting from a table or other flat surface and the image is too high or low, you can adjust the
image height using the projector's adjustable foot.
41
1. Turn on the projector and display an image.
2. Press and hold the foot release lever to extend or retract the front adjustable foot.
Note: You can adjust the position up to 9°.
3. Release the lever to lock the foot when the image is at the position you want.
If the projected image is unevenly rectangular, you need to adjust the image shape.
Parent topic: Using Basic Projector Features
Related references
Projector Parts - Base
Image Shape
You can project an evenly rectangular image by placing the projector directly in front of the center of the
screen and keeping it level. If you place the projector at an angle to the screen, or tilted up or down, or off
to the side, you may need to correct the image shape for the best display quality.
When you turn on automatic keystone correction in your projector's Settings menu, your projector
automatically corrects vertical keystone effects when you reposition the projector.
Correcting Image Shape with H/V Keystone
Correcting Image Shape with Quick Corner
Parent topic: Using Basic Projector Features
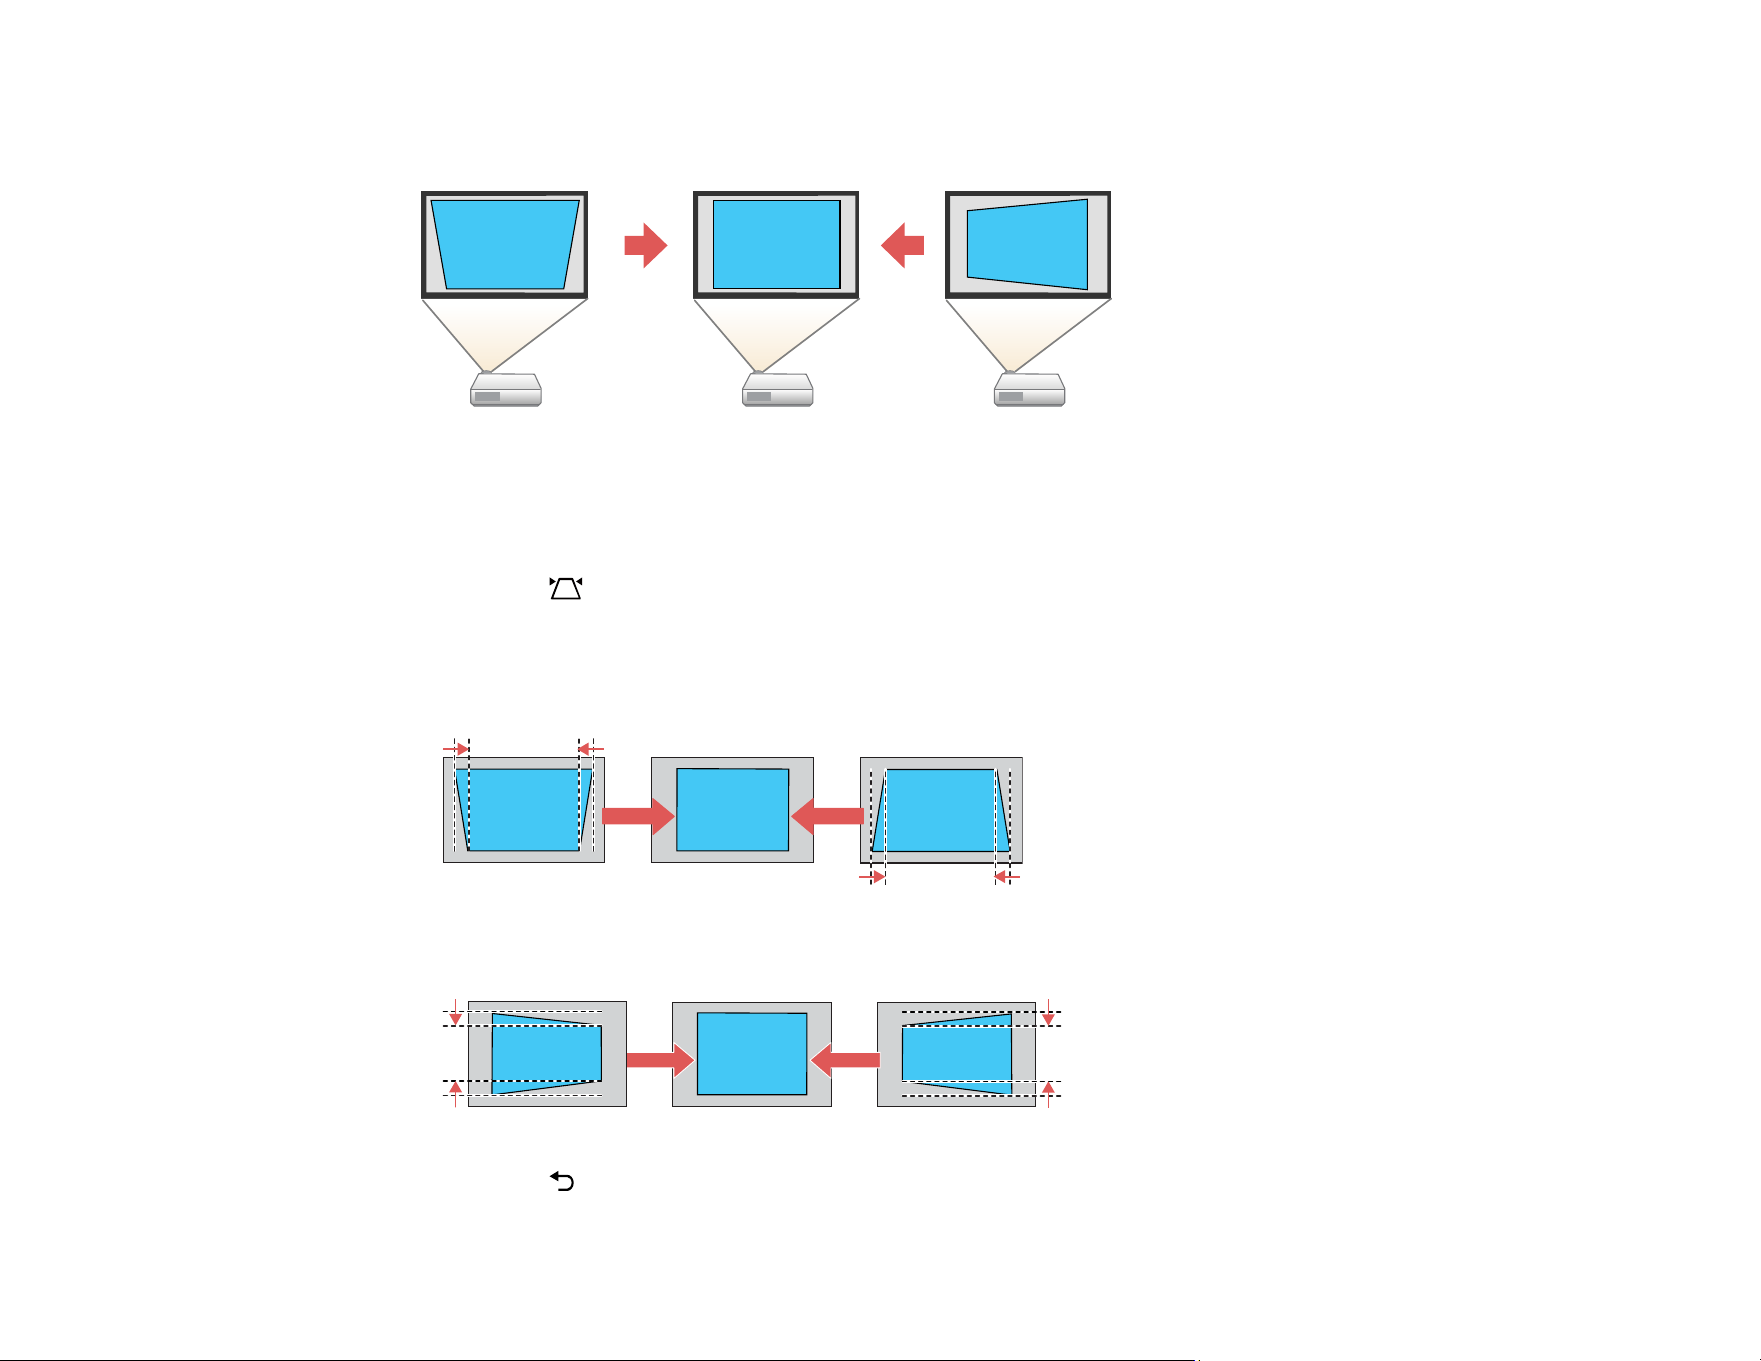
Correcting Image Shape with H/V Keystone
You can use the projector remote control or control panel buttons to correct the shape of an image that is
unevenly rectangular on the sides.
42
Note: You can also adjust the keystone settings from the Settings > Installation > Keystone menu.
Note: You cannot combine Keystone correction with other image shape correction methods.
1. Turn on the projector and display an image.
2. Press the keystone button on the projector remote control.
3. Use the arrow buttons on the projector remote control to select between vertical and horizontal
keystone correction, and to adjust the image shape as necessary.
V-Keystone
H-Keystone
4. Press the Esc button when you are finished.
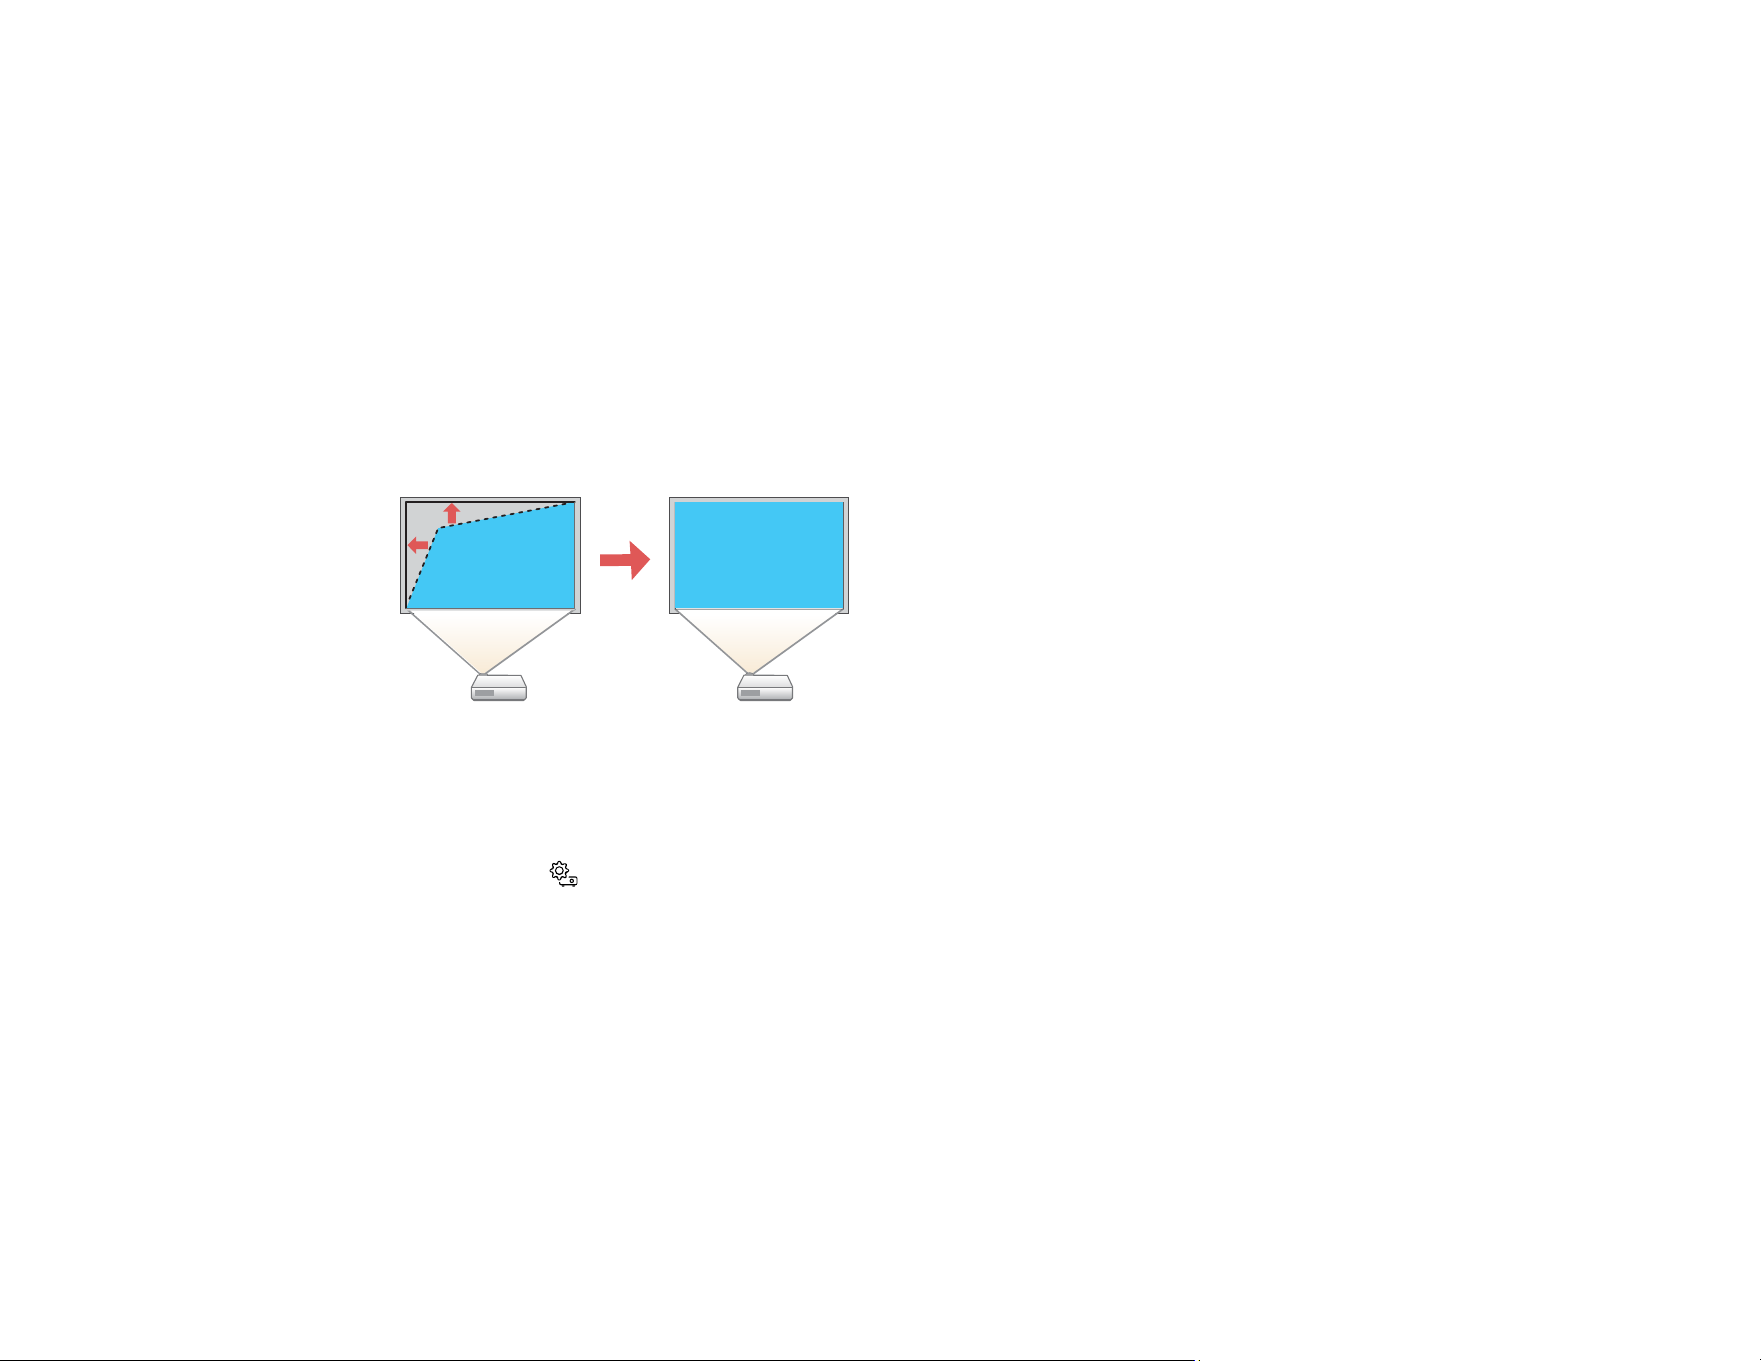
43
After correction, your image is slightly smaller.
Parent topic: Image Shape
Related references
Projector Feature Settings - Settings Menu
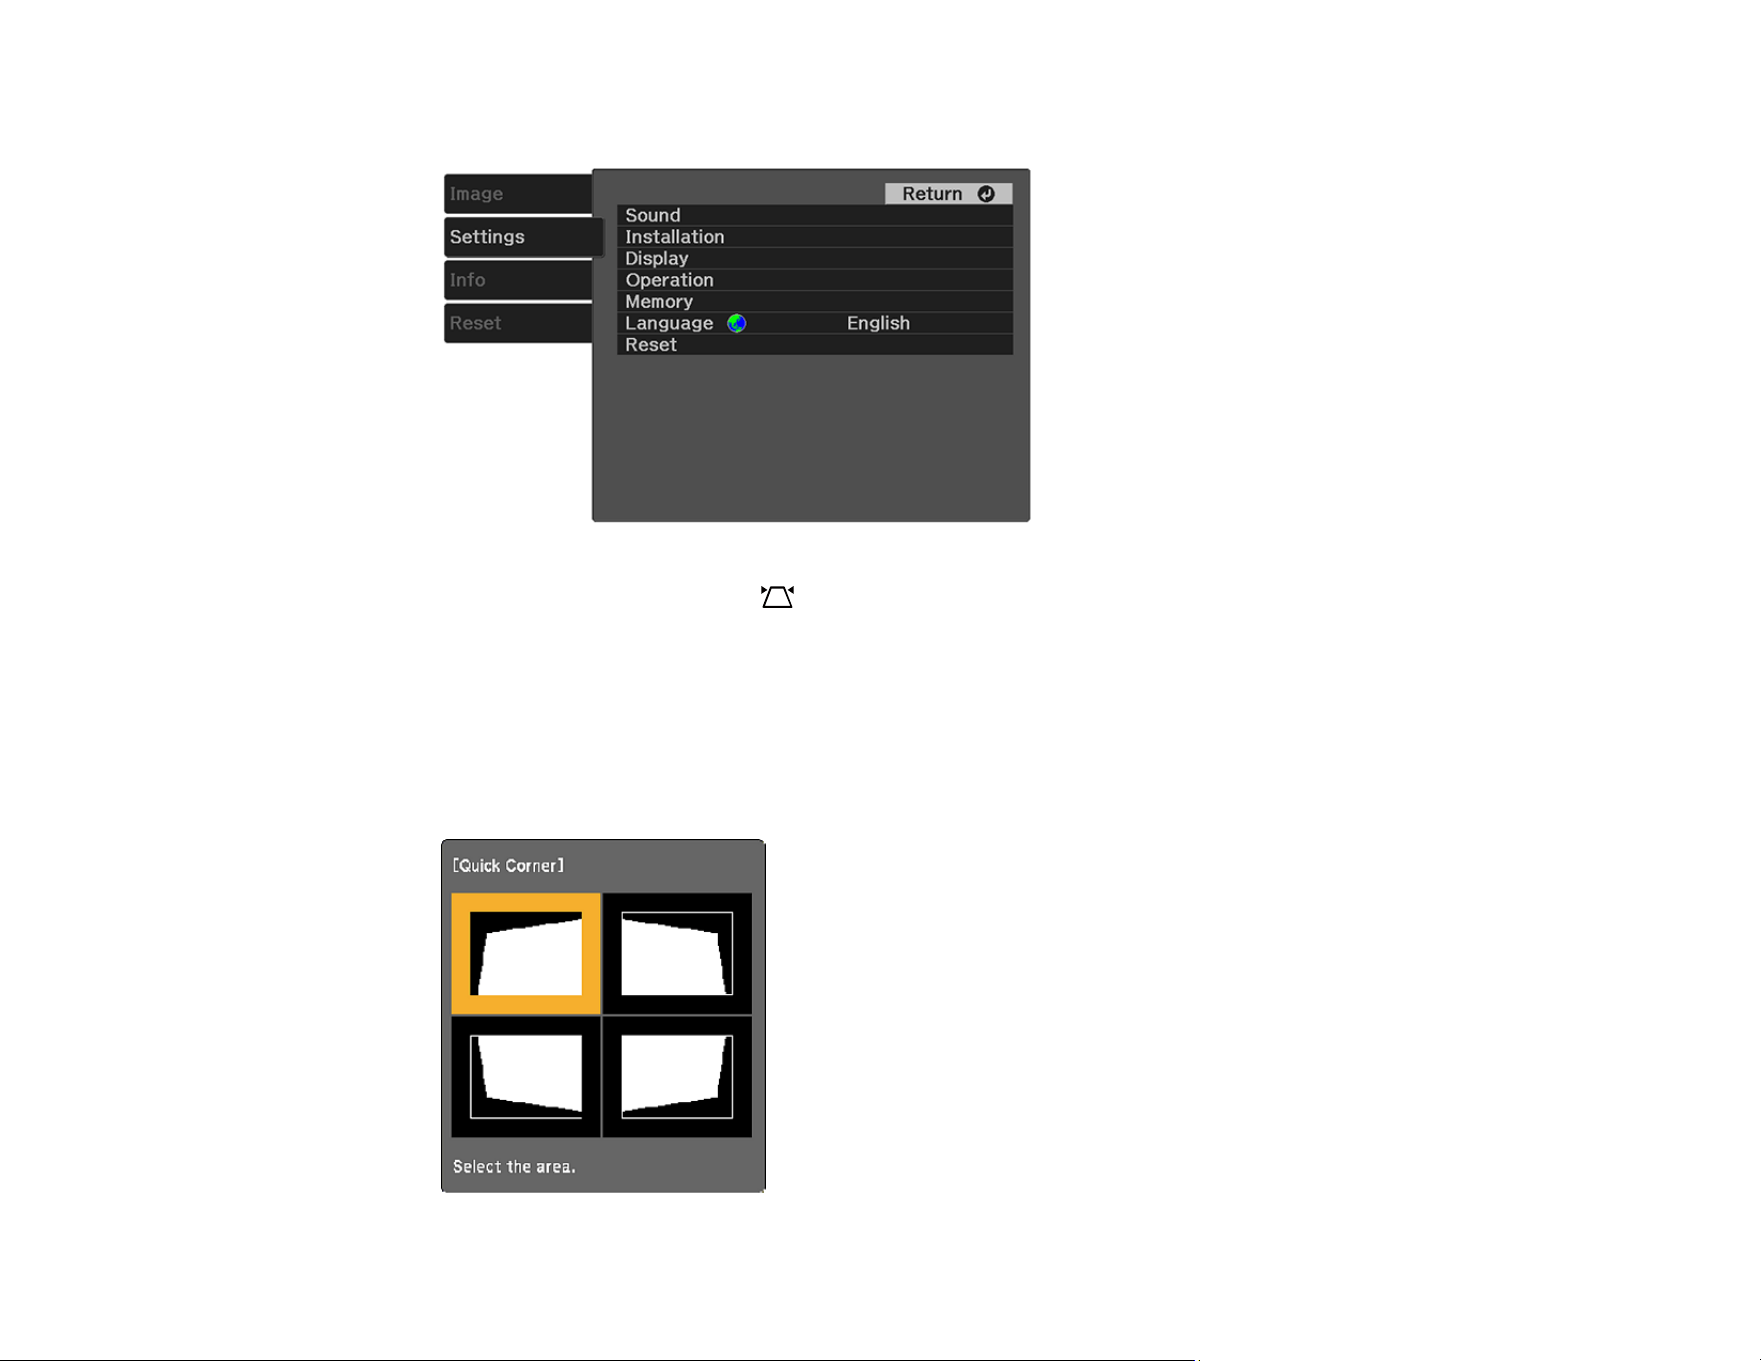
Correcting Image Shape with Quick Corner
You can use the projector's Quick Corner setting to correct the shape and size of an image that is
unevenly rectangular on all sides.
Note: To provide the best possible image quality, adjust the projector's position to correct the image
shape. If this isn't possible, use the Quick Corner setting to correct the image shape.
Note: You cannot combine Quick Corner correction with other image shape correction methods.
1. Turn on the projector and display an image.
2. Press the Settings button on the projector remote control.
44
3. Press the arrow buttons to select the Settings menu and press Enter.
Note: You can also press the keystone button on the projector remote control to display the
Keystone adjustment screen.
4. Select the Installation setting and press Enter.
5. Select the Keystone setting and press Enter.
6. Select the Quick Corner setting and press Enter twice.
You see the Quick Corner adjustment screen:
45
7. Use the arrow buttons on the projector remote control to select the corner of the image you want to
adjust, then press Enter.
8. Press the arrow buttons to adjust the image shape as necessary, then press Enter to return to the
area selection screen.
Note: To reset your adjustments, press and hold the Esc button for at least 2 seconds to display
a reset screen, then select Reset Quick Corner and Yes.
9. Press the Settings button to exit the menu or the Esc button to return to the previous screen.
Parent topic: Image Shape
Related references
Projector Feature Settings - Settings Menu
Focusing the Image Using the Focus Lever
You can adjust the sharpness of the projected image using the focus lever on the projector.
1. Turn on the projector and display an image.
2. Move the lever left or right to adjust the focus.
Parent topic: Using Basic Projector Features
46
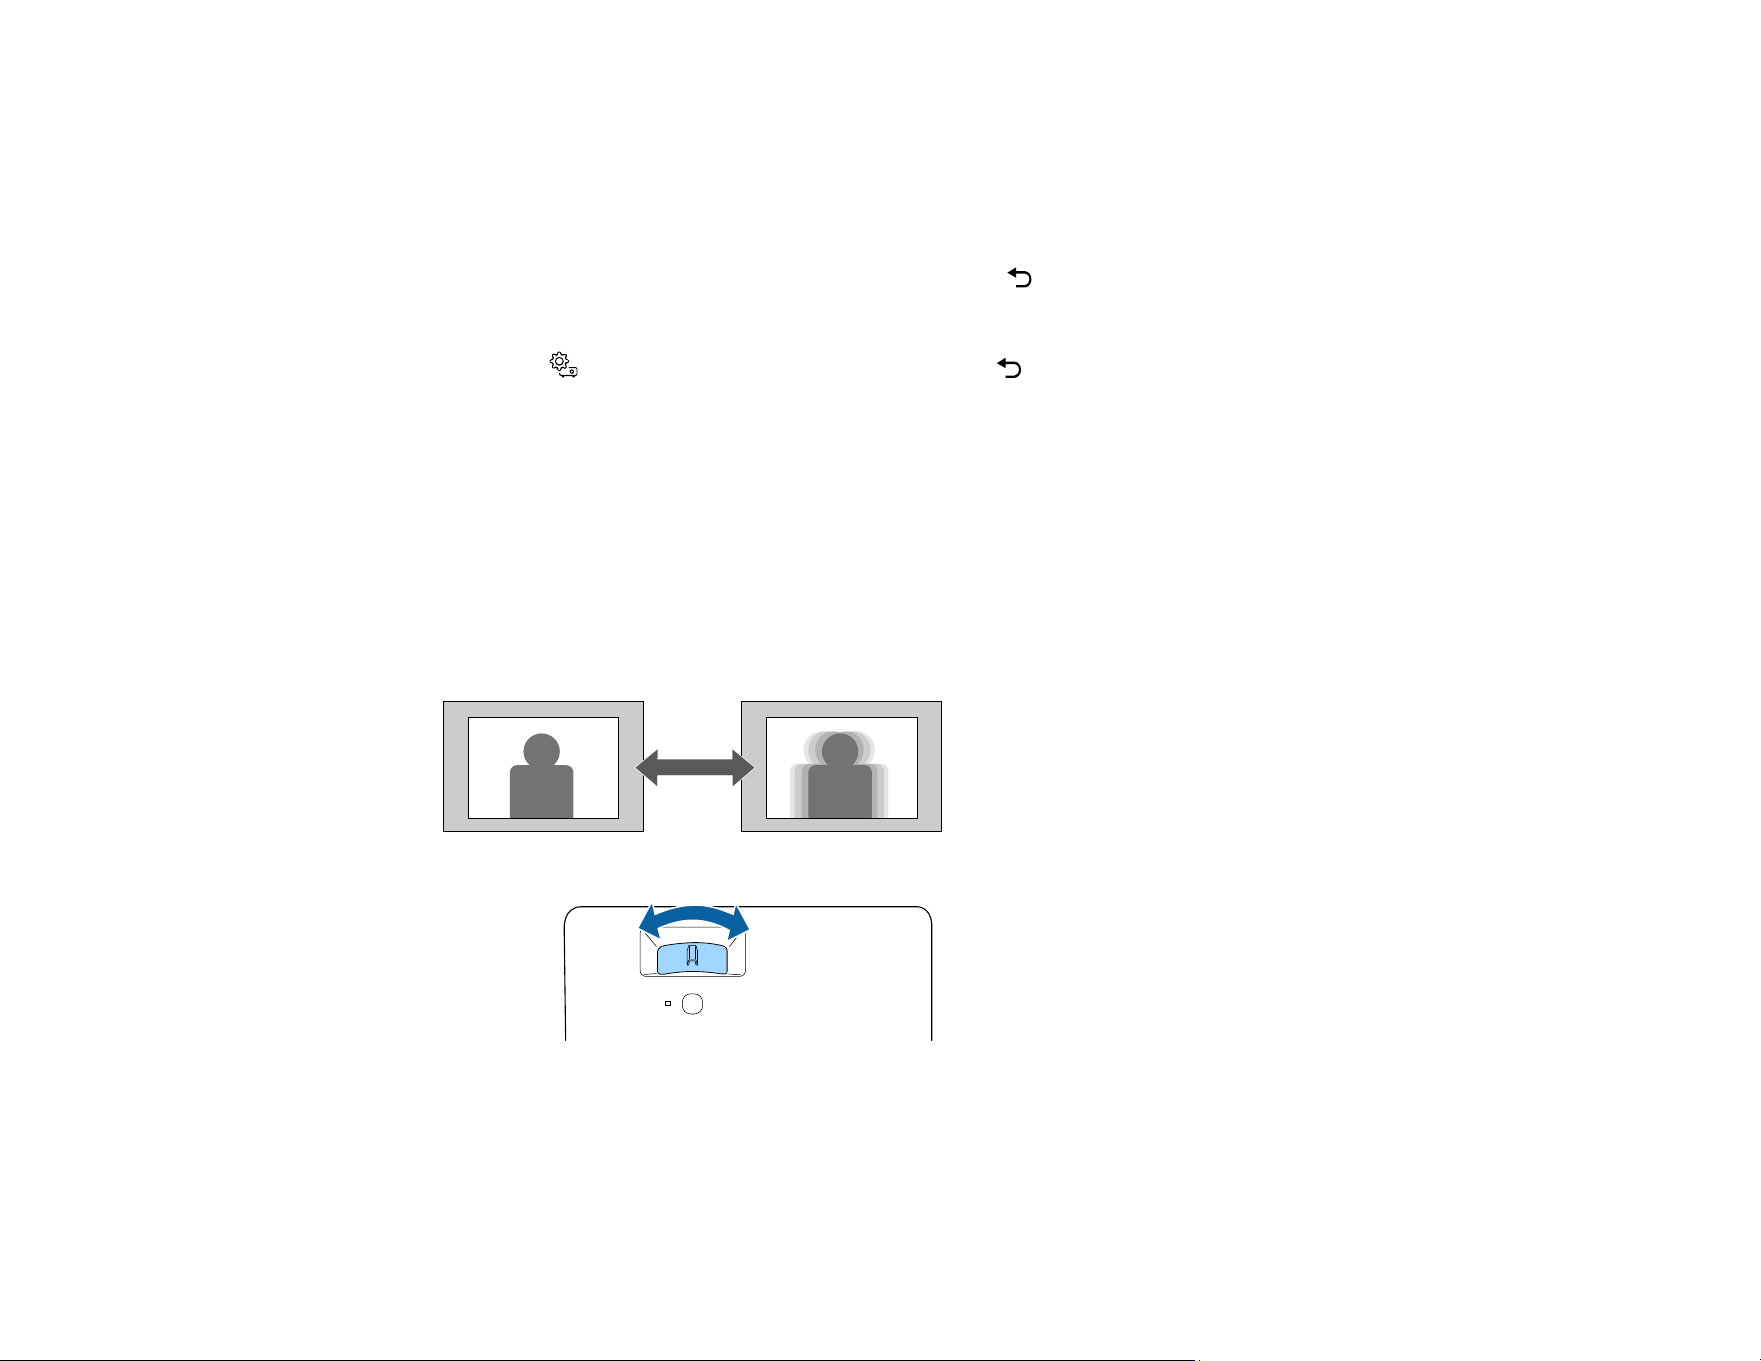
Resizing the Image Using Zoom
You can resize the displayed image.
1. Turn on the projector and display an image.
2. Press the Settings button on the projector remote control.
3. Press the arrow buttons to select the Settings menu and press Enter.
4. Select the Installation setting and press Enter.
5. Select the Zoom setting and press Enter.
6. Press the left or right arrow button to adjust the zoom setting between Wide and Tele.
7. Press the Settings button to exit the menu or the Esc button to return to the previous screen.
Parent topic: Using Basic Projector Features
Selecting an Image Source
If you connected multiple image sources to the projector, such as a USB device and DVD player, you
may want to switch from one image source to the other.
1. Make sure the connected image source you want to use is turned on.
2. For video image sources, insert a DVD or other video media and press its play button, if necessary.
47
3. Press the Source Search button on the remote control. Press the up or down buttons to select
the image source.
Note: If no image signal is detected, check the cable connections between the projector and the
image source.
Parent topic: Using Basic Projector Features
Color Mode
The projector offers different Color Modes to provide optimum brightness, contrast, and color for a
variety of viewing environments and image types. You can select a mode designed to match your image
and environment, or experiment with the available modes.
Changing the Color Mode
Available Color Modes
Parent topic: Using Basic Projector Features
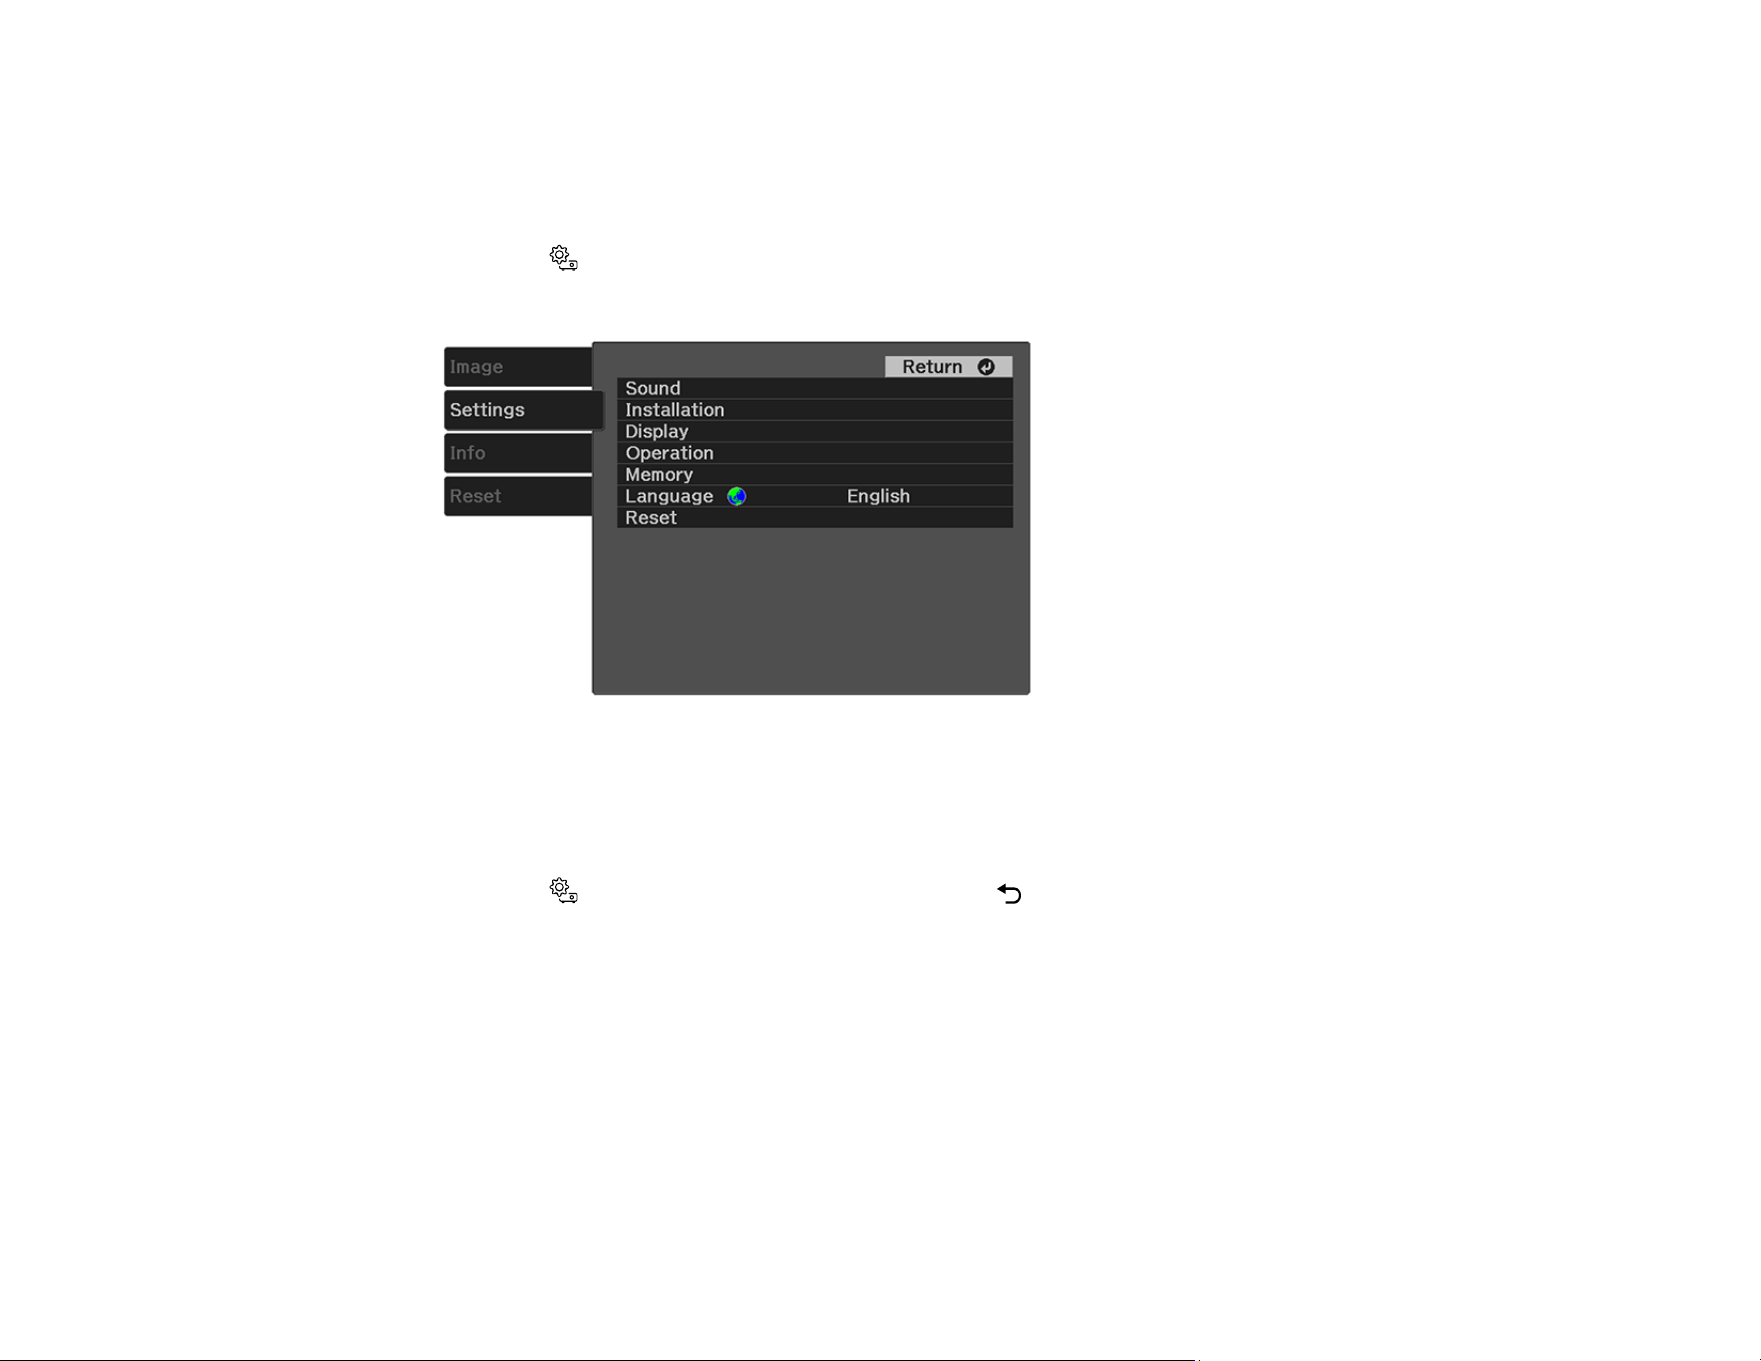
Changing the Color Mode
You can change the projector's color mode using the remote control to optimize the image for your
viewing environment.
1. Turn on the projector and display an image.
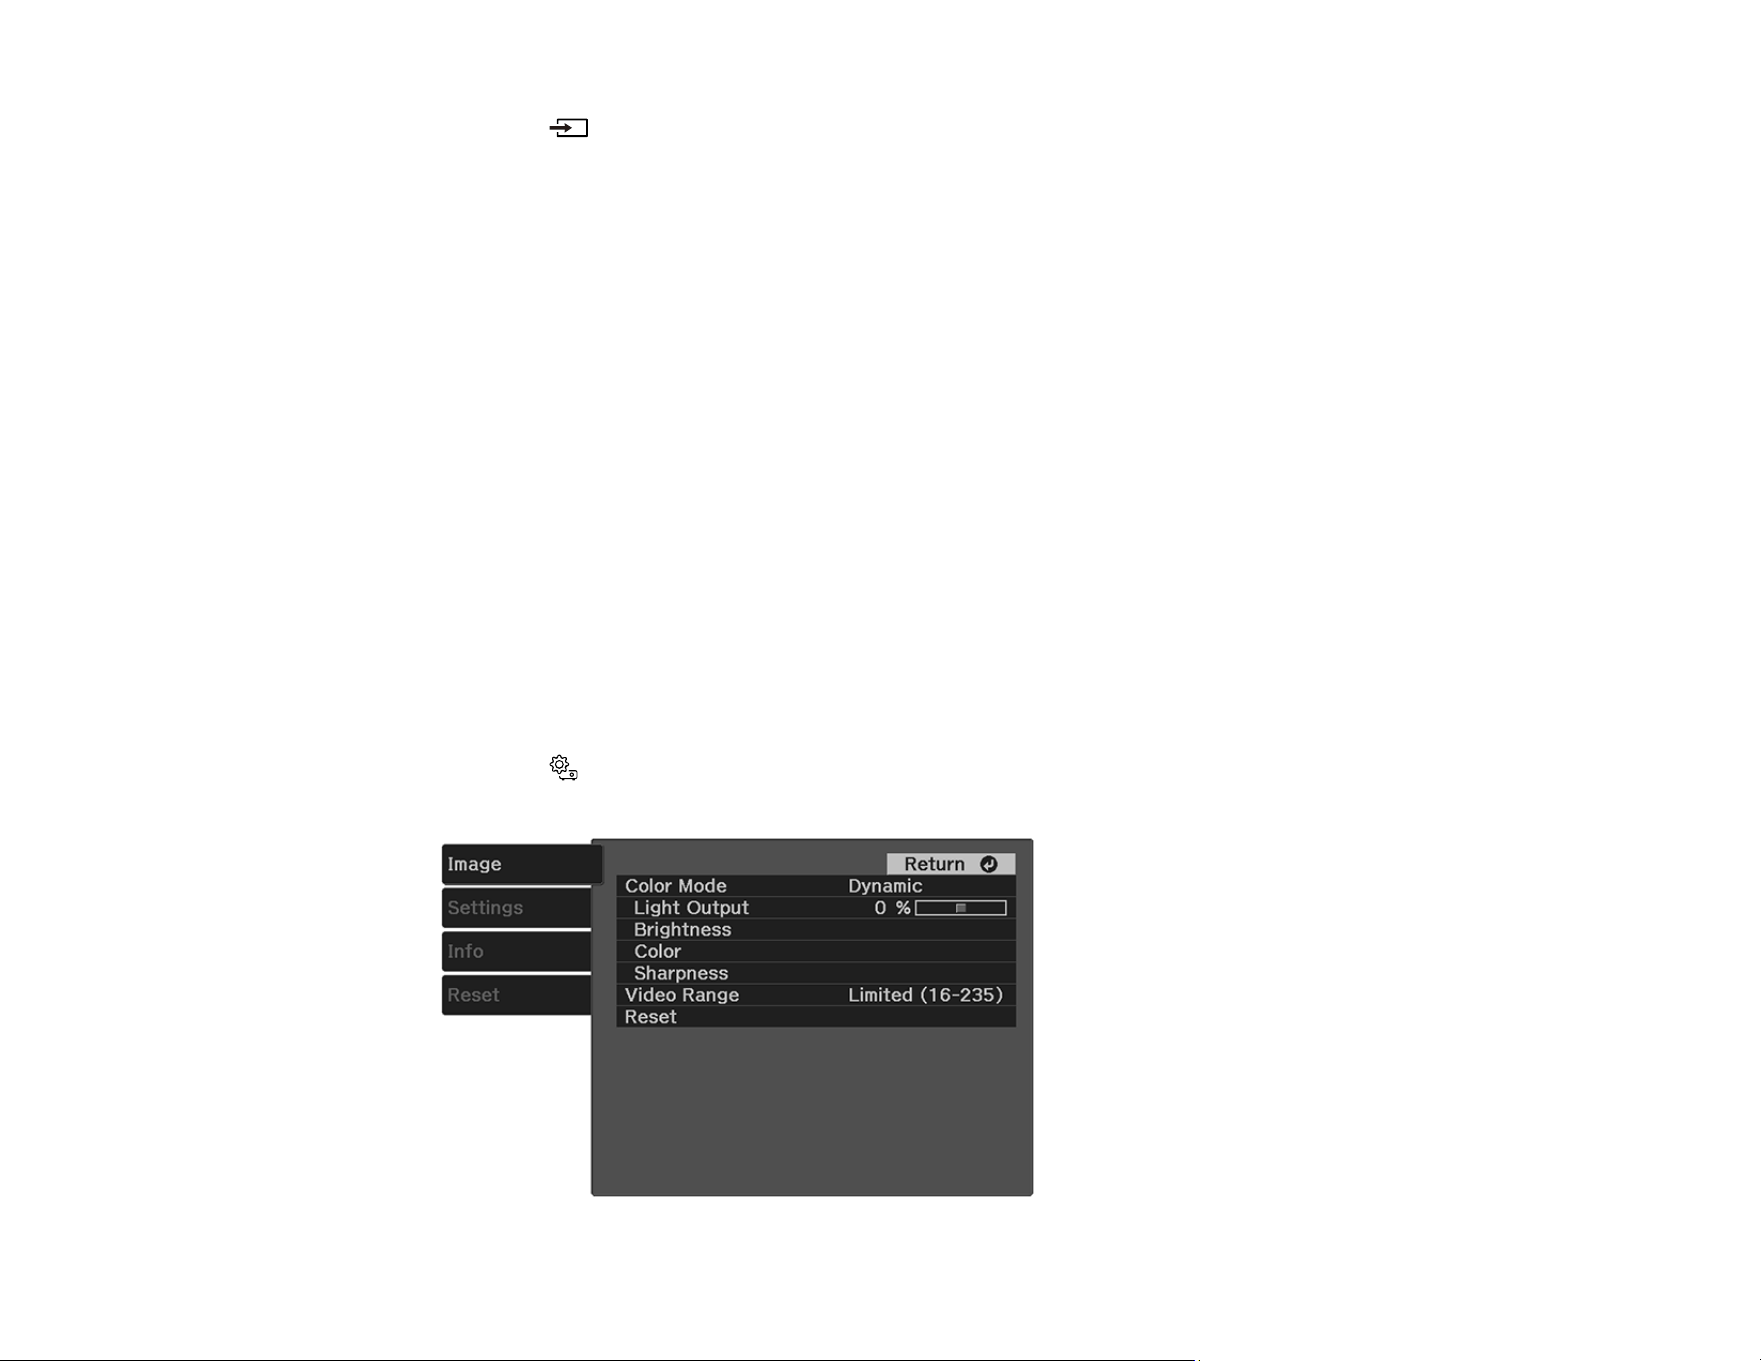
2. Press the Settings button on the remote control.
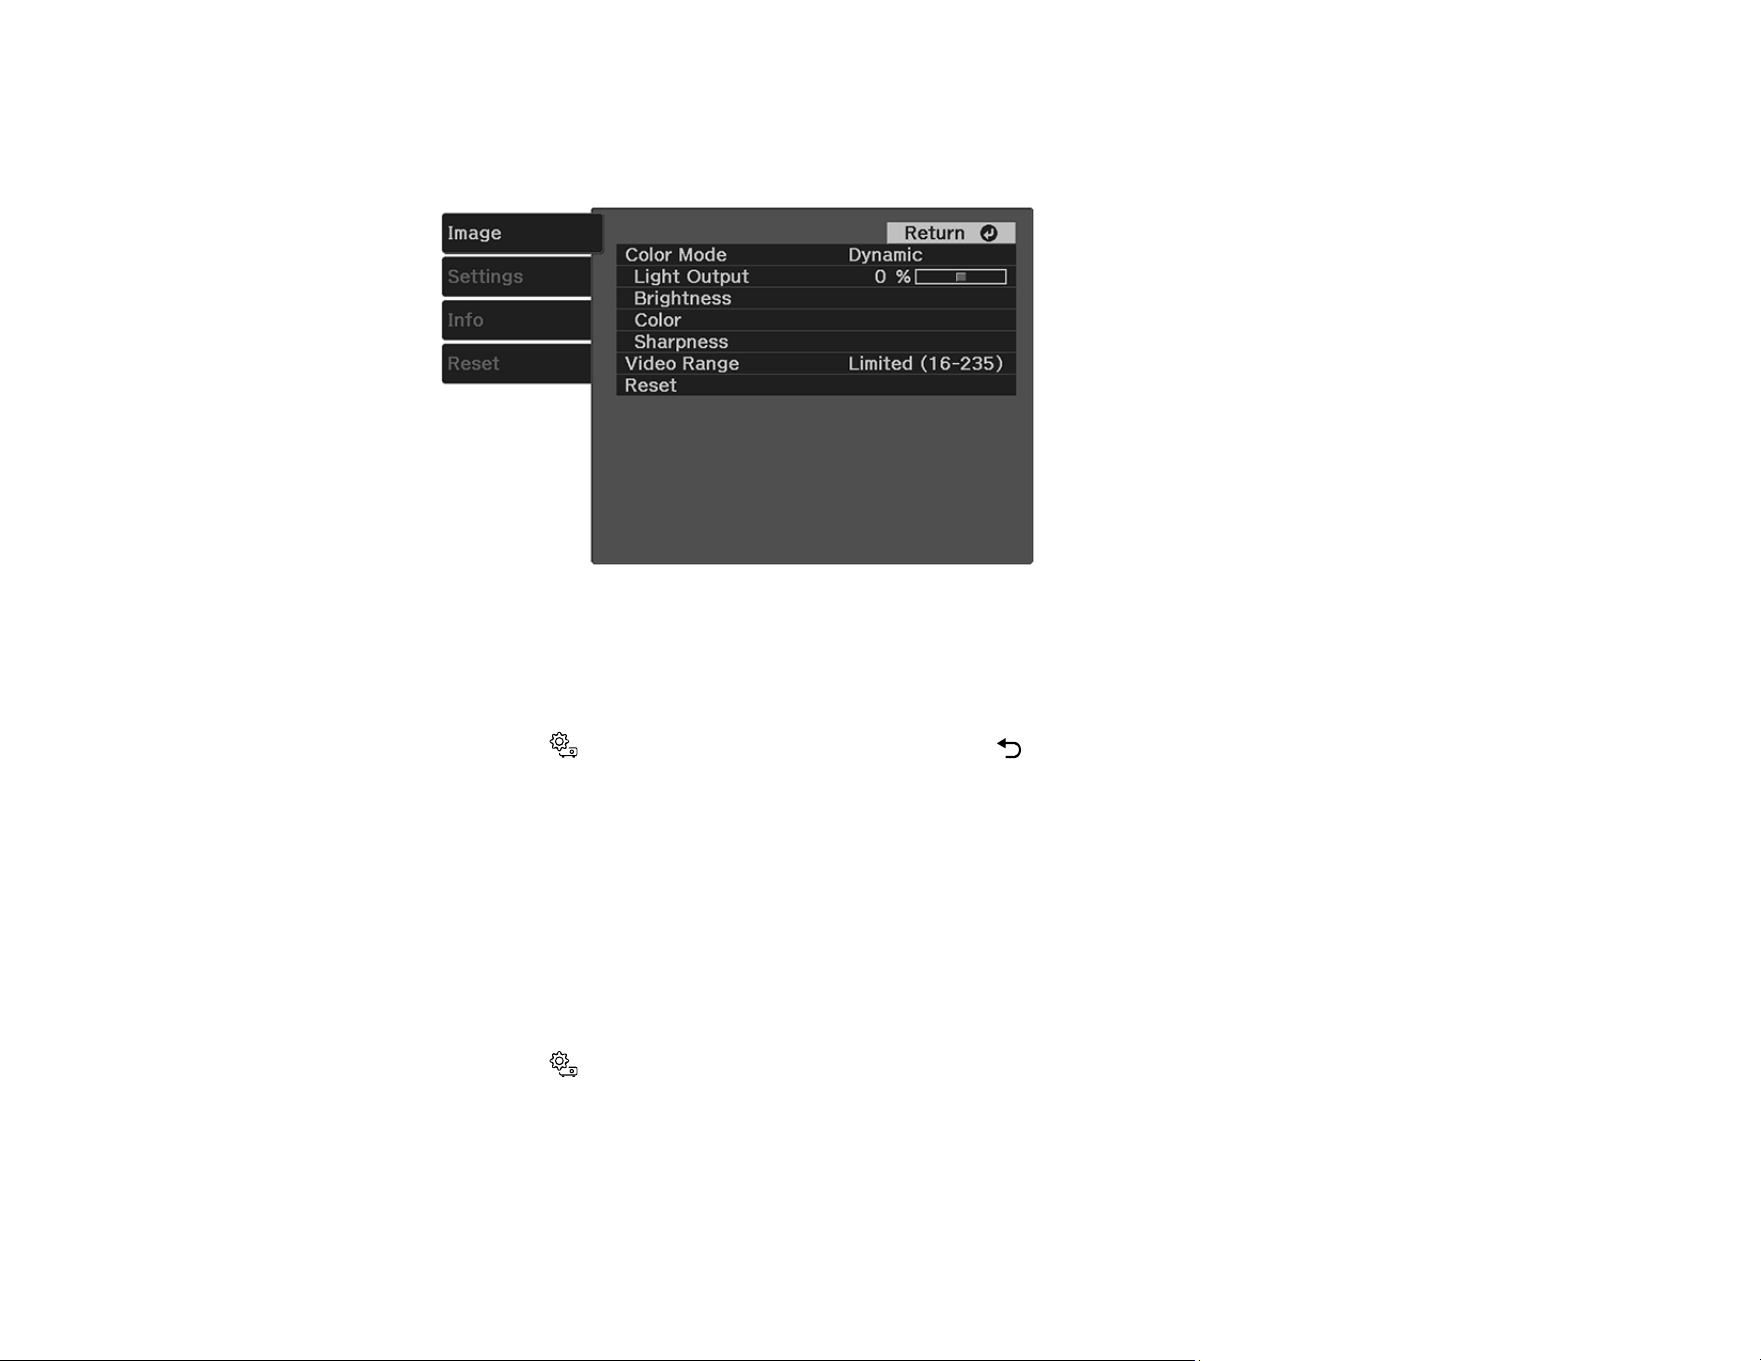
You see a screen like this:
48
3. Select the Image > Color Mode setting.
4. Select the color mode from the list.
5. Press the Settings button to exit the menu or the Esc button to return to the previous screen.
Parent topic: Color Mode
Related references
Image Quality Settings - Image Menu
Available Color Modes
You can set the projector to use these Color Modes, depending on the input source you are using:
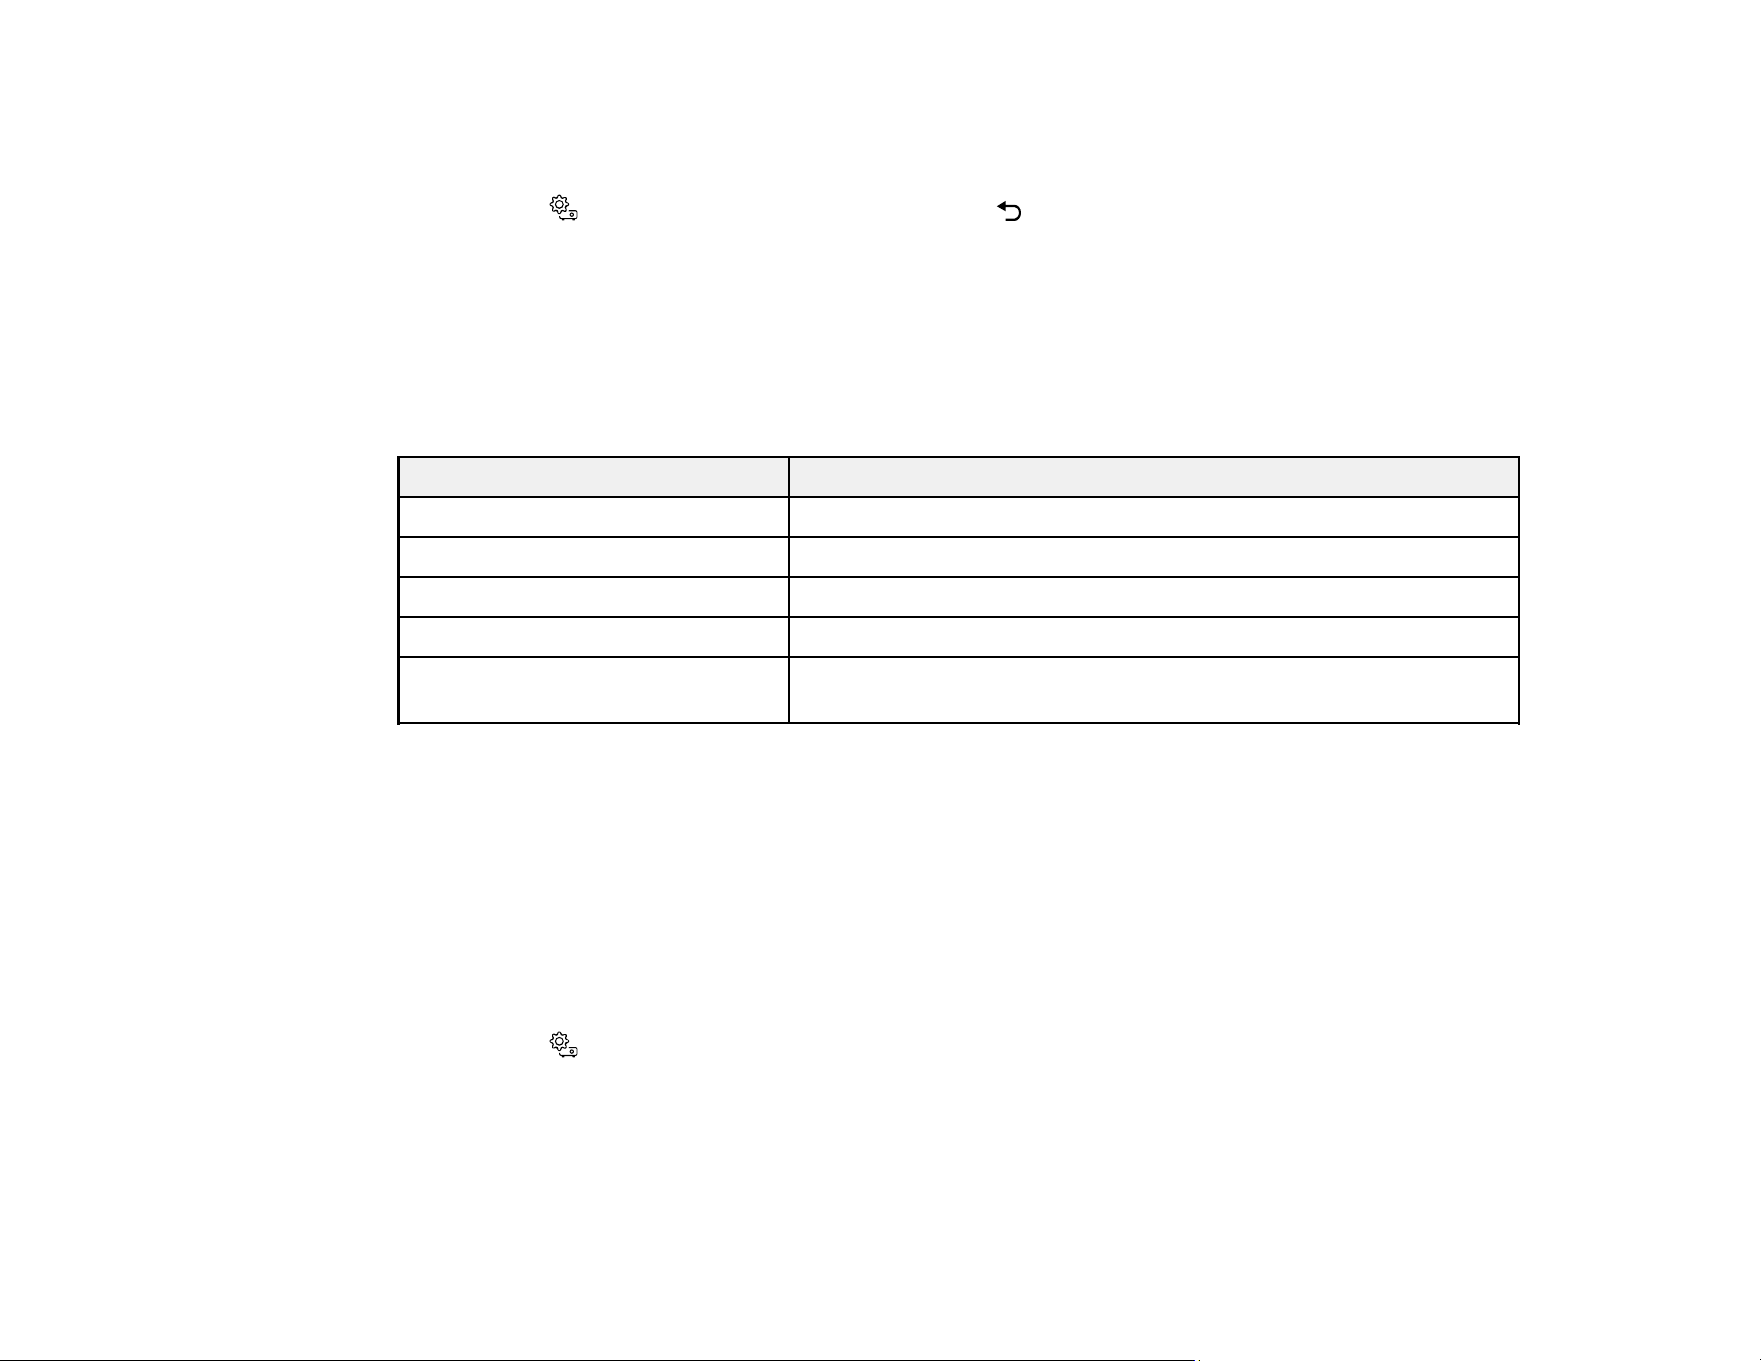
Color Mode Description
Dynamic Best for optimizing brightness
Vivid Best for projecting general content in a bright environment
Bright Cinema Best for projecting movies in a bright environment
Cinema Best for projecting movies in a dark environment
Natural Best for projecting the image as is (choose this mode when
making color adjustments)
Parent topic: Color Mode
Related references
Image Quality Settings - Image Menu
Turning On Automatic Luminance Adjustment
You can turn on the Dynamic Contrast setting to automatically optimize the image luminance. This
improves the image contrast based on the brightness of the content you project.
1. Turn on the projector and display an image.
2. Press the Settings button on the projector remote control.

49
3. Select the Image menu and press Enter.
4. Select the Brightness setting and press Enter.
5. Select the Dynamic Contrast setting and press Enter.
6. Choose one of the following options and press Enter:
• Off: turns off Dynamic Contrast
• Normal: adjusts brightness at the standard speed
• High Speed: adjusts brightness as soon as a scene changes
7. Press the Settings button to exit the menu or the Esc button to return to the previous screen.
Parent topic: Using Basic Projector Features
Adjusting Light Output (Brightness)
You can adjust the brightness of the projector's light output.
1. Turn on the projector and display an image.
2. Press the Settings button on the projector remote control.
50
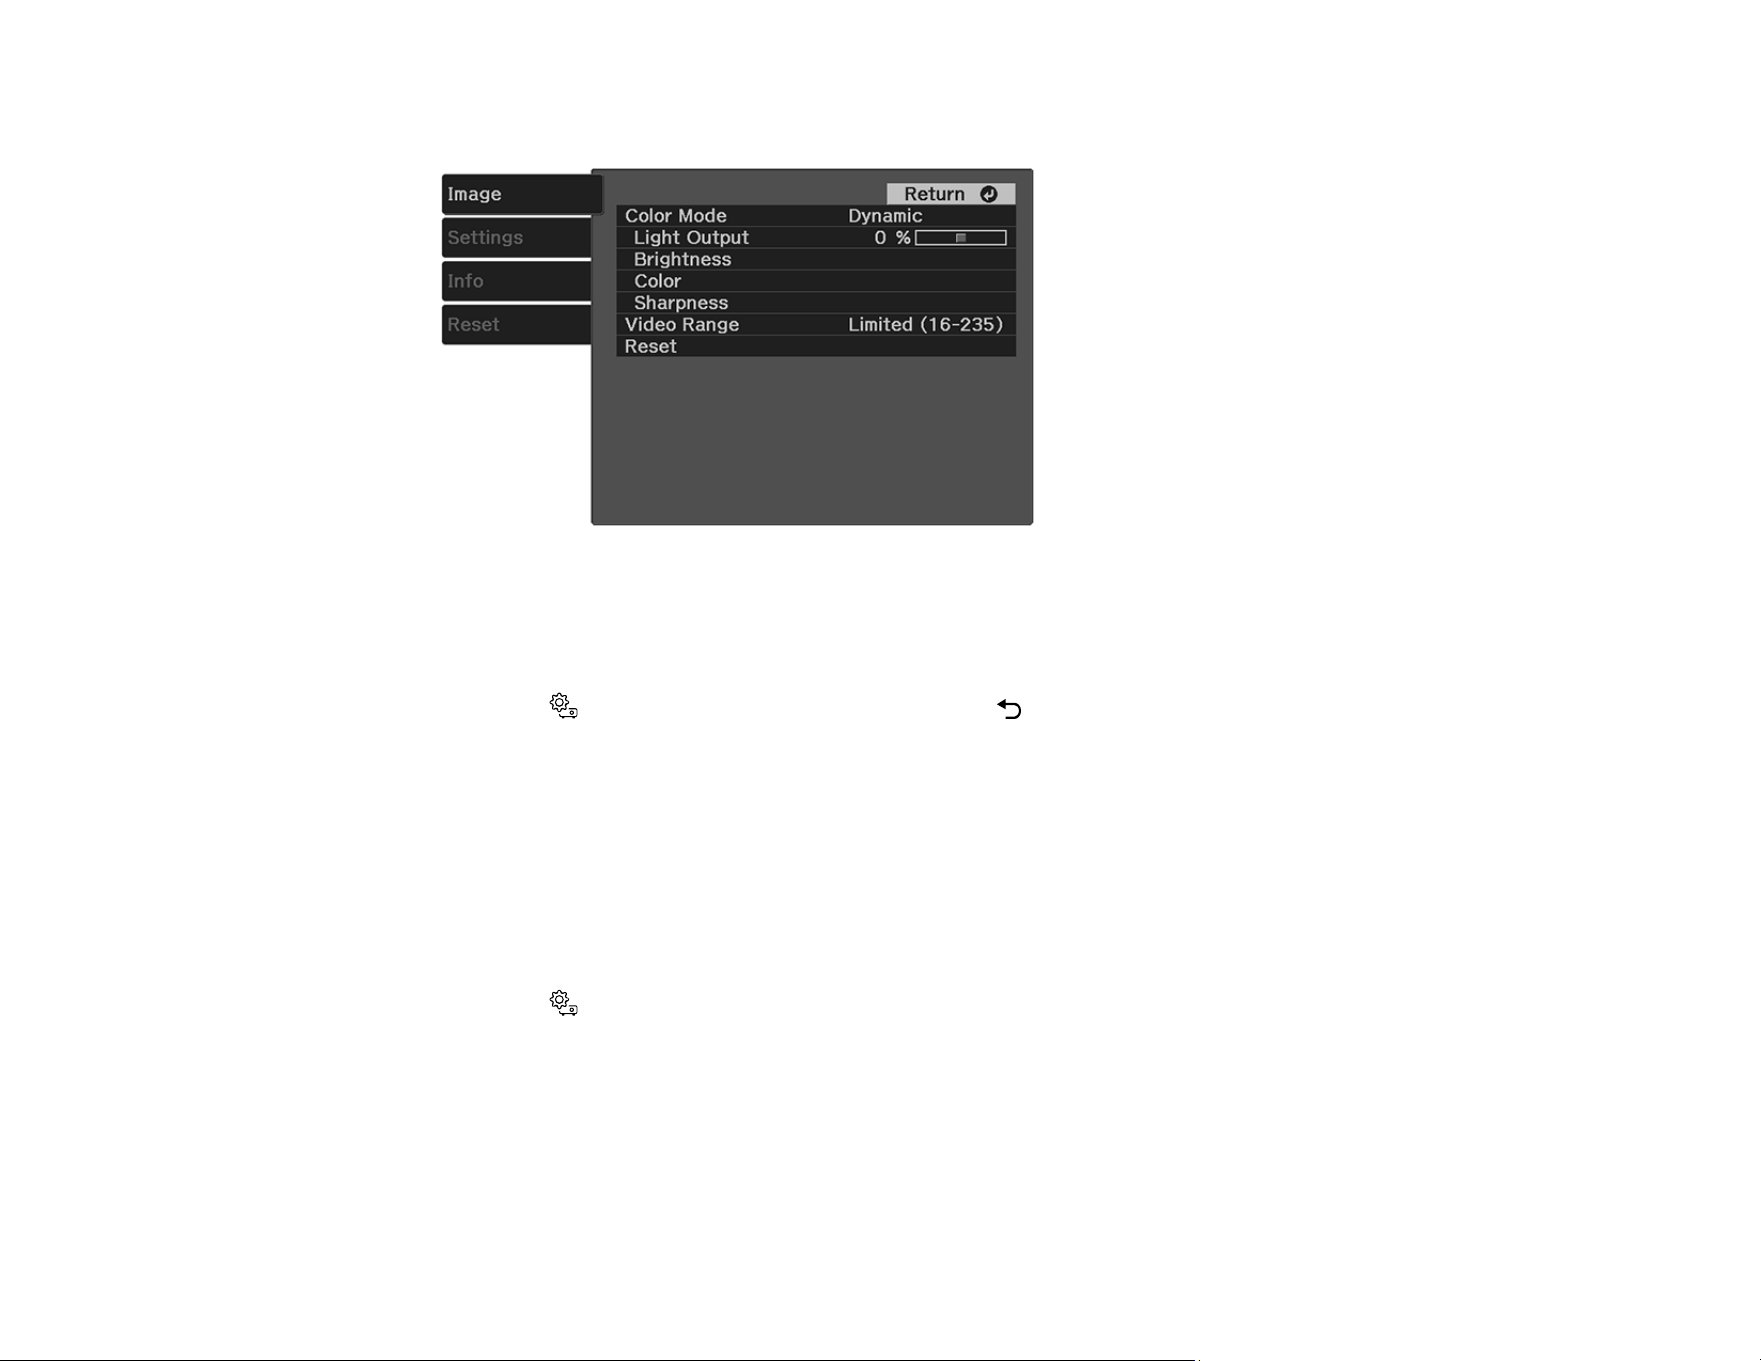
3. Select the Image menu and press Enter.
4. Select the Light Output setting and press Enter.
5. Press the left or right arrow buttons to adjust the brightness between 50% (ECO) and 100%
(Normal).
6. Press the Settings button to exit the menu or the Esc button to return to the previous screen.
Parent topic: Using Basic Projector Features
Related references
Image Quality Settings - Image Menu
Adjusting Image Sharpness
You can adjust various aspects of the displayed image.
1. Turn on the projector and display an image.
2. Press the Settings button on the projector remote control.
51
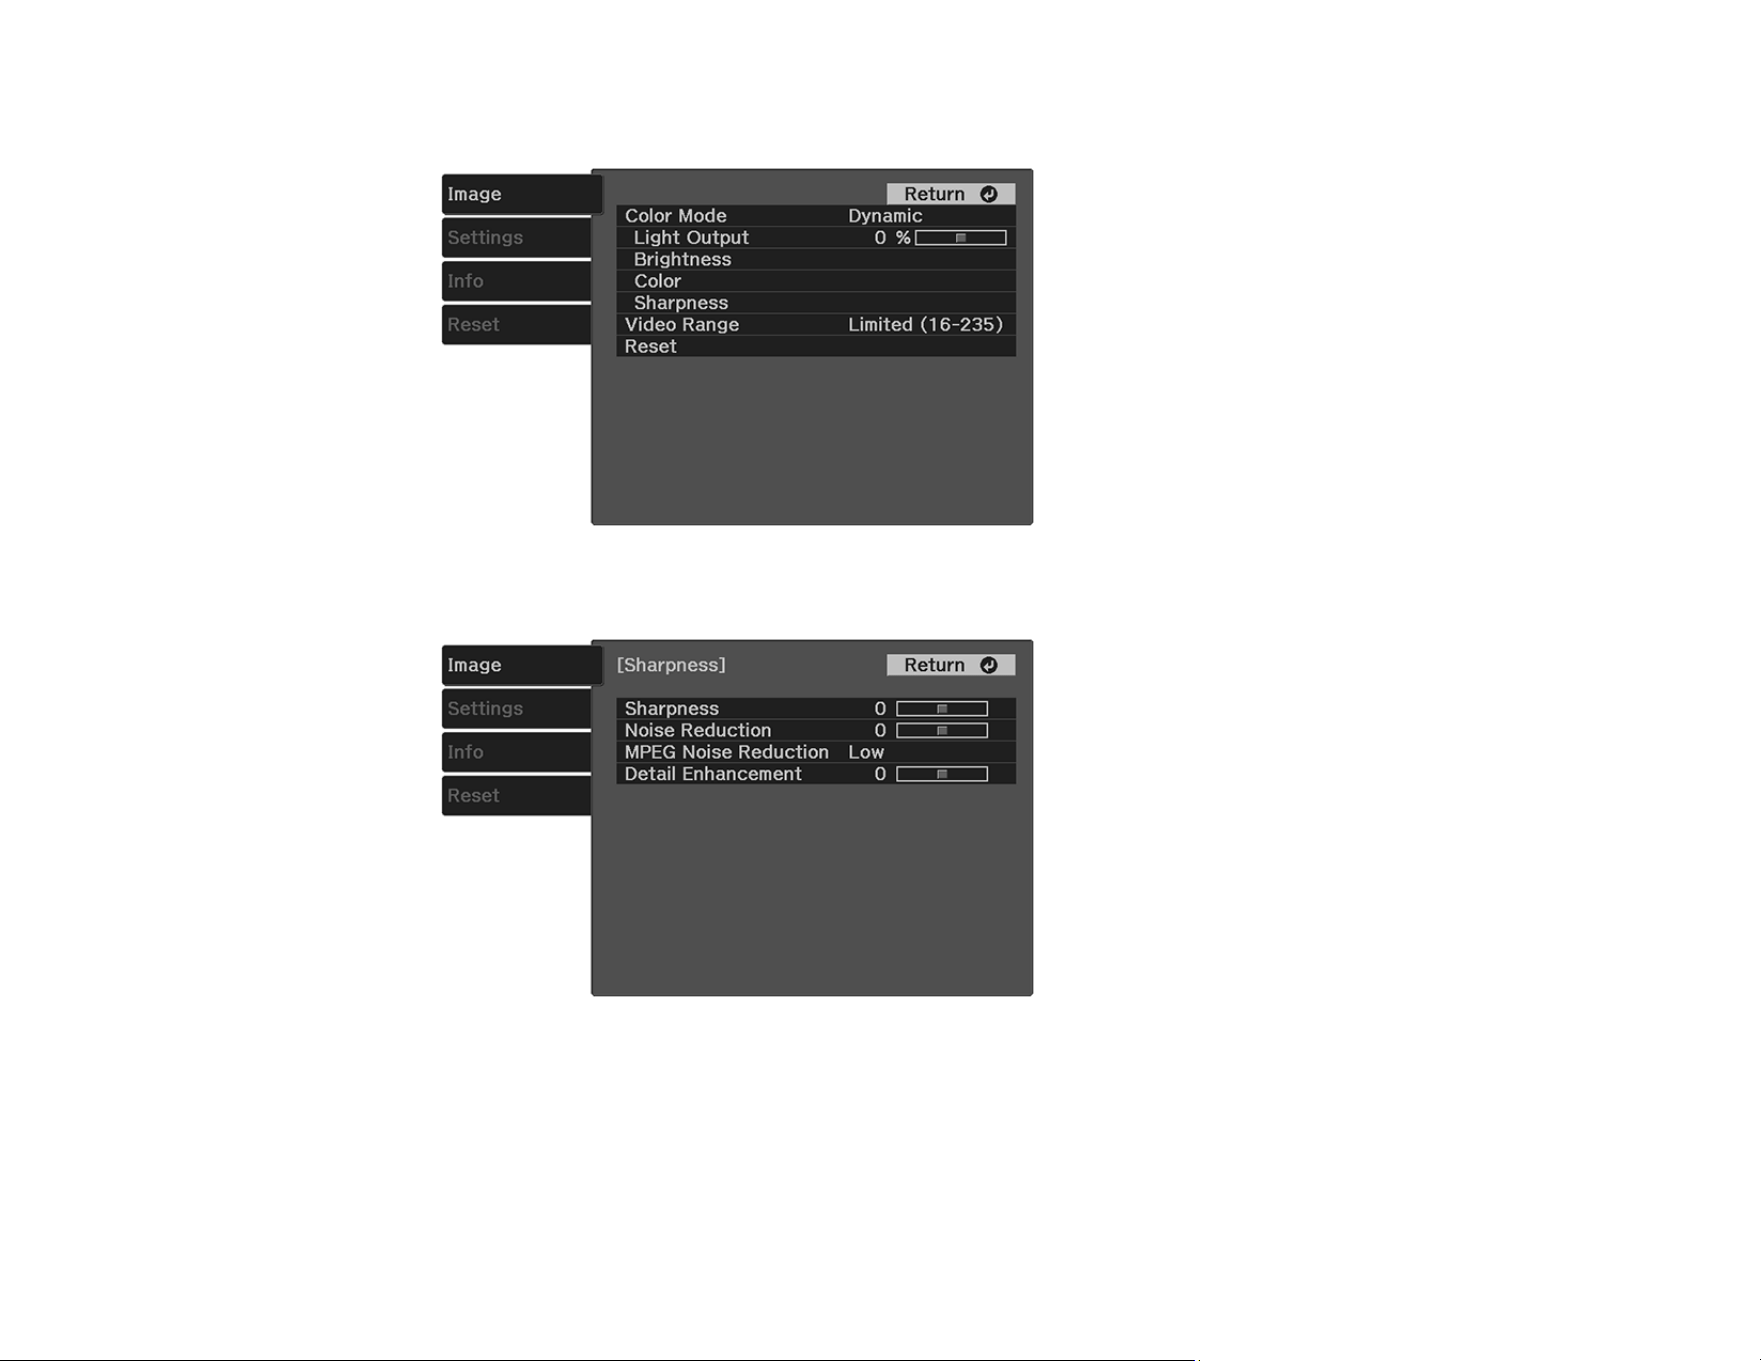
3. Select the Image menu and press Enter.
4. Select the Sharpness setting and press Enter.
5. Do the following as necessary to adjust the displayed image:
• To adjust the outline of the image, adjust the Sharpness setting.
• To reduce flickering in the image, adjust the Noise Reduction setting.
• To reduce flickering in an MPEG image, adjust the MPEG Noise Reduction setting.

52
• To create a more textural feel to the image, adjust the Detail Enhancement setting.
6. Press the Settings button to exit the menu or the Esc button to return to the previous screen.
Parent topic: Using Basic Projector Features
Related references
Image Quality Settings - Image Menu
Using Advanced Image Adjustment Features
Follow the instructions in these sections to use your projector's advanced image adjustments.
Adjusting the Color Temperature
Adjusting the RGB Offset and Gain
Adjusting the Hue, Saturation, and Brightness
Adjusting Gamma
Parent topic: Using Basic Projector Features
Adjusting the Color Temperature
You can change the overall color tone if the image contains a bluish or reddish tone.
1. Turn on the projector and display an image.
2. Press the Settings button.
53
3. Select the Image menu and press Enter.
You see a screen like this:
4. Select the Color > White Balance > Color Temp. setting and press Enter.
5. Use the arrow buttons to adjust the value of the Color Temp. setting. Higher values increase the
blue tint, and lower values increase the red tint.
6. Press the Settings button to exit the menu or the Esc button to return to the previous screen.
Parent topic: Using Advanced Image Adjustment Features
Related references
Image Quality Settings - Image Menu
Adjusting the RGB Offset and Gain
You can adjust the brightness of darker and brighter areas of the image by adjusting the Offset and
Gain settings for the individual image colors.
1. Turn on the projector and display an image.
2. Press the Settings button.

54
3. Select the Image menu and press Enter.
You see a screen like this:
4. Select the Color > White Balance > Custom setting and press Enter.
5. Do the following as necessary for each color (Red, Green, and Blue):
• To adjust the brightness of dark areas, adjust the Offset setting.
• To adjust the brightness of bright areas, adjust the Gain setting.
Higher values will make the image brighter but can decrease shading details, while lower values will
make the image darker but can increase the visibility of details.
6. Press the Settings button to exit the menu or the Esc button to return to the previous screen.
Parent topic: Using Advanced Image Adjustment Features
Related references
Image Quality Settings - Image Menu
Adjusting the Hue, Saturation, and Brightness
You can adjust the hue, saturation, and brightness settings for individual image colors.
1. Turn on the projector and display an image.
2. Press the Settings button.
55
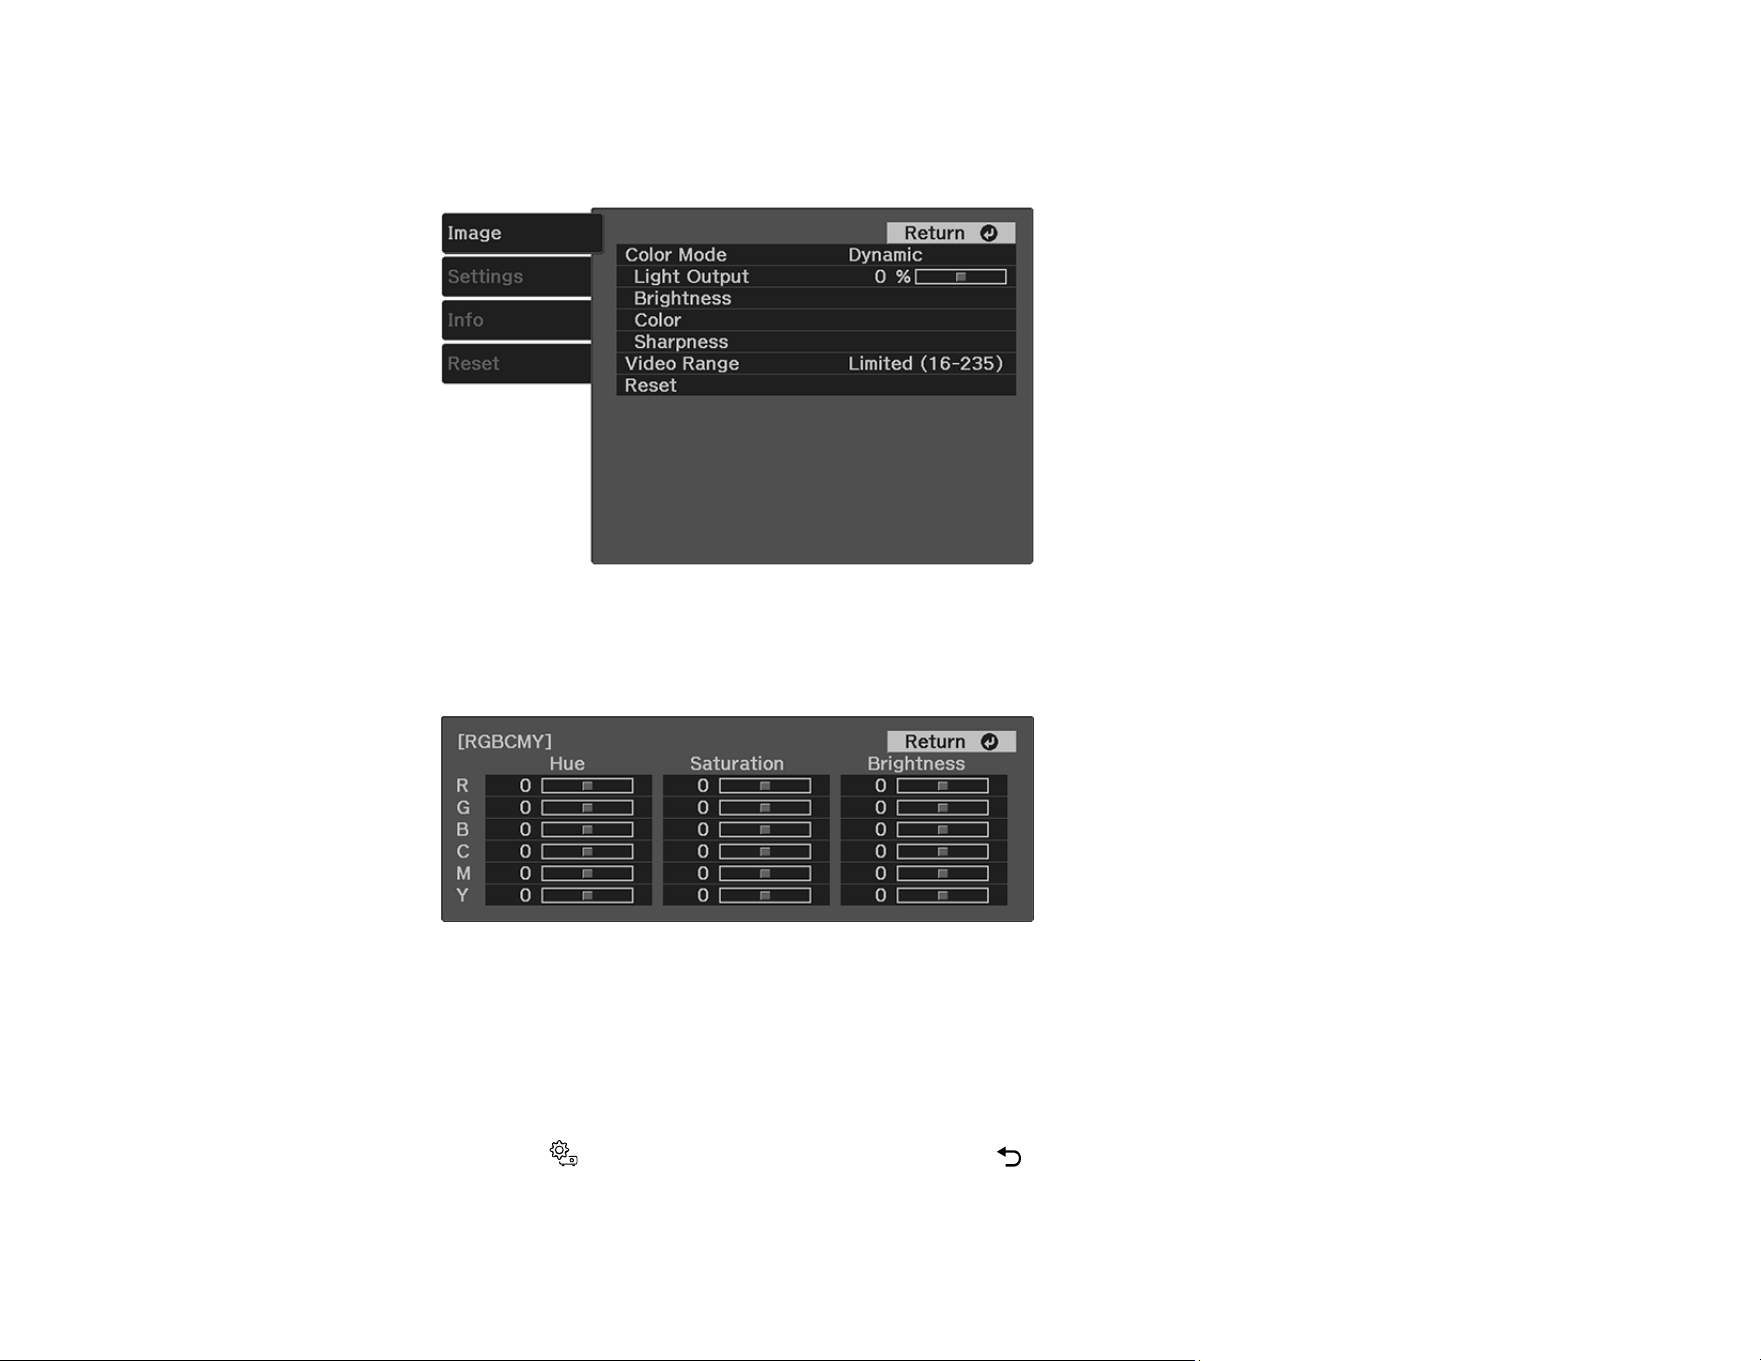
3. Select the Image menu and press Enter.
You see a screen like this:
4. Select the Color > RGBCMY setting and press Enter.
5. Select the color to adjust and press Enter.
6. Do the following as necessary for each setting:
• To adjust the overall hue of the color (bluish, greenish, reddish), adjust the Hue setting.
• To adjust the overall vividness of the color, adjust the Saturation setting.
• To adjust the overall brightness of the color, adjust the Brightness setting.
7. Press the Settings button to exit the menu or the Esc button to return to the previous screen.
Parent topic: Using Advanced Image Adjustment Features
56
Related references
Image Quality Settings - Image Menu
Adjusting Gamma
You can adjust the gamma to improve differences in halftone brightness that vary depending on the
connected device.
Note: Project a still image to adjust the gamma; you cannot adjust it properly when projecting a movie or
other moving video. Medical images may not reproduce correctly depending on your operating
environment and screen.
1. Turn on the projector and display an image.
2. Press the Settings button.
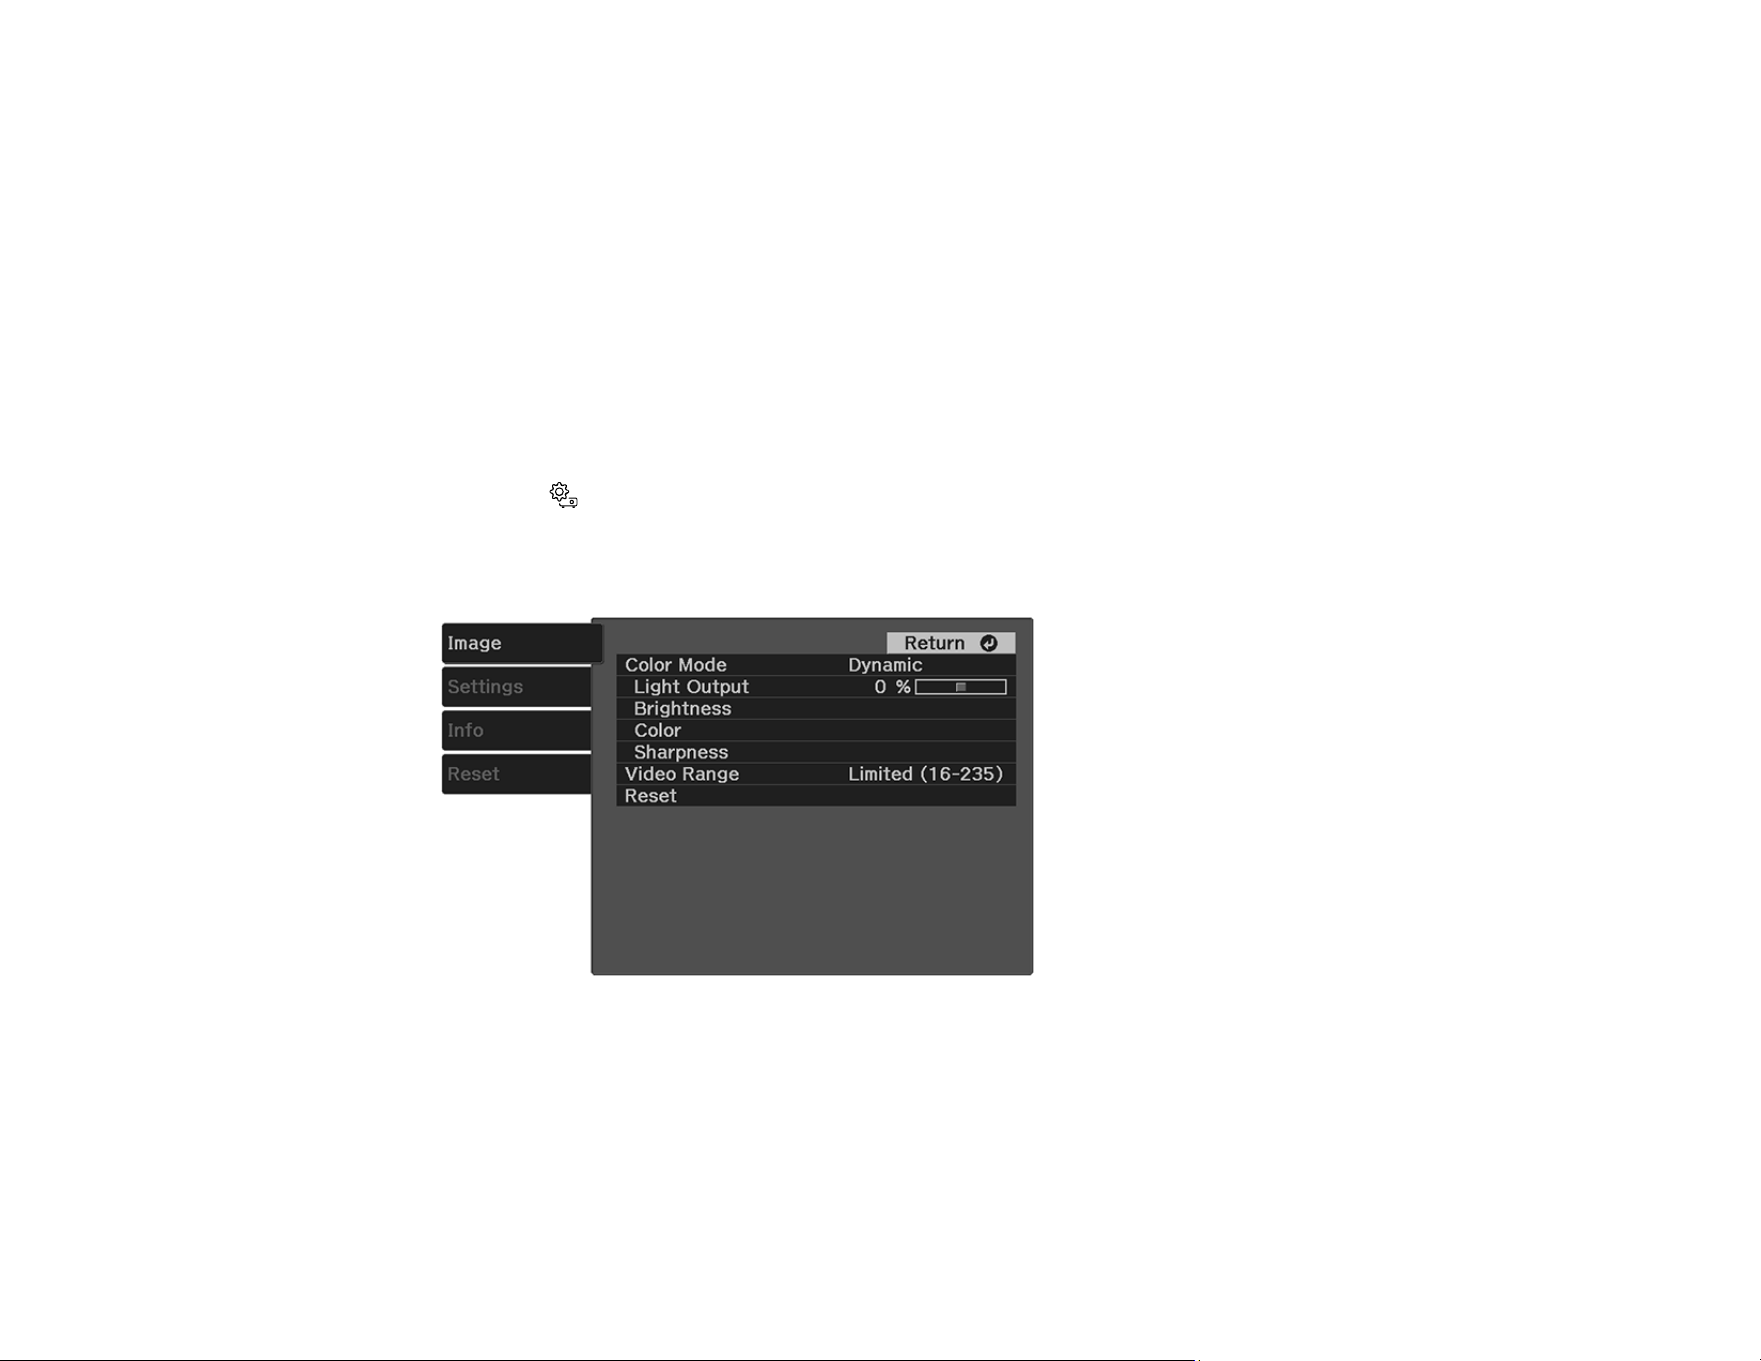
3. Select the Image menu and press Enter.
You see a screen like this:
4. Select the Brightness > Gamma setting and press Enter.
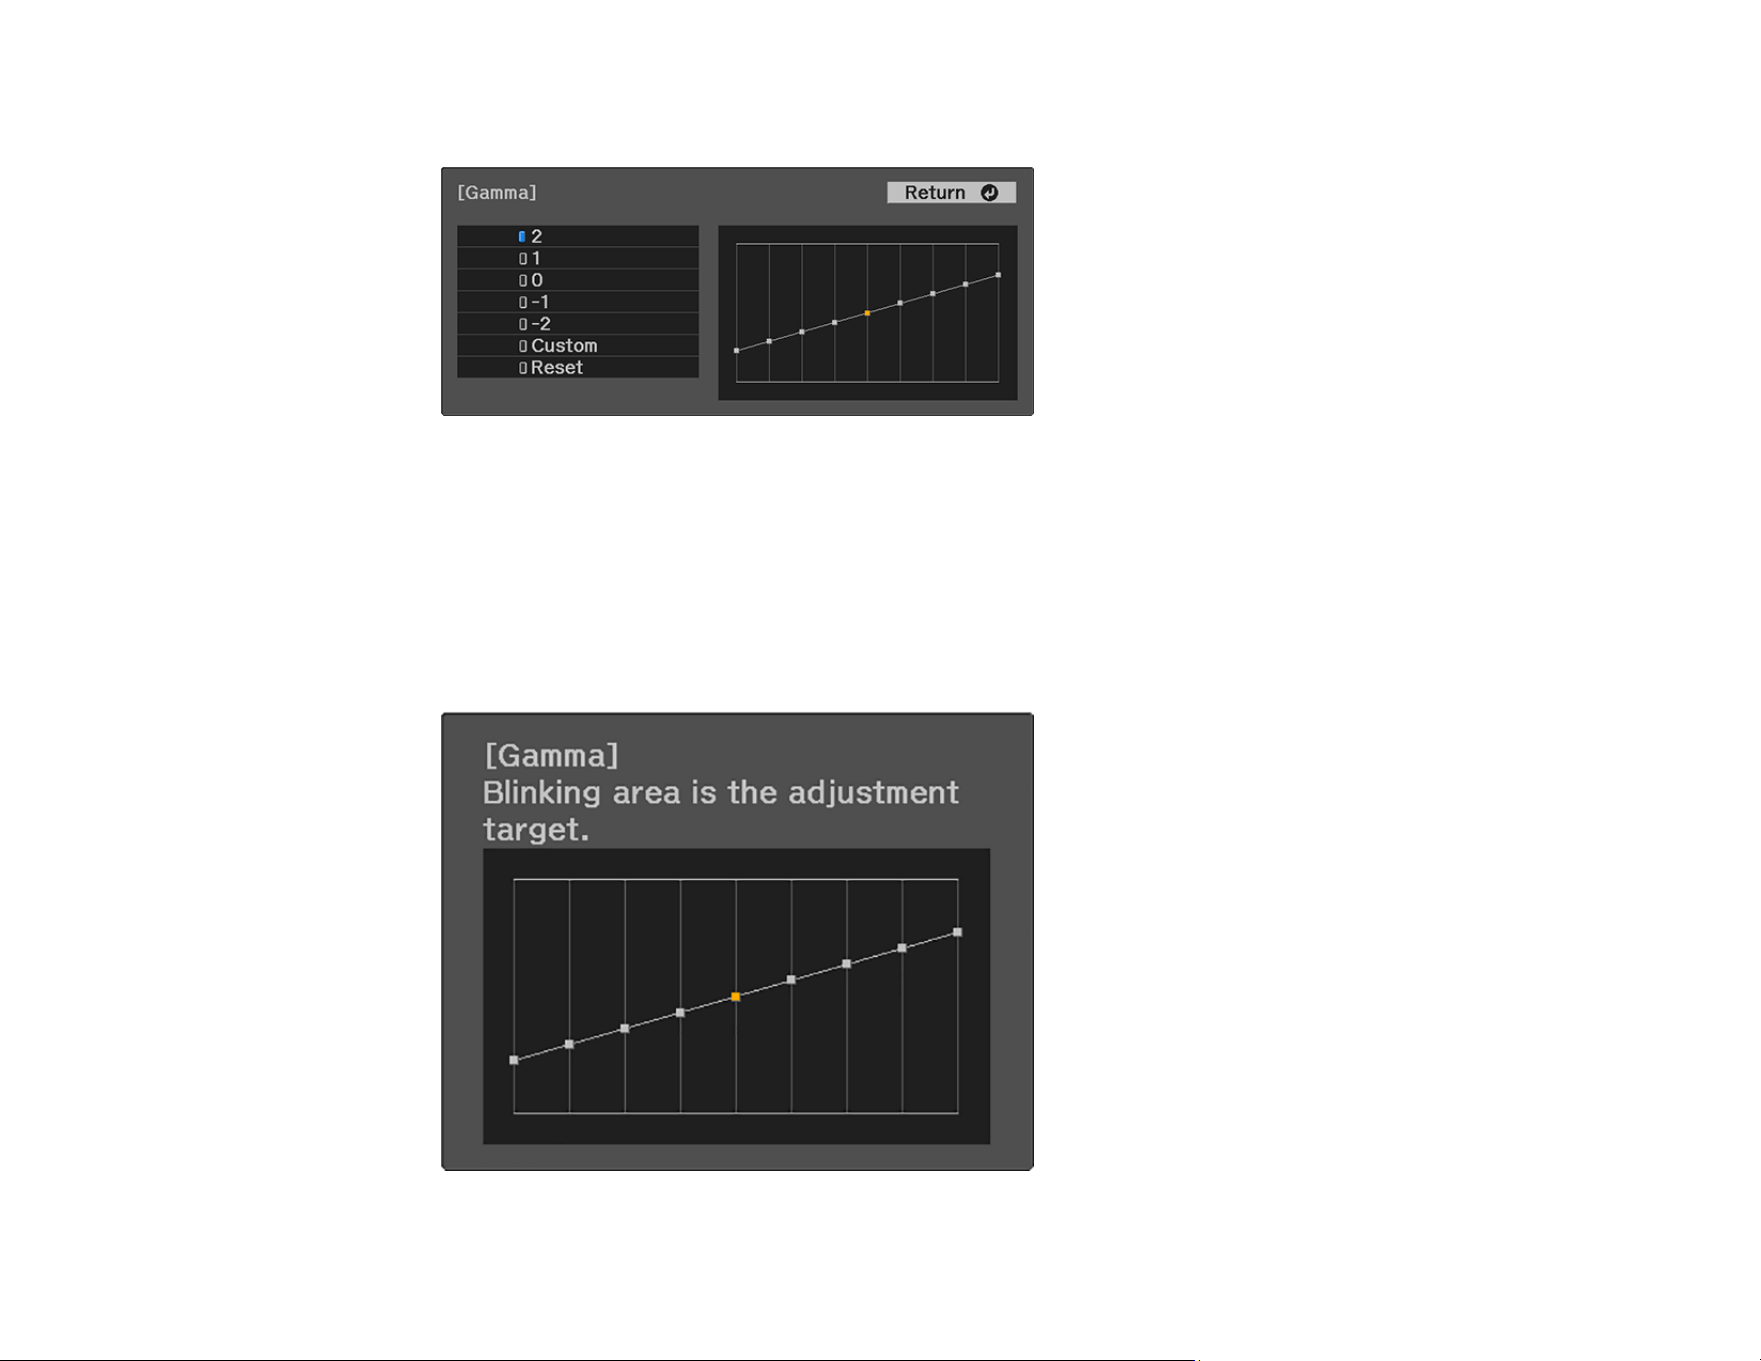
57
You see a screen like this:
5. Use the arrow buttons to adjust the value of the Gamma setting as follows:
• To brighten darker areas of the image, select higher gamma values. (Color saturation in the lighter
areas may become weaker.)
• To reduce overall image brightness and sharpen the image, select lower gamma values.
6. To adjust specific tones in the gamma using a graph, select the Custom setting and press Enter.
You see a screen like this:
58
7. Press the left or right arrow button to select the tone you want to change, then press the up or down
arrow button to adjust the tone and press Enter.
8. Press the Settings button to exit the menu or the Esc button to return to the previous screen.
Parent topic: Using Advanced Image Adjustment Features
Related references
Image Quality Settings - Image Menu
Saving Settings to Memory and Using Saved Settings
You can save the customized Image menu settings for your video input and then select the saved
settings whenever you want to use them.
1. Turn on the projector and display an image.
2. Press the Settings button on the projector remote control.
3. Press the arrow buttons to select the Settings menu and press Enter.
4. Select the Memory setting and press Enter.
5. Choose one of the following options and press Enter:
• Load Memory: overwrites your current settings with saved settings
• Save Memory: saves your current settings to memory (10 memories with different names are
available)

59
Note: A memory name that has already been used is indicated by a blue mark. Saving over a
previously saved memory overwrites the settings with your current settings. The name of the
memory defaults to the current color mode. Use the Rename Memory option after saving a
memory set to create a custom name.
• Erase Memory: erases the selected memory settings
• Rename Memory: renames a saved memory
Note: To delete all saved memories, select the Reset Memory setting in the Reset menu.
6. Press the Settings button to exit the menu or the Esc button to return to the previous screen.
Parent topic: Using Basic Projector Features
Related references
Projector Feature Settings - Settings Menu
Projector Reset Options - Reset Menu
Controlling the Volume with the Volume Buttons
You can use the volume buttons to adjust the volume of the projector's internal speaker or any external
speakers or headphones connected to the projector.
Note: You must adjust the volume separately for each connected input source.
1. Turn on the projector and start a video that includes audio.
2. To raise or lower the volume, press the volume up or volume down button on the projector
remote control.
A volume gauge appears on the screen.
Parent topic: Using Basic Projector Features
Related references
Projector Feature Settings - Settings Menu
Changing the Sound Mode
You can change the projector's sound mode to provide optimal sound for a variety of image types.
1. Turn on the projector and start a video.
60
2. Press the Settings button on the remote control.
3. Press the arrow buttons to select the Settings menu and press Enter.
4. Select the Sound > Sound Mode setting and press Enter.
5. Select a sound mode and press Enter.
6. Press the Settings button to exit the menu or the Esc button to return to the previous screen.
Available Sound Modes
Parent topic: Using Basic Projector Features
Related references
Projector Feature Settings - Settings Menu
Available Sound Modes
You can set the projector to use these sound modes, depending on the input source you are using:
Sound Mode Description
Standard Outputs audio using normal sound quality
Vocal Best for hearing voices and spoken dialogue
Music Best for listening to music. Higher and lower pitched sounds are
clearer.

62
Adjusting Projector Features
Follow the instructions in these sections to use your projector's feature adjustments.
Operating Connected Devices Using the HDMI Link Features
Projecting a PC Free Presentation
Wireless Network Projection from a Mobile Device (Screen Mirroring)
Shutting Off the Picture and Sound Temporarily
Installing a Security Cable
Copying Menu Settings Between Projectors
Operating Connected Devices Using the HDMI Link Features
You can use the projector remote control to control certain features of devices connected to the
projector's HDMI port.
Note: The connected device and HDMI cable must meet the HDMI CEC standard. The device must also
be configured; see the documentation that came with the device. All devices or functions may not
operate properly.
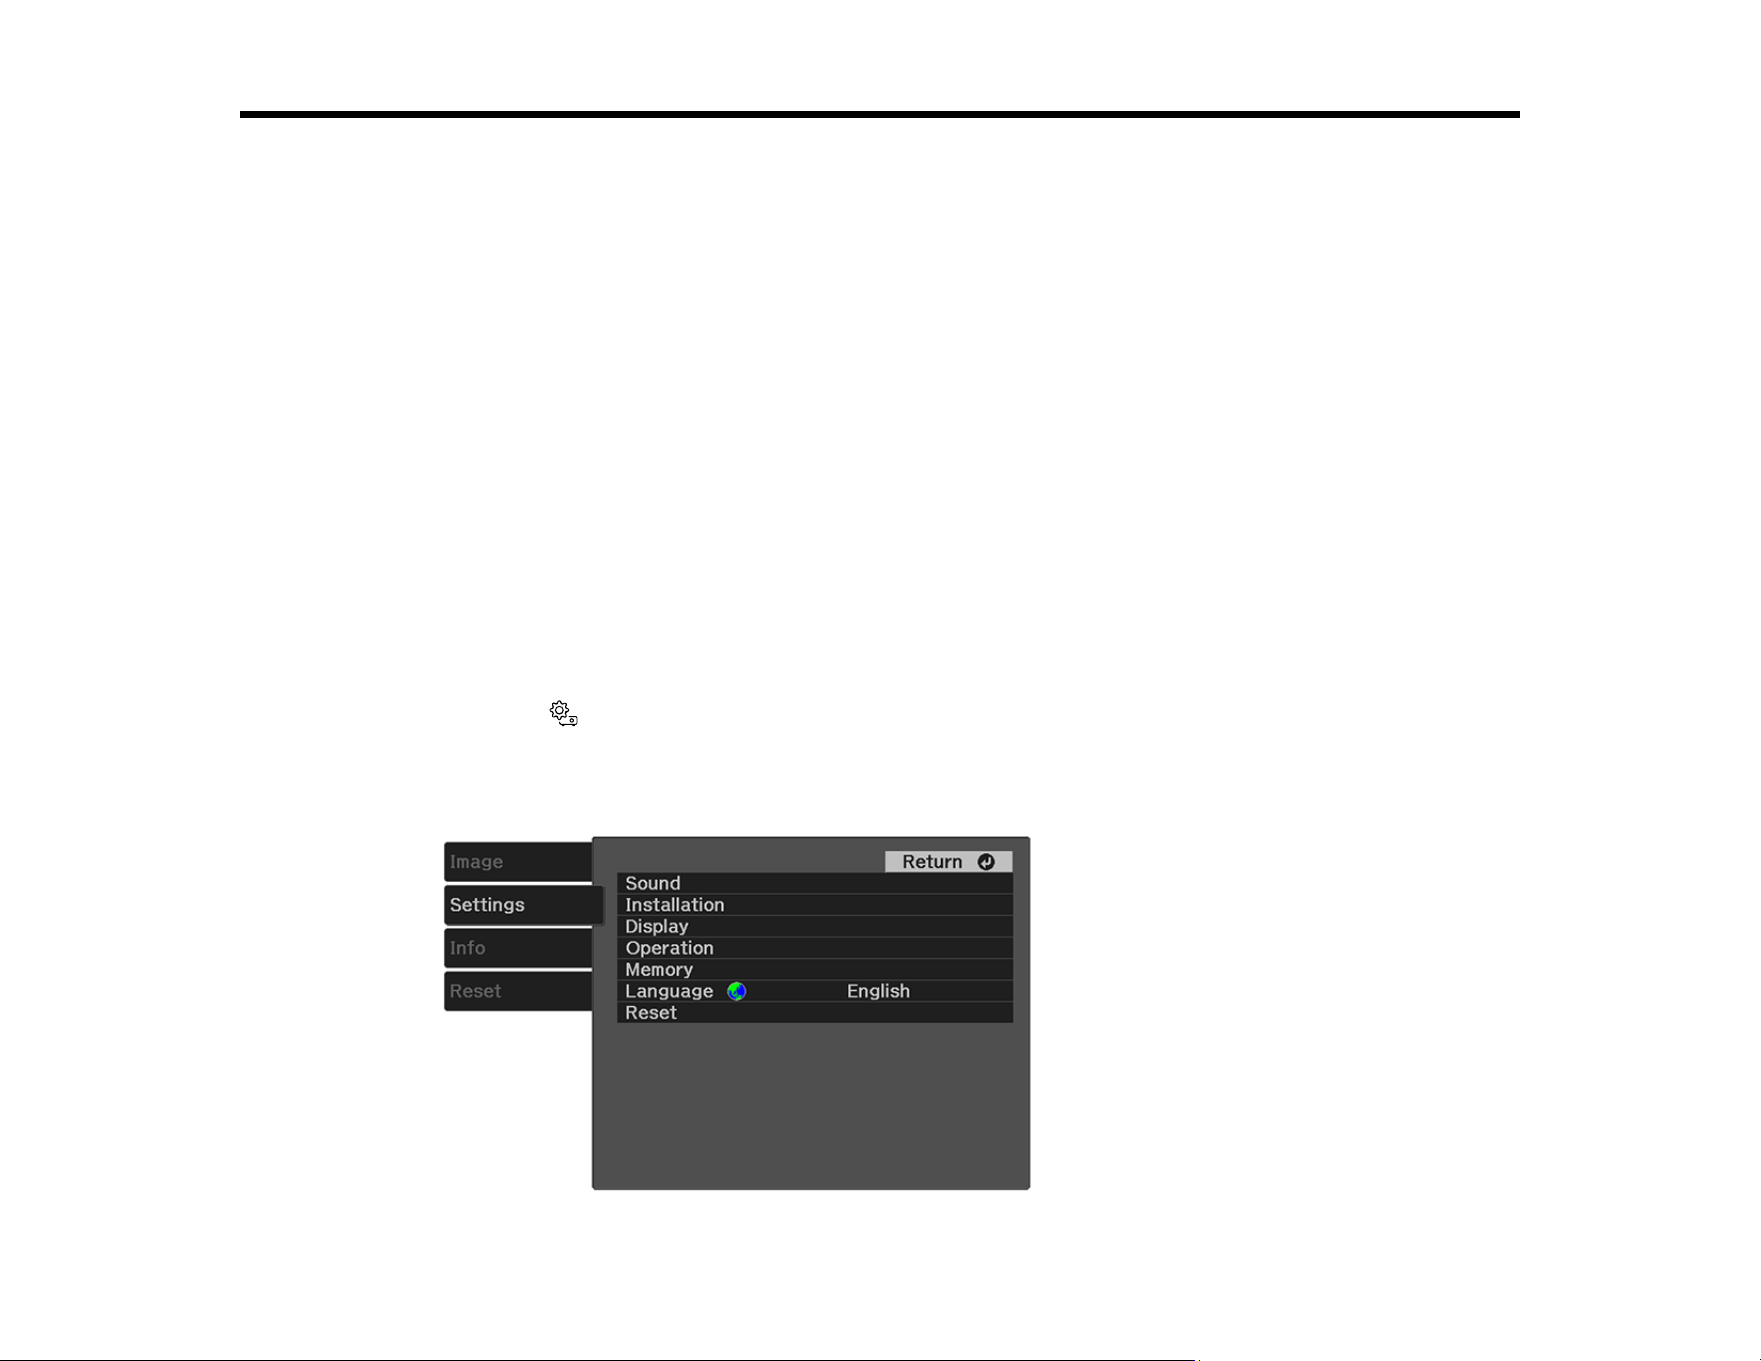
1. Press the Settings button on the projector remote control.
2. Press the arrow buttons to select the Settings menu and press Enter.
You see this screen:
63
3. Select the Operation setting and press Enter.
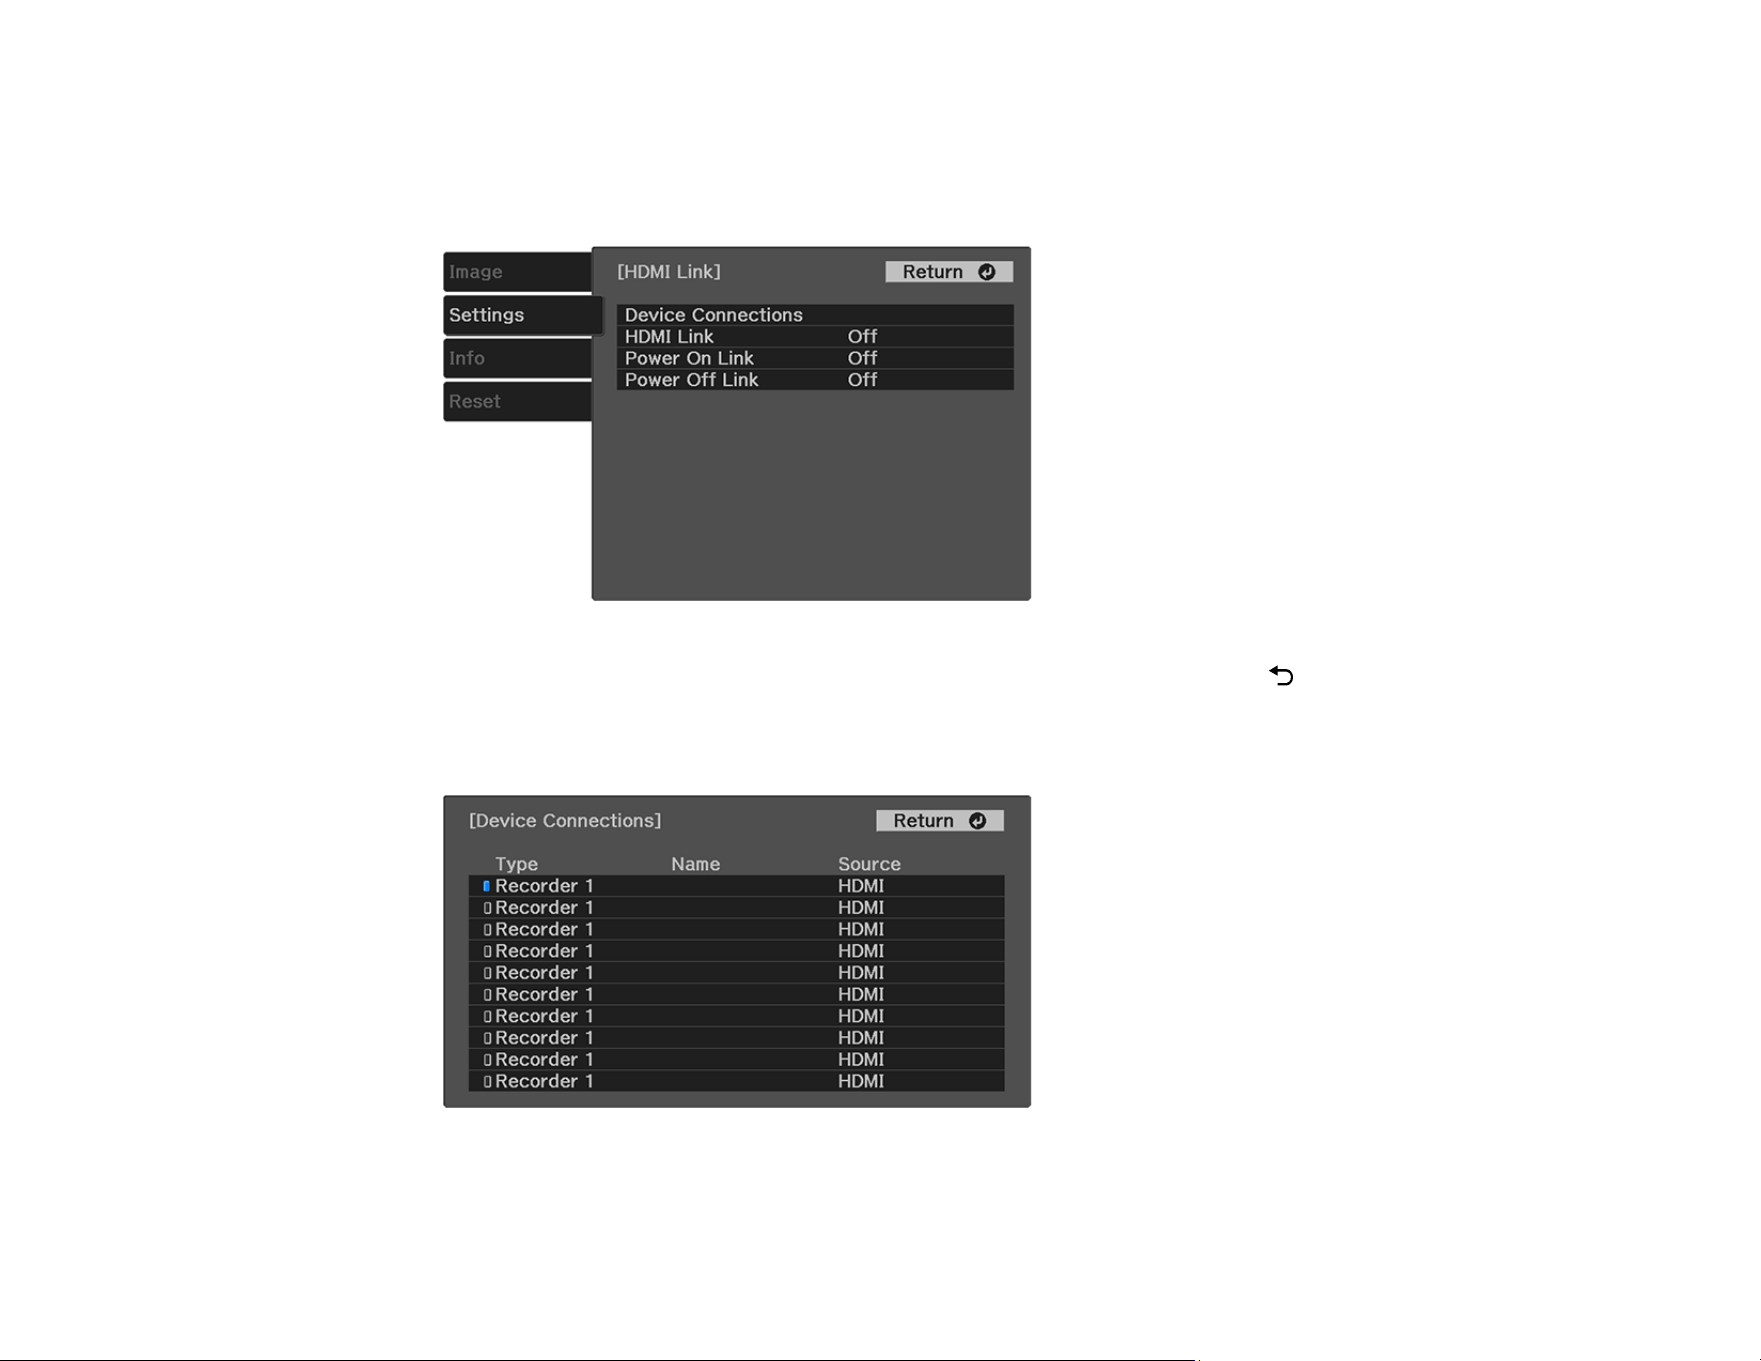
4. Select the HDMI Link setting and press Enter.
You see this screen:
5. Select the HDMI Link setting and press Enter. Then select On and press the Esc button.
6. Select the Device Connections setting and press Enter.
You see this screen:
Note: Linked devices are indicated by a blue mark. You cannot select grayed-out devices.

64
7. Select the device you want to control and project images from and press Enter.
8. Select the following HDMI Link options as necessary and press Enter:
• Power On Link: select what happens when you turn on the projector or linked device. Select PJ -
> Device or Bidirectional to turn the linked device on when the projector is turned on, or select
Device -> PJ or Bidirectional to turn the projector on when the linked device is turned on.
• Power Off Link: select whether linked devices are turned off when the projector is turned off.
9. Press the Settings button to exit the menu or the Esc button to return to the previous screen.
Parent topic: Adjusting Projector Features
Related references
Projector Feature Settings - Settings Menu
Projecting a PC Free Presentation
You can use your projector's PC Free feature whenever you connect a USB device that contains
compatible files. This lets you quickly and easily display the contents of the files and control their display
using the projector's remote control.
PC Free Precautions
Supported PC Free File Types
Starting a PC Free Slideshow
Starting a PC Free Movie Presentation
PC Free Display Options
Parent topic: Adjusting Projector Features
PC Free Precautions
Note the following precautions when using PC Free features:
• Do not disconnect the USB device while it is being accessed; otherwise, PC Free may not operate
correctly.
• You may not be able to use the security features on certain USB devices with PC Free features.
• When connecting a USB device that includes an AC adapter, connect the AC adapter to an electrical
outlet when you use the USB device with your projector.
• Some commercially available USB card readers may not be compatible with your projector.
• You cannot correct keystone distortion while projecting in PC Free, so correct the image shape before
you begin your presentation.

65
Parent topic: Projecting a PC Free Presentation
Supported PC Free File Types
You can project these types of files using the projector's PC Free feature.
Note: For best results, place your files on media that is formatted in FAT16/32. If you have trouble
projecting from media formatted for non-Windows file systems, try formatting the media for Windows
instead. You may not be able to use the security features on certain USB storage devices with PC Free
features. When connecting a USB-compatible hard drive, connect the AC adapter supplied with the
drive. PC Free may not work with USB device security features.
Note: While projecting a PC Free presentation, you cannot correct the image shape using keystone
correction. Correct the image shape before starting your presentation.
File type and
extension
Details
Image (.jpg) Make sure the file is not:
• CMYK format
• Progressive format
• Highly compressed
• Above 8192 × 8192 resolution
Image (.bmp) Make sure the file resolution is not above 1280 × 800
Image (.gif ) Make sure the file is not:
• Above 1280 × 800 resolution
• Animated
• Interlaced
Image (.png) Make sure the file resolution is not:
• Above 1920 × 1080
• Interlaced
66
File type and
extension
Details
Motion JPEG
movie (.avi)
Supports only AVI 1.0
Make sure the file is not:
• Saved with a video codec other than Motion JPEG
• Saved with an audio codec other than PCM or ADPCM
• Above 1280 × 720 resolution
• Larger than 2GB
Parent topic: Projecting a PC Free Presentation
Starting a PC Free Slideshow
After connecting a USB device or digital camera to the projector, you can switch to the USB input source
and start your slideshow.
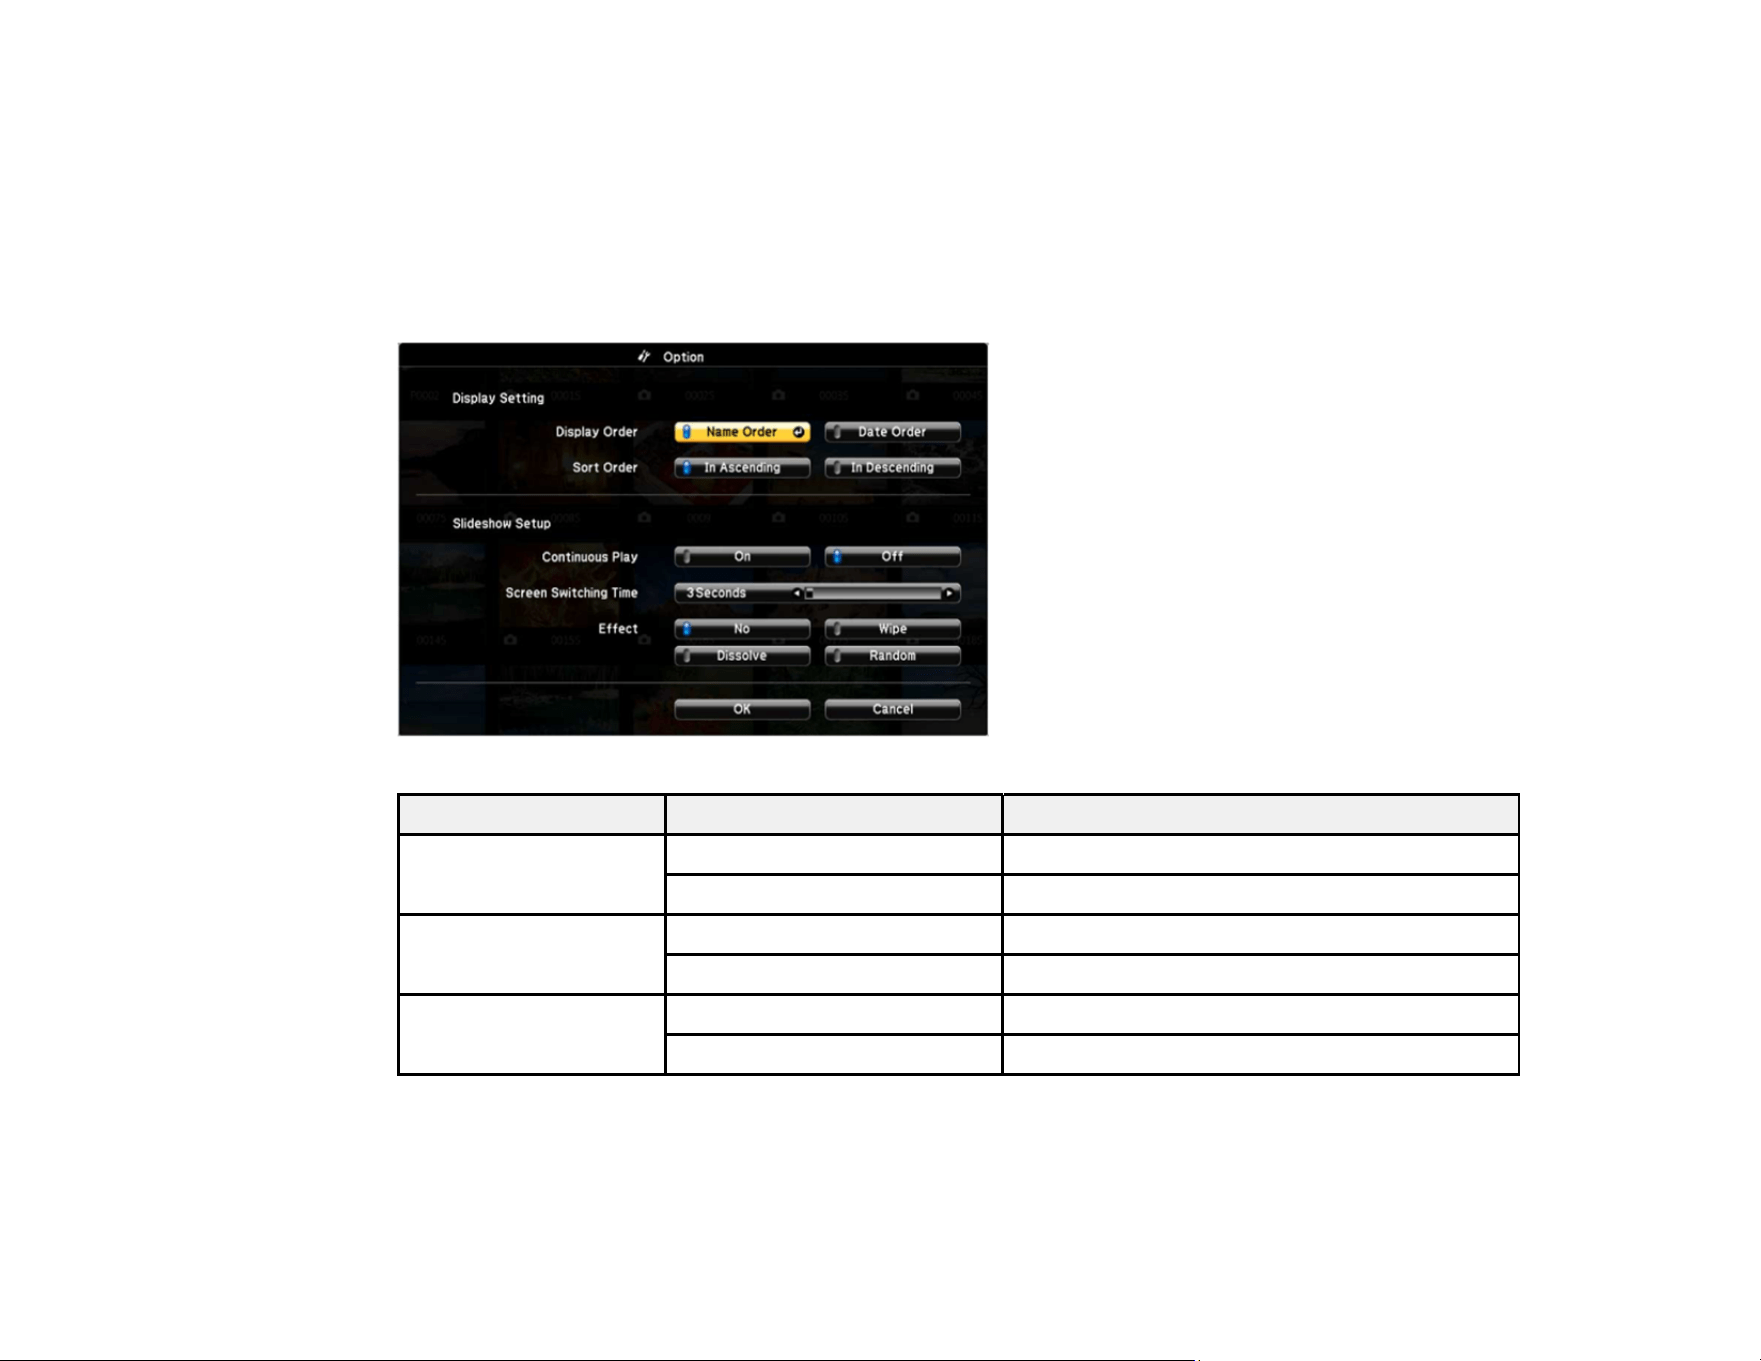
Note: You can change the slideshow operation options or add special effects by highlighting Option at
the bottom of the screen and pressing Enter.
1. Press the Source Search button on the remote control.
2. Select the USB source.

67
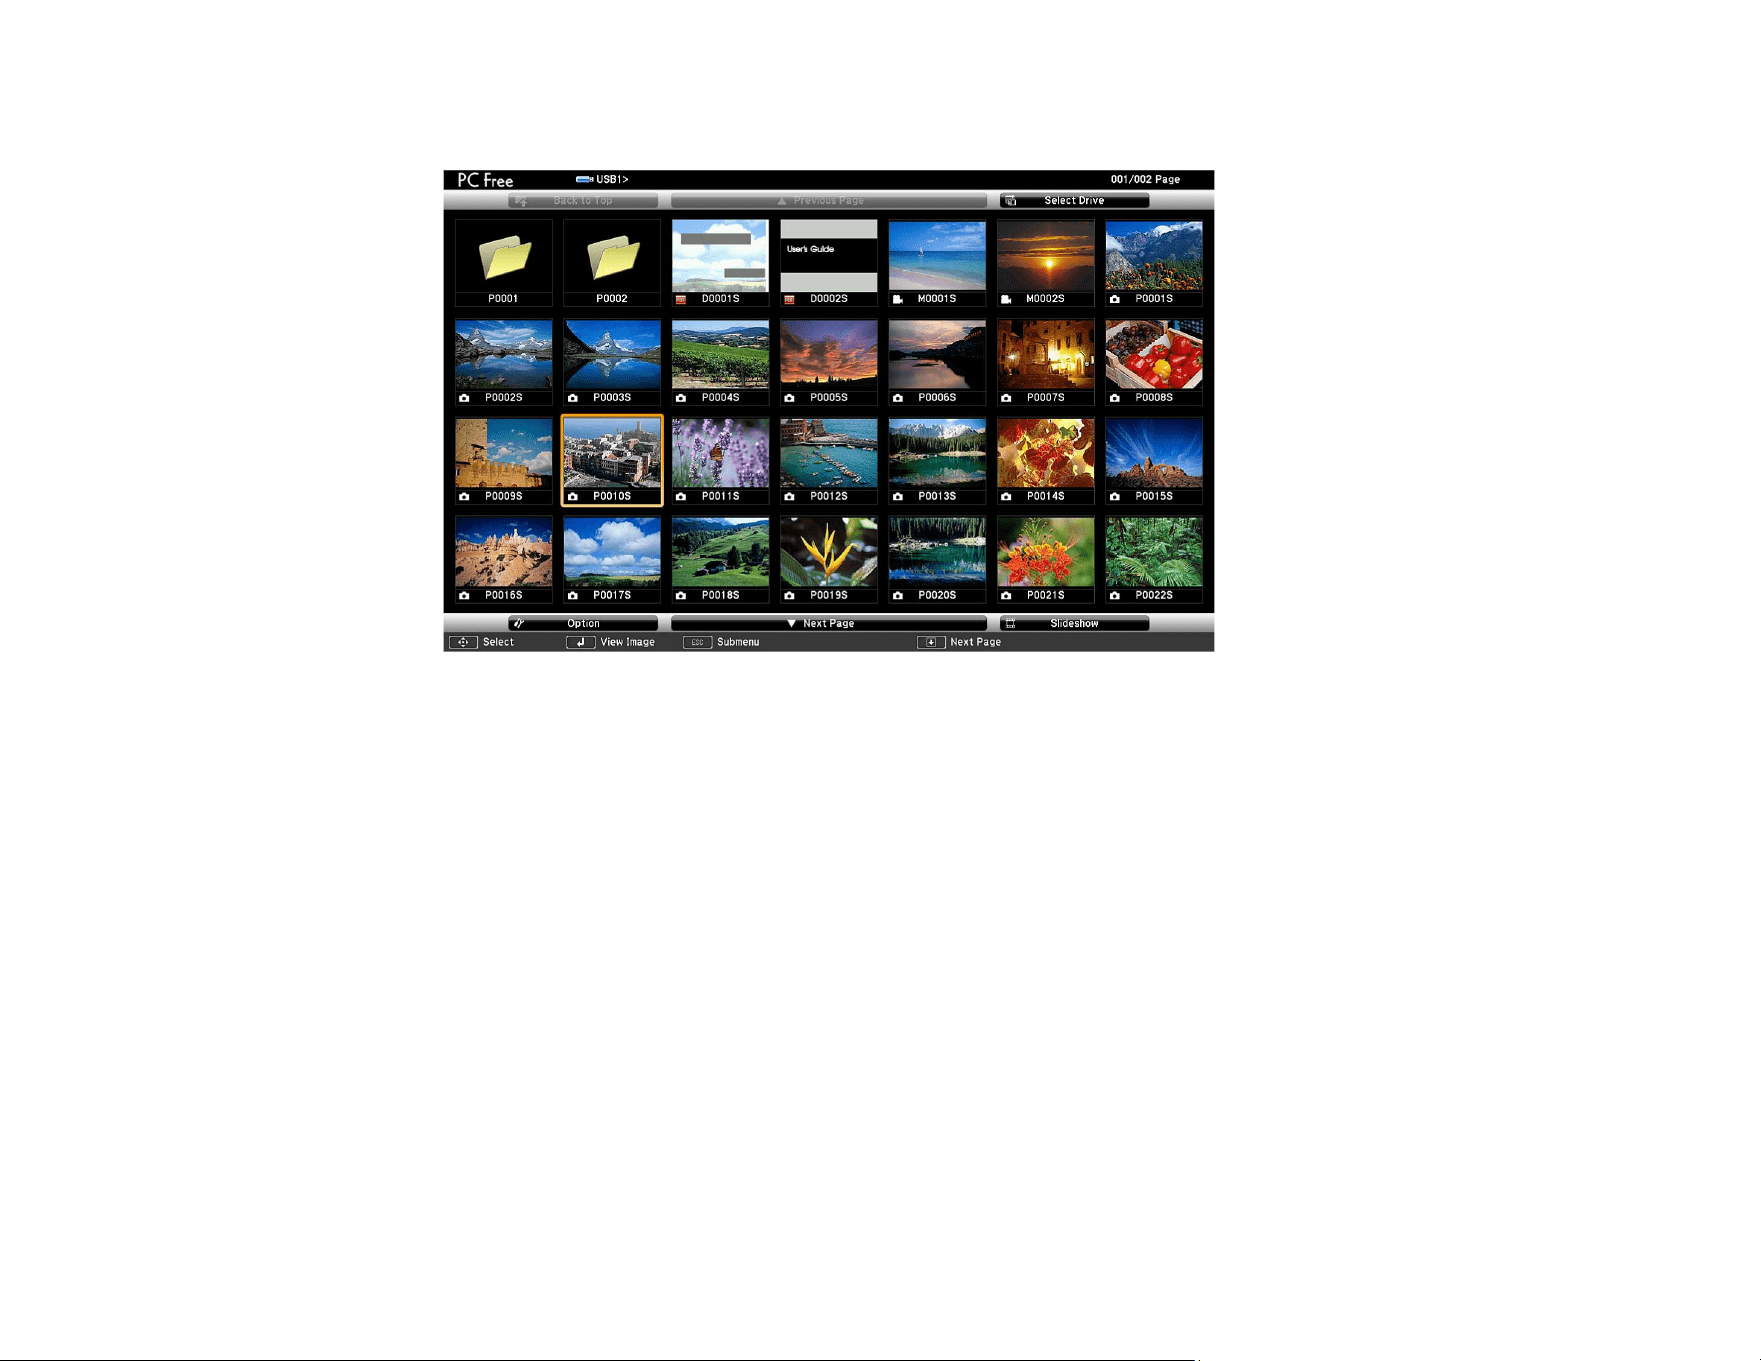
The PC Free screen appears.
Note: If the Select Drive screen appears, press the arrow buttons to select the drive and press
Enter.
3. Do the following as necessary to locate your files:
• If you need to display files inside a subfolder on your device, press the arrow buttons to highlight
the folder and press the Enter button.
• To move back up a folder level on your device, highlight Back to Top and press Enter.
• To view additional files in a folder, highlight Next page or Previous page and press Enter.
• To display images from a different USB drive, select Select Drive at the top of the PC Free screen
and press Enter.
4. Do one of the following:
• To display an individual image, press the arrow buttons to highlight the image and press Enter.
(Press the Esc button to return to the file list screen.)

68
• To display a slide show of all the images in a folder, press the arrow buttons to highlight the
Slideshow option at the bottom of the screen and press Enter.
Note: If any file names are longer than the display area or include unsupported symbols, the file
names may be shortened or changed only in the screen display.
5. While projecting, use the following commands to control the display as necessary:
• To rotate a displayed image, press the up or down arrow button.
• To move to the next or previous image, press the left or right arrow button.
6. To stop the display, follow the on-screen instructions or press the Esc button.
7. Turn off the USB device, if necessary, and then disconnect the device from the projector.
Parent topic: Projecting a PC Free Presentation
Starting a PC Free Movie Presentation
After connecting a USB device or digital camera to the projector, you can switch to the USB input source
and start your movie.
Note: You can change the operation options by highlighting Option at the bottom of the screen and
pressing Enter.
1. Press the Source Search button on the remote control.
2. Select the USB source.
69
The PC Free screen appears.
Note: If the Select Drive screen appears, press the arrow buttons to select the drive and press
Enter.
3. Do the following as necessary to locate your files:
• If you need to display files inside a subfolder on your device, press the arrow buttons to highlight
the folder and press the Enter button.
• To move back up a folder level on your device, highlight Back to Top and press Enter.
• To view additional files in a folder, highlight Next page or Previous page and press Enter.
• To display movie files from a different USB drive, select Select Drive at the top of the PC Free
screen and press Enter.
4. To play back a movie, press the arrow buttons to highlight the file and press Enter.
Note: If any file names are longer than the display area or include unsupported symbols, the file
names may be shortened or changed only in the screen display. If you want to play back all the
movies in a folder in sequence, select the Slideshow option at the bottom of the screen.
70
5. To stop movie playback, press the Esc button, highlight Exit, and press Enter.
6. Turn off the USB device, if necessary, and then disconnect the device from the projector.
Parent topic: Projecting a PC Free Presentation
PC Free Display Options
You can select these display options when using the projector's PC Free feature.
Setting Options Description
Display Order Name Order Displays files in name order
Date Order Displays files in date order
Sort Order In Ascending Sorts files in first-to-last order
In Descending Sorts files in last-to-first order
Continuous Play On Displays a slideshow continuously
Off Displays a slideshow one time through
71
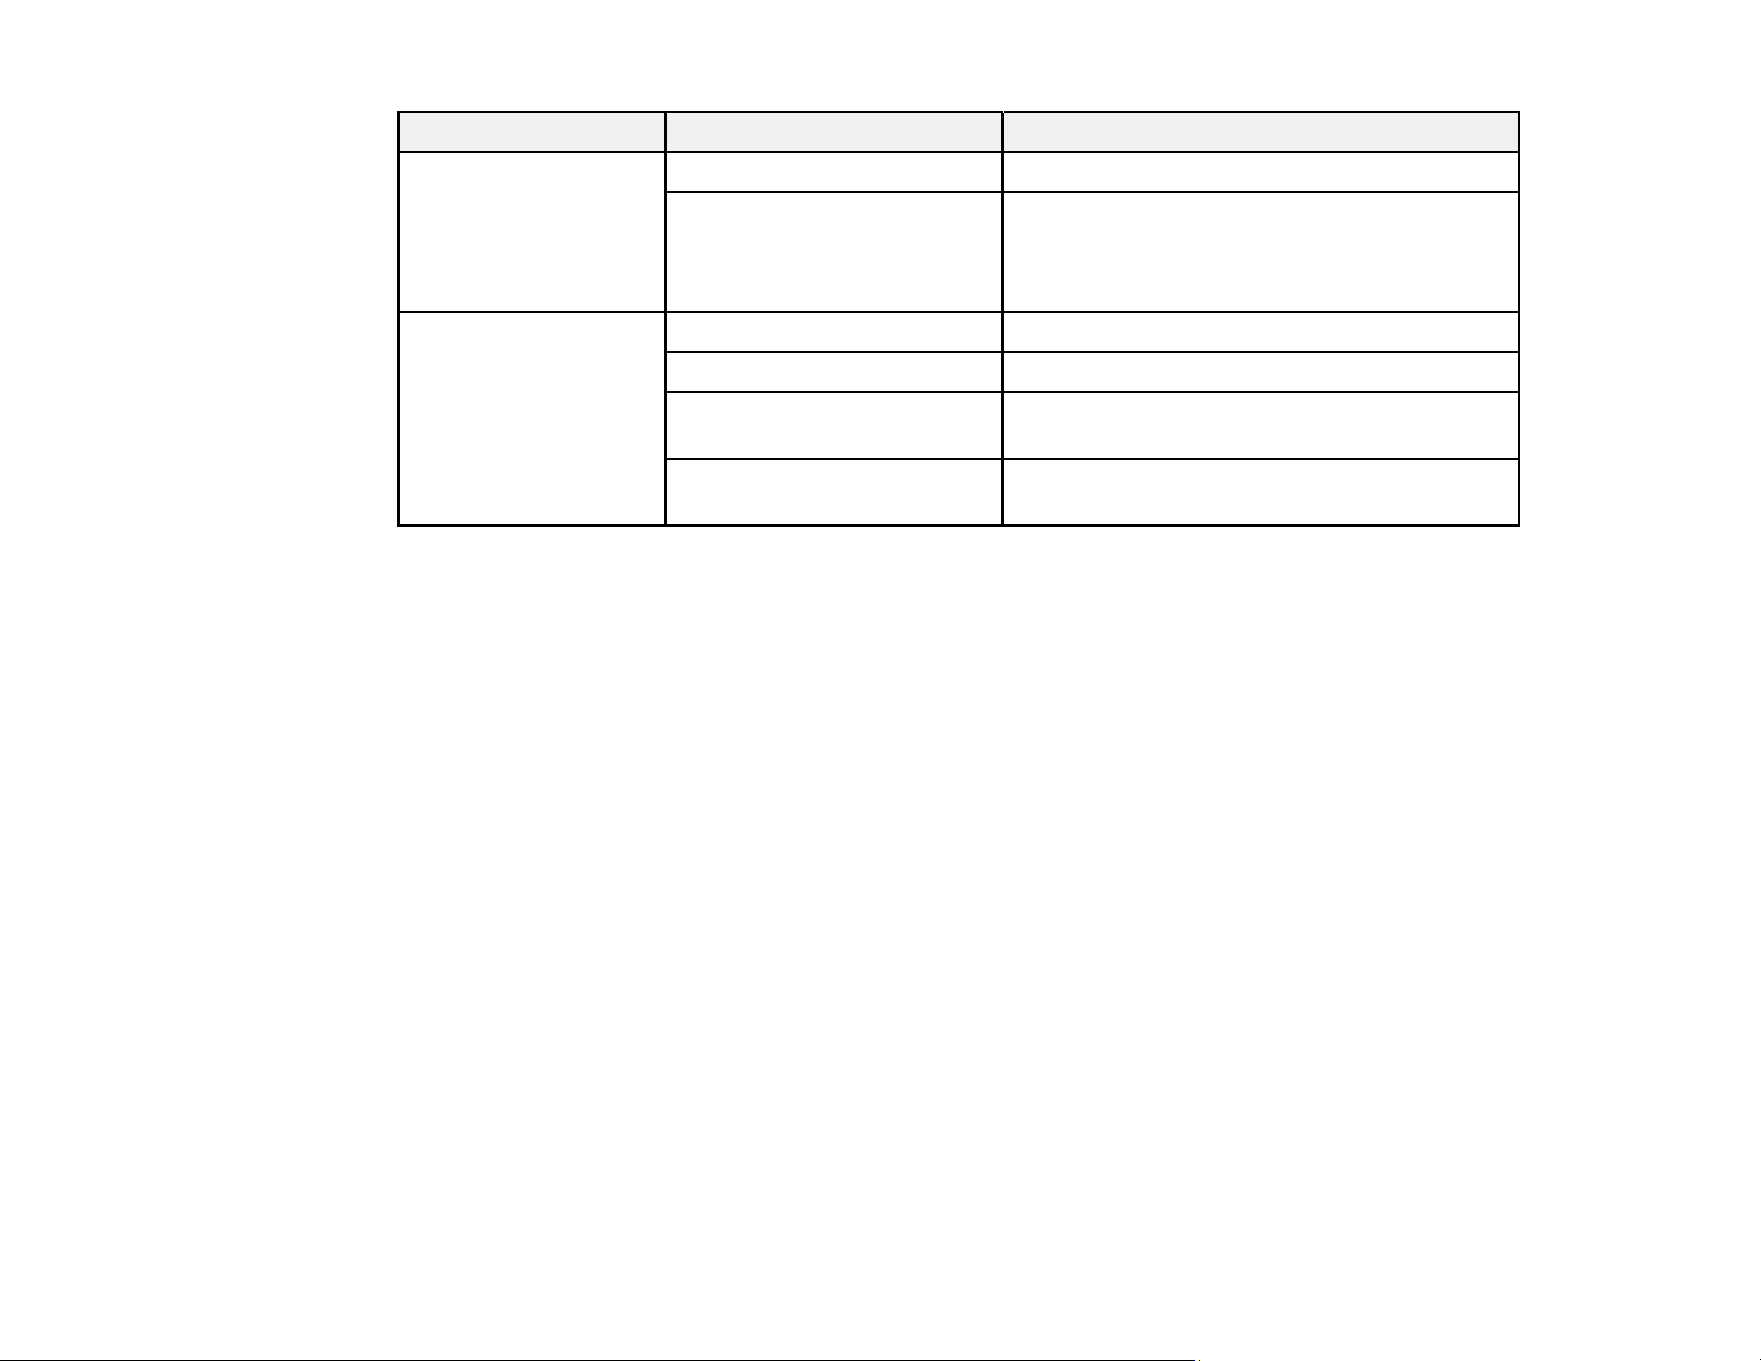
Setting Options Description
Screen Switching
Time
No Does not display the next file automatically
1 Second to 60 Seconds Displays files for the selected time and
switches to the next file automatically; high
resolution images may switch at a slightly
slower rate
Effect No No effect
Wipe Transitions between images with a wipe effect
Dissolve Transitions between images with a dissolve
effect
Random Transitions between images using a random
variety of effects
Parent topic: Projecting a PC Free Presentation
Wireless Network Projection from a Mobile Device (Screen Mirroring)
Screen Mirroring Restrictions
Selecting Screen Mirroring Settings
Connecting for Screen Mirroring with Miracast
Connecting for Screen Mirroring with a Windows 8.x/Windows 10 Computer
Parent topic: Adjusting Projector Features
Screen Mirroring Restrictions
Note the following when using Screen Mirroring features:
• You cannot project an interlaced image.
• You cannot play audio with more than 3 channels.
• You cannot project images with a resolution above 1920 × 1080 and a frame rate above 30 fps.
• You cannot project 3D video.
• You cannot use extended Miracast features on Windows 8.1.
• You may not be able to view contents with copyright protection using a Miracast connection.
• Do not change the projector's Screen Mirroring settings during Screen Mirroring projection. Doing so
may cause the projector to disconnect and delay reconnection.
72
Parent topic: Wireless Network Projection from a Mobile Device (Screen Mirroring)
Selecting Screen Mirroring Settings
You can select Screen Mirroring settings for your projector and then project images from your mobile
device.
1. Press the Settings button on the remote control.
2. Press the arrow buttons to select the Settings menu and press Enter.
3. Select the Operation > Screen Mirroring setting and press Enter.
4. Set the Screen Mirroring setting to On.
5. Select Screen Mirroring Settings and press Enter.
6. To enter a name for the projector, select Display Name. You can enter up to 32 alphanumeric
characters.
7. Select Basic or Extended as the Operation Mode setting.
8. Select Adjust Image Quality to adjust the screen mirroring speed/quality. Select a small number to
improve the quality and select a large number to increase the speed.

73
9. Select Extended and select these settings as necessary (the Extended setting is only available if
you select Extended as the Operation Mode setting):
• Interrupt Connection lets you select whether to allow other devices to connect while using
Screen Mirroring. Select Off to prevent other devices from connecting while Screen Mirroring is
active, or select On to allow another device to connect.
• Channel lets you select the wireless channel for the Screen Mirroring connection.
10. Press the Settings button to exit the menu or the Esc button to return to the previous screen.
Parent topic: Wireless Network Projection from a Mobile Device (Screen Mirroring)
Related references
Projector Feature Settings - Settings Menu
Connecting for Screen Mirroring with Miracast
If your mobile device supports Miracast, you can connect it to the projector wirelessly and project images
and sound.
1. Select the Screen Mirroring settings on your projector as necessary.
2. Press the Source Search button on the remote control to switch to the Screen Mirroring source.
You see the Screen Mirroring standby screen.
3. On your mobile device, use the Miracast function to search for the projector.
Note: See your mobile device's documentation for information on accessing the Miracast function.
You see a list of available devices.
4. Select your projector from the list.
5. If you see the PIN entry screen on your mobile device, enter the PIN code displayed on the Screen
Mirroring standby screen or at the bottom right of the projected image.
The projector displays the image from your mobile device.
Caution: It may take some time to establish the connection. Do not disconnect the projector's power
cord while it is connecting to your device. Doing so may cause your device to freeze or malfunction.
Note: Depending on the mobile device, you may need to delete a device when connecting. Follow
the on-screen instructions on your device.

74
Parent topic: Wireless Network Projection from a Mobile Device (Screen Mirroring)
Related references
Projector Feature Settings - Settings Menu
Connecting for Screen Mirroring with a Windows 8.x/Windows 10 Computer
You can set up your computer to wirelessly project images and play sound using Screen Mirroring.
1. Select the Screen Mirroring settings on your projector as necessary.
2. Press the Source Search button on the remote control to switch to the Screen Mirroring source.
You see the Screen Mirroring standby screen.
3. Do one of the following:
• Windows 10: Open Action Center and select Connect.
• Windows 8.x: Select Devices > Project > Add a wireless display.
4. Select your projector's Display Name from the list.
5. If you see the PIN entry screen on your computer, enter the PIN code displayed on the Screen
Mirroring standby screen or at the bottom right of the projected image.
The projector displays the image from your computer or mobile device.
Note: It may take some time to establish the connection. Do not disconnect the projector's power
cord while it is connecting to your device. This may cause your device to freeze or malfunction.
Parent topic: Wireless Network Projection from a Mobile Device (Screen Mirroring)
Related references
Projector Feature Settings - Settings Menu
Shutting Off the Picture and Sound Temporarily
You can temporarily turn off the projector's picture and sound. Any sound or video action continues to
run, however, so you cannot resume projection at the point that you stopped it.
1. Press the A/V mute button on the projector remote control to temporarily stop projection and mute
any sound.
2. To turn the picture and sound back on, press the A/V mute button again.
Parent topic: Adjusting Projector Features

75
Installing a Security Cable
You can use the security slot on the side of the projector to attach a Kensington lock. See your local
computer or electronics dealer for purchase information.
Parent topic: Adjusting Projector Features
Copying Menu Settings Between Projectors
After you select menu settings for your projector, you can transfer them to another projector of the same
model.
Note: Copy the projector's settings before you adjust the projected image using the projector's image
adjustment settings.
Caution: If the copy process fails due to a power failure, communication error, or for any other reason,
Epson will not be responsible for any repair costs incurred.
The following settings will not transfer between projectors:
• Info menu items
• Any settings unique to a specific projector, such as Screen Mirroring settings
Saving Settings to a USB Flash Drive
Transferring Settings from a USB Flash Drive
Saving Settings to a Computer
Transferring Settings from a Computer
Parent topic: Adjusting Projector Features
Saving Settings to a USB Flash Drive
You can save the projector settings you want to transfer to a USB flash drive.
Note: Use an empty flash drive. If the drive contains other files, the transfer may not complete correctly.
The flash drive must use the FAT format and cannot have any security features.
1. Turn off the projector and unplug the power cord from the projector's power inlet.

76
2. Insert the flash drive into the USB-A port.
Note: Connect the flash drive directly to the projector. Do not use a hub or your settings may not be
saved correctly.
3. Press and hold the Esc button on the remote control as you connect the power cord to the
projector.
4. When the status indicator light turns on, release the Esc button.
The lights flash to indicate that settings are transferring to the flash drive. When the lights stop
flashing, the status indicator turns blue and the projector enters standby mode.
Caution: Do not unplug the power cord or remove the flash drive while the lights are flashing. This
could damage the projector.
5. Once the projector enters standby mode, remove the flash drive.
Parent topic: Copying Menu Settings Between Projectors
Transferring Settings from a USB Flash Drive
After saving projector settings to a USB flash drive, you can transfer them to another projector of the
same model.
Note: Make sure the USB flash drive contains only a single settings transfer from another projector of
the same model. The settings are contained in a file called pjconfdata.bin. If the drive contains other
files, the transfer may not complete correctly.
Do not adjust image settings on a projector until after you transfer settings to it. Otherwise, you may have
to repeat your adjustments.
1. Turn off the projector and unplug the power cord from the projector's power inlet.
2. Insert the flash drive into the USB-A port.
Note: Connect the flash drive directly to the projector. Do not use a hub or your settings may not be
saved correctly.
3. Press and hold the Settings button on the remote control as you connect the power cord to the
projector.
4. When the status indicator turns on, release the Settings button.

77
The lights flash to indicate that settings are transferring to the projector. When the lights stop
flashing, the status indicator light turns blue and the projector enters standby mode.
Caution: Do not unplug the power cord or remove the flash drive while the lights are flashing. This
could damage the projector.
5. Once the projector enters standby mode, remove the flash drive.
Parent topic: Copying Menu Settings Between Projectors
Saving Settings to a Computer
You can save the projector settings you want to transfer to a computer.
Your computer must be running one of the following operating systems:
• Windows 7
• Windows 8.x
• Windows 10
• OS X 10.11.x
• macOS 10.12.x
• macOS 10.13.x
• macOS 10.14.x
• macOS 10.15.x
1. Turn off the projector and unplug the power cord from the projector's power inlet.
2. Connect a USB Mini-B cable to your projector's Service port.
3. Connect the other end to any available USB port on your computer.
4. Press and hold the Esc button on the remote control as you connect the power cord to the
projector.
5. When all of the projector lights turn on, release the Esc button.
The projector shows up as a removable disk on your computer.
6. Open the removable disk and copy the pjconfdata.bin file to your computer.
7. Once the file has copied, do one of the following:
• Windows: Open the My Computer, Computer, Windows Explorer, or File Explorer utility.
Right-click the name of your projector (listed as a removable disk) and select Eject.

78
• Mac: Drag the removable disk icon for your projector from the desktop into the trash.
The projector turns off when you disconnect the USB cable.
Parent topic: Copying Menu Settings Between Projectors
Transferring Settings from a Computer
After saving projector settings to a computer, you can transfer them to another projector of the same
model.
Your computer must be running one of the following operating systems:
• Windows 7
• Windows 8.x
• Windows 10
• OS X 10.11.x
• macOS 10.12.x
• macOS 10.13.x
• macOS 10.14.x
• macOS 10.15.x
Do not adjust image settings on a projector until after you transfer settings to it. Otherwise, you may have
to repeat your adjustments.
1. Turn off the projector and unplug the power cord from the projector's power inlet.
2. Connect a USB cable to your projector's Service port.
3. Connect the other end to any available USB port on your computer.
4. Press and hold the Settings button on the control panel or remote control as you turn on the
power switch.
5. The projector shows up as a removable disk on your computer.
6. Copy the pjconfdata.bin file from your computer to the removable disk.
Note: Do not copy any other files to the removable disk.
7. Once the file has copied, do one of the following:
• Windows: Open the My Computer, Computer, Windows Explorer, or File Explorer utility.
Right-click the name of your projector (listed as a removable disk) and select Eject.

79
• Mac: Drag the removable disk icon for your projector from the desktop into the trash.
Disconnect the USB cable. When the status indicator stops flashing, the projector turns off.
Caution: Do not unplug the power cord while the lights are flashing. This could damage the
projector.
Note: If the status indicator flashes orange, the batch setup file may be corrupt or the cable is not
connected correctly. Disconnect the USB cable, then unplug the projector and try the procedure
again. If the problem continues, unplug the projector and contact Epson for help.
Parent topic: Copying Menu Settings Between Projectors
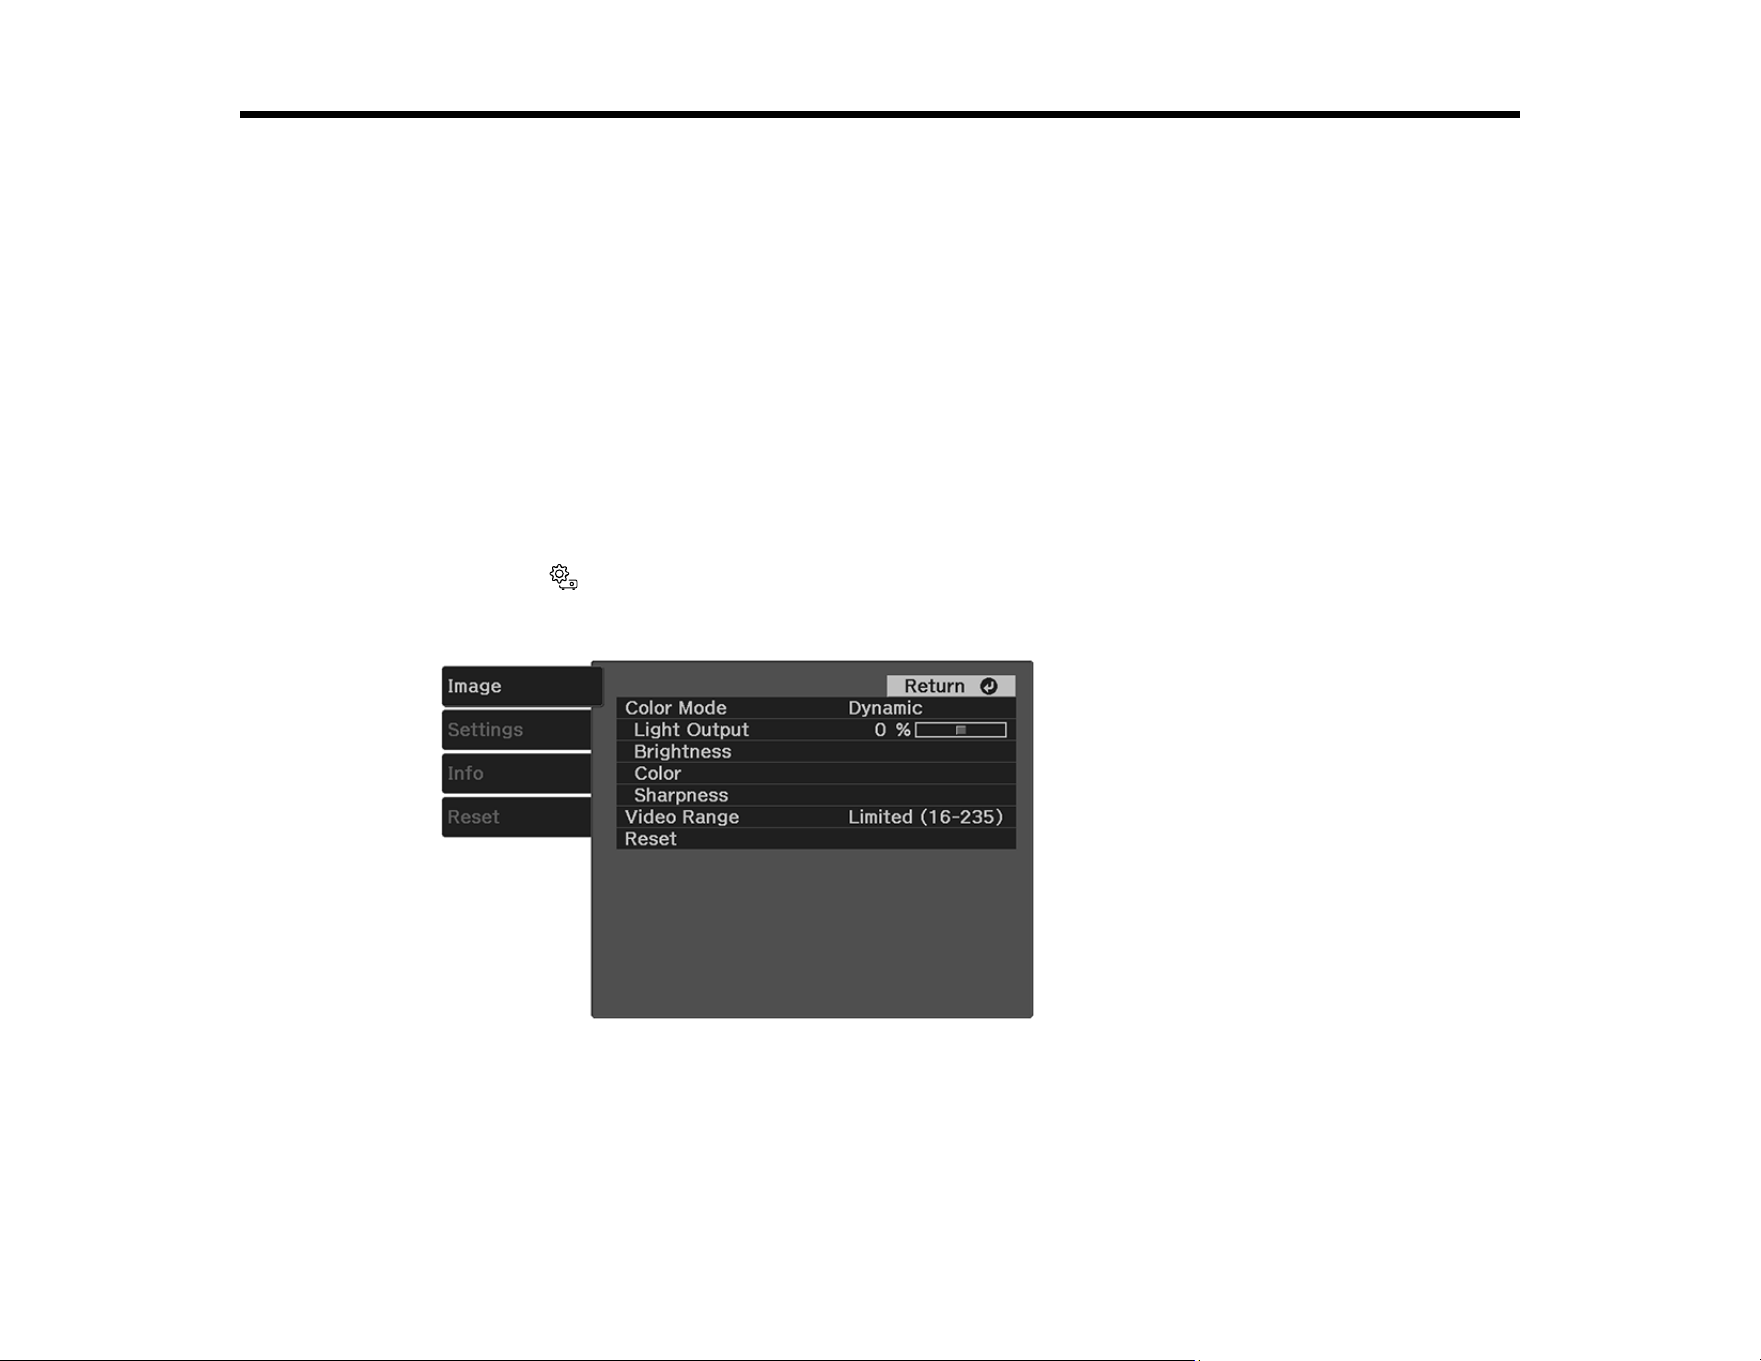
80
Adjusting the Menu Settings
Follow the instructions in these sections to access the projector menu system and change projector
settings.
Using the Projector's Menus
Image Quality Settings - Image Menu
Projector Feature Settings - Settings Menu
Projector Information Display - Info Menu
Projector Reset Options - Reset Menu
Using the Projector's Menus
You can use the projector's menus to adjust the settings that control how your projector works. The
projector displays the menus on the screen.
1. Press the Settings button on the projector remote control.
You see a screen like this:
2. Press the up or down arrow button to move through the menus listed on the left. The settings for
each menu are displayed on the right.
Note: The available settings depend on the current input source.
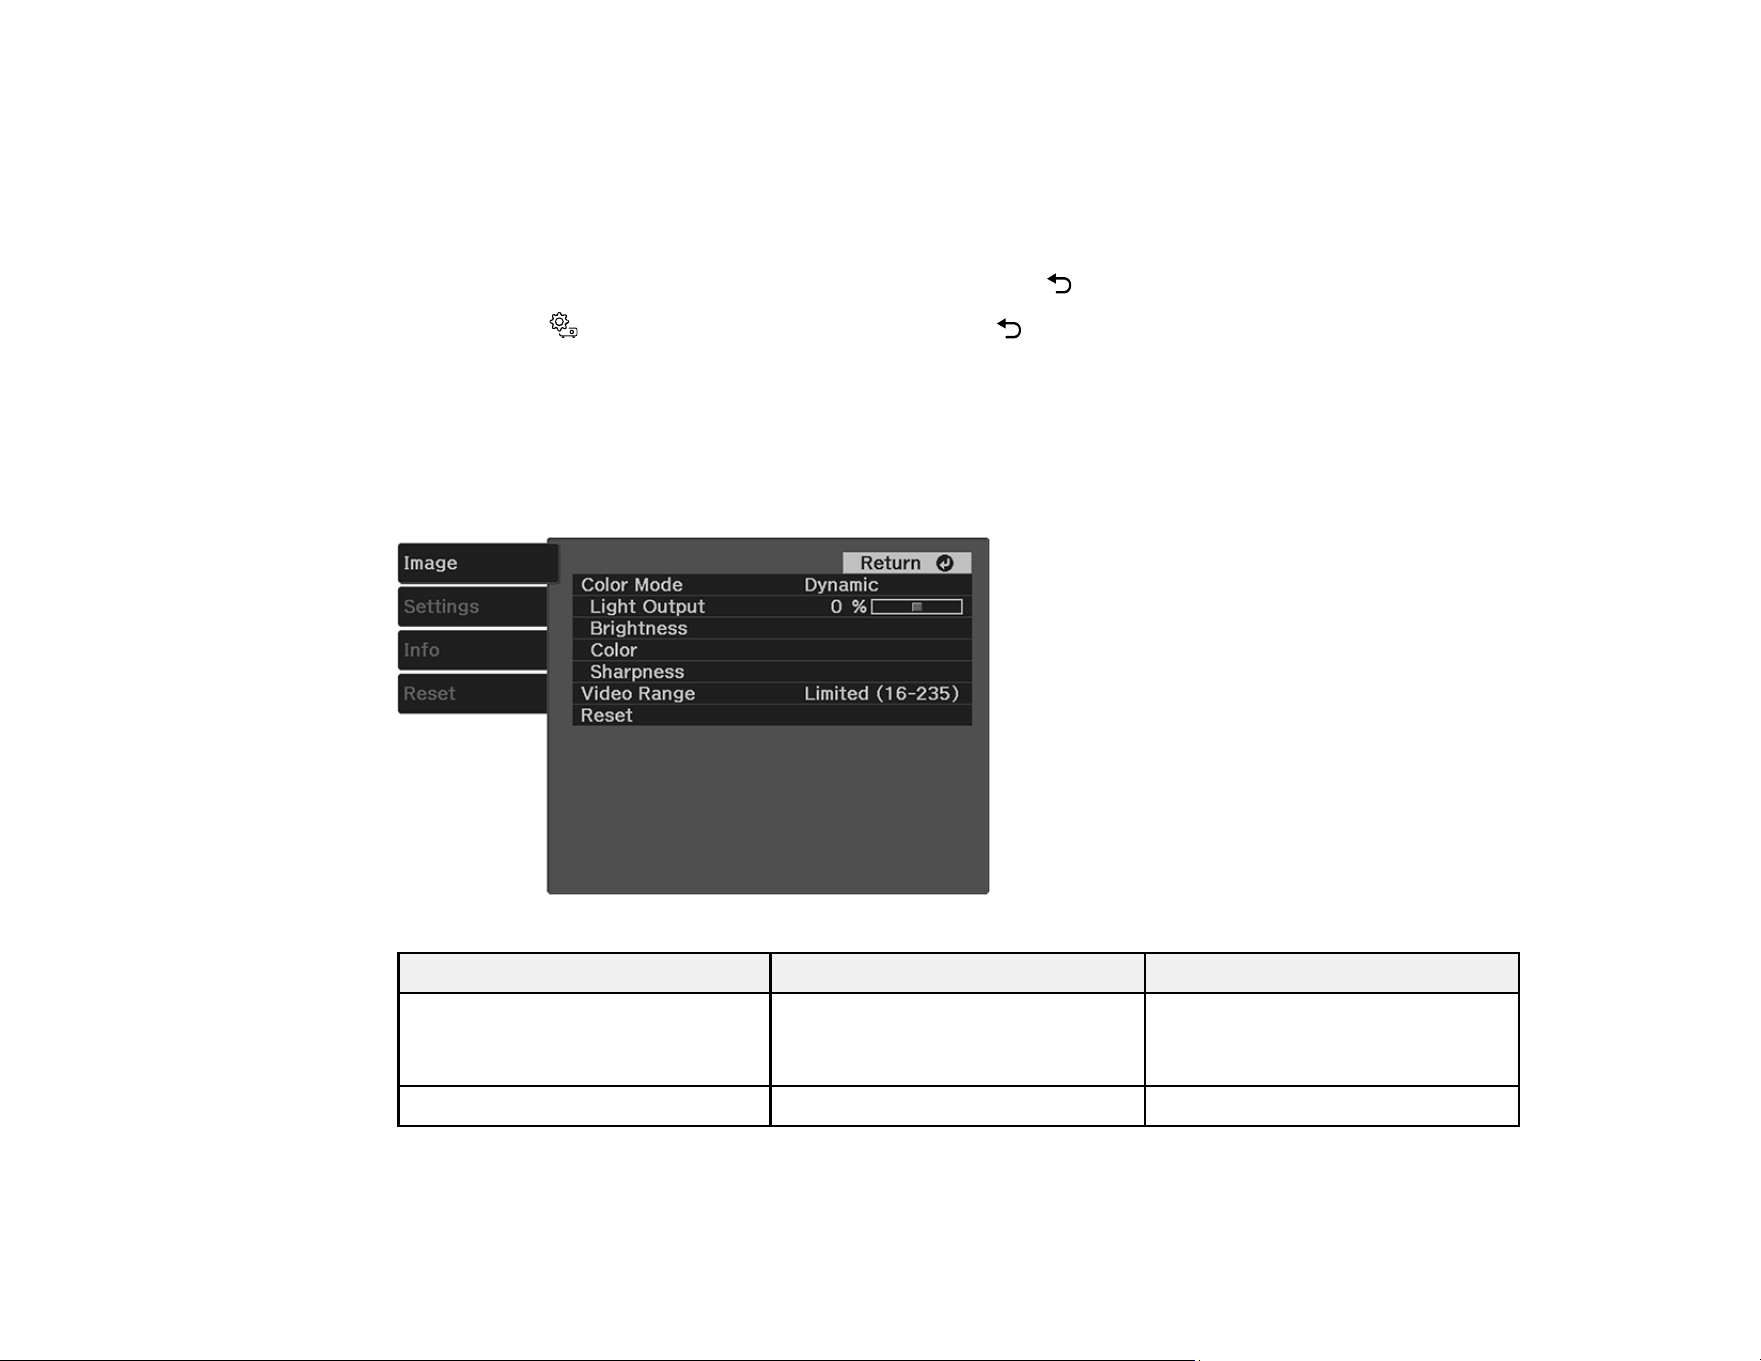
81
3. To change settings in the displayed menu, press Enter.
4. Press the up or down arrow button to move through the settings.
5. Change the settings using the buttons listed on the bottom of the menu screens.
6. To return all the menu settings to their default values, select Reset.
7. When you finish changing settings on a menu, press the Esc button.
8. Press the Settings button to exit the menu or the Esc button to return to the previous screen.
Parent topic: Adjusting the Menu Settings
Image Quality Settings - Image Menu
Settings on the Image menu let you adjust the quality of your image for the input source you are currently
using. The available settings depend on the currently selected input source.
Setting Options Description
Color Mode See the list of available Color
Modes
Adjusts the vividness of image
colors for various image types
and environments
Light Output 50% (ECO) to 100% (Normal) Adjusts laser brightness
82
Setting Options Description
Brightness Brightness Lightens or darkens the overall
image
Contrast Adjusts the difference between
light and dark areas in the image
Scene Adaptive Gamma Adjusts the gamma depending
on the displayed scene
Gamma Adjusts the coloring in the image
Dynamic Contrast Adjusts the projected luminance
based on the image brightness.
Select Off, Normal, or High
Speed.
Color Color Saturation Adjusts the color intensity of the
image
Tint Adjusts the balance of green to
magenta tones in the image
White Balance Color Temp.: sets the color
temperature according to the
selected color mode; lower
values tint the image red, and
higher values tint the image blue
Customized: adjusts the
individual RGB components of
the offset and gain
RGBCMY Adjusts the hue, saturation, and
brightness for each individual
color
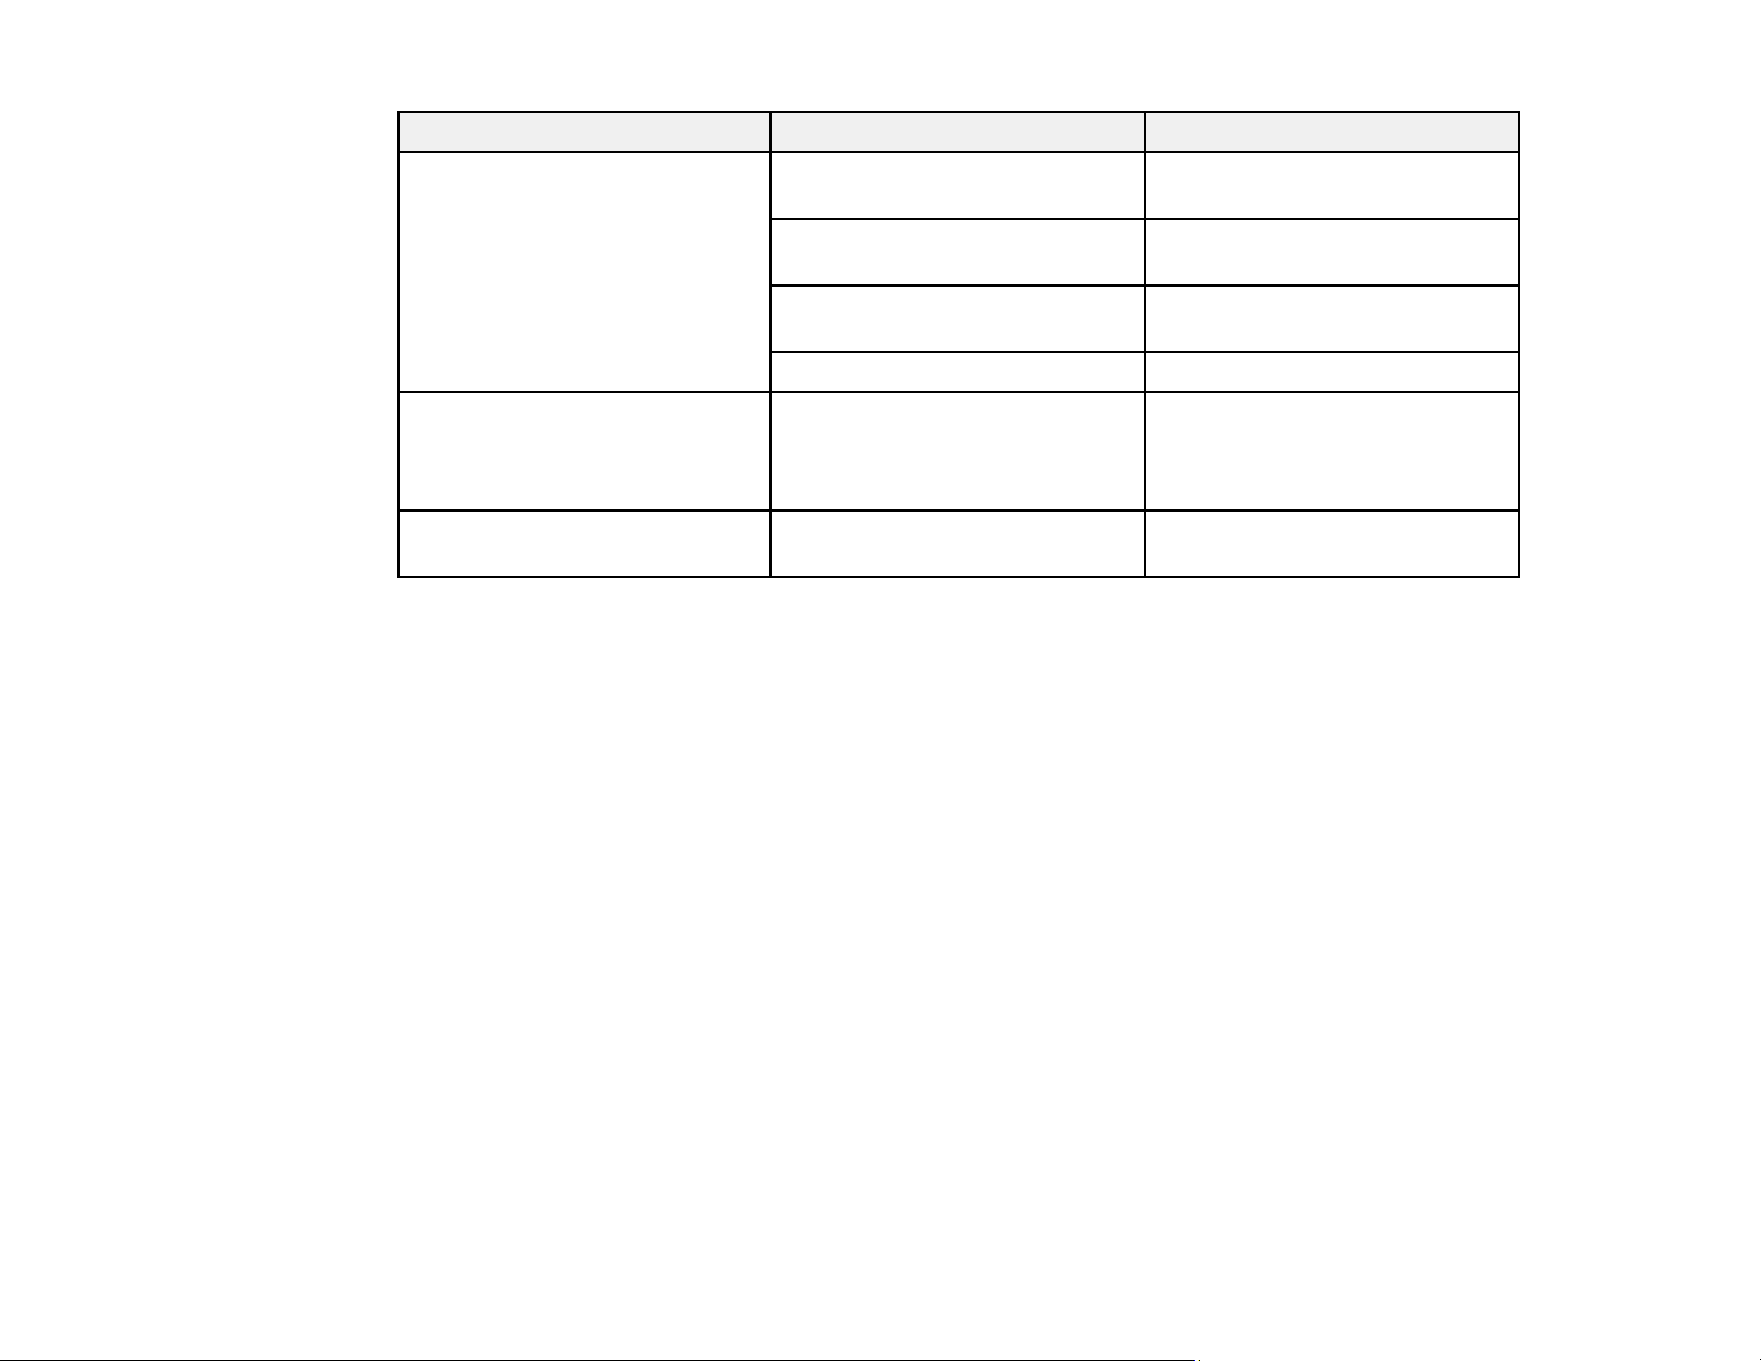
83
Setting Options Description
Sharpness Sharpness Adjusts the sharpness or
softness of image details
Noise Reduction Reduces flickering in analog
images
MPEG Noise Reduction Reduces noise or artifacts in
MPEG videos
Detail Enhancement Creates a more textured image
Video Range Auto
Limited (16–235)
Full (0–255)
Sets the video range to match
the setting of the device
connected to the HDMI port
Reset — Resets all Image menu settings
to their defaults
Note: The Brightness setting does not affect laser brightness. To change the laser brightness, adjust
the Light Output setting.
Parent topic: Adjusting the Menu Settings
Related references
Available Color Modes
Related tasks
Changing the Color Mode
Adjusting Image Sharpness
Adjusting Light Output (Brightness)
Adjusting the Color Temperature
Adjusting the RGB Offset and Gain
Adjusting the Hue, Saturation, and Brightness
Adjusting Gamma
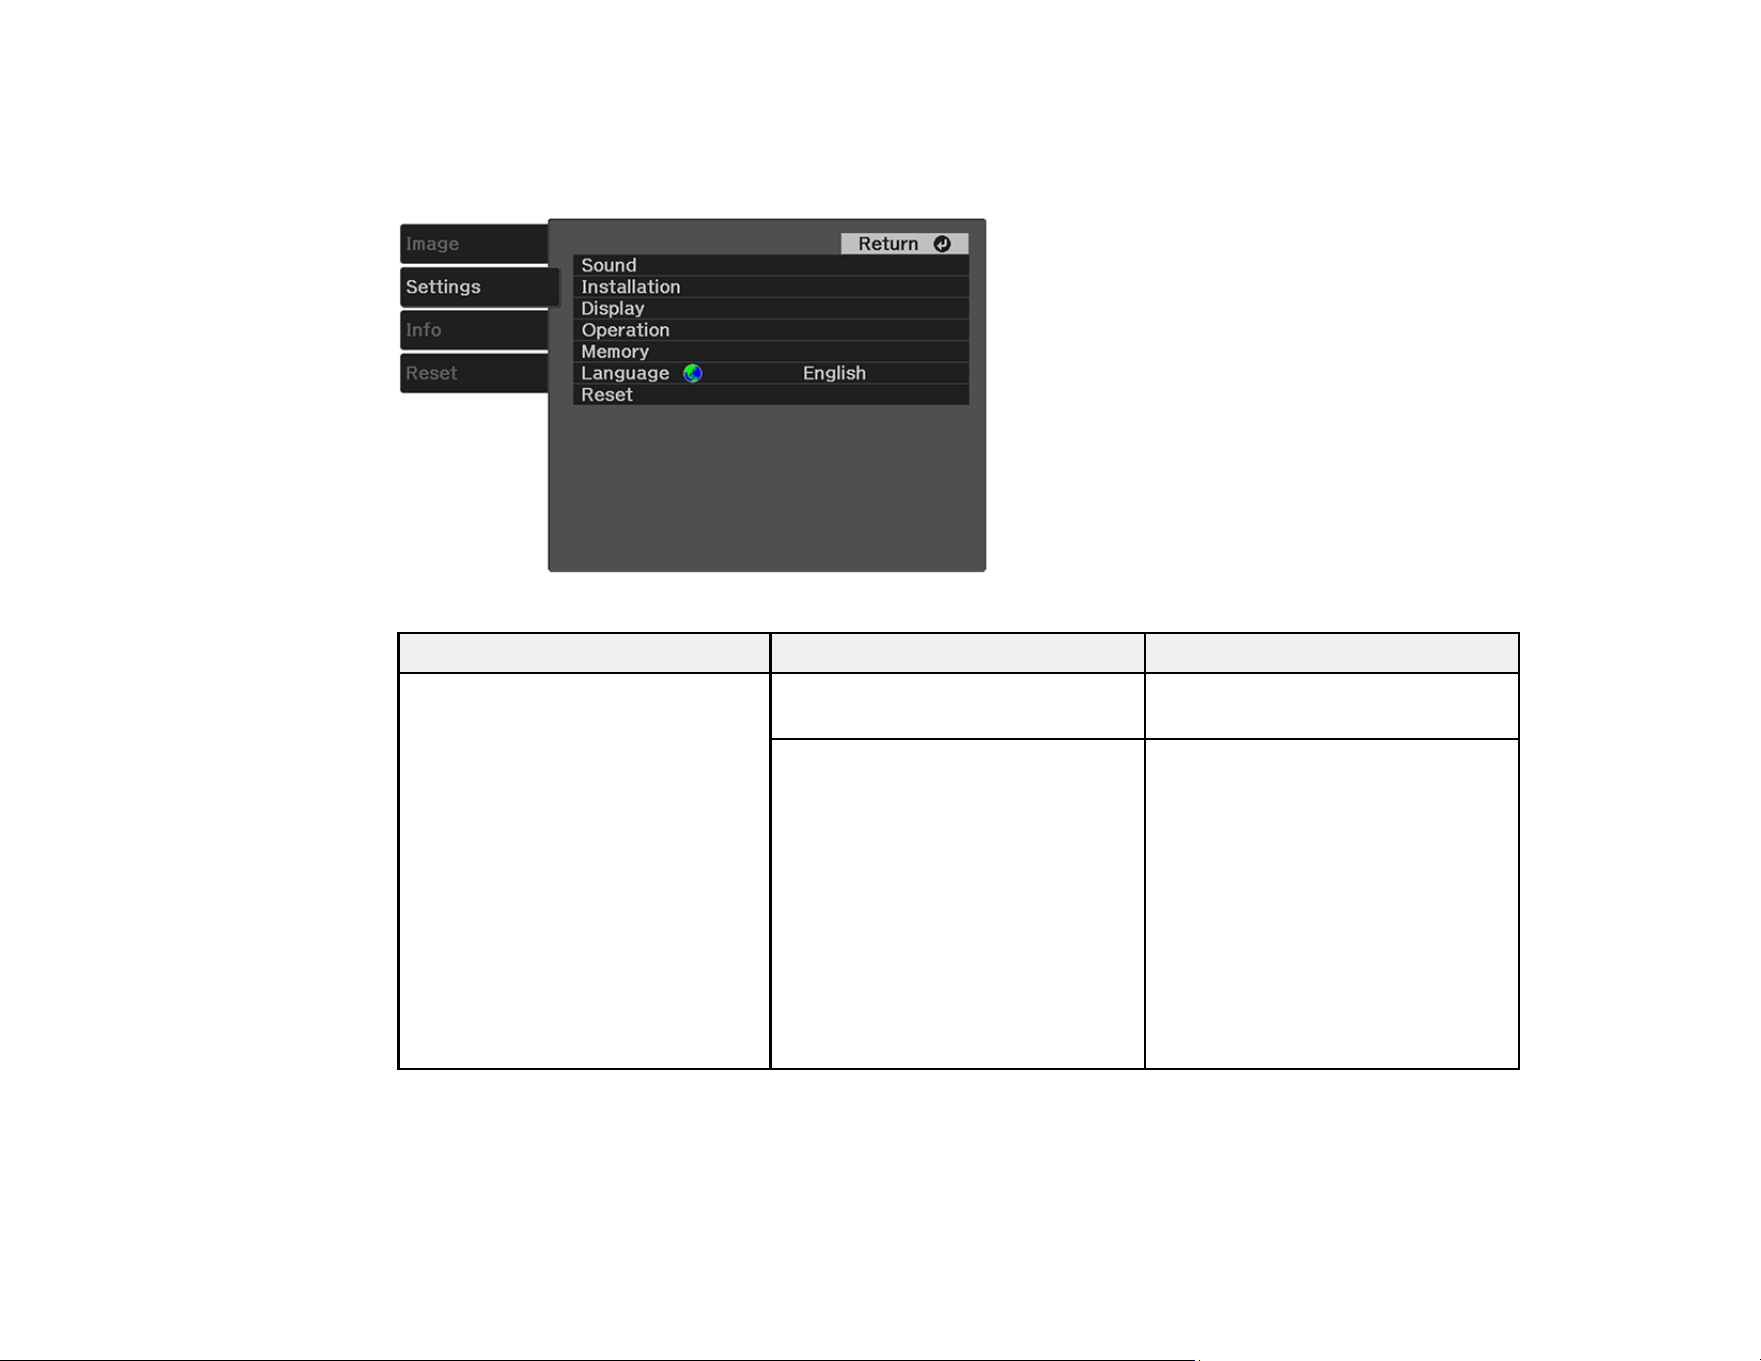
84
Projector Feature Settings - Settings Menu
Options on the Settings menu let you customize various projector features.
Setting Options Description
Sound Volume Adjusts the volume of the
projector's speaker
Sound Mode Sets a sound mode for the type
of playback content (music,
movie, etc.)
Standard: best for normal sound
quality
Vocal: best for voices and
dialogue
Music: best for music
Movie: best for video or movie
audio
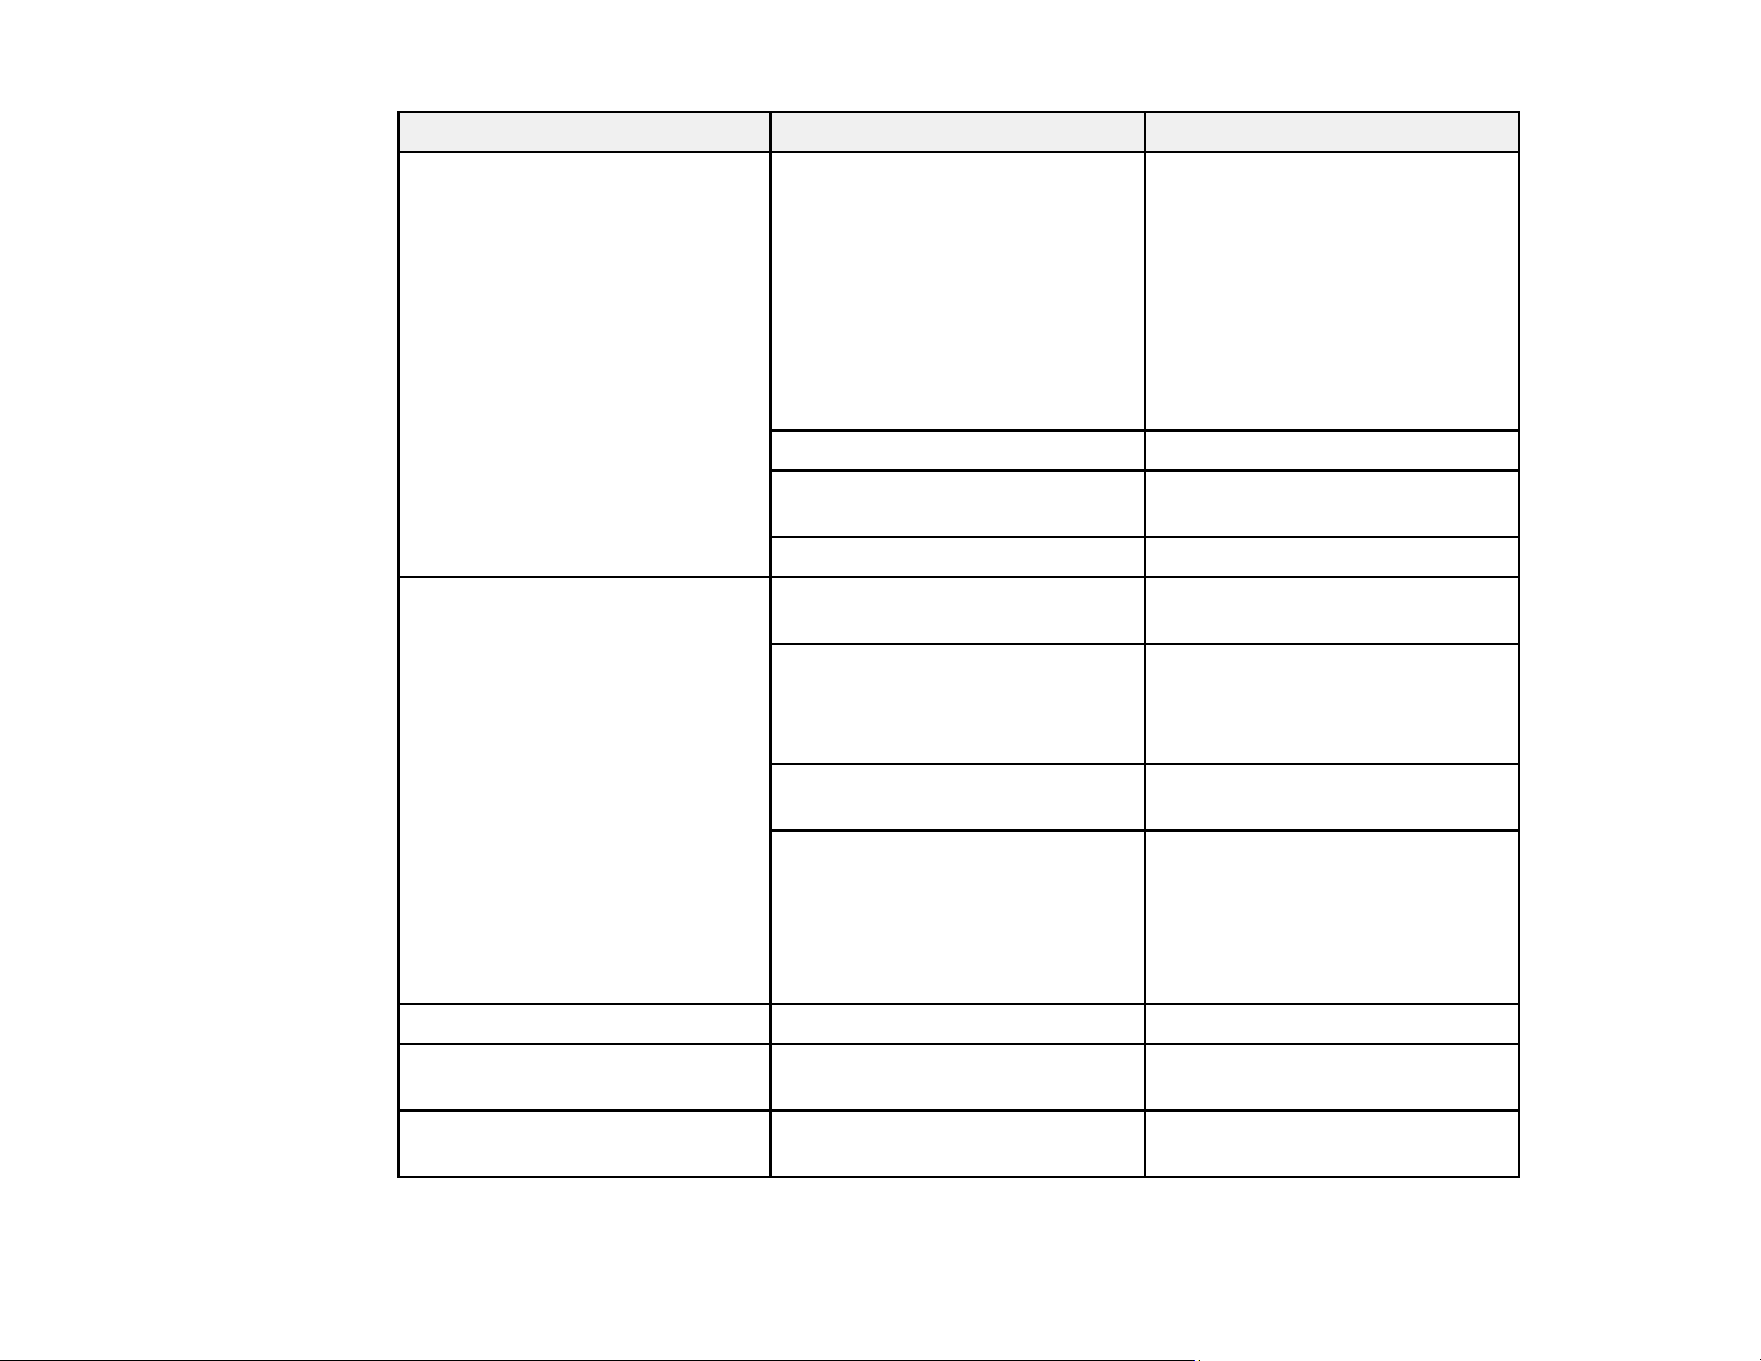
85
Setting Options Description
Installation Keystone Adjusts image shape to
rectangular (horizontally and
vertically)
H/V Keystone: lets you manually
correct horizontal and vertical
sides
Quick Corner: select to correct
image shape and alignment
using an on-screen display
Zoom Adjusts the image size
Projection Selects the way the projector
faces the screen
OSD Rotation Rotates the menu display 90°
Display Welcome Guide Shows the product features and
usage tips
Messages Select On to display messages
for color mode name, aspect
ratio, or high temperature
warning
Startup Screen Select On to display Epson logo
at startup
Standby Confirmation Select Off to shut down the
projector without displaying the
shutdown confirmation prompt
when you press the power button
on the control panel or on the
projector remote control
Operation Various options (see table below) Various options (see table below)
Memory Various options Sets up or saves customized
settings to memory
Language Various languages Sets the language for the
projector menus and messages
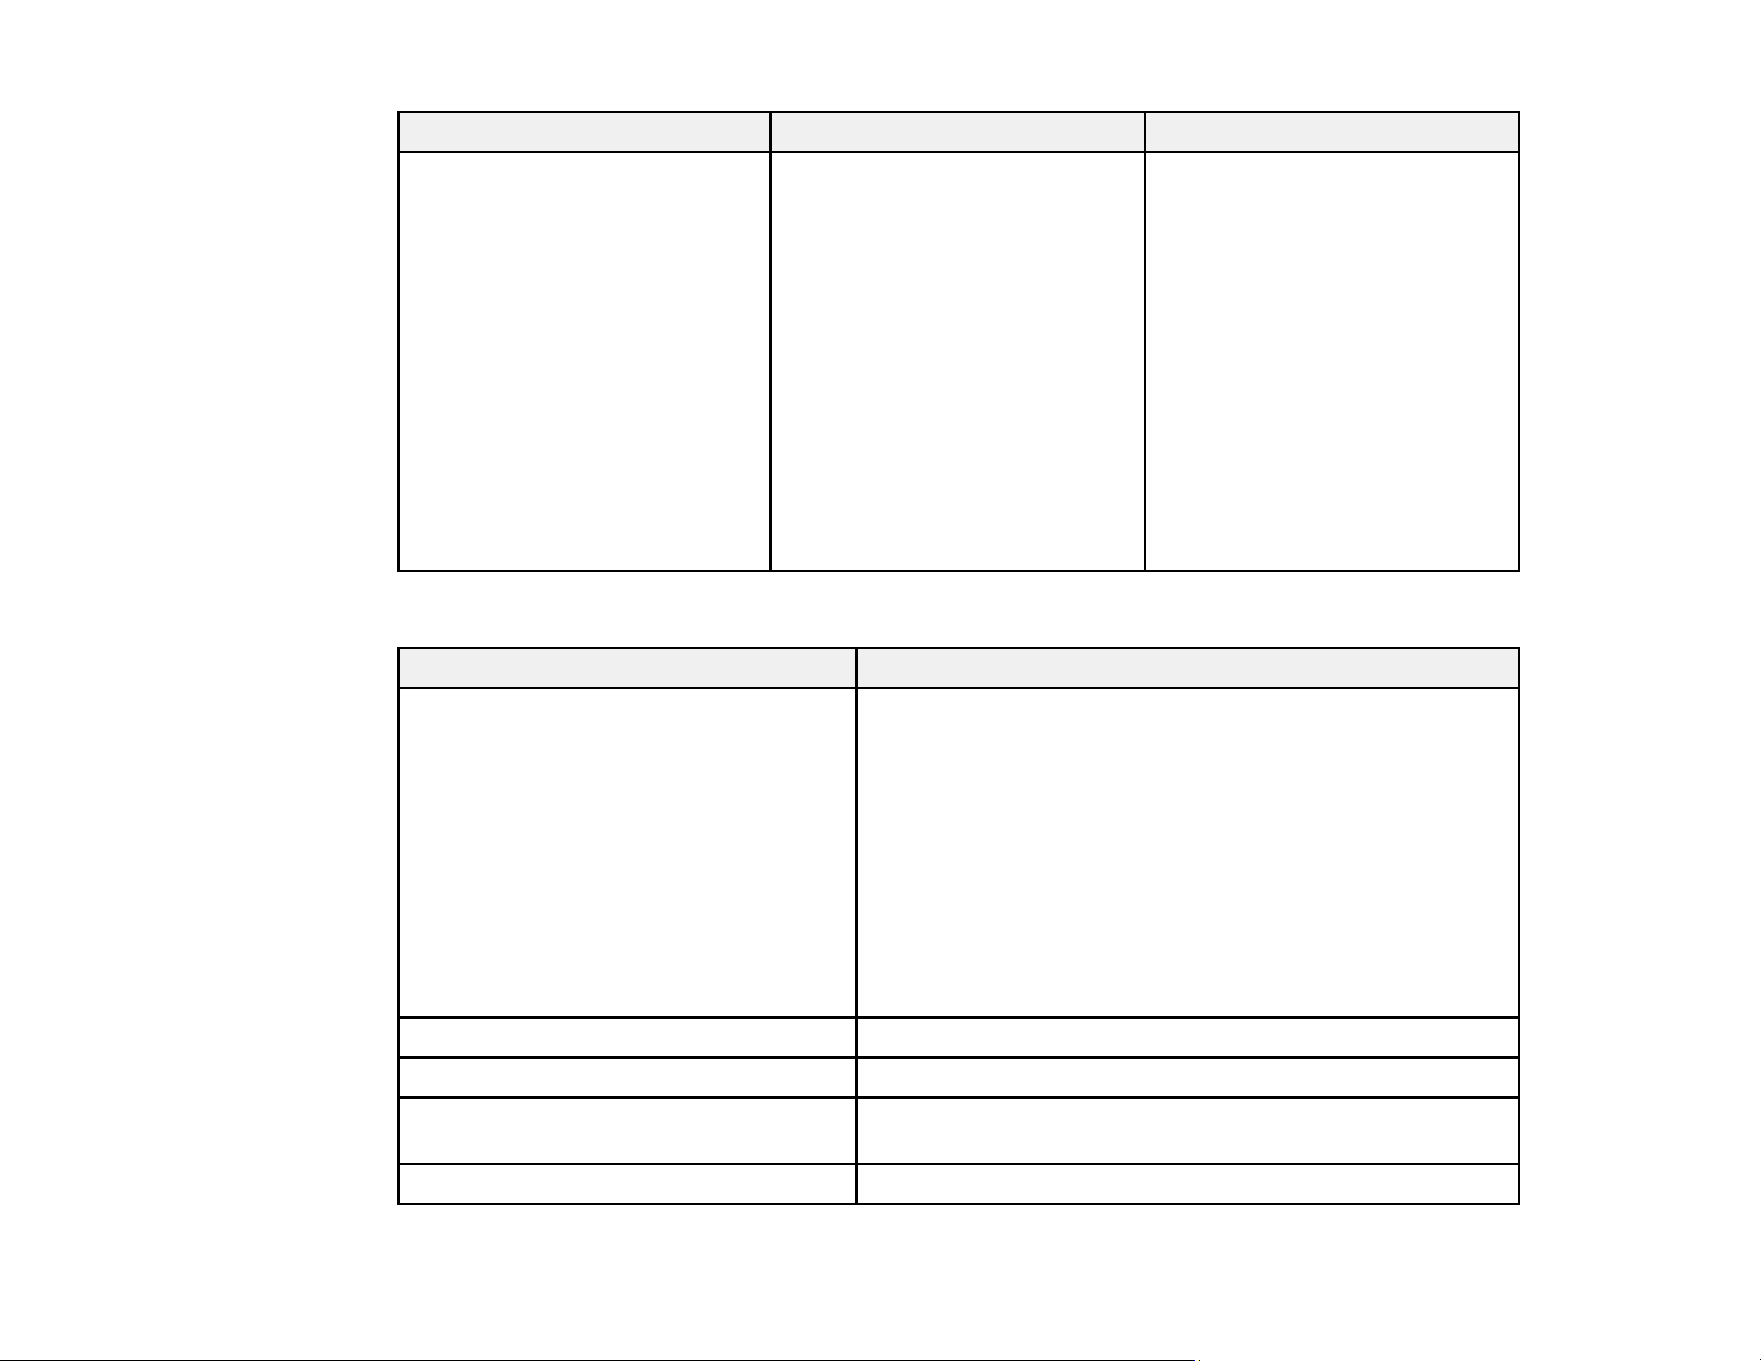
86
Setting Options Description
Reset — Resets all projector settings,
except for the following:
• Zoom
• Projection
• Power On Link
• Power Off Link
• Screen Mirroring
• Energy Save Standby
• HDMI EQ Setting
• Memory
• Language
Operation settings
Options Description
HDMI Link Adjusts HDMI Link options that allow the projector remote
control to control HDMI-connected devices that support the
CEC standard
Device Connections: lists the device connected to the
HDMI port
HDMI Link: turns HDMI Link on or off
Power On Link: controls what happens when you turn on
the projector or connected device
Power Off Link: controls if the connected device is turned
off or not when you turn off the projector
Screen Mirroring Select On to enable Screen Mirroring.
Screen Mirroring Settings Configures the Screen Mirroring settings (see table below)
Sleep Mode Select On to place the projector in standby mode after a
certain interval of inactivity
Sleep Mode Timer Sets the sleep mode interval between 1 and 30 minutes
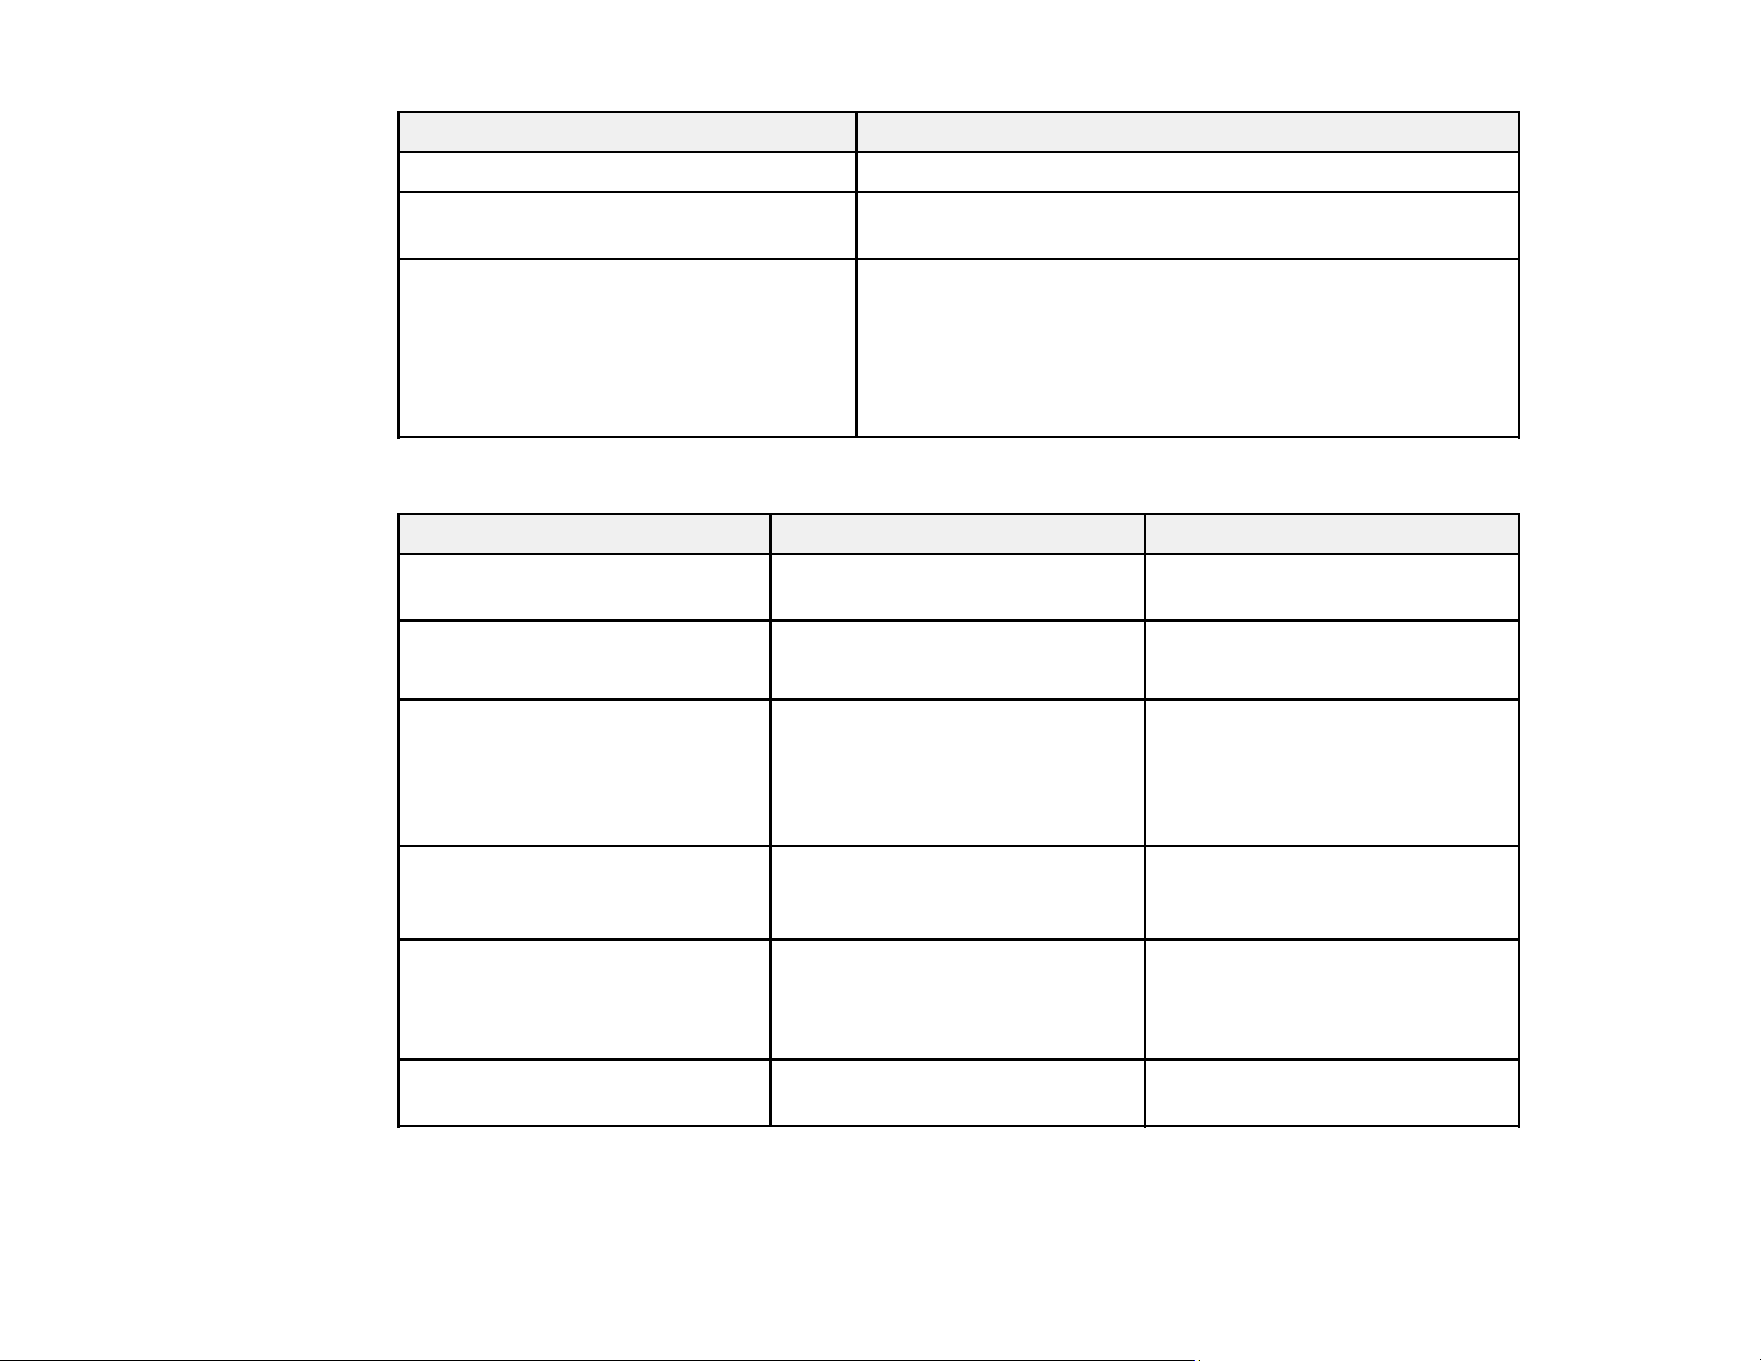
87
Options Description
Illumination Turns off the indicators on the projector
Energy Save Standby Select On to send power to the connected USB device even
if the projector is in standby mode (when the power is off).
HDMI EQ Setting Adjusts the signal level of the HDMI input. Change the
setting if there is interference with the signal or if there is no
image.
Note: If there is no image when using a media streaming
device, select 1 as the setting value.
Screen Mirroring Settings
Setting Options Description
Display Name Up to 32 alphanumeric
characters
Sets the device name shown
when searching for the projector
Operation Mode Basic
Extended
Select Extended to display
additional settings
Adjust Image Quality 1 to 4 Adjusts the quality of the screen
mirroring image. Smaller
numbers emphasize quality;
larger numbers emphasize
speed.
Interrupt Connection On
Off
Select On to allow devices to
interrupt the screen mirroring
connection
Channel Various options Selects the wireless channel
used for screen mirroring.
Change the setting if you
experience interference.
Reset — Resets all settings on the Screen
Mirroring Settings menu
Parent topic: Adjusting the Menu Settings
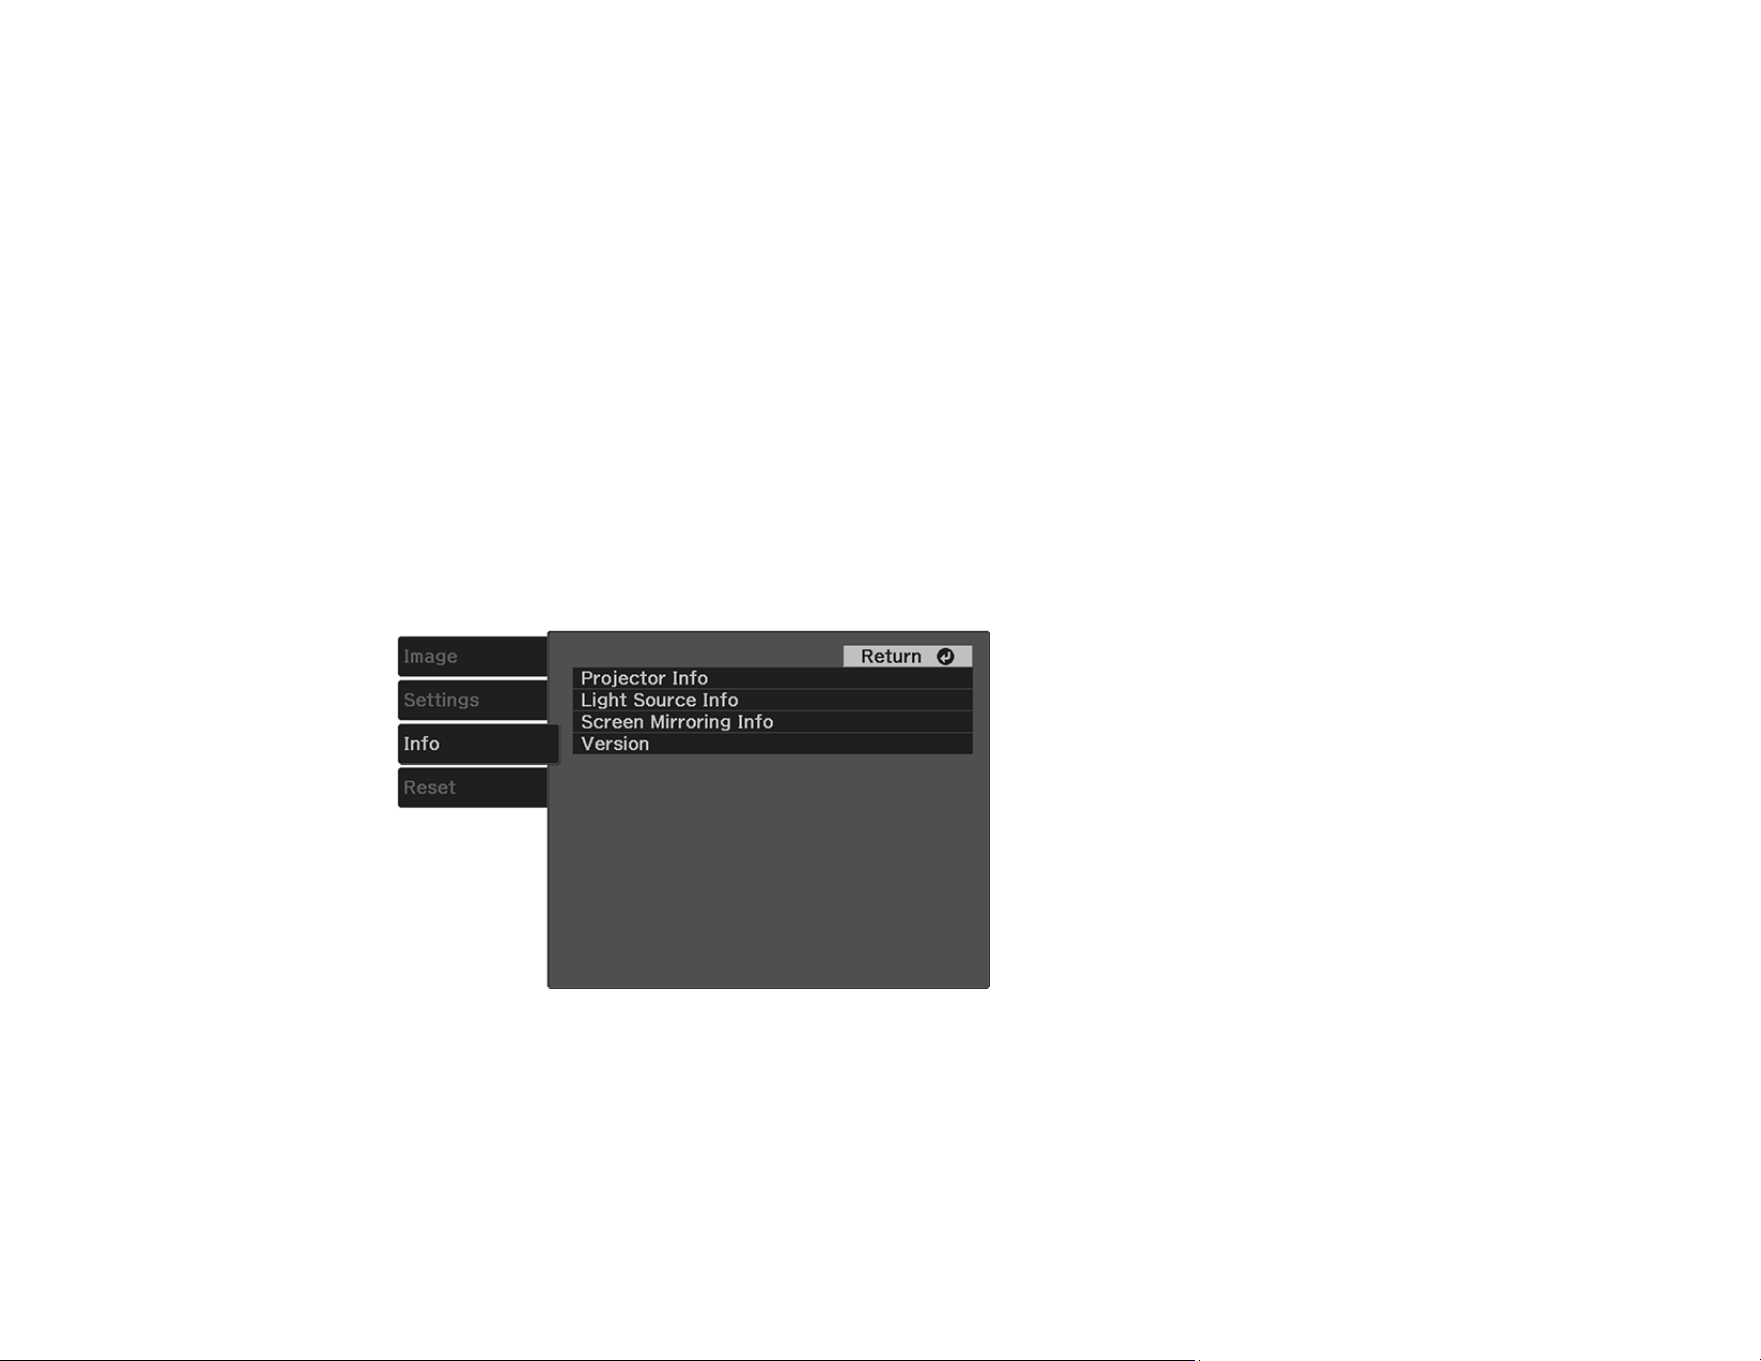
88
Related references
Available Sound Modes
Related tasks
Changing the Sound Mode
Controlling the Volume with the Volume Buttons
Correcting Image Shape with H/V Keystone
Correcting Image Shape with Quick Corner
Operating Connected Devices Using the HDMI Link Features
Selecting Screen Mirroring Settings
Connecting for Screen Mirroring with Miracast
Connecting for Screen Mirroring with a Windows 8.x/Windows 10 Computer
Projector Information Display - Info Menu
You can display information about the projector and input sources by viewing the Info menu. However,
you cannot change any settings in the menu.
Select Projector Info to display the settings described below. Select Light Source Info to display the
projector's light source information. Select Screen Mirroring Info to display information about the
screen mirroring connection. Select Version to display the projector's firmware version.

89
Information item Description
Operation Hours Displays the number of hours the projector has been used since it
was turned on
Source Displays the name of the port to which the current input source is
connected
Input Signal Displays the input signal setting of the current input source
Resolution Displays the resolution of the current input source
Refresh Rate Displays the refresh rate of the current input source
Sync Info Displays information that may be needed by a service technician
Status Displays information about projector problems that may be needed
by a service technician
Product Name Displays the projector's model name
Serial Number Displays the projector's serial number
Parent topic: Adjusting the Menu Settings
Projector Reset Options - Reset Menu
You can reset most of the projector settings to their default values using the Reset menu.


91
Maintaining and Transporting the Projector
Follow the instructions in these sections to maintain your projector and transport it from place to place.
Projector Maintenance
Air Filter and Vent Maintenance
Replacing the Remote Control Batteries
Transporting the Projector
Projector Maintenance
Your projector needs little maintenance to keep working at its best.
You may need to clean the projector lens periodically, and clean the air filter and air vents to prevent the
projector from overheating due to blocked ventilation.
The only parts you should replace are the air filter and remote control batteries. If any other part needs
replacing, contact Epson or an authorized Epson servicer.
This projector uses a sealed laser light source which does not need servicing and cannot be replaced.
Warning: Before cleaning any part of the projector, turn it off and unplug the power cord. Never open
any cover on the projector, except as specifically explained in this manual. Dangerous electrical voltages
in the projector can injure you severely.
Warning: Do not try to service this product yourself, except as specifically explained in this manual.
Refer all other servicing to qualified servicers.
Cleaning the Lens
Cleaning the Projector Case
Parent topic: Maintaining and Transporting the Projector
Cleaning the Lens
Clean the projector's lens periodically, or whenever you notice dust or smudges on the surface.
• To remove dust or smudges, gently wipe the lens with lens-cleaning paper.

92
• To remove stubborn smudges, moisten a soft, lint-free cloth with lens cleaner and gently wipe the
lens. Do not spray any liquid directly on the lens.
Warning: Do not use a lens cleaner that contains flammable gas. The high heat generated by the
projector may cause a fire.
Caution: Do not use glass cleaner or any harsh materials to clean the lens and do not subject the lens
to any impacts; you may damage it. Do not use canned air, or the gases may leave a residue. Avoid
touching the lens with your bare hands to prevent fingerprints on or damage to the lens surface.
Parent topic: Projector Maintenance
Cleaning the Projector Case
Before cleaning the projector case, turn off the projector and unplug the power cord.
• To remove dust or dirt, use a soft, dry, lint-free cloth.
• To remove stubborn dirt, use a soft cloth moistened with water and mild soap. Do not spray liquid
directly on the projector.
Caution: Do not use wax, alcohol, benzine, paint thinner, or other chemicals to clean the projector
case. These can damage the case. Do not use canned air, or the gases may leave a flammable
residue.
Parent topic: Projector Maintenance
Related tasks
Turning Off the Projector
Air Filter and Vent Maintenance
Regular filter maintenance is important to maintaining your projector. Your Epson projector is designed
with an easily accessible, user-replaceable filter to protect your projector and make regular maintenance
simple. Filter maintenance intervals will depend on the environment.
If regular maintenance is not performed, your Epson projector will notify you when the temperature
inside the projector has reached a high level. Do not wait until this warning appears to maintain your
projector filter as prolonged exposure to high temperatures may reduce the life of your projector or laser.
Damage due to the failure to properly maintain the projector or its filter may not be covered by the
projector's Limited Warranty.
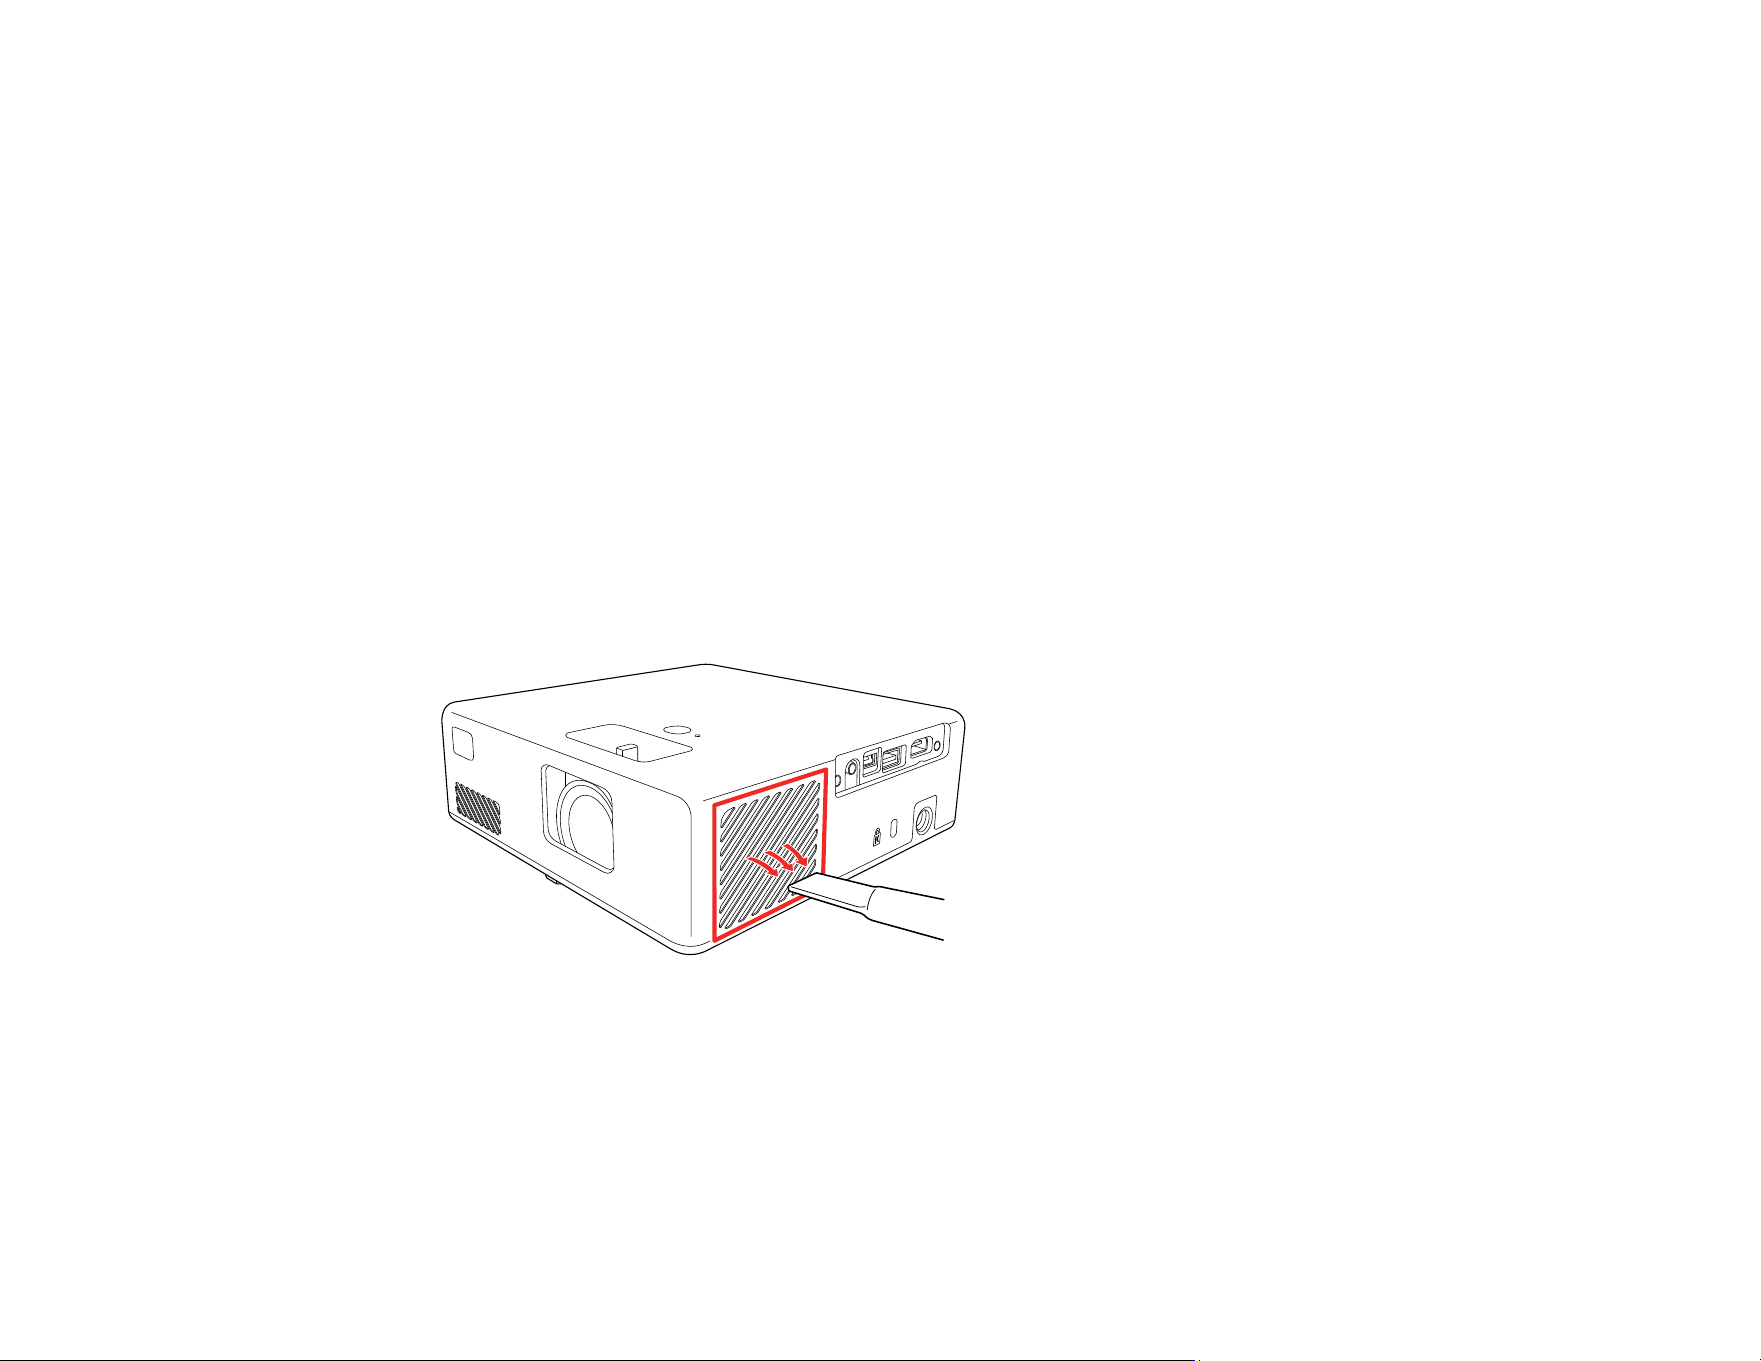
93
Cleaning the Air Filter and Vents
Replacing the Air Filter
Parent topic: Maintaining and Transporting the Projector
Cleaning the Air Filter and Vents
Clean the projector's air filter or vents if they get dusty, or if you see a message telling you to clean them.
Clean the air filter immediately when the projector displays a message indicating high temperatures
inside the projector. It is recommended that you clean the filter every 5000 hours. Clean the filter and
vents more frequently if you are using the projector in a dusty or smoky environment.
Caution: If you do not perform regular maintenance, the projector will display a high temperature
warning. Do not wait until this message appears to clean your air filter and vents, as prolonged exposure
to high temperatures can reduce the life of your projector.
1. Turn off the projector and unplug the power cord.
2. Gently remove the dust using a small vacuum designed for computers or a very soft brush (such as
a paintbrush).
Note: You can remove the air filter so you can clean both sides of it. Do not rinse the air filter in
water or use any detergent or solvent to clean it.
Caution: Do not use canned air. The gases may leave a flammable residue or push dust and debris
into the projector's optics or other sensitive areas.
3. If dust is difficult to remove or the air filter is damaged, replace the air filter.
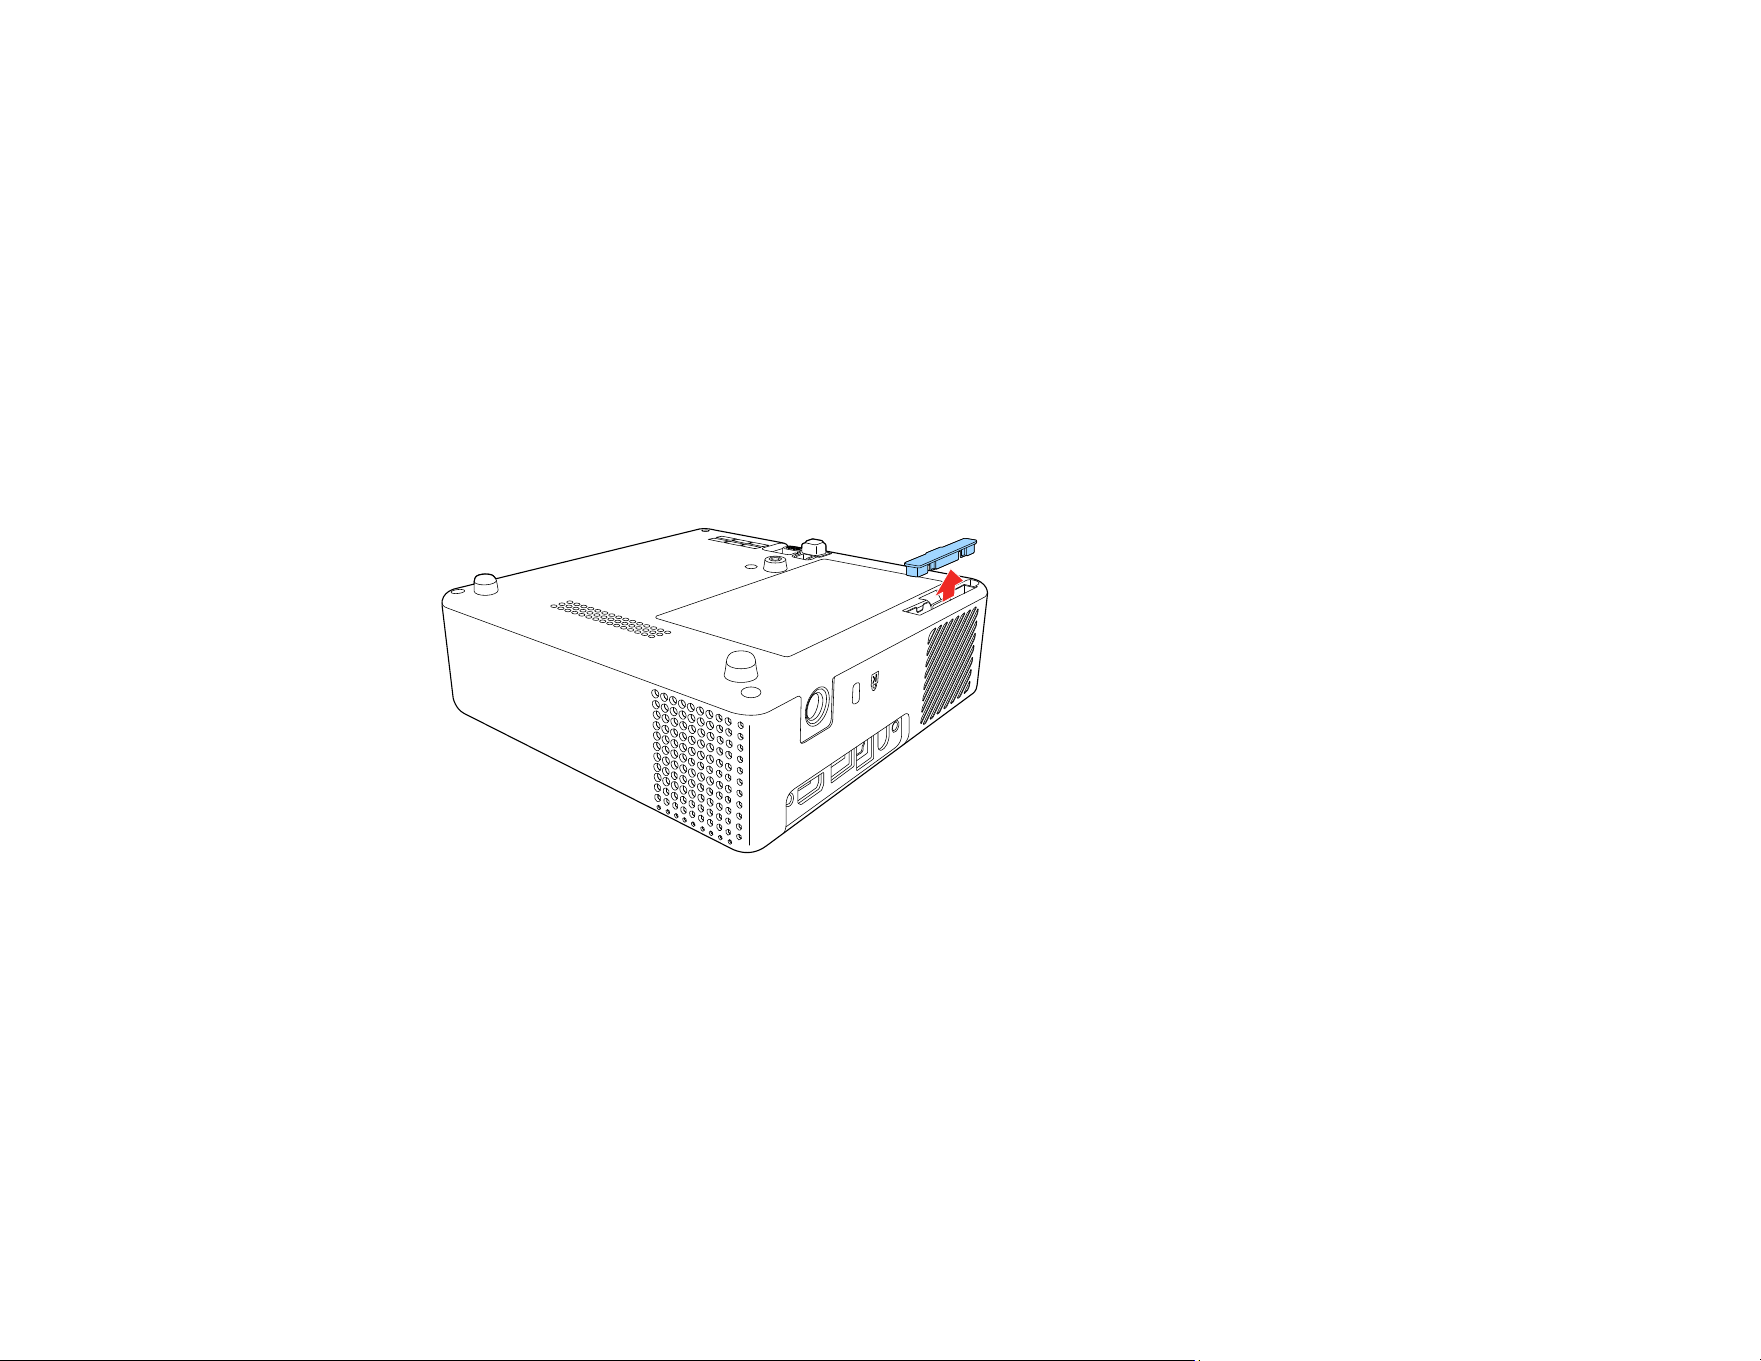
94
Parent topic: Air Filter and Vent Maintenance
Replacing the Air Filter
You need to replace the air filter in the following situations:
• After cleaning the air filter, you see a message telling you to clean or replace it
• The air filter is torn or damaged
You can replace the air filter while the projector is mounted to the ceiling using the optional Epson
mounting plate (ELPMB65) or placed upside-down on a table.
1. Turn off the projector and unplug the power cord.
2. Place the projector upside-down on a table.
3. Remove the air filter cover.
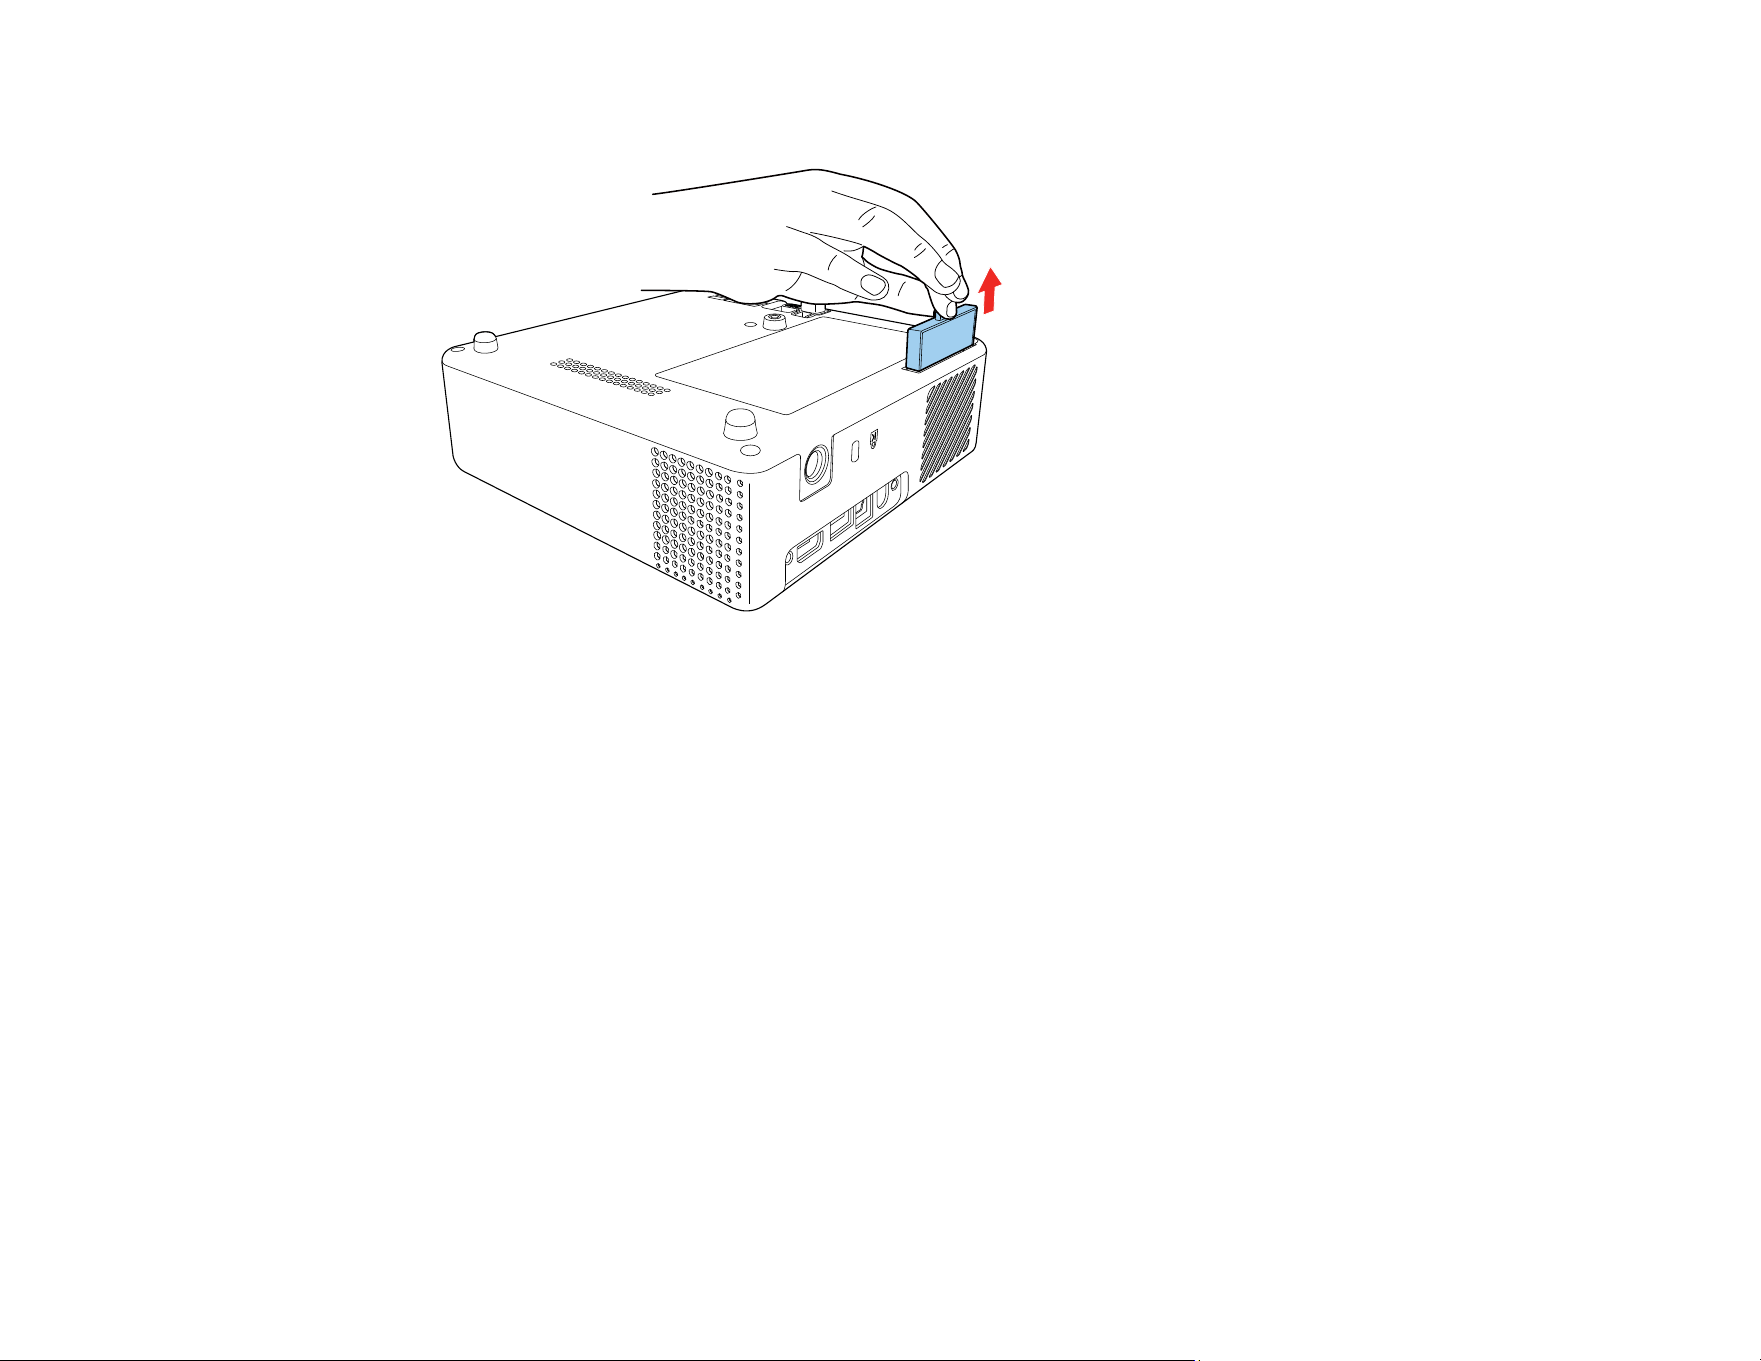
95
4. Pull the air filter out of the projector.
Note: Air filters contain ABS resin and polyurethane foam. Dispose of used air filters according to
local regulations.
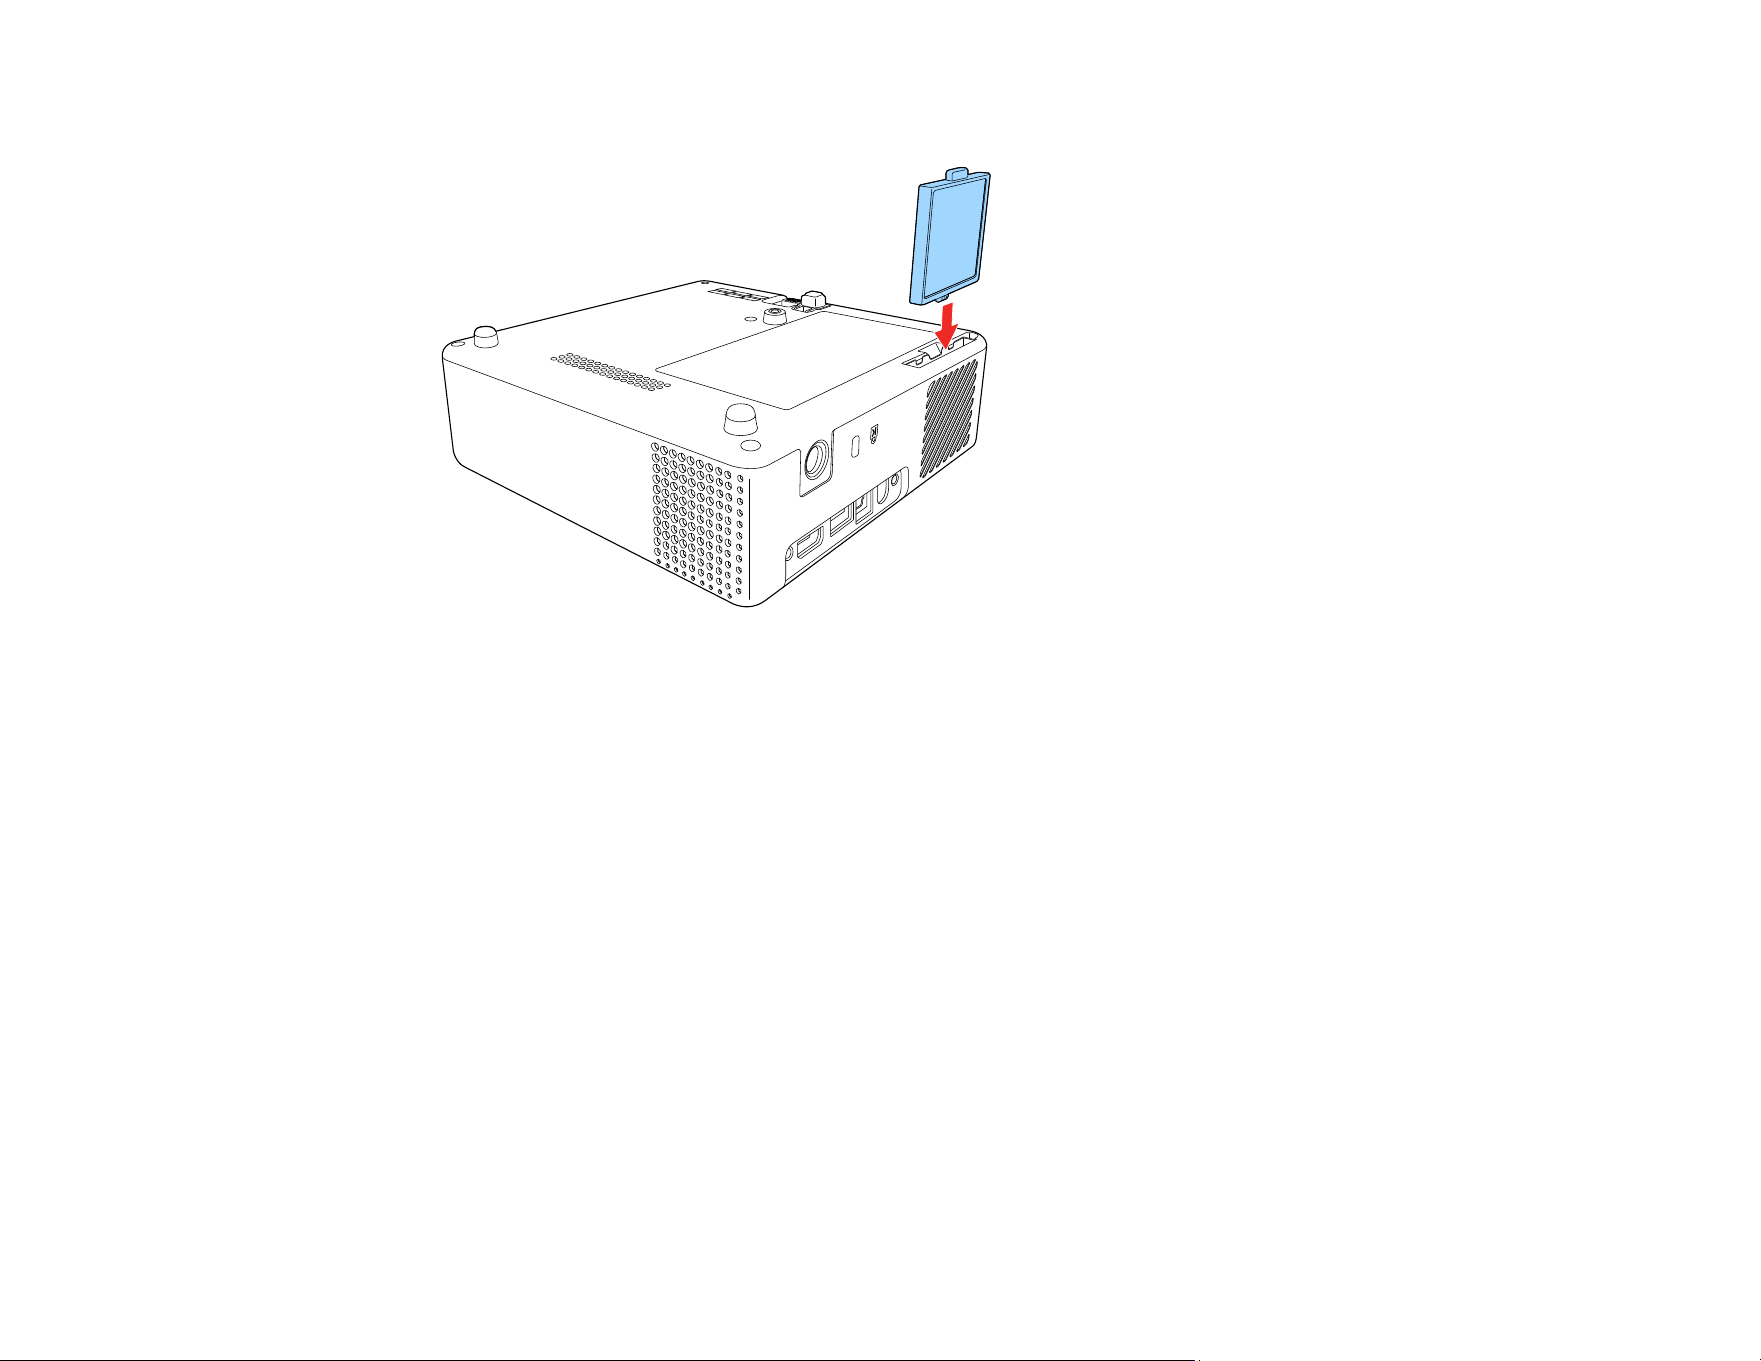
96
5. Place the new air filter in the projector as shown and push gently until it clicks into place.
6. Replace the air filter cover.
Parent topic: Air Filter and Vent Maintenance
Related references
Optional Equipment and Replacement Parts
Replacing the Remote Control Batteries
The remote control uses two AAA manganese or alkaline batteries. Replace the batteries as soon as
they run out.
Caution: Use only the type of batteries specified in this manual. Do not install batteries of different types,
or mix new and old batteries.
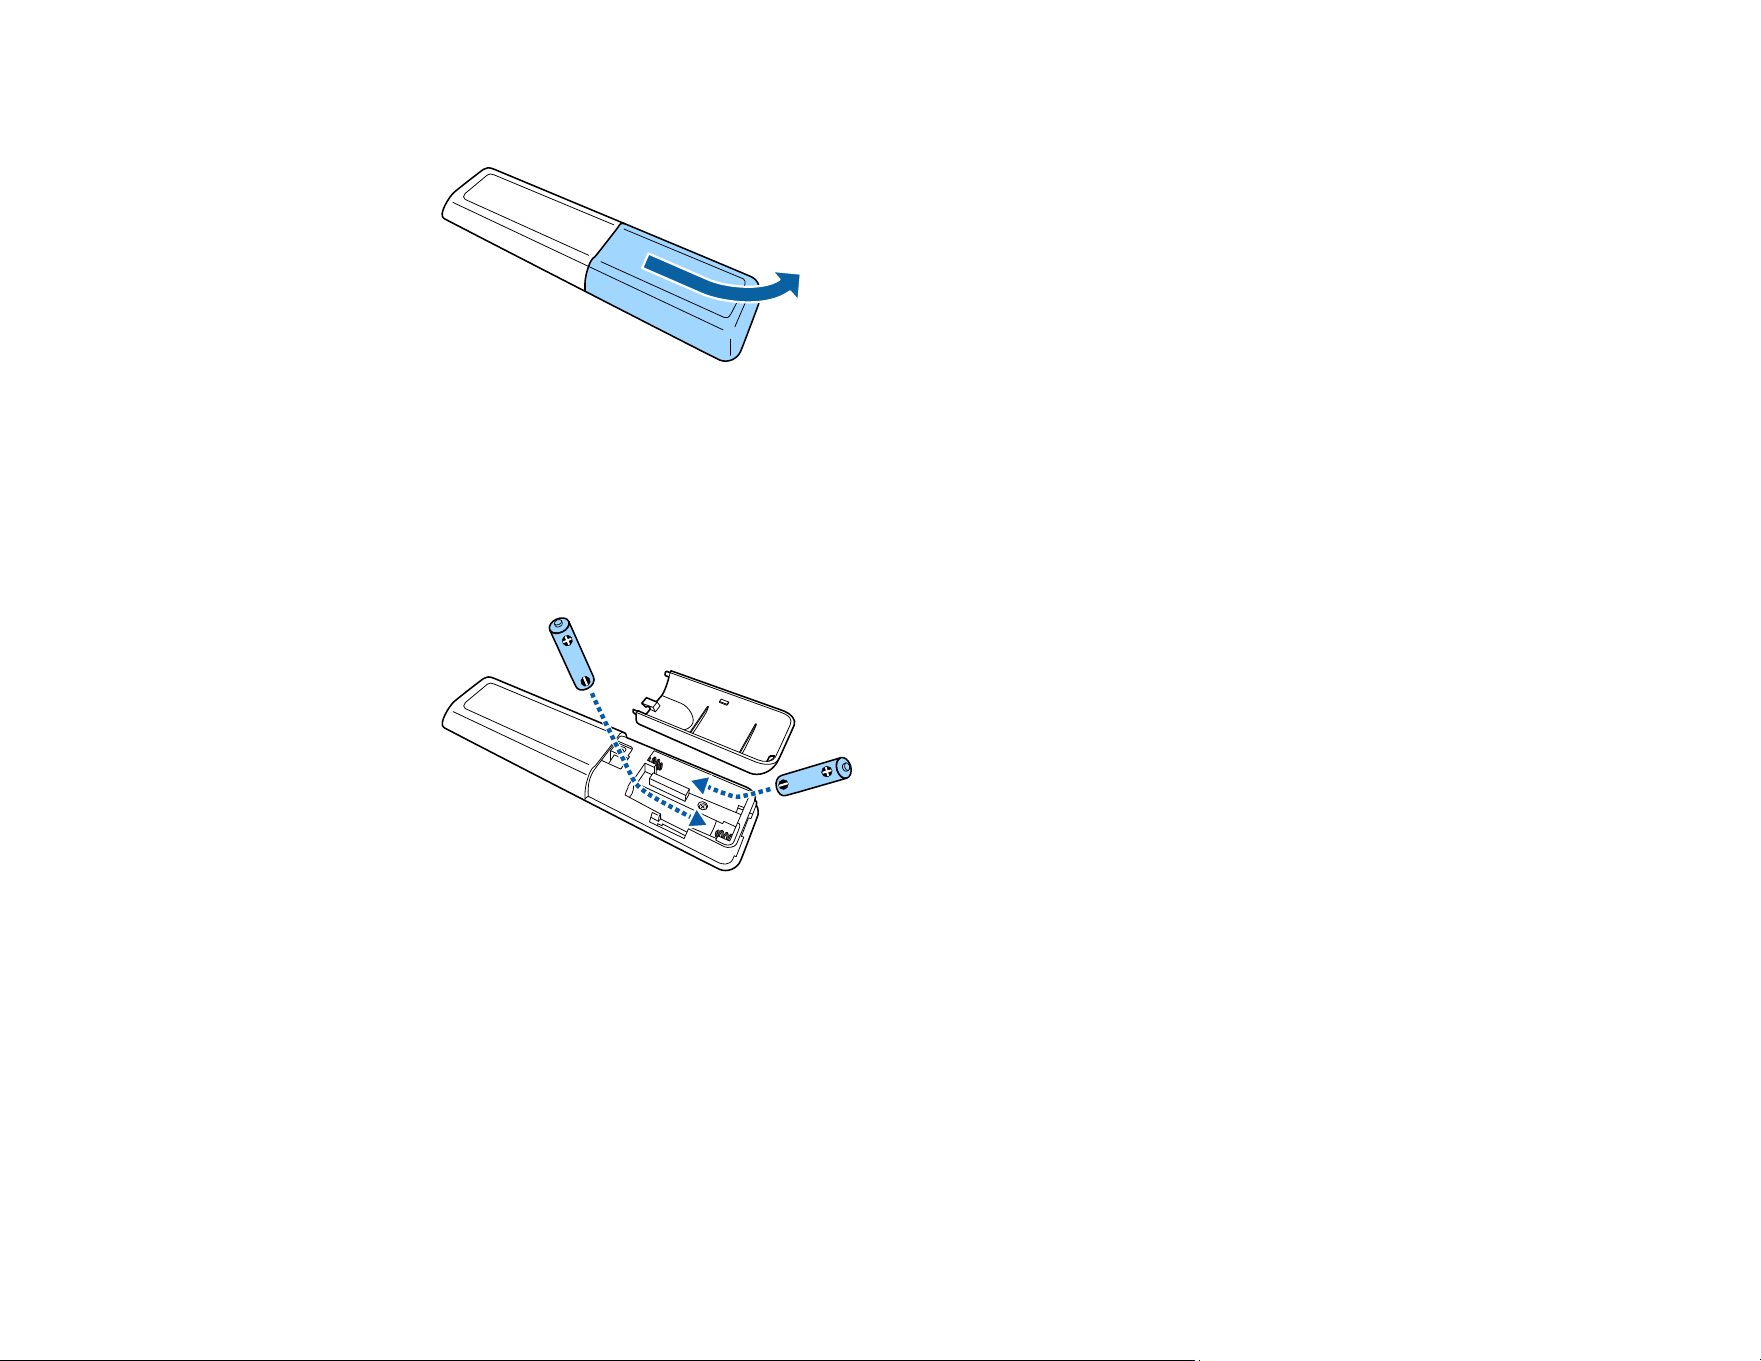
97
1. Remove the battery cover as shown.
2. Remove the old batteries.
Warning: If the battery fluid has leaked, wipe it away with a soft cloth and avoid getting the fluid on
your hands. If it gets on your hands, wash them immediately to avoid injury.
3. Insert the batteries with the + and – ends facing as shown.
Warning: Make sure the batteries are inserted in the correct positions. If the batteries are not
inserted correctly, they could explode or leak, causing a fire, injury, or damage to the product.

98
4. Replace the battery cover and press it down until it clicks into place.
Warning: Dispose of used batteries according to local regulations. Do not expose batteries to heat
or flame. Keep batteries out of the reach of children; they are choking hazards and are very
dangerous if swallowed.
Parent topic: Maintaining and Transporting the Projector
Transporting the Projector
The projector contains precision parts, some of which are glass. Follow the guidelines here to transport,
ship, or store the projector safely.
1. Remove any equipment connected to the projector.
2. Turn off the projector.
3. Make sure the status indicator is not lit, then unplug the power cord.
4. Do one of the following:
• When transporting the projector a long distance or as checked luggage, pack it in a firm box with
cushioning around it and mark the box "Fragile."
• When shipping the projector for repairs, place it in its original packing materials, if possible, or use
equivalent materials with cushioning around the projector. Mark the box "Fragile."
Note: Epson shall not be liable for any damages incurred during transportation.
Parent topic: Maintaining and Transporting the Projector
Related tasks
Turning Off the Projector

99
Solving Problems
Check the solutions in these sections if you have any problems using the projector.
Projection Problem Tips
Projector Light Status
Solving Image or Sound Problems
Solving Projector or Remote Control Operation Problems
Solutions to HDMI Link Problems
Solutions When You Cannot Connect Using Screen Mirroring
Solutions When the Image or Sound Contains Static During Screen Mirroring
Where to Get Help (U.S. and Canada)
Where to Get Help (Latin America)
Projection Problem Tips
If the projector is not working properly, try turning it off and unplugging it. Then plug it back in and turn it
on.
If this does not solve the problem, check the following:
• The lights on the projector may indicate what the problem is.
• The solutions in this manual can help you solve many problems.
If none of these solutions help, you can contact Epson for technical support.
Parent topic: Solving Problems
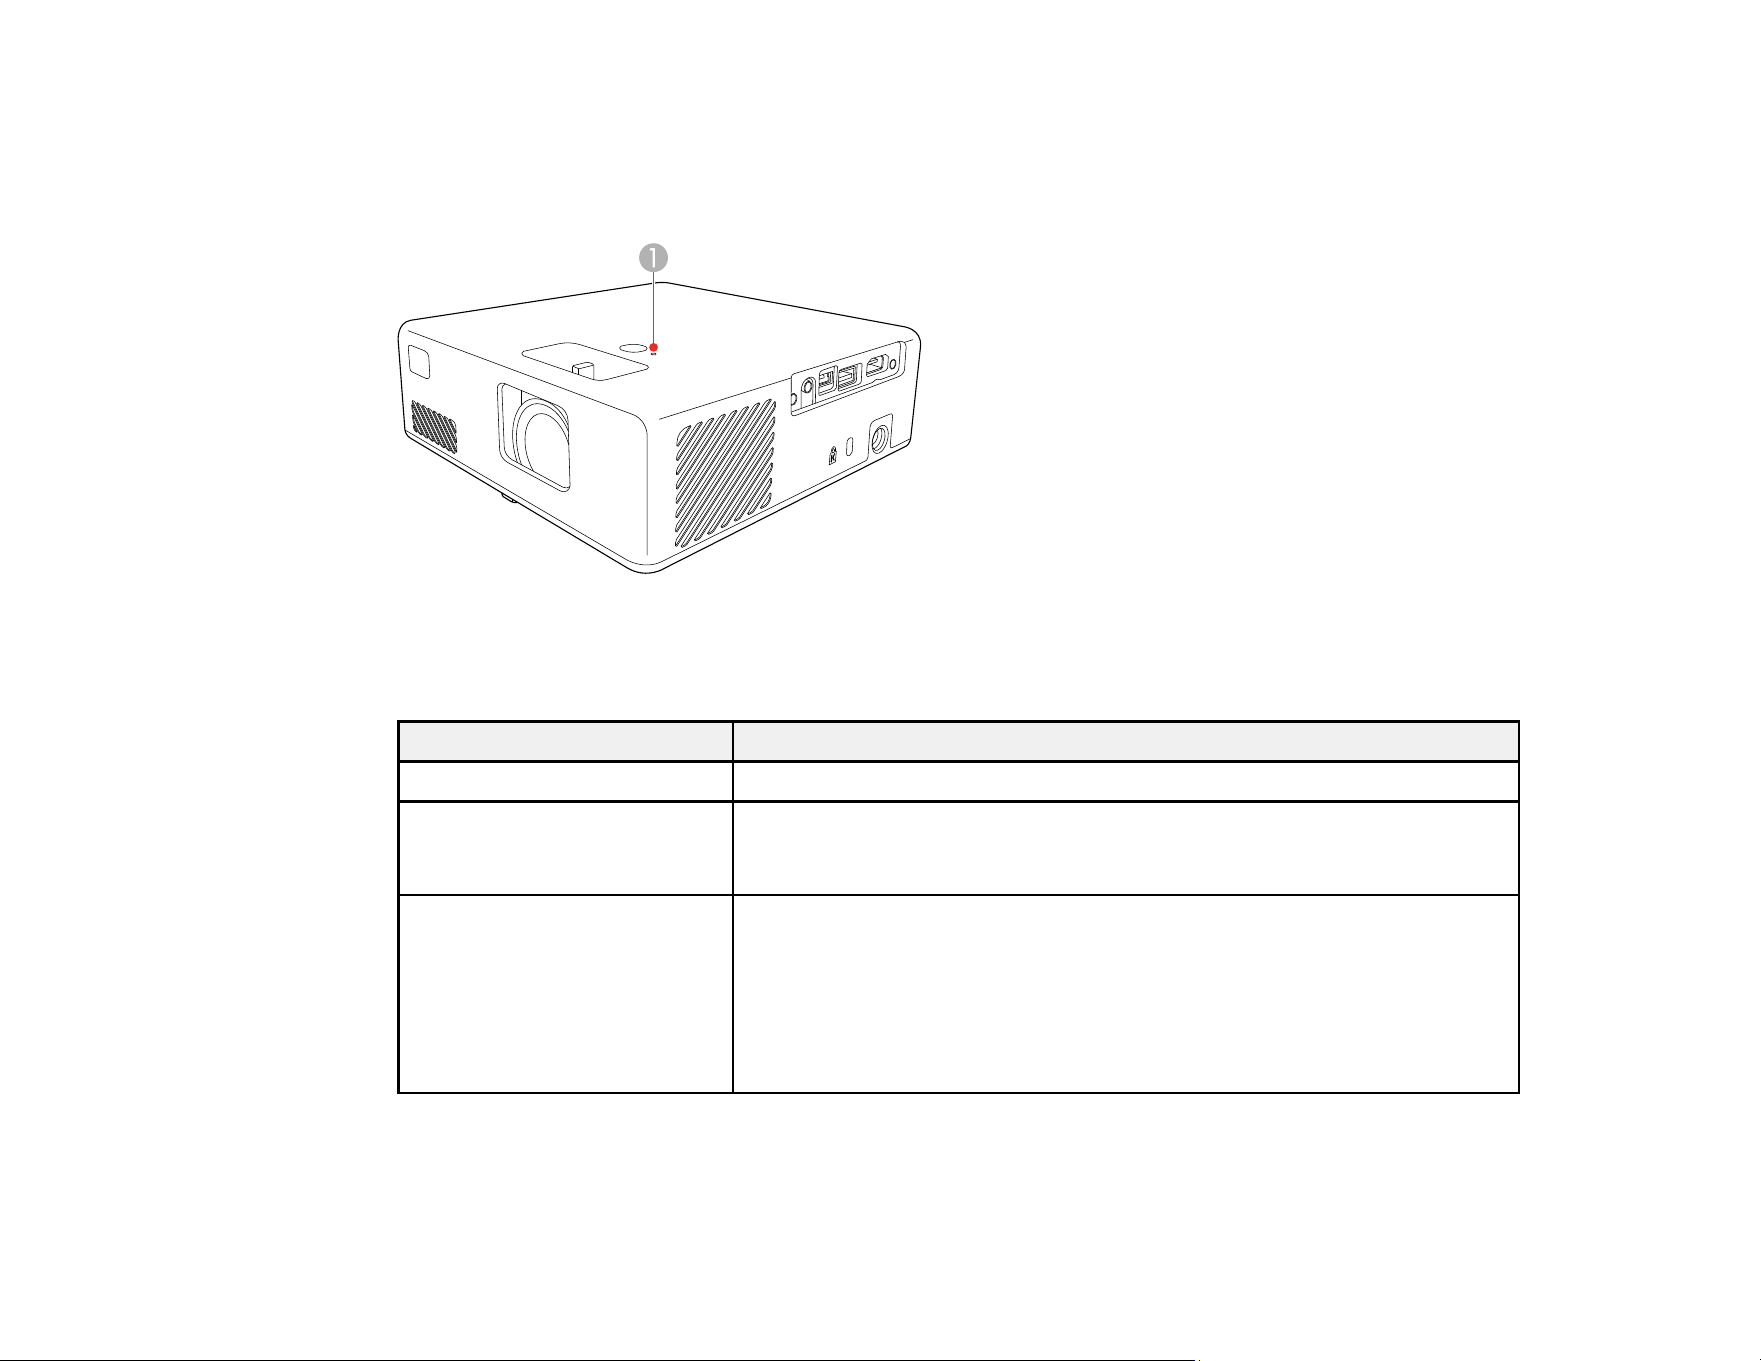
100
Projector Light Status
The lights on the projector indicate the projector status and let you know when a problem occurs. Check
the status and color of the lights and look for a solution in the tables here.
1 Status indicator
Status indicator Status and solution
Blue Normal operation
Flashing blue The projector is warming up, shutting down, or initializing the projector.
The remote control may not function if the status indicator is flashing
blue.
Off The projector is in standby or sleep mode. When you press the power
button on the projector or remote, projection begins.
• Make sure that the vents are not clogged with dust or obstructed by
nearby objects.
• If the problem persists, unplug the projector and contact Epson for
help.

101
Status indicator Status and solution
Orange Projector is too hot and has turned off.
• Let the projector cool down for at least five minutes
• Make sure that the vents and air filter are not clogged with dust or
obstructed by nearby objects.
• Clean or replace the air filter.
• Make sure the environmental temperature is not too hot.
• If the problem persists, unplug the projector and contact Epson for
help.
Flashing orange One of the following has occurred:
• The laser has a problem
• A fan or sensor has a problem
• An internal projector error has occurred.
Turn the projector off, unplug it, and contact Epson for help.
Note: If the lights display a pattern not listed in the tables above, turn the projector off, unplug it, and
contact Epson for help.
Parent topic: Solving Problems
Related references
Projector Environmental Specifications
Where to Get Help (U.S. and Canada)
Where to Get Help (Latin America)
Related tasks
Turning Off the Projector
Cleaning the Air Filter and Vents
Replacing the Air Filter
Solving Image or Sound Problems
Check the solutions in these sections if you have any problems with projected images or sound.
Solutions When No Image Appears

102
Solutions When "No Signal" Message Appears
Solutions When the Image is Not Rectangular
Solutions When Only a Partial Image Appears
Solutions When the Image Contains Noise or Static
Solutions When the Image is Fuzzy or Blurry
Solutions When the Image Brightness or Colors are Incorrect
Solutions to Sound Problems
Parent topic: Solving Problems
Solutions When No Image Appears
If no image appears, try the following solutions:
• Press the A/V mute button on the projector remote control to see if the image was temporarily
turned off.
• Check the status light to confirm the projector is operating normally.
• Make sure all necessary cables are securely connected and the power is on for the projector and
connected video sources.
• Try using a shorter HDMI cable.
• Try connecting the video source directly to the projector.
• Press the projector's power button to wake it from standby or sleep mode. Also see if your connected
computer is in sleep mode or displaying a blank screen saver.
• Make sure the connected device meets the HDMI CEC standard. See the documentation supplied
with the device for more information. If necessary, set the CEC function for the connected device
again and restart the device. Turn off the projector and the connected streaming device or video
source, and then turn them back on.
• Make sure the connected device does not require MHL; the projector's HDMI port does not support
MHL.
• If you are projecting from a laptop computer, make sure it is set up to display on an external monitor.
• If you are projecting from a computer using an HDMI cable, turn off the computer and the projector.
Make sure the HDMI cable is securely connected, turn the projector on, then turn the computer on.
• Make sure the computer's display resolution does not exceed the projector's resolution and frequency
limits. If necessary, select a different display resolution for your computer. (See your computer manual
for details.)

103
• If the other solutions do not solve the problem, reset all of the projector settings using the options on
the Reset menu.
Parent topic: Solving Image or Sound Problems
Related references
Projector Light Status
Projector Parts - Remote Control
Projector Reset Options - Reset Menu
Related tasks
Turning On the Projector
Operating Connected Devices Using the HDMI Link Features
Solutions When "No Signal" Message Appears
If the "No Signal" message appears, try the following solutions:
• Press the Source Search button and wait a few seconds for an image to appear.
• Turn on the connected computer or video source, and press its play button to begin your presentation,
if necessary.
• Check the connection from the projector to your video sources.
• If you are projecting from a laptop computer, make sure it is set up to display on an external monitor.
• If necessary, turn the projector and the connected computer or video source off and then on again.
• If you are projecting using a thumb-sized media streaming device, set the HDMI EQ Setting to 1 in the
projector's Settings > Operation menu.
• Connect the video source directly to the projector.
• Try a different video cable.
• If the other solutions do not solve the problem, reset all of the projector settings using the options on
the Reset menu.
Displaying From a PC Laptop
Displaying From a Mac Laptop
Parent topic: Solving Image or Sound Problems
Related concepts
Projector Connections

104
Related references
Projector Feature Settings - Settings Menu
Projector Reset Options - Reset Menu
Displaying From a PC Laptop
If you see the "No Signal" message when you display from a PC laptop, you need to set up the laptop to
display on an external monitor.
1. Hold down the laptop's Fn key and press the key labeled with a monitor icon or CRT/LCD. (See your
laptop manual for details.) Wait a few seconds for an image to appear. To display on both the
laptop's monitor and the projector, try pressing the same keys again.
Note: On Windows 7 or later, hold down the Windows key and press P at the same time, then click
Duplicate.
2. If the same image is not displayed by the laptop and projector, check the Windows Display utility to
make sure the external monitor port is enabled and extended desktop mode is disabled. (See your
computer or Windows manual for instructions.)
3. If necessary, check your video card settings and set the multiple display option to Clone, Mirror, or
Duplicate.
Parent topic: Solutions When "No Signal" Message Appears
Displaying From a Mac Laptop
If you see the "No Signal" message when you display from a Mac laptop, you need to set up the laptop
for mirrored display. (See your laptop manual for details.)
1. Open the System Preferences utility and select Displays, Display, or Color LCD.
2. Click the Arrange or Arrangement tab.
3. Select the Mirror Displays checkbox.
Parent topic: Solutions When "No Signal" Message Appears
Solutions When the Image is Not Rectangular
If the projected image is not evenly rectangular, try the following solutions:
• Place the projector directly in front of the center of the screen, facing it squarely, if possible.
• Adjust the image shape using the keystone settings in the projector's menu.
Parent topic: Solving Image or Sound Problems

105
Related concepts
Projector Placement
Related tasks
Correcting Image Shape with H/V Keystone
Correcting Image Shape with Quick Corner
Solutions When Only a Partial Image Appears
If only a partial computer image appears, try the following solutions:
• If you zoomed into or out of the image using the Zoom setting, press the Esc button on the
projector remote control until the projector returns to a full display.
• Check your computer display settings to disable dual display and set the resolution within the
projector's limits. (See your computer manual for details.)
• Check the resolution assigned to your presentation files to see if they are created for a different
resolution than you are projecting in. (See your software help for details.)
• If the other solutions do not solve the problem, reset all of the projector settings using the options on
the Reset menu.
Parent topic: Solving Image or Sound Problems
Related references
Supported PC Free File Types
Projector Reset Options - Reset Menu
Related tasks
Resizing the Image Using Zoom
Solutions When the Image Contains Noise or Static
If the projected image seems to contain electronic interference (noise) or static, try the following
solutions:
• Check the cables connecting your computer or video source to the projector. They should be:
• Separated from the power cord to prevent interference
• Securely connected at both ends
• Not connected to an extension cable
• Try decreasing the Sharpness setting in the Image menu.
• Select a computer video resolution and refresh rate that are compatible with the projector.

106
• If you connected an extension power cable, try projecting without it to see if it caused interference in
the signal.
Parent topic: Solving Image or Sound Problems
Related references
Supported Video Display Formats
Related tasks
Adjusting Image Sharpness
Solutions When the Image is Fuzzy or Blurry
If the projected image is fuzzy or blurry, try the following solutions:
• Adjust the image focus.
• Clean the projector lens.
• Position the projector close enough to the screen, and directly in front of it.
• Position the projector so the keystone adjustment angle is not so wide that it distorts the image.
• Adjust the Sharpness setting to improve image quality.
• If you are projecting from a computer, use a lower resolution or adjust the computer's resolution to
match the projector's native resolution, if possible.
Parent topic: Solving Image or Sound Problems
Related references
Projector Setup and Installation Options
General Projector Specifications
Related tasks
Cleaning the Lens
Focusing the Image Using the Focus Lever
Correcting Image Shape with H/V Keystone
Correcting Image Shape with Quick Corner
Adjusting Image Sharpness
Solutions When the Image Brightness or Colors are Incorrect
If the projected image is too dark or light, or the colors are incorrect, try the following solutions:
• Try selecting a color mode that best fits the image and environment.

107
• Check your video source settings.
• Adjust the available settings on the Image menu, such as Brightness, Contrast, Tint, and/or Color
Saturation.
• Make sure you selected the correct Video Range setting in the Image menu, if available for your
image source.
• Make sure all the cables are securely connected to the projector and your video device. If you
connected long cables, try connecting shorter cables.
• Position the projector close enough to the screen.
Parent topic: Solving Image or Sound Problems
Related references
Image Quality Settings - Image Menu
Related tasks
Changing the Color Mode
Adjusting the Hue, Saturation, and Brightness
Adjusting the Color Temperature
Adjusting the RGB Offset and Gain
Adjusting Gamma
Solutions to Sound Problems
If there is no sound when you expect it or the volume is too low or high, try the following solutions:
• Adjust the projector's volume settings.
• Press the A/V mute button on the projector remote control to resume video and audio if they were
temporarily stopped.
• Check your computer or video source to make sure the volume is turned up and the audio output is set
for the correct source.
• Check the cable connection between the projector and your video source.
• If you do not hear sound from an HDMI source, set the connected device to PCM output.
• If you are using a Mac and you do not hear sound from an HDMI source, make sure your Mac
supports audio through the HDMI port. If not, you need to connect an audio cable.
• If you hear a hissing sound from your projector's speakers when projecting from a computer running
Windows 10 over a network, you may need to adjust the Windows 10 sound properties:
1. Right-click the speaker icon in the Windows taskbar and select Sounds.

108
2. Click the Playback tab, select the playback device, and click Properties.
3. Click the Advanced tab, set the sample rate and bit depth setting to 16 bit, 44100 Hz (CD Quality),
click Apply, and click OK.
Note: These steps may vary depending on the Windows 10 version you are using.
• If you turn the projector on immediately after turning it off, the cooling fans may run at high speed
momentarily and cause an unexpected noise. This is normal.
Parent topic: Solving Image or Sound Problems
Related tasks
Controlling the Volume with the Volume Buttons
Shutting Off the Picture and Sound Temporarily
Solving Projector or Remote Control Operation Problems
Check the solutions in these sections if you have problems operating the projector or remote control.
Solutions to Projector Power or Shut-Off Problems
Solutions to Remote Control Problems
Parent topic: Solving Problems
Solutions to Projector Power or Shut-Off Problems
If the projector does not come on when you press the power button or it shuts off unexpectedly, try the
following solutions:
• Make sure the power cord is securely connected to the projector and to a working electrical outlet.
• If the projector's laser shuts off and the Status light is orange, the projector has overheated and shut
off. Check the solutions for this light status.
• If the power button on the remote control does not turn on the projector, check its batteries.
• The power cord may be defective. Try another power cord. If that doesn't work, disconnect the cord
and contact Epson.
• The cooling fans may run in standby status depending on the projector settings. Also, when the
projector wakes from standby status, the fans may cause an unexpected noise. This is not a
malfunction.
Parent topic: Solving Projector or Remote Control Operation Problems

109
Related references
Projector Light Status
Where to Get Help (U.S. and Canada)
Where to Get Help (Latin America)
Related tasks
Replacing the Remote Control Batteries
Solutions to Remote Control Problems
If the projector does not respond to remote control commands, try the following solutions:
• Check that the remote control batteries are installed correctly and have power. If necessary, replace
the batteries.
• Make sure you are operating the remote control within the reception angle and range of the projector.
• Make sure the projector is not warming up or shutting down.
• Check to see if a button on the remote control is stuck down, causing it to enter sleep mode. Release
the button to wake the remote control up.
• Strong fluorescent lighting, direct sunlight, or infrared device signals may be interfering with the
projector's remote receivers. Dim the lights or move the projector away from the sun or interfering
equipment.
• If you lose the remote control, you can purchase another from an authorized Epson reseller.
Parent topic: Solving Projector or Remote Control Operation Problems
Related references
Projector Light Status
Where to Get Help (U.S. and Canada)
Where to Get Help (Latin America)
Related tasks
Replacing the Remote Control Batteries
Solutions to HDMI Link Problems
If you cannot control an HDMI device using the HDMI Link buttons, try the following solutions:
• Make sure all necessary cables are securely connected and the power is on for the projector and
connected video sources.
• Make sure the cables meet the HDMI CEC standard.

110
• Make sure the connected device meets the HDMI CEC standard. See the documentation supplied
with the device for more information.
• Make sure the HDMI Link setting is set to On.
• Check if the device is available in the Device Connections list in the Settings menu. If the device
does not appear, it does not meet the HDMI CEC standards. Connect a different device.
• Make sure the connected devices are turned on and in standby status. See the documentation
supplied with the device for more information.
• If you connected a new device or changed any connections, make sure the CEC function is set for the
connected device. You may need to restart the device.
• If you have connected a speaker or receiver, set the output to PCM.
Parent topic: Solving Problems
Related references
Projector Feature Settings - Settings Menu
Related tasks
Operating Connected Devices Using the HDMI Link Features
Solutions When You Cannot Connect Using Screen Mirroring
If you are unable to connect to the projector using Screen Mirroring, try the following solutions:
• Select On as the Screen Mirroring setting in the projector's Network menu.
• Make sure the Display Name in the screen mirroring settings does not include "-" or it may not display
correctly on your mobile device.
• Make sure the Operation Mode and Channel settings are correct for your mobile environment and try
connecting again.
• Select Off as the Interrupt Connection setting in the Extended menu.
• Change the Channel setting depending on your network environment.
• Make sure the mobile device settings are correct.
• You may not be able to connect immediately after disconnecting from the projector. Wait a while and
try connecting again.
• Restart the mobile device.
• If you have previously connected to the projector using Screen Mirroring, the device may have saved
the previous connection information. Delete the saved information and connect to the projector from
the list of available devices.

111
Parent topic: Solving Problems
Related references
Screen Mirroring Restrictions
Related tasks
Selecting Screen Mirroring Settings
Connecting for Screen Mirroring with Miracast
Connecting for Screen Mirroring with a Windows 8.x/Windows 10 Computer
Solutions When the Image or Sound Contains Static During Screen
Mirroring
If the projected image or sound contains static during Screen Mirroring, try the following solutions:
• Avoid covering the Wi-Fi antenna of the mobile device.
• If you use a Screen Mirroring connection and an internet connection at the same time, the image may
stop or contain noise. Disconnect the internet connection to expand your wireless bandwidth and
improve the connection speed of the mobile device.
• Make sure the projection contents meet the Screen Mirroring requirements.
• Depending on the settings of the mobile device, the connection may be lost when the device enters
power saving mode. Check the electrical power saving settings on the mobile device.
• Update to the latest version of the wireless driver or firmware on the mobile device.
Parent topic: Solving Problems
Related references
Screen Mirroring Restrictions
Related tasks
Selecting Screen Mirroring Settings
Where to Get Help (U.S. and Canada)
If you need to contact Epson for technical support services, use the following support options.
Internet Support
Visit Epson's support website at epson.com/support (U.S.), epson.ca/support (Canada), or
latin.epson.com/support (Caribbean) and select your product for solutions to common problems with

112
your projector. You can download utilities and documentation, get FAQs and troubleshooting advice, or
e-mail Epson with your questions.
Speak to a Support Representative
To use the Epson PrivateLine Support service, call (800) 637-7661. This service is available for the
duration of your warranty period. You may also speak with a projector support specialist by dialing (562)
276-4394 (U.S.) or (905) 709-3839 (Canada).
Support hours are 6 AM to 8 PM, Pacific Time, Monday through Friday and 7 AM to 4 PM, Pacific Time,
Saturday.
Days and hours of support are subject to change without notice. Toll or long distance charges may
apply.
Before you call, have the following information ready:
• Product name
• Product serial number (located on the bottom or rear of the projector, or in the menu system)
• Proof of purchase (such as a store receipt) and date of purchase
• Computer or video configuration
• Description of the problem
Purchase Supplies and Accessories
You can purchase screens, other optional accessories, and replacement parts from an Epson authorized
reseller. To find the nearest reseller, call 800-GO-EPSON (800-463-7766) in the U.S. or 800-807-7766 in
Canada. Or you can purchase online at epsonstore.com (U.S. sales) or epsonstore.ca (Canadian sales).
To purchase a replacement remote control, call (562) 276-4394 (U.S.) or (905) 709-3839 (for dealer
referral in Canada).
Parent topic: Solving Problems
Where to Get Help (Latin America)
If you need to contact Epson for technical support services, use the following support options.
Internet Support
Visit Epson's support website at latin.epson.com/support and select your product for solutions to
common problems. You can download utilities and documentation, get FAQs and troubleshooting
advice, or e-mail Epson with your questions.

113
Speak to a Support Representative
Before you call for support, please have the following information ready:
• Product name
• Product serial number (located on the bottom or rear of the projector, or in menu system)
• Proof of purchase (such as a store receipt) and date of purchase
• Computer or video configuration
• Description of the problem
Then call:
Country Telephone
Argentina (54 11) 5167-0300
0800-288-37766
Bolivia* 800-100-116
Brazil State capitals and metropolitan areas: 3004-6627
Other areas: 0800-377-6627 / 0800-EPSONBR
Chile (56 2) 2484-3400
Colombia Bogota: (57 1) 592-2200
Other cities: 018000-915235
Costa Rica 800-377-6627
Dominican Republic* 1-888-760-0068
Ecuador* 1-800-000-044
El Salvador* 800-6570
Guatemala* 1-800-835-0358
Mexico Mexico City: (52 55) 1323-2052
Other cities: 01-800-087-1080
Nicaragua* 00-1-800-226-0368
Panama* 00-800-052-1376
Paraguay 009-800-521-0019

114
Country Telephone
Peru Lima: (51 1) 418-0210
Other cities: 0800-10-126
Uruguay 00040-5210067
Venezuela (58 212) 240-1111
*Contact your local phone company to call this toll-free number from a mobile phone.
Note: Toll or long distance charges may apply. If your country does not appear on the list, contact the
sales office in the nearest country.
Purchase Supplies and Accessories
You can purchase optional accessories and replacement parts from an Epson authorized reseller. To
find the nearest reseller, go to latin.epson.com. Or you can contact your nearest sales office as
described in "Where to Get Help."
Parent topic: Solving Problems

115
Technical Specifications
These sections list the technical specifications of your projector.
General Projector Specifications
Projector Light Source Specifications
Remote Control Specifications
Projector Dimension Specifications
Projector Electrical Specifications
Projector Environmental Specifications
Projector Safety and Approvals Specifications
Safety and Approvals Specifications for Latin America
Supported Video Display Formats
General Projector Specifications
Type of display Poly-silicon TFT active matrix
Resolution 1920 × 1080 pixels (Full HD)
Lens F=2.0
Focal length: 13.9 mm
Color reproduction Up to 16.77 billion colors
Brightness Normal light source mode:
White light output 1000 lumens (ISO 21118 standard)
Color light output 1000 lumens
ECO light source mode:
White light output 500 lumens (ISO 21118 standard)
Note: Color brightness (color light output) and white brightness
(white light output) will vary depending on usage conditions. Color
light output measured in accordance with IDMS 15.4; white light
output measured in accordance with ISO 21118.
Contrast ratio 200,000 with Dynamic Color Mode and Normal light source mode

116
Image size
(in native aspect ratio)
Zoom (Wide): 30 inches (0.8 m) to 150 inches (3.8 m)
Zoom (Tele): 20 inches (0.5 m) to 114 inches (2.9 m)
Projection distance
(in native aspect ratio)
30" screen: 26 inches (0.66 m)
150" screen: 133 inches (3.37 m)
Projection methods Front, Front/Upside Down, Rear, Rear/Upside Down
Optical aspect ratio
(width-to-height)
16:9
Focus adjustment Manual
Internal sound system 1.5 W (2-way mono)
Fan noise level 27 dB (Normal power consumption)
22 dB (ECO power consumption)
USB Type A port compatibility One USB 2.0 compliant port for PC Free or firmware updates, or 5 V
(2 A) power supply
USB Type mini-B port
compatibility
One USB 2.0 compliant port for service
Parent topic: Technical Specifications
Projector Light Source Specifications
Type Laser diode
Light source output power Up to 22.5 W
Wavelength 449 to 461 nm
Light source life
(approximate)
Normal Light Source Mode:
Up to about 20000 hours
Quiet Light Source Mode:
Up to about 20000 hours
Note: Turn off this product when not in use to prolong the life of the projector. Laser life will vary
depending upon mode selected, environmental conditions, and usage. Brightness decreases over time.

117
Parent topic: Technical Specifications
Remote Control Specifications
Reception range 16.4 feet (5 m)
Batteries Two alkaline or manganese AAA
Parent topic: Technical Specifications
Projector Dimension Specifications
Height (excluding feet) 2.3 inches (58 mm)
Width 6.9 inches (175 mm)
Depth 6.9 inches (175 mm)
Weight Approx. 2.7 lb (1.2 kg)
(not including raised section)
Parent topic: Technical Specifications
Projector Electrical Specifications
Rated frequency 50/60 Hz
Power supply 100 to 240 V AC ±10%
24 V, 4.1 A
Power consumption
(100 to 120 V)
Operating:
Normal/Custom Power Consumption mode: 102 W
ECO Power Consumption mode: 73 W
Standby: 0.5 W
Power consumption
(220 to 240 V)
Operating:
Normal/Custom Power Consumption mode: 102 W
ECO Power Consumption mode: 73 W
Standby: 0.5 W

118
Parent topic: Technical Specifications
Projector Environmental Specifications
Temperature Operating:
Up to 7500 feet (2286 m): 41 to 95 °F (5 to 35 °C)
7500 feet (2286 m) to 9843 feet (3000 m): 41 to 86 °F (5 to 30 °C)
Storage: 14 to 140 °F (–10 to 60 °C)
Humidity (relative, non-
condensing)
Operating: 20 to 80%
Storage: 10 to 90%
Operating altitude Up to 9843 feet (3000 m)
Parent topic: Technical Specifications
Projector Safety and Approvals Specifications
United States FCC Part 15B Class B (DoC)
UL60950-1 2nd edition (cTUVus Mark)
Canada ICES-003 Class B
CSA C22.2 No. 60950-1-07 / CSA C22.2 No. 60950-1-14
Parent topic: Technical Specifications
Safety and Approvals Specifications for Latin America
Notice for Argentina
WLAN Module: WLU5000-D101(RoHS)
Brand: EPSON
CNC ID: C-16265

119
Notice for Mexico
Operation is subject to the following two conditions: (1) this device may not cause harmful interference,
and (2) this device must accept any interference received, including interference that may cause
undesired operation of the device.
Product Model: EF11
WLAN Module Model: WLU5000-D101(RoHS)
Brand: EPSON
IFT Certification Number: RCPEPWL16-0829
Notice for Paraguay
Imported by:
Fastrax, S.A.
Av. Perú esq. Río de Janeiro, Barrios Las Mercedes, Asunción, Paraguay
Imported by:
Sol Control S.R.L.
Av. Gral. Bernardino Caballero 810 esq. Celsa Speratti, Asunción, Paraguay
Notice for Peru
Product Model: EF11
Brand: EPSON
This product uses the following WLAN module:
WLAN Module Model: WLU5000-D101(RoHS)
FCC ID: BKMAE-WLU5000
Product Manufacturer: Seiko Epson Corporation
Address: 3-3-5 Owa Suwa-shi, Nagano-Ken 392-8502, Japan
Parent topic: Technical Specifications
Supported Video Display Formats
For best results, your computer's monitor port or video card resolution should be set to display in the
projector's native resolution. However, your projector includes Epson's SizeWise chip that supports other
computer display resolutions, so your image will be resized to fit automatically.
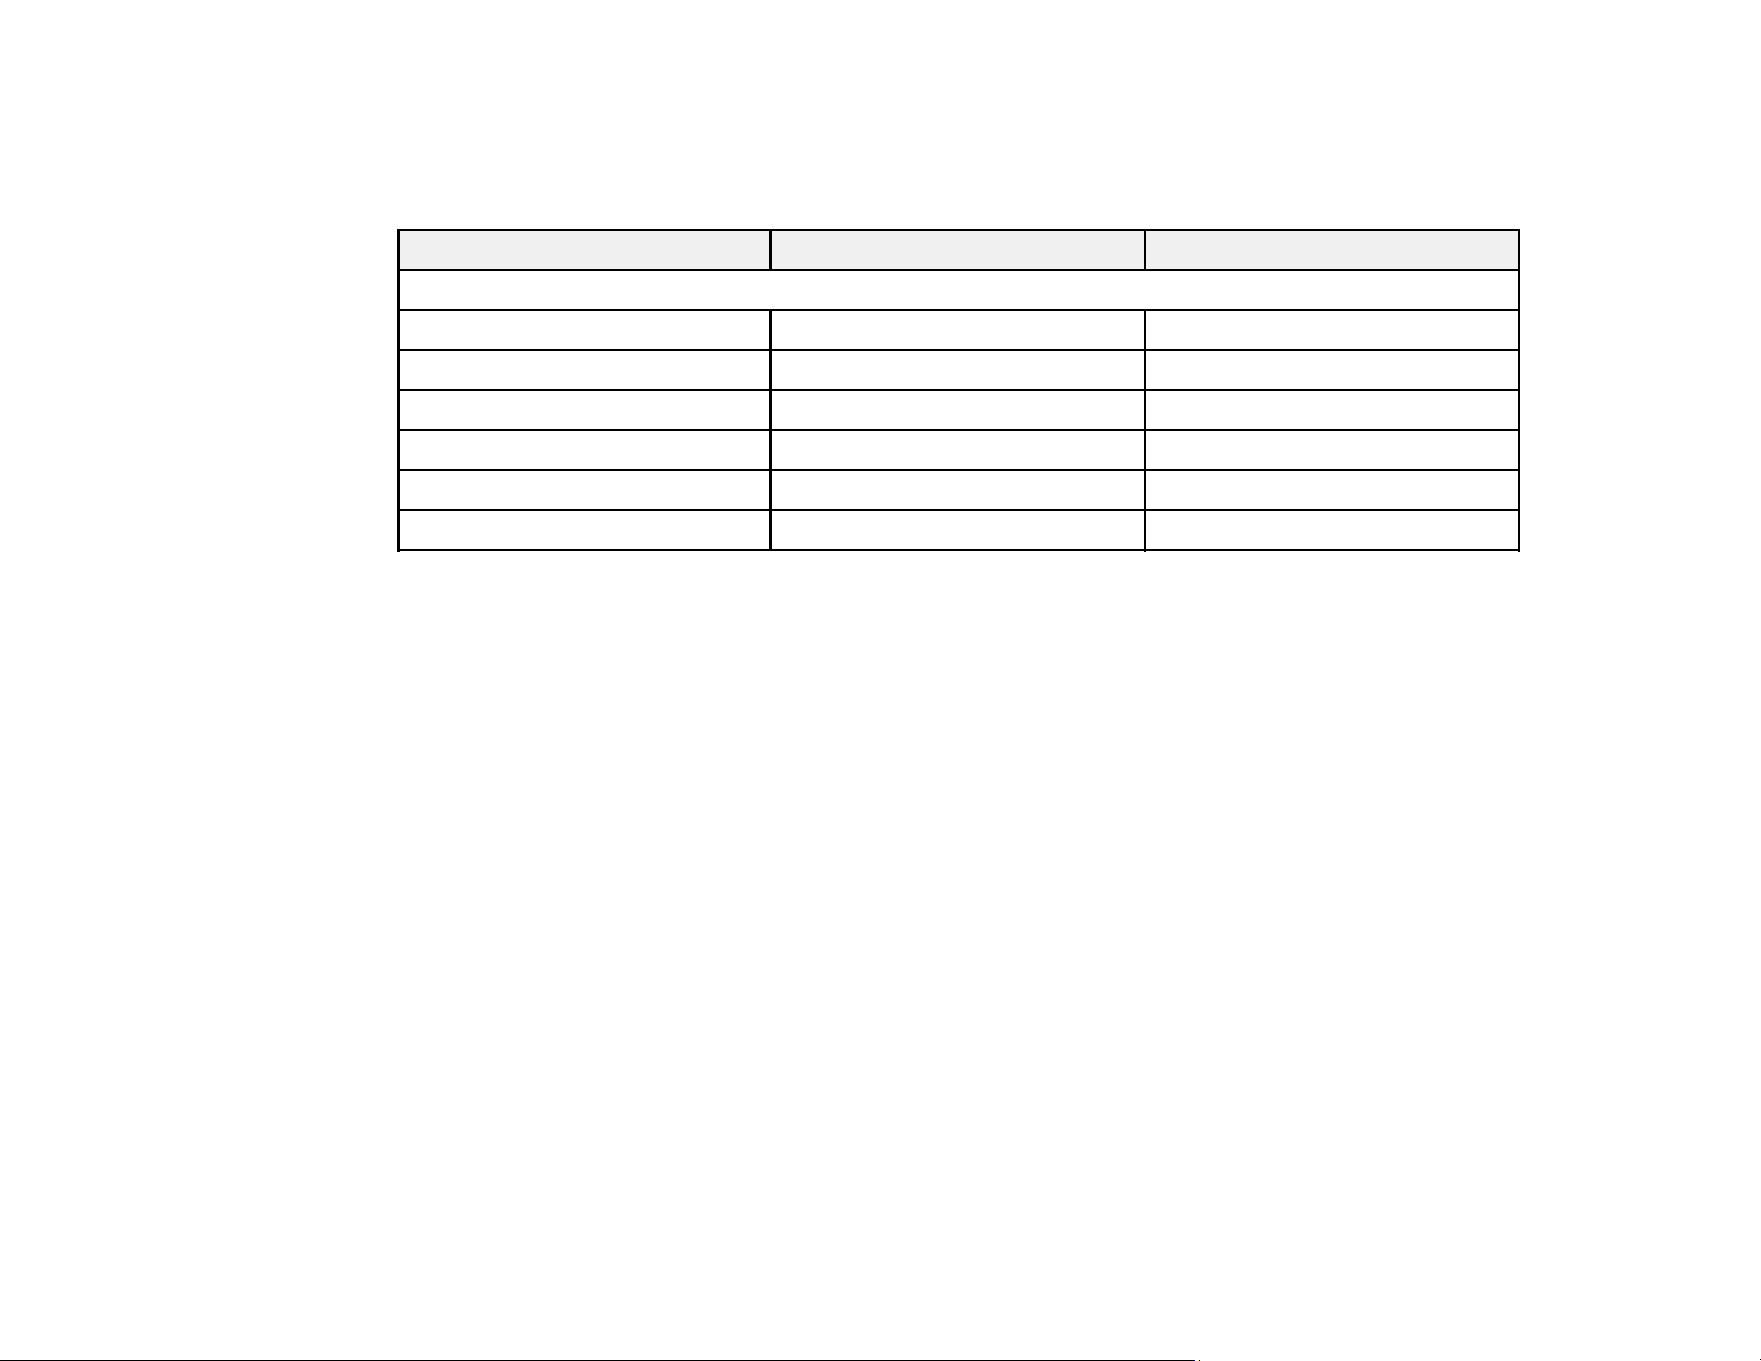
120
Your computer's monitor port or video card refresh rate (vertical frequency) must be compatible with the
projector. (See your computer or video card manual for details.)
The table here lists the compatible refresh rate and resolution for each compatible video display format.
Display format Refresh rate (in Hz) Resolution (in pixels)
HDMI Input Signals
VGA60 60 640 × 480
SDTV (480i/480p) 59.94 720 × 480
SDTV (576i/576p) 50 720 × 576
HDTV (720p) 50/59.94/60 1280 × 720
HDTV (1080i) 50/59.94/60 1920 × 1080
HDTV (1080p) 23.98/24/29.97/30/50/59.94/60 1920 × 1080
Parent topic: Technical Specifications

121
Notices
Check these sections for important notices about your projector.
Recycling (U.S. and Canada)
Important Safety Information
Laser Safety Information
Important Safety Instructions
List of Safety Symbols
FCC Compliance Statement
Binding Arbitration and Class Waiver
Trademarks
Copyright Notice
Recycling (U.S. and Canada)
Epson offers a recycling program for end of life products. Please go to this site for information on how to
return your products for proper disposal.
Parent topic: Notices
Important Safety Information
Caution: Never look into the projector lens when the light source is on. This can damage your eyes and
is especially dangerous for children. Before cleaning any part of the projector, turn it off and unplug the
power cord. Never open any cover on the projector, except as specifically explained in this manual.
Dangerous electrical voltages in the projector can injure you severely. Except as specifically explained in
this User's Guide, do not attempt to service this product yourself. Refer all servicing to qualified service
personnel.
Warning: The projector and its accessories come packaged in plastic bags. Keep plastic bags away
from small children to avoid any risk of suffocation.
Parent topic: Notices

122
Laser Safety Information
This projector is a Class 1 laser product that complies with the IEC/EN60825-1:2014 international
standard for lasers. Follow these safety instructions when using the projector.
Warning: Possibly hazardous optical radiation emitted from this product. Do not look at operating light
source. Eye injury may result.
• If an error occurs in the projector, turn off the power and unplug the projector immediately. Continuing
to use the projector could result in an electric shock, fire, or visual impairment. Contact Epson support.
• Do not attempt to disassemble or modify the projector. The projector contains a high-power laser
component. Serious injury could result.
• Do not look into the lens during projection. Also, do not look into the lens using optical devices, such
as a magnifying glass or telescope. This could cause visual impairment.
• As with any bright source, do not stare into the beam, RG2 IEC/EN 62471-5:2015.
• When turning on the projector at a distance using the remote control, make sure no one is looking into
the lens.
• Do not allow small children to operate the projector. Children must be accompanied by an adult.
• Do not apply optical devices, such as a magnifying glass or reflector, to the projected image. Using the
projector may result in physical harm, fire, or an accident.
• Before using the projector, make sure there is nothing in the area that could reflect the projected
image.
• When disposing of the projector, do not disassemble it. Dispose of the projector in accordance with
your local or national laws and regulations.
Complies with FDA performance standards for laser products except for conformance as a Risk Group 2
LIP as defined in IEC 62471-5: Ed. 1.0. For more information see Laser Notice No. 57, dated May 8,
2019.

123
Laser warning labels are attached to the projector.
• Inside
• Base
WARNING: Never open any covers on the projector except as specifically explained in the projector
manual. Dangerous electrical voltages inside the projector can severely injure you.
• Side
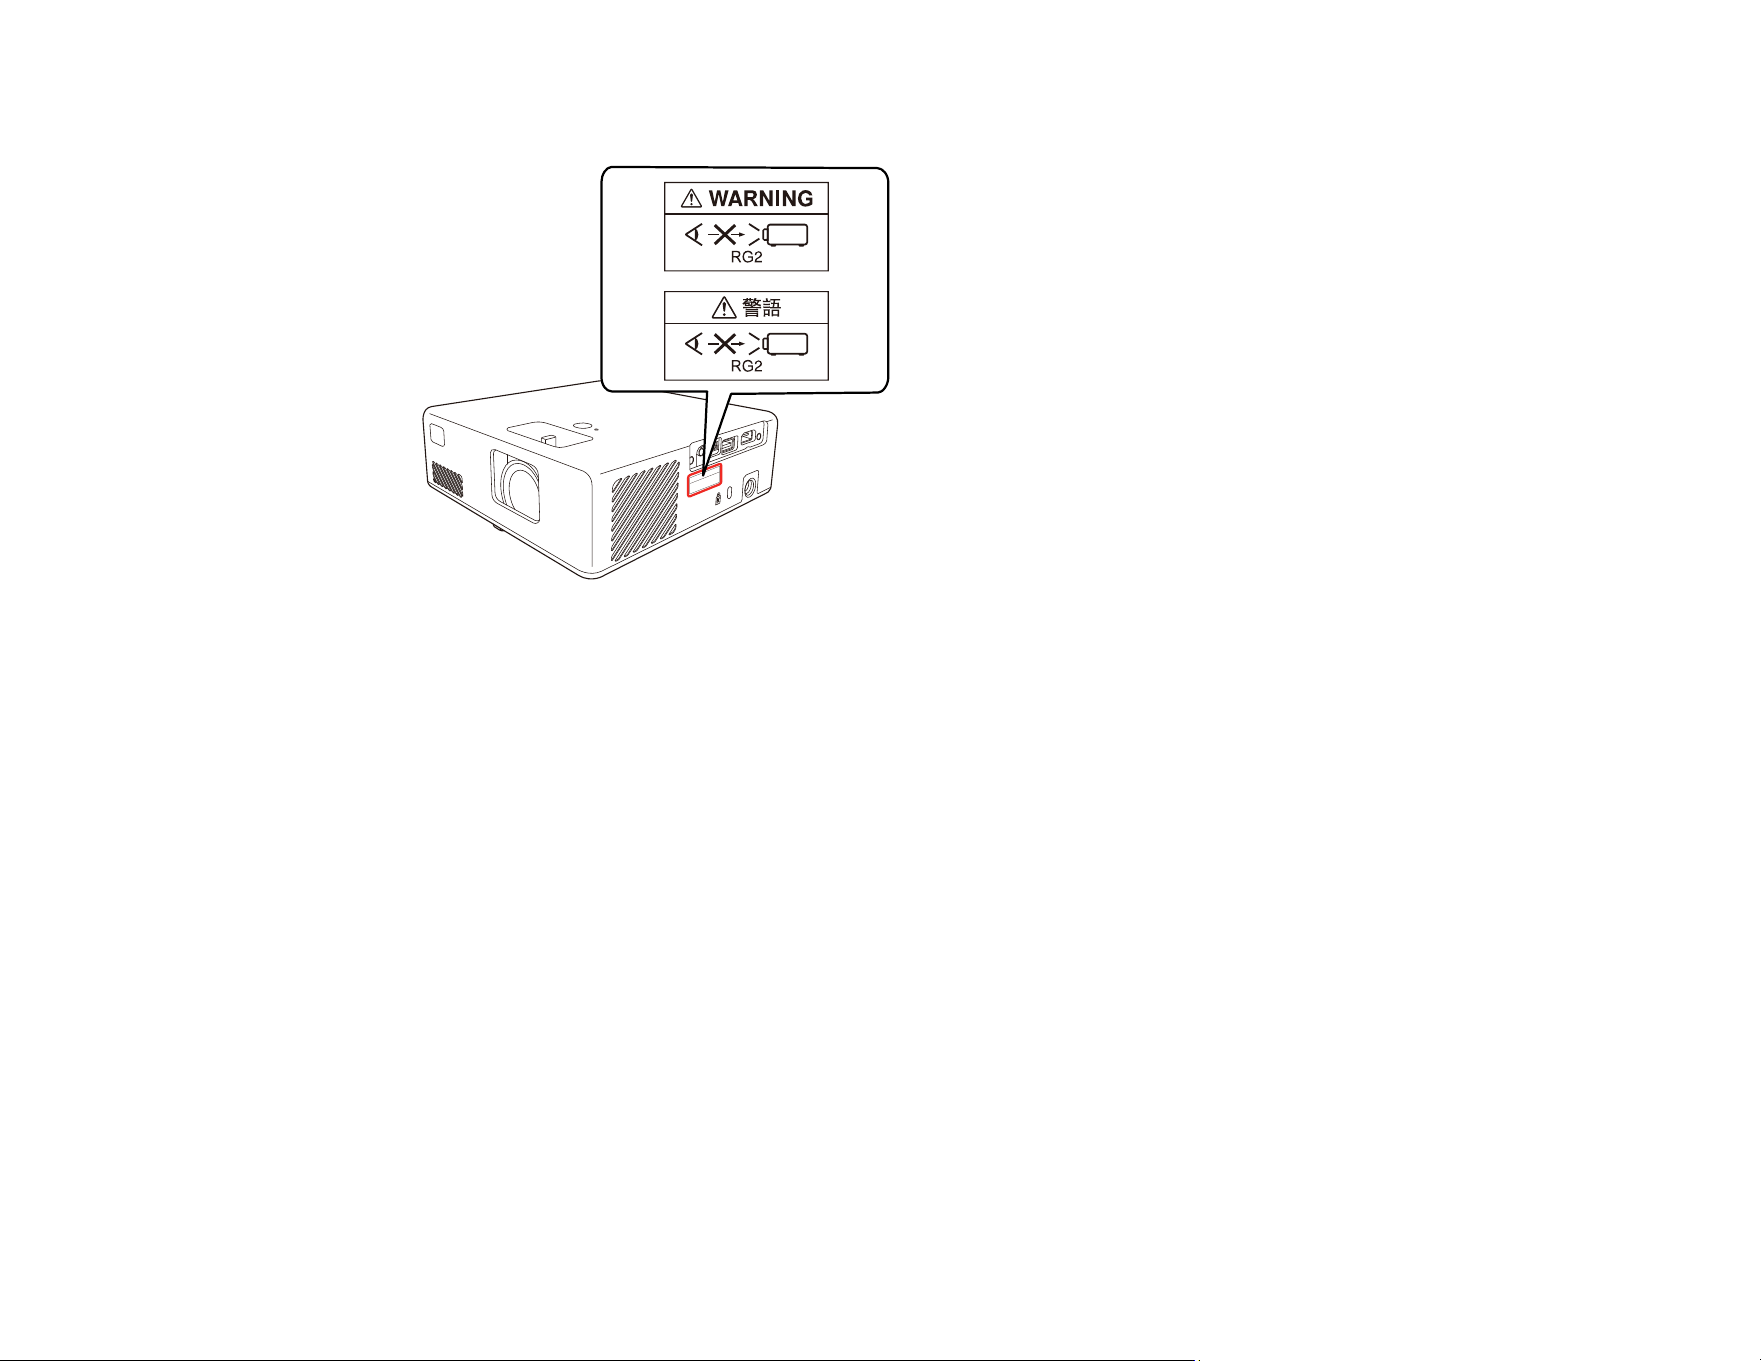
124
As with any bright source, do not stare into the beam (RG2 IEC/EN 62471-5:2015).
Parent topic: Notices
Important Safety Instructions
Follow these safety instructions when setting up and using the projector:
• Do not look into the lens when the projector is on. The bright light can damage your eyes. Avoid
standing in front of the projector so the bright light does not shine into your eyes.
• When turning on the projector at a distance using the remote control, make sure there is no one
looking into the lens.
• Do not place the projector on an unstable cart, stand, or table.
• Do not install in locations where salt damage could occur, or in locations subject to corrosive gas such
as sulphuric gas from hot springs. Otherwise, corrosion could cause the projector to fall. It could also
cause the projector to malfunction.
• When installing the projector in a high position, take measures to prevent it from falling by using wires
to ensure safety in an emergency, such as an earthquake, and to prevent accidents. If the projector is
not installed correctly, the projector could fall. This may result in injury or accidents. Contact your
dealer to carry out the installation work.
• When installing or adjusting a ceiling or wall mount, do not use adhesives to prevent the screws from
loosening and do not use oils or lubricants. This may cause the projector case to crack and the

125
projector to fall from its ceiling mount. This could cause serious injury to anyone under the mount and
could damage the projector.
• Failure to install the mount plate, mounting hardware, and projector may cause the projector to fall.
After installing the projector onto VESA compliant (75 × 75mm) mounting hardware using the optional
or supplied mount plate (ELPMB65), make sure you secure the mounting hardware to all of the
projector's mount plate fixing points. Also, secure the projector and the mounting hardware using wire
that is strong enough to hold their weight.
• Do not install the projector in locations exposed to high humidity and dust, such as on a kitchen
counter, in the kitchen, or near a humidifier, or in locations exposed to oil smoke or steam. Doing so
could cause fire or electric shock.
Examples of environments that could cause the projector to fall due to case deterioration:
• Locations subject to excessive smoke or airborne oil particles, such as factories or kitchens
• Locations containing volatile solvents or chemicals, such as factories or laboratories
• Locations where the projector could be subjected to detergents or chemicals, such as factories or
kitchens
• Locations in which aroma oils are often used, such as relaxation rooms
• Near devices that produce excessive smoke, airborne oil particles, or foam at events
• Do not use the projector near water, sources of heat, high-voltage electrical wires, or sources of
magnetic fields.
• Use the type of power source indicated on the projector. Use of a different power source may result in
fire or electric shock. If you are not sure of the power available, consult your dealer or power company.
• Place the projector near a wall outlet where the plug can be easily unplugged.
• Take the following precautions when handling the plug: Do not hold the plug with wet hands. Do not
insert the plug into a dusty outlet. Insert the plug firmly into the outlet. Do not pull the power cord when
disconnecting the plug; always be sure to hold the plug when disconnecting it. Do not overload wall
outlets, extension cords, or power strips. Failure to comply with these precautions could result in fire or
electric shock.
• Do not place the projector where the cord can be walked on. This may result in fraying or damage to
the plug.
• Unplug the projector from the wall outlet and allow to cool before cleaning. Use a dry cloth (or, for
stubborn dirt or stains, a moist cloth that has been wrung dry) for cleaning. Do not use liquid or aerosol
cleaners, any sprays containing flammable gas, or solvents such as alcohol, paint thinner, or benzine.
• Do not block the slots and openings in the projector case. They provide ventilation and prevent the
projector from overheating. If the vents are covered, the internal temperature could rise and cause a

126
fire. Do not place the projector in locations subject to high temperatures, such as near heating
equipment. Do not operate the projector on a sofa, rug, or other soft surface, or set it on top of loose
papers. Do not cover the projector with a blanket, curtain, or tablecloth. If you are setting up the
projector near a wall, leave at least of space between the wall and the projector.
• Do not operate the projector in a closed-in cabinet unless proper ventilation is provided.
• Never allow objects of any kind to enter any openings in the projector. Do not leave objects, especially
flammable objects, near the projector. Never spill liquid of any kind into the projector.
• You may need to clean the air filter and vent. A clogged air filter or vent can block ventilation needed
to cool the projector. Do not use canned air, or the gases may leave a residue.
• Do not store the projector outdoors for an extended length of time.
• Except as specifically explained in this manual, do not attempt to service this product yourself. Refer
all servicing to qualified personnel. Opening or removing covers may expose you to dangerous
voltages and other hazards.
• Never open any covers on the projector except as specifically explained in this manual. Never attempt
to disassemble or modify the projector. Refer all repairs to qualified service personnel.
• Unplug the projector from the wall outlet and refer servicing to qualified service personnel under the
following conditions: if it does not operate normally when you follow the operating instructions, or
exhibits a distinct change in performance; if smoke, strange odors, or strange noises come from the
projector; if the power cord or plug is damaged or frayed; if liquid or foreign objects get inside the
projector, or if it has been exposed to rain or water; if it has been dropped or the housing has been
damaged.
• Do not touch the plug during an electrical storm. Otherwise, you may receive an electric shock.
• Unplug the projector when it will not be used for extended periods.
• Do not use the projector where it may be exposed to rain, water, or excessive humidity.
• Do not use or store the projector where it may be exposed to smoke, steam, corrosive gases,
excessive dust, vibration, or shock.
• Do not use the projector where flammable or explosive gases may be present.
• Do not use or store the projector or remote control in a hot location, such as near a heater, in direct
sunlight, or in a closed vehicle.
• If you use the projector in a country other than where you purchased it, use the correct power cord for
that country.
• Do not stand on the projector or place heavy objects on it.
• Do not use the projector outside of the required temperature range below:

127
41 to 95 °F (5 to 35 °C) at an altitude of 7500 feet (2286 m) or less, or 41 to 86 °F (5 to 30 °C) at a
higher altitude
Doing so may cause an unstable display and could lead to projector damage. Do not use or store the
projector where it may be exposed to sudden changes in temperature.
• Do not store the projector outside of the required temperature range of 14 to 140 °F (–10 to 60 °C) or
in direct sunlight for long periods of time. Doing so may cause damage to the case.
• Do not place anything that can become warped or damaged by heat near the exhaust vents. Do not
bring your hands or face close to the vents while projection is in progress. Do not bring your face close
to the projector while it is in use.
• Before you move the projector, make sure its power is turned off, the plug is disconnected from the
outlet, and all cables are disconnected.
• Do not place the source of an open flame, such as a lit candle, on or near the projector.
• During projection, do not block the light from the projector with a book or other objects. If the light from
the projector is blocked, the area on which the light shines becomes hot which could cause it to melt,
burn, or start a fire. Also, the lens may get hot due to the reflected light which could cause the
projector to malfunction. To stop projection, use the A/V Mute function, or turn off the projector.
• Do not modify the power cord. Do not place heavy objects on top of the power cord or bend, twist, or
pull it excessively. Keep the power cord away from hot electrical appliances.
• Always lower the volume before turning off the projector. Turning on the projector with the volume too
high can damage your ears.
• Incorrect battery usage may cause leakage of battery fluid and battery rupture, which could result in
fire, injury, or corrosion. When replacing batteries, take the following precautions: insert batteries so
that the polarities are correct; do not use batteries of different types or mix old and new batteries; do
not use any batteries other than those specified; if batteries leak, wipe away battery fluid with a soft
cloth; if battery fluid gets on your hands, wash them immediately; replace the batteries as soon as they
run out; remove the batteries if you will not be using the projector for a long period of time; do not
expose batteries to heat or flame and do not put them in water; dispose of used batteries according to
local regulations; keep batteries out of the reach of children. Batteries are choking hazards and are
very dangerous if swallowed.
• Under the following conditions, unplug the projector from the outlet and refer all repairs to qualified
service personnel. Continuing to use the projector under these conditions may result in fire or electric
shock.
• If smoke is coming from the AC adapter
• If strange odors or noises come from the AC adapter
• If the AC adapter has been damaged

128
• If liquid or foreign objects get inside the AC adapter
• Incorrect use of the AC adapter may cause malfunction, fire, or electric shock. Take the following
precautions when using the AC adapter:
• Do not use any AC adapter other than the one supplied with the projector.
• The supplied AC adapter is designed specifically for this projector model. Do not use it with any
other models.
• Do not apply strong pressure or shocks to the AC adapter.
• Do not hold the AC adapter with wet hands.
• Do not install the AC adapter in a narrow space and do not cover it with cloth.
• Do not touch the AC adapter for a long time while it is energized. It may cause a low-temperature
burn.
• Do not spray flammable gas such as insecticide on the AC adapter.
• Do not put the AC adapter in a high-pressure container or a cooking appliance such as a microwave
oven.
• Do not place the AC adapter near the projector's air exhaust vent.
• Do not wind the power cord around the AC adapter.
Restriction of Use
Parent topic: Notices
Restriction of Use
When this product is used for applications requiring high reliability/safety such as transportation devices
related to aviation, rail, marine, automotive; disaster prevention devices; various safety devices; or
functional/precision devices, you should use this product only after giving consideration to including fail-
safes and redundancies into your design to maintain safety and total system reliability.
Because this product was not intended for use in applications requiring extremely high reliability/safety
such as aerospace equipment, main communication equipment, nuclear power control equipment, or
medical equipment related to direct medical care, please make your own judgment on this product's
suitability after a full evaluation.
Parent topic: Important Safety Instructions
List of Safety Symbols
The following table lists the meaning of the safety symbols labeled on the equipment.
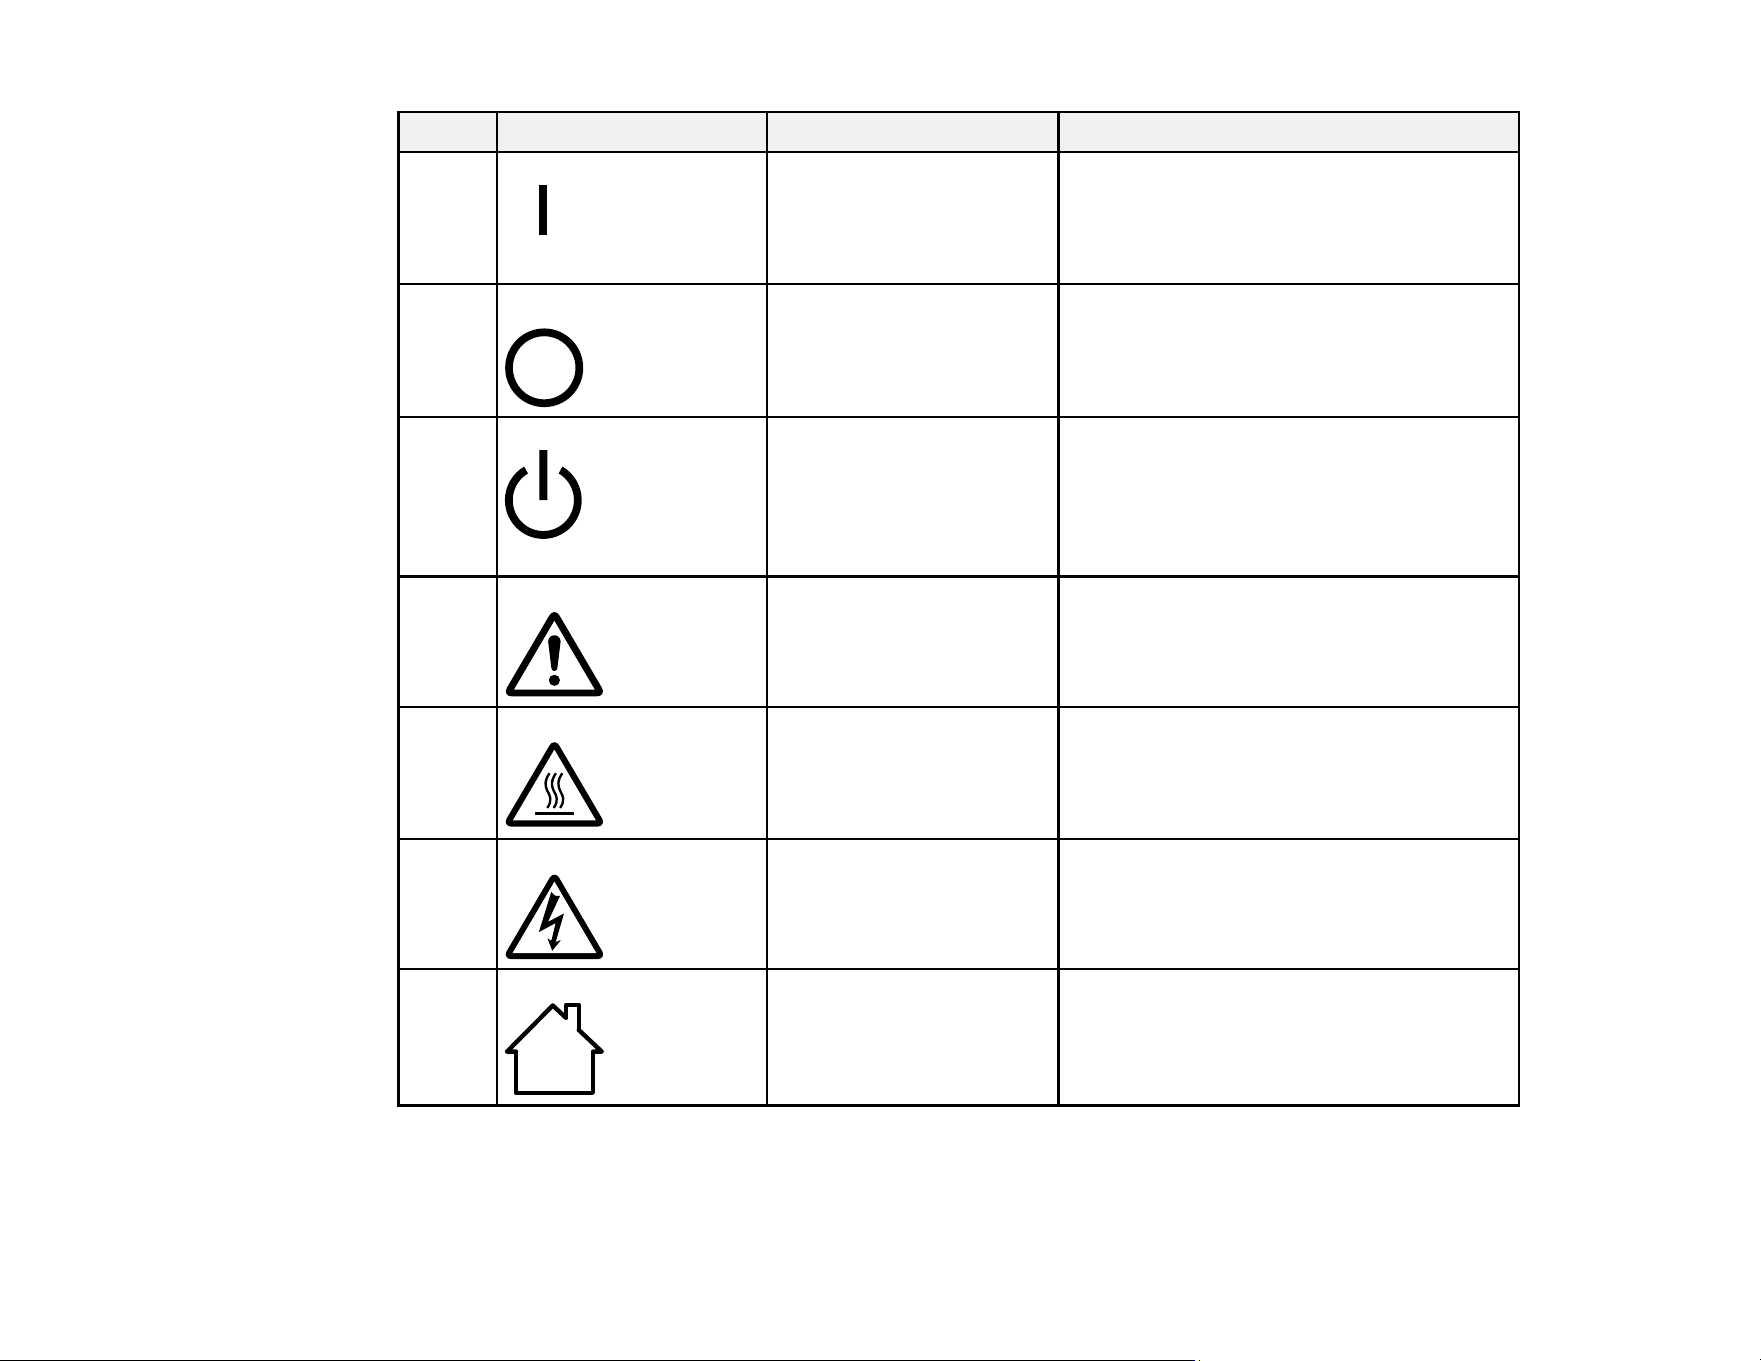
129
No. Symbol Approved Standards Description
1 IEC60417
No.5007
"ON" (power)
To indicate connection to the mains.
2 IEC60417
No.5008
"OFF" (power)
To indicate disconnection from the
mains.
3 IEC60417
No.5009
Stand-by
To identify the switch or switch position
by means of which part of the equipment
is switched on in order to bring it into the
stand-by condition.
4 ISO7000
No.0434B,
IEC3864-B3.1
Caution
To identify general caution when using
the product.
5 IEC60417
No.5041
Caution, hot surface
To indicate that the marked item can be
hot and should not be touched without
taking care.
6 IEC60417
No.6042
ISO3864-B3.6
Caution, risk of electric shock
To identify equipment that has risk of
electric shock.
7 IEC60417
No.5957
For indoor use only
To identify electrical equipment designed
primarily for indoor use.
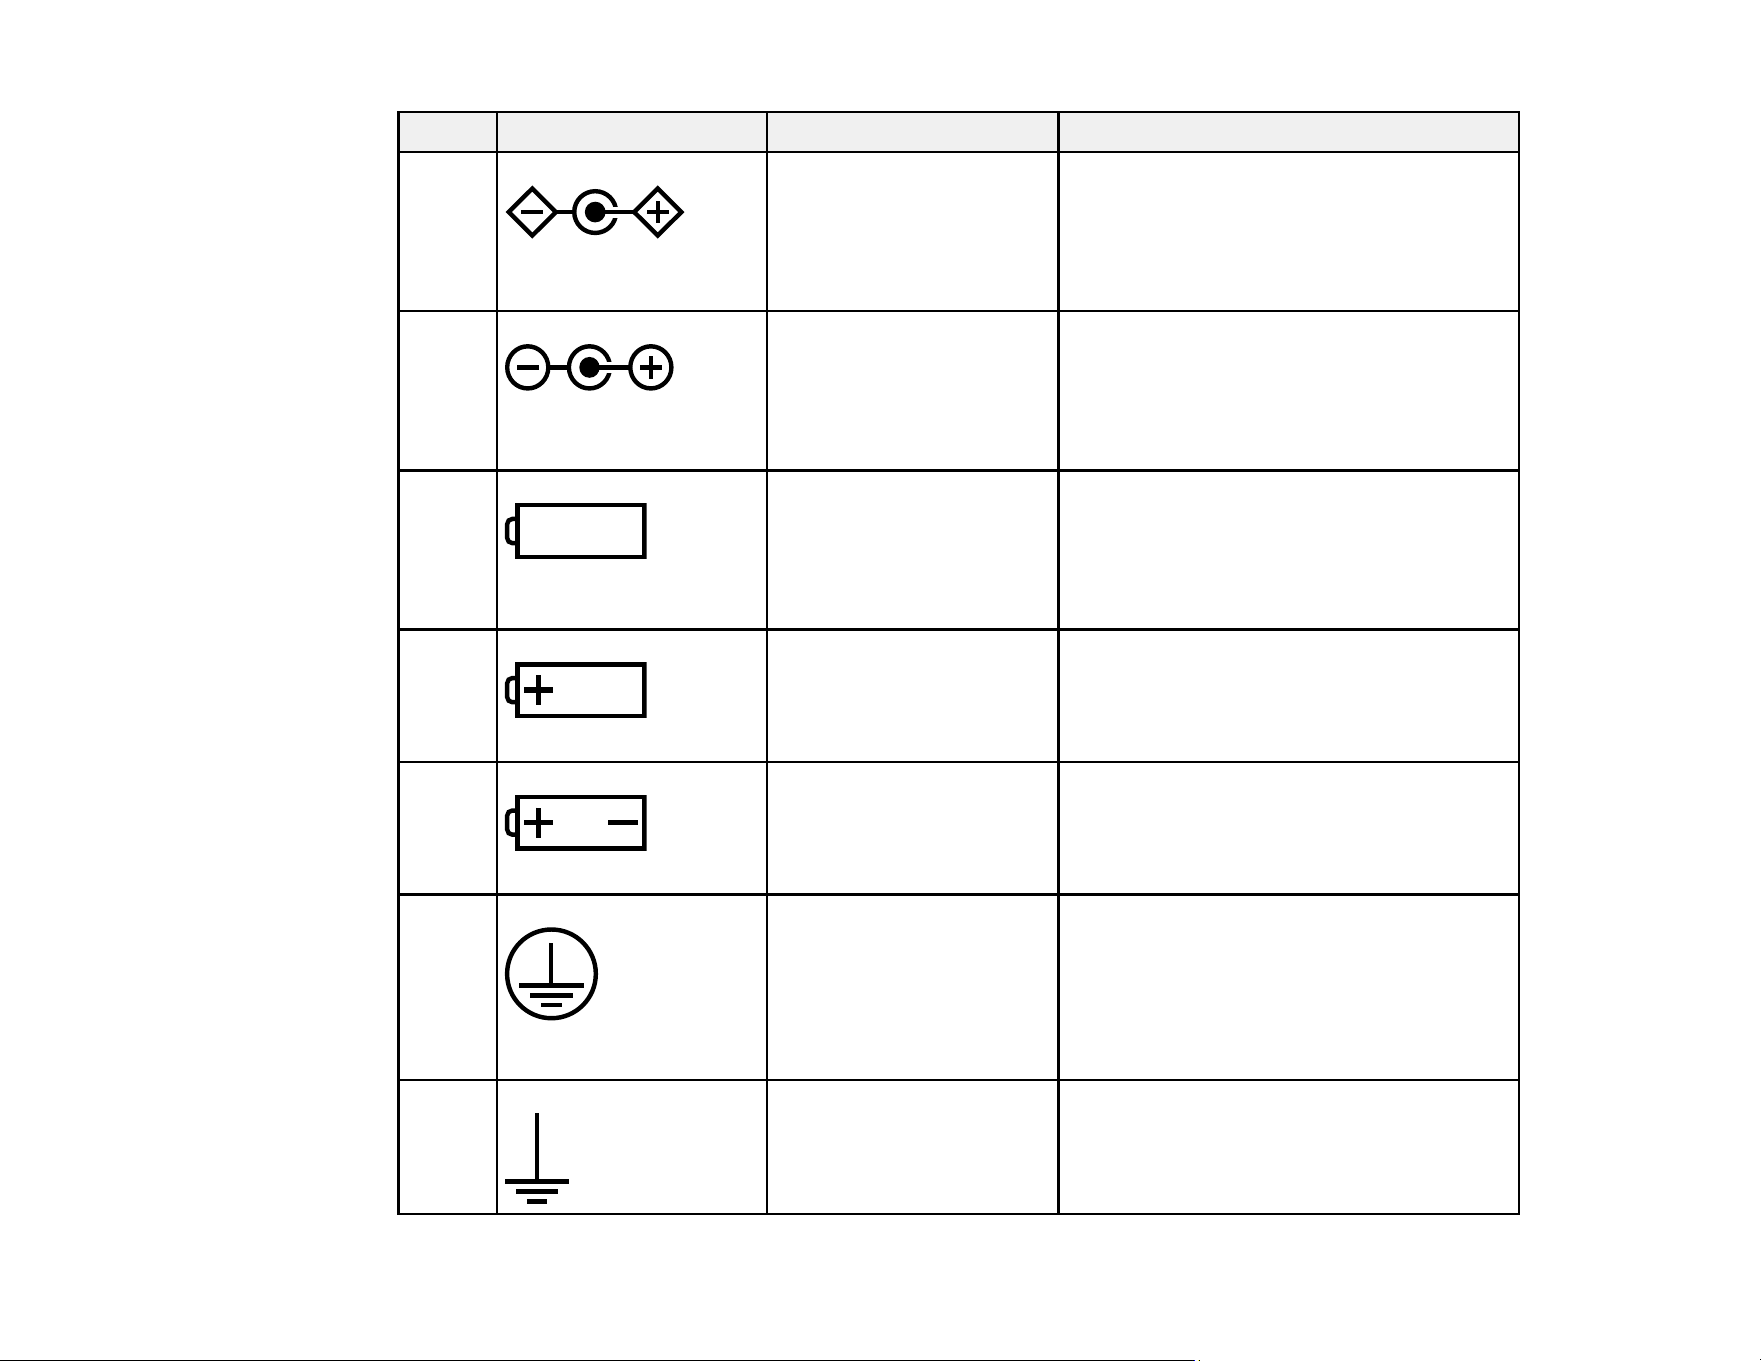
130
No. Symbol Approved Standards Description
8 IEC60417
No.5926
Polarity of DC power connector
To identify the positive and negative
connections (the polarity) on a piece of
equipment to which a DC power supply
may be connected.
9 — Polarity of DC power connector
To identify the positive and negative
connections (the polarity) on a piece of
equipment to which a DC power supply
may be connected.
10 IEC60417
No.5001B
Battery, general
On battery powered equipment. To
identify a device for instance a cover for
the battery compartment, or the
connector terminals.
11 IEC60417
No.5002
Positioning of cell
To identify the battery holder itself and to
identify the positioning of the cell(s)
inside the battery holder.
12 — Positioning of cell
To identify the battery holder itself and to
identify the positioning of the cell(s)
inside the battery holder.
13 IEC60417
No.5019
Protective earth
To identify any terminal which is intended
for connection to an external conductor
for protection against electric shock in
case of a fault, or the terminal of a
protective earth electrode.
14 IEC60417
No.5017
Earth
To identify an earth (ground) terminal in
cases where neither the symbol No.13 is
explicitly required.
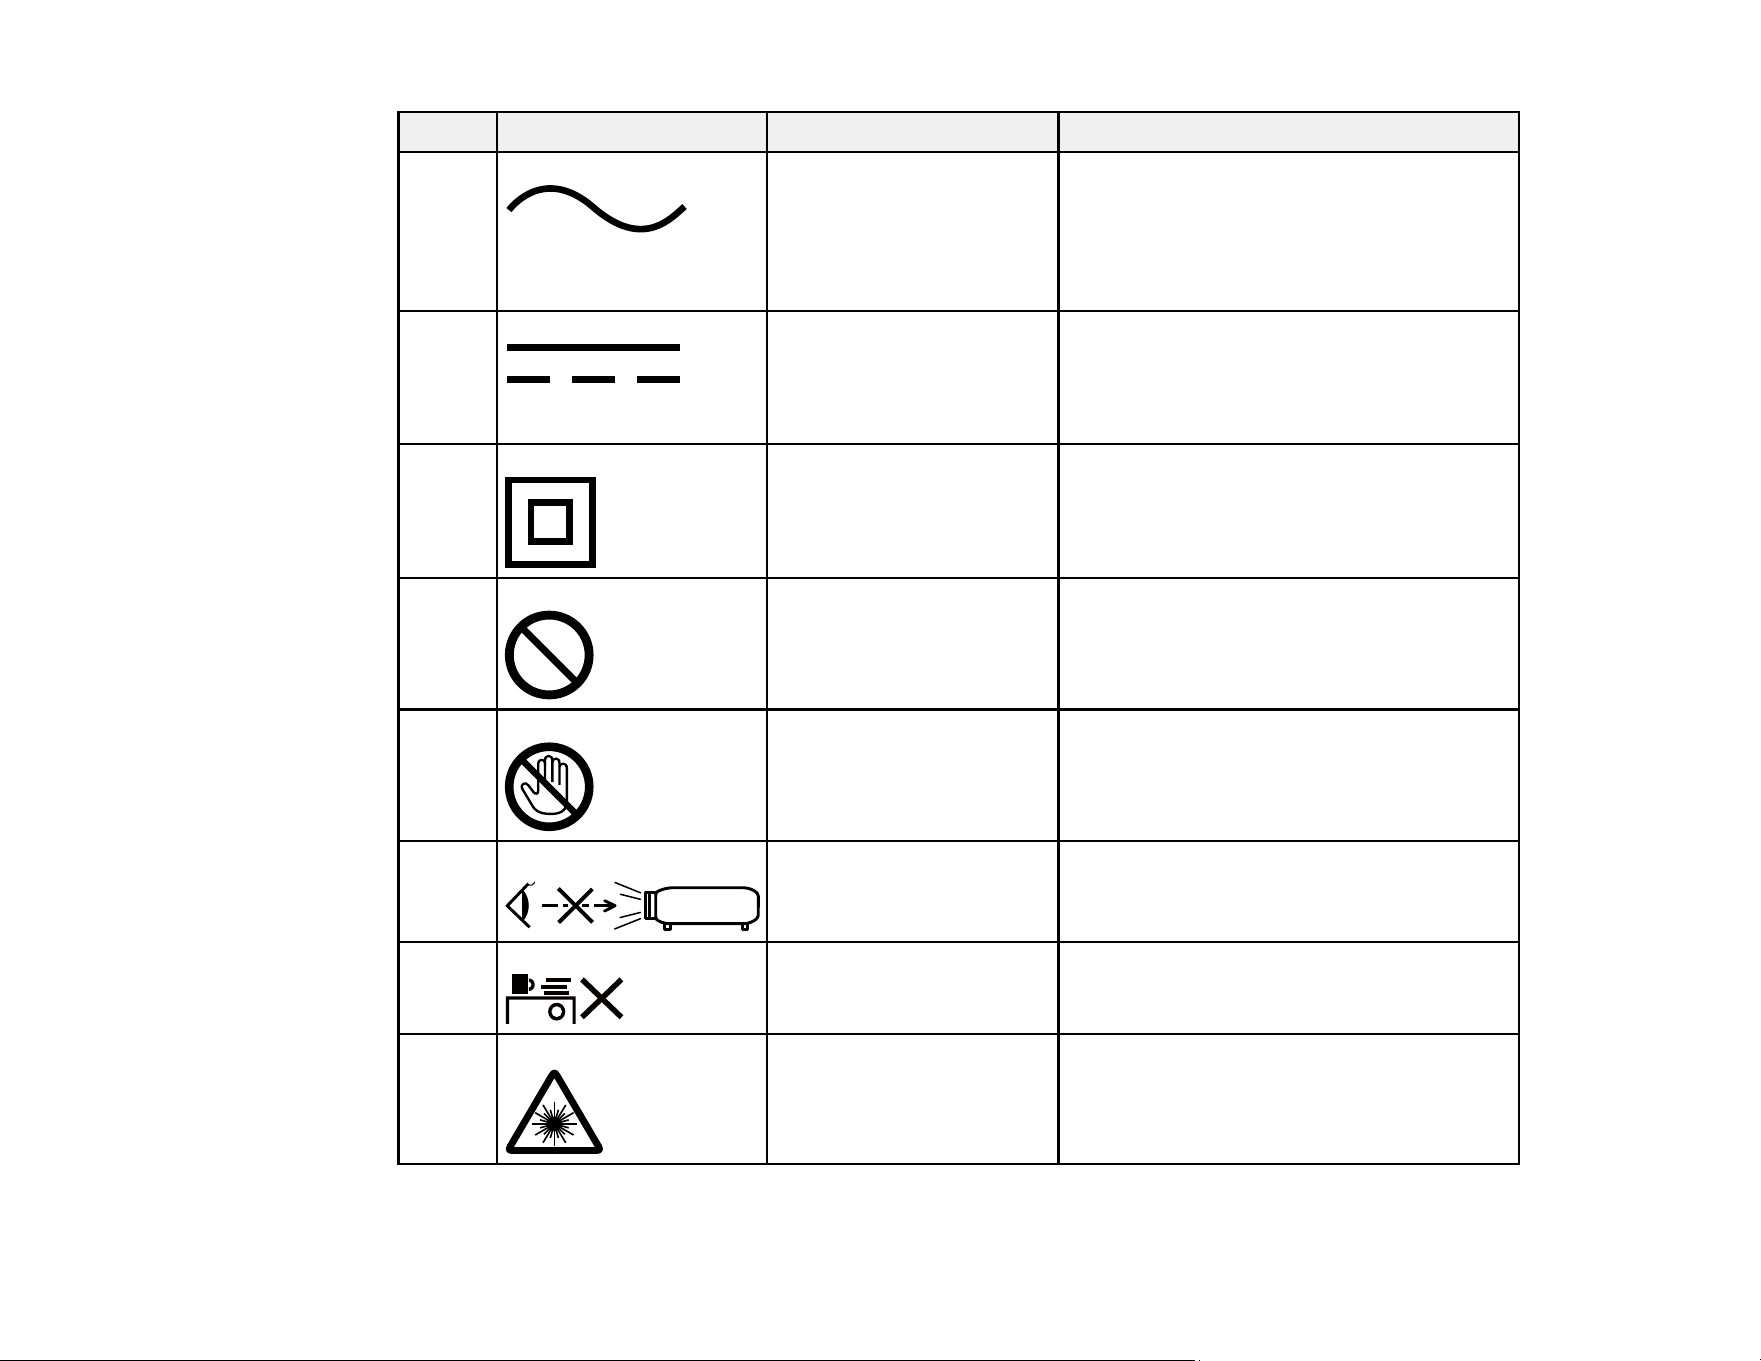
131
No. Symbol Approved Standards Description
15 IEC60417
No.5032
Alternating current
To indicate on the rating plate that the
equipment is suitable for alternating
current only; to identify relevant
terminals.
16 IEC60417
No.5031
Direct current
To indicate on the rating plate that the
equipment is suitable for direct current
only; to identify relevant terminals.
17 IEC60417
No.5172
Class II equipment
To identify equipment meeting the safety
requirements specified for Class II
equipment according to IEC 61140.
18 ISO 3864 General prohibition
To identify actions or operations that are
prohibited.
19 ISO 3864 Contact prohibition
To indicate injury that could occur due to
touching a specific part of the equipment.
20 — Never look into the optical lens while the
projector is on.
21 — To indicate that the marked item don’t
place anything on projector.
22 ISO3864
IEC60825-1
Caution, laser radiation
To indicate the equipment has a laser
radiation part.
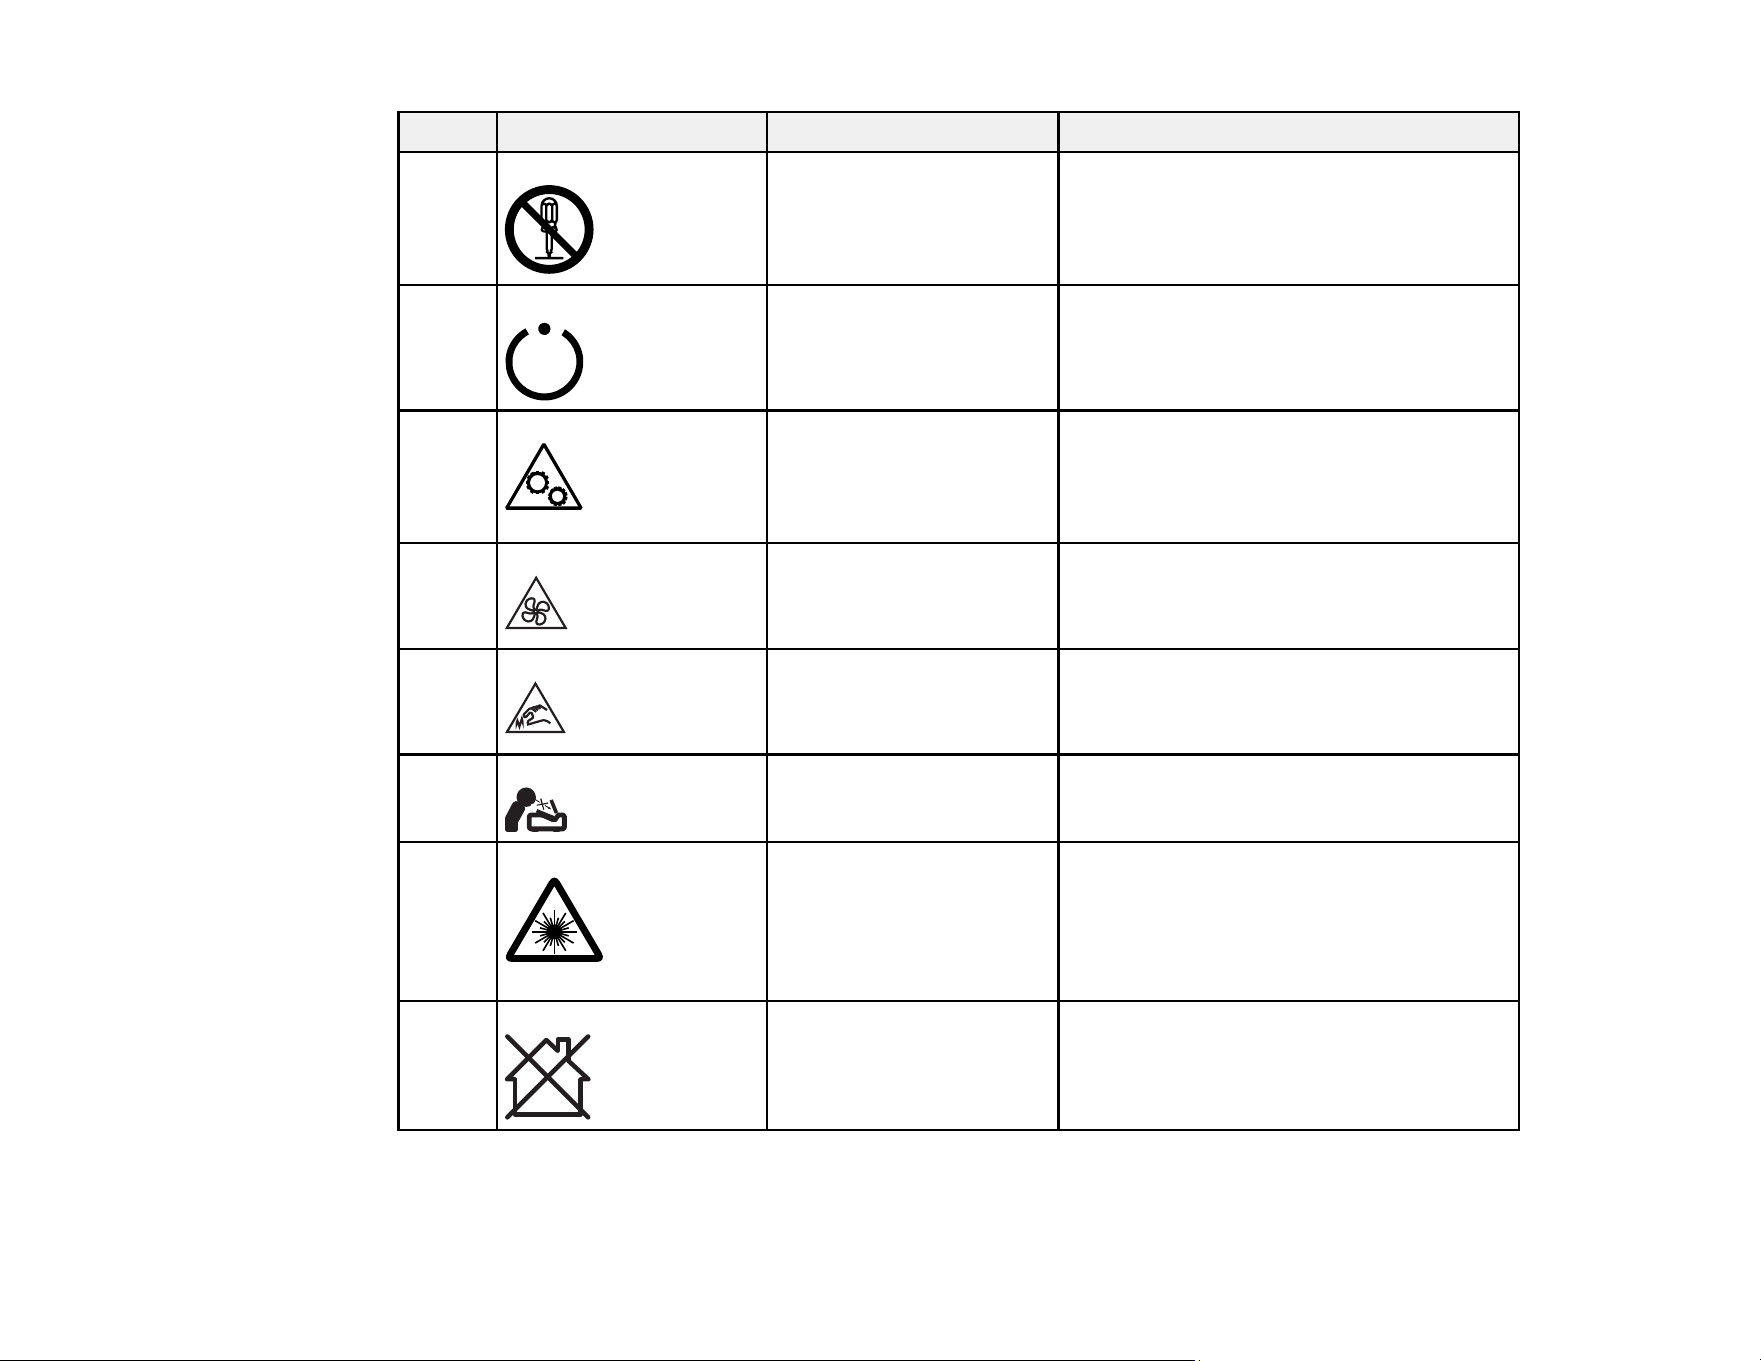
132
No. Symbol Approved Standards Description
23 ISO 3864 Disassembly prohibition
To indicate a risk of injury, such as
electric shock, if the equipment is
disassembled.
24 IEC60417
No. 5266
Standby, partial standby
To indicate that part of the equipment is
in the ready status.
25 ISO3864
IEC60417
No. 5057
Caution, movable parts
To indicate that you must keep away
from movable parts according to
protection standards.
26 IEC60417
No. 6056
Caution, moving fan blades
To indicate that you must keep away
from moving fan blades.
27 IEC60417
No. 6043
Caution, sharp corners
To indicate that you must not touch sharp
corners.
28 — To indicate that looking into the lens
while projecting is prohibited.
29 ISO7010
No. W027
ISO3864
Warning, optical radiation (UV, visible
light, IR, etc.)
To indicate that you must be careful not
to injure your eyes or skin when in the
vicinity of optical radiation.
30 IEC60417
No. 5109
Not to be used in residential areas
To indicate that the electrical equipment
is not suitable for a residential area.
Parent topic: Notices

133
FCC Compliance Statement
For United States Users
This equipment has been tested and found to comply with the limits for a Class B digital device, pursuant
to Part 15 of the FCC Rules. These limits are designed to provide reasonable protection against harmful
interference in a residential installation. This equipment generates, uses, and can radiate radio
frequency energy and, if not installed and used in accordance with the instructions, may cause harmful
interference to radio communications. However, there is no guarantee that interference will not occur in
a particular installation. If this equipment does cause interference to radio and television reception, which
can be determined by turning the equipment off and on, the user is encouraged to try to correct the
interference by one or more of the following measures:
• Reorient or relocate the receiving antenna.
• Increase the separation between the equipment and receiver.
• Connect the equipment into an outlet on a circuit different from that to which the receiver is connected.
• Consult the dealer or an experienced radio/TV technician for help.
This device complies with part 15 of the FCC Rules. Operation is subject to the following two conditions:
(1) This device may not cause harmful interference, and (2) this device must accept any interference
received, including interference that may cause undesired operation.
WARNING
The connection of a non-shielded equipment interface cable to this equipment will invalidate the FCC
Certification or Declaration of this device and may cause interference levels which exceed the limits
established by the FCC for this equipment. It is the responsibility of the user to obtain and use a shielded
equipment interface cable with this device. If this equipment has more than one interface connector, do
not leave cables connected to unused interfaces. Changes or modifications not expressly approved by
the manufacturer could void the user’s authority to operate the equipment.
For Canadian Users
CAN ICES-3(B)/NMB-3(B)
Parent topic: Notices

134
Binding Arbitration and Class Waiver
1. DISPUTES, BINDING INDIVIDUAL ARBITRATION, AND WAIVER OF CLASS ACTIONS AND
CLASS ARBITRATIONS
1.1 Disputes. The terms of this Section 1 shall apply to all Disputes between you and Epson. The term
"Dispute" is meant to have the broadest meaning permissible under law and includes any dispute, claim,
controversy or action between you and Epson arising out of or relating to this Agreement, Epson
branded products (hardware and including any related software), or other transaction involving you and
Epson, whether in contract, warranty, misrepresentation, fraud, tort, intentional tort, statute, regulation,
ordinance, or any other legal or equitable basis. "DISPUTE" DOES NOT INCLUDE IP CLAIMS, or more
specifically, a claim or cause of action for (a) trademark infringement or dilution, (b) patent infringement,
(c) copyright infringement or misuse, or (d) trade secret misappropriation (an "IP Claim"). You and Epson
also agree, notwithstanding Section 1.6,that a court, not an arbitrator, may decide if a claim or cause of
action is for an IP Claim.
1.2 Binding Arbitration. You and Epson agree that all Disputes shall be resolved by binding arbitration
according to this Agreement. ARBITRATION MEANS THAT YOU WAIVE YOUR RIGHT TO A JUDGE
OR JURY IN A COURT PROCEEDING AND YOUR GROUNDS FOR APPEAL ARE LIMITED.
Pursuant to this Agreement, binding arbitration shall be administered by JAMS, a nationally recognized
arbitration authority, pursuant to its code of procedures then in effect for consumer related disputes, but
excluding any rules that permit joinder or class actions in arbitration (for more detail on procedure, see
Section 1.6 below). You and Epson understand and agree that (a) the Federal Arbitration Act (9 U.S.C.
§1, et seq.) governs the interpretation and enforcement of this Section 1, (b) this Agreement
memorializes a transaction in interstate commerce, and (c) this Section 1 shall survive termination of this
Agreement.
1.3 Pre-Arbitration Steps and Notice. Before submitting a claim for arbitration, you and Epson agree to
try, for sixty (60) days, to resolve any Dispute informally. If Epson and you do not reach an agreement to
resolve the Dispute within the sixty (60) days), you or Epson may commence an arbitration. Notice to
Epson must be addressed to: Epson America, Inc., ATTN: Legal Department, 3131 Katella Ave., Los
Alamitos, CA 90720 (the "Epson Address"). The Dispute Notice to you will be sent to the most recent
address Epson has in its records for you. For this reason, it is important to notify us if your address
the Dispute shall include the sender's name, address and contact information, the facts giving rise to the
Dispute, and the relief requested (the "Dispute Notice"). Following receipt of the Dispute Notice, Epson
and you agree to act in good faith to resolve the Dispute before commencing arbitration.
1.4 Small Claims Court. Notwithstanding the foregoing, you may bring an individual action in the small
claims court of your state or municipality if the action is within that court's jurisdiction and is pending only
in that court.

135
1.5 WAIVER OF CLASS ACTIONS AND CLASS ARBITRATIONS. YOU AND EPSON AGREE THAT
EACH PARTY MAY BRING DISPUTES AGAINST THE OTHER PARTY ONLY IN AN INDIVIDUAL
CAPACITY, AND NOT AS A PLAINTIFF OR CLASS MEMBER IN ANY CLASS OR
REPRESENTATIVE PROCEEDING, INCLUDING WITHOUT LIMITATION FEDERAL OR STATE
CLASS ACTIONS, OR CLASS ARBITRATIONS. CLASS ACTION LAWSUITS, CLASS-WIDE
ARBITRATIONS, PRIVATE ATTORNEY-GENERAL ACTIONS, AND ANY OTHER PROCEEDING
WHERE SOMEONE ACTS IN A REPRESENTATIVE CAPACITY ARE NOT ALLOWED.
ACCORDINGLY, UNDER THE ARBITRATION PROCEDURES OUTLINED IN THIS SECTION, AN
ARBITRATOR SHALL NOT COMBINE OR CONSOLIDATE MORE THAN ONE PARTY'S CLAIMS
WITHOUT THE WRITTEN CONSENT OF ALL AFFECTED PARTIES TO AN ARBITRATION
PROCEEDING.
1.6 Arbitration Procedure. If you or Epson commences arbitration, the arbitration shall be governed by
the rules of JAMS that are in effect when the arbitration is filed, excluding any rules that permit arbitration
on a class or representative basis (the "JAMS Rules"), available at http://www.jamsadr.com or by calling
1-800-352-5267 (U.S. or Canada), or https://www.jamsadr.com/about/ or by calling +1-949-224-1810
(Latin America), and under the rules set forth in this Agreement. All Disputes shall be resolved by a
single neutral arbitrator, and both parties shall have a reasonable opportunity to participate in the
selection of the arbitrator. The arbitrator is bound by the terms of this Agreement. The arbitrator, and not
any federal, state or local court or agency, shall have exclusive authority to resolve all disputes arising
out of or relating to the interpretation, applicability, enforceability or formation of this Agreement,
including any claim that all or any part of this Agreement is void or voidable. Notwithstanding this broad
delegation of authority to the arbitrator, a court may determine the limited question of whether a claim or
cause of action is for an IP Claim, which is excluded from the definition of "Disputes" in Section 1.1
above. The arbitrator shall be empowered to grant whatever relief would be available in a court under
law or in equity. The arbitrator may award you the same damages as a court could, and may award
declaratory or injunctive relief only in favor of the individual party seeking relief and only to the extent
necessary to provide relief warranted by that party's individual claim. In some instances, the costs of
arbitration can exceed the costs of litigation and the right to discovery may be more limited in arbitration
than in court. The arbitrator's award is binding and may be entered as a judgment in any court of
competent jurisdiction.
You may choose to engage in arbitration hearings by telephone. Arbitration hearings not conducted by
telephone shall take place in a location reasonably accessible from your primary residence, or in Orange
County, California, at your option.
a) Initiation of Arbitration Proceeding. If either you or Epson decides to arbitrate a Dispute, both parties
agree to the following procedure:
(i) Write a Demand for Arbitration. The demand must include a description of the Dispute and the amount
of damages sought to be recovered. You can find a copy of a Demand for Arbitration at
http://www.jamsadr.com ("Demand for Arbitration").

136
(ii) Send three copies of the Demand for Arbitration, plus the appropriate filing fee, to: JAMS, 500 North
State College Blvd., Suite 600 Orange, CA 92868, U.S.A.
(iii) Send one copy of the Demand for Arbitration to the other party (same address as the Dispute
Notice), or as otherwise agreed by the parties.
b) Hearing Format. During the arbitration, the amount of any settlement offer made shall not be disclosed
to the arbitrator until after the arbitrator determines the amount, if any, to which you or Epson is entitled.
The discovery or exchange of non-privileged information relevant to the Dispute may be allowed during
the arbitration.
c) Arbitration Fees. Epson shall pay, or (if applicable) reimburse you for, all JAMS filings and arbitrator
fees for any arbitration commenced (by you or Epson) pursuant to provisions of this Agreement.
d) Award in Your Favor. For Disputes in which you or Epson seeks $75,000 or less in damages exclusive
of attorney's fees and costs, if the arbitrator's decision results in an award to you in an amount greater
than Epson's last written offer, if any, to settle the Dispute, Epson will: (i) pay you $1,000 or the amount
of the award, whichever is greater; (ii) pay you twice the amount of your reasonable attorney's fees, if
any; and (iii) reimburse you for any expenses (including expert witness fees and costs) that your attorney
reasonably accrues for investigating, preparing, and pursuing the Dispute in arbitration. Except as
agreed upon by you and Epson in writing, the arbitrator shall determine the amount of fees, costs, and
expenses to be paid by Epson pursuant to this Section 1.6d).
e) Attorney's Fees. Epson will not seek its attorney's fees and expenses for any arbitration commenced
involving a Dispute under this Agreement. Your right to attorney's fees and expenses under Section
1.6d) above does not limit your rights to attorney's fees and expenses under applicable law;
notwithstanding the foregoing, the arbitrator may not award duplicative awards of attorney's fees and
expenses.
1.7 Opt-out. You may elect to opt-out (exclude yourself) from the final, binding, individual
arbitration procedure and waiver of class and representative proceedings specified in this
Agreement by sending a written letter to the Epson Address within thirty (30) days of your assent
to this Agreement (including without limitation the purchase, download, installation of the
Software or other applicable use of Epson Hardware, products and services) that specifies (i)
your name, (ii) your mailing address, and (iii) your request to be excluded from the final, binding
individual arbitration procedure and waiver of class and representative proceedings specified in
this Section 1. In the event that you opt-out consistent with the procedure set forth above, all
other terms shall continue to apply, including the requirement to provide notice prior to litigation.
1.8 Amendments to Section 1. Notwithstanding any provision in this Agreement to the contrary, you
and Epson agree that if Epson makes any future amendments to the dispute resolution procedure and
class action waiver provisions (other than a change to Epson's address) in this Agreement, Epson will
obtain your affirmative assent to the applicable amendment. If you do not affirmatively assent to the
applicable amendment, you are agreeing that you will arbitrate any Dispute between the parties in

137
accordance with the language of this Section 1 (or resolve disputes as provided for in Section 1.7, if you
timely elected to opt-out when you first assented to this Agreement).
1.9 Severability. If any provision in this Section 1 is found to be unenforceable, that provision shall be
severed with the remainder of this Agreement remaining in full force and effect. The foregoing shall not
apply to the prohibition against class or representative actions as provided in Section 1.5. This
means that if Section 1.5 is found to be unenforceable, the entire Section 1 (but only Section 1)
shall be null and void.
Parent topic: Notices
Trademarks
EPSON
®
and Quick Corner
®
are registered trademarks and EPSON Exceed Your Vision is a registered
logomark of Seiko Epson Corporation.
PrivateLine
®
is a registered trademark and SizeWise
TM
is a trademark of Epson America, Inc.
Windows is a registered trademark of Microsoft Corporation in the United States and/or other countries.
Apple and Mac are trademarks of Apple Inc., registered in the U.S. and other countries.
Google is a trademark of Google LLC.
Miracast
®
is a registered trademark of Wi-Fi Alliance
®
General Notice: Other product names used herein are for identification purposes only and may be
trademarks of their respective owners. Epson disclaims any and all rights in those marks.
Parent topic: Notices
Copyright Notice
All rights reserved. No part of this publication may be reproduced, stored in a retrieval system, or
transmitted in any form or by any means, electronic, mechanical, photocopying, recording, or otherwise,
without the prior written permission of Seiko Epson Corporation. The information contained herein is
designed only for use with this Epson product. Epson is not responsible for any use of this information as
applied to other products.
Neither Seiko Epson Corporation nor its affiliates shall be liable to the purchaser of this product or third
parties for damages, losses, costs, or expenses incurred by purchaser or third parties as a result of:

138
accident, misuse, or abuse of this product or unauthorized modifications, repairs, or alterations to this
product, or (excluding the U.S.) failure to strictly comply with Seiko Epson Corporation's operating and
maintenance instructions.
Seiko Epson Corporation shall not be liable for any damages or problems arising from the use of any
options or any consumable products other than those designated as Original Epson Products or Epson
Approved Products by Seiko Epson Corporation.
This information is subject to change without notice.
A Note Concerning Responsible Use of Copyrighted Materials
Copyright Attribution
Parent topic: Notices
A Note Concerning Responsible Use of Copyrighted Materials
Epson encourages each user to be responsible and respectful of the copyright laws when using any
Epson product. While some countries' laws permit limited copying or reuse of copyrighted material in
certain circumstances, those circumstances may not be as broad as some people assume. Contact your
legal advisor for any questions regarding copyright law.
Parent topic: Copyright Notice
Copyright Attribution
© 2020 Epson America, Inc.
10/20
CPD-59707
Parent topic: Copyright Notice
