Caution:
Before attempting to connect or operate this product, please read these instructions carefully.
Notice:
This product is not suitable for use in locations where children are likely to be present.
Do not install this product in locations where ordinary persons can easily reach.
For information about screws and brackets required for installation, refer to the
corresponding section of this document.
Standard accessories
Operating Instructions (this document)
....
1 pc. Fixing screws for attachment plate ........5 pcs.
(M4 x 8 mm {5/16 inches}) (of them, 1 for spare)
Other items that are needed (not included)
Fixing screws (M4)
...................................
4 pcs.
Pipe ........................................................ 1 pc.
Safety wire .............................................. 1 pc.
IMPORTANT
Minimum pullout strength: 196 N {44 lbf} (per 1 pc.)
This value indicates the minimum pull-out strength required value per screw. For information
about the minimum pull-out strength, refer to our support website <Control No.: C0120>.
Select screws according to the material of the location that the camera will be mounted
to. In this case, wood screws and nails should not be used.
For the safety wire specifications, refer to Step 1
【
2
】
.
Precautions for installation
In order to prevent injury, the product must be securely mounted to the ceiling according
to the Installation Guide of this bracket.
Mounting method for this product
This product is designed to be used as a pendant mount camera. If the product is mounted on a
desktop or at a slant, the camera may not work correctly and its lifetime may be shortened.
Make sure to remove this product if it will no longer be used.
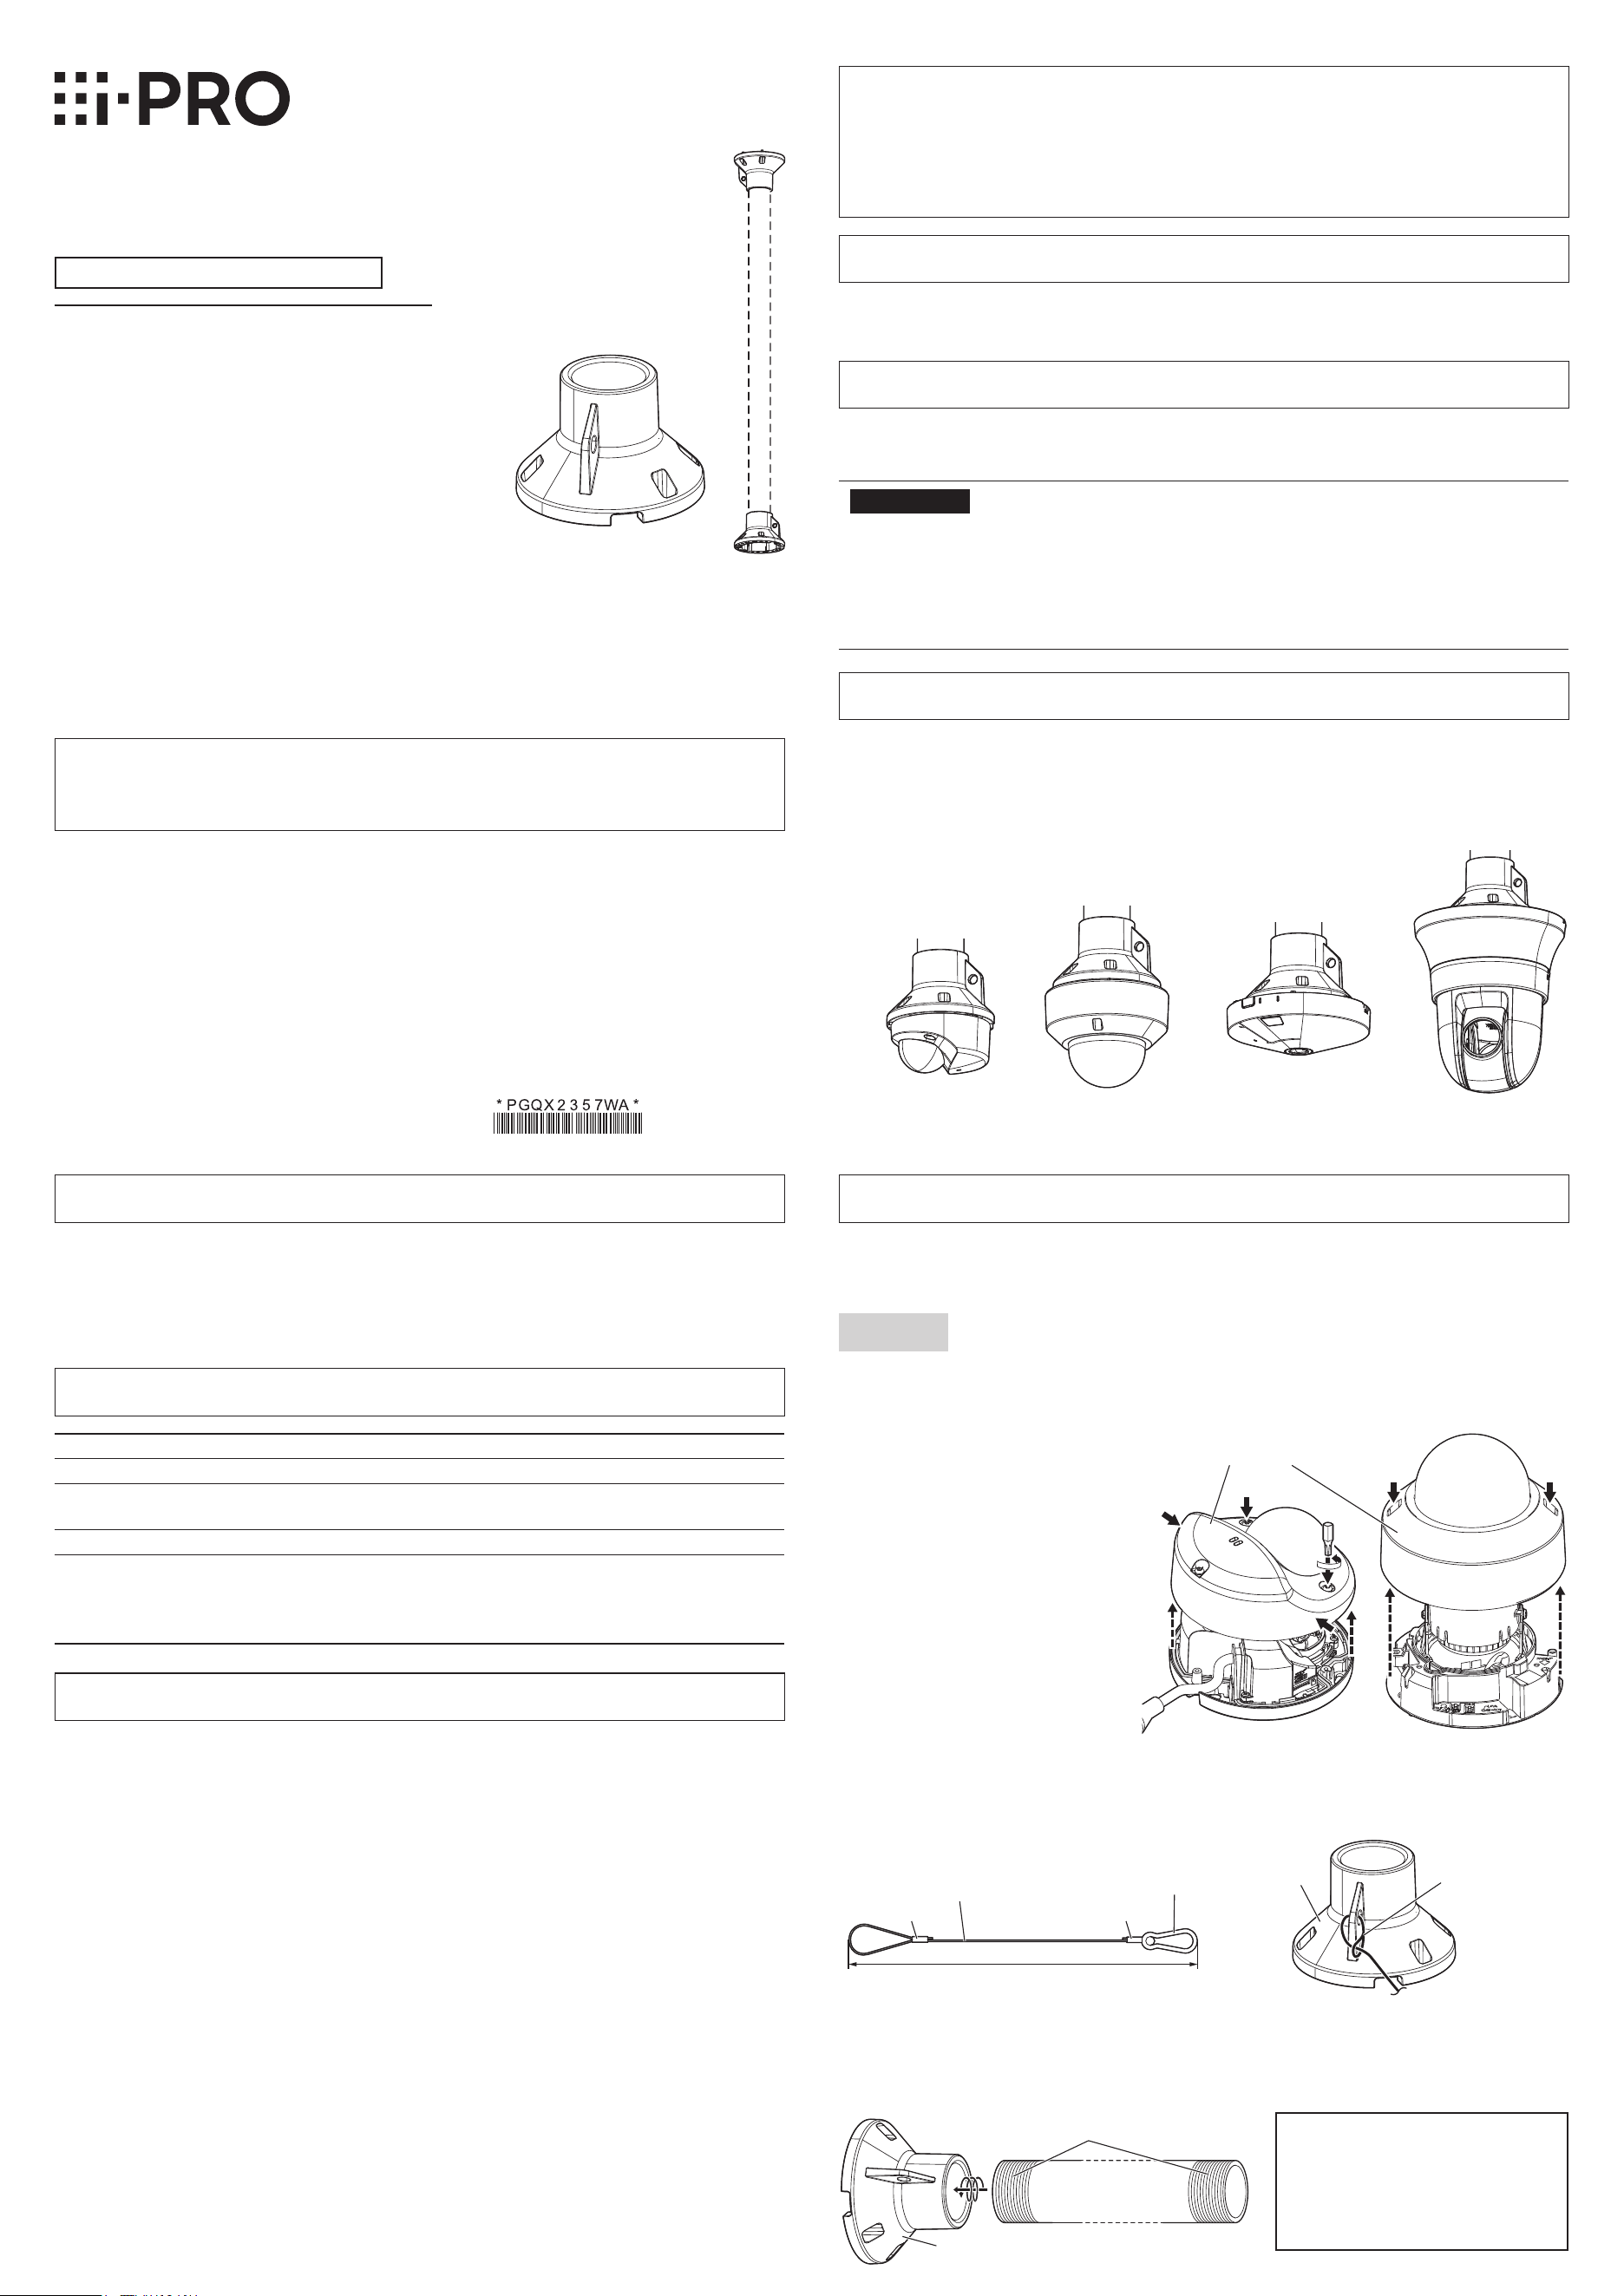
Compact dome type
WV-S31xx series
Indoor dome type
WV-S21xx
series
Indoor 360-degree
panoramic type
WV-S41xx
series
Indoor PTZ type
WV-S61xx
series
<Installation example>
Installation
Be sure to read “Precautions” and “Precautions for installation” before installation.
Refer to the operating instructions of the camera for details on the camera installation
(including the camera mounting, cable connection and adjustment).
Step 1
This manual explains how to use this product in 2 places (one on
the ceiling and the other on the camera).
For information about other examples of use, refer to our support
website (https://i-pro.com/global/en/surveillance/training_
support/support/technical_information <Control No.:C0508>).
【
1
】
Remove the enclosure from
the camera body.
For compact dome types and indoor
dome types of cameras, the enclosure
is removed before installation.
Refer to the parts describing
installation in the Installation Guide for
each camera for information on how to
remove the enclosure.
【
2
】
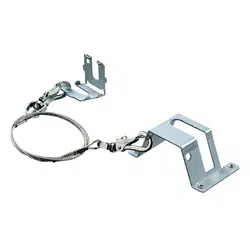
Attach the safety wire to this product (used on ceiling).
1 Prepare the safety wire by the specifications
shown in the below illustration.
Wire: ø3 mm {1/8 inches} steel
Capable of bearing 88 N
{19.8 lbf} or more.
Snap hook
Total length: Pipe length + 500 mm {19-11/16 inches}
Caulking Caulking
2
Attach the safety wire to this product (used
on ceiling) as shown in the below illustration.
This
product
Safety wire
(locally
procured)
【
3
】
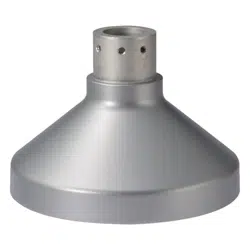
Attach the pipe (locally procured) to this product (used on camera).
Recommended pipe:
ø48.6 mm {1-29/32 inches}
t = 3.5 mm {1/8 inches}
Material:Stainless Steel
Maximum permissible length:
1.5 m {59-1/16 inches}
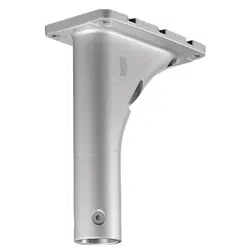
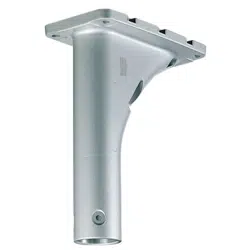
This product (used on camera)
<WV-QCL100-W>
40A R 1-1/2, 11crest, length 30 mm
{1-3/16 inches} or more (male taper pipe thread)
<WV-QCL101-W>
NPT 1-1/2, 11.5crest, length 30 mm
{1-3/16 inches} or more (male taper pipe thread)
Pipe
(locally procured)
Enclosure
<
Compact dome type
>
<Indoor dome type
>
(Pipe is locally procured)
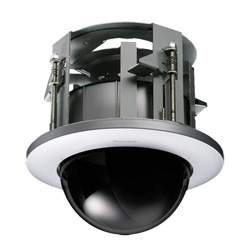
Operating Instructions
Included Installation Instructions
Ceiling Mount Bracket
Model No.
WV-QCL100-W
WV-QCL101-W
Before attempting to connect or install this product,
please read these instructions carefully
and save this manual for future use.
The external appearance and other parts shown in this manual may differ from the actual
product within the scope that will not interfere with normal use due to improvement of the
product.
i-PRO Co., Ltd. assumes no responsibility for injuries or property damage resulting
from failures arising out of improper installation, operation inconsistent with this
documentation or through use of parts other than this product, such as locally
procured parts.
Preface
This product is used to attach indoor dome type or PTZ type cameras to a high ceiling using a
locally procured pipe.
For the latest information about the supported cameras, refer to our support website
(https://i-pro.com/global/en/surveillance/training_support/support/technical_information <Control
No.:C0501>).
Specifications
Ambient operating temperature: –50 °C to +60 °C {–58 °F to +140 °F}
Maximum superimposed load: 88 N {19.8 lbf}
Dimensions: ø113 mm × 75 mm (H)
{ø4-7/16 inches x 2-15/16 inches (H)}
Mass: Approx. 330 g {0.73 lbs}
Finish: Aluminum die cast
i-PRO white
WV-QCL100-W :
ISO standard threading
WV-QCL101-W :
ANSI standard threading
Precaution
Do not use this bracket except with suitable cameras.
Failure to observe this may cause a drop resulting in injury or accidents.
Do not apply excessive force.
Failure to observe this may cause damage to the attaching part or a drop resulting in injury or
accidents.
Do not attach a device exceeding the mass limit.
Failure to observe this may cause a drop resulting in injury or accidents.
Observe the mass limit.
Refer installation work to the dealer.
Installation work requires technique and experience. Failure to observe this may cause fire,
electric shock, injury, or damage to the product.
Be sure to consult the dealer.
Install the product securely on a ceiling in accordance with the installation
instructions.
Failure to observe this may cause injury or accidents.
The measures of protection against a fall of this product shall be taken.
Failure to observe this may cause a drop resulting in injury or accidents. Be sure to install the
safety wire.
When using this product, also read the “Precautions” described in the operating
instructions for the camera to be attached.
For U.S. and Canada:
i-PRO Americas Inc.
For Europe and other countries:
i-PRO EMEA B.V.
https://www.i-pro.com/
© i-PRO Co., Ltd. 2022
Fs0320-3042
Printed in China
WV-QCL100_PGQX2357WAC6_カメラ天井吊り下げ金具_en.indd 1 2021/10/28 14:30:06
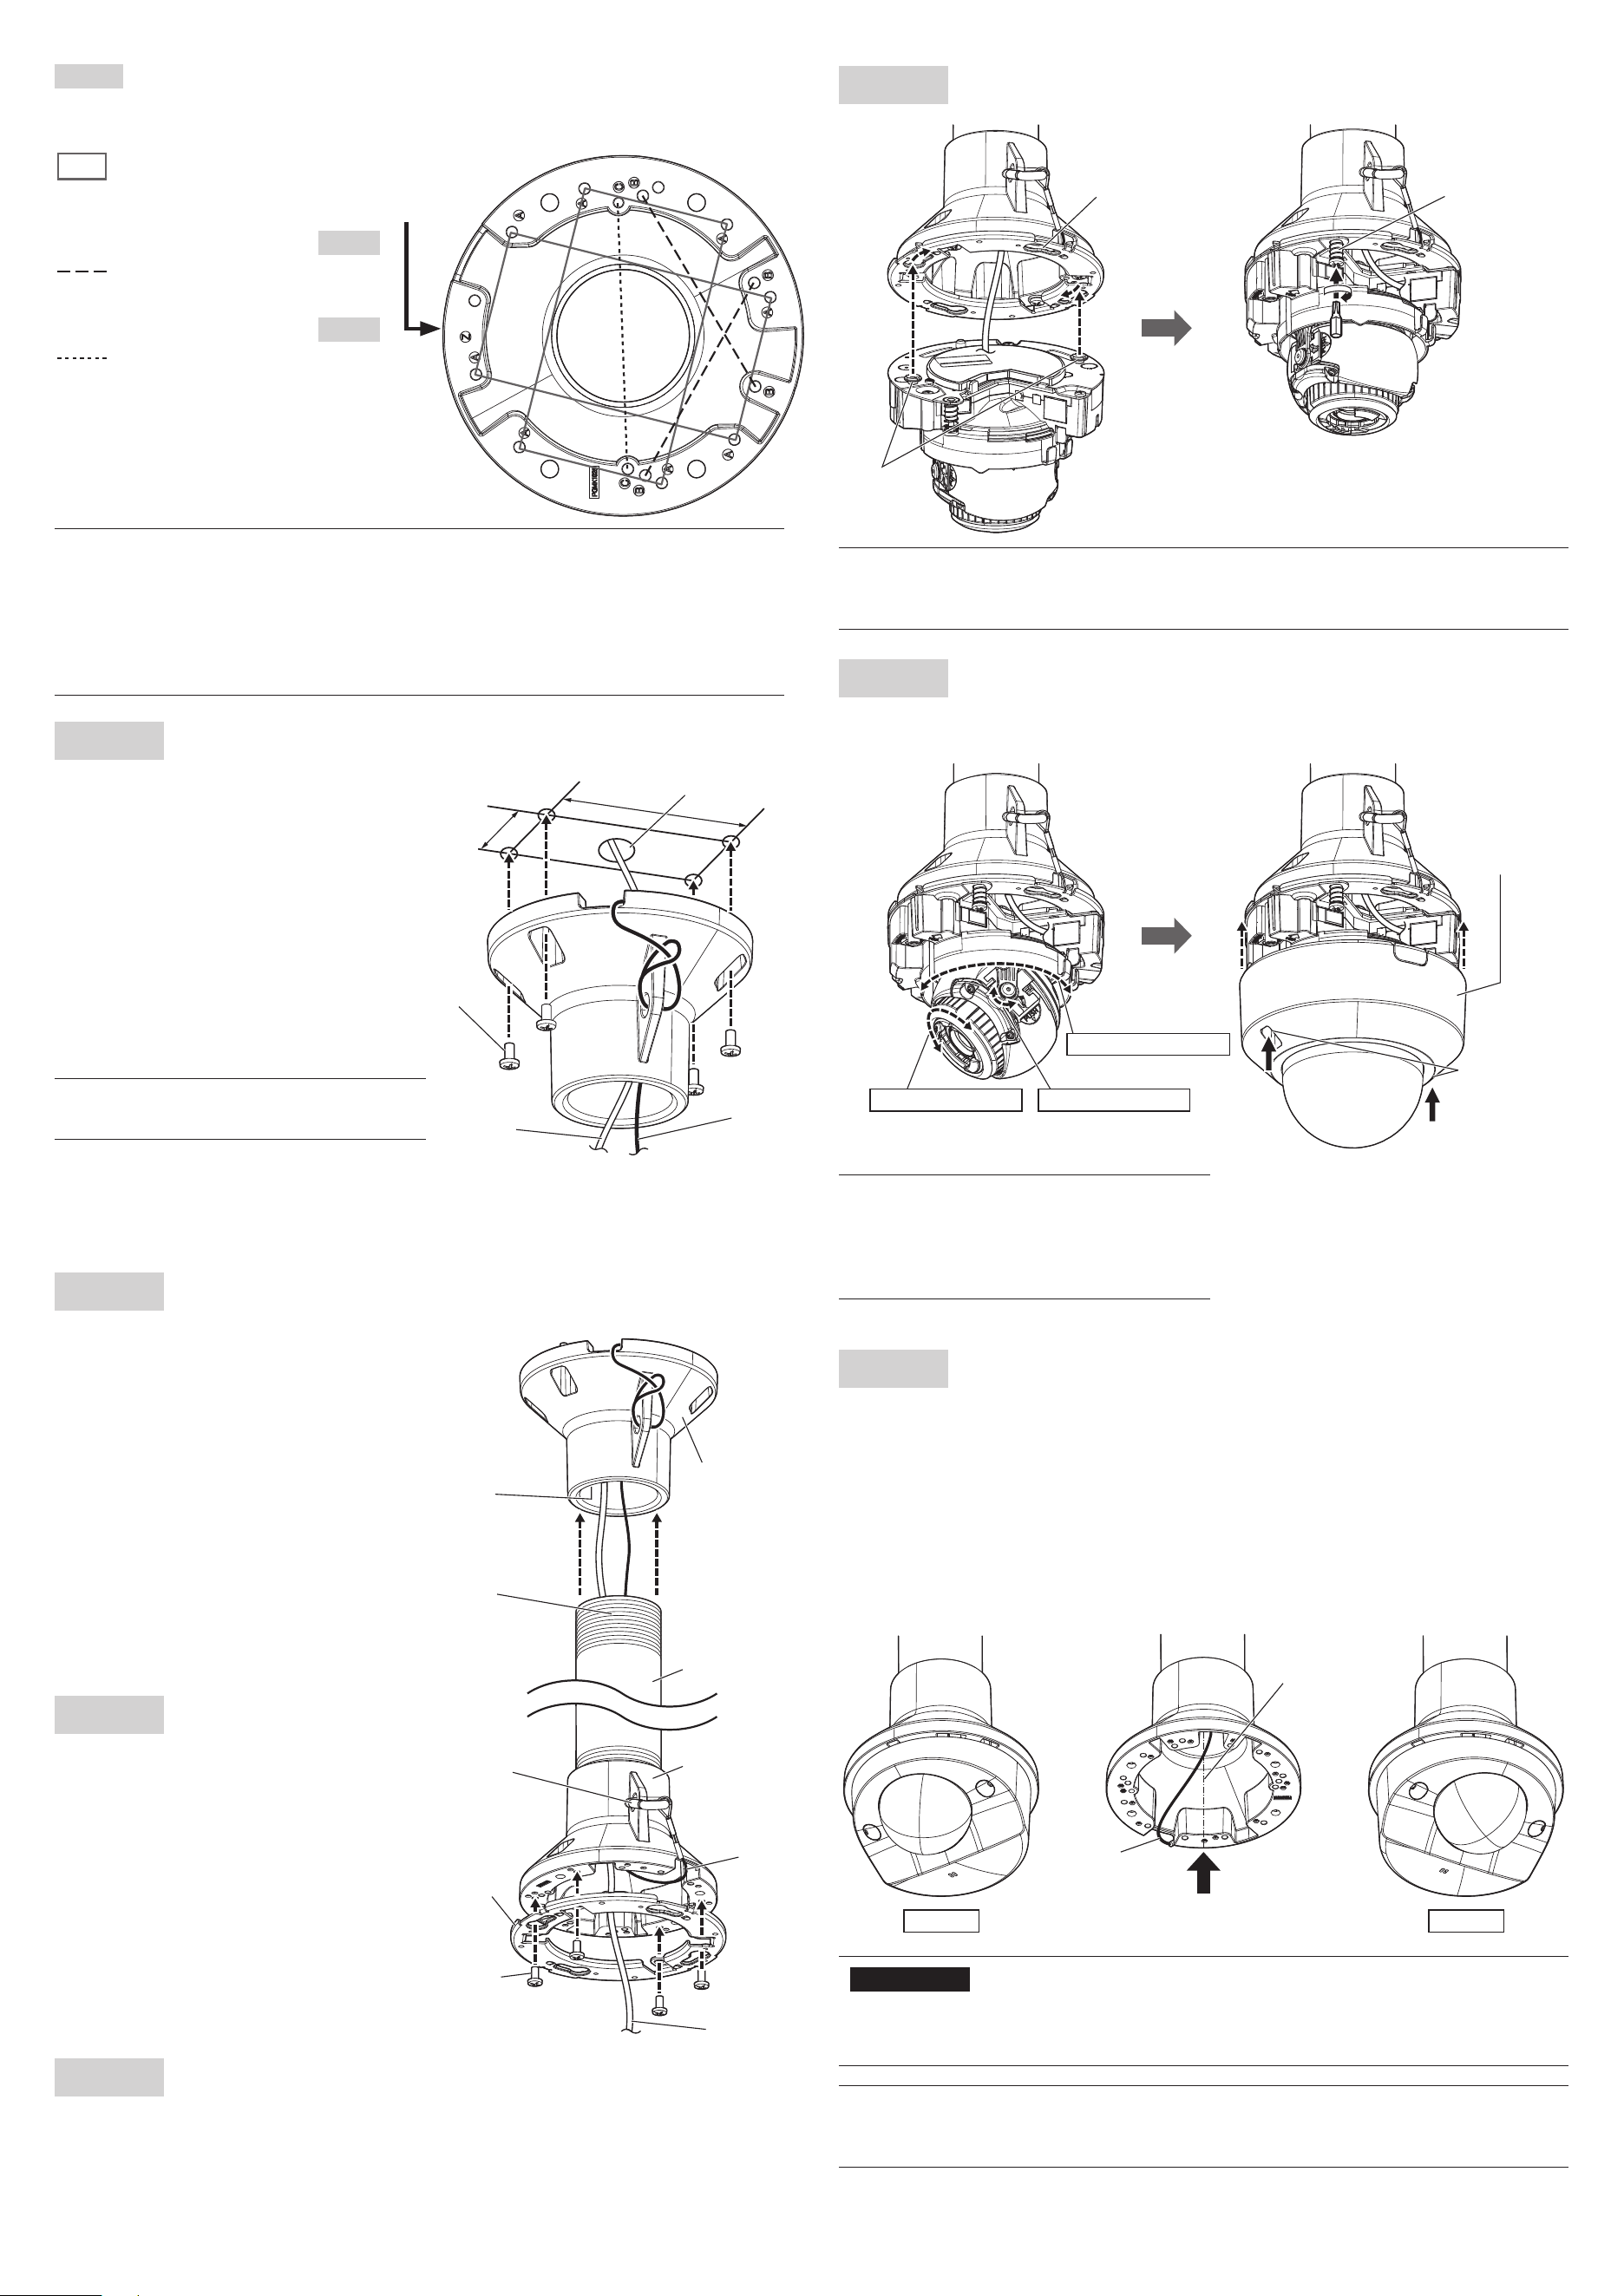
Step 1 (Continued)
【
4
】
Check the position for fixing this product (in 2 places) and pipe, and the
position for fixing the camera to this product, before mounting.
When attaching using the
attachment plate (holes of
Ⓐ
):
Each series of S61xx, S22xx,
S21xx, S41xx
.
Step 2
When attaching the camera directly
to this product (holes of
Ⓑ
)
S31xx series
.
Step 8
When attaching the camera directly
to this product (holes of
Ⓒ
) using
holes of fixing pitch 83.5 mm
{3-9/32 inches}
Position of
the wire hook
section
NOTE
The position for fixing this product will change depending on the pipe (locally procured) tapping
variation. Be sure to attach this product to the pipe, and confirm the transition in the rotation
direction of this product on the ceiling and camera before deciding the attachment position.
For S31xx Series, the shooting direction of the camera is restricted. (Refer to Step 8)
Be sure to attach the camera to this product (used on camera), and the pipe to this
product (used on ceiling) and check the post-attached camera direction before using it.
Step 2
Fix this product (used on ceiling) to the ceiling.
Decide the location where this product is
to be attached on the ceiling, then make
the holes for fixing and wiring as shown
in the illustration on the right.
Thread the cables and the safety wire
through this product (used on ceiling),
then fix to the ceiling.
Fixing screws (4 pcs.) (M4: locally
procured)
Minimum pullout strength:
196 N {44 lbf} (per 1 pc.)
NOTE
Install to a horizontal ceiling.
46 mm
{1-13/16
inches}
83.5 mm
{3-9/32
inches}
Wiring hole
φ30 mm
{1-3/16 inches}
Fixing screws
(4 pcs.)
(M4: locally
procured)
Cables
Safety wire
(locally
procured)
Step 6
Temporarily fix the camera to the attachment plate and tighten the
camera fixing screw (red) to fix the camera firmly.
Holes of the
attachment plate
(4 places)
Attachment
mounting
screws
Camera fixing
screw (red)
Be sure to tighten the camera fixing screw. Failure to observe
this may cause camera trouble due to camera falling.
Recommended tightening torque: 0.78 N·m {0.58 lbf·ft}
NOTE
You can change the angle of mounting the camera to the attachment plate in units of 90
degrees, as necessary.
Step 7
After adjusting the angular field of view of the camera, fix the
enclosure to the original poisition.
Refer to the Installation Guide for the camera for detailed
adjustment methods.
Recommended tightening torque
: 0.59 N·m {0.44 lbf·ft}
Enclosure
Enclosure
fixing screws
Horizontal (PAN) angle
Azimuth (YAW) angle Vertical (TILT) angle
■ The following explanation describes an example of attaching an indoor dome type
WV-S2131L model.
For how to install the camera, refer to the instructions for installation in the Operating
Instructions for each model.
Step 3
Attach the pipe fitted to this product (used on camera) in Step 1, to
this product (used on ceiling) fitted to the ceiling in Step 2.
Tighten the screw section of the pipe for
fixing the pipe securely to this product
(used on ceiling). Failure to observe this
may cause a drop resulting in accidents.
Step 4
Attach the attachment
plate to this product
(used on camera).
1 Fix the snap hook of the safety wire to
the wire hook section on this product
(used on camera).
2 Fix the attachment plate (camera
accessory) to this product (used on
camera).
Recommended tightening torque
: 0.78 N·m {0.58 lbf·ft}
Step 5
Connect the cables to the camera.
For how to connect and other details, refer to the Operating Instructions for each camera.
■
The “recommended tightening torque” values shown hereon for the different screws used
in mounting the camera are the values of the model used for the description in this manual.
Check the Operating Instructions of the camera you are using and confirm the values.
This product
(used on ceiling)
Pipe
(locally procured)
This product
(used on camera)
Snap hook of
the safety wire
Fixing screws for
attachment plate
(4pcs.) (M4 x 8 mm
{5/16 inches}: accessory)
Attachment plate
(camera
accessory)
<WV-QCL100-W>
40A
Rp 1-1/2, 11crest, depth
30 mm {1-3/16 inches} MAX
(female parallel pipe thread)
<WV-QCL101-W>
NPS 1-1/2, 11.5crest, depth
30 mm {1-3/16 inches} MAX
(female parallel pipe thread)
<WV-QCL100-W>
40A
R 1-1/2, 11crest, length
30 mm {1-3/16 inches}
or more
(male taper pipe thread)
<WV-QCL101-W>
NPT 1-1/2, 11.5crest, length
30 mm {1-3/16 inches}
or more
(male taper pipe thread)
Cables
Safety
wire
NOTE
The recommended tightening torque for the
screws depends on the camera you are
using. Refer to the Installation Guide for
each camera.
Step 8
Attaching the compact dome type WV-S31xx series
【
1
】
Install according to the description in Steps 2 and 3.
【
2
】
Fix the snap hook of the safety wire to the wire hook section of this product (used on
camera) according to the description in Step 4 1.
(There is no attachment plate fitting work.)
【
3
】
Connect the network cable and fix the camera to this product (used on camera). Attach the
camera in such a way that the opposite side of the wire hook section of this product (used
on camera) is towards the front of the camera. You can fix the camera pointing the front of
the camera tilted at 30 degrees to the left or right.
Recommended tightening torque
: 0.78 N·m {0.58 lbf·ft}
Left 30° Right 30°
Wire hook section
Center line
Safety
wire
IMPORTANT
When fixing a compact dome type camera, it can be fixed in only the 2 directions illustrated
above. If the photographing area cannot be adjusted with these 2 directions and PAN
rotation, invert the mounting direction of this product (used for the ceiling) by 180 degrees.
NOTE
When fixing a compact dome-type camera, of the three fixing positions, use the 2 forward
places to fix.
WV-QCL100_PGQX2357WAC6_カメラ天井吊り下げ金具_en.indd 2 2021/10/28 14:30:08