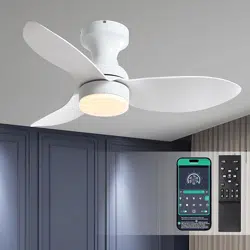
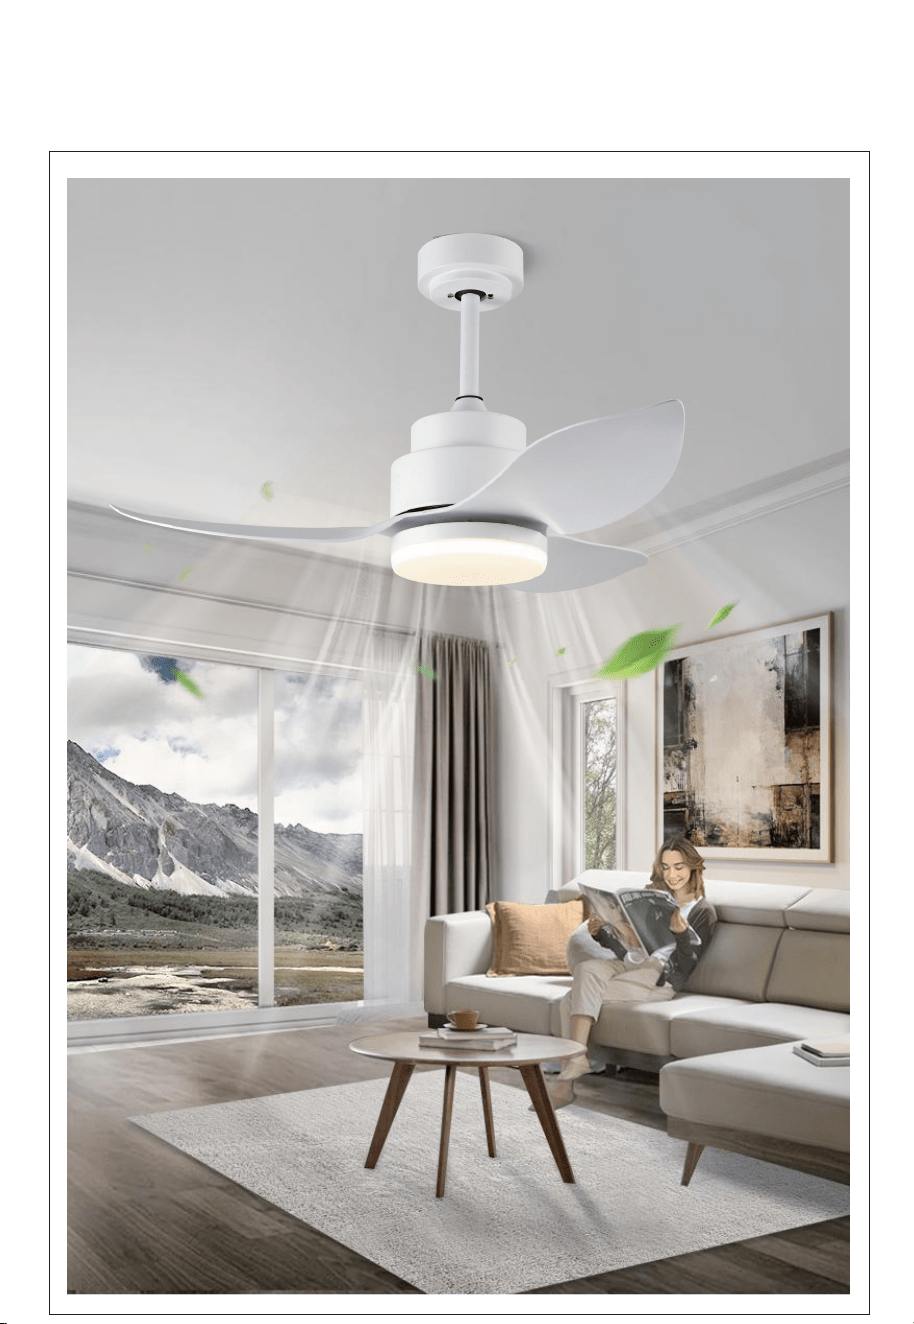
Surtime ceiling fan
Installation Instructions
Safety Precautions
1. For your safety, all electrical connections and disconnections should be performed by a
qualified electrician.
2. Any action performed for the electrical connection of the device must be carried out after
ensuring that the general power supply is disconnected,by removing the corresponding fuse or
disarming the protective switch in order to ensure total isolation of the power supply.
3. When deciding where to mount the fan, be sure that there is at least 30 inches(76 cm) of space
between the fan and any wall or other obstruction that the fan blades could collide with. The
greater this distance, the more effective the air flow produced.After the fan is mounted, be sure
that the blades are no less than 7ft(2.1 m) above the ground.
4 . The anchor point for the fan must be able to support a weight of at least 100 pounds(45 kg). If
mounting on a ceiling junctionbox, be sure that the fan is adequately supported to prevent
loosening or turning.
5. The fan’s electrical connection must be “grounded” (the fan’s ground cable connected to the
installation’s grounding network) in order to avoid any branching that may be dangerous to
people.
6. Do not connect the fan’s power supply to any dimmers,potentiometers, or light switches, as it
will cause the fan tomalfunction and/or will damage the motor. The fan must be directly
connected to a properly protected installation circuit(magnetothermal differential switch with the
adequate size for the fan’s consumption and technical specifications).Only use the fan’s control
to turn it on or stop it.
7. It is recommended to not use these types of fans along with gas installations simultaneously in
the same room.
8. The fan must be not be moving and must have come to a complete stop before changing its
direction of rotation.This will prevent damage to its motor and to the control unit, when
applicable.
9. Do not insert anything that could hit the fan’s blades into its pathway while it is moving, as this
could cause damage to people, can damage the blades, and can offset the balance of the unit,
causing vibrations and wobbling.
10. After installing the fan, ensure that all fastenings aresecure and tightened in order to avoid any
noise caused by loose elements.
11. Due to the fan’s movement, certain fastenings may become loose. Check all fastenings twice
per year at a minimum in order to ensure that they are sufficiently tight. If necessary, they must
be retightened.
12. The motor housing can be cleaned with a soft brush or a lint-free cloth to avoid scratching the
surface. Clean the blades with a lint-free cloth. Important: Turn off the main power supply before
starting any maintenance. Do not clean the fans with water or a damp cloth.
Note: The important warnings and instructions indicated in this manual are not
guaranteed to cover all possible conditions and situations that may occur. It
must be understood that common sense, precaution, and care are factors that
cannot be included in all products. These factors can and must only be provided
by the use
r who maintains and enjoys this fan.
The information contained in the following pages has been prepared to ensure your
maximum enjoyment of your fan
Please remove the fuse or turn off the circuit breaker to cut off the power before installing
the fan. Ensure all electrical connections are in compliance with local laws, regulations
and national eletrical codes. If you are not familiar with electrical installation and wirin
g,
please hire a qualified electrician or consult the wiring manual.
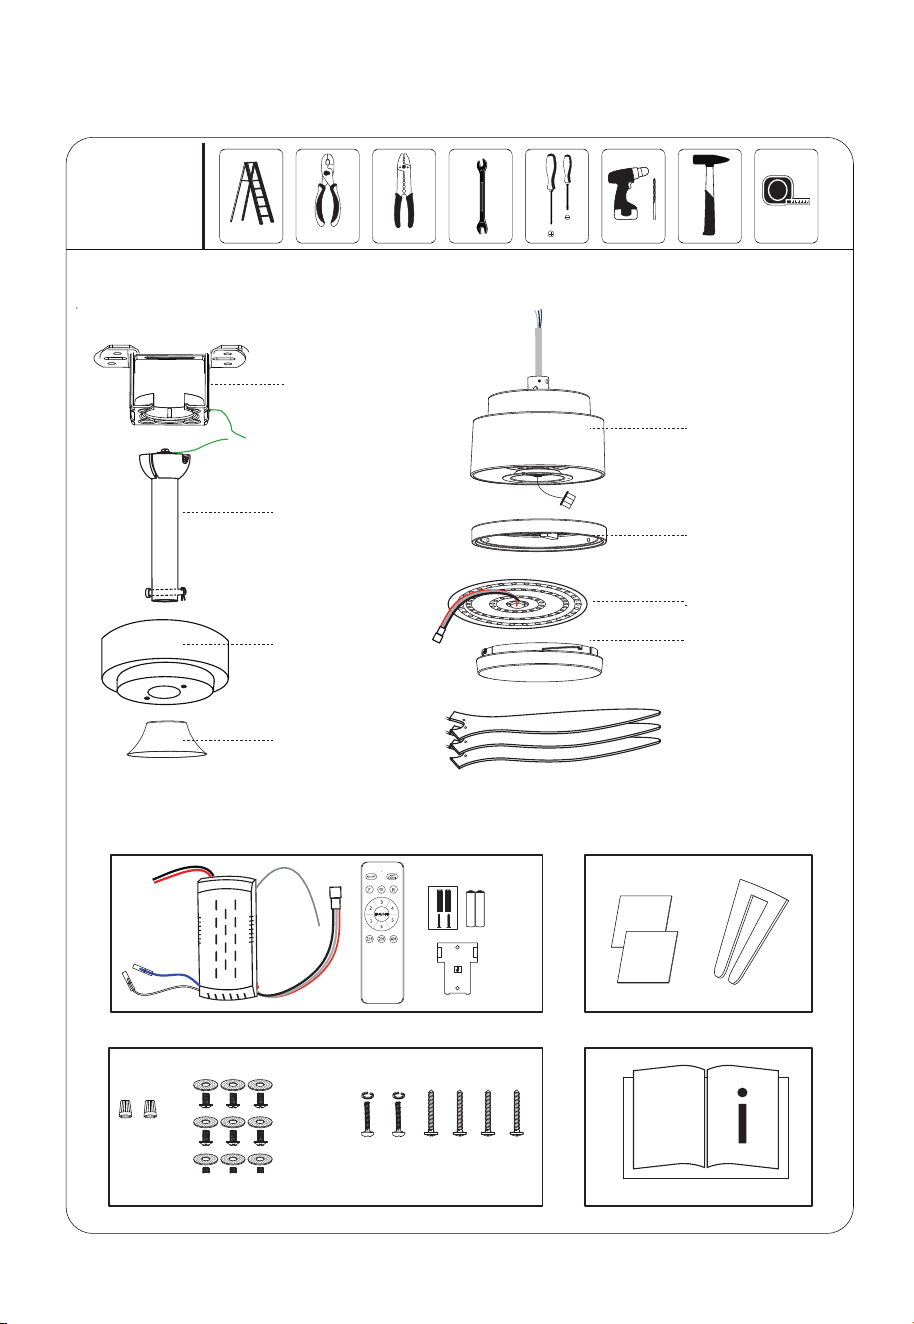
9.Blades
8. Light cover
6.Light kit
7.ight source
1.Bracket
4.Yoke cover
2.Down rod
3.Canopy
5.Body/motor
.1.
Tools
Needed
Installation kit
Instructions manual
Package Contents
Blade balancing kit
Remote control unit
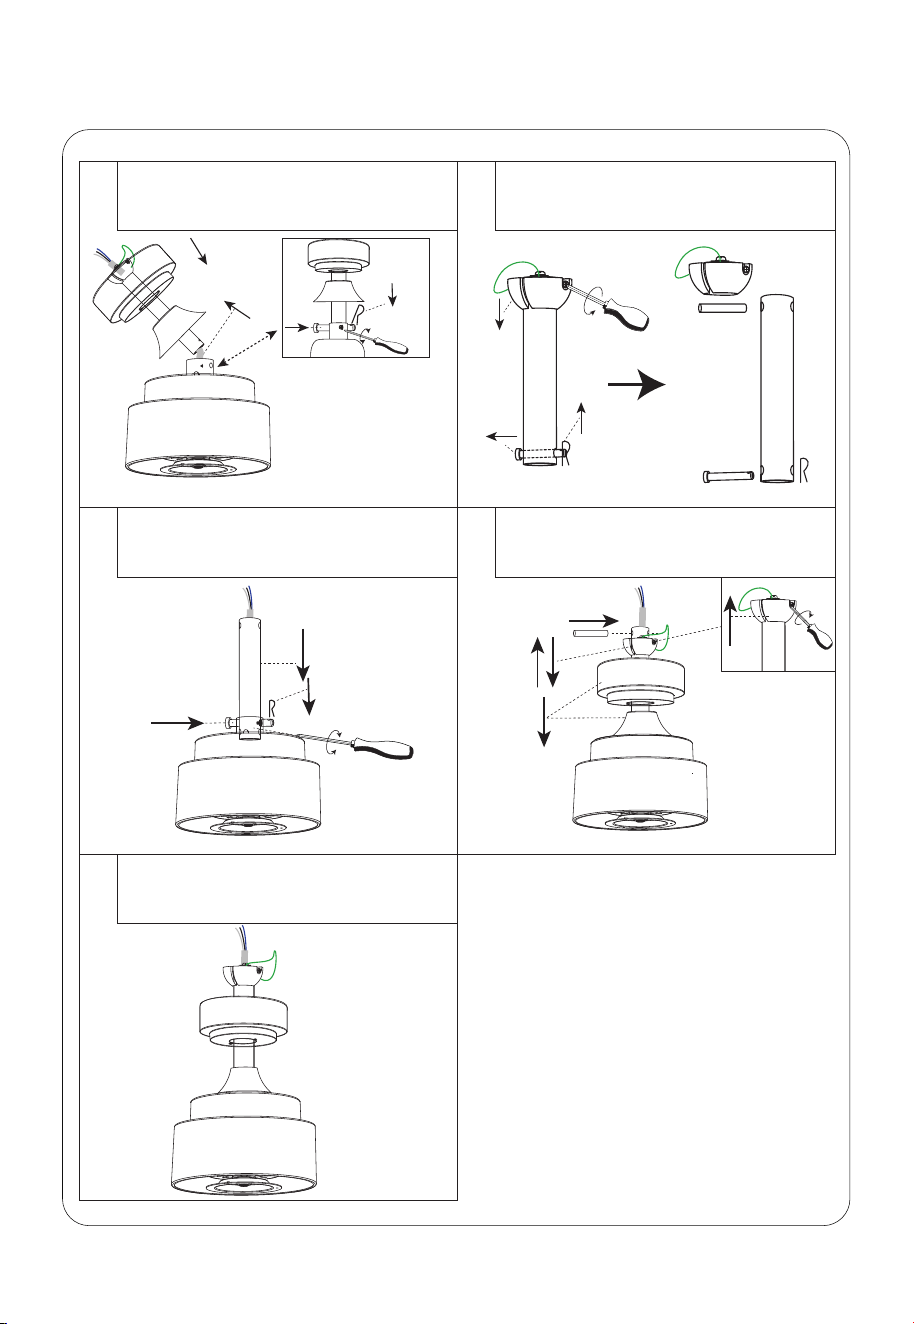
①
If you do not change the downrod, Please
follow this step to install.
2.Pass the cable through the down rod
and lock the down rod.
OK
②
⑤
③
If you replace the down rod of other
specifications, Please follow the following
three steps to install:
1.Decompose Drown rod
3.Install the yoke cover and canopy. Then
insert the fixing pin, push the Hanging ball
up, and fix it with screws.
④
screw
Step 1(Basic assembly of the fan)
.2.
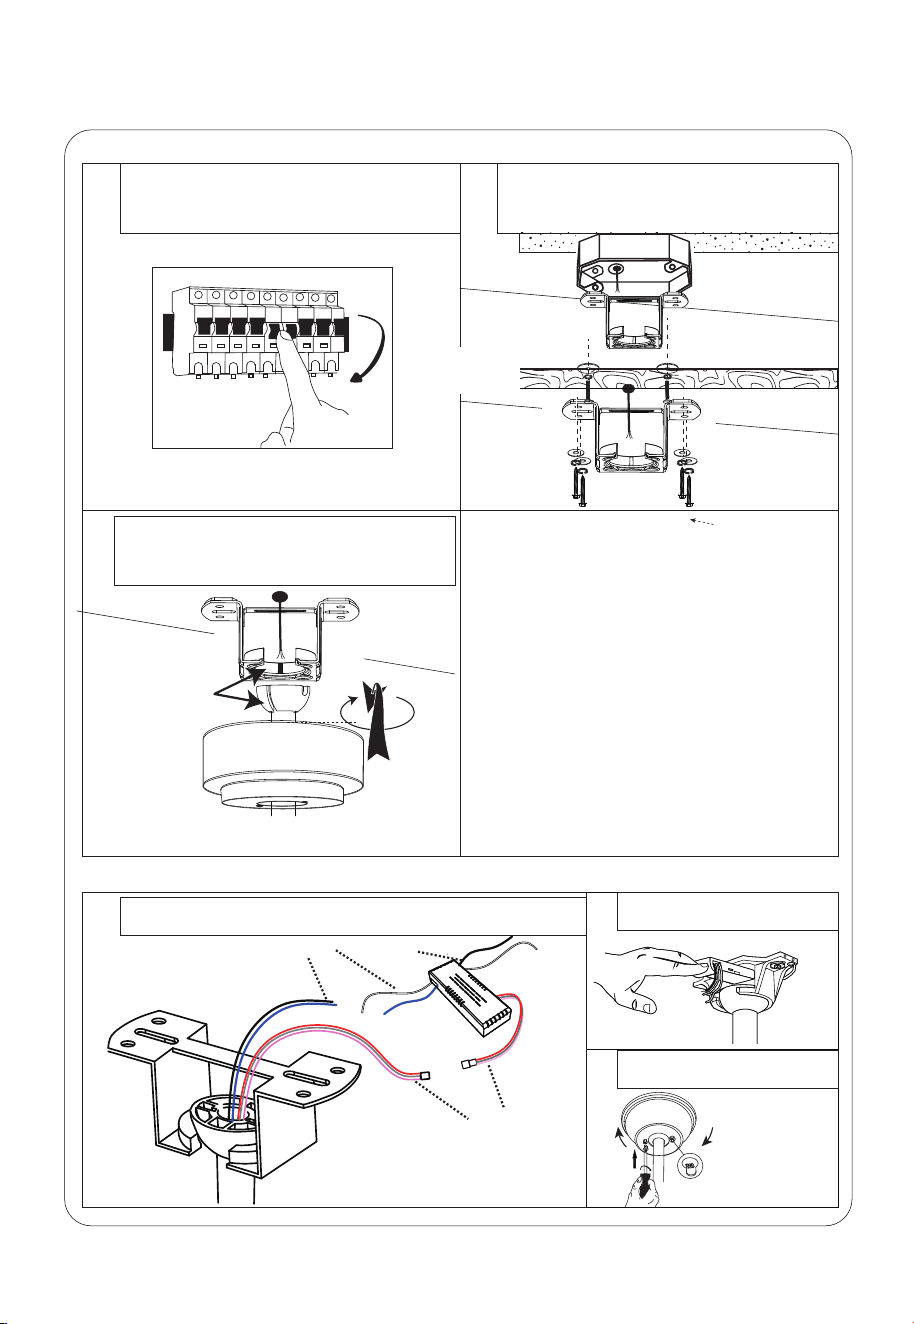
③
Snap the basically assembled fan into the
installed Bracket.
Step 2 (Ceiling bracket installation and fan into the installed Bracket)
FAN
Click!
buckle
①
Connect the wires according to the polarity (the color of the
House power cord may be different if the color is the same).
.3.
OFF
①
Turn off the fan power supply at the circuit
breaker box and the wall switch.
Step 3 (Receiver installation and wiring)
②
③
Put the receiver into the
Bracket and arrange the wires
Adjust the position of Canopy,
then lock it
②
Electrical
Outlet Box
ACCEPTABLE FOR
FAN SUPPORT
Can be installed on <15º sloped roof.
Choose the following installation methods
according to the actual situation of the roof.
②
or
Solid wood roof
Not included
Screw
Light source line
Ceiling line
Motor line
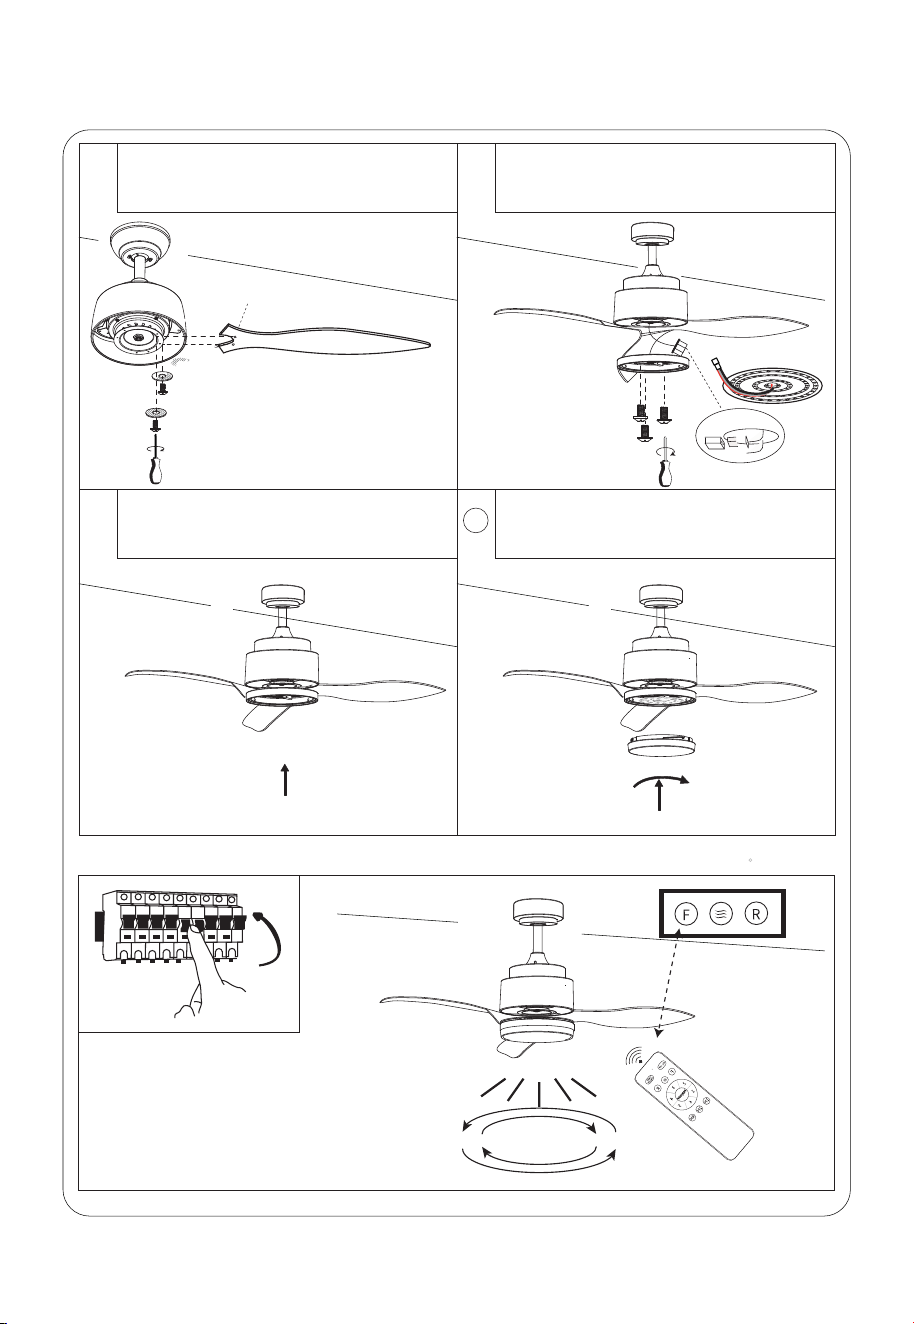
Step 4 (Blades and Light kit installation)
①
Align the blades with the mounting holes,
and then fix them with screws.
②
③
Install light source
Remove the pre-installed screws.
Connect the light kit cable, and then lock
the light kit.
Installation of light cover
4
.4.
Step 5(Switch on and ceiling fan works)
ON
Insert
The light source thread
has a port and is directly
plugged in.
It says "THIS SIDE UP" blades face up
Forward / Reverse
Swtich
.5.
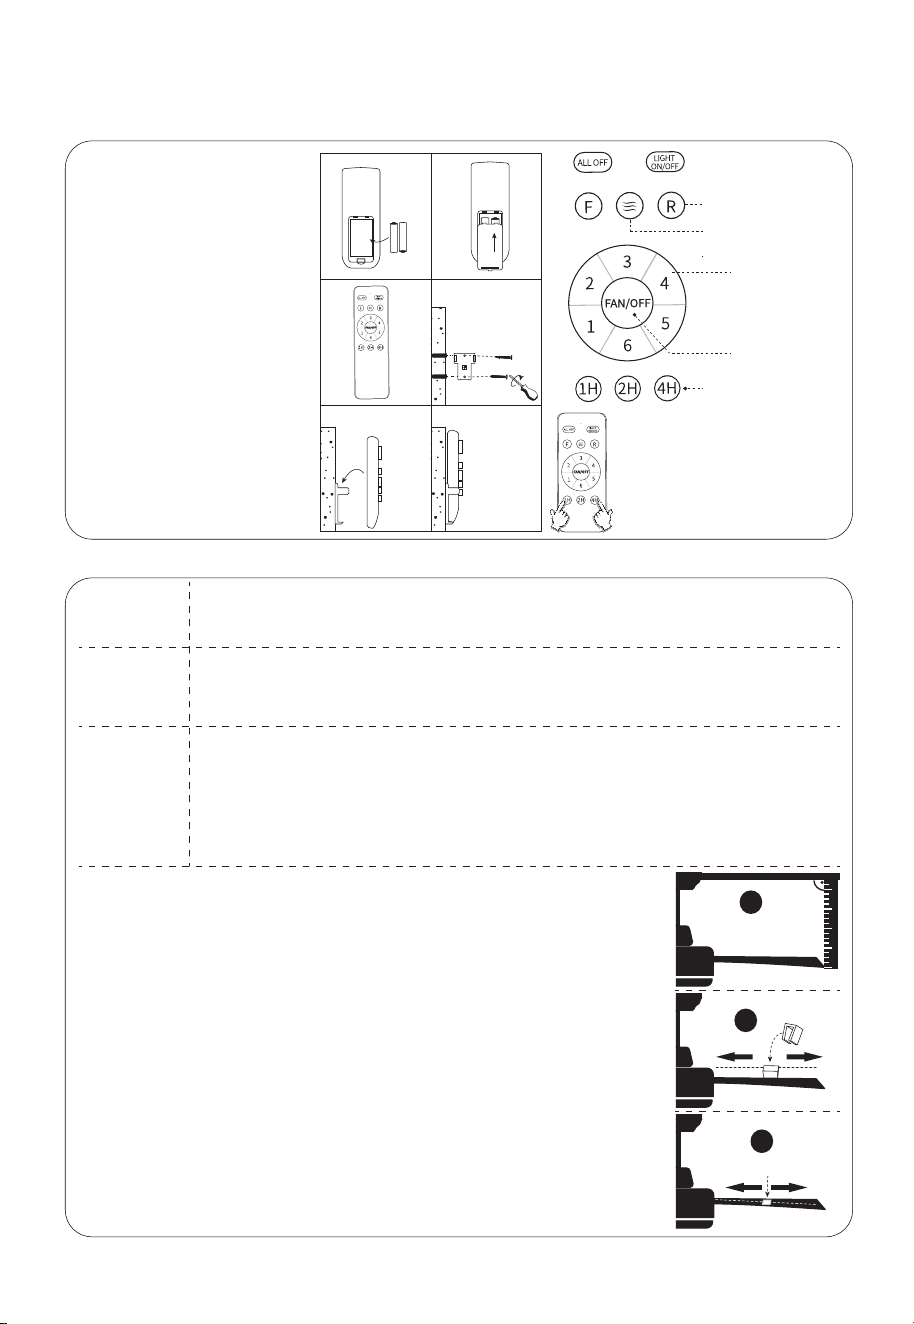
Remote Control ( Esmitter ) Operation
TroubleShooting
1.Check all fuses or circuit breakers if disconnecting the power supply to the fan.
2.Turn off electrical power and check all wire connections to fan and in switch housing.It must be
carried out by a electrician
1.The fan may be running in reverse, so air is going upward.
2.The room may contain items that obstruct the air flow.
3.The fan may be too small for size of the room.
1. Assure that the screws fastening blade arm to motor are tight and the lock washers provided for
that purpose have been used
2.Lower the upper canopy to ensure a separation from the ceiling of no less than 3mm to reduce
noisy
3.Check to see if any of the blades are cracked .If so,replace all of the blades
4.If this is the first use ,leave the fan on for at least 8 hours.In the event that mechanical noise
continues after this period,contact certified electrician
Balancing – Wobbling problems during fan operation
If the fan body wobbles during its operation, this is not a sign of malfunctioning (even if it wobbles
a few centimeters). To reduce wobbling, you can turn off the fan,and:
1.Check that all blades are properly fastened by tightening their screws.
2.Check the distance between each blade and the ceiling. Measurements to the ceiling can be
carried out as shown in the following diagram. If variations exist and you have already correctly
tightened the screws, check that all blades have the same shape. If any of them have a shape
that is visibly different, this may be causing an imbalance during fan operation.
If you have completed the previous steps and the wobbling has not resolved,you should apply
dynamic balancing with the kit provided, as explained below:
1.Turn the fan on to the highest speed so that the greatest amount of wobbling is produced.
2.Turn off the fan. Select a blade and place a clip on it (see diagram) halfway between the
fastening and the far edge of the blade.
3.Turn on the fan and check whether the wobbling has improved or gotten worse.Turn it off once
again and if the wobbling has not improved, place the clip on another blade. Repeat this
process and determine on which blade it improves the wobbling.
4.Leave the clip on the blade that produces the best results. Move the clip forward or backwards
on this blade until finding the position that offers the best results.
5.Afterwards, remove the clip and place one of the weights on the upper part of the center line of
the blade at the position where the clip was located.
1
3
2
Fan does
not work
Fan turns
but airflow is
inadequate
Fan is noisy
Sixth Gear
Wind Speed
Fan OFF
Fan Timer Switch
Forward and everse
Natural wind
1. Please check whether the
battery is installed correctly and
whether it is charged. If
necessary, replace the remote
control battery.
2. Please check if there are
similar remote control products
working nearby, because remote
control products of the same
frequency will interfere with each
other.
3.Please press and hold the
“MED”and “LOW” buttons at the
same time within 5 seconds after
the product is powered on, until
you hear two beeps to succeed.
If it doesn't work, please try
again.
① ②
④
③
⑥
⑤
If emitter can not
control the fan
AAA 1.5V
After turning on the power, long press 1H
and 4H two keys, three seconds later, there
will be a "D" sound, that is, the code is
successfully paired

Warranty
Dear Customer:
This product from the date of purchase, free warranty 1 year. If the product has been
misused, damaged by accident or in any other way of improper use, this warranty
becomes void. If you have any problem in using the product, please feel free to
contact us, after-sales email address is:
Your satisfaction is our purpose of service.
Q:What if the lampshade breaks?
A:Dear, please contact us immediately for free replacement, we will send you
again in 5-7 days!
Q:Why does the light go off or flicker?
A:When this happens, it may be that the light source port line is not plugged in tightly
or there is a problem with the light source panel. You can first plug in the port again.
If not, please contact us!
Q:What if the ceiling fan's lights or fans don't work?
A:If you have these problems, please contact the after-sales mailbox, we will provide
you with solutions in time, and Surtime ceiling fan guarantee free return and
exchange within 60 days!
Customer questions & answers