1
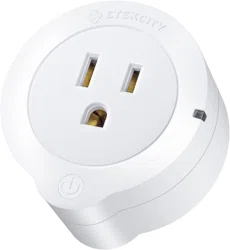
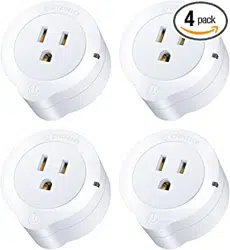
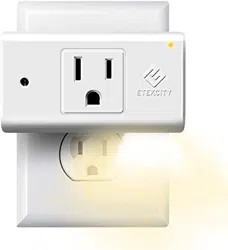
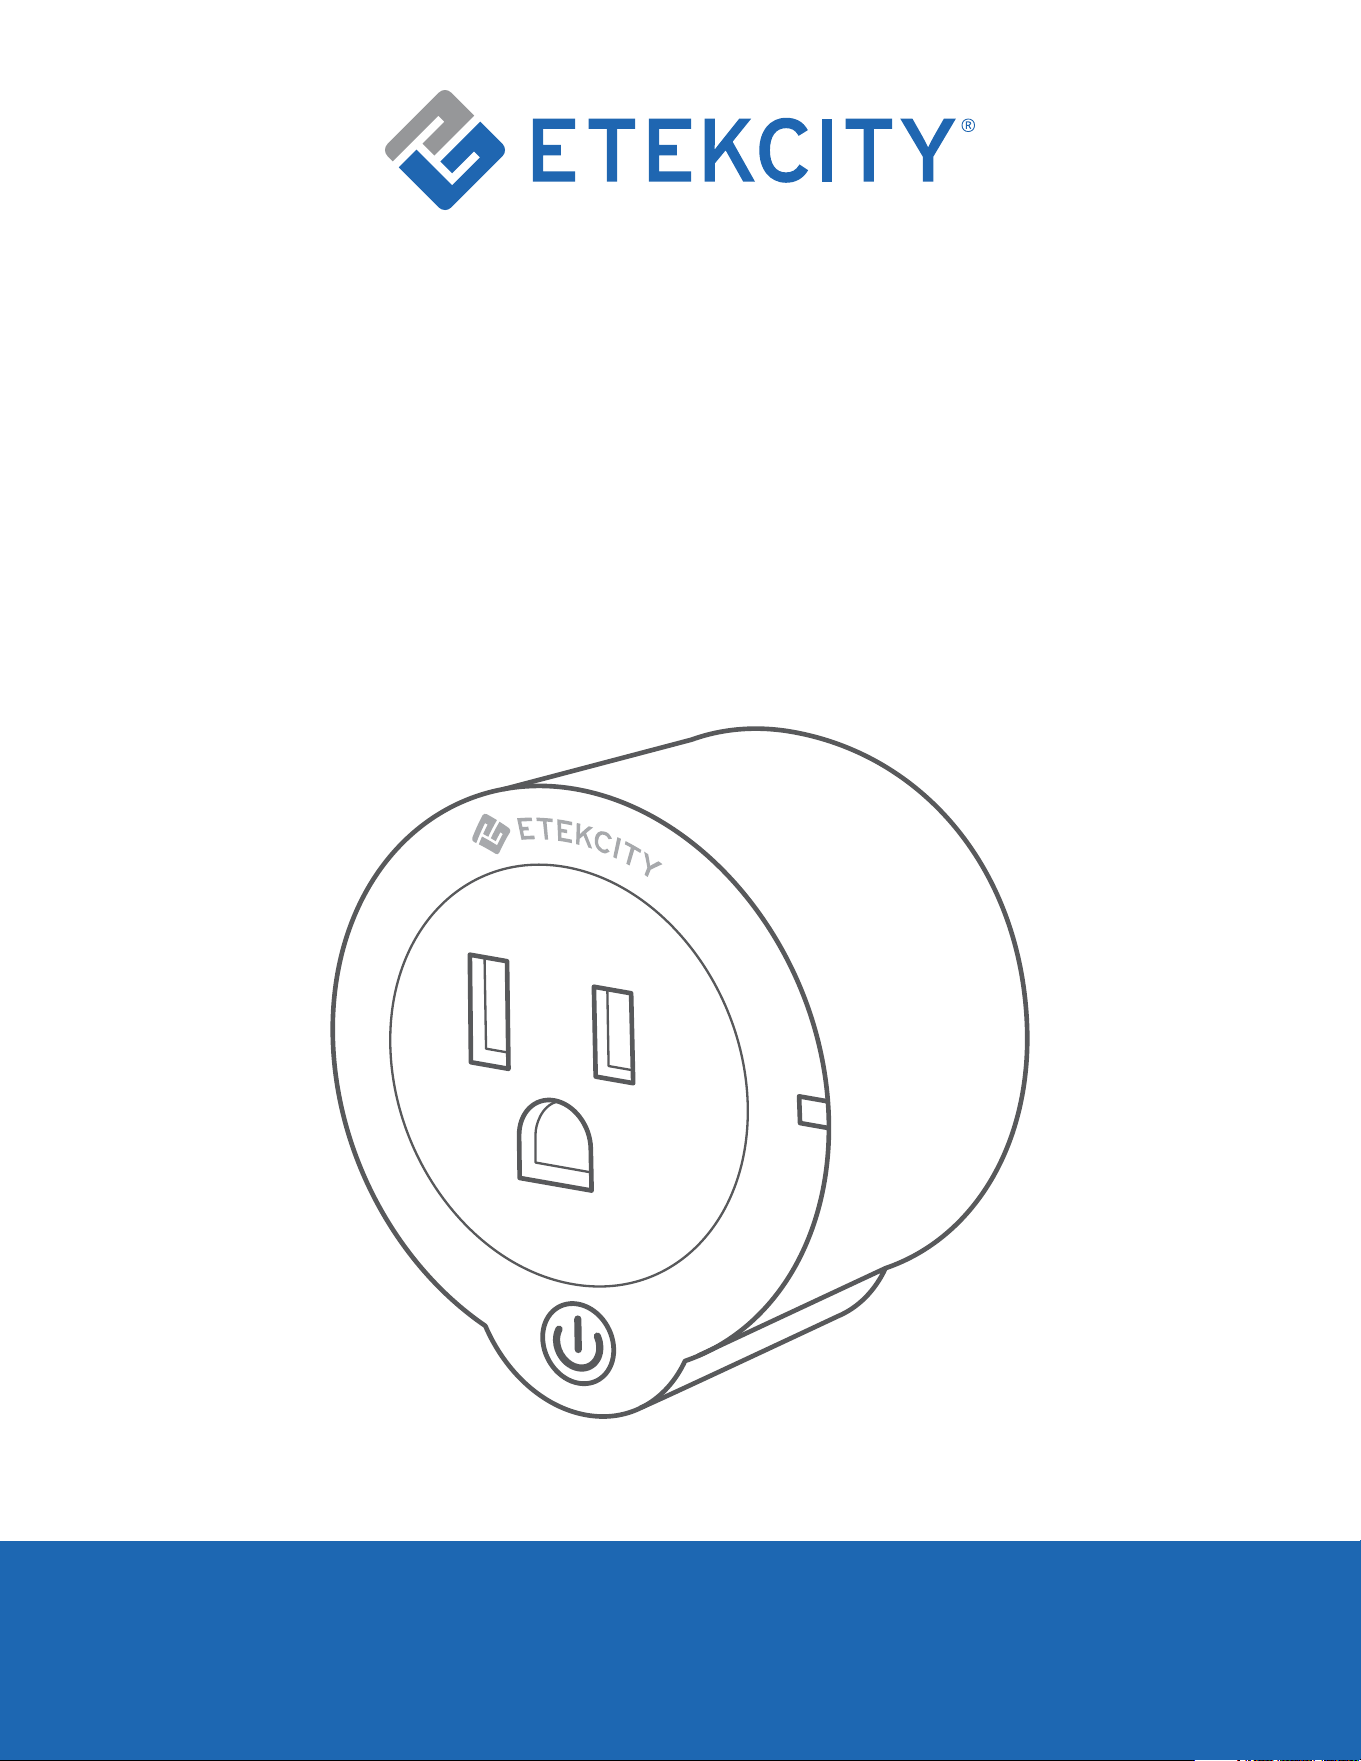
Voltson Smart WiFi Outlet
Model: ESW01-USA-R19 / ESW01-USA-R6P
Questions or Concerns?
Mon–Fri, 9:00 am–5:00 pm PST/PDT
support@etekcity.com • (855) 686-3835
User Manual

2
Your smart outlet allows you to control electrical
appliances, such as lights, fans, and kitchen
appliances with your Android™ or iOS® devices.
With the free VeSync app, turn your appliances on
and off from anywhere, at any time.
If you have any questions or concerns, please
reach out to our helpful Customer Support Team
at support@etekcity.com. We hope you enjoy your
new smart outlet!
Exclusive deals, giveaways, and product registration.
Better products for better living.
Find us at etekcity.com
Thank you for purchasing the
Voltson Smart WiFi Outlet by Etekcity.
Become an Etekcitizen

3
Table of Contents
4
5
6
7
8
9
11
11
12
16
18
20
21
22
23
24
25
26
26
26
27
28
29
29
32
35
41
41
41
42
49
51
Specifications
Safety Information
Product Diagram
LED Indicator Light Chart
VeSync App Setup
Configuration
Functions
• Turning the Smart Outlet
On/Off
• Schedules
• Timer
• Away Mode
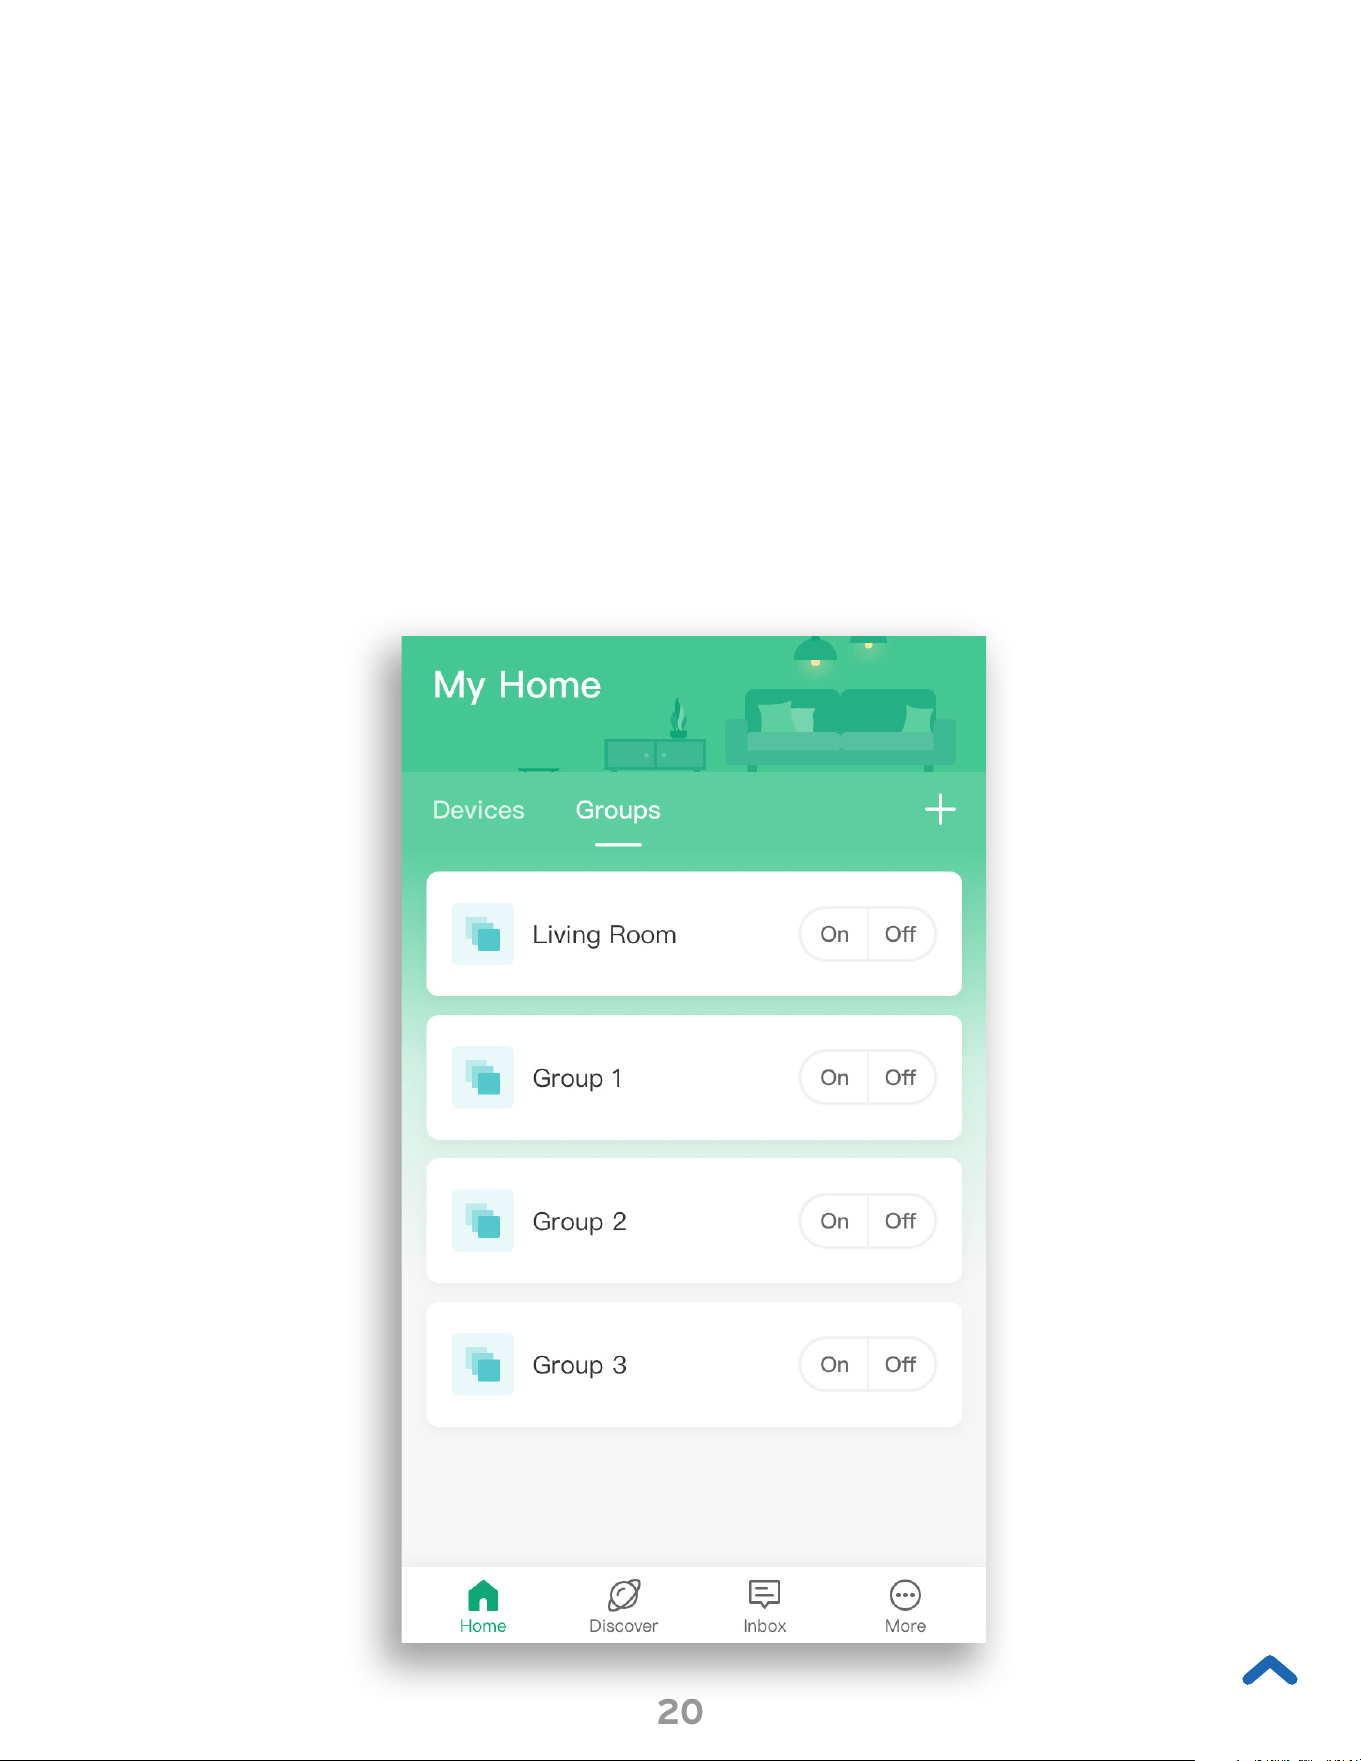
Groups
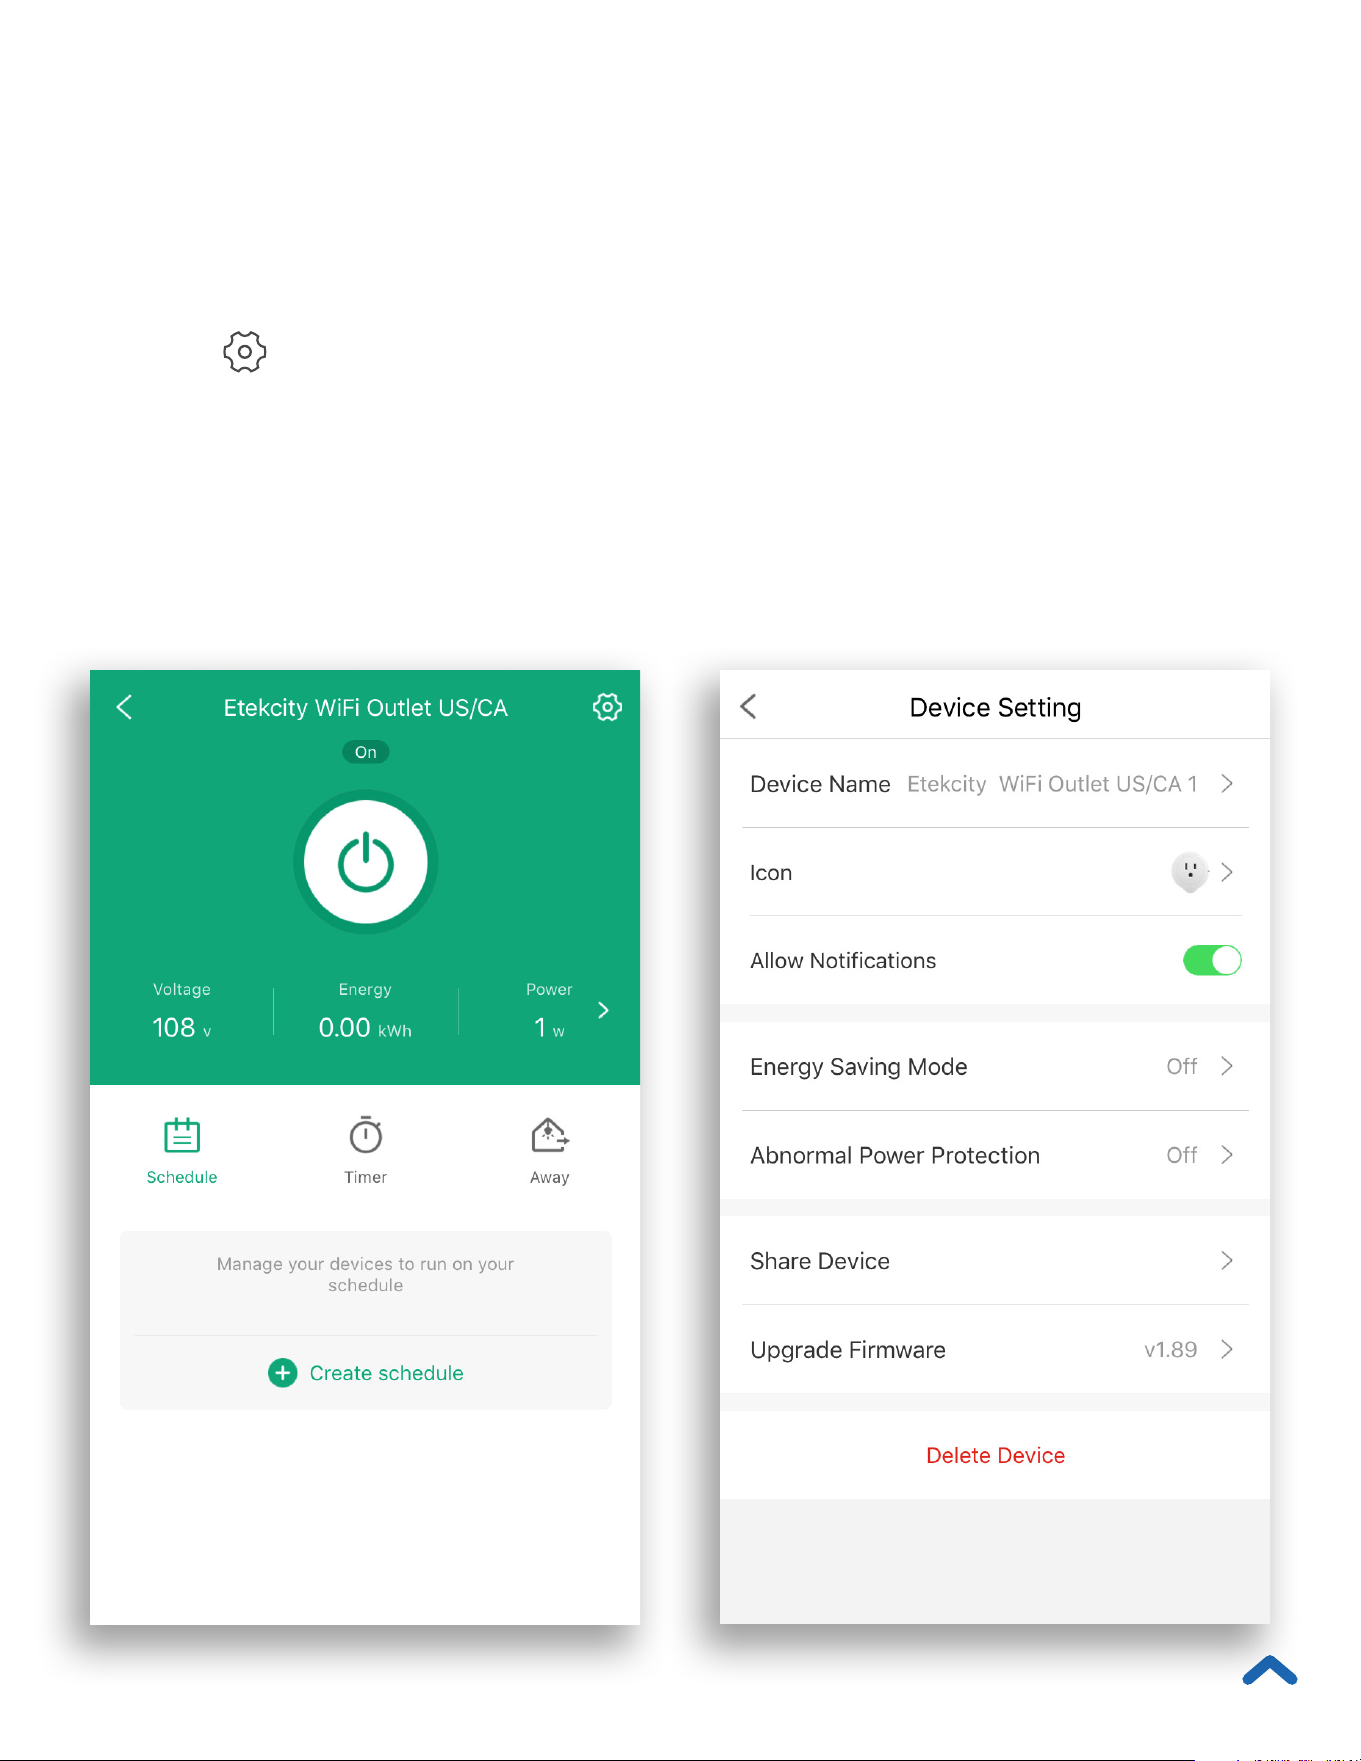
Device Settings
• Energy Saving Mode
• Abnormal Power
Protection
• Share Your Smart Outlet
• Delete a Smart Outlet
More Features
• Connecting with Amazon
Alexa
• Connecting with Google
Assistant
• Contact Customer
Support
Help and Feedback
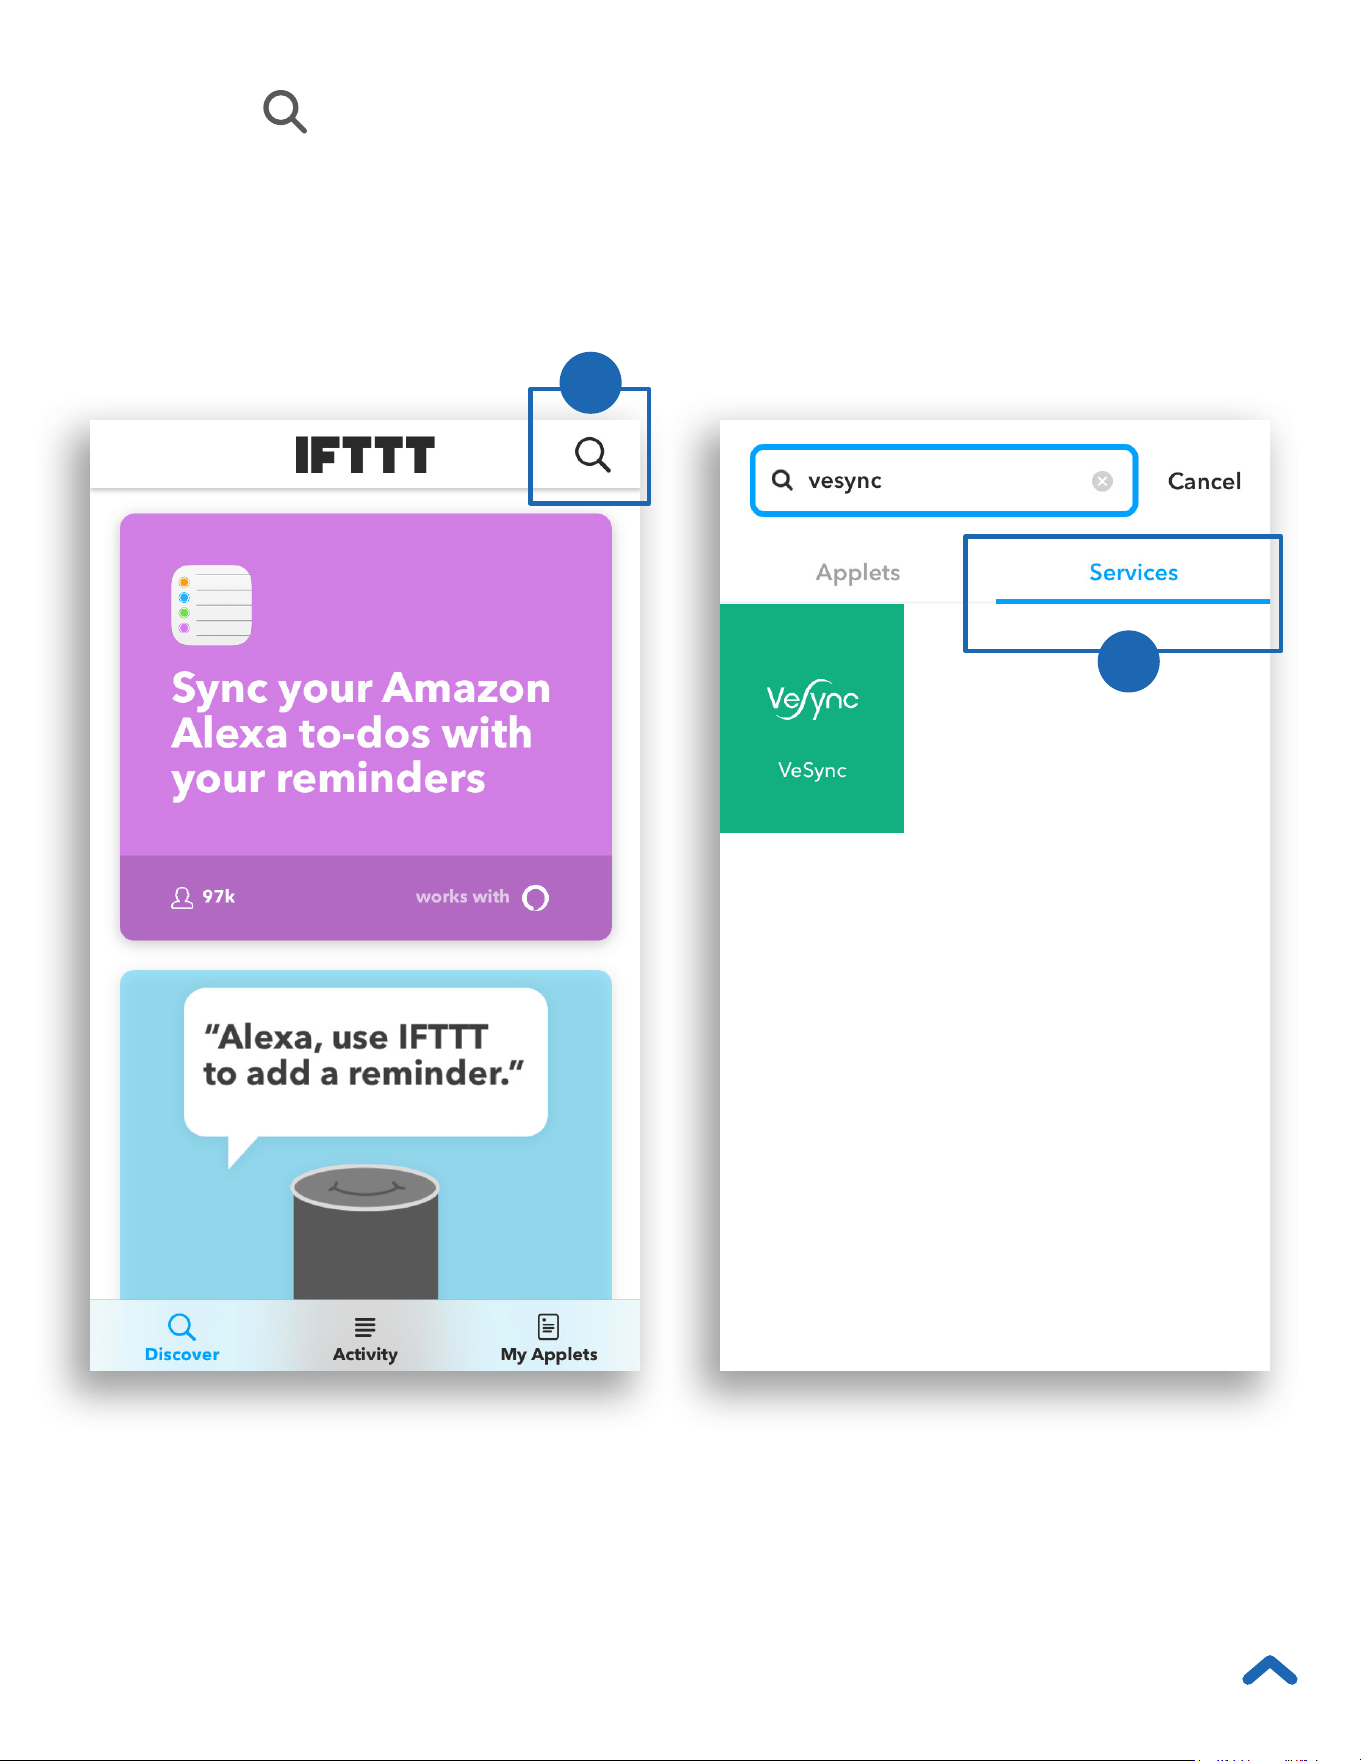
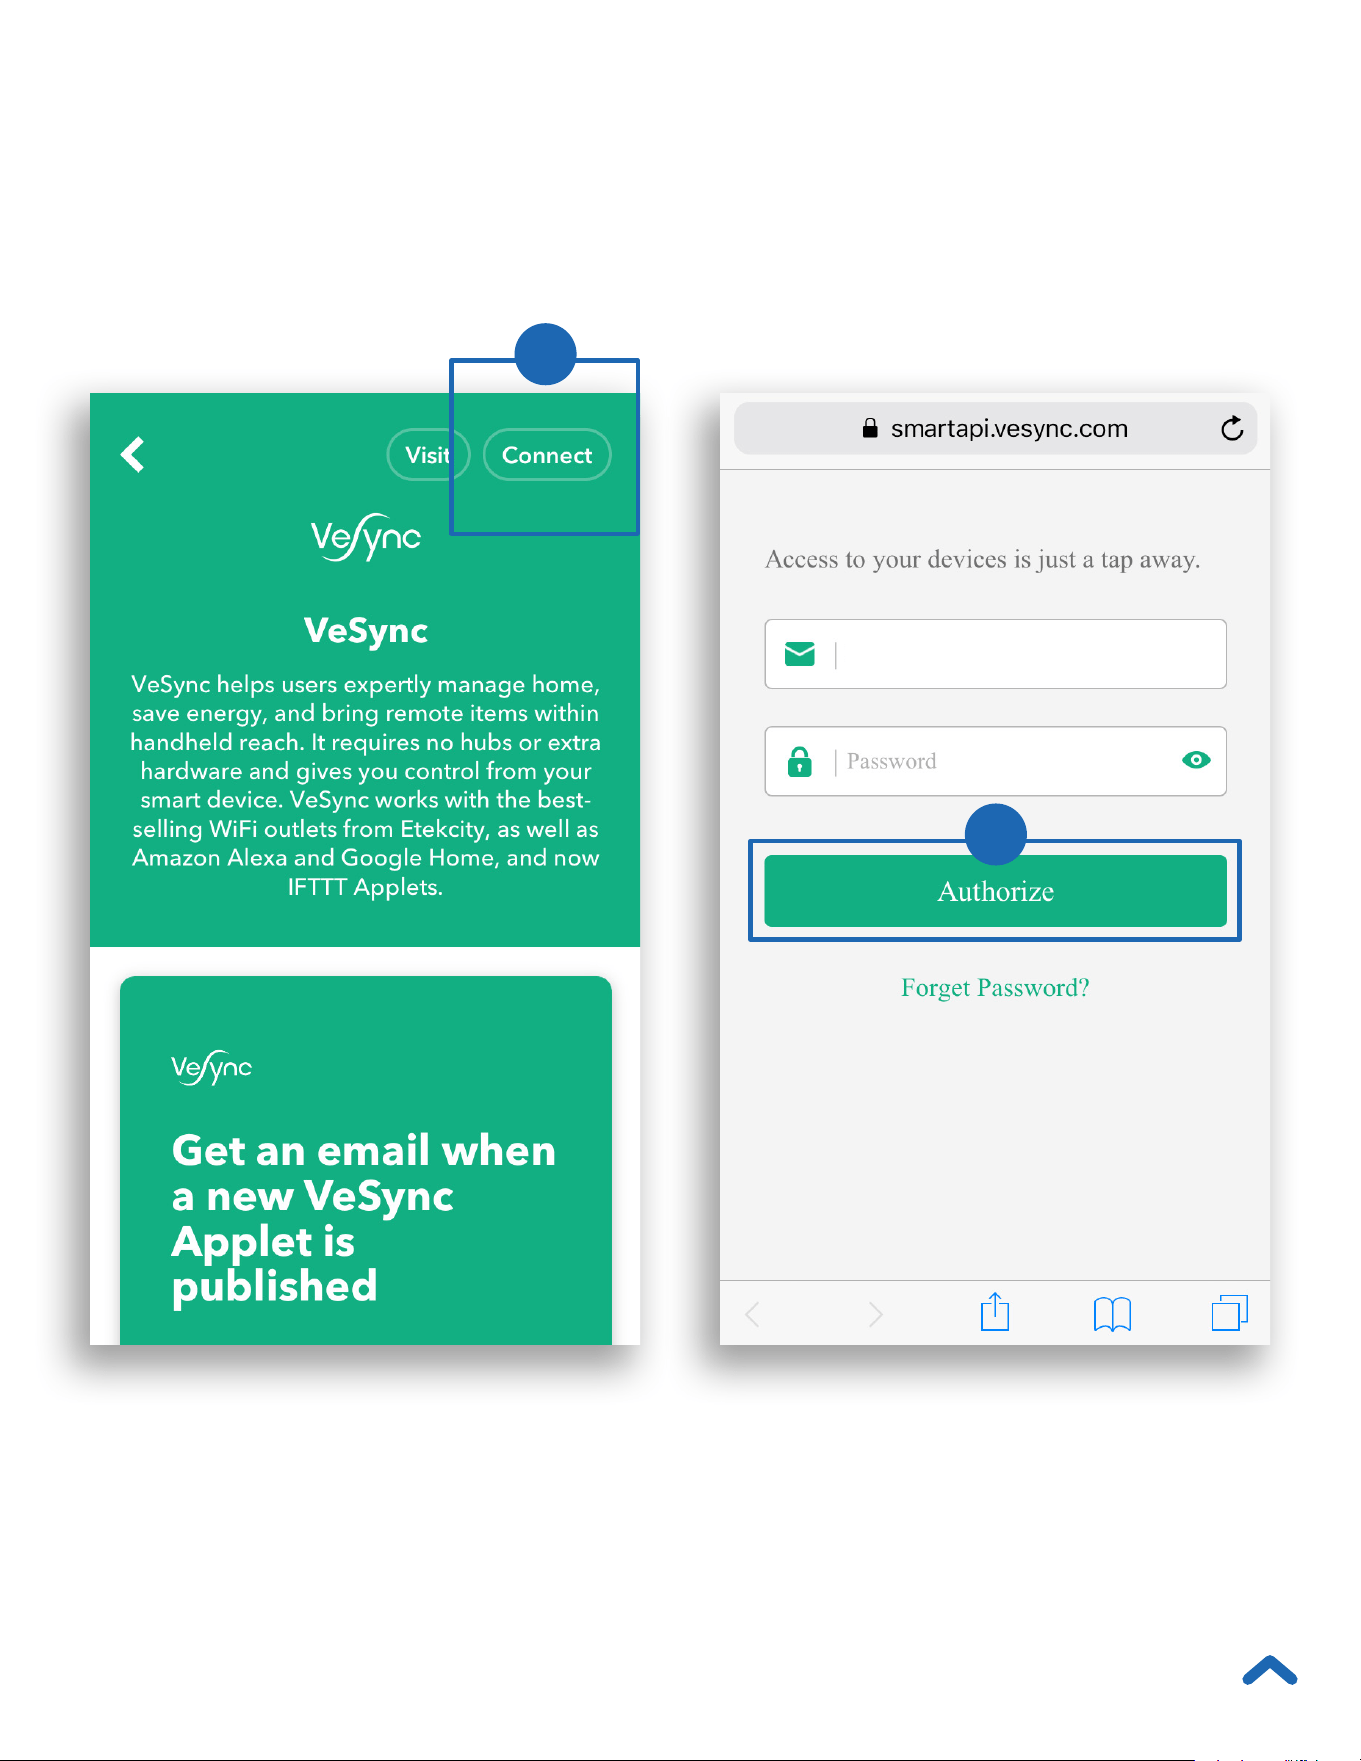
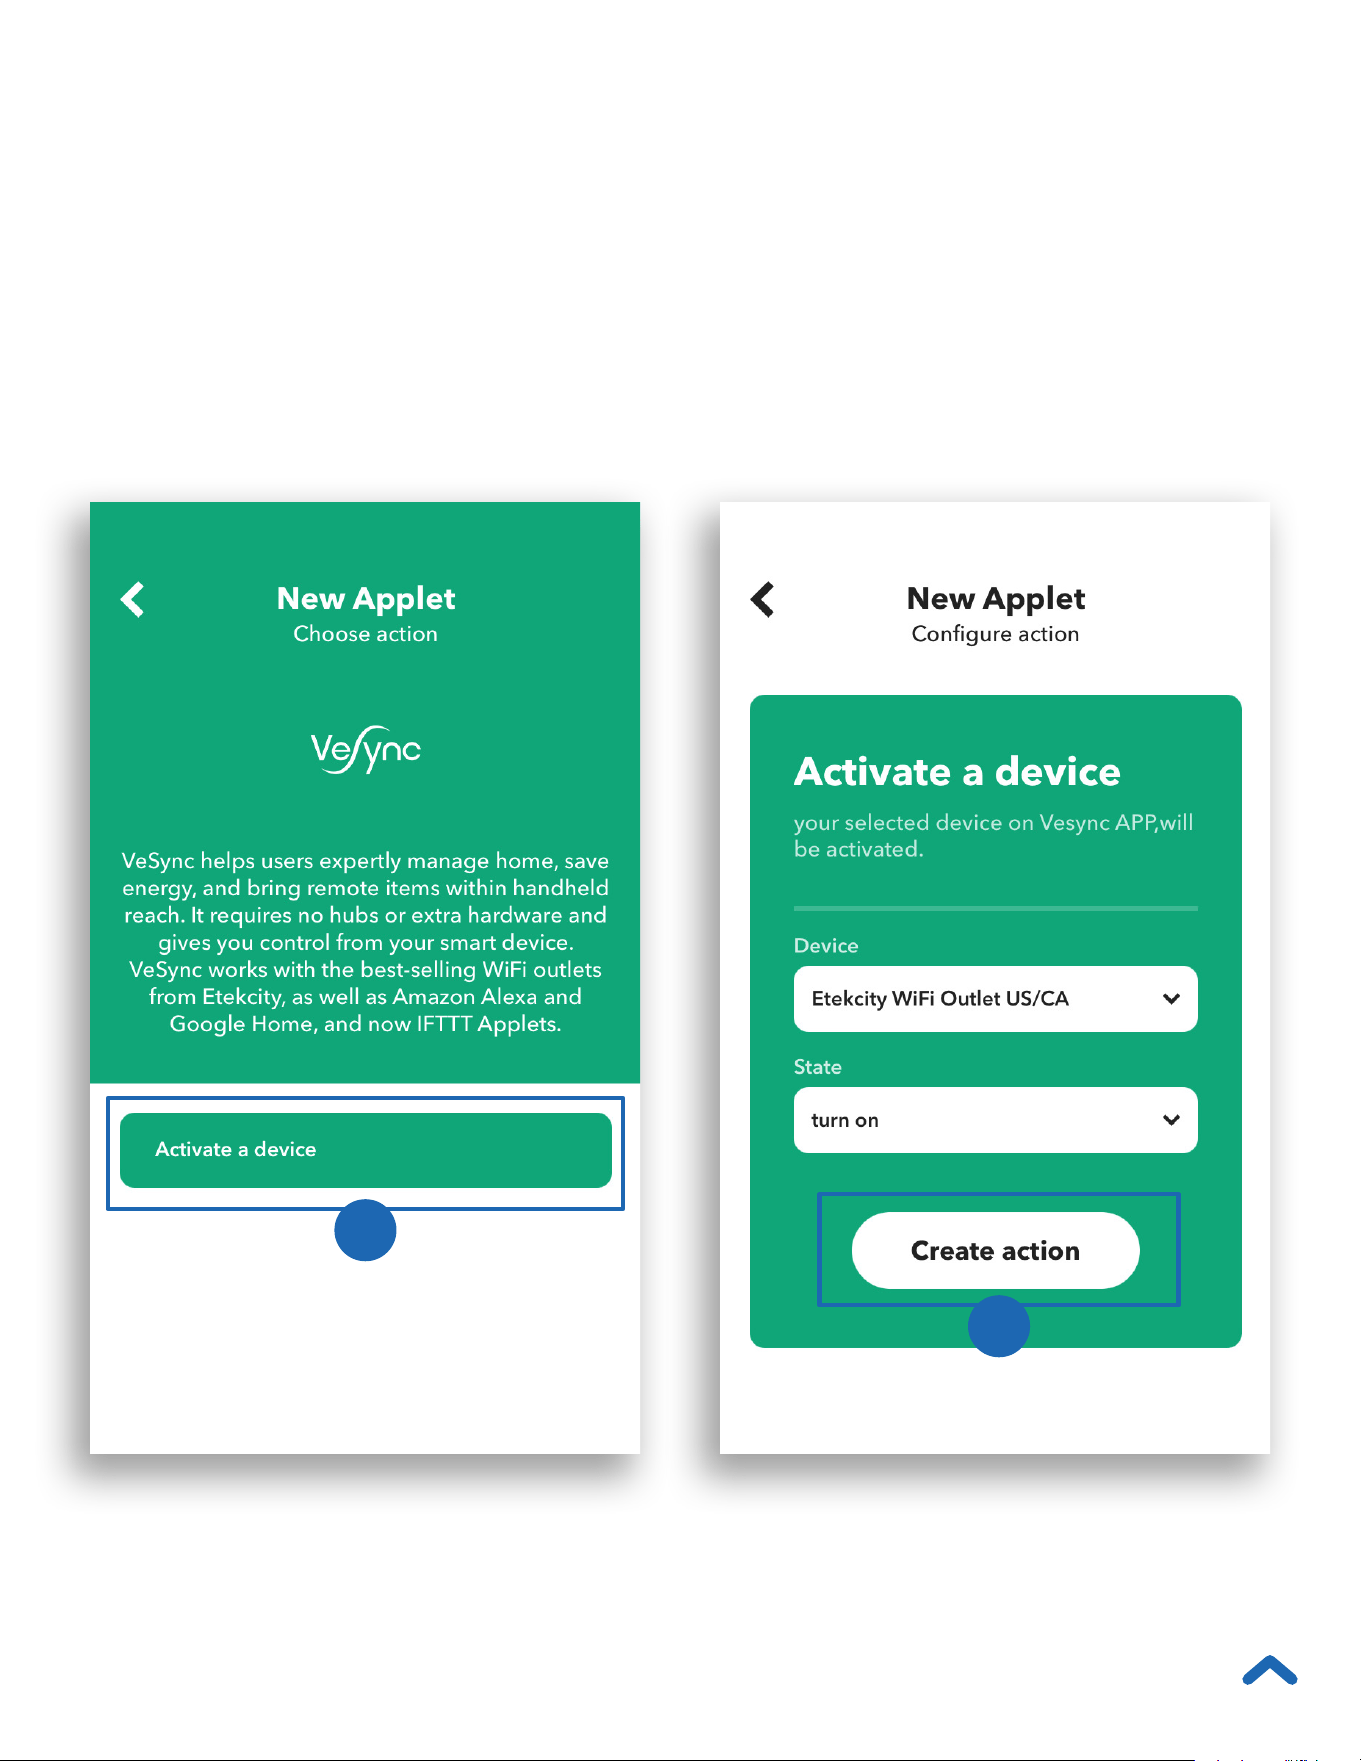
IFTTT
• Pairing Your Smart
Outlet with IFTTT
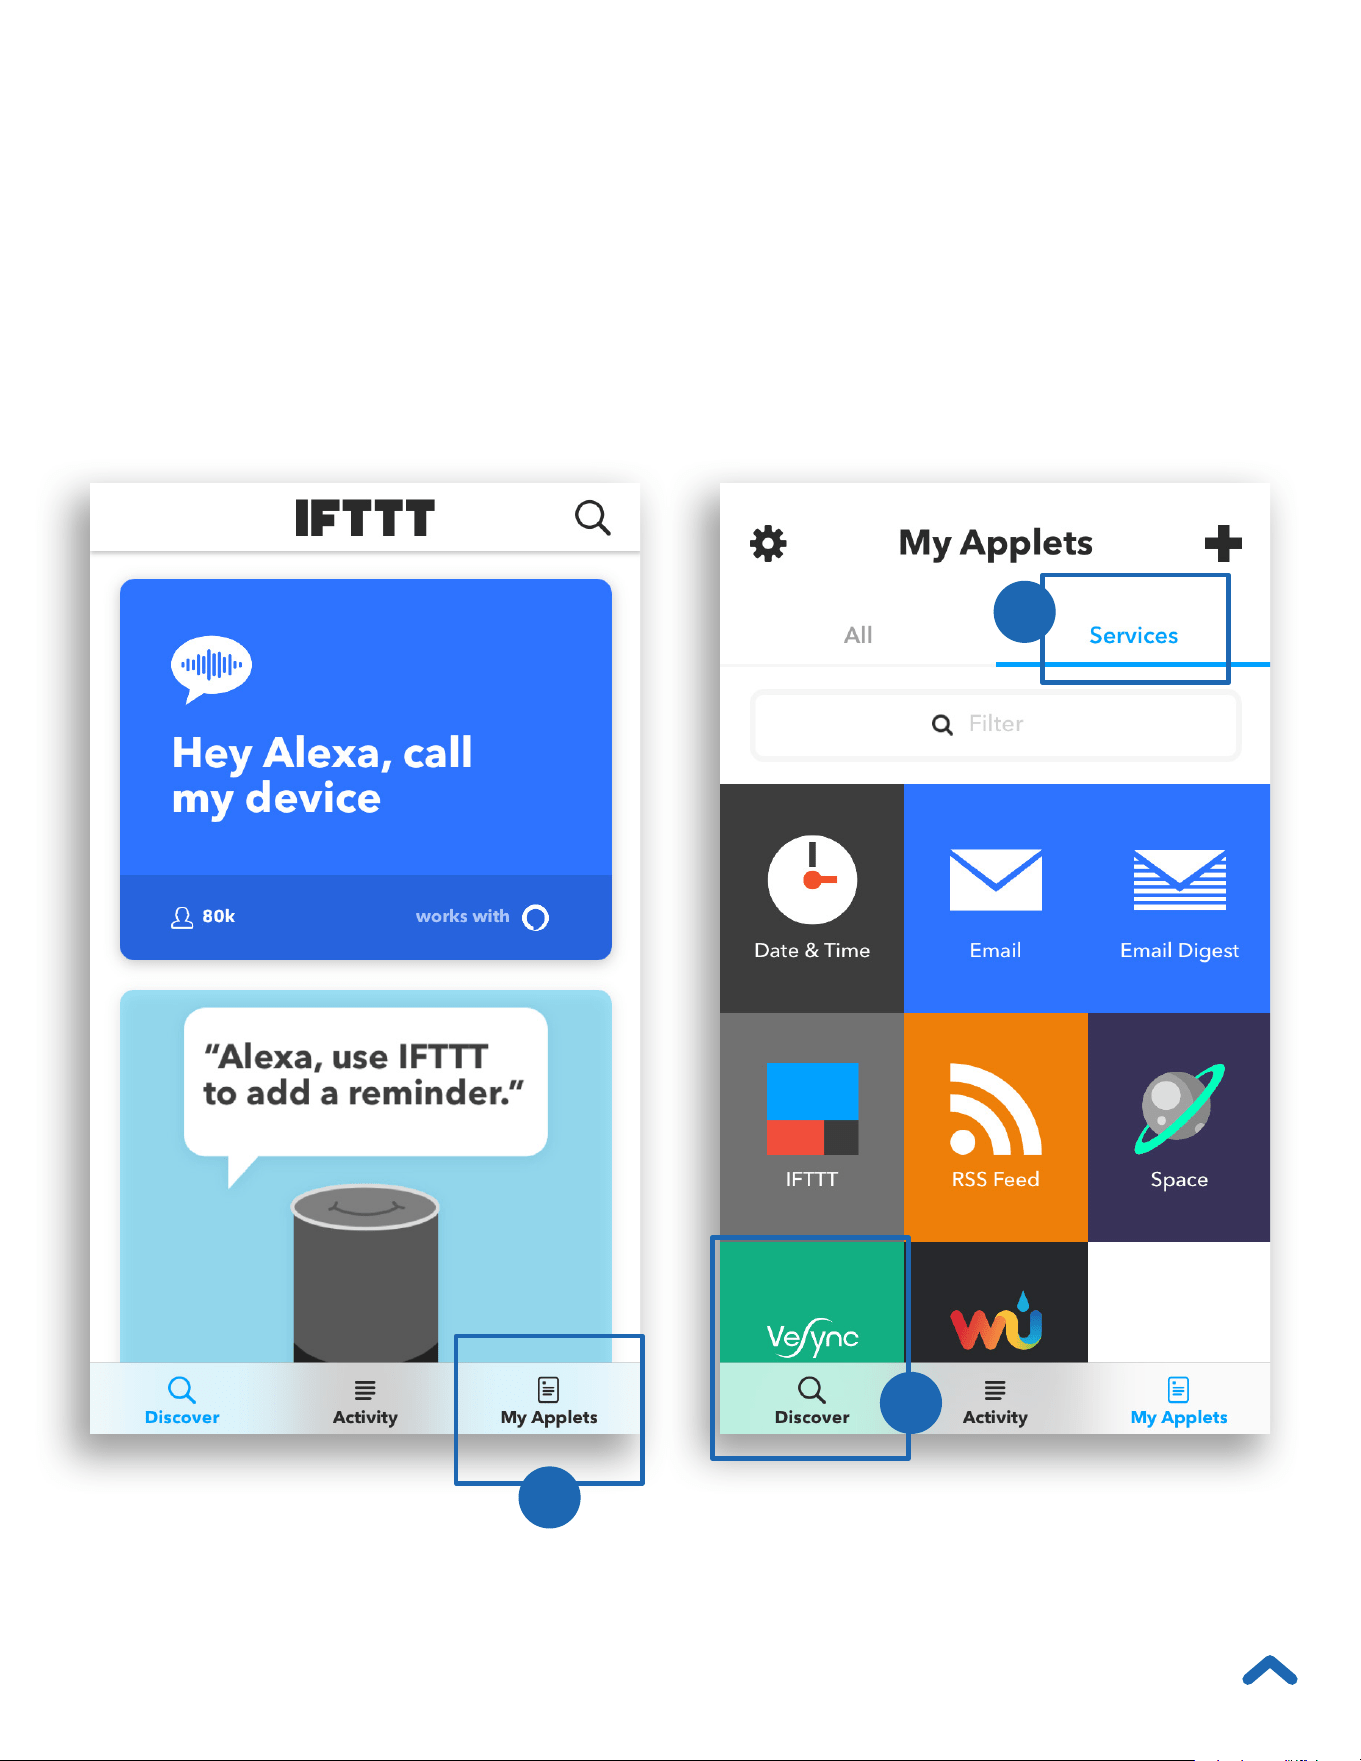
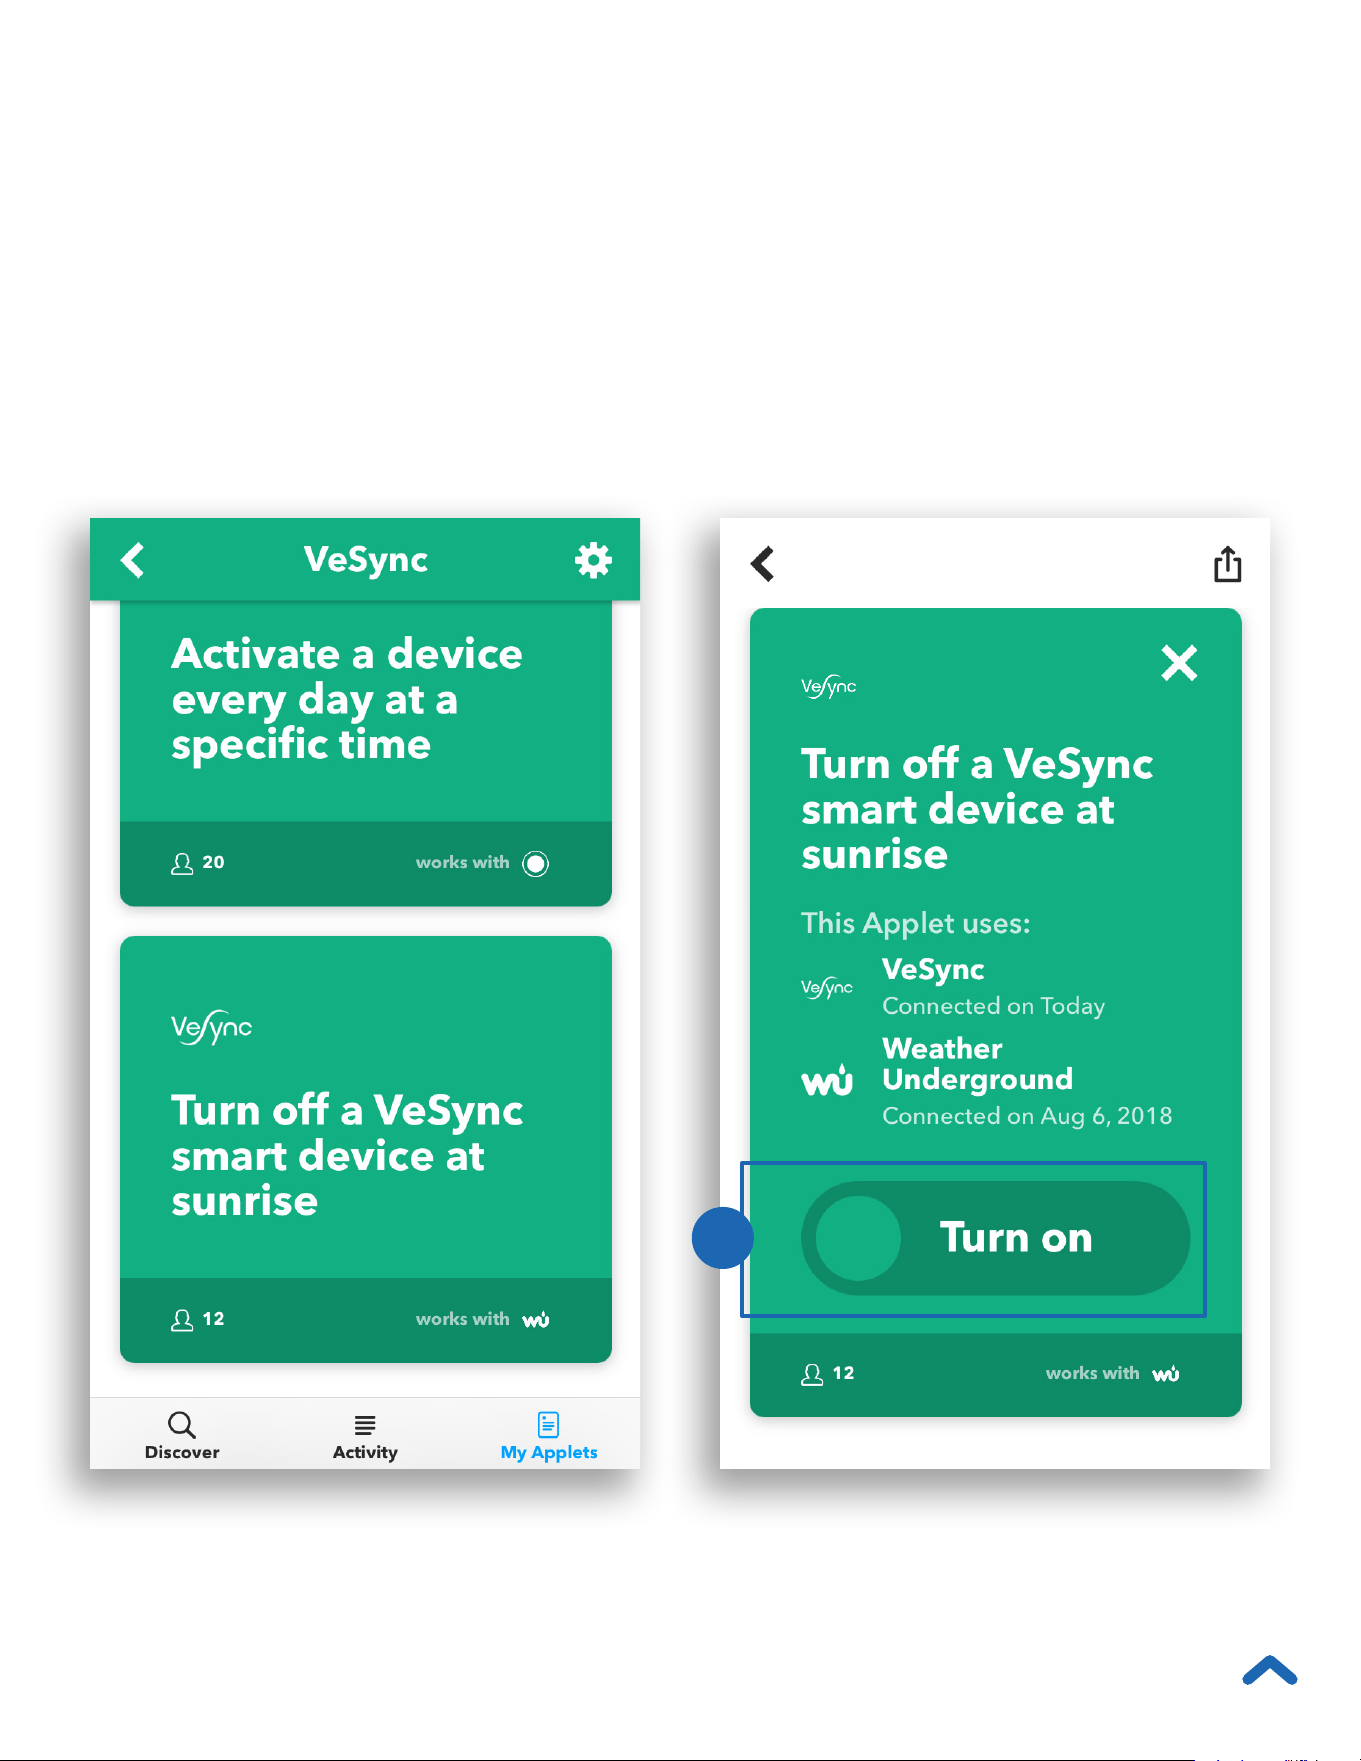
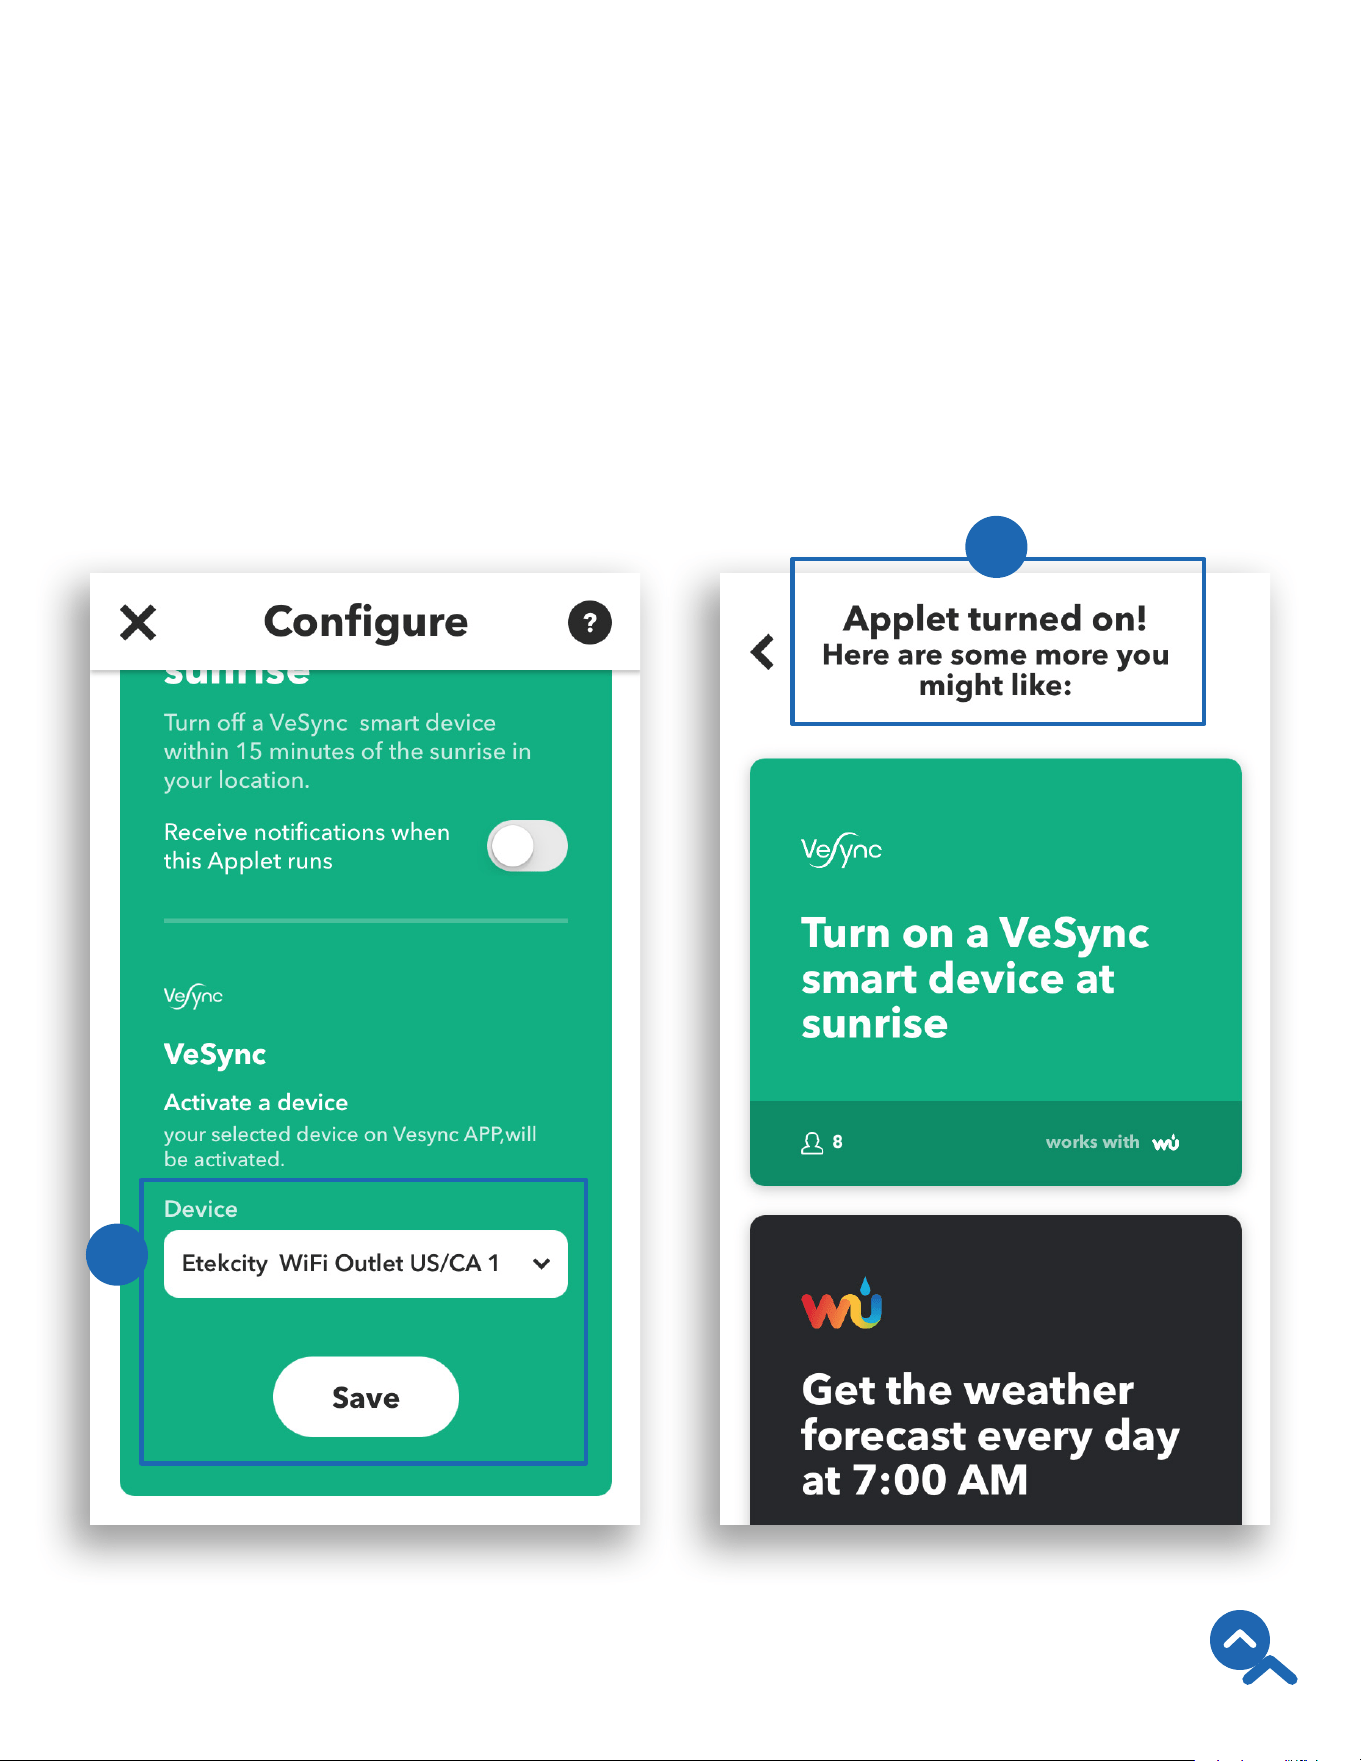
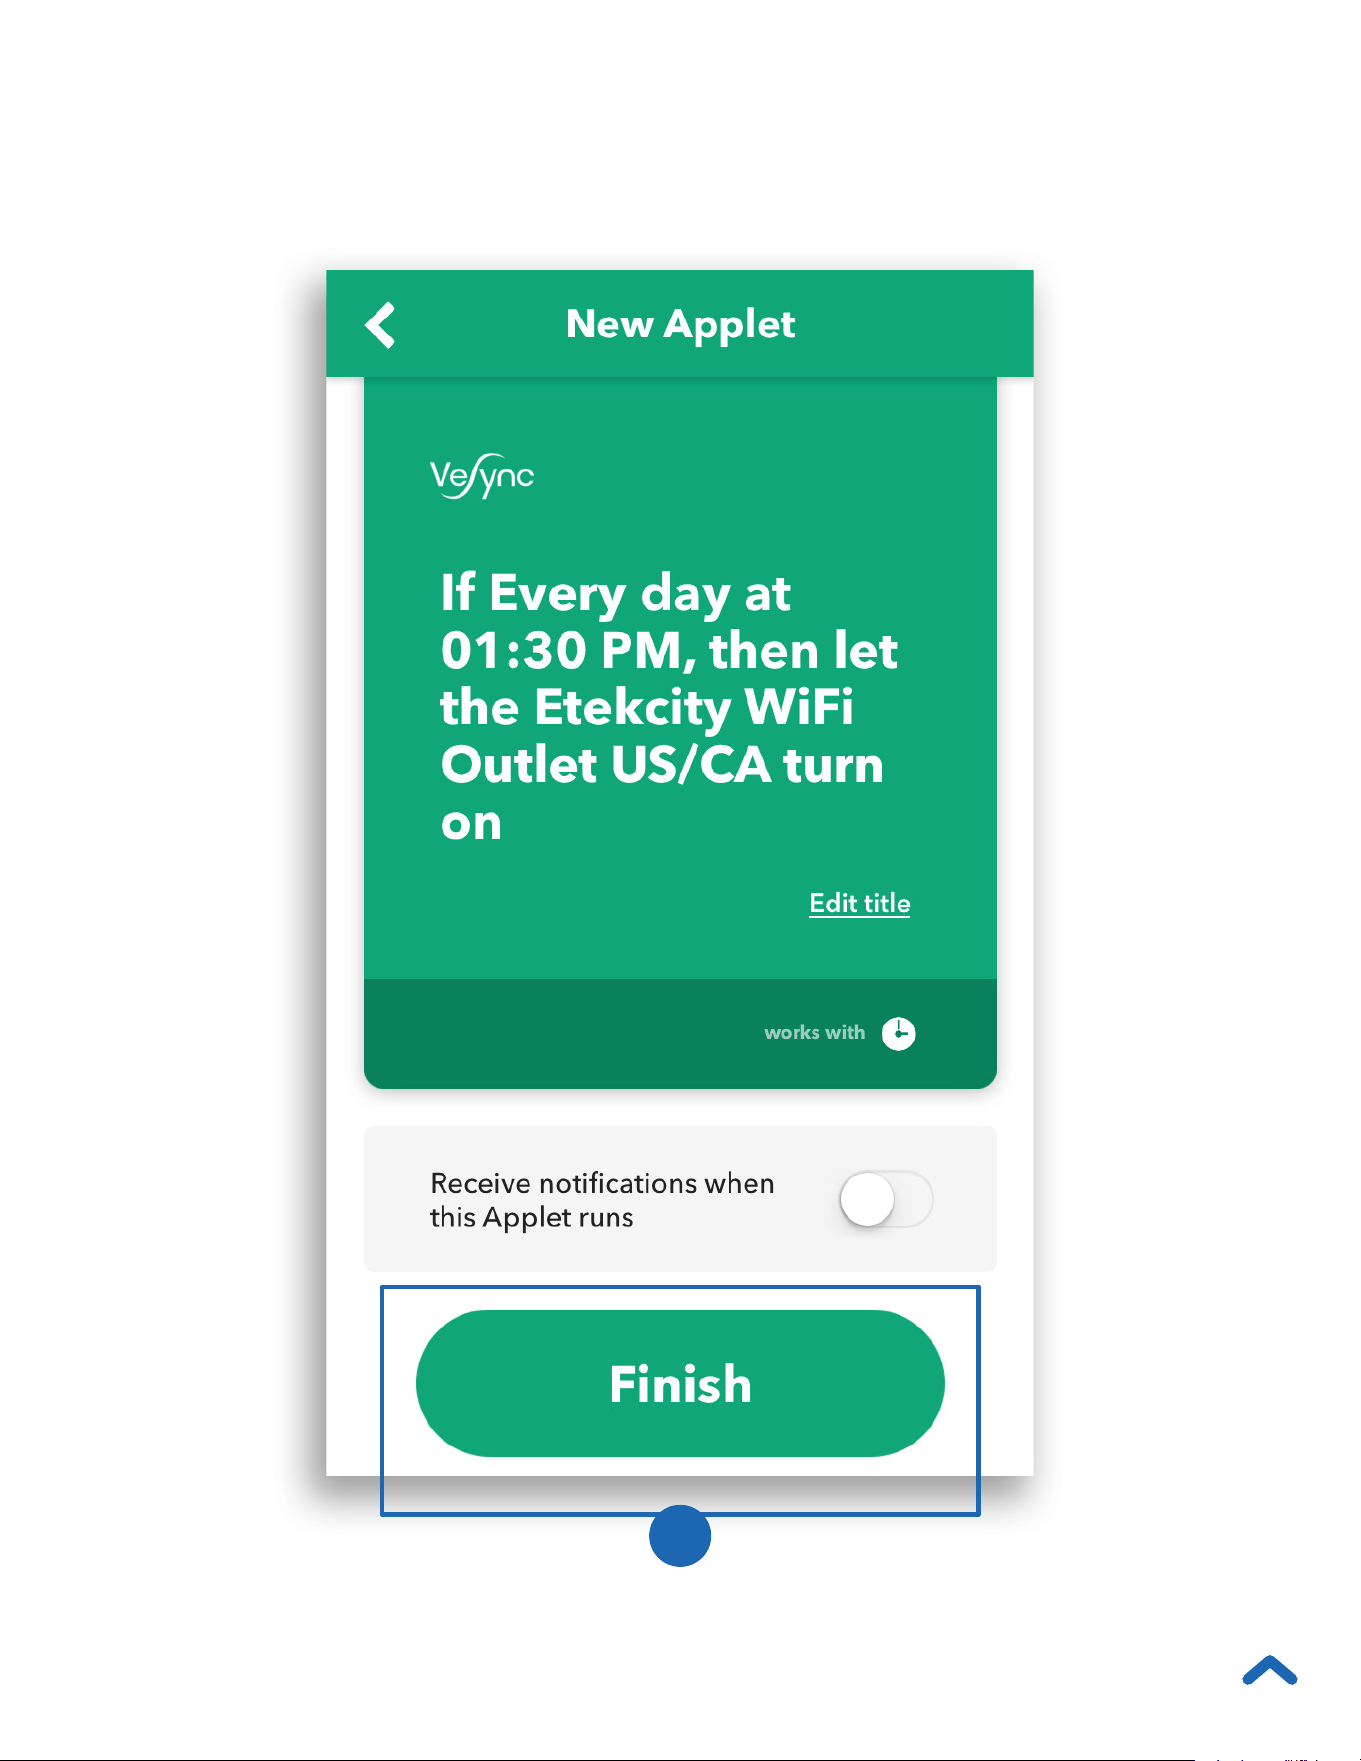
• Create an Applet
Using Existing VeSync
Templates
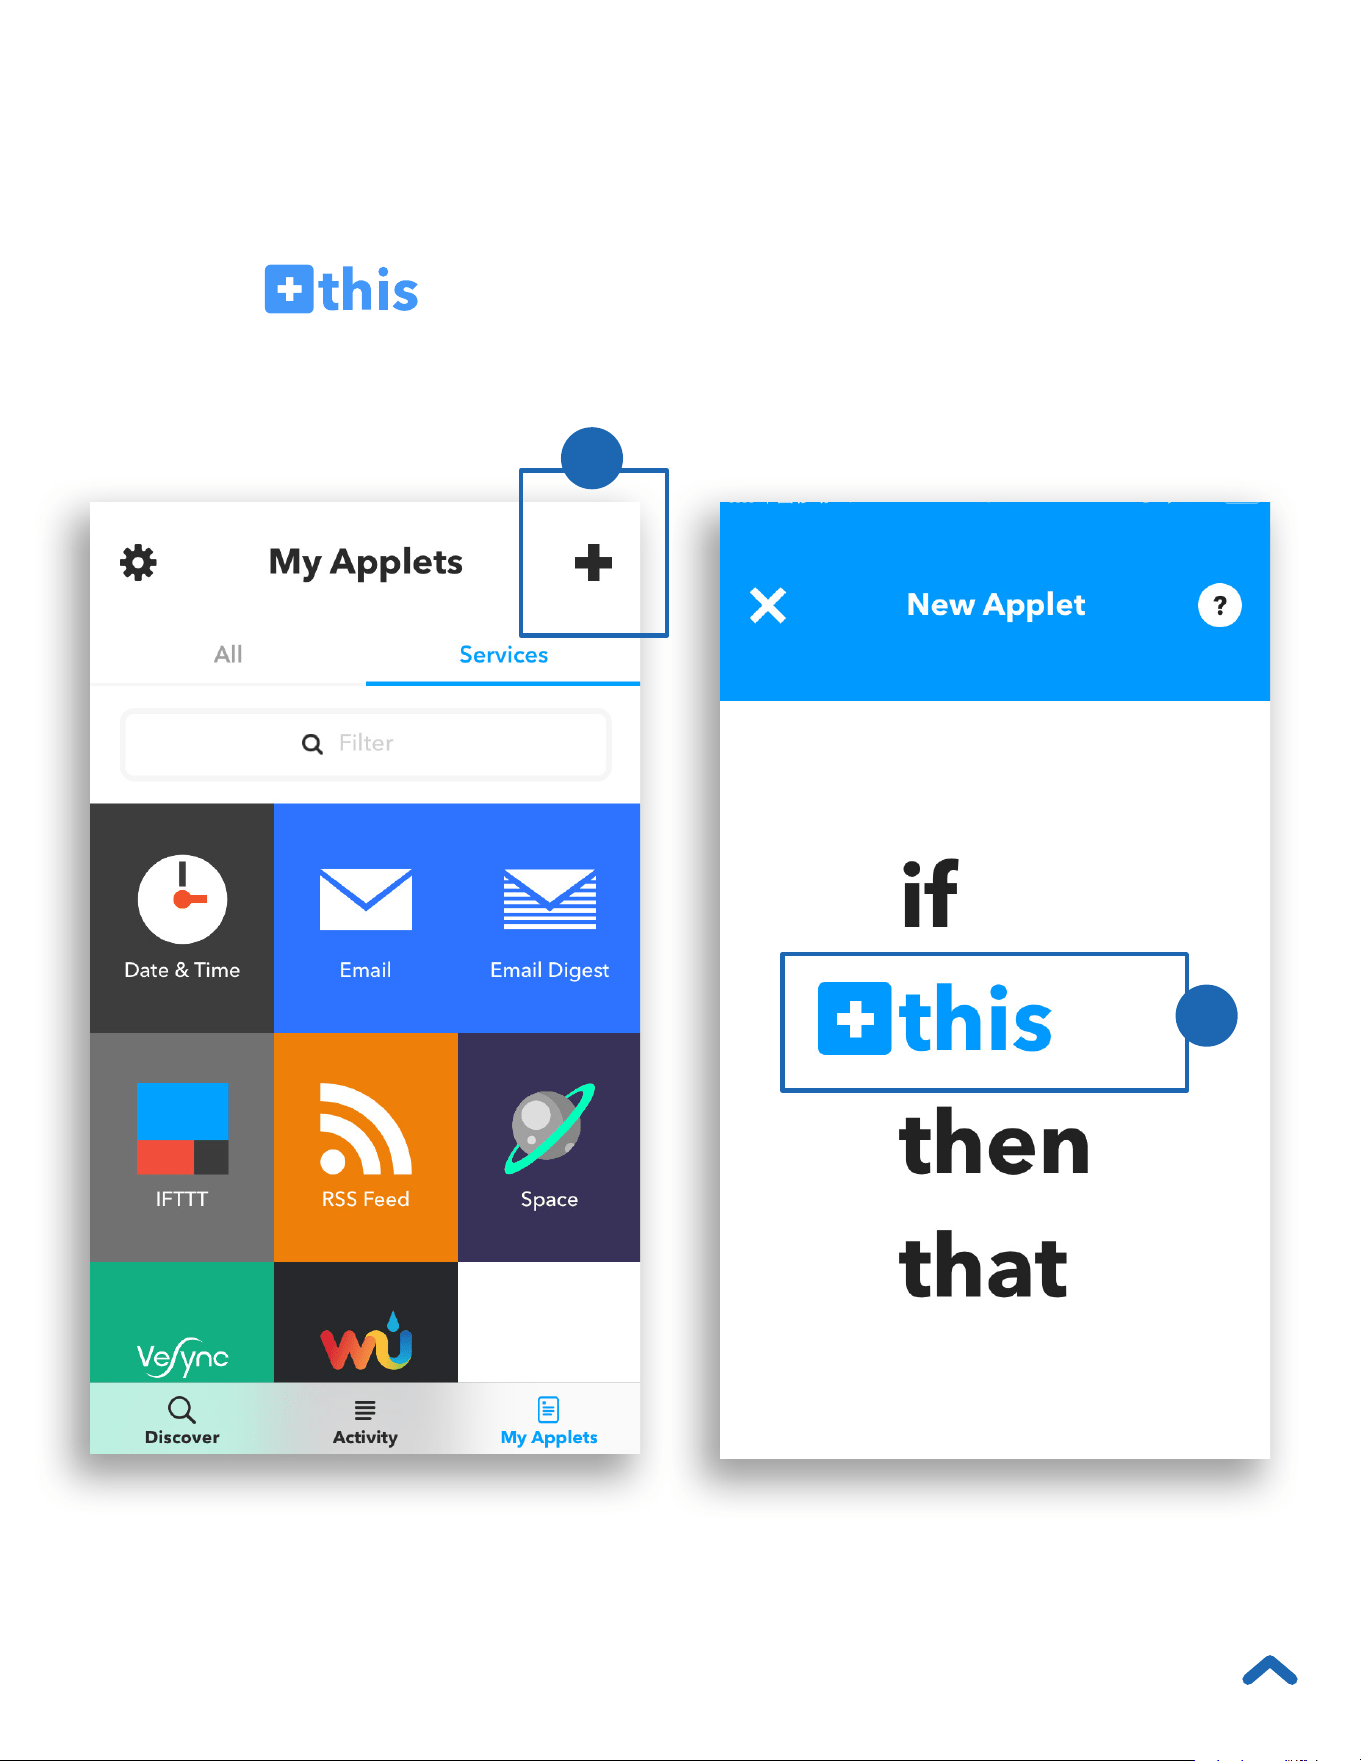
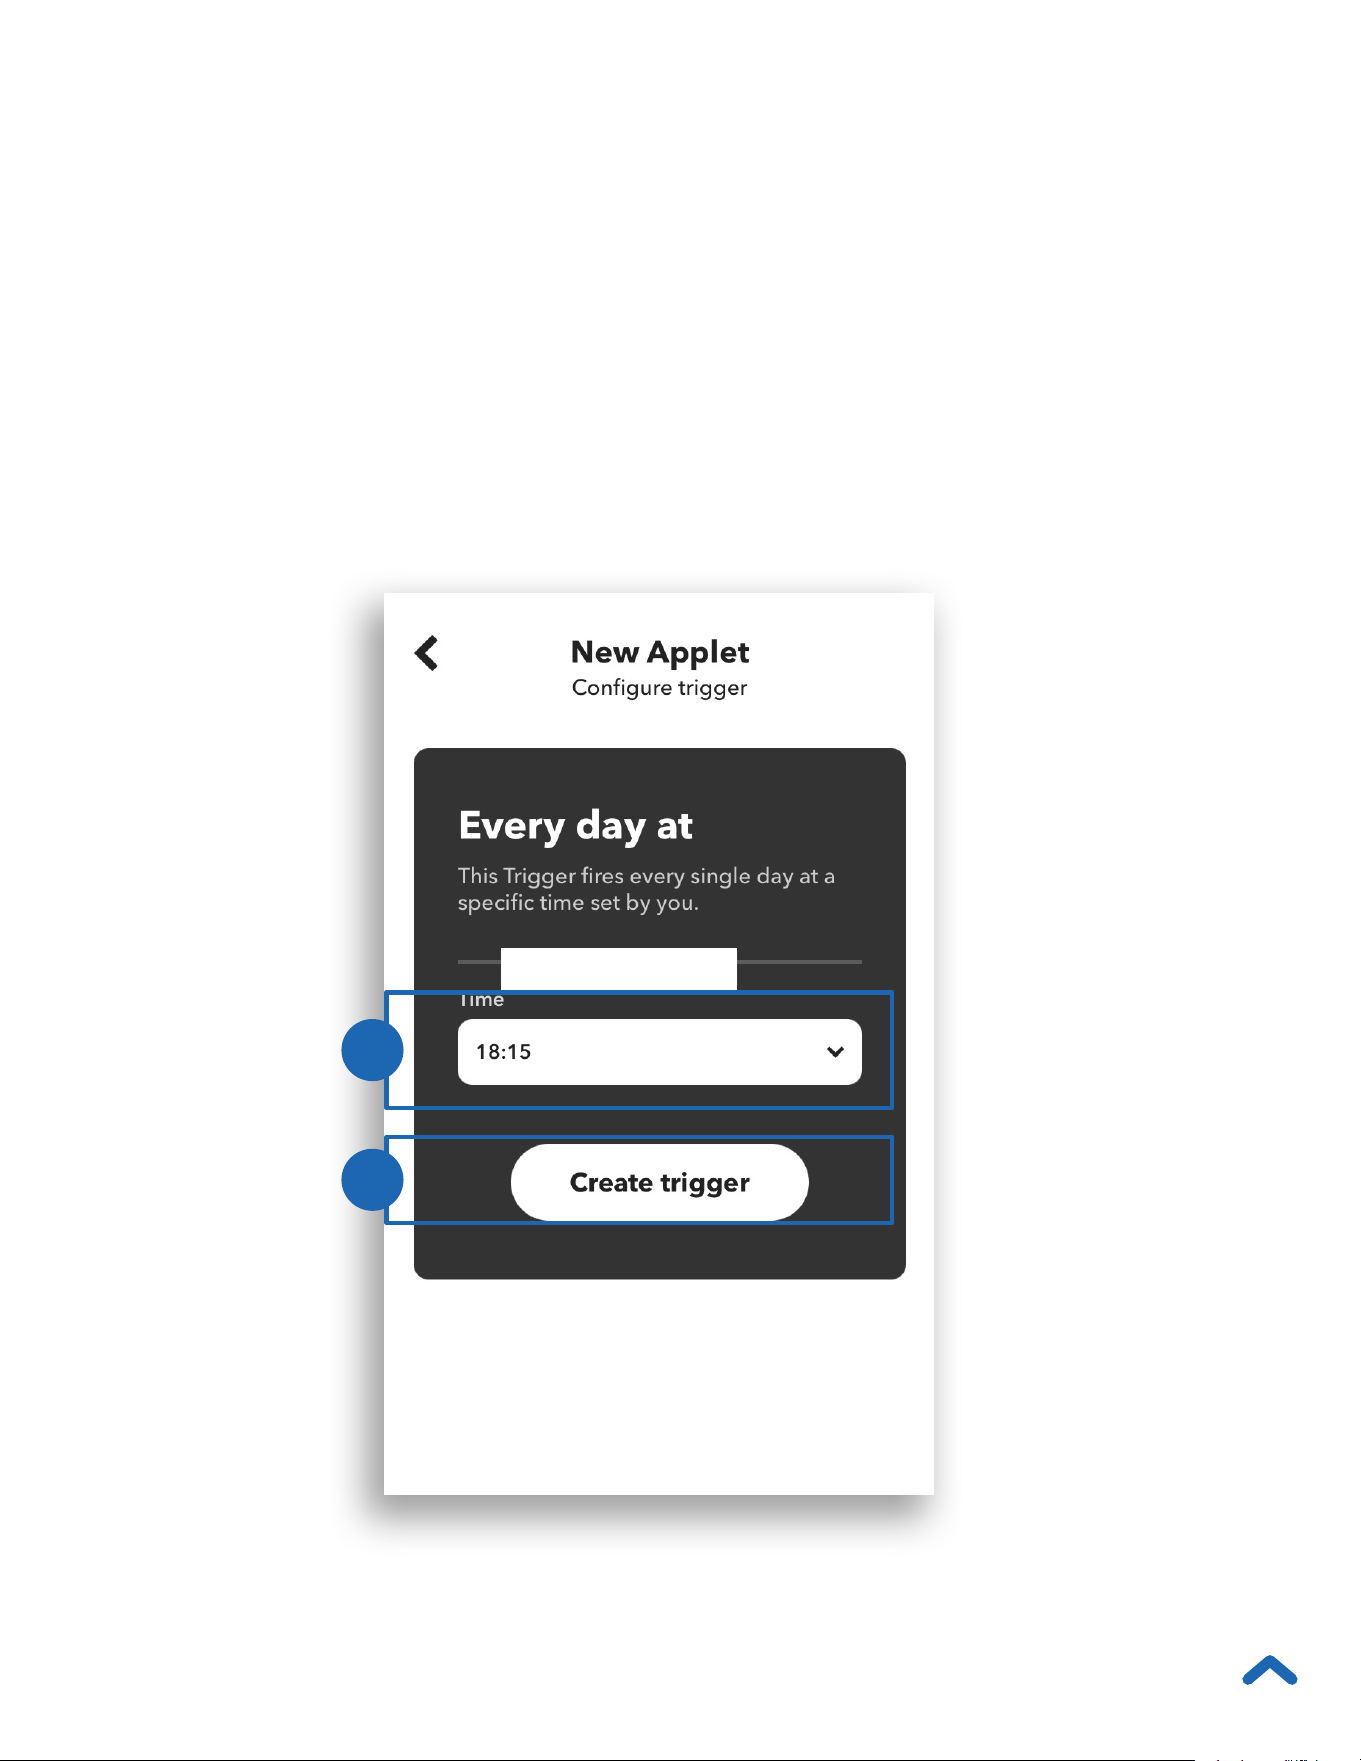
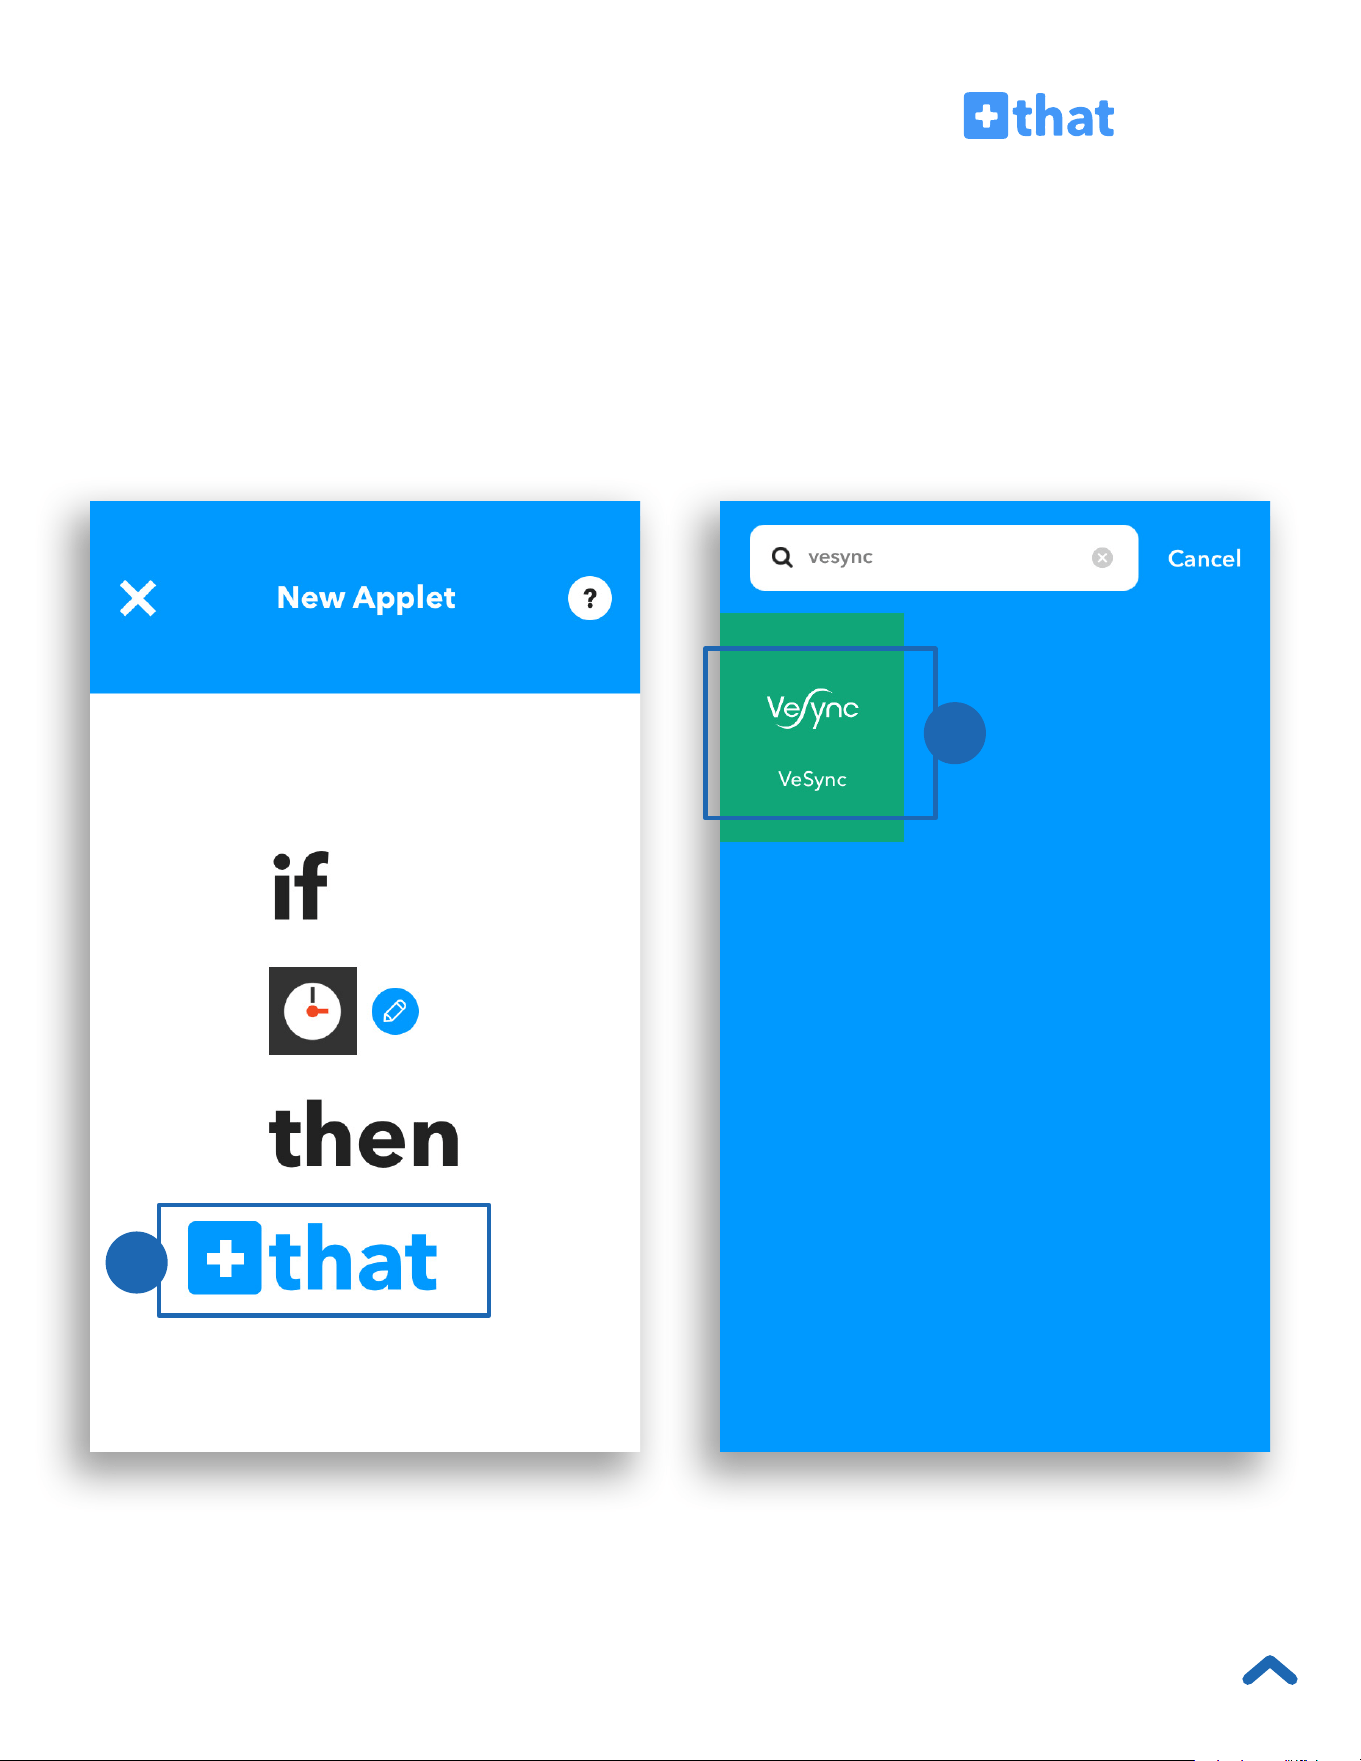
• Create a Custom Applet
Maintaining Your Smart Outlet
• Firmware Updates
• Resetting
Troubleshooting
Warranty Information
Customer Support

4
Specifications
Maximum Switch Current 10A
Power Supply AC 120V, 60Hz
Power Consumption 0.7–1.2W
Wireless Distance
(Outlet to Router)
98–164 ft / 30–50 m
(max visible range)
Communication Mode IEEE802.11b/g/n (WiFi)
Communication Frequency 2400–2483.5MHz
Compatible Systems
Android™ 4.3 or higher /
iOS
®
9.0 or higher
Operating Environment 14°–104°F / -10°–40°C
Storage & Transportation
Environment
-4°–104°F / -20°–60°C
Dimensions
4 x 2.5 x 1.2 in /
102 x 62 x 30 mm
Note: The smart outlet’s WiFi signal range can be weakened or
disrupted if:
• Your WiFi bandwidth is not 2.4GHz
• Your WiFi network and/or your smart outlet is blocked by
objects that are too thick, such as walls, floors, and furniture
• Other electrical appliances are interfering with your WiFi
signal (such as microwave ovens, wireless speakers, and LCD
displays)

5
To reduce the risk of injury and/or damage to this smart
outlet, please read and follow all instructions and safety
guidelines in this manual.
• Do not exceed the smart outlet’s maximum load current
of 10A (approximately 1200W) by plugging in appliances
that require a higher load current. Always check
appliance labels to find out their electrical power rating
before using.
Safety Information
Note: For inductive loads (such as appliances with motors), the
maximum current is 5A (600W).
• Keep out of reach of children.
• Only use indoors, in a dry location.
• Always keep away from water or other liquids.
• Household use only.
SAVE THESE INSTRUCTIONS
6
• A smartphone running on iOS 9.0/Android 4.3 or higher.
• A secure 2.4GHz WiFi connection (supports 802.11b/g/n
standard).
The smart outlet is compatible with electrical appliances
that use up to 10A current. Connecting an appliance that
uses more than 10A current may cause the smart outlet
fuse to blow.
Product Requirements
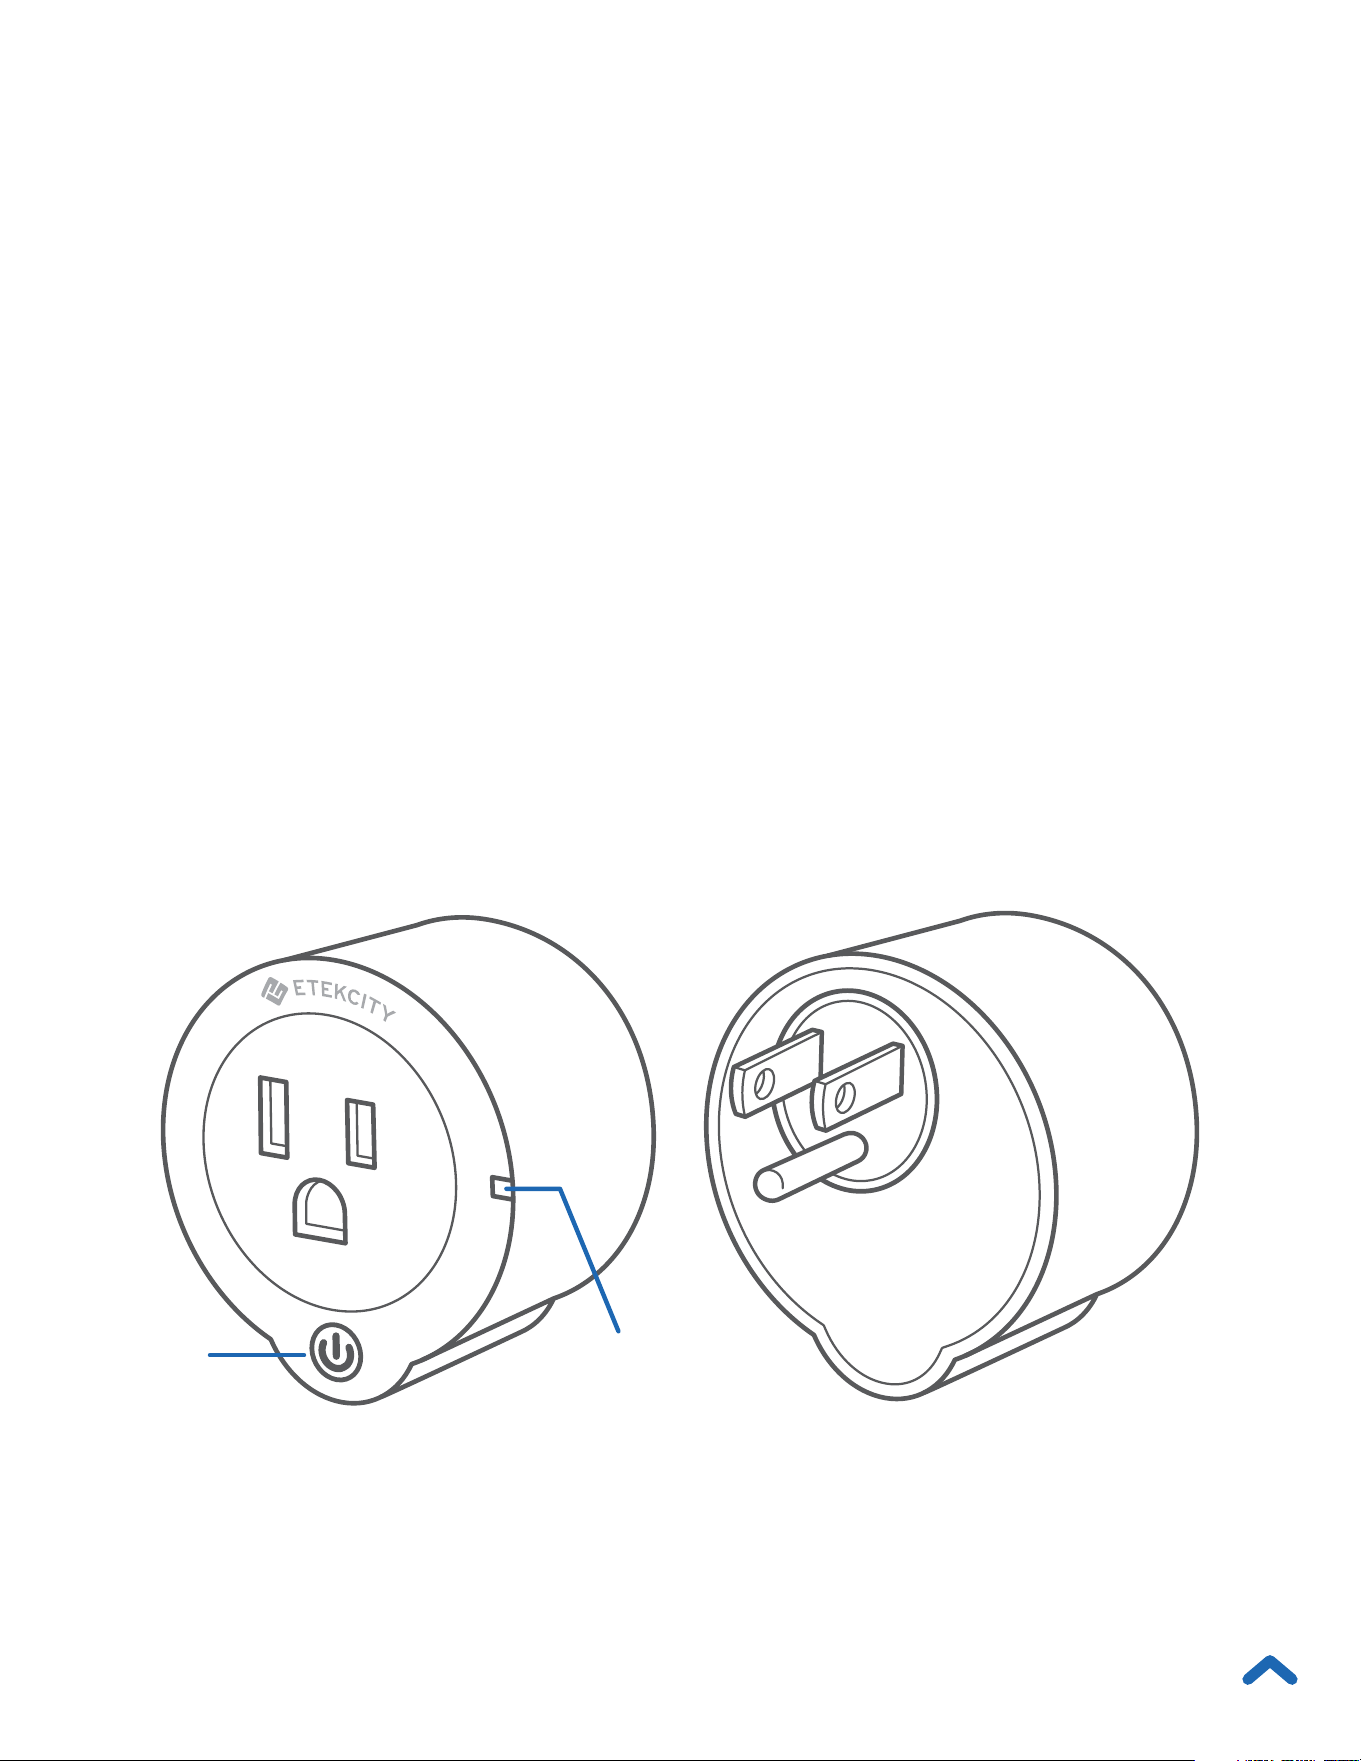
Product Diagram
Front Back
A. Power Button
B. LED Indicator Light
A
B
7
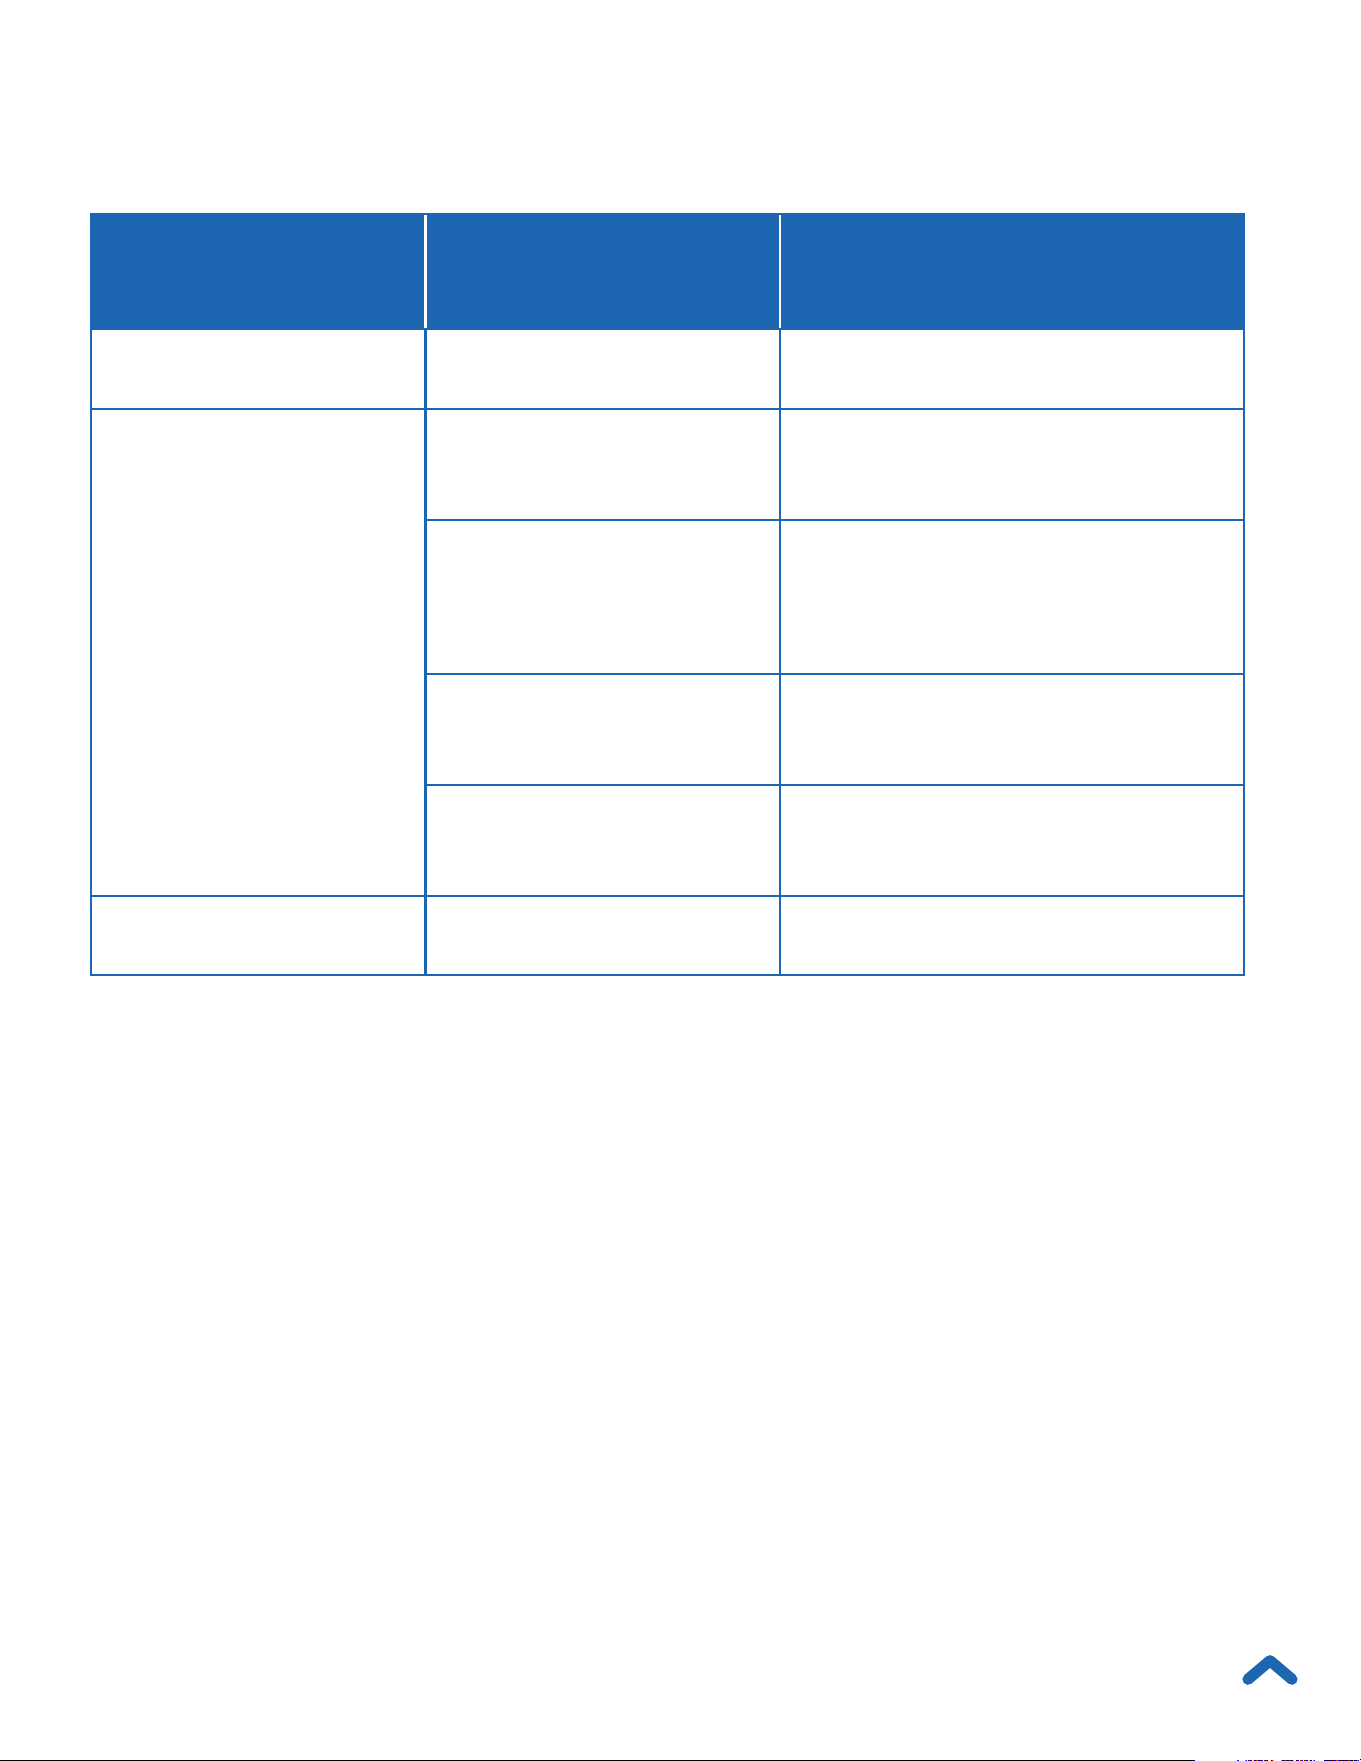
LED Indicator Light Chart
Light Indicator
Color
Status Description
Yellow Solid Smart outlet is on
Blue / Purple
Blinks twice every
5 seconds
Smart outlet is trying to
connect to WiFi
Blinks once every
5 seconds
Smart outlet is connected
to WiFi, but is trying to
connect to server
2 blinks per
second
Smart outlet is in
Configuration Mode
4 blinks per
second
Smart outlet is resetting
None No light Smart outlet is off
8
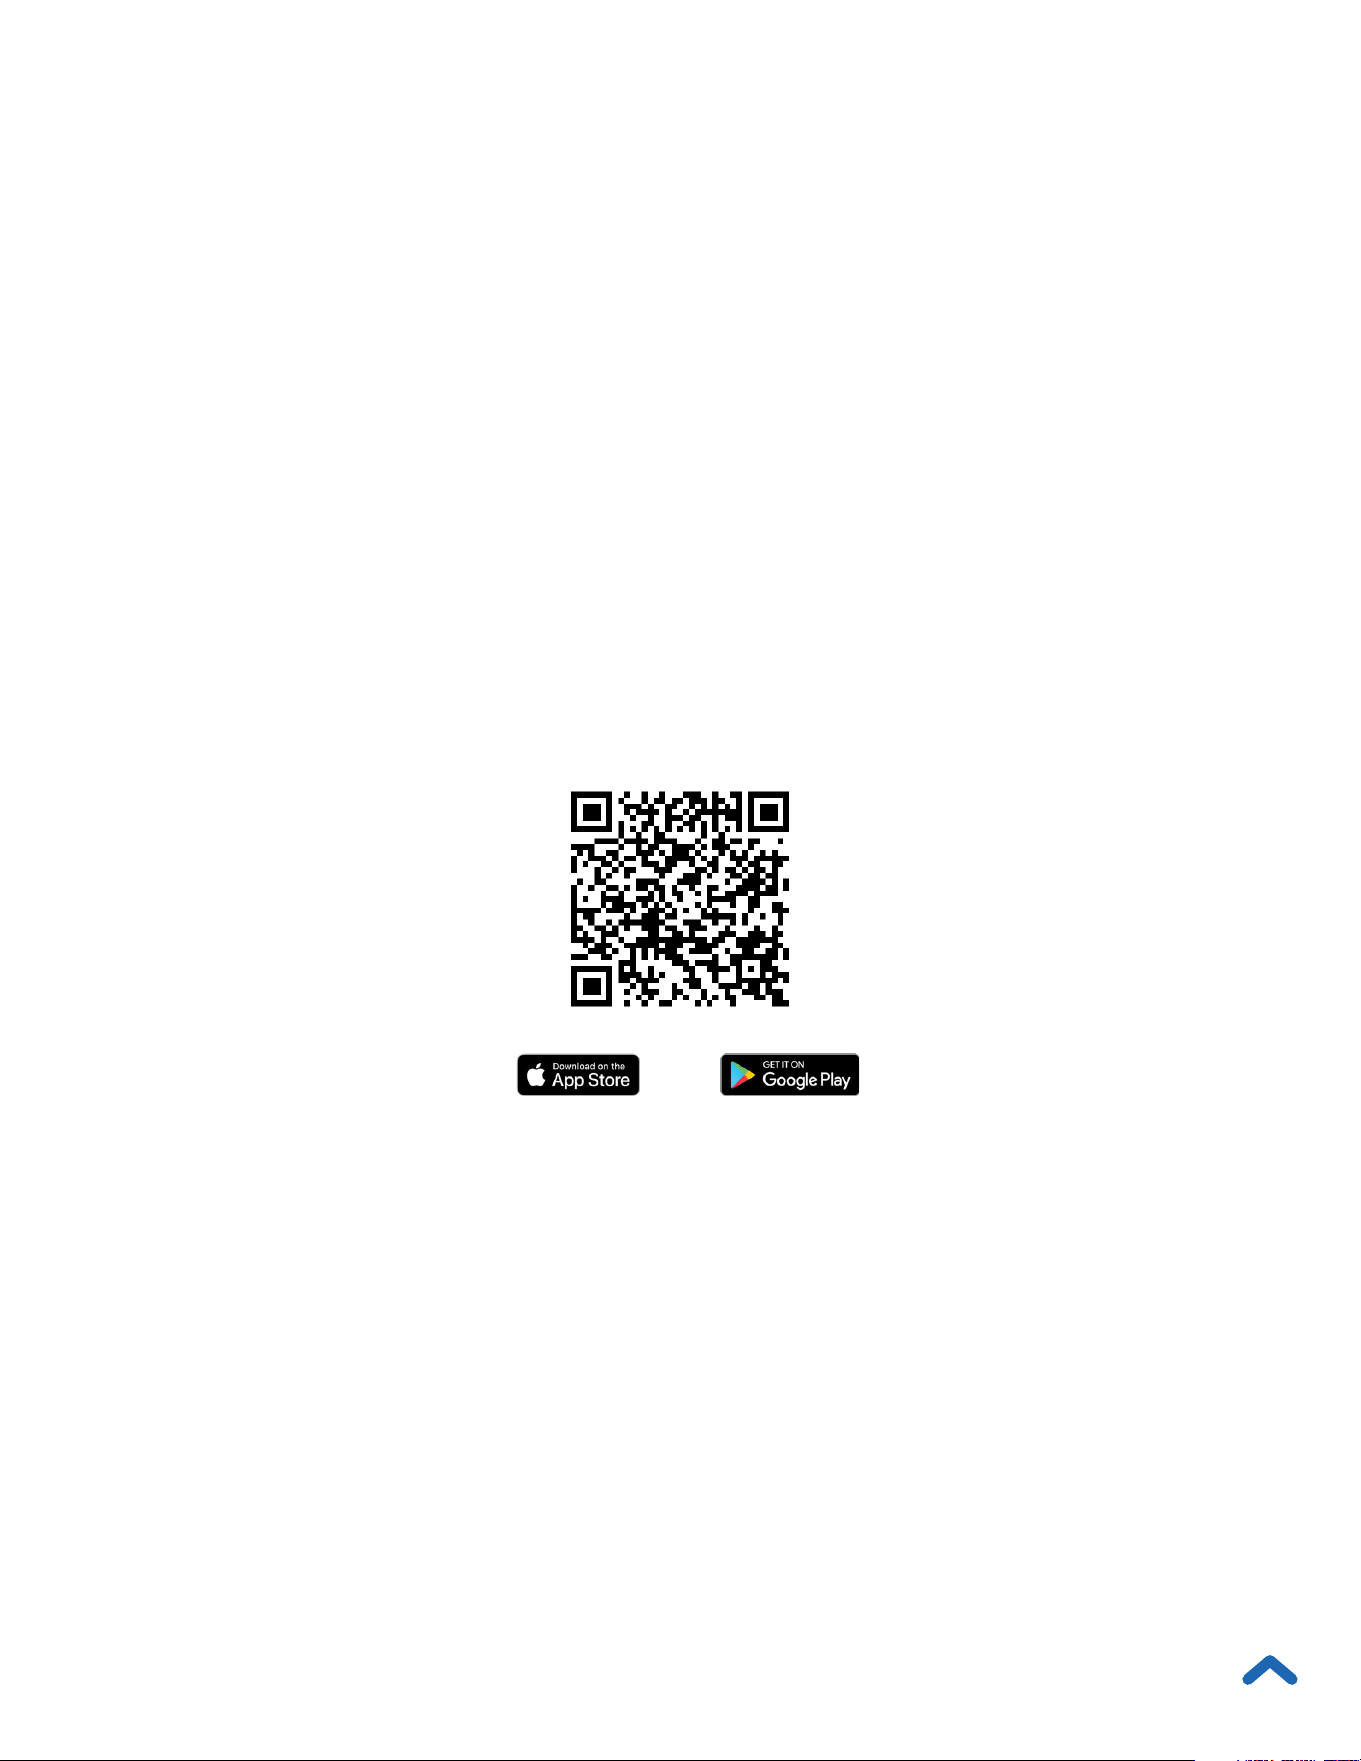
VeSync App Setup
1. To download the VeSync app, scan the QR code or
search “VeSync” in the Apple App Store
®
or
Google Play Store.
Note: For Android users, you must select Allow to use
VeSync.
Note: You must create your own VeSync account to use third-
party services and products, such as the Amazon Echo and
Google Home™. These will not work with the guest account. With
a VeSync account, you can also allow your family or friends to
control your smart outlet.
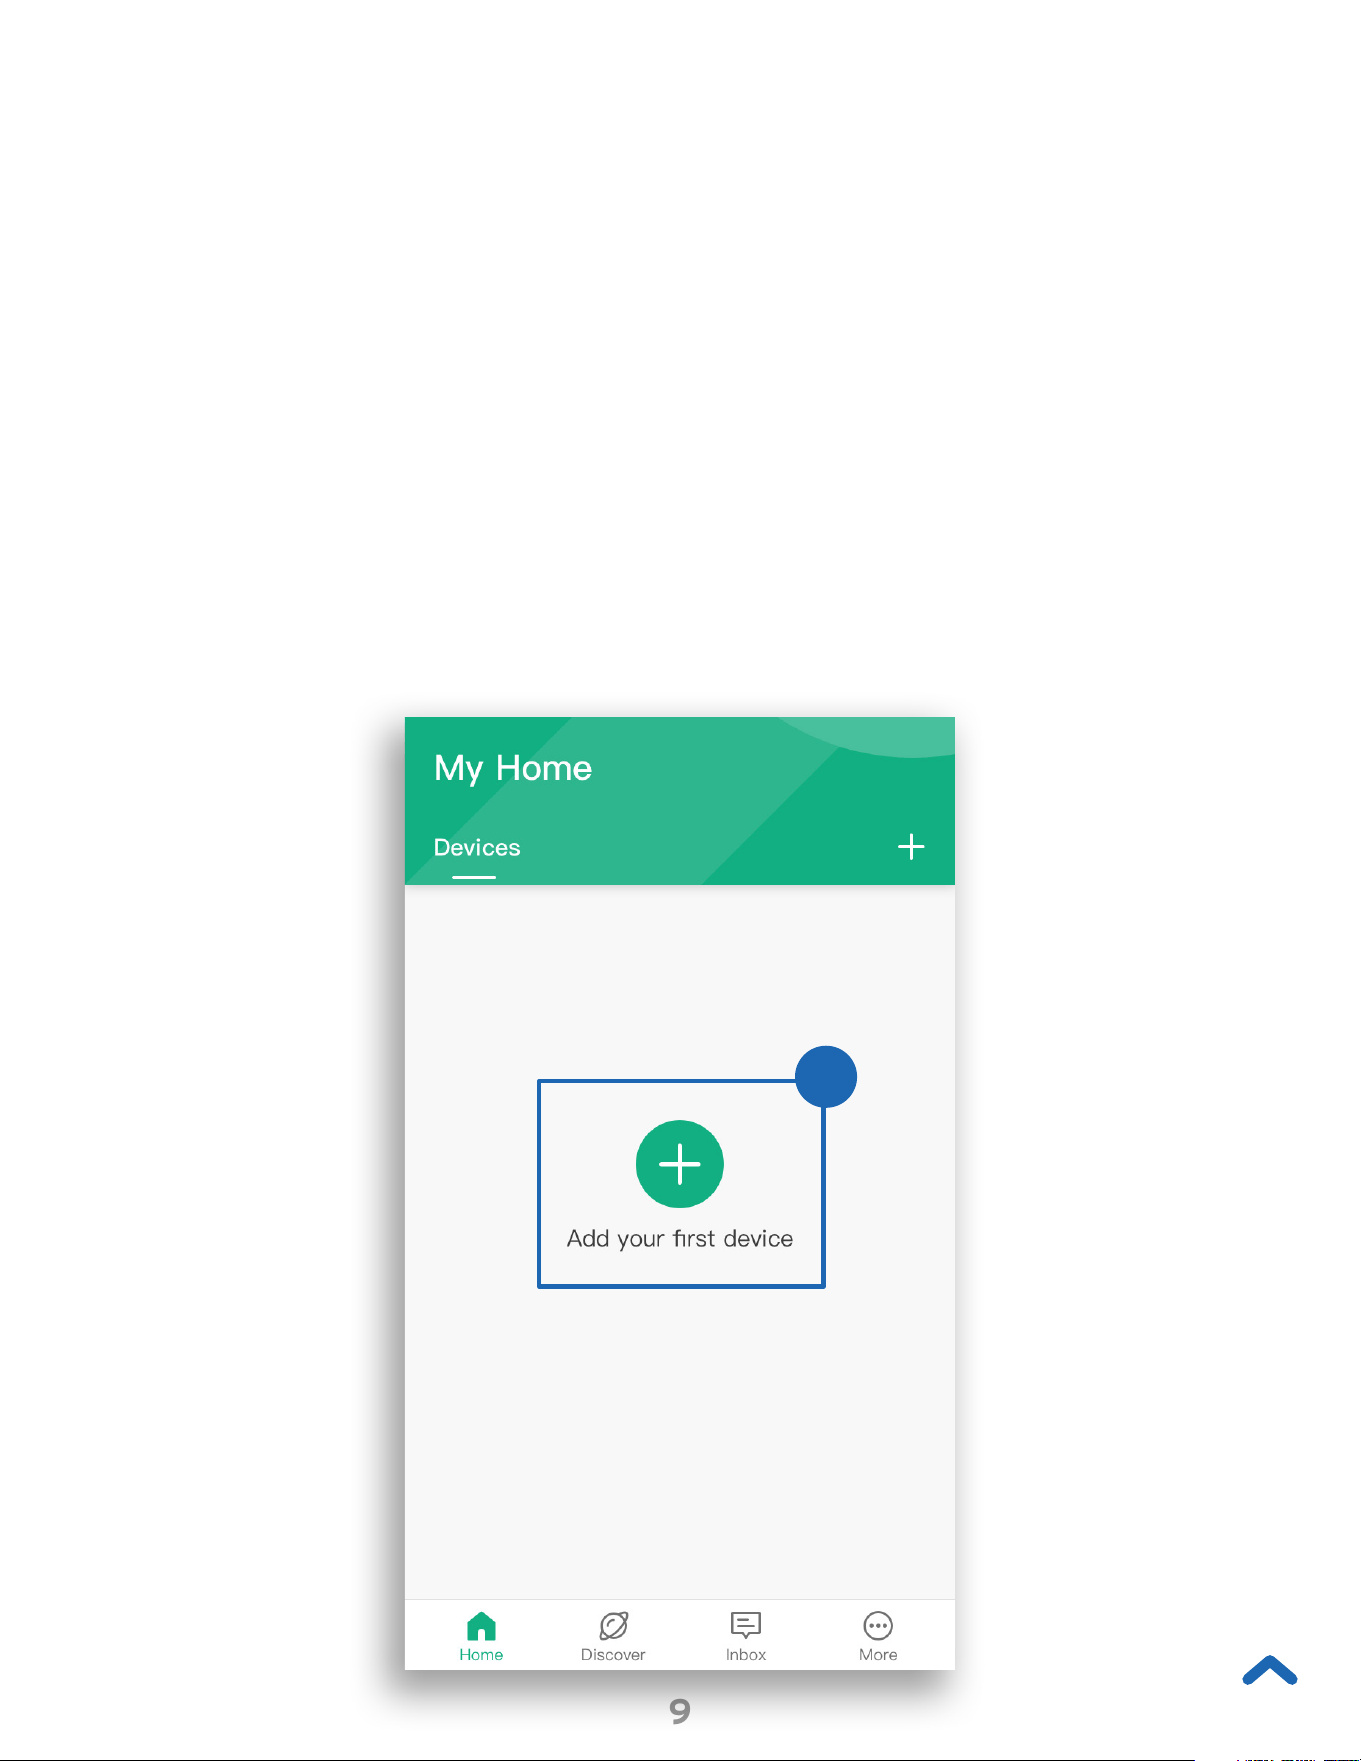
2. Open the VeSync app. If you already have an account,
tap Log In. To create a new account, tap Sign Up.
Note: Due to ongoing updates and improvements, the VeSync app
may appear slightly different than shown in the manual. In case of
any differences, follow the in-app instructions.
10
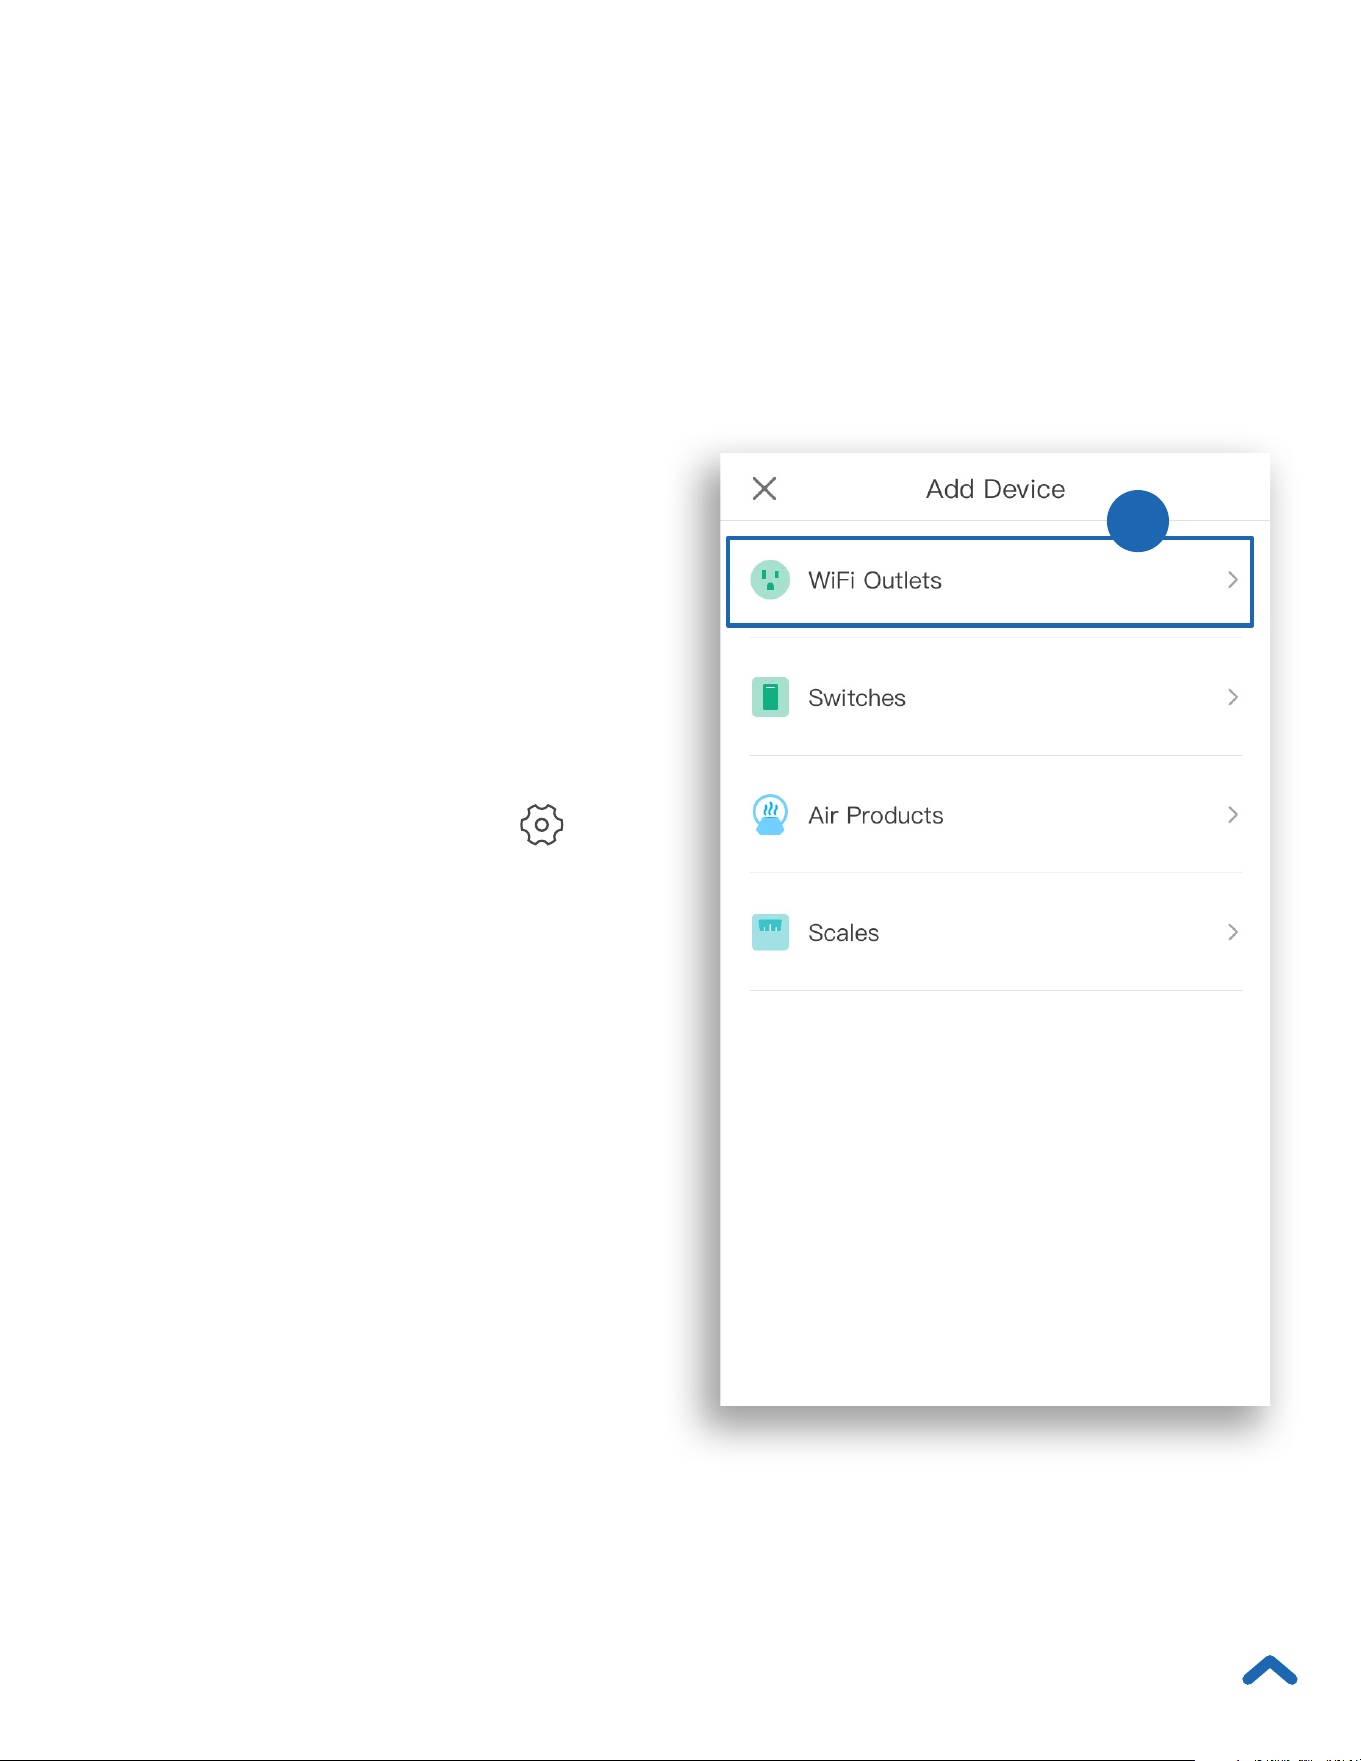
3
3. Tap WiFi Outlets, then select your smart outlet.
4. Follow the in-app instructions to add your smart outlet.
Note:
• You can connect to the
VeSync app by selecting
ESW01-USA-R19, ESW01-
USA-R6P, or Etekcity
10A WiFi Outlet US/CA.
• After setup is complete,
you can change the name
and icon at any time by
going to the smart outlet
screen and tapping .
11
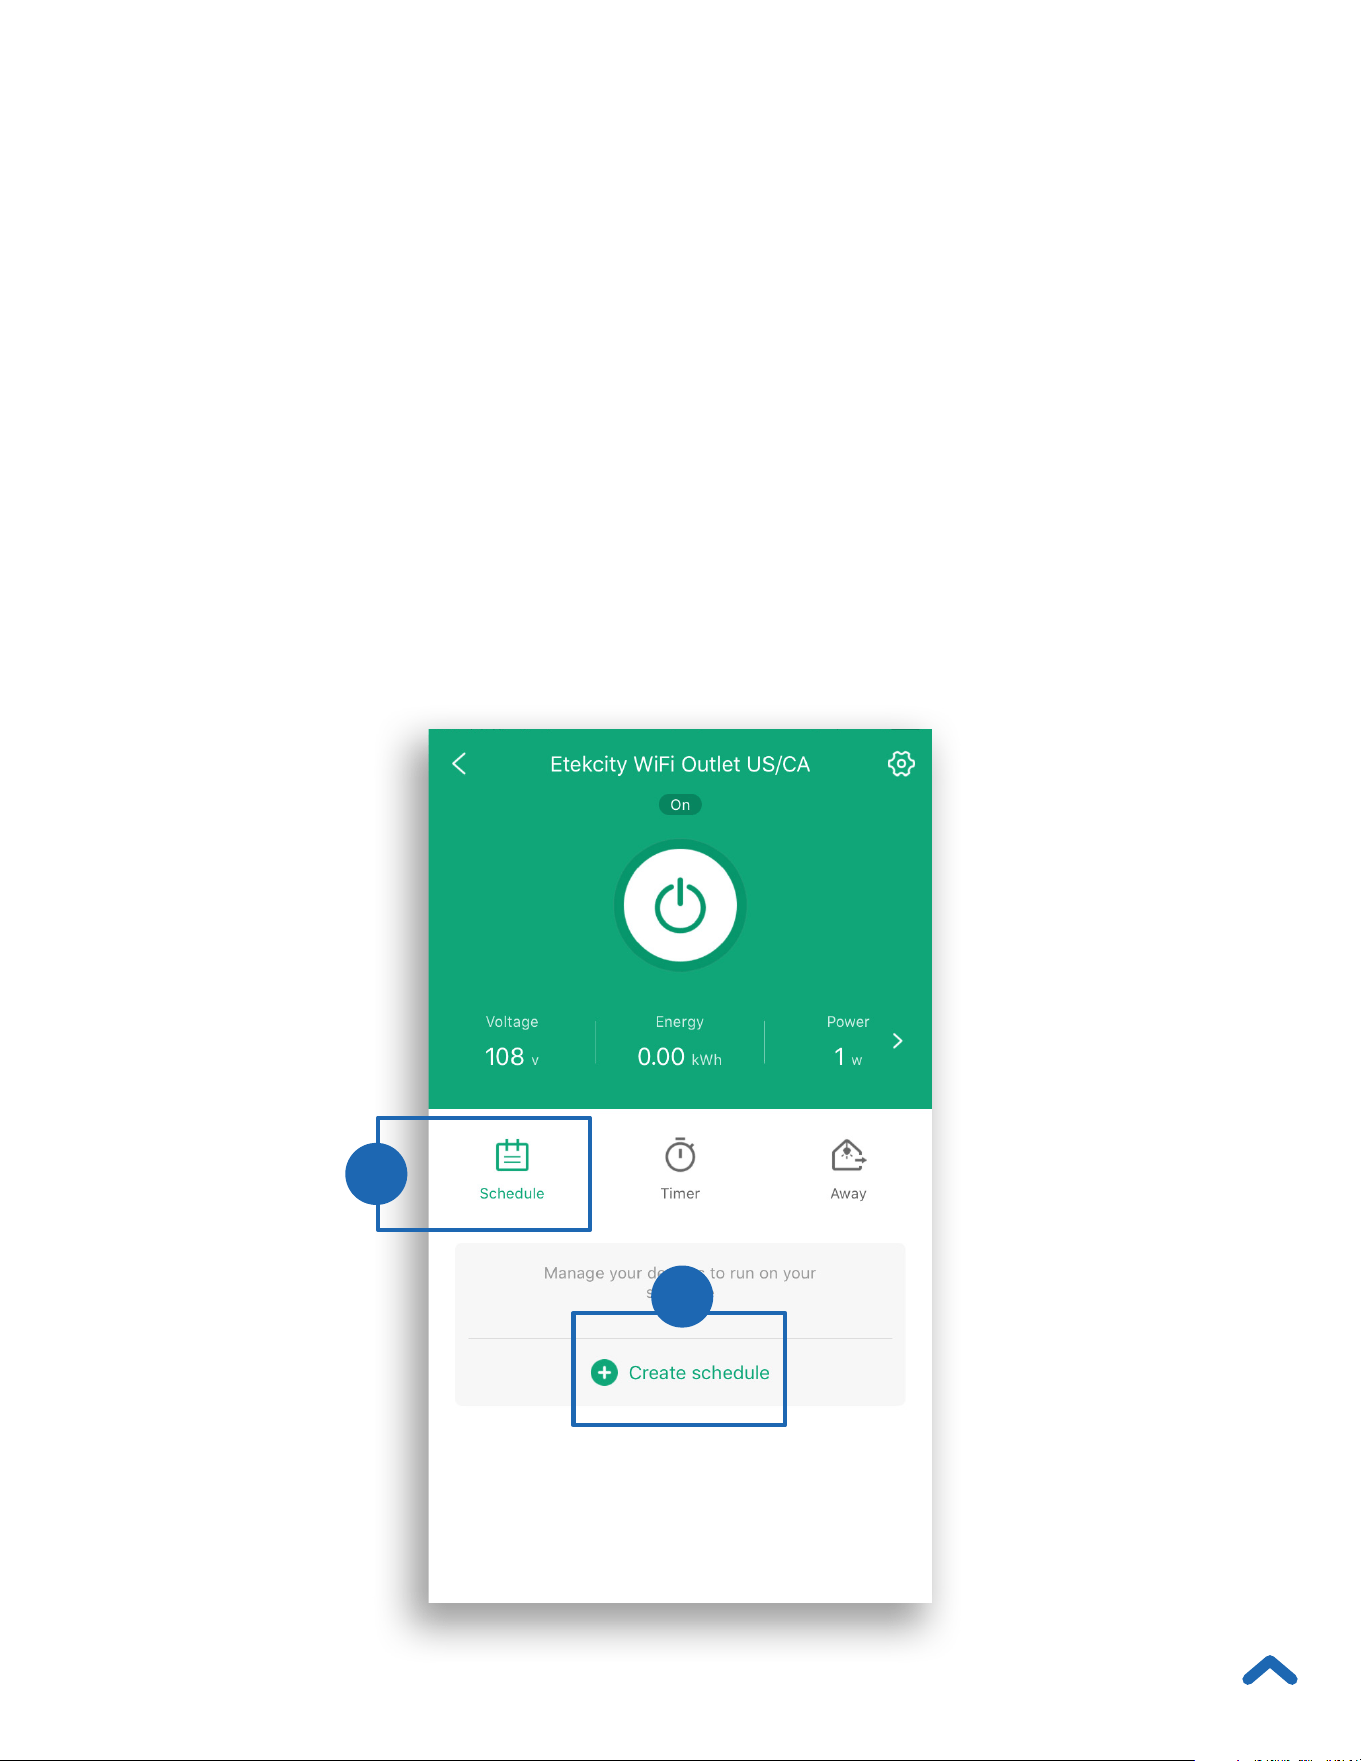
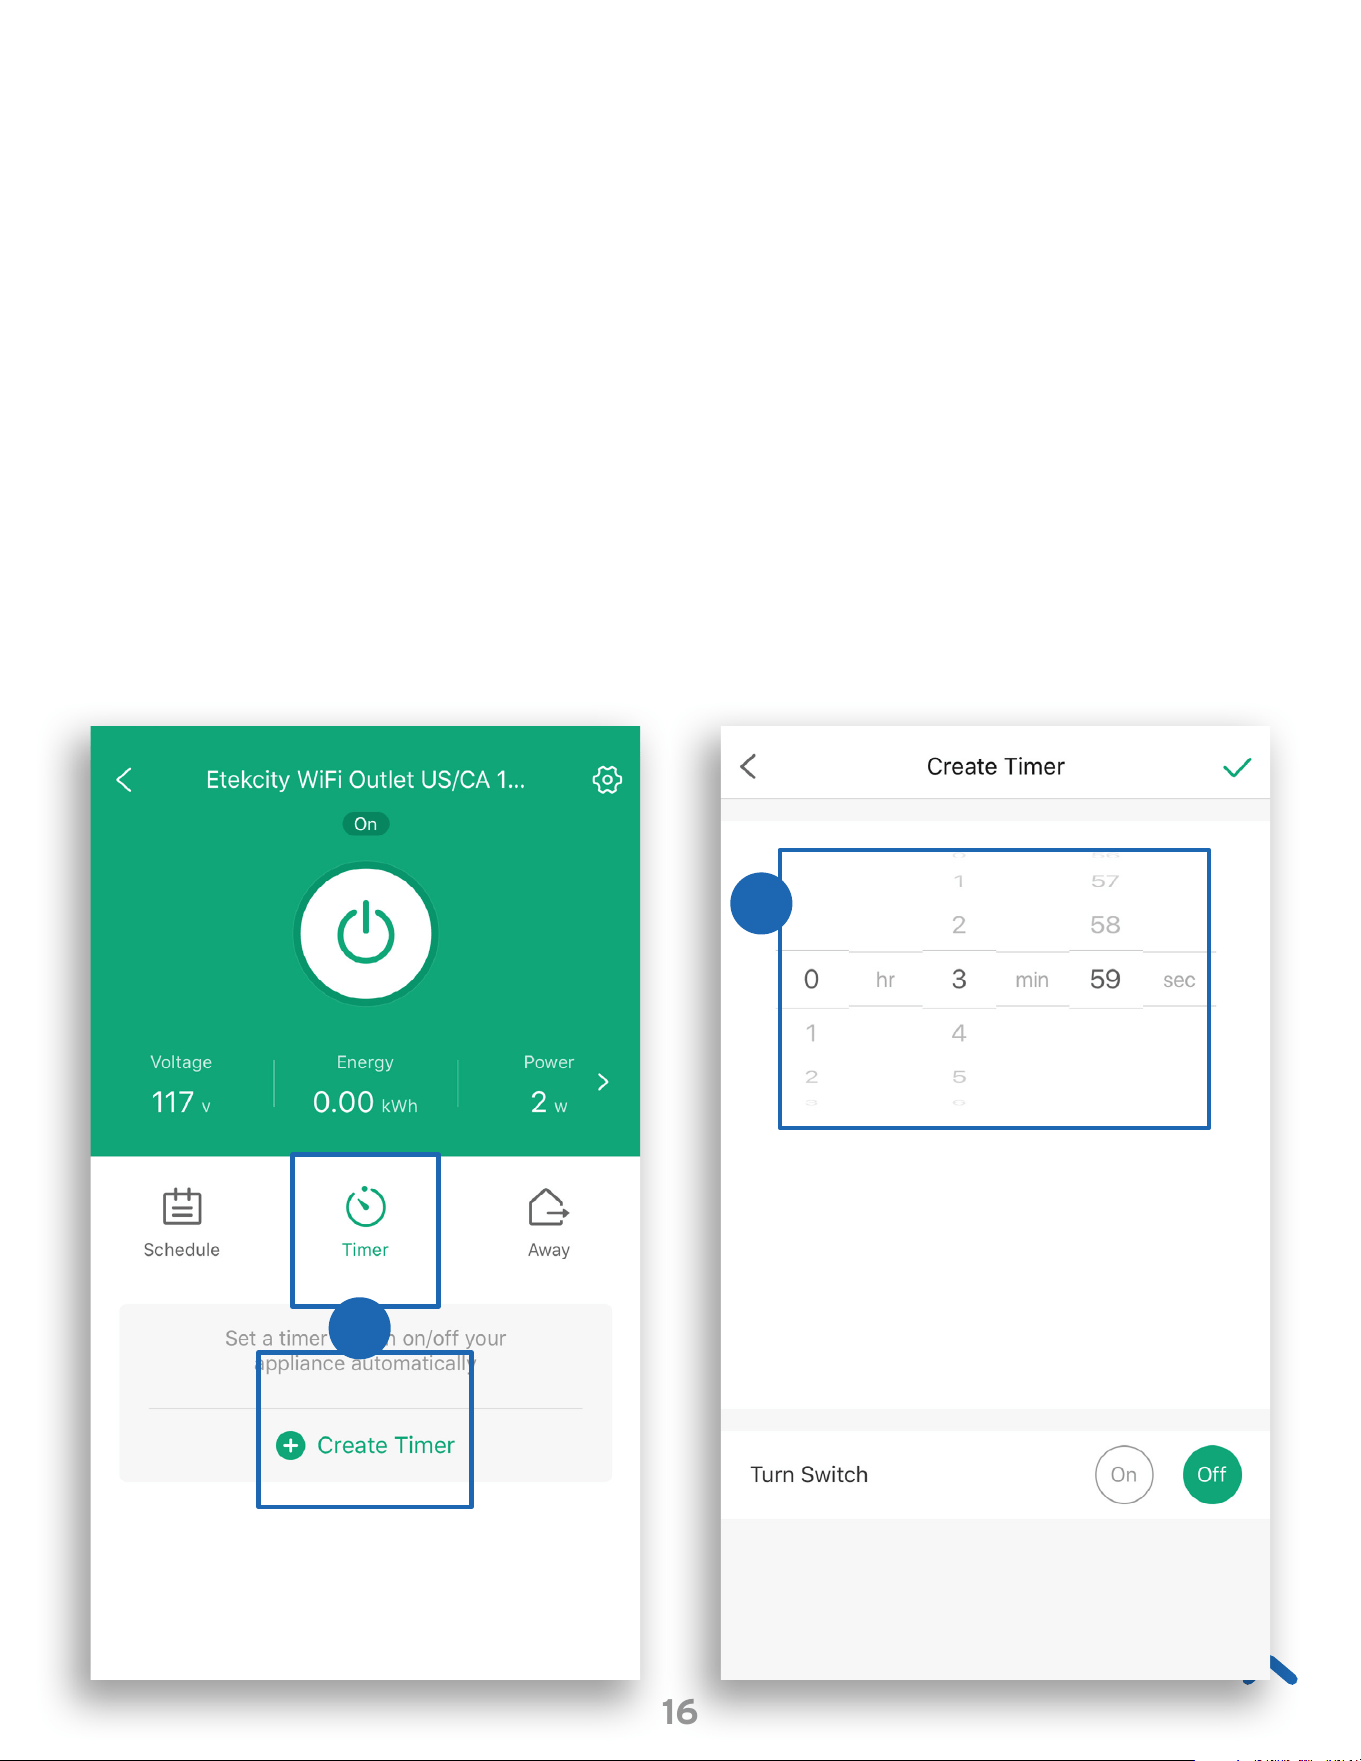
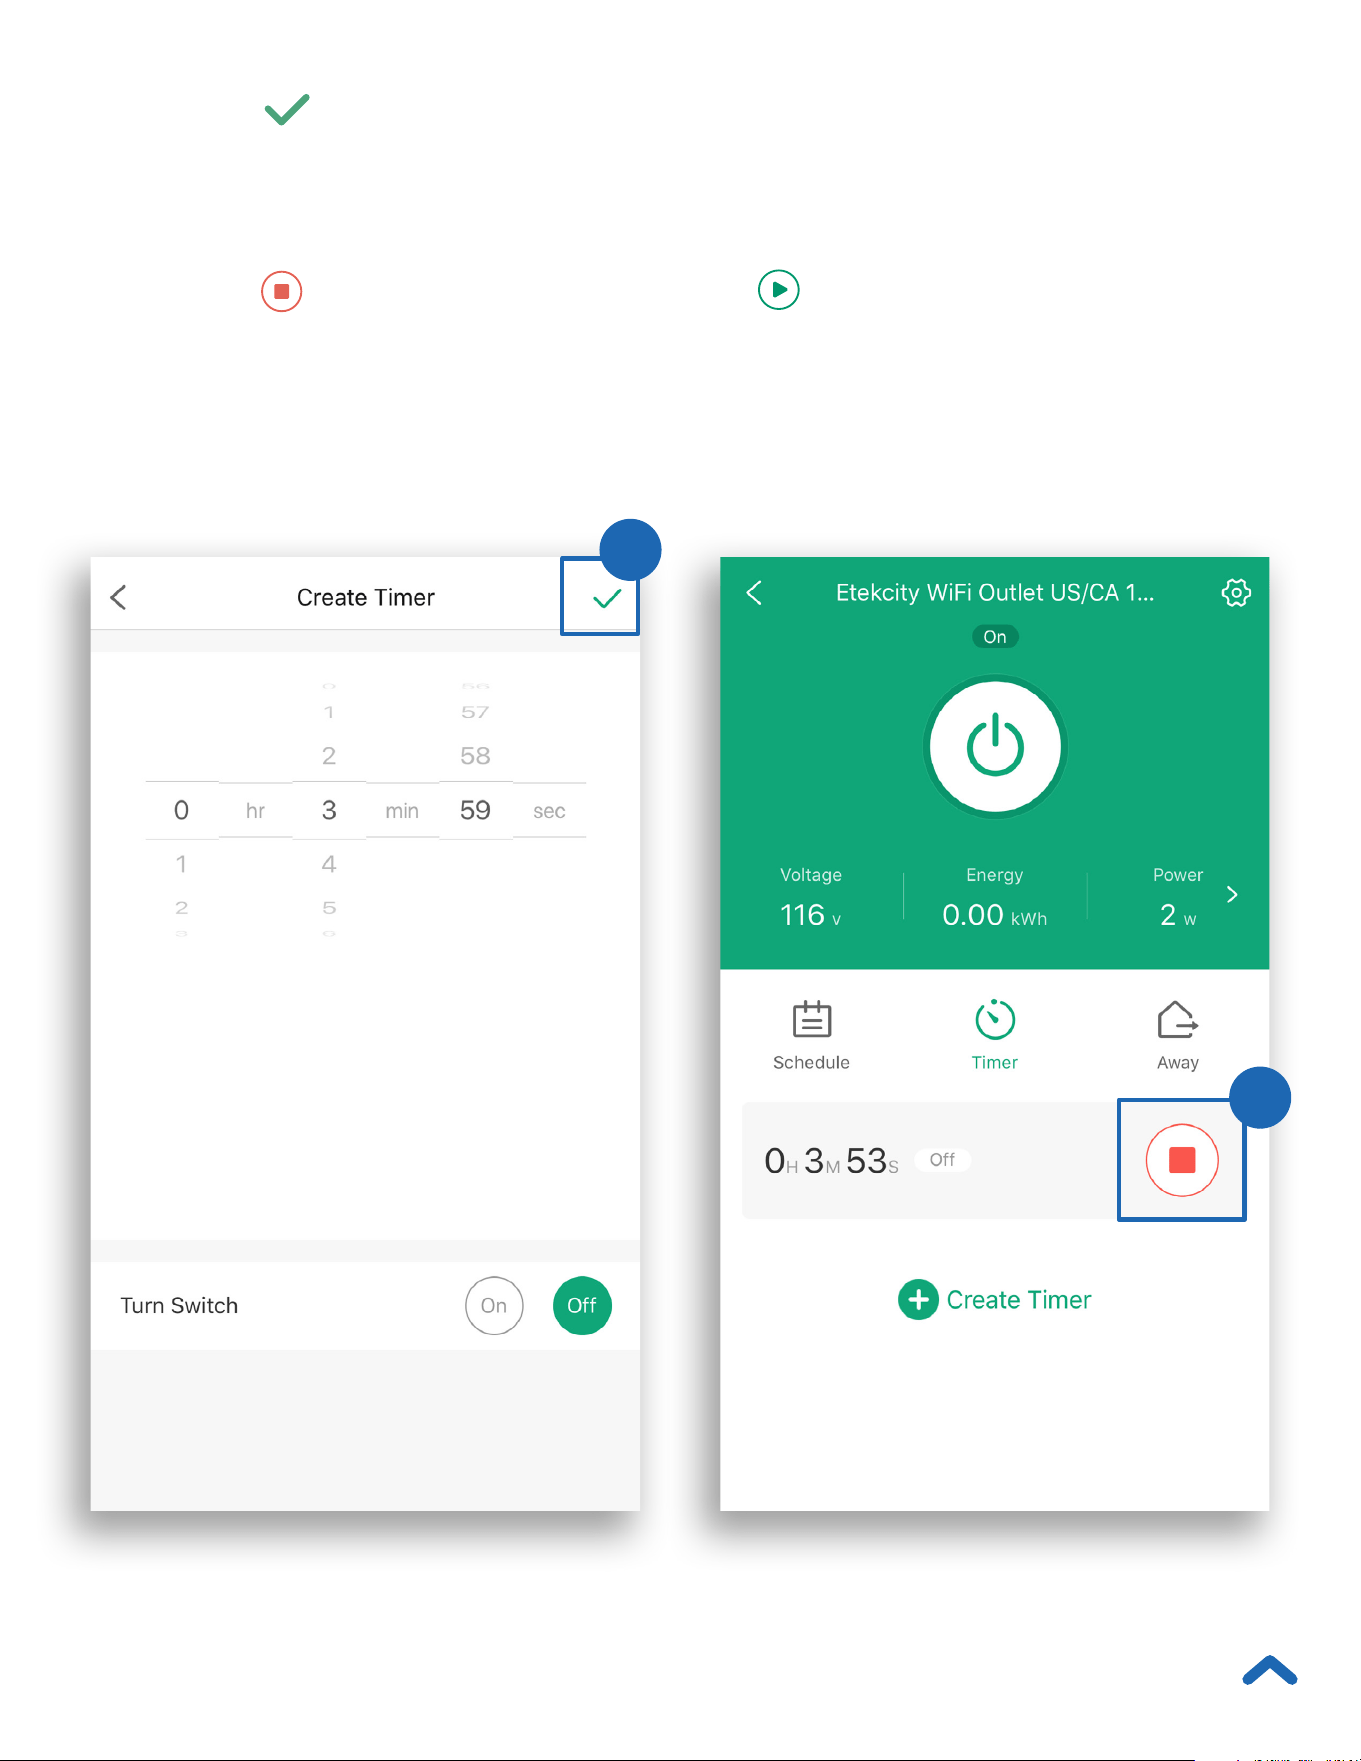
Functions
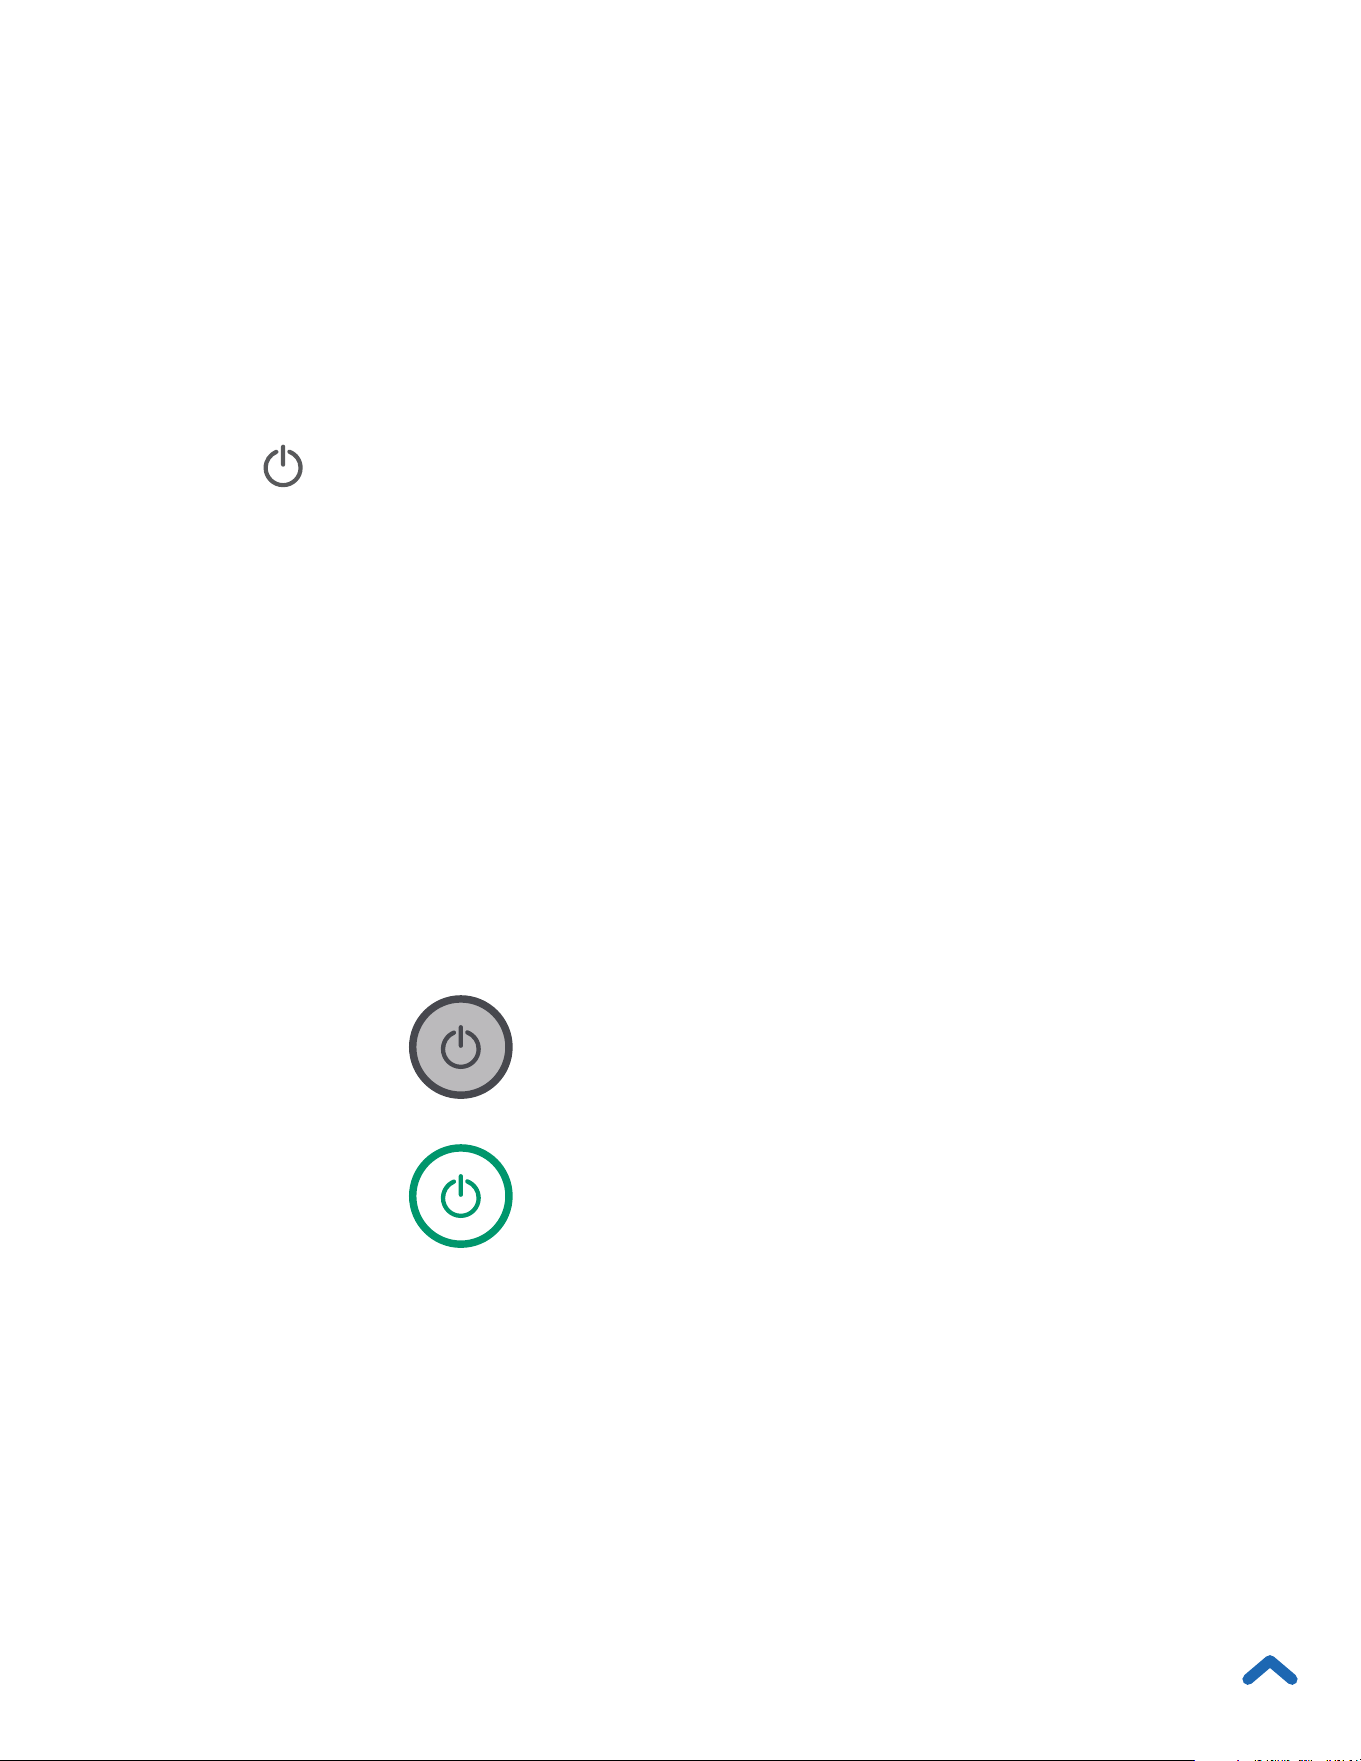
Turning the Smart Outlet On/Off
To turn the smart outlet on/off:
A. Press the smart outlet’s power button.
B. Tap on the My Home screen or the smart outlet
screen in the VeSync app.
Smart outlet is off
Smart outlet is on
Note: The smart outlet will remain connected to the internet
even when it is turned off.
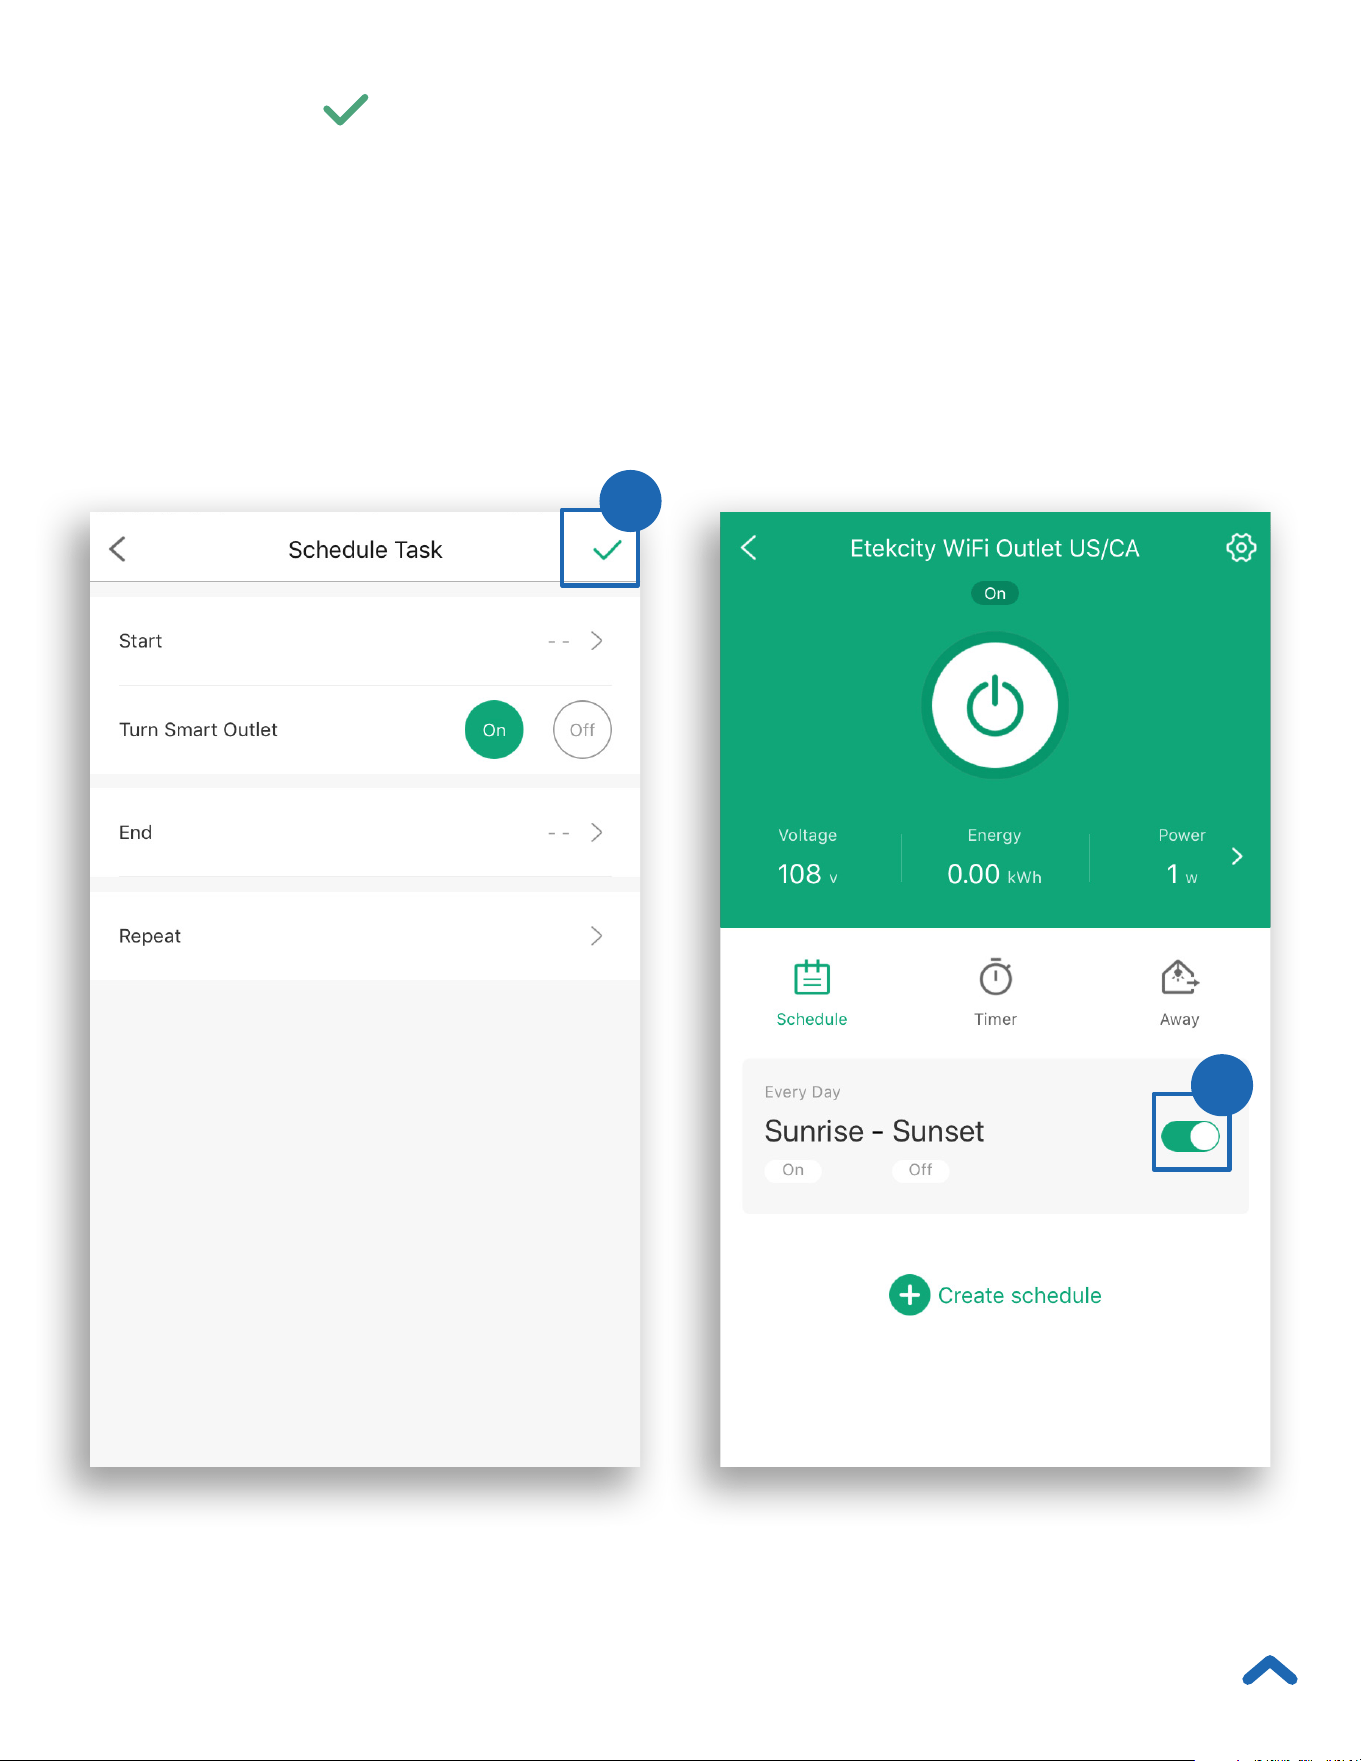
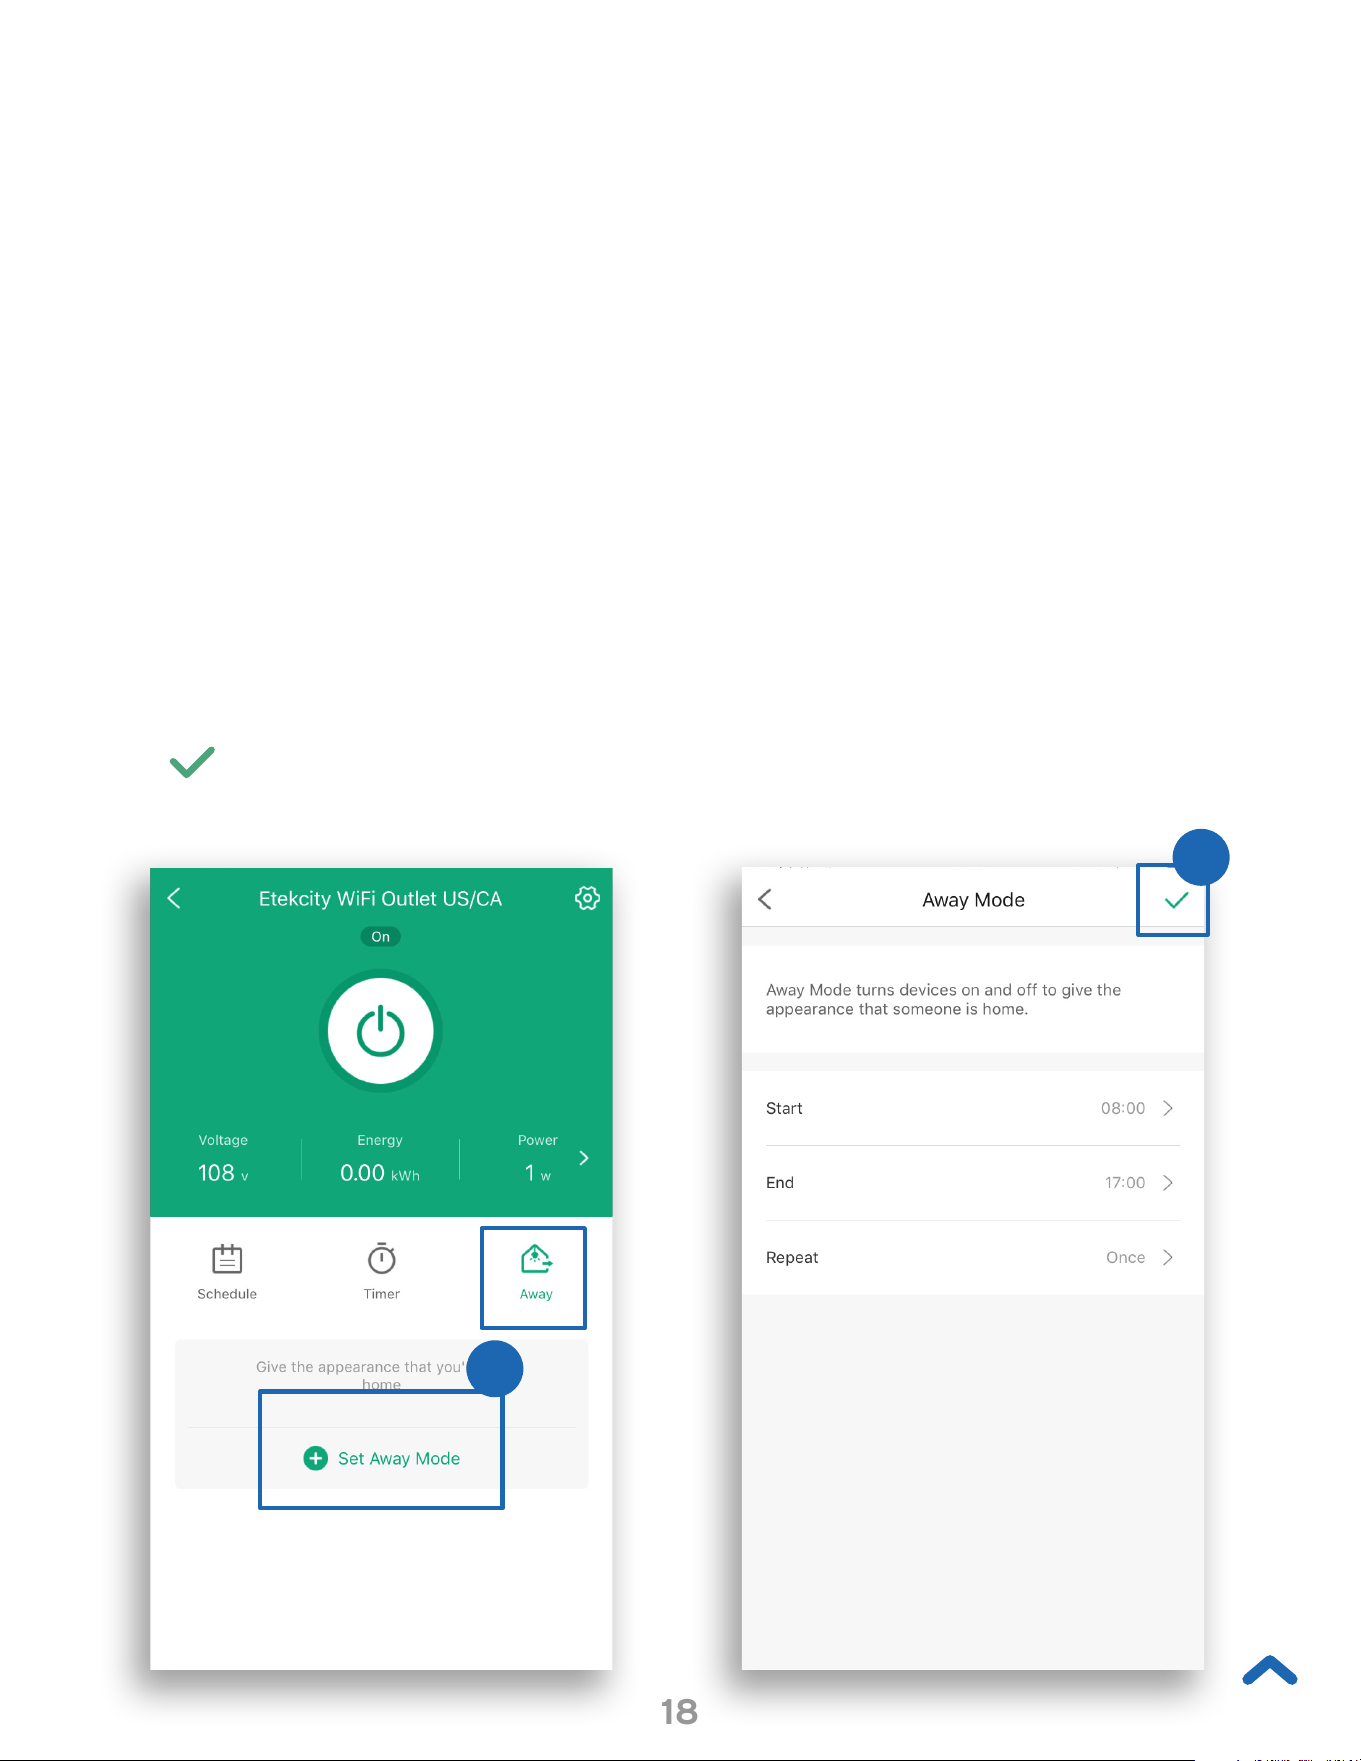
18
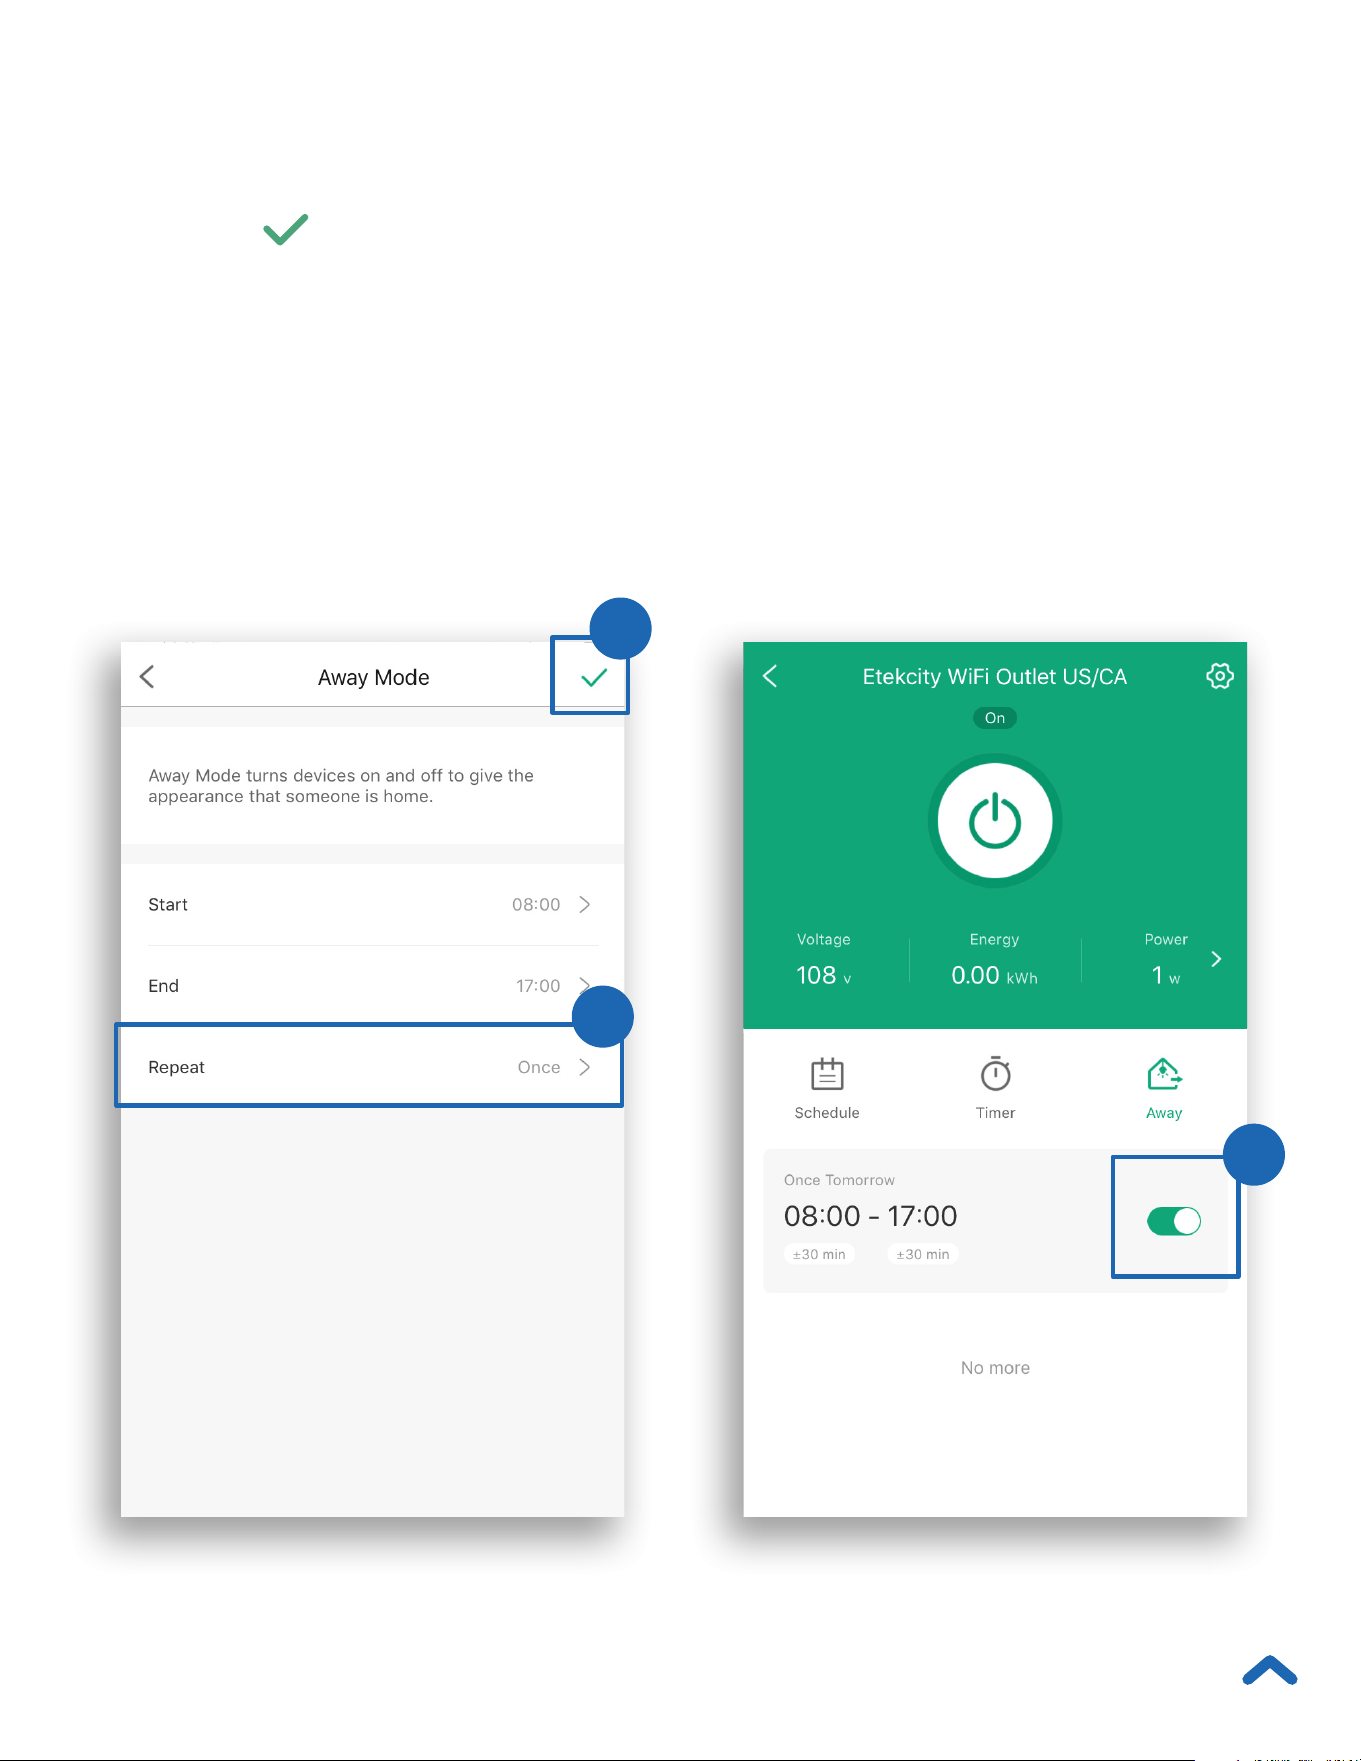
Away Mode
Use Away Mode to have your smart outlet turn on and off
periodically to give the appearance that someone is home
while you’re away.
1. From the My Home screen, tap the name of the smart
outlet to open the smart outlet screen.
2. On the smart outlet screen, tap Away, then Set Away
Mode.
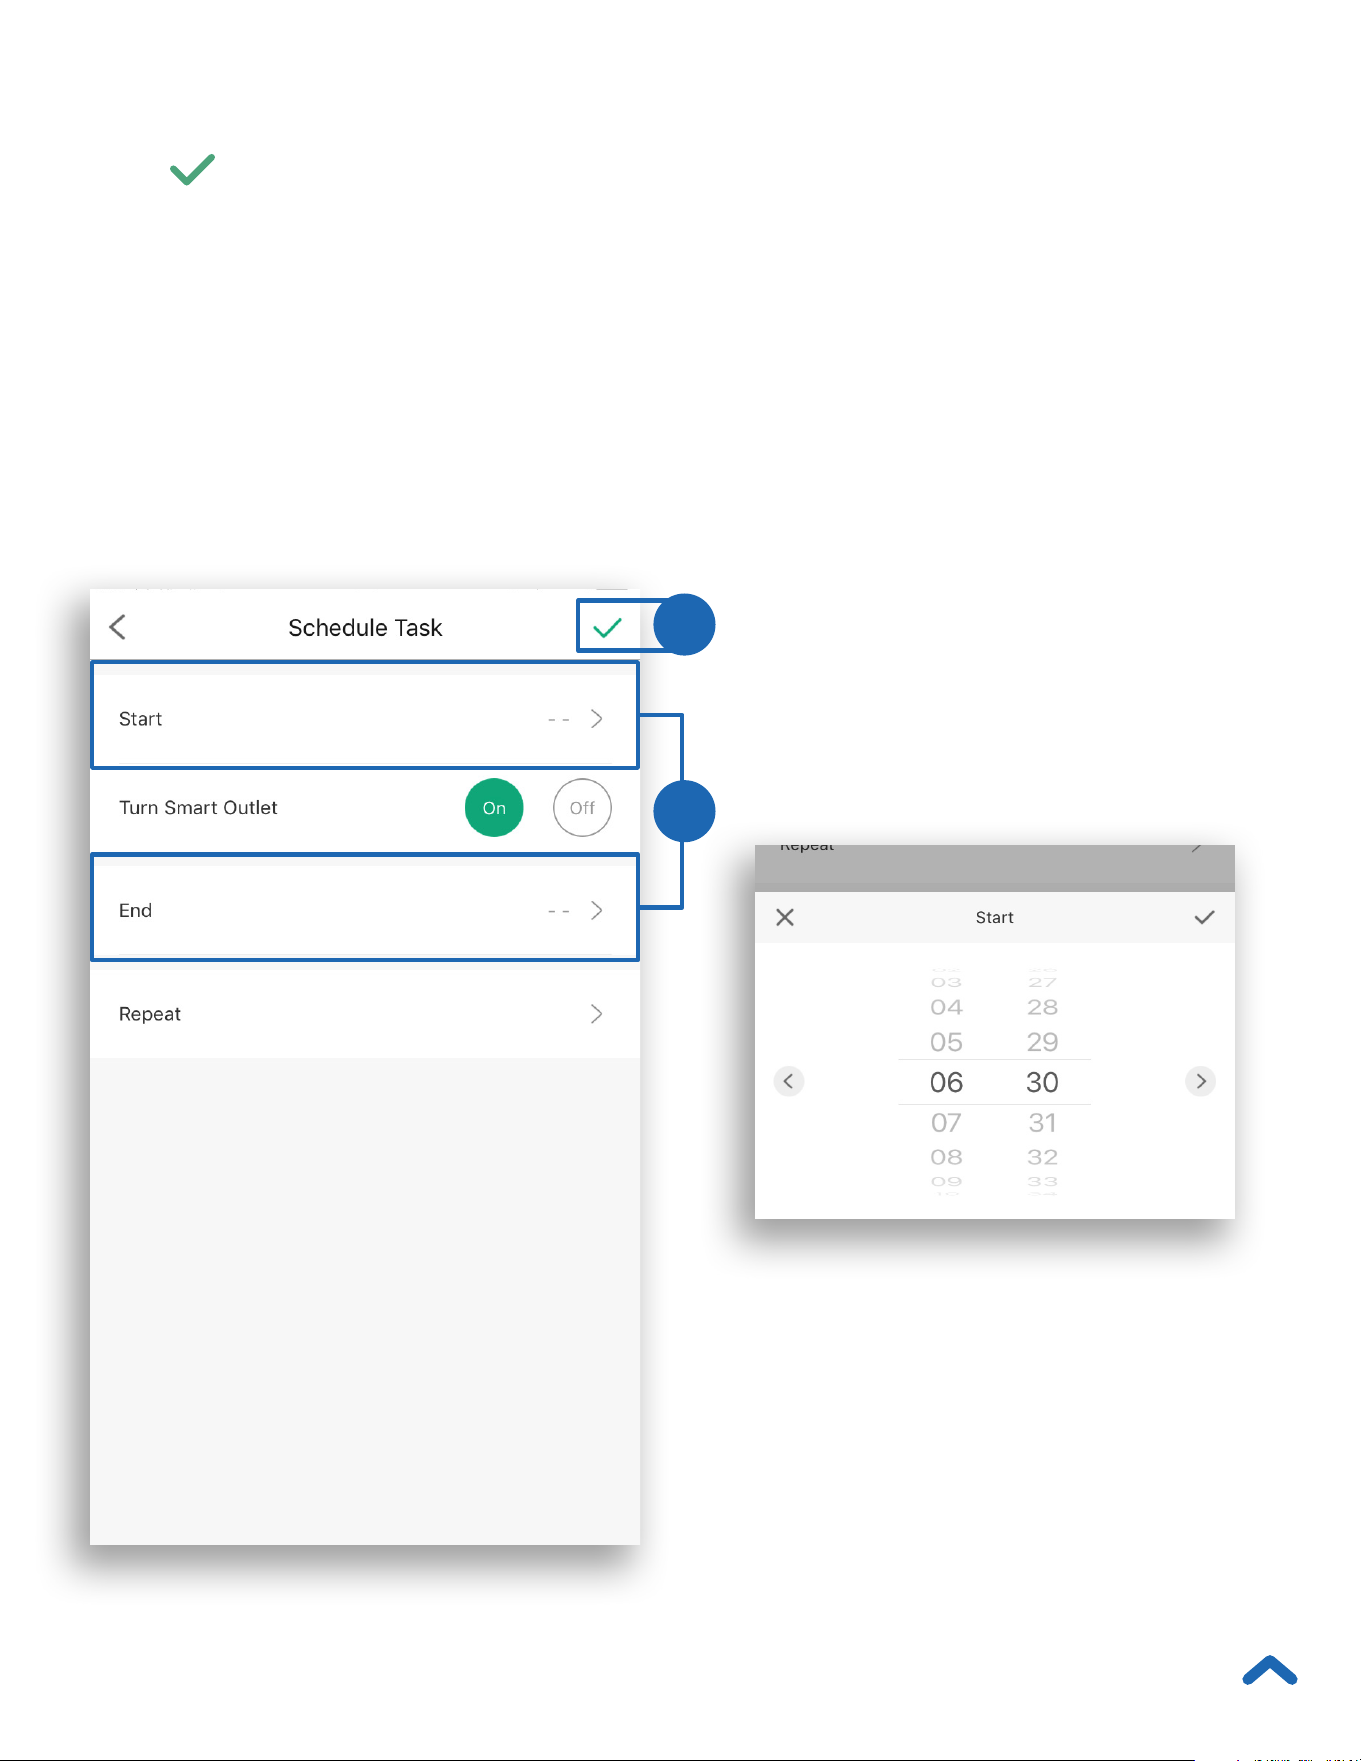
3. Tap Start and End to set the start and end times. Tap
to confirm.
2
3
22
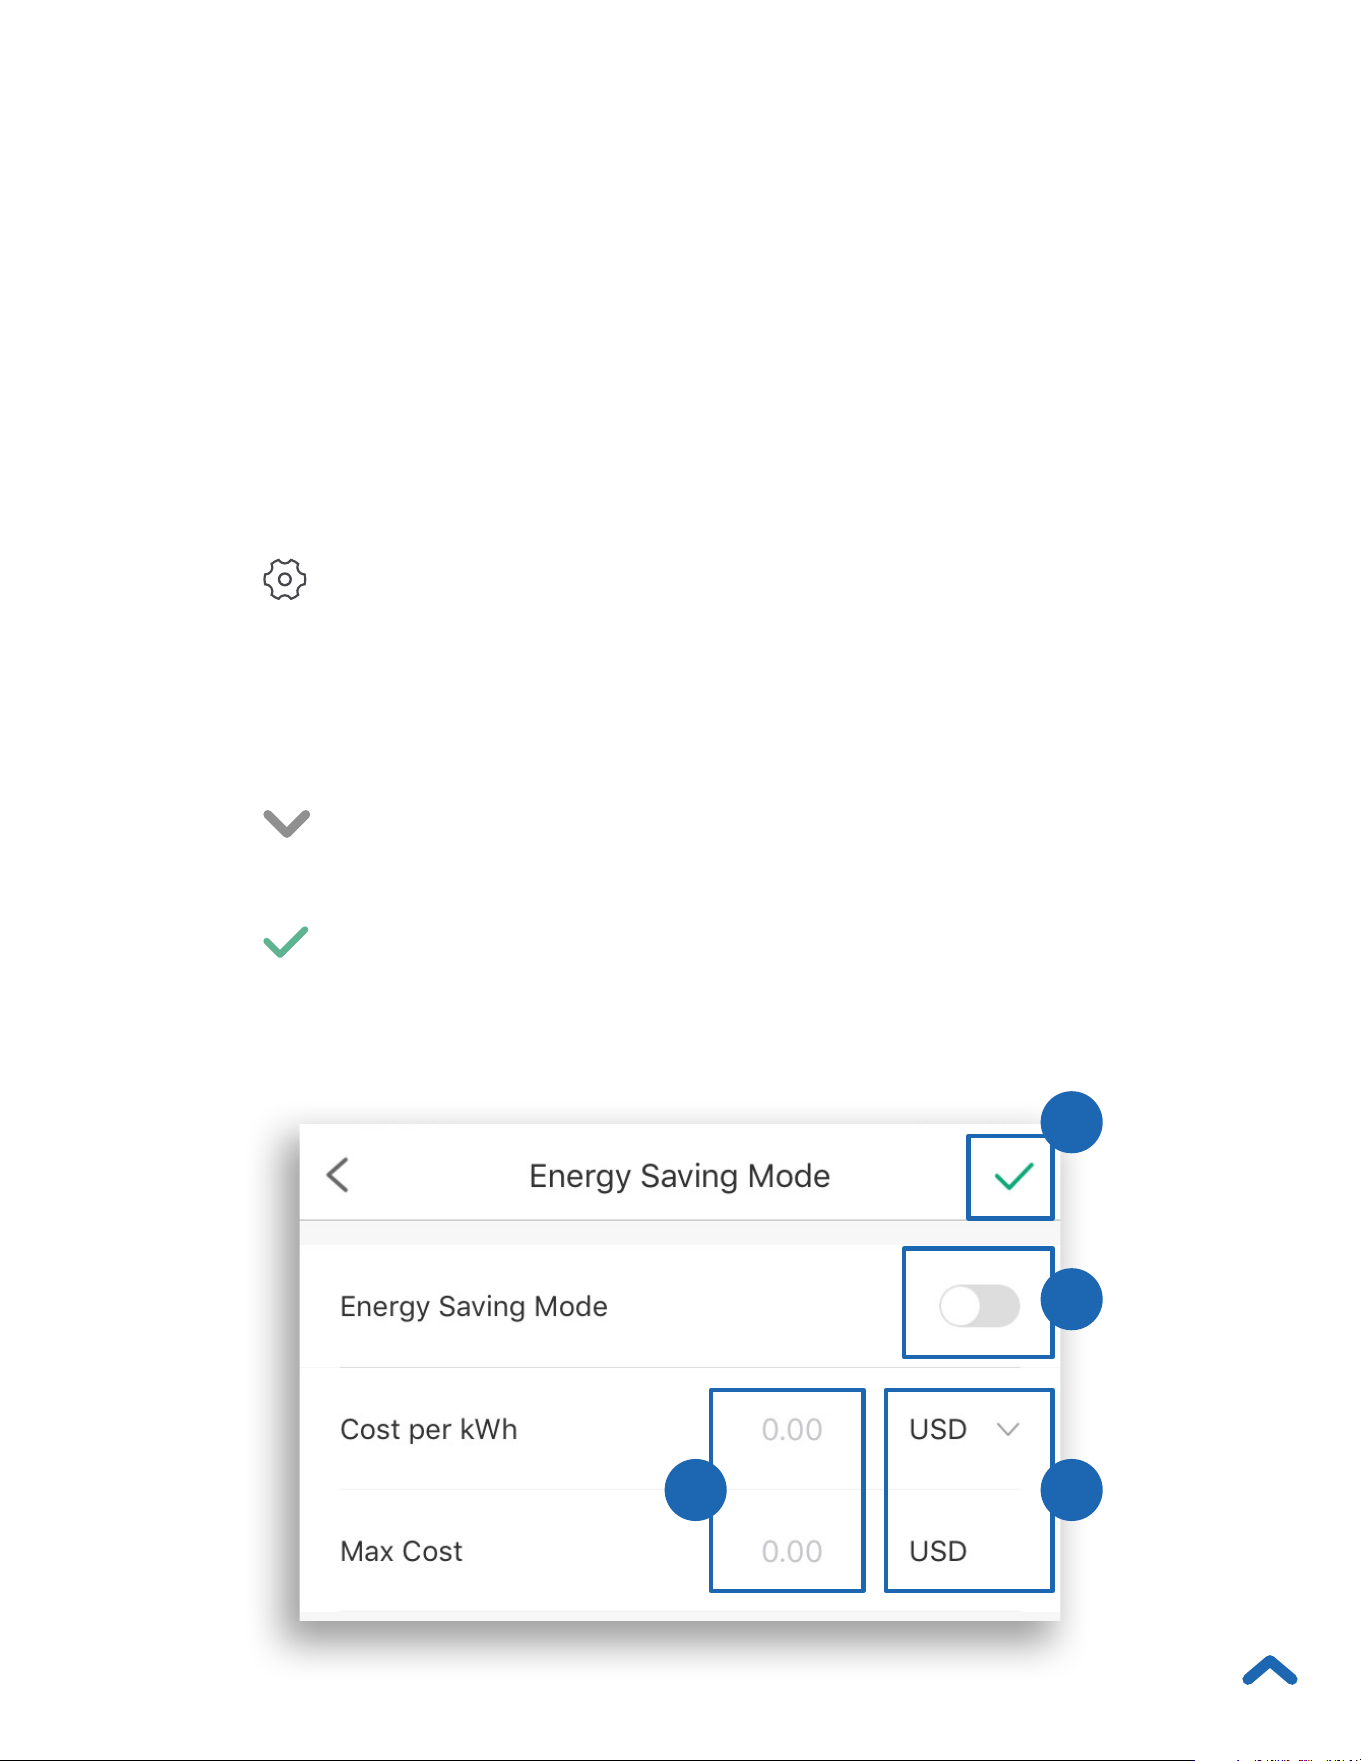
Energy Saving Mode
You can program your smart outlet to save on energy costs
by turning off your appliance when the maximum cost
setting is reached.
1. From the My Home screen, tap the name of the smart
outlet to open the smart outlet screen.
2. Tap to see Device Settings, then tap Energy
Saving Mode.
3. Tap the toggle to turn “Energy Saving Mode” on or off.
4. Enter the Cost per kWh and Max Cost.
5. Tap to switch between the monetary units, EUR or
USD.
6. Tap to confirm.
3
4 5
6
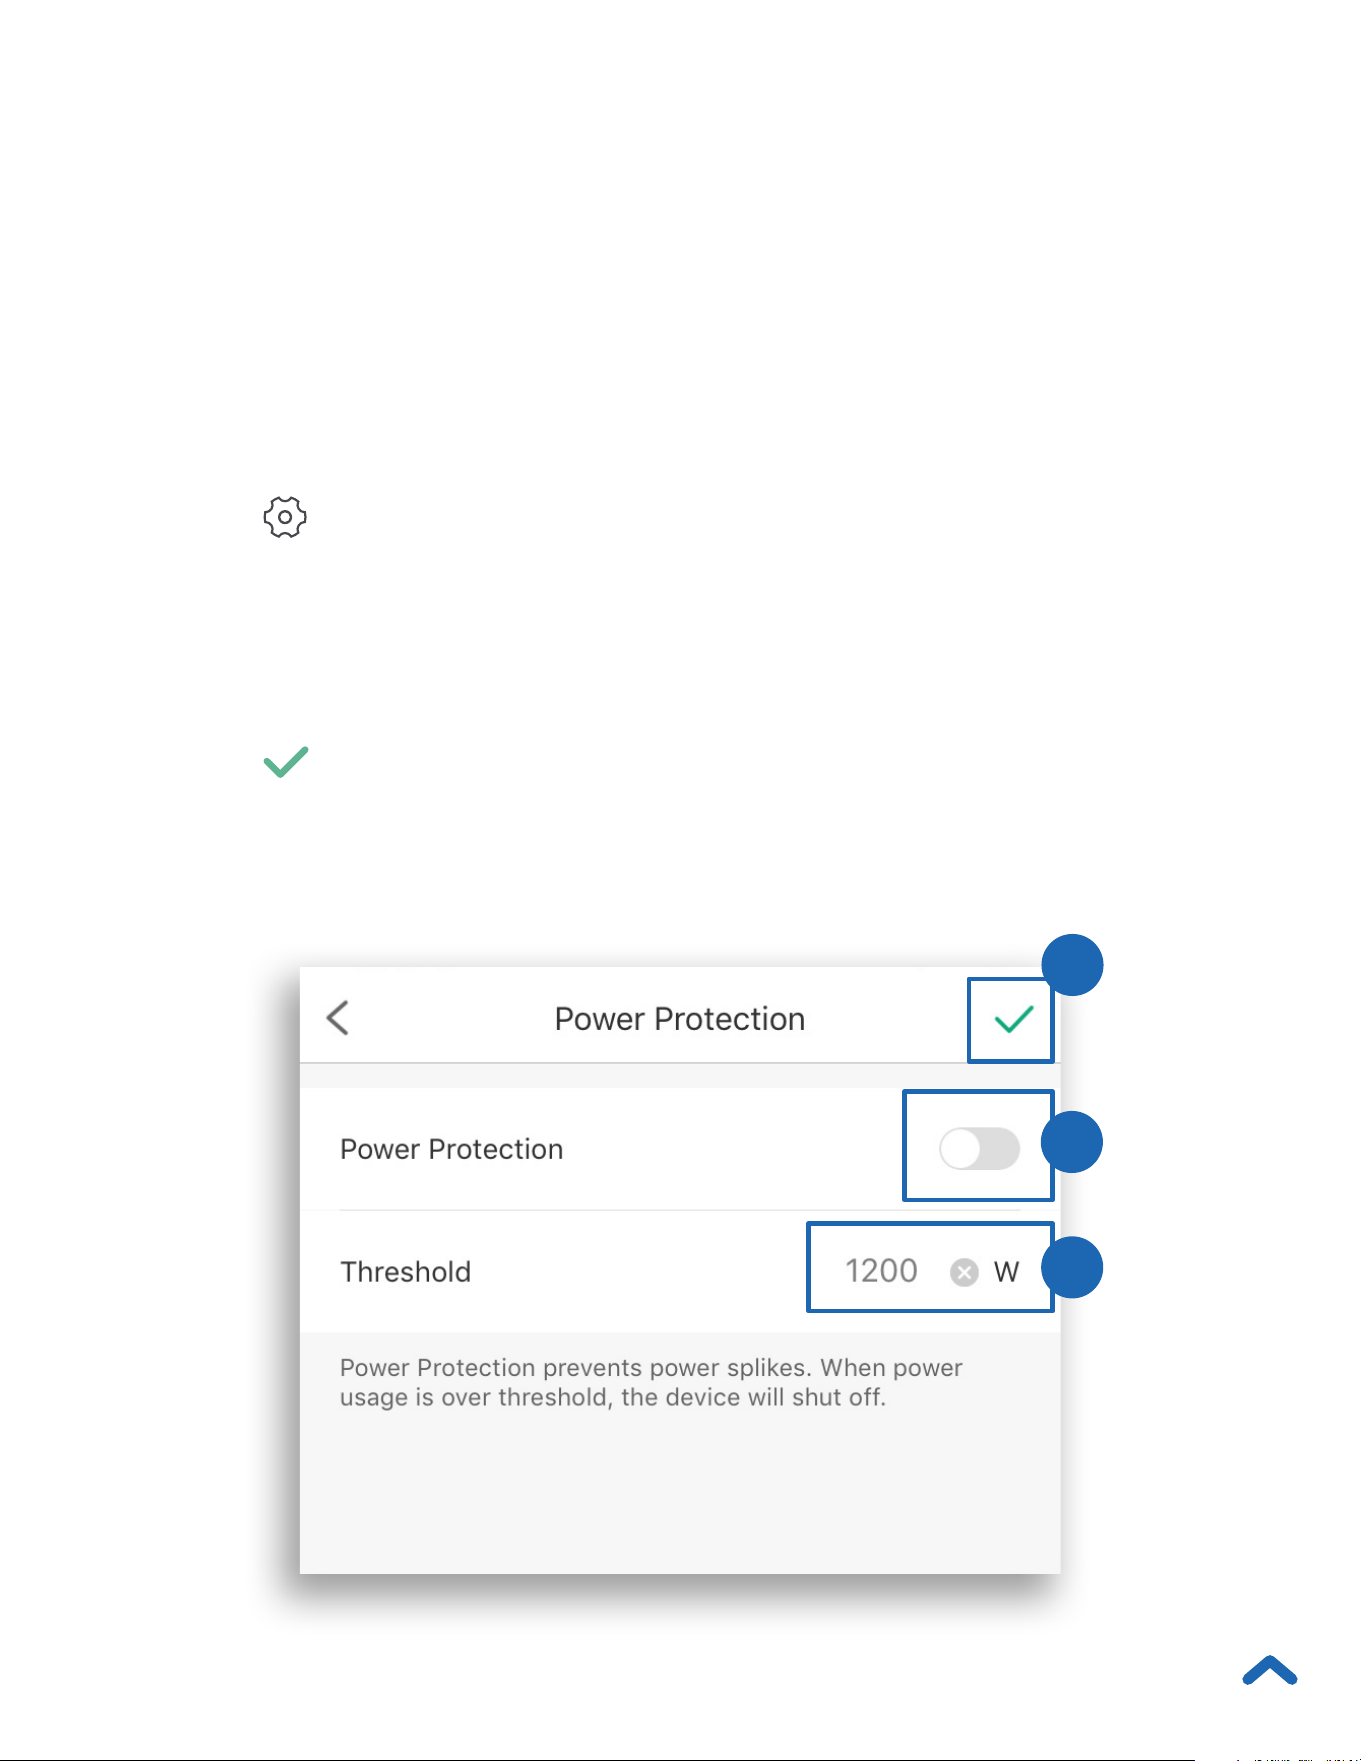
23
Abnormal Power Protection
Turn on Power Protection to protect your connected
appliances from power spike damage.
1. From the My Home screen, tap the name of the smart
outlet to open the smart outlet screen.
2. Tap to see Device Settings, then tap Power
Protection
3. Tap the toggle to turn Power Protection on or off.
4. Enter power usage threshold.
5. Tap to confirm.
3
4
5
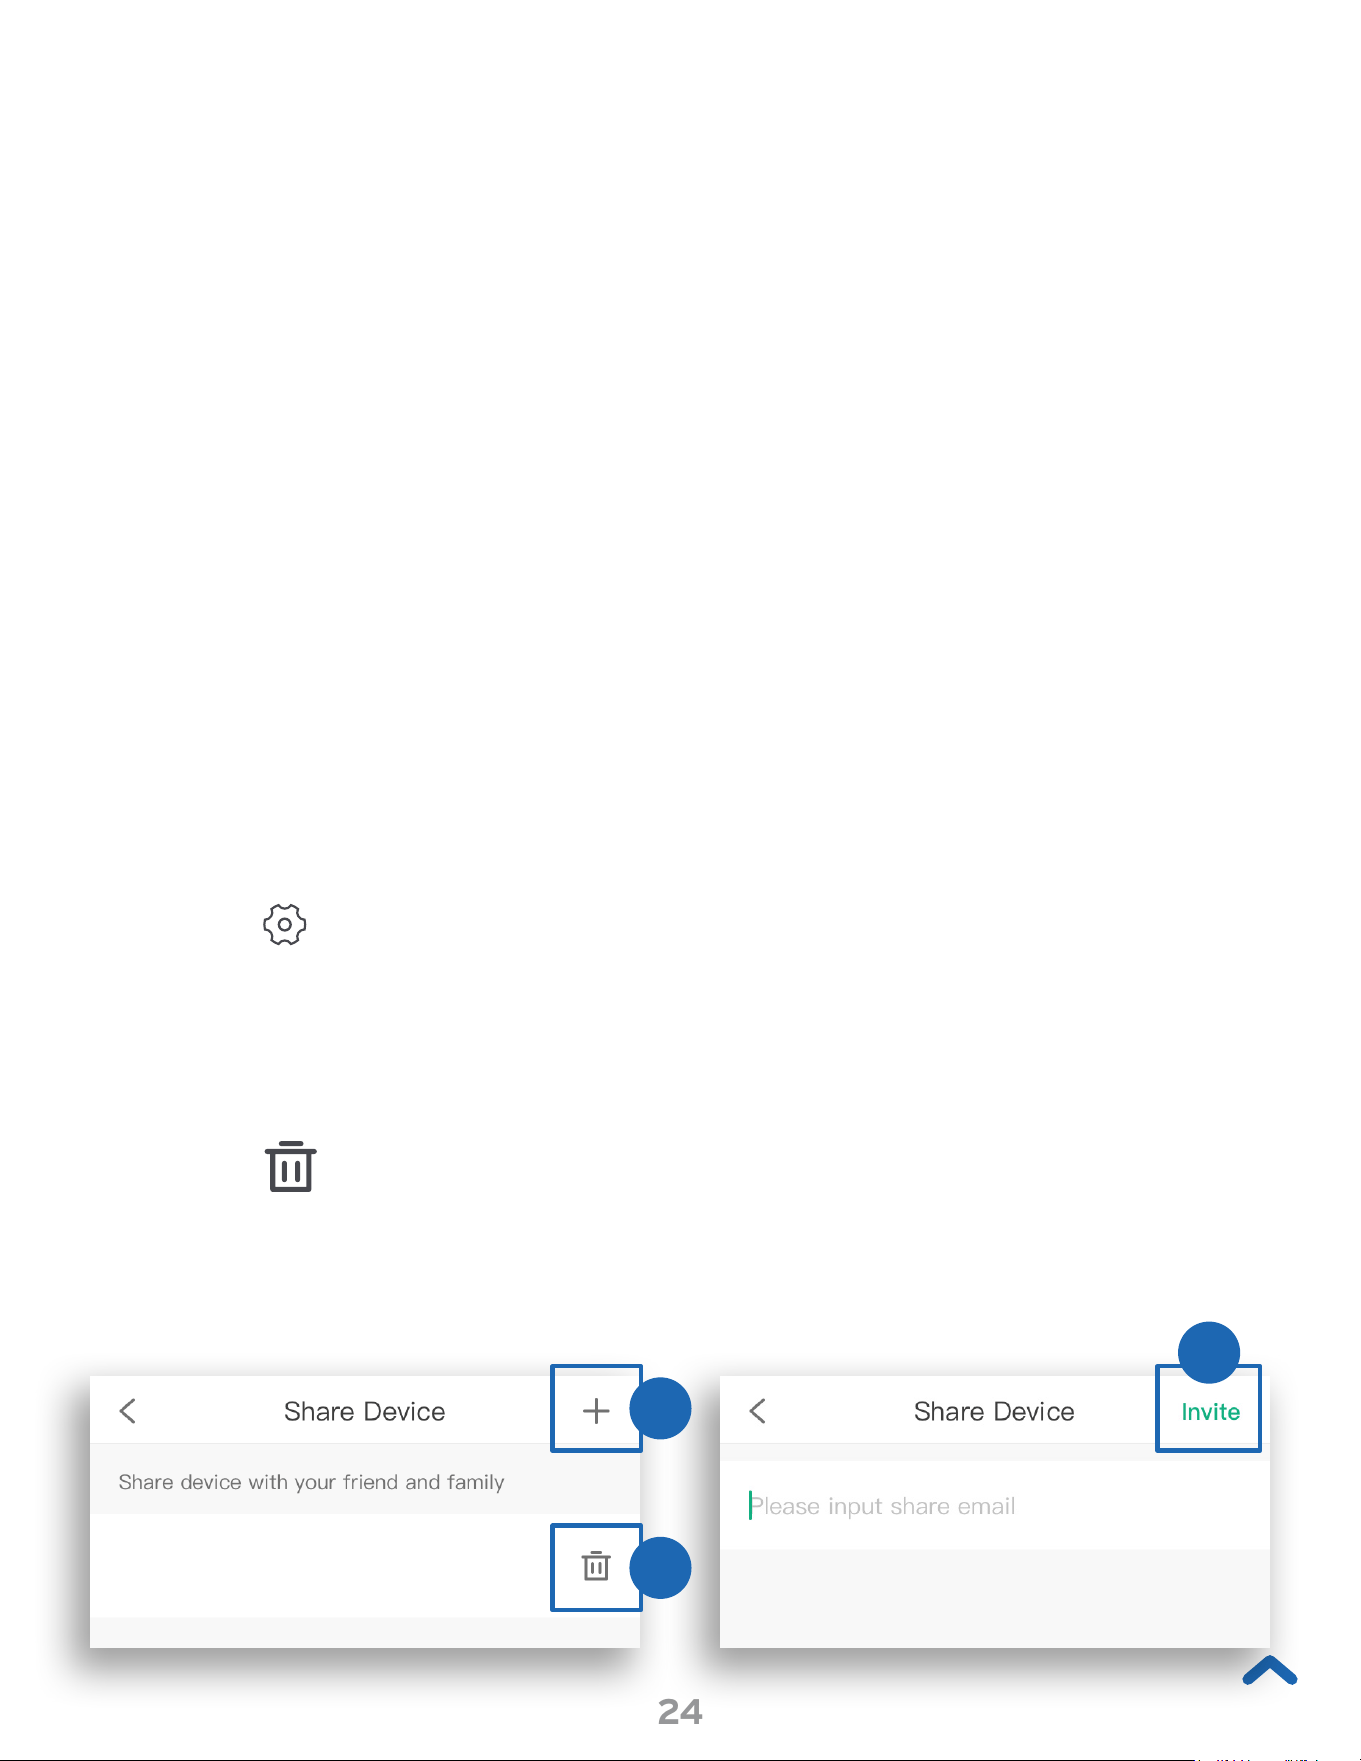
24
Sharing Your Smart Outlet
Share your device to allow others to also control your smart
outlet.
1. From the My Home screen, tap on the name of the
smart outlet to open the smart outlet screen.
2. Tap to see Device Settings, then tap Share Device.
3. Tap + on the Share Device screen.
4. Type in the email of the user you want to share control
of your smart outlet with. Tap Invite.
5. Tap to remove users you have shared your device
with. They will no longer be able to control your smart
outlet.
3
4
5
Example
Note:
• You must have a VeSync account to share your smart outlet.
• People you share your smart outlet with must have a
VeSync account.
• Shared users can edit your device settings. If they delete
your device, it will only be deleted from their account. You
can unshare at any time.
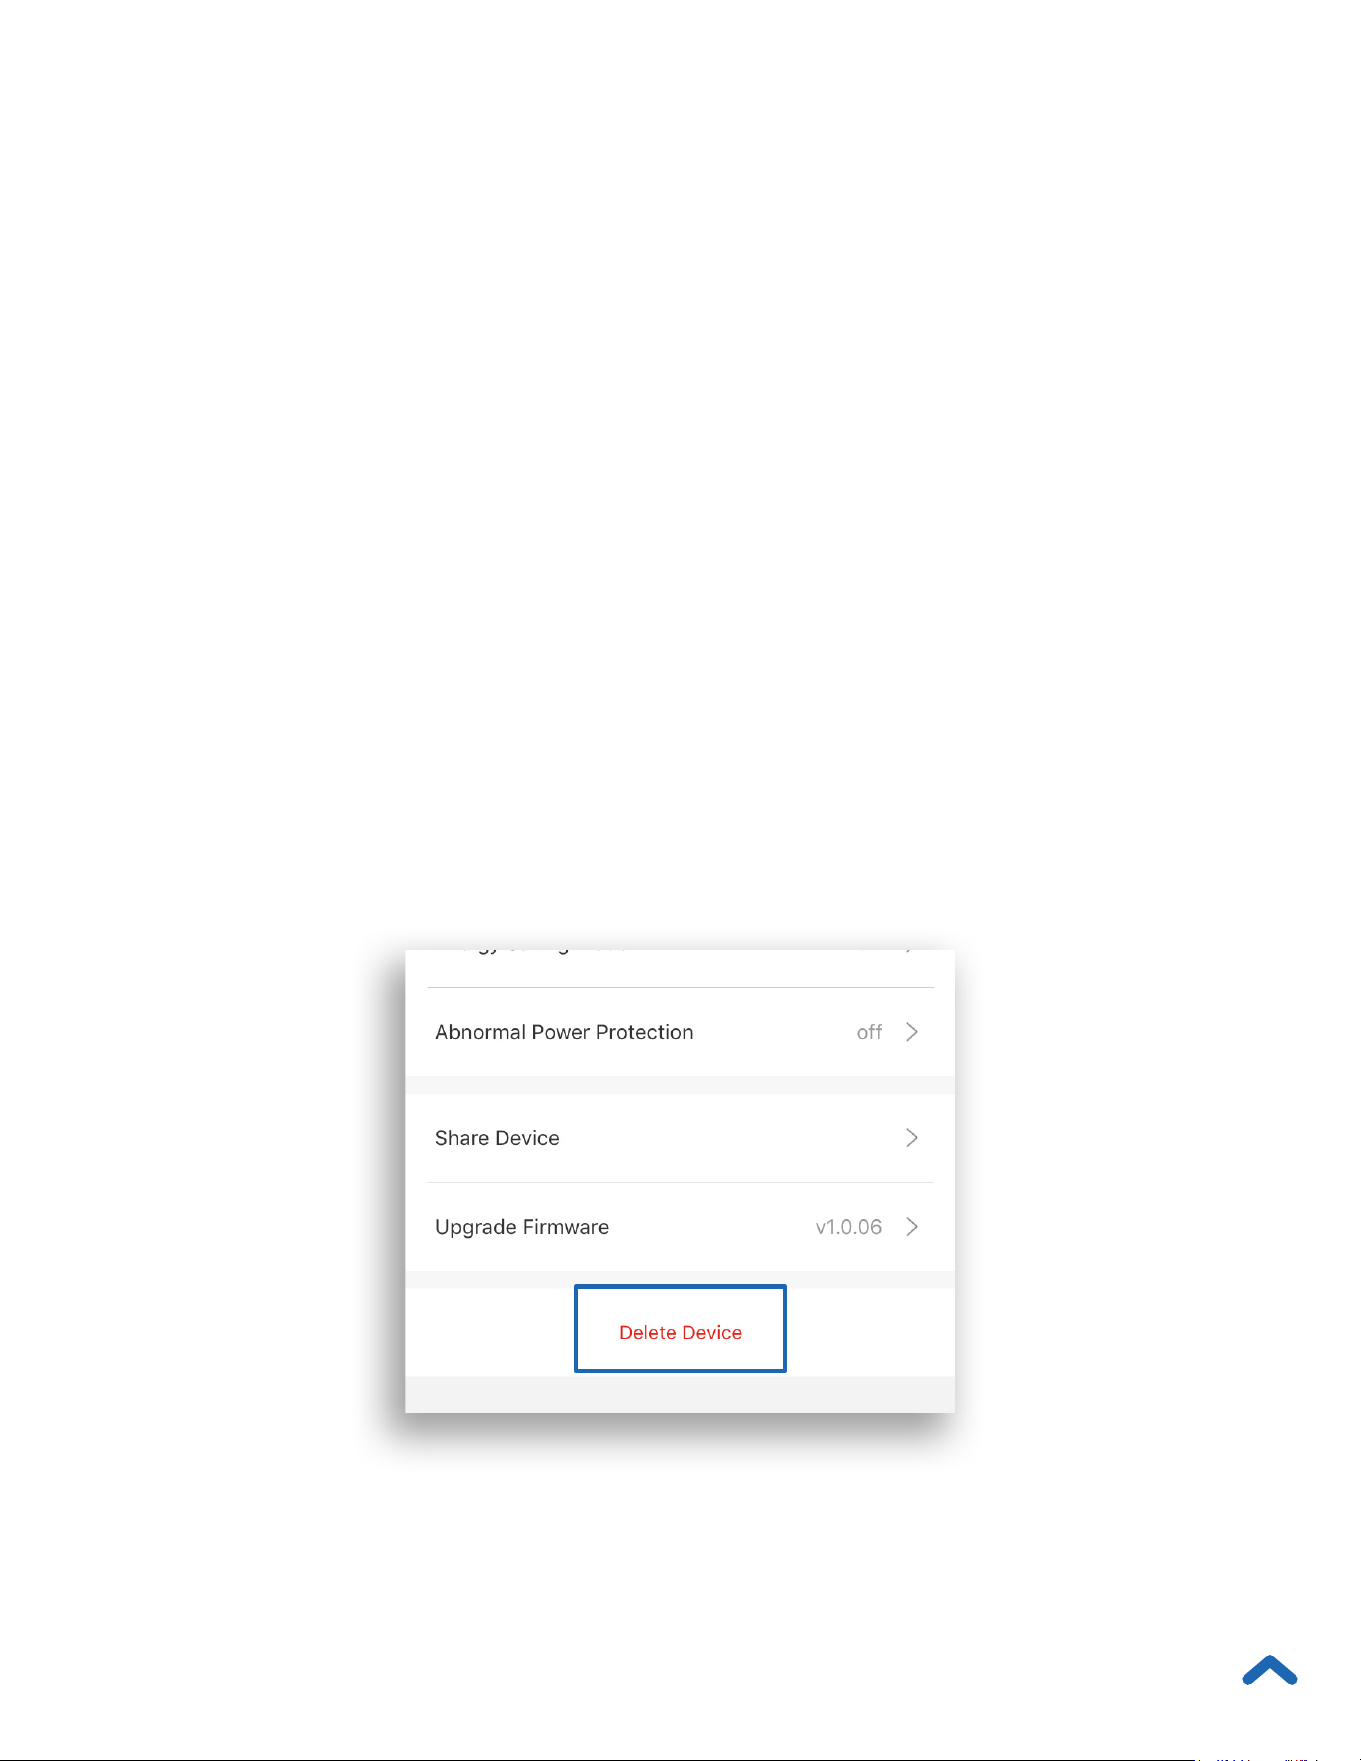
25
Deleting Your Smart Outlet from VeSync
You can delete your smart outlet from the “My Home”
screen in the VeSync app.
• iOS: Swipe left on the smart outlet’s name to
delete.
• Android: Press and hold on the smart outlet’s
name for 2 seconds to delete.
You can also delete your smart outlet in Device Settings
(see page 21). Tap Delete Device at the bottom of the
screen.

26
To view instructions in the VeSync app, tap More at the
bottom of the screen, then tap Link to Alexa.
To view instructions in the VeSync app, tap More at the
bottom of the screen, then tap Link to Google Assistant.
More Features
Connecting with Amazon Alexa
Connecting with Google Assistant
™
Note: You must create your own VeSync account to connect
with Alexa.
Note: You must create your own VeSync account to connect
with Google Assistant.

27
Contact Customer Support
You can contact our friendly Customer Support Team
through the VeSync app, in addition to the help line.
• To chat directly with our US office Customer Support
Team, tap Inbox at the bottom of the screen. Then, tap
Online support to send a chat message.
Note: Chat hours are Mon–Fri, 9:00 am–5:00 pm PST/PDT.
Messages sent outside chat hours will receive an email
response.

28
Help and Feedback
1. To get in-app help or send feedback on your smart
outlet, tap More at the bottom of the screen, then tap
Help and Feedback.
2. Tap the name of your smart outlet.
Note: If your smart outlet is not installed, tap More, then tap
WiFi Outlet and choose your smart outlet.
Note: Entering your router model or including a picture
of your label is especially helpful if you’re having issues
connecting to your smart outlet in the app.
3. Tap any issue to see more information. If you can’t find
the solution to your problem, tap Report an Issue.
4. Type in your feedback and tap Submit. A member of
our support team will reach out to you within 24 hours.


42
Resetting Your Smart Outlet
Resetting the smart outlet can help troubleshoot many
issues you may have, including if your smart outlet has
gone offline.
Note: Power outages, internet outages, or changing WiFi
routers may cause your smart outlet to go offline.
Note: Resetting the smart outlet will erase all of your custom
settings and restore the default settings.
1. Delete the smart outlet from the VeSync app. Swipe
left (iOS) or tap and hold (Android) the smart outlet
name, then tap Delete.
2. Press and hold the power button for about 15 seconds
until the indicator light blinks blue rapidly (4 times a
second). The indicator light will blink rapidly 10 times,
and the smart outlet will turn off.
3. Reconfigure your smart outlet with the VeSync app
(see Configuration, page 9).

43
Troubleshooting
My outlet isn’t connecting to the VeSync app.
• During the setup process, you must be connected to a secure
2.4GHz WiFi network. Confirm that the network is working correctly.
• Make sure the WiFi password you entered is correct.
• There should be no spaces at the beginning or end of the
password.
• Test the password by connecting a different electronic
device to the router.
• If you’re manually typing in the SSID and password, double
check that both are entered correctly.
• Make sure your smart outlet is in Configuration Mode (see
page 9). The indicator light should be blinking. If not, press and
hold the power button for 5 seconds until the indicator light blinks.
• Your router should be within a 164 ft / 50 m visible range of the
smart outlet. Your phone should be as close as possible to your
smart outlet.
• Your router may need to be at a higher location, away from
obstructions.
• Make sure your smart outlet and router are away from appliances
(such as microwave ovens, refrigerators, electronic devices, etc.) to
avoid signal interference.
• If you’re using a VPN, make sure it’s turned off while setting up
your smart outlet.
• Reset your smart outlet (see Resetting, page 42).

44
Connecting for Advanced Users
Try these suggestions for checking your router configuration.
• Make sure you don’t have too many devices connected
to your router on the 2.4GHz band. Your router may
limit the number of devices you can connect. Turn off
this limit in your router settings.
• Disable portal authentication. If portal authentication
is enabled, the smart outlet will not be able to access
your WiFi network, and setup will fail.
Note: Portal authentication requires you to sign in
to your WiFi network through a web page before you
can use the Internet.
• Make sure that the router DHCP service is enabled.
This service is used to assign an IP address to your
smart outlet. If the DHCP service is disabled, the smart
outlet will not be able to obtain an IP address and will
not be able to connect to your WiFi network.
• Disable URL filtering.
• Open firewall ports. Your smart outlet needs to use
ports 443, 4005, 1883, and 17273 to connect to your
WiFi network.
• Disable wireless MAC address filtering.
• Confirm that your ISP has not disabled ports 1883 and
17273.

45
Why do I need to turn on my phone’s location or GPS when I’m setting
up my smart outlet?
• During configuration, the VeSync app will need to access your WiFi
information. Many newer phones require permission to access GPS
or location services in order to access WiFi information or search
for nearby WiFi networks, which is necessary for connecting a
smart product to WiFi.
I can’t find the “ESP” access point during configuration.
• Press and hold the power button on the smart outlet for 5 seconds,
until the indicator light blinks to trigger Configuration Mode.
The “ESP” access point will appear in your list of available WiFi
connections.
• During Configuration Mode, the indicator light on the smart outlet
will blink. You will have 5 minutes to pair the smart outlet with your
phone.
Amazon Alexa or Google Assistant can’t find my app or can’t discover
my smart outlet.
• Make sure the smart outlet is within 164 ft / 50 m visible range of
your wireless network router.
• Make sure the smart outlet has power.
• Check that your Amazon Alexa or Google Assistant is working
properly.
• Make sure your Amazon Alexa or Google Assistant are connected
to the same network as the smart outlet.
46
After adding my smart outlet to VeSync, the smart outlet icon won’t
appear on the “My Home” screen of the VeSync app.
• Refresh the VeSync menu by swiping down on the screen.
• Close and reopen the app.
My smart outlet is offline.
1. Make sure the smart outlet is on and has power, then refresh the
VeSync menu by swiping down on the screen.
2. Make sure your router is connected to the internet, and your
phone’s network connection is working properly.
3. Delete the offline smart outlet from the VeSync app. Swipe left
(iOS) or tap and hold (Android), and tap Delete.
4. Reset the smart outlet (see page 42).
5. Once the smart outlet has been deleted and reset, reconfigure
the smart outlet with the VeSync app (see page 42).
6. When the smart outlet is online again, update the firmware (see
page 41).
Note: Power outages, internet outages, or changing WiFi routers
may cause your outlets to go offline.
My smart outlet isn’t turning on/off as scheduled.
• Make sure that the schedule is still turned on. The toggle switch
should look like , not .
• Make sure your phone’s GPS or Location Services is turned on.
• Make sure the smart outlet is connected to a working network and
is not offline.
If your problem is not listed, please contact Customer Support (see
page 51).

47
Attributions
iOS is a registered trademark of Cisco Systems, Inc. and/or its affiliates in
the United States and certain other countries.
Apple App Store is a trademark of Apple Inc.
Android, Google, and Google Play are trademarks of Google LLC.
Wi-Fi
®
is a registered trademark of Wi-Fi Alliance
®
.
The Bluetooth® word mark and logos are registered trademarks owned
by Bluetooth SIG, Inc. and any use of such marks by Etekcity Corporation
is under license.

48
FCC Notice
FCC Radiation Exposure Notice
This device complies with part 15 of the FCC Rules. Operation is subject to the following 2
conditions: (1) this device may not cause harmful interference, and (2) this device must accept any
interference received, including interference that may cause undesired operation. Any changes or
modifications not expressly approved by the party responsible for compliance could void the user’s
authority to operate the equipment.
NOTE: This equipment has been tested and found to comply with the limits for a Class B digital
device, pursuant to Part 15 of the FCC Rules. These limits are designed to provide reasonable
protection against harmful interference in a residential installation. This equipment generates,
uses, and can radiate radio frequency energy and, if not installed and used in accordance with
the instructions, may cause harmful interference to radio communications. However, there is no
guarantee that interference will not occur in a particular installation. If this equipment does cause
harmful interference to radio or television reception, which can be determined by turning the
equipment off and on, the user is encouraged to try to correct the interference by one or more of
the following measures:
• Reorient or relocate the receiving antenna.
• Increase the separation between the equipment and receiver.
• Connect the equipment into an outlet on a circuit different from that to which the receiver is
connected.
• Consult the dealer or an experienced radio/TV technician for help.
This equipment complies with FCC radiation exposure limits set forth for an uncontrolled
environment. End users must follow the specific operating instructions for satisfying RF exposure
compliance. To maintain compliance with FCC RF exposure compliance requirements, please follow
operation instructions as documented in this manual. This transmitter must not be co-located
or operating in conjunction with any other antenna or transmitter. This equipment should be
installed and operated with a minimum distance of 20 cm between the radiator and your body. The
availability of some specific channels and/or operational frequency bands are country dependent
and are firmware programmed at the factory to match the intended destination. The firmware
setting is not accessible by the end user.
49
Warranty Information
Terms & Policy
Etekcity Corporation warrants all products to be of the highest quality in
material, craftsmanship, and service, effective from the date of purchase
to the end of the warranty period.
Etekcity Corporation will replace any product found to be defective due
to manufacturer flaws based on eligibility. Refunds are available within
the first 30 days of purchase. Refunds are only available to the original
purchaser of the product. This warranty extends only to personal use
and does not extend to any product that has been used for commercial,
rental, or any other use for which the product is not intended. There are
no warranties other than the warranties expressly set forth with each
product.
This warranty is non-transferrable. Etekcity Corporation is not responsible
in any way for any damages, losses, or inconveniences caused by
equipment failure or by user negligence, abuse, or use noncompliant with
the user manual or any additional safety or use warnings included in the
product packaging and manual.
This warranty does not apply to the following:
• Damage due to abuse, accident, alteration, misuse, tampering, or
vandalism.
• Improper or inadequate maintenance.
• Damage in return transit.
• Unsupervised use by children under 18 years of age.
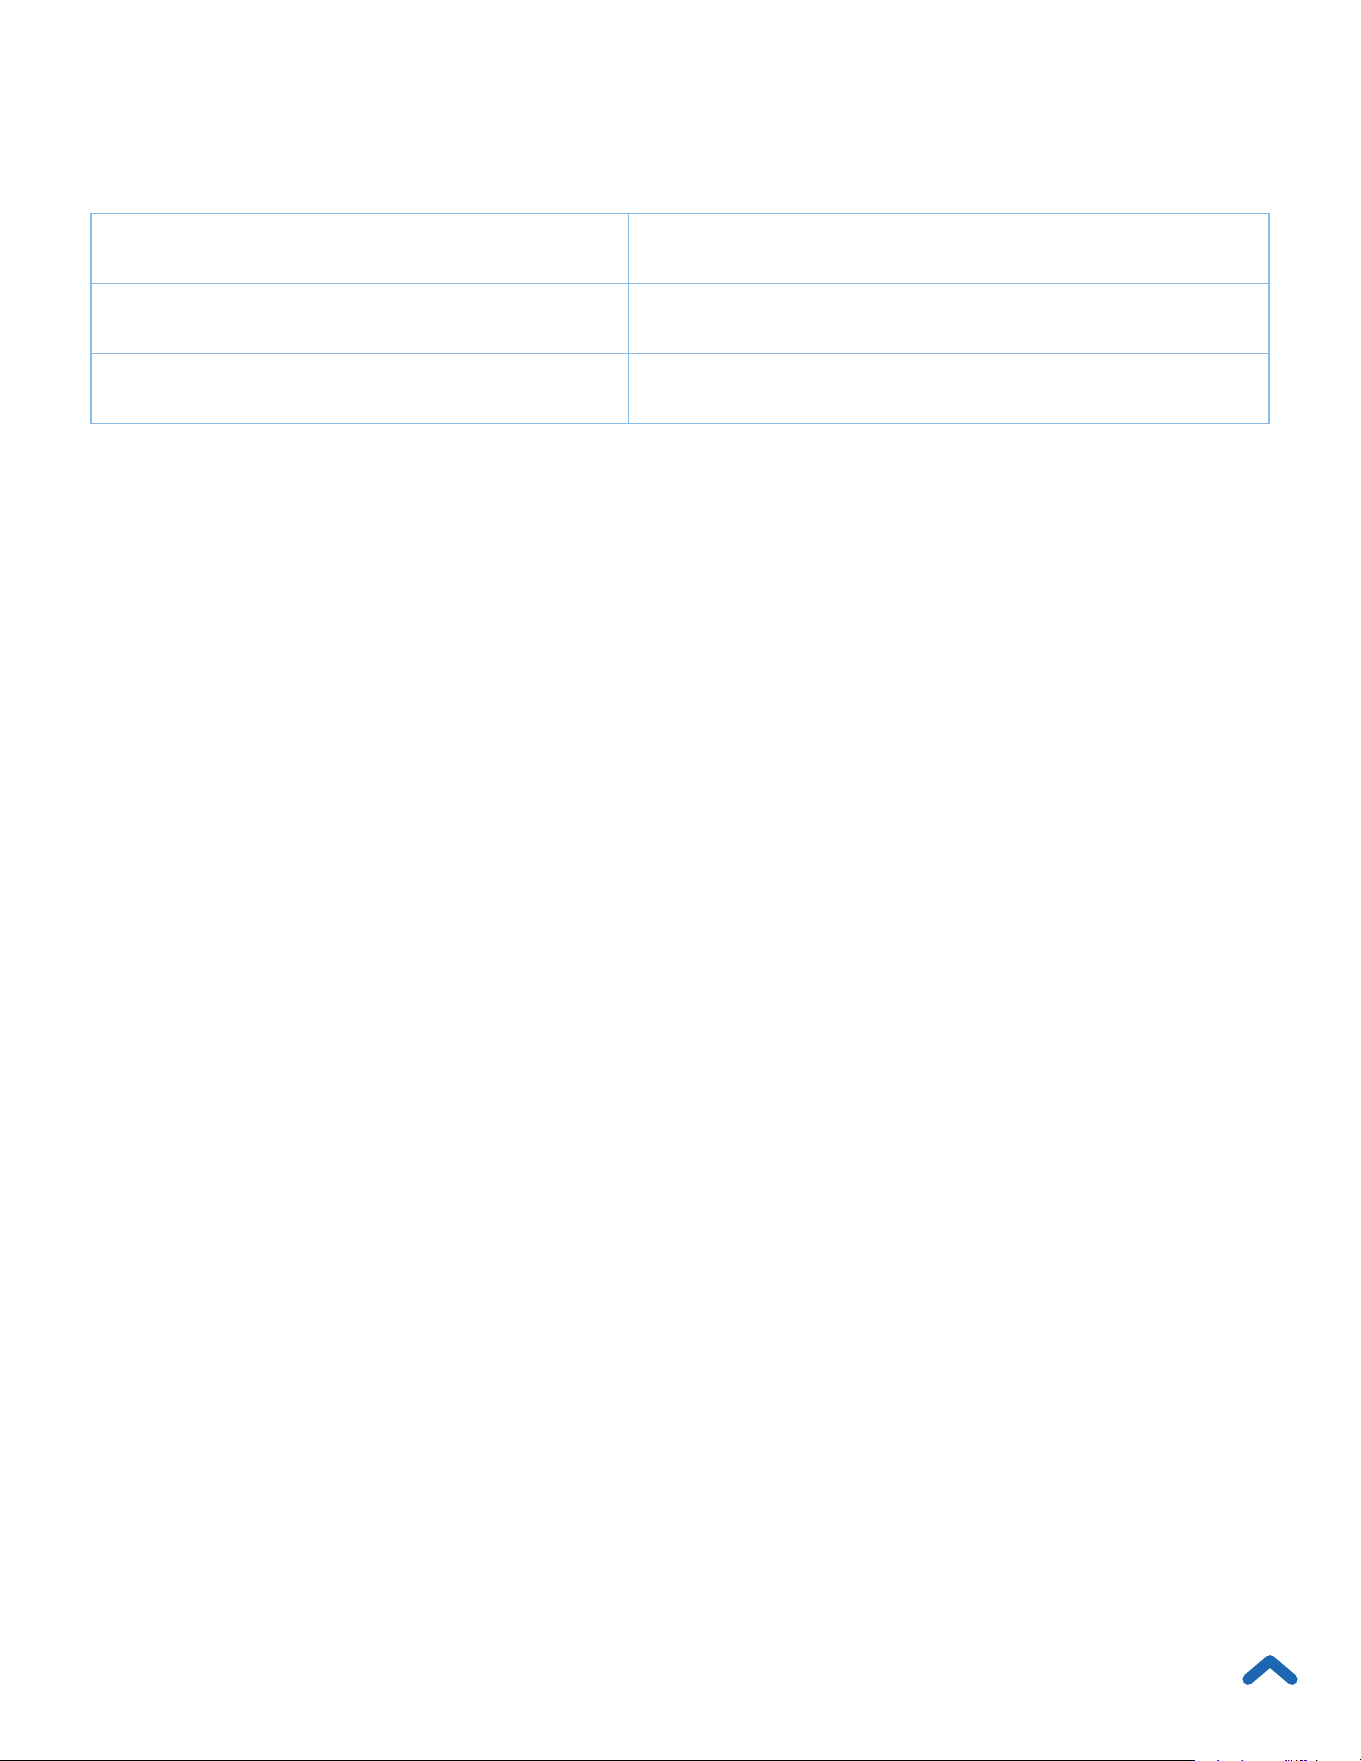
Product Voltson Smart WiFi Outlet (10A)
Model ESW01-USA-R19 / ESW01-USA-R6P
Default Warranty Period 1 year

50
Etekcity Corporation and its subsidiaries assume no liability for damage
caused by the use of the product other than for its intended use or as
instructed in the user manual. Some states do not allow this exclusion
or limitation of incidental or consequential losses so the foregoing
disclaimer may not apply to you. This warranty gives you specific legal
rights and you may also have other rights which may vary from state to
state.
ALL EXPRESSED AND IMPLIED WARRANTIES, INCLUDING THE
WARRANTY OF MERCHANTABILITY, ARE LIMITED TO THE PERIOD
OF THE LIMITED WARRANTY.
Extend Your Warranty by 1 Year
Register your product at www.etekcity.com/warranty to extend your
1-year warranty by an additional year.
Please fill out all required fields and include your order ID, place of
purchase, and purchase date, if applicable.
Defective Products & Returns
If you discover your product is defective within the specified warranty
period, please contact Customer Support via support@etekcity.com with
a copy of your invoice and order ID. DO NOT dispose of your product
before contacting us. Once our Customer Support Team has approved
your request, please return the product with a copy of the invoice and
order ID.

51
Customer Support
If you have any questions or concerns about your new
product, please contact our helpful Customer Support
Team.
Etekcity Corporation
1202 N. Miller St., Suite A
Anaheim, CA 92806
Email: support@etekcity.com
Toll-Free: (855) 686-3835
Support Hours
Mon–Fri, 9:00 am–5:00 pm PST/PDT
*Please have your invoice and order ID ready before
contacting Customer Support.