Loading ...
Loading ...
Loading ...
10 49-5000874 Rev. 1
Installation Instructions
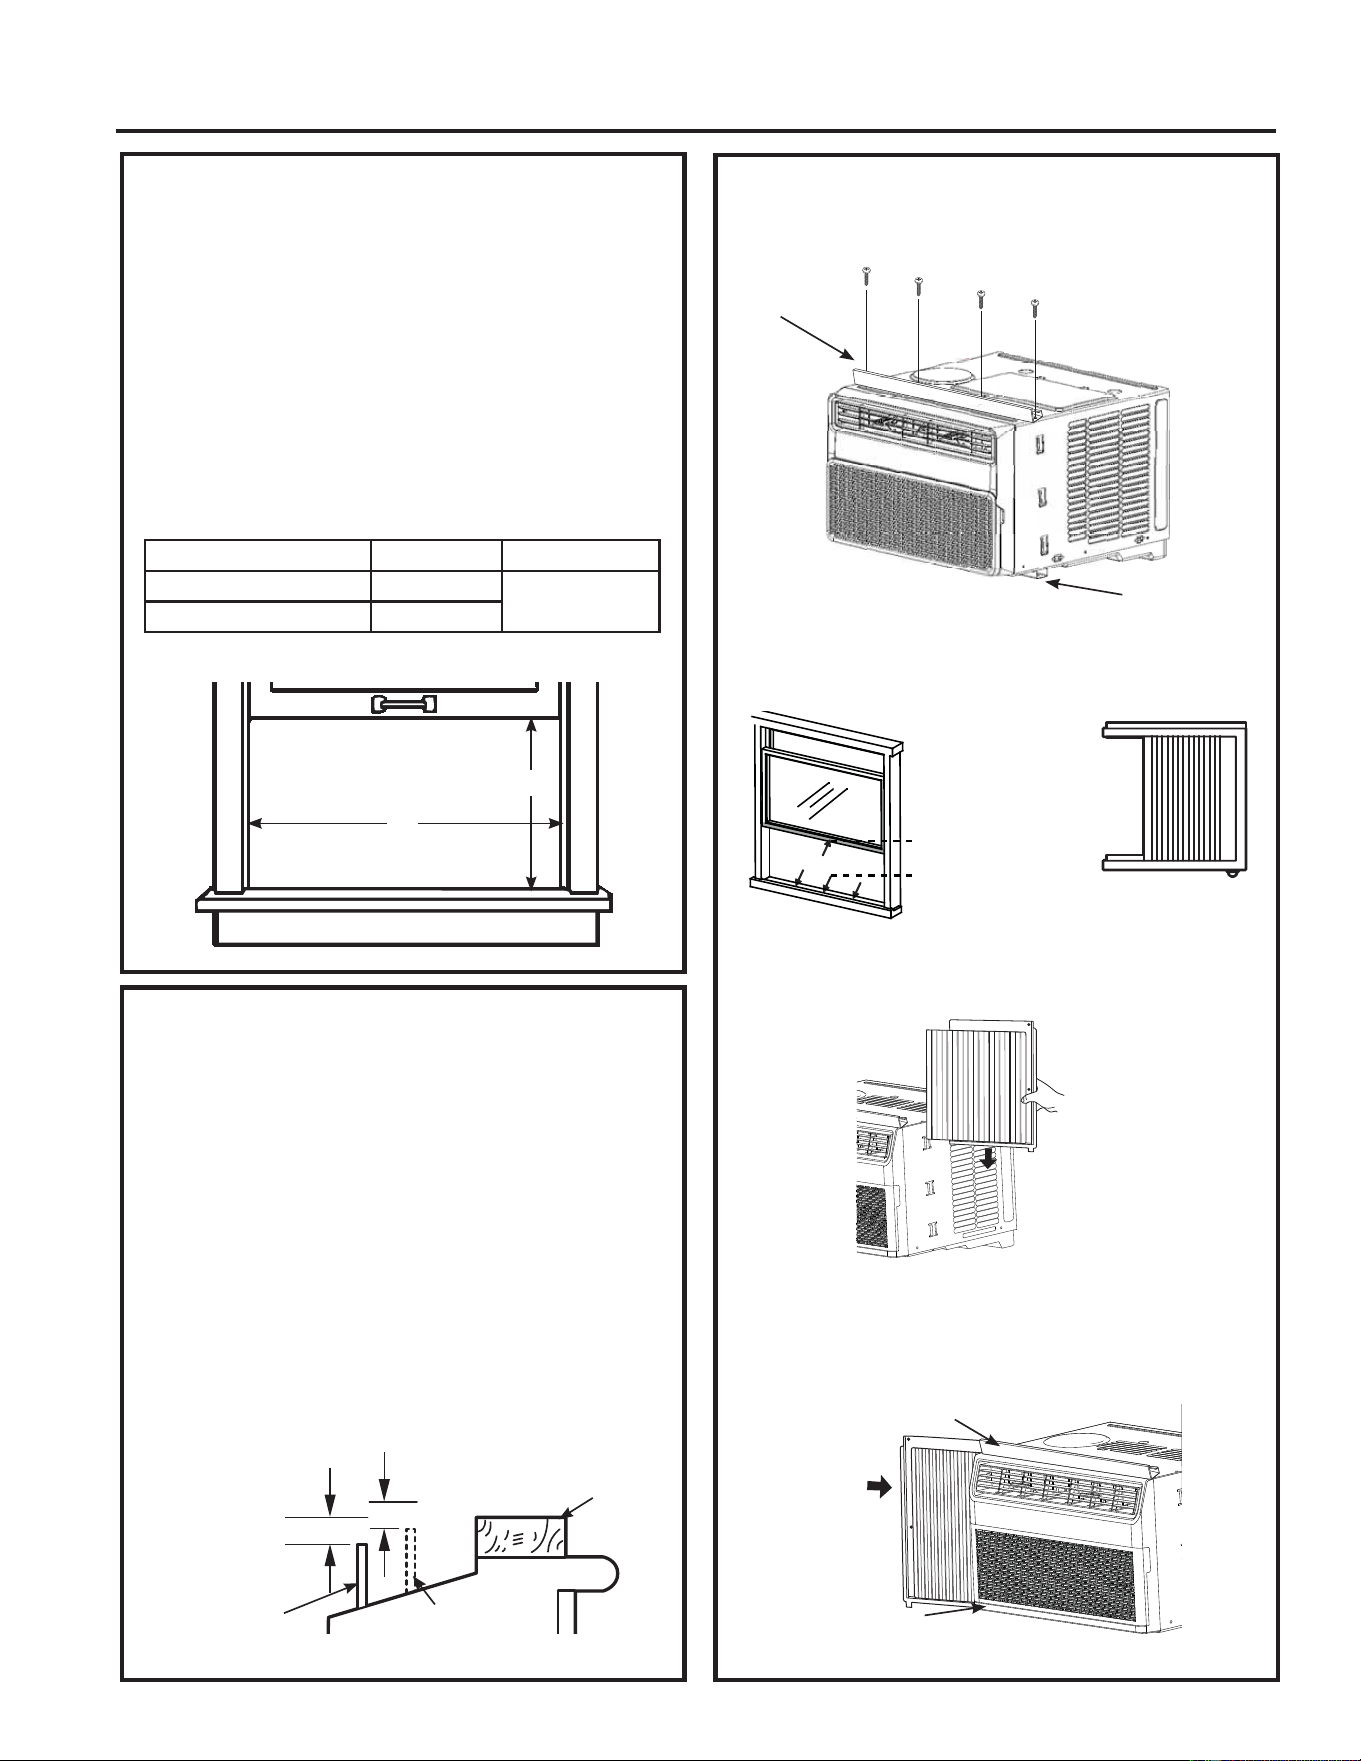
3.
PREPARE THE AIR CONDITIONER
A. ,QVWDOOWKH7RS5DLORQWKH$&ZLWK´
screws from the outside of the case.
B. Apply the weather seals provided to the bottom,
top and sides of the window to the seal around
the perimeter of the air conditioner.
C. Slide the side curtain panels into the side panel
rails.
D. Slide left and right side curtain frames into top
and bottom rails.
1. WINDOW REQUIREMENTS
• These instructions are for a standard
double-hung window. You will need to modify
them for other types of windows.
• The air conditioner can be installed without the
side curtain panels if needed to fit in a narrow
window. See the window opening dimensions.
• All supporting parts must be secured to firm
wood, masonry or metal.
• The electrical outlet must be within reach of
the power cord.
• Follow the dimensions in the table and
illustration for your model.
2. STORM WINDOW REQUIREMENTS
A storm window frame will not allow the air
conditioner to tilt toward the outside, and will
NHHSLWIURPGUDLQLQJSURSHUO\7RDGMXVWIRUWKLV
attach a piece of wood to the sill.
WOOD PIECES
WIDTH: 2Ǝ
LENGTH: Long enough to fit inside the window
frame.
THICKNESS: To determine the thickness, place
DSLHFHRIZRRGRQWKHVLOOWRPDNHLWƎKLJKHU
than the top of the storm window frame or the
vinyl frame.
Attach securely with nails or screws provided by
the installer.
A
(With side curtain panels)
B
ƎKLJKHU
than storm
window
frame
Storm window
frame
Wood
Sill
ƎKLJKHU
than vinyl frame
(on some windows)
Vinyl frame
Models A B
PWDV08 ´PLQ
´´
PWDV10/12/14 ´PLQ
Cut and apply
weather strip to
front and bottom
edge of window
frame.
Cut and apply
weather strip to
back edge of
the window sill.
Cut and apply a weather
strip to side of the curtain
frame (one on each side).
INSTALLATION INSTRUCTIONS
Top mounting
rail
Bottom
mounting rail
Top rail
Bottom rail
Loading ...
Loading ...
Loading ...