Thank you for choosing Hisense. We are sure you will find your new refrigerator a
pleasure to use. However, before you use the appliance, we recommend that you
carefully read the instructions, which provide details about installing and using the
product. Please keep this manual for future reference.
2
REFRIGERATOR SAFETY............................................................................................ .................3
PARTS AND FEATURES...............................................................................................................11
INSTALLATION REQUIREMENTS................................................................................................ 12
Location Requirements..........................................................................................................................12
Electrical Requirements.........................................................................................................................12
INSTALLATION INSTRUCTIONS.................................................................................................. 13
Unpack the Refrigerator......................................................................................................................... 13
Installation Positioning........................................................................................................................... 13
Door Removal............................................................................................................................................. 13
Installing the water lines.........................................................................................................................16
Level Refrigerator......................................................................................................................................17
Align Doors...................................................................................................................................................17
REFRIGERATOR USE.................................................................................................................... 18
Opening and Closing Doors.................................................................................................................18
Using the Controls..................................................................................................... ......................................19
Features.................................................................................................................... ....................................23
General Use Information............................................................................................... ..........................26
REFRIGERATOR CARE................................................................................................................ 27
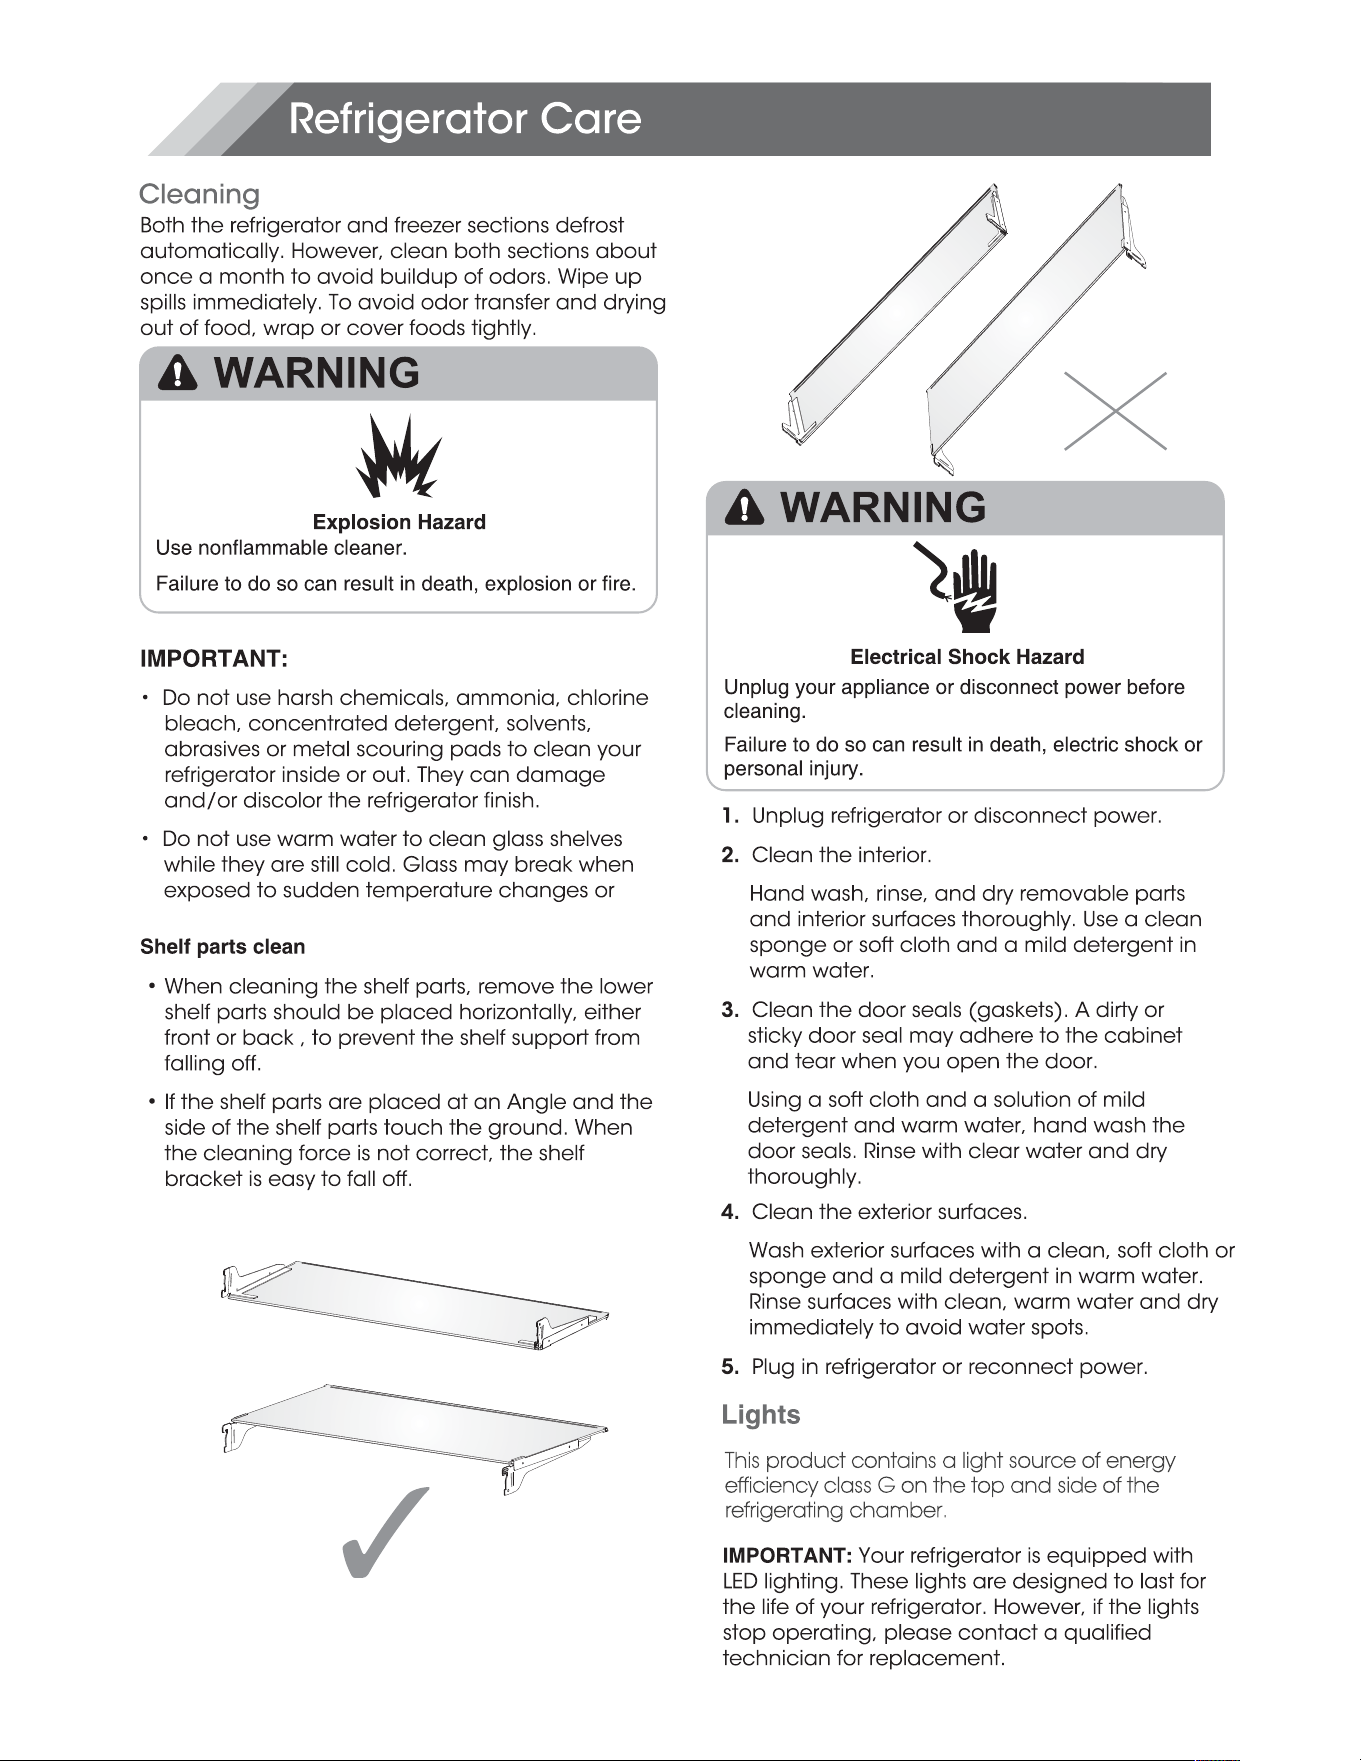
Cleaning.......................................................................................................................................................27
Lights....................................................................................................................... .......................................27
Vacation and Moving Care..................................................................................................................28
Reinstalling/Using Refrigerator Again.............................................................................................28
TROUBLESHOOTING................................................................................................ ...................29
Contents

Y
WARNING — Connect to potable water supply only.
In order to sense the temperatrue and humidity near the
appliance and make the appliance run better,add
temperatrue and humidity sensors outside the box of
appliance.
To avoid a hazard due to instability of the appliance, it
must be installed in accordance with the instructions.The
incorporated ice-maker can only be installed by the
manufacturer and can not be changed by the user.The
appliance is intended to be permanently connected to
the water mains and not connected by a detachable
hose-set.
Warning!
Correct Disposal of this product
This marking indicates that this product
should not be disposed with other household
wastes throughout the EU. To prevent
possible harm to the environment or human
health from uncontrolled waste disposal,
recycle it responsibly to promote the
sustainable reuse of material resources. To
return your used device, please use the
return and collection systems or contact the
retailer where the product was purchased.
They can take this product for environmental
safe recycling.
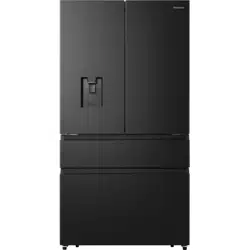
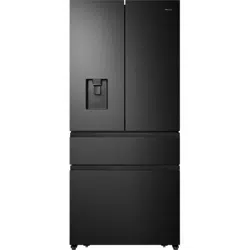
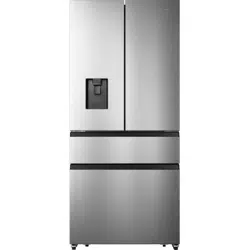
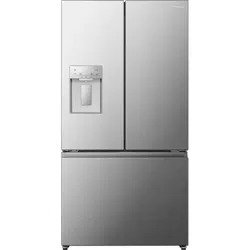
Your model may look different from this and other images in this manual,depending on
your model’s features.
Parts and Features
Proper Disposal of Your Old Refrigerator
Remove doors from your old refrigerator.
Failure to do so can result in death or brain damage.
Suffocation Hazard
IMPORTANT: Child entrapment and suffocation are
not problems of the past. Junked or abandoned
refrigerators are still dangerous– even if they will sit
for “just a few days.” If you are getting rid of your old
refrigerator, please follow these instructions to help
prevent accidents.
Before You Throw Away Your Old Refrigerator or
Freezer:
Take off the doors.
Leave the shelves in place so that children may
not easily climb inside.
Important information to know about disposal
of refrigerants:
Dispose of refrigerator in accordance with
Federal and Local regulations. Refrigerants
must be evacuated by a licensed, EPA certified
refrigerant technician in accordance with
established procedures.
11
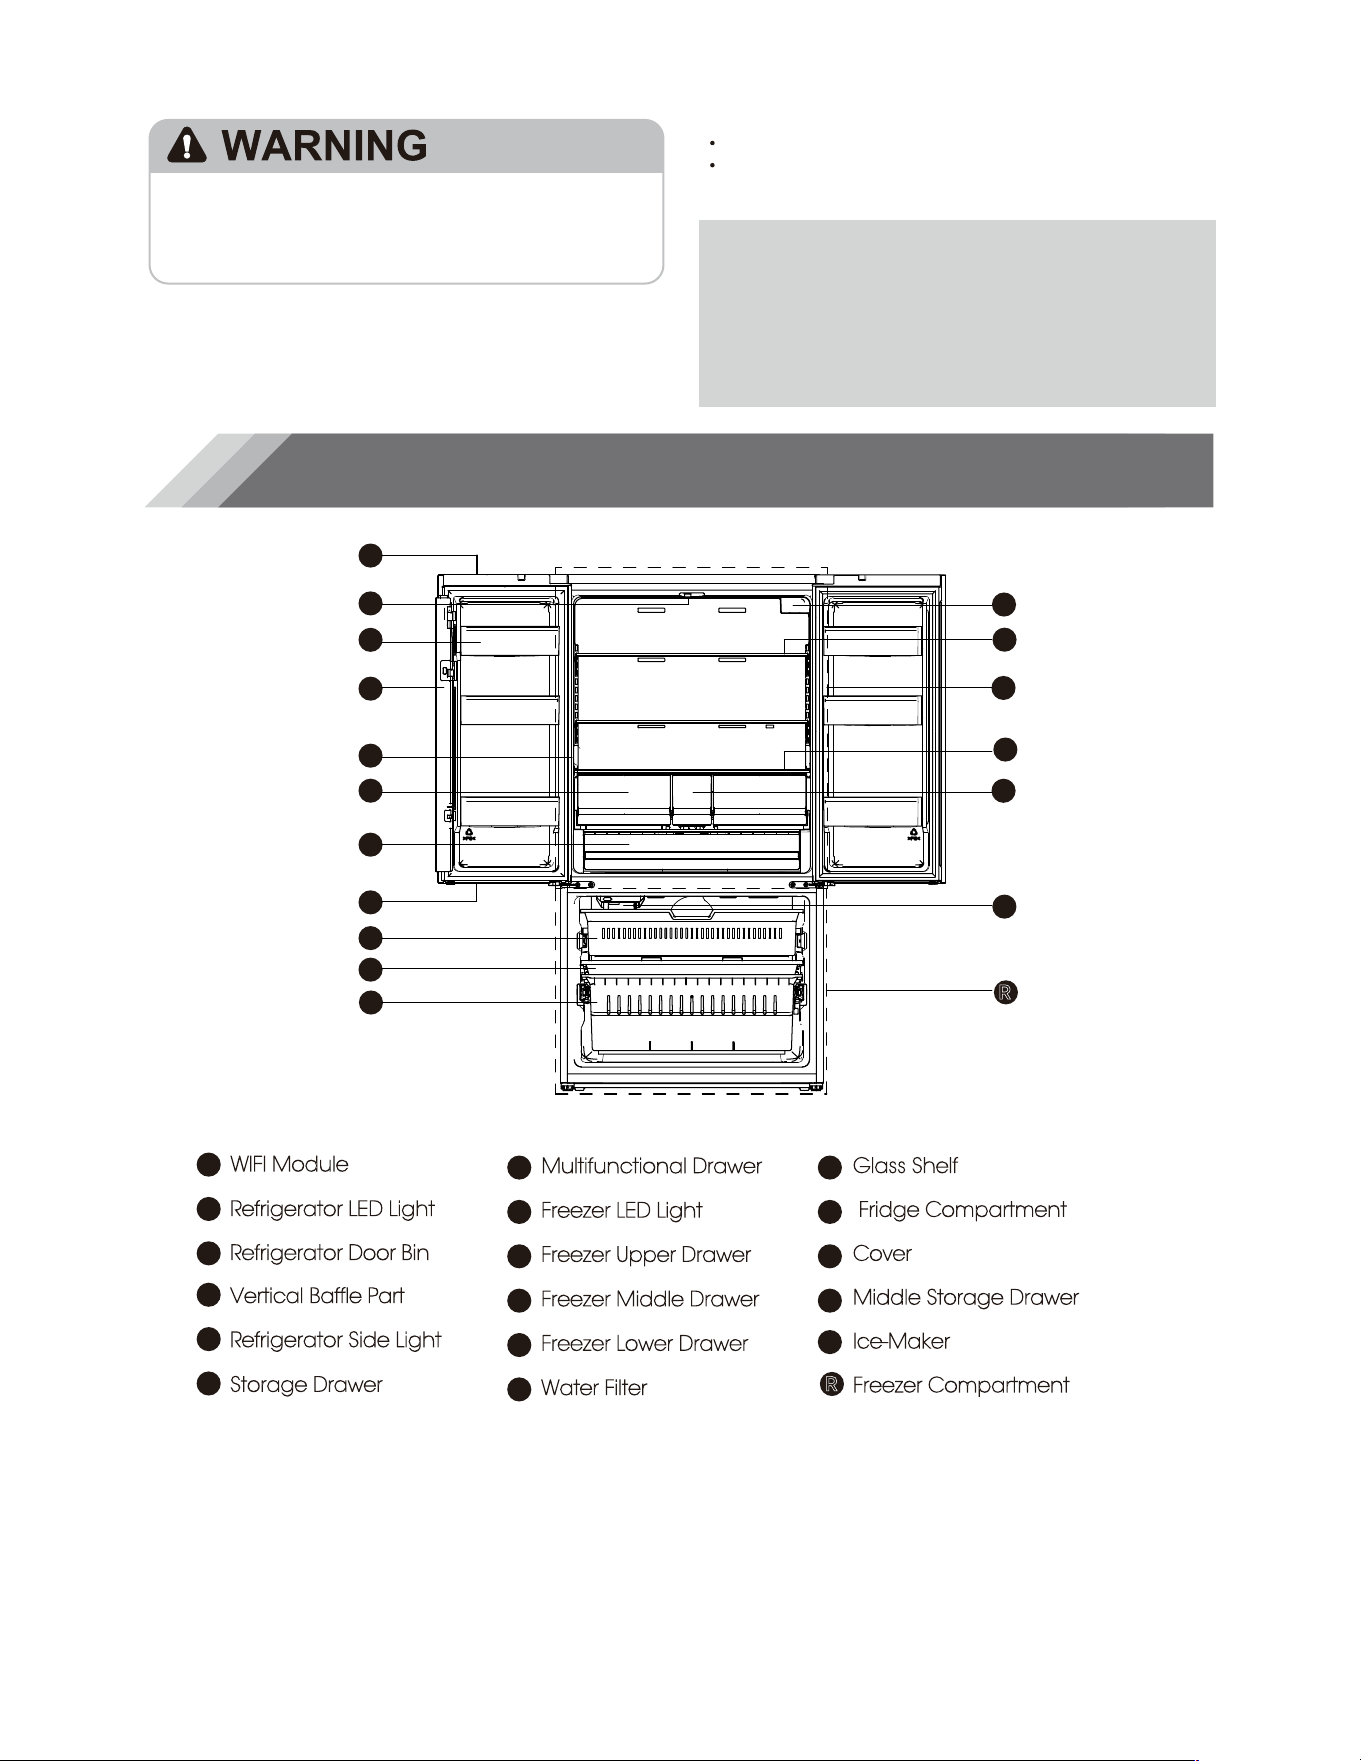
NOTE:
To get the best energy efficiency of this product, please place all shelves, drawers on their
original position as the illustration above.
A
F
H
K
B
C
D
N
I
J
G
E
NOTE:
O
Q
A
B
C
D
E
F
G
WIFI Module
Refrigerator LED Light
Refrigerator Door Bin
Vertical Baffle Part
Refrigerator Side Light
Storage Drawer
H
I
J
K
L
M
Multifunctional Drawer
Freezer LED Light
Freezer Upper Drawer
Freezer Middle Drawer
Freezer Lower Drawer
Water Filter
N
O
P
Glass Shelf
Fridge Compartment
Cover
Middle Storage Drawer
Ice-Maker
Freezer Compartment
L
M
P
Q
R
R
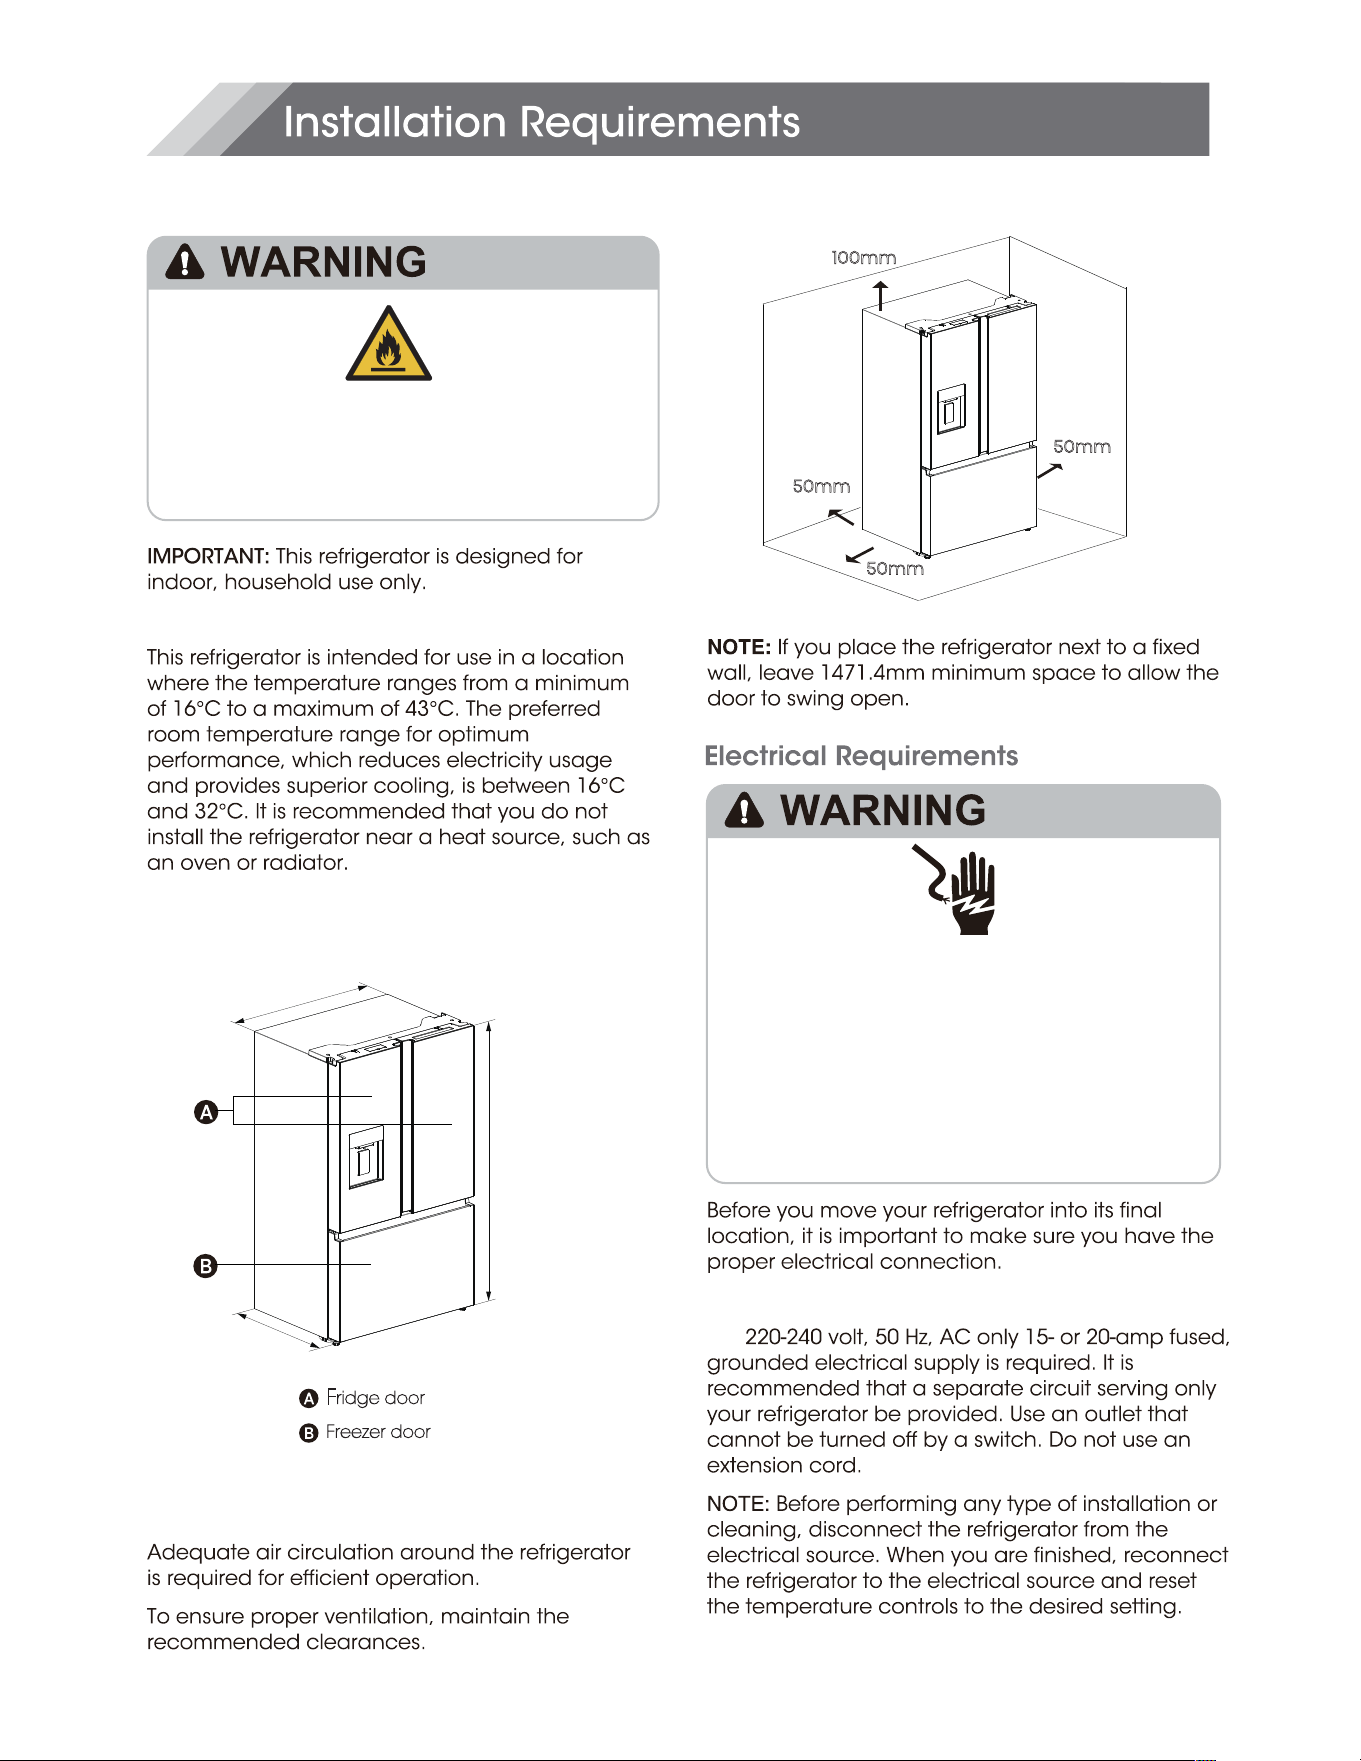
Location Requirements
12
Risk of fire/ flammable materials
AC
Keep flammable materials and vapors,such as
gasoline,away from appliance.
Failure to do so can result in death,explosion or fire.
Electrical Shock Hazard
Plug into a grounder 3 prong outlet.
Do not remove the ground prong from the power
cord plug.
Do not use an adapter.
Do not use an extension cord.
Failure to do so can result in death,fire or
electrical shock.
Recommender Clearances
Temperature
Exterior and Dimensions
Ventilation
Recommender Grounding Method
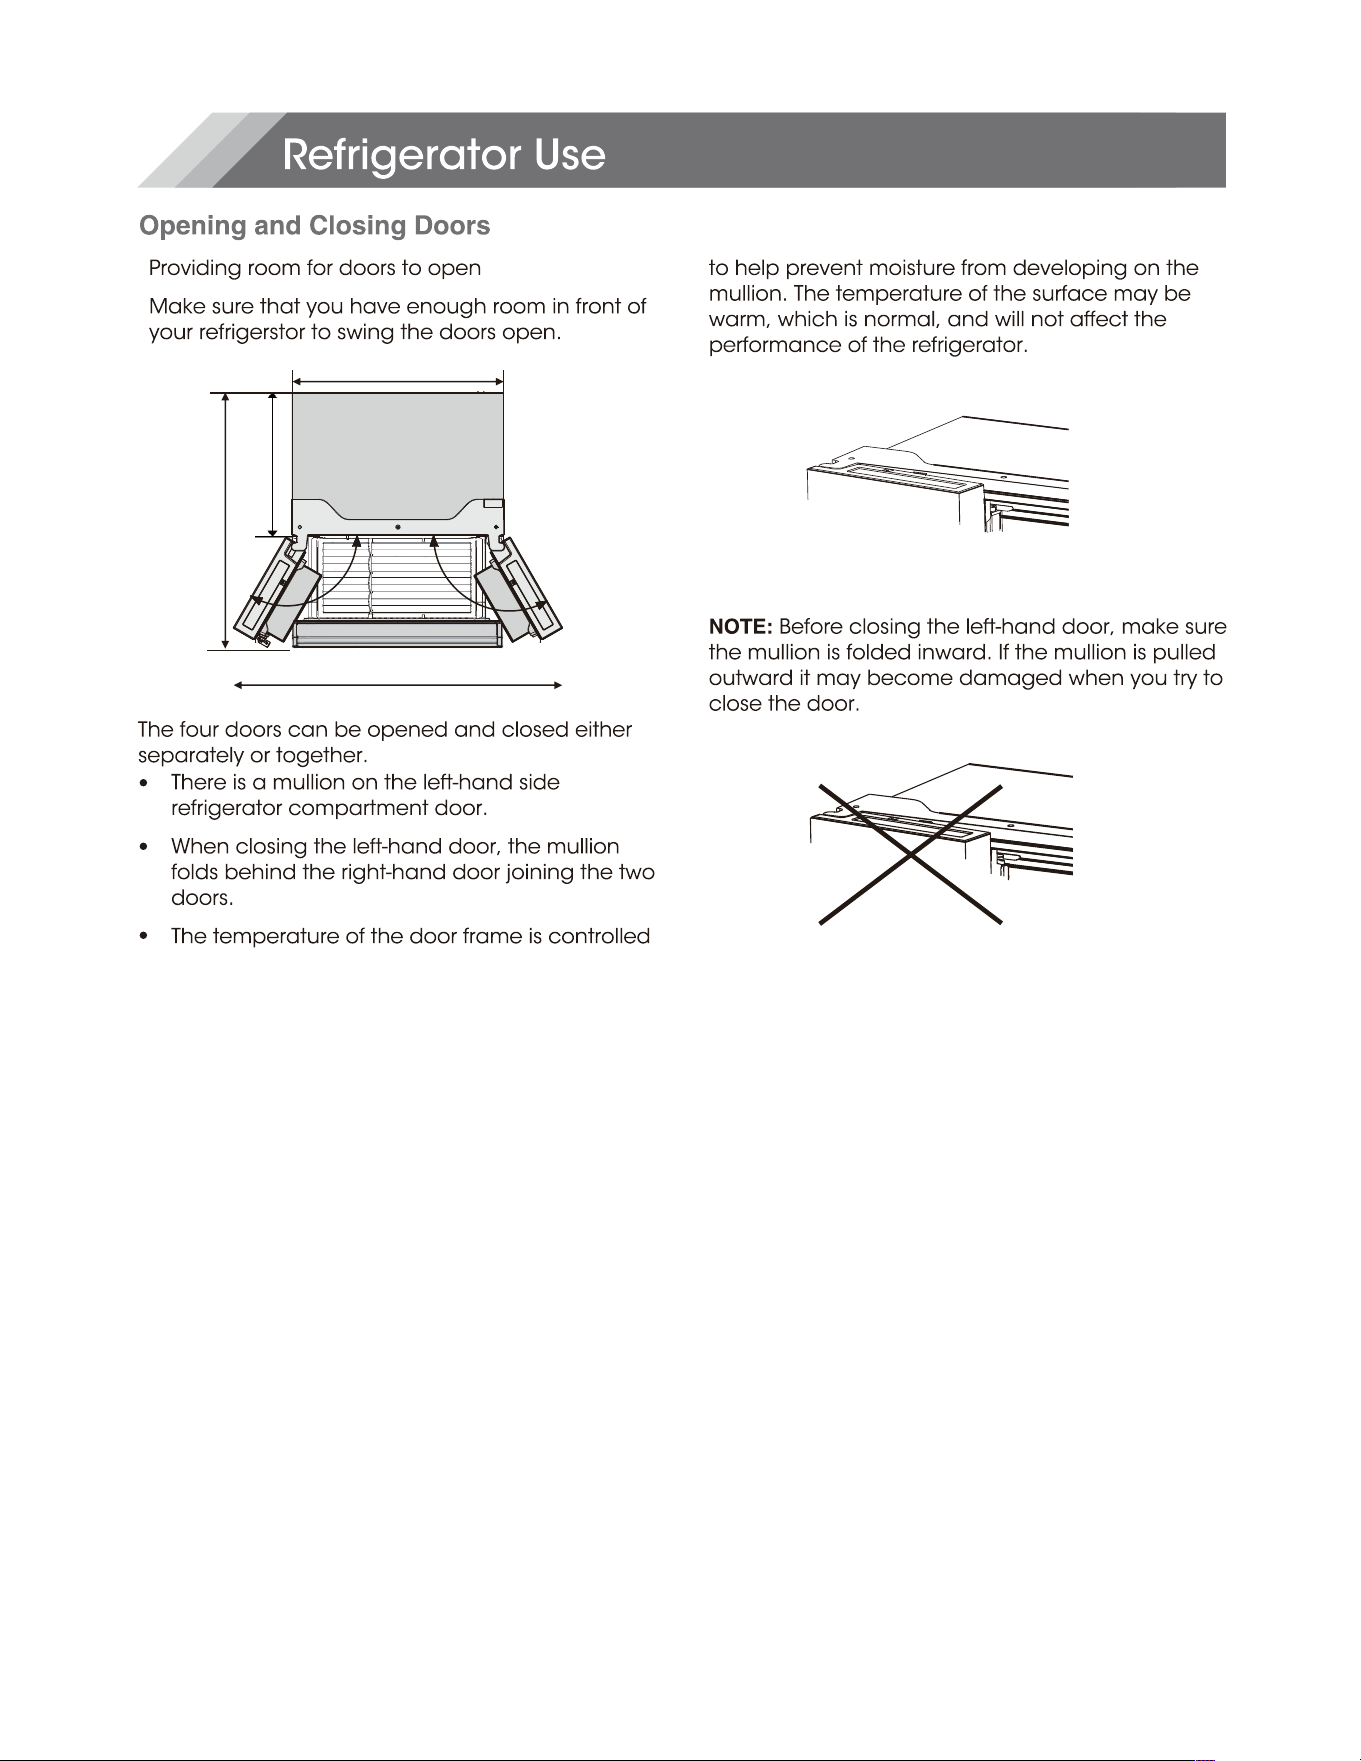
F
ridge door
Freezer door
100mm
50mm
50mm
50mm
914mm
730mm
1785mm
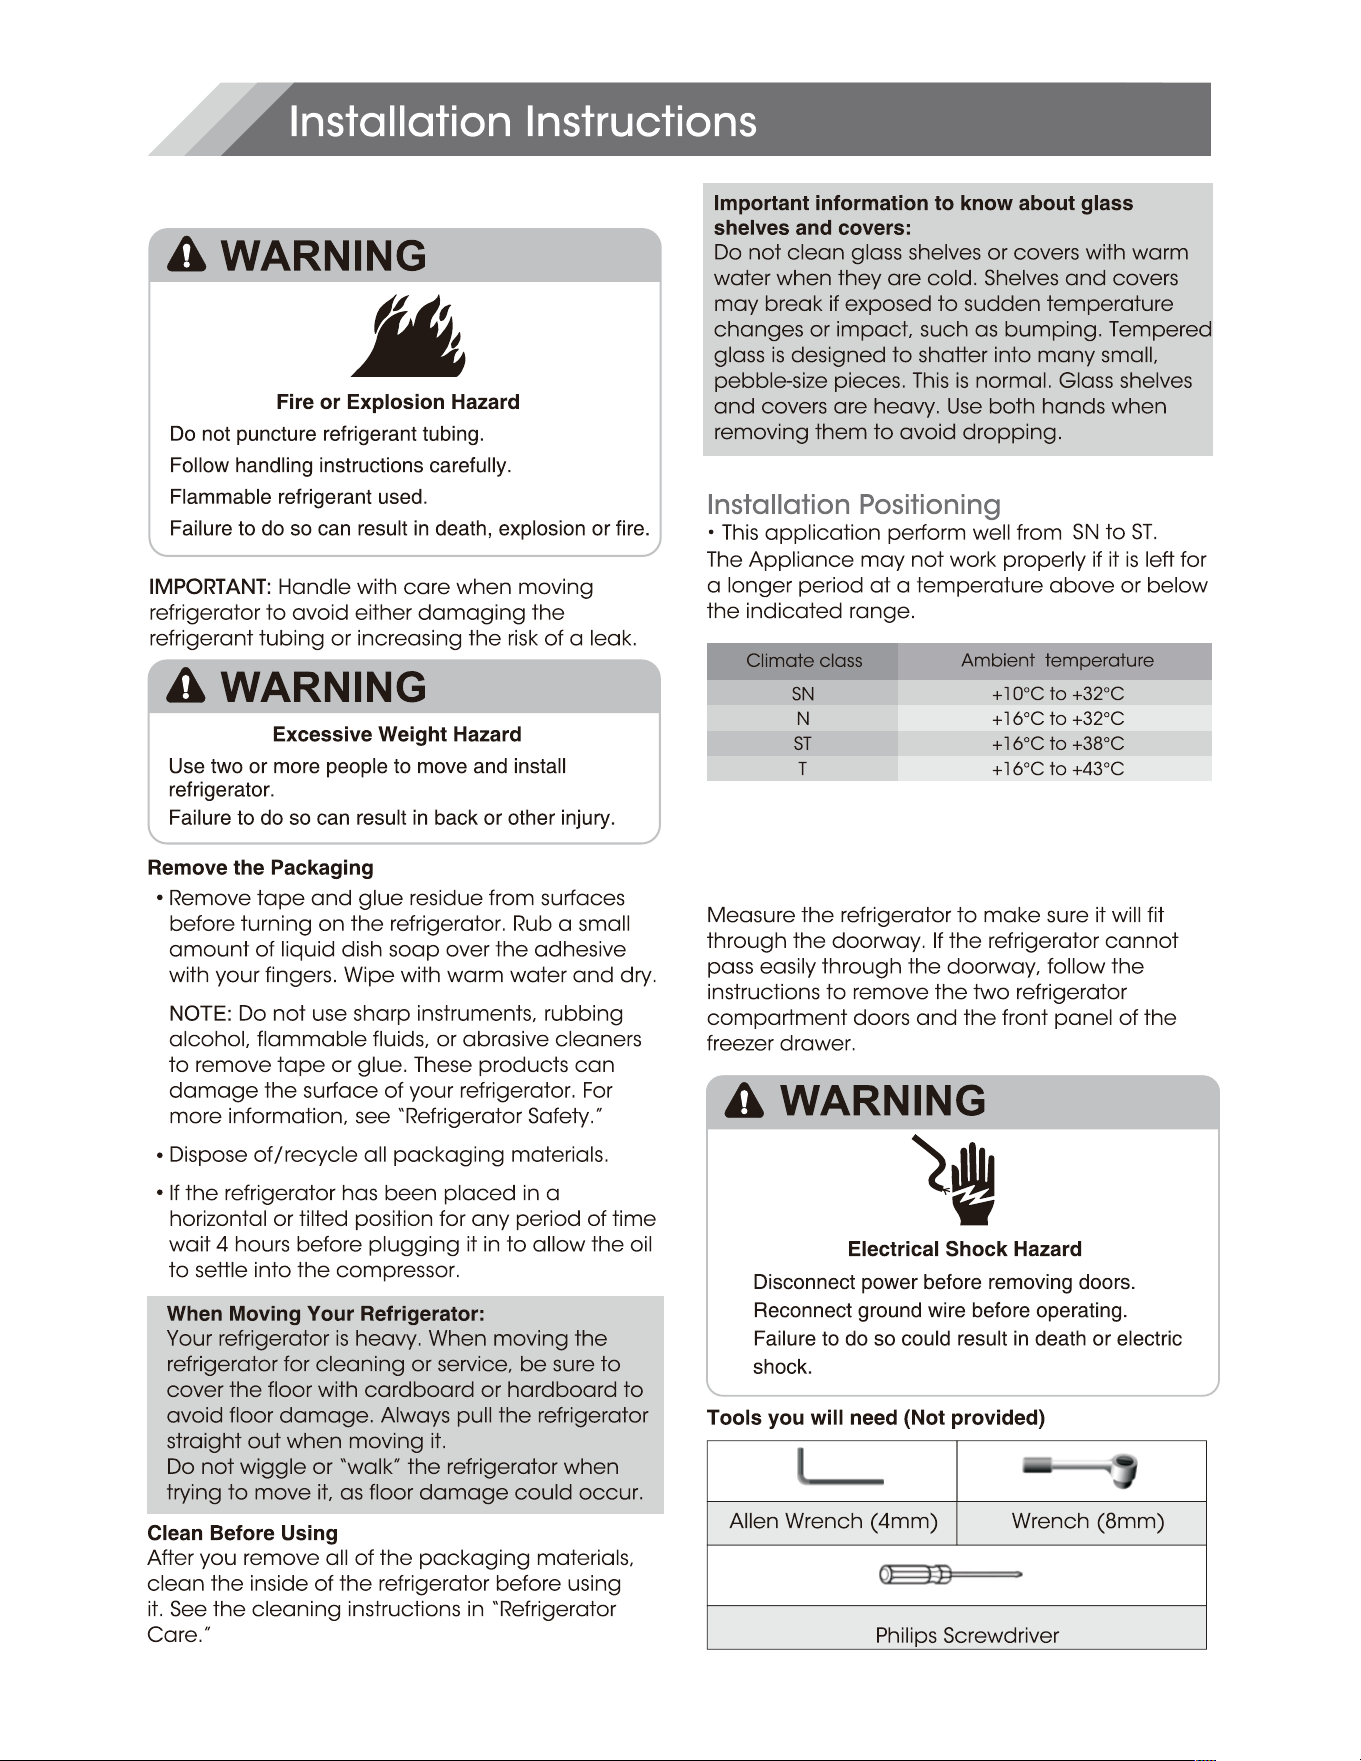
Unpack the Refrigerator
Door Removal
(only if needed)
13
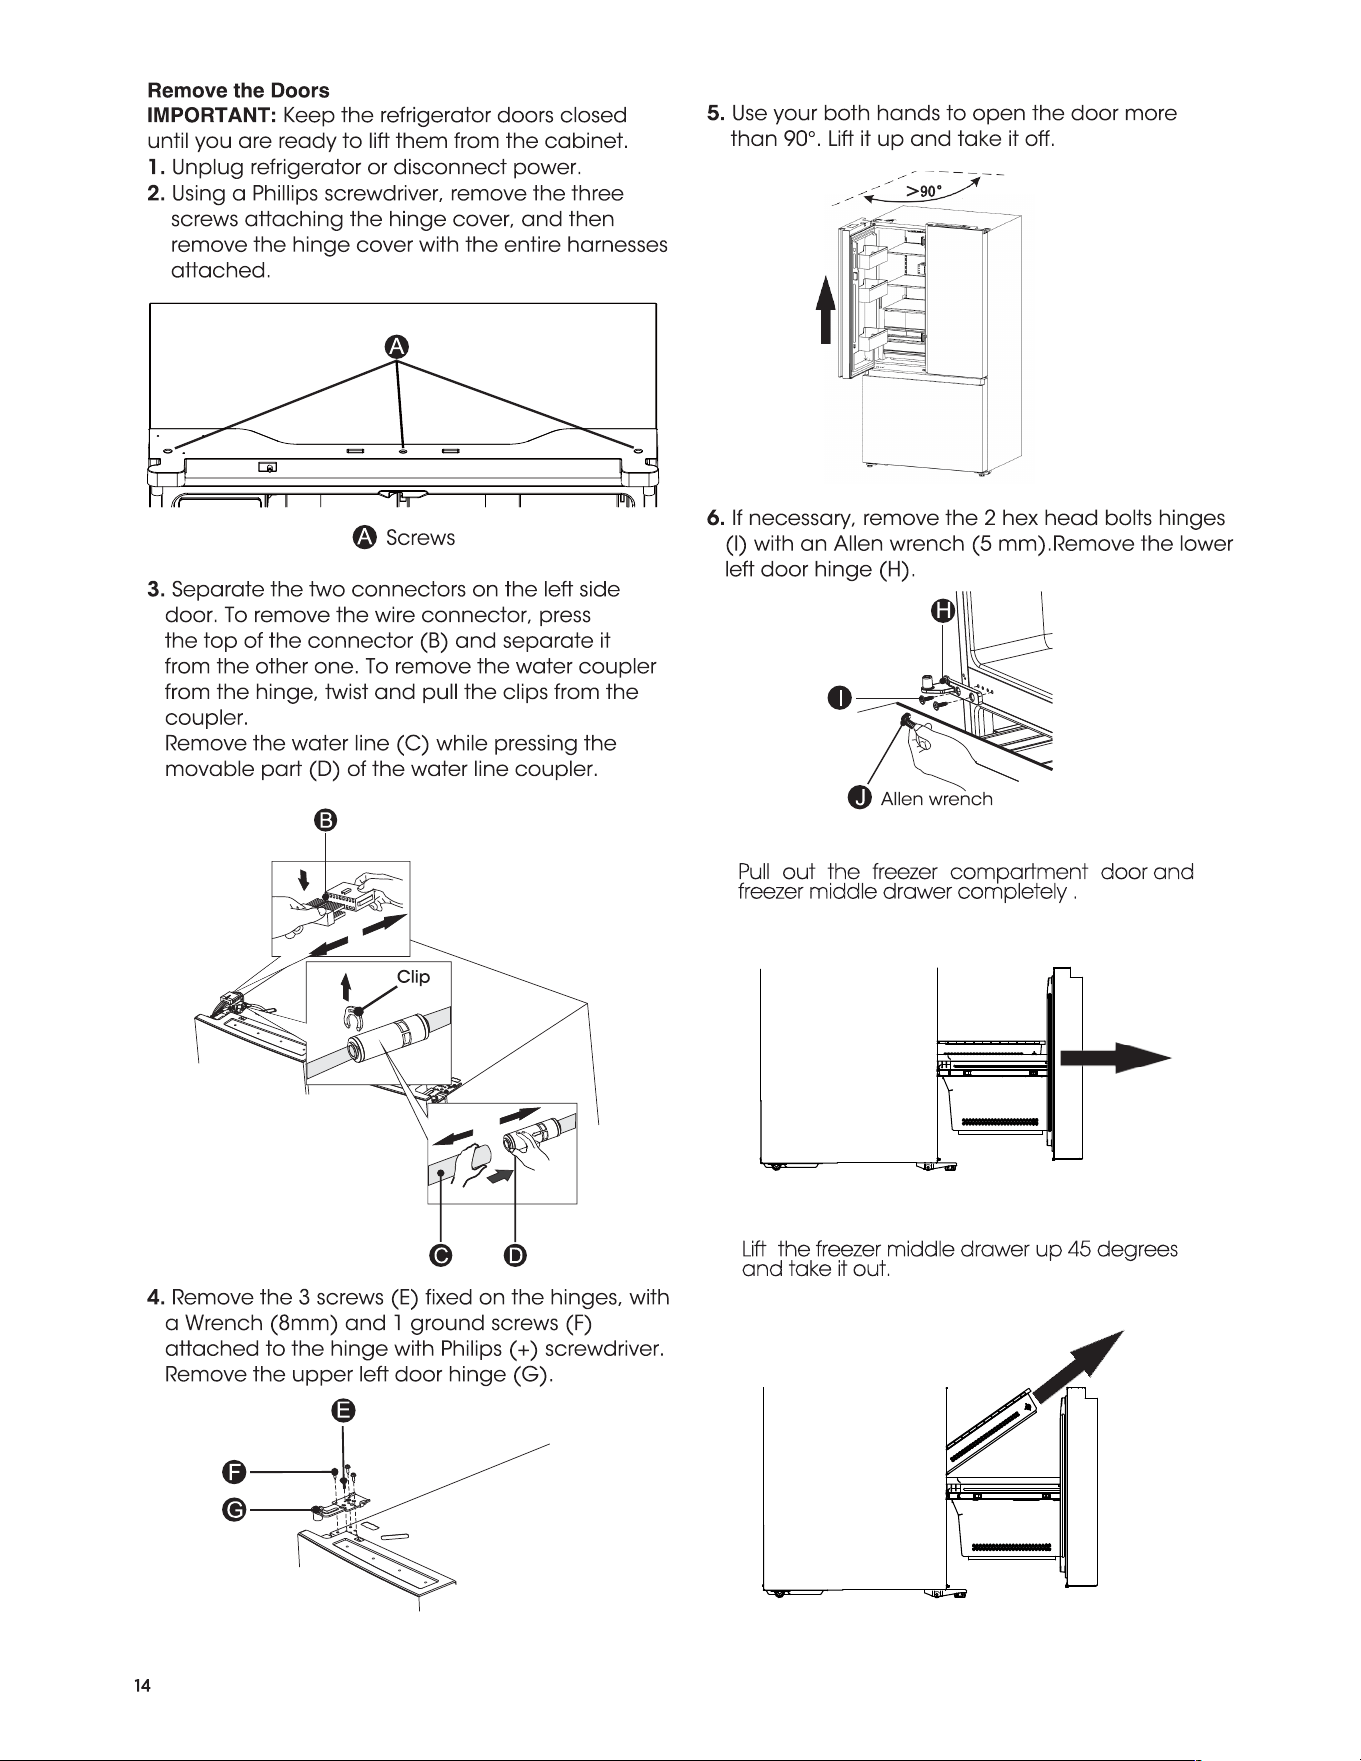
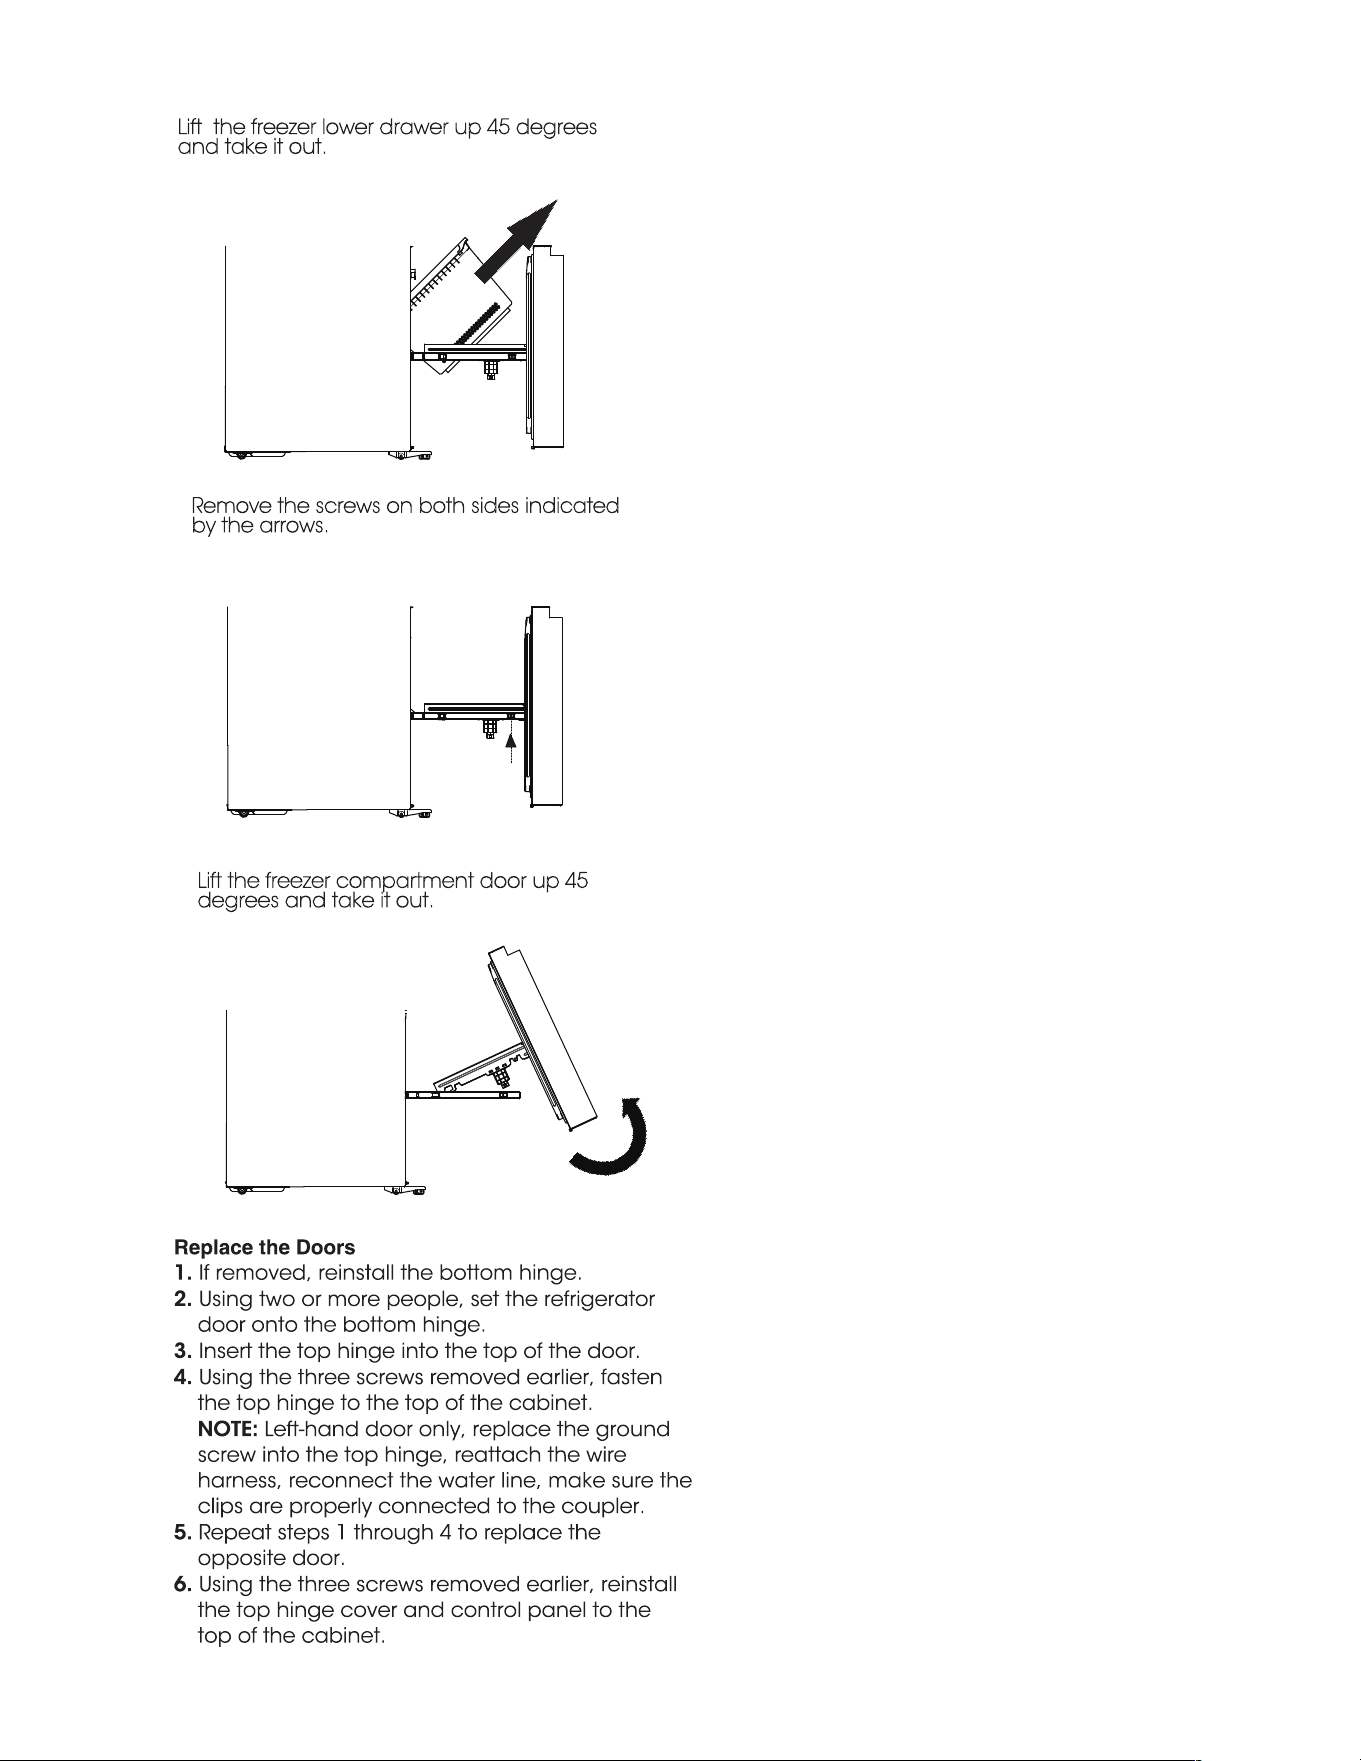
7.
Pull out the freezer compartment door and
freezer middle drawer completely .
8.
Lift the freezer middle drawer up 45 degrees
and take it out.
>90°
9.
Lift the freezer lower drawer up 45 degrees
and take it out.
10.
Remove the screws on both sides indicated
by the arrows.
11.
Lift the freezer compartment door up 45
degrees and take it out.
15
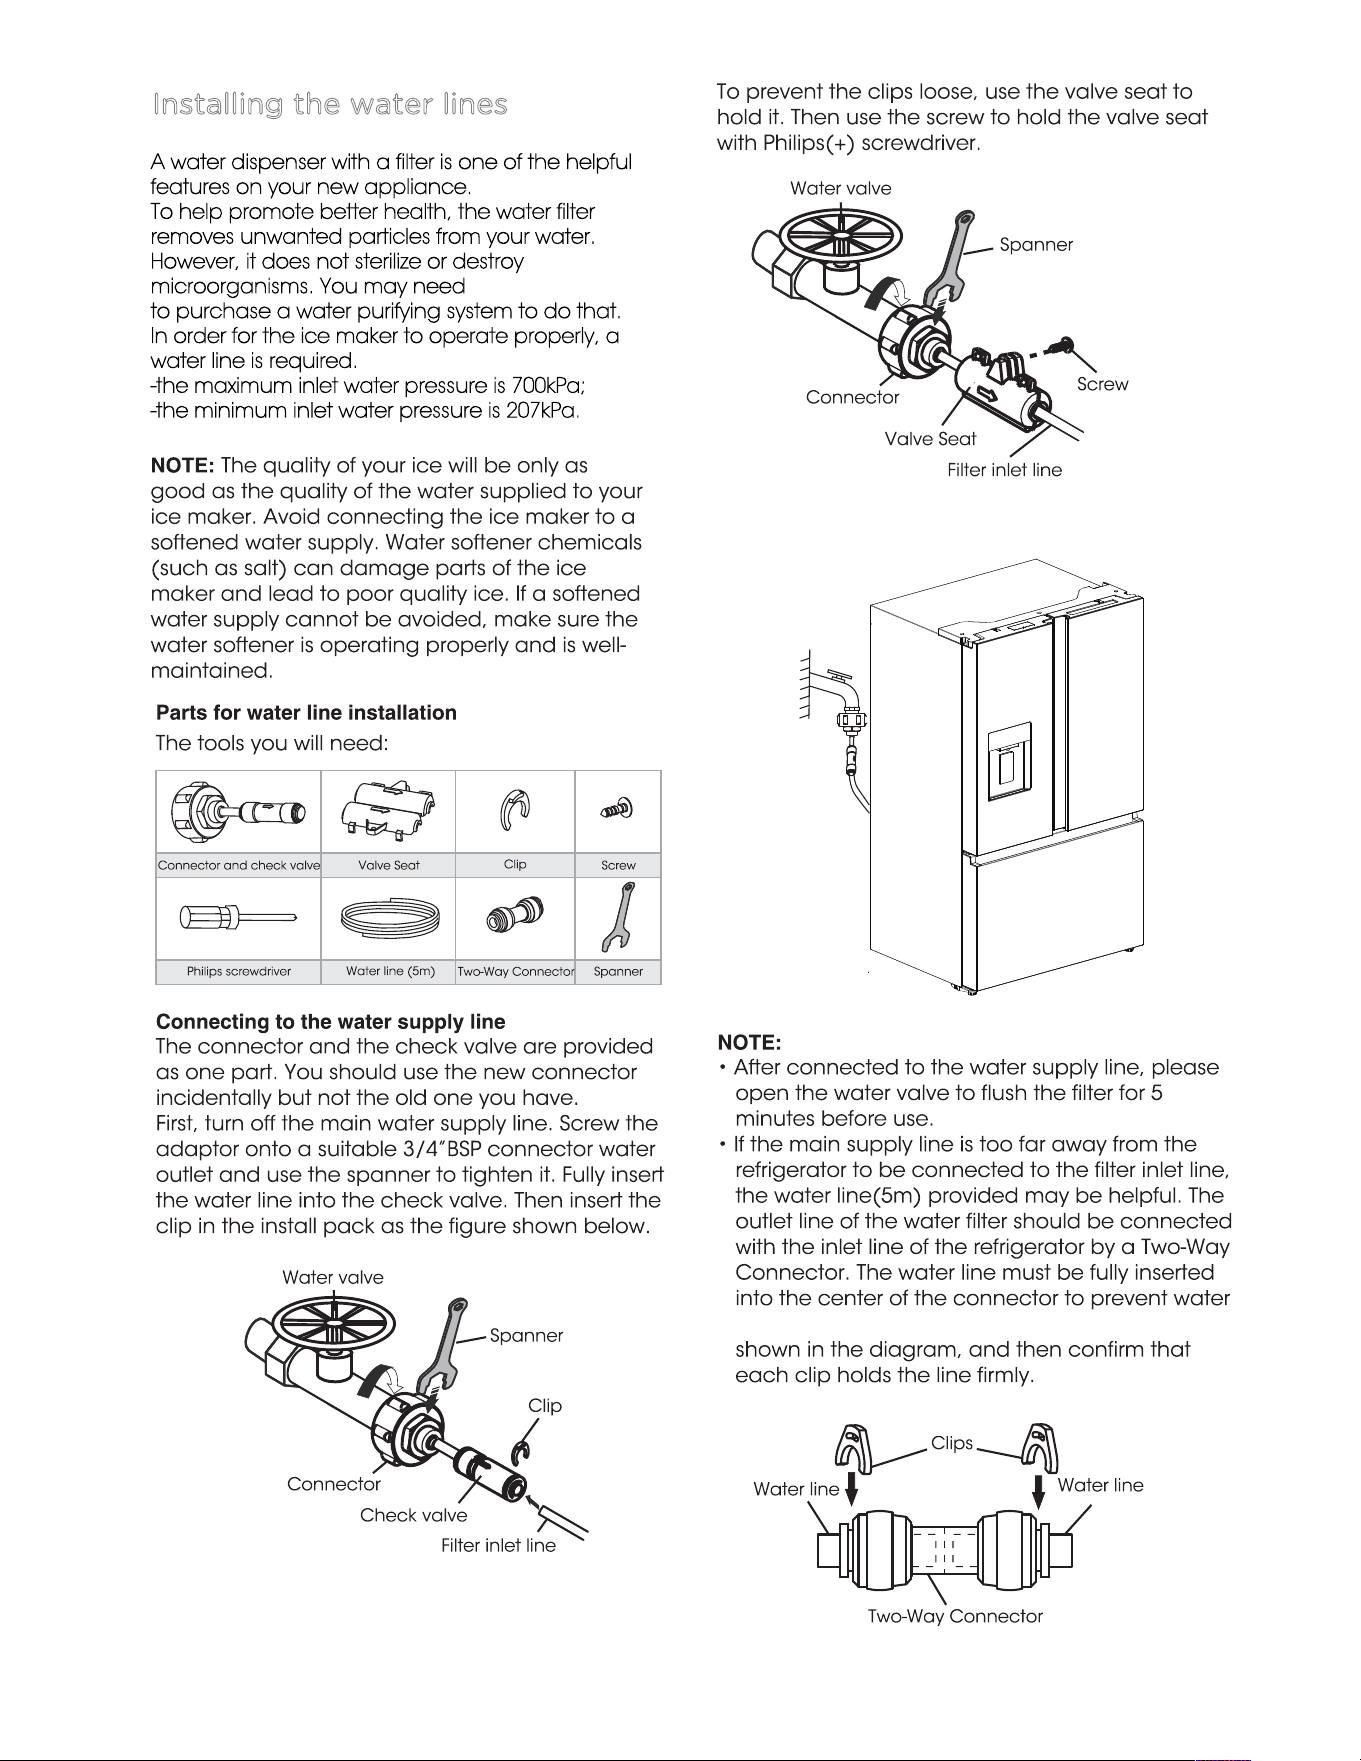
leaking. Insert the 2 clips in the installion pack as
Installing the water lines
A water dispenser with a filter is one of the helpful
features on your new appliance.
To help promote better health, the water filter
removes unwanted particles from your water.
However, it does not sterilize or destroy
microorganisms. You may need
to purchase a water purifying system to do that.
In order for the ice maker to operate properly, a
water line is required.
-the maximum inlet water pressure is 700kPa;
-the minimum inlet water pressure is 207kPa.
16
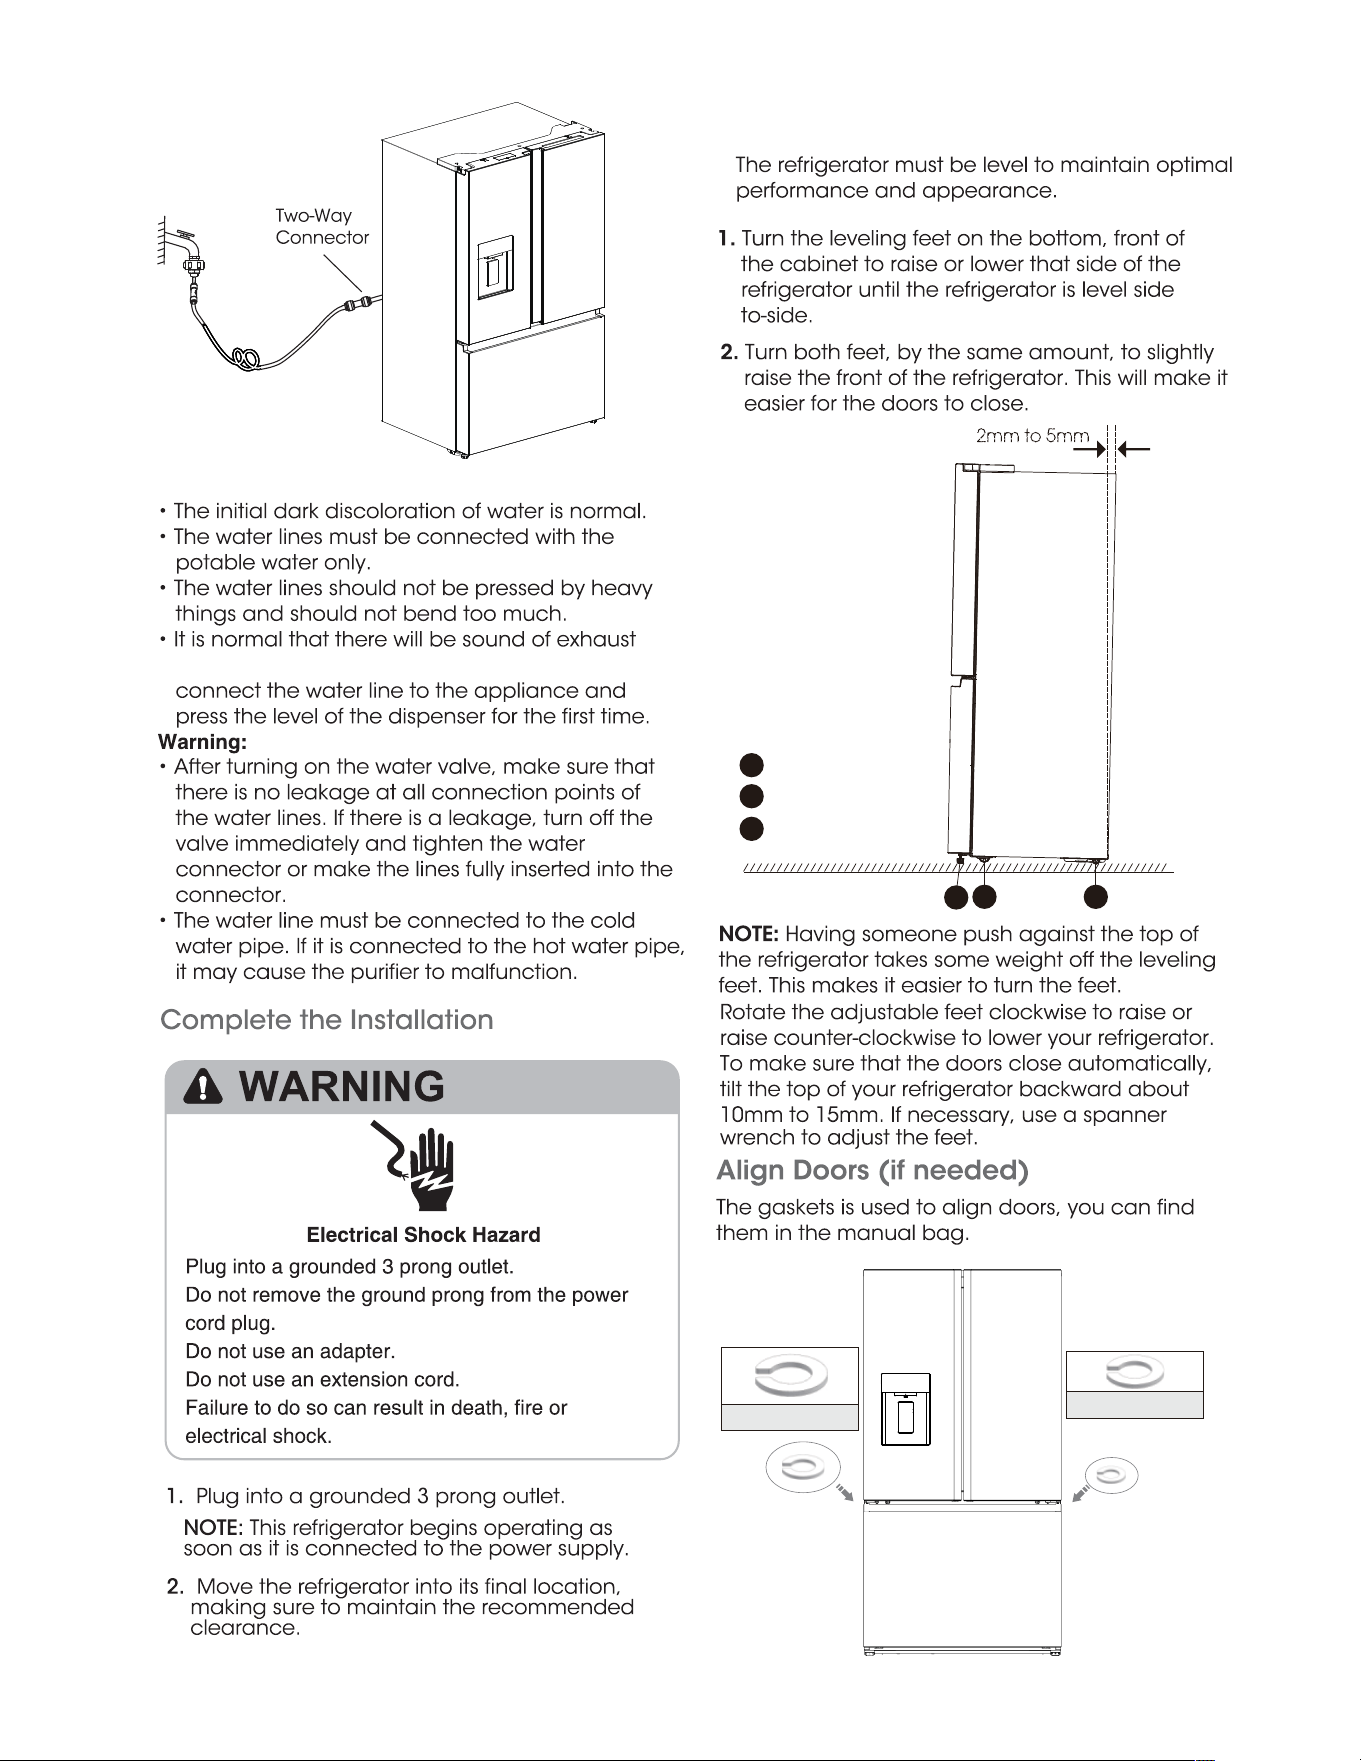
Level Refrigerator if needed
coming out from the appliance when you
17
2mm to 5mm
C
A
B
A
B
C
Adjustable foot
Roller
Roller
small gasket 2 pcs
big gasket 2 pcs
908mm
1471.4mm
1115mm
610mm
18
turn
Leaving any door open for over 2 minutes will
activate door alarm. The “ ” icon will flicker, the
control panel will display “dr” , and you will hear a
buzzer sound. The buzzer will sound 3 times per
minute and will stop after 8 minutes. In case of
alarm, you can touch the Alarm button to cancel
door alarm, then the “ ” icon stop flickering and
keep on, the buzzer sound will stop at the same
time. Also door alarm can be stopped by closing
all the doors.
To save energy, please avoid keeping doors open
for a long time when using refrigerator.
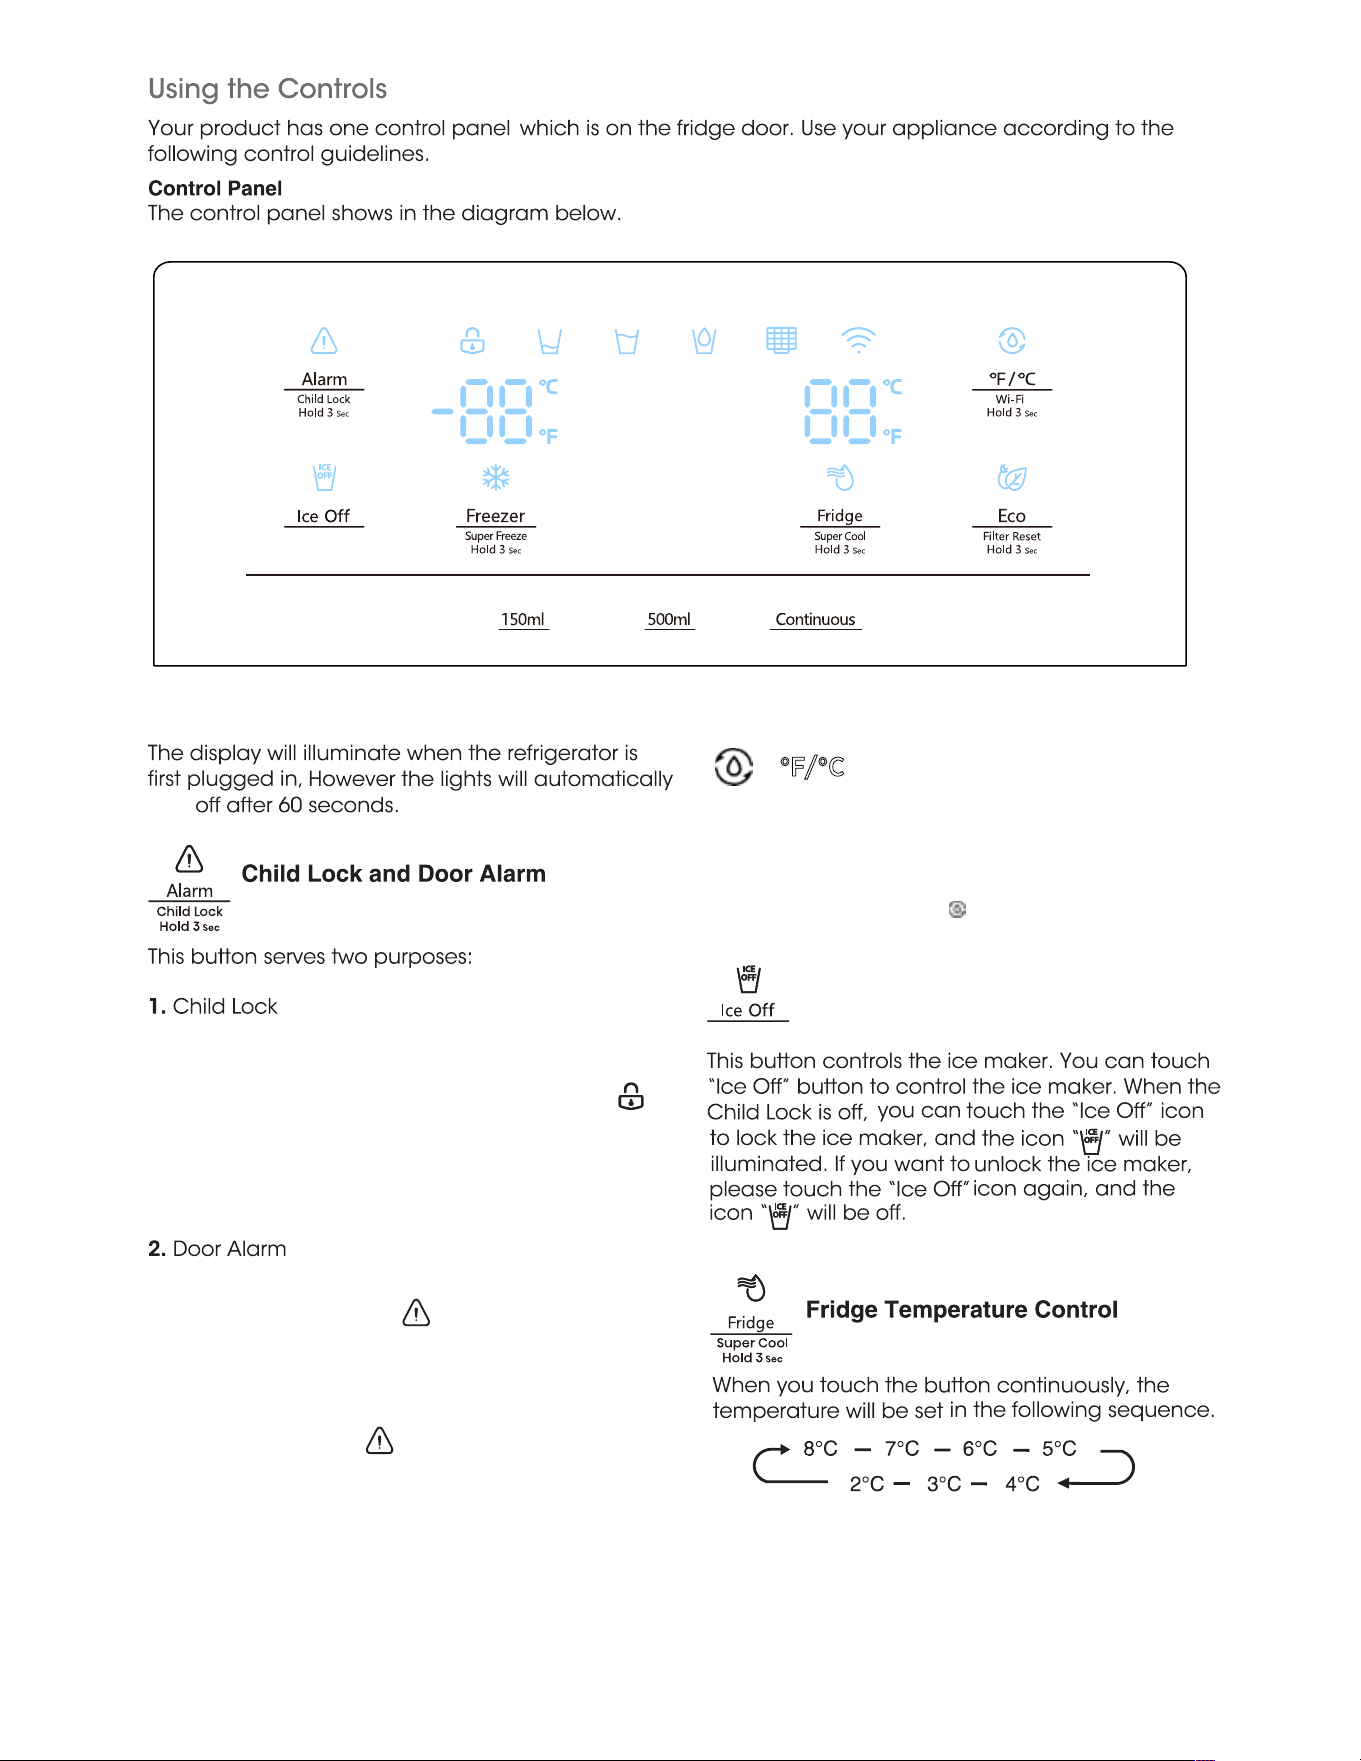
°F/°C
When the Child Lock is off, you can touch the "
°F/ °C " button to switch between Celsius and
Fahrenheit units. When it is switched to
Fahrenheit, the icon " " will be on.
Ice Off
Press and hold "Alarm" for 3 seconds to lock
the whole Control Panel including dispenser
function If Control panel is locked, the icon “ ”
will be on, and none of the buttons on the
Control panel work. To unlock the Control
panel, please press and hold “Alarm” for 3
seconds again.
19
To freeze fresh food activate
the Super Freeze function at
least 24 hours before placing
the food to complete pre-freezing
When the Child Lock is on,the dispenser will not
work.When the Child Lock is off,you can press the
“150ml”or “500ml” option to choose the volume of
water to be dispensed,and press the “Continuous”
button will activate the continuous water mode.If
you choose the function of
“150ml”,the “ ” icon will be illuminated, choose
the fuction of “500ml” the “ ” icon will be
illuminated,and the “ ” icon will be illuminated
when “Continuous” function is chosen.
When uses "150ml " or "500ml " to fetch water,it
automatically switches to the continuous water
fetching function after 30 seconds.
During the process of fetching water, it is
forbidden to switch the three outlet modes of
150ml, 500ml and Contunuous. It is necessary to
release the water intake switch before it can be
operated.
You can touch this button to turn Energy Save
mode on and off. When you turn Energy Save on,
the Eco icon “ ” lights.
The temperature of the fridge is automatically
switched to 6°C(or 43°F) and the freezer to -17°C
(or 1°F) .If Energy Save is off, the icon“ ” will go off
and the temperature setting will revert back to the
previous setting.
“ ” will be illuminated, the freezer temperature
setting displays -24°C(or -11°F).
Super Freeze can quickly lower the temperature and
freeze your food faster than usual. This can retain
more of the vitamins and nutrition in fresh food and
keep your food longer. Super Freeze automatically
switches off after 52 hours, and the freezer
temperature setting will revert back to the previous
setting. When the Super Freeze function is on, you
can touch “Freezer” to switch off the Super Freeze
function.
The Super Freeze is used to perform pre-freezing and
fast freezing in sequence of Freezer compartment
This function accelerates the freezing of fresh food
and,at the same time,protects foodstuffs already
stored from undesirable warming.
Demo mode is for store display,and it prevents the
refrigerator from generating cool air. In this Cooling
off Mode, the refrigerator may seem like it is working
but it will not make cool air. The indicators on the
control panel will show “OF”. To cancel this mode,
press and hold “Alarm” and “℉/℃” keys at the
same time for 3 seconds and the buzzer gave a
long sound.
the "Eco" button,"Eco" function will be activated,
and "Super Cool" mode will be off.
"Eco" button,"Eco" function will be activated,and
"Super Freezer" mode will be off.
The first time the power is switched on and the
water enters the filter, the filter state is calculated at
99%. When the water filter state drops to 15%, the
icon “ ” is lit. When the filter state reaches 10%,
the icon “ ” will flash, The user needs to replace
the filter and long press the Energy Save Button for
3 seconds to reset the water filter state.The filter
state will then be re-calculated to 99%.
If you have set the temperature type to Fahrenheit,
the temperature settings cycle from 46°F to 36°F.
If you have set the temperature type to
Fahrenheit, the temperature settings cycle from 7°
F to -11°F.
46°F
45°F
44°F
38°F
37°F
36°F
7°F
6°F
-11°F
-10°F
displays 2°C(or 36°F).Super Cool automatically
switches off after 3 hours,and the refrigerator
temperature setting will revert back to the previous
setting.When Super Cool functiong is on,you can
touch the"Fridge" to switch it off.
Water Dispense Control
20
21
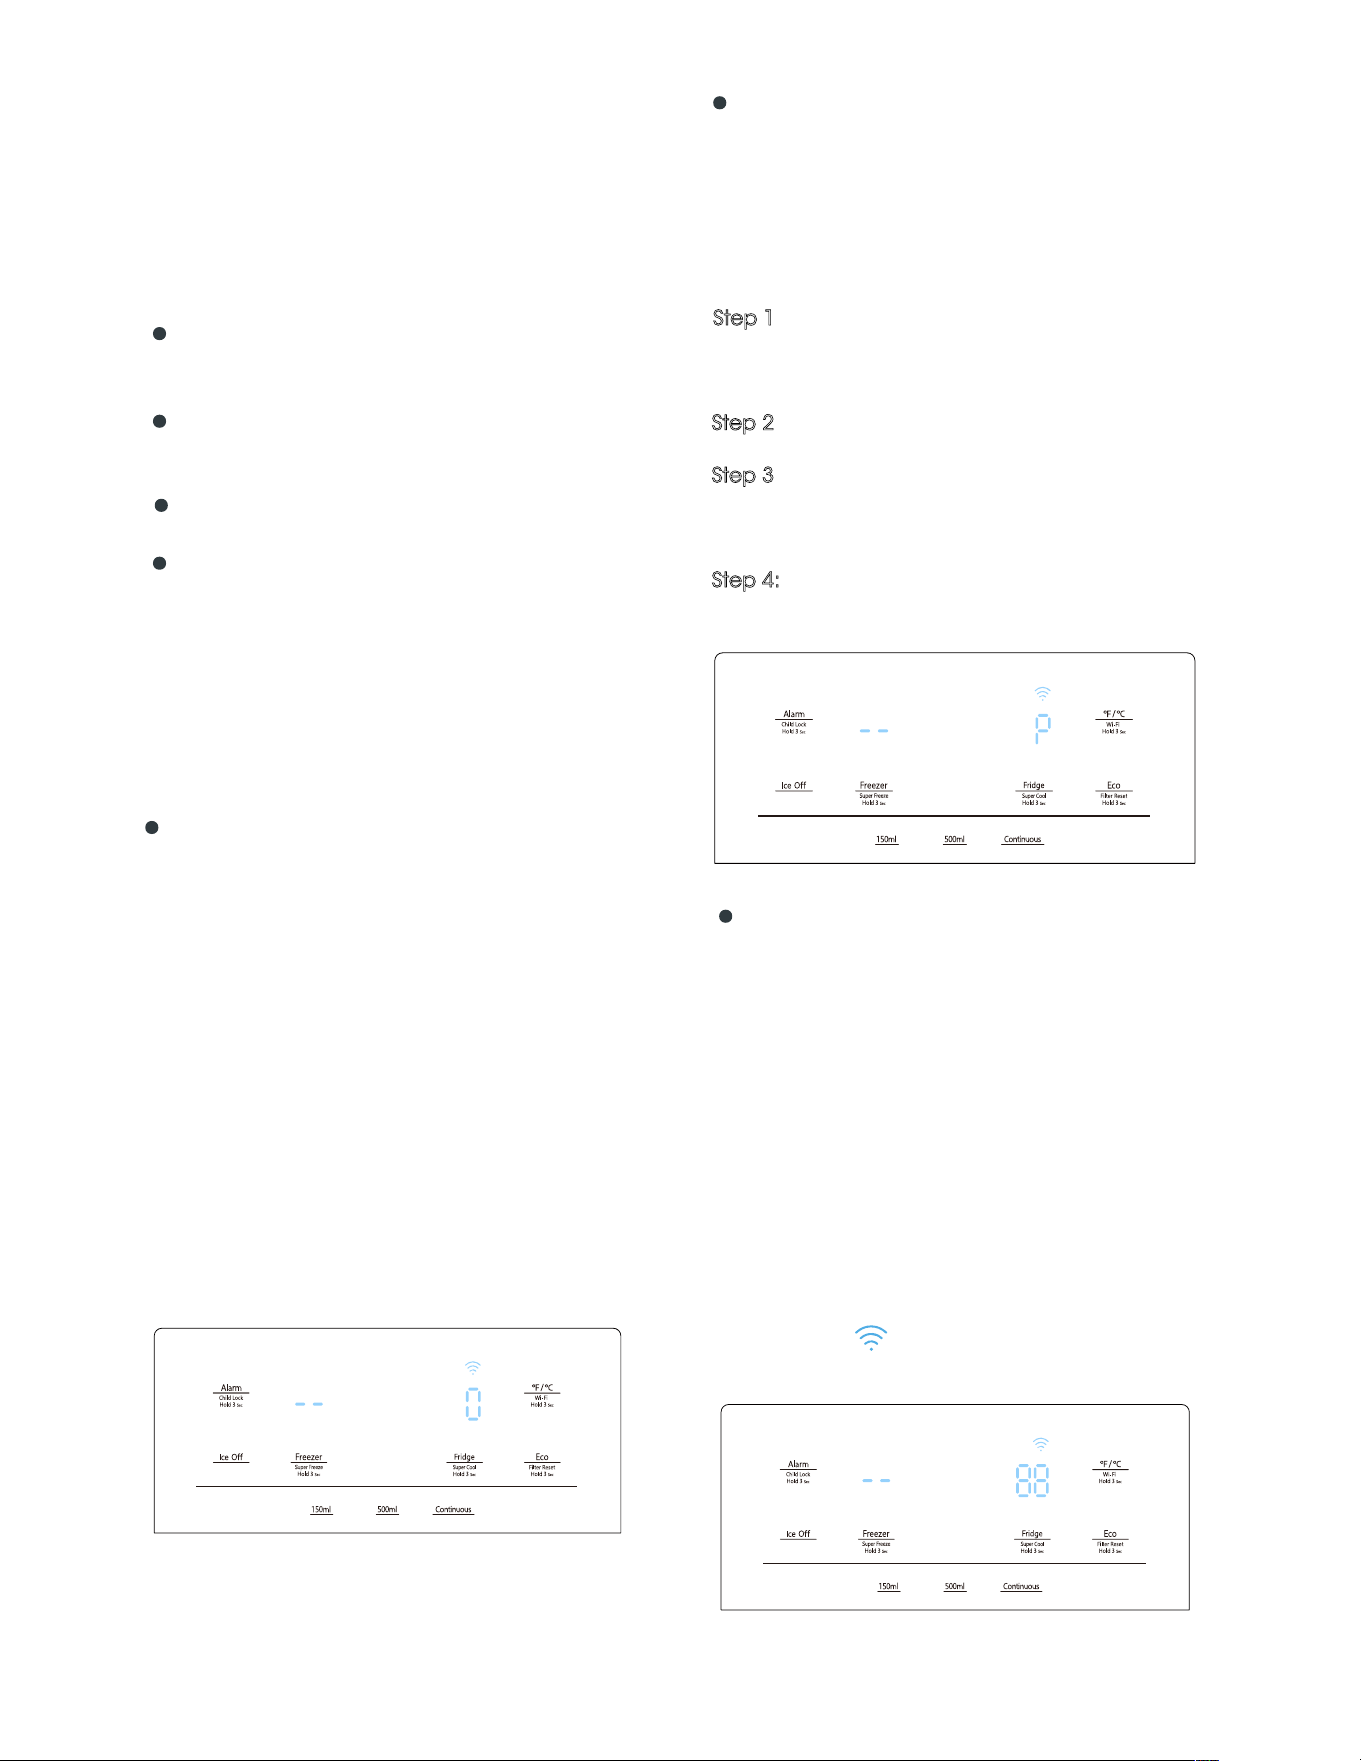
Wi-Fi function
This appliance may be controlled remotely with
a smart phone or a tablet computer. If the
appliance is not connected to the home
network, it will function like a regular appliance.
What do you need to connect the
appliance?
Signal from the local wireless network (Wi-Fi)
should be sufficiently strong in the spot where
the appliance is installed.
Home network router has to be connected
to the internet, and the Wi-Fi function on the
appliance should be activated.
The smart phone/tablet computer has to
be connected to the internet.
Operating system on your smart phone/
tablet computer should be compatible with the
ConnectLife app.
After activating the Wi-Fi function, connect your
device to your home router in order to connect
your appliance with the ConnectLife mobile app.
Step 1: Set the appliance to normal operation.
Touch the Wi-Fi icon for approximately 3
seconds. You entered network connection
menu when ' - - ' appears in the display.
Step 2: Touch the Fridge key to select ' O ' within
60 seconds.
Step 3: Touch the Wi-Fi icon to confirm the
selection mode. The Wi-Fi symbol starts blinking
and the network of this appliance is now open to
connect to, for 5 minutes.
Step 4: When the Wi-Fi symbol is on, it means
that the Wi-Fi connection is successful. The
display will return to normal.
The appliance can be paired with your mobile
device. Simply pair another user to your
appliance. This requires, that your appliance
was already to be set up before and is
connected to your home network. If not, go
back and select SET UP APPLIANCE.
Step 1: Set the appliance to normal operation.
Touch the Wi-Fi icon for approximately 3
seconds. You entered network connection menu
when ' - - ' appears in the display.
Step 2
: Touch the Fridge key to select ' P ' within
60 seconds.
Step 3: Touch the Wi-Fi icon to confirm the
selection mode. The PAIR network of this
appliance is now open to connect to, for 5
minutes.
Step 4:
When the display returns to normal, it
means the PAIR connection is successful.
APPLIANCE Wi-Fi STATE
There are three WiFi states as shown below, you
can activate the display board according to the
relevant steps.
CONNECT APPLIANCE TO Wi-Fi
MULTI-USER PAIR APPLIANCE
UNBIND ALL USERS OF APPLIANCE
Step 1: Set the appliance to normal operation.
Touch the Wi-Fi icon for approximately 3
seconds. You entered network connection menu
when ' - - ' appears in the display.
Step 2: Touch the Fridge key to select ' 88 ' within
60 seconds.
Step 3: Touch the Wi-Fi icon to confirm the
selection mode to realize unbinding.
Step 4: After the device is unbound, it will
automatically enter the distribution network state,
the Wi-Fi icon flashes, and the distribution
network time is up to 5 minutes.
By activating this function, the user information
stored in the appliance will be deleted, and
appliance will be removed from all paired app
user accounts.

Note!
The control panel will light up when the door
is open or you touch any button.
The light will go off without touching any
button or the doors have been closed for one
minutes.
When the refrigerator is powered on, all the
icons of the control panel will light up for 3
seconds, and a buzzer sounds. The Child Lock
is off.And the temperature setting reverts back
to the previous setting.
As the application continues to be
upgraded, please refer to the actual display
interface.
User manual:
Transmitting frequency band(s) and max
allowed transmitting power in the operating
frequency band(s): 2040-2483.5MHz,less than
or equal to 20dbm.
This equipment should be installed and
operated with minimum distance 20cm
between the radiator & your body.
The ConnectLife App is available to
download free of charge from the Apple App
Store or from the Google Play Store.
Installing the ConnectLife app
1. Go to the App Store (on Apple
devices), AppGallery (on Huawei devices)
or Google Play Store (on Android
devices) on your phone/tablet computer.
3.
Choose the ConnectLife app andinstall it
on your smart phone/tablet computer.
2.
Search for " ConnectLife".
INFORMATION!
We recommend downloading and installing
the mobile app and creating a ConnectLife
account before attempting to set up the
connection with your appliance.
ConnectLife App
Add Refrigerator on APP
1.
Select ‘Add appliances’ or ‘+’.
2. Select ‘Refrigerator’ .
3.
Open the Camera on App to scan the
appliance SN code(barcode). The 23-bit
barcode can be found under the data
plate on the inside of the refrigerator.
4.
Select ‘SET UP APPLIANCE’,
follow the instruct and make sure Wi-Fi
function of the appliance is activated, then
select 'Next'.
Note: When the appliance has connected
to the home network and other users want to
pair the same appliance, they can directly
select ‘PAIR APPLIANCE’ to bind.
5.
Turn on bluetooth as prompted, you are
now presented with the appliance
(refrigerator HIS -XXXX), then select it.
6. Select secure Wi-Fi option, input the
password and connect.
7. Select the location of appliance and save.
8. Add successful, you are now able to
control appliance remotely.
22

shelf is
1.
Pull out the freezer compartment door and
freezer upper drawer completely .
2.
Remove the screws on both sides indicated by
the arrows.
3.
Lift the freezer upper drawer up 45 degrees and
take it out.
①
②
4.
Lift the freezer middle and lower drawer up 45
degrees and take it out.
The water dispenser is located in the fridge
door.To get water,touch the “150ml”or “500ml” or
"Continuous" button on the display panel to
choose the different modes,then put the glass in
suitable place and press down the impact
pole.After taking the water,keep the glass in place
for 2 seconds to prevent water from dripping out.
Following installation, allow 24 hours to produce the
first batch of ice. Discard the first three batches of ice
produced. Allow 2 to 3 days to fill the ice storage
container.
If the ice in the ice container clumps, break up ice
using a plastic utensil and discard. Do not use a sharp
tool to break up the ice. This can cause damage to
the ice container.
Do not store any items other than ice in the ice
storage container.
Feeler Arm Ice Storage ContainerMotor
4.Getting cold water and making ice
Making ice
23
Screw
24
5.Using your fridge compartment
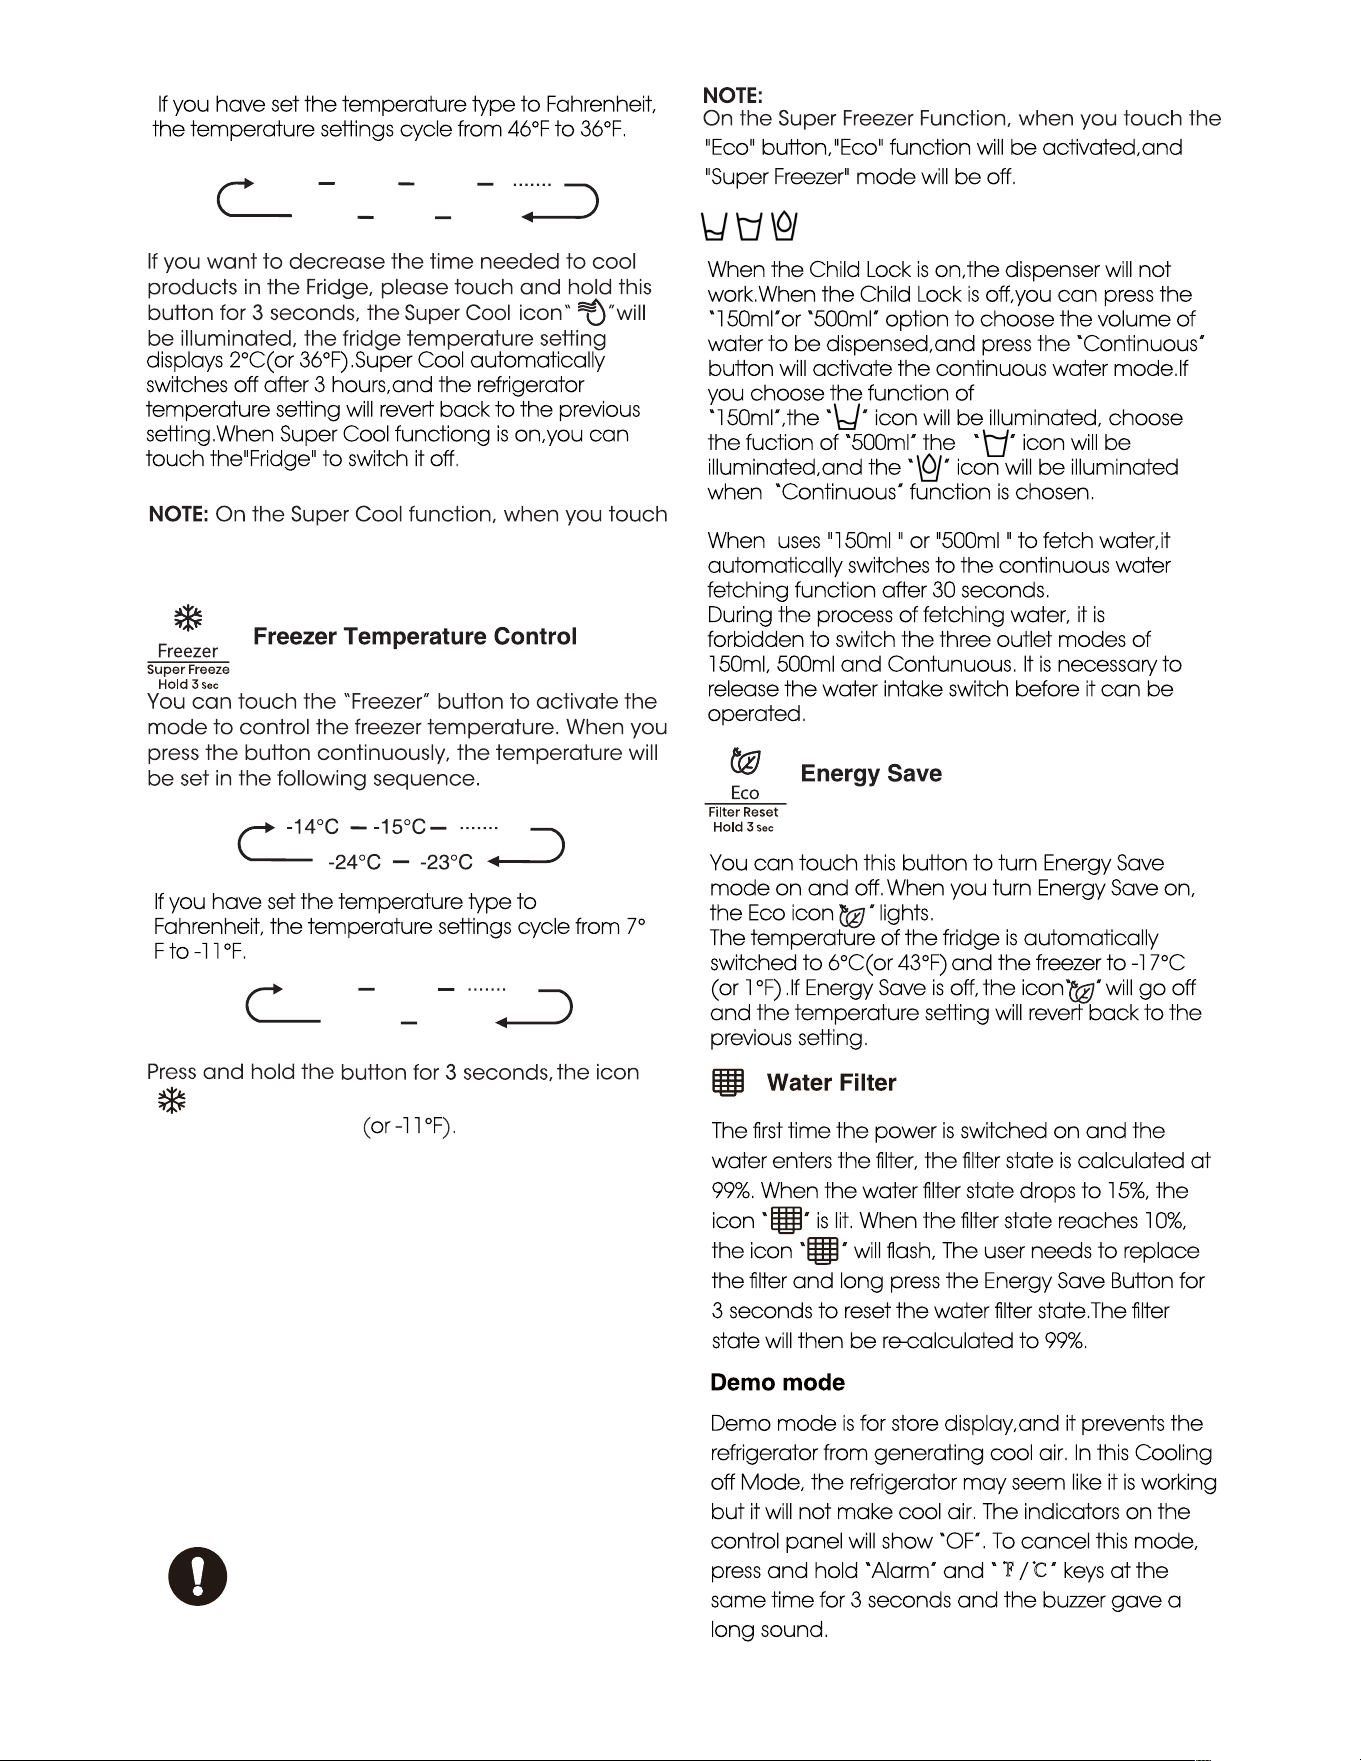
To remove the door baskets,simply lift the
To
relocate the door baskets,slide it in above
25
6.Changing the water filter
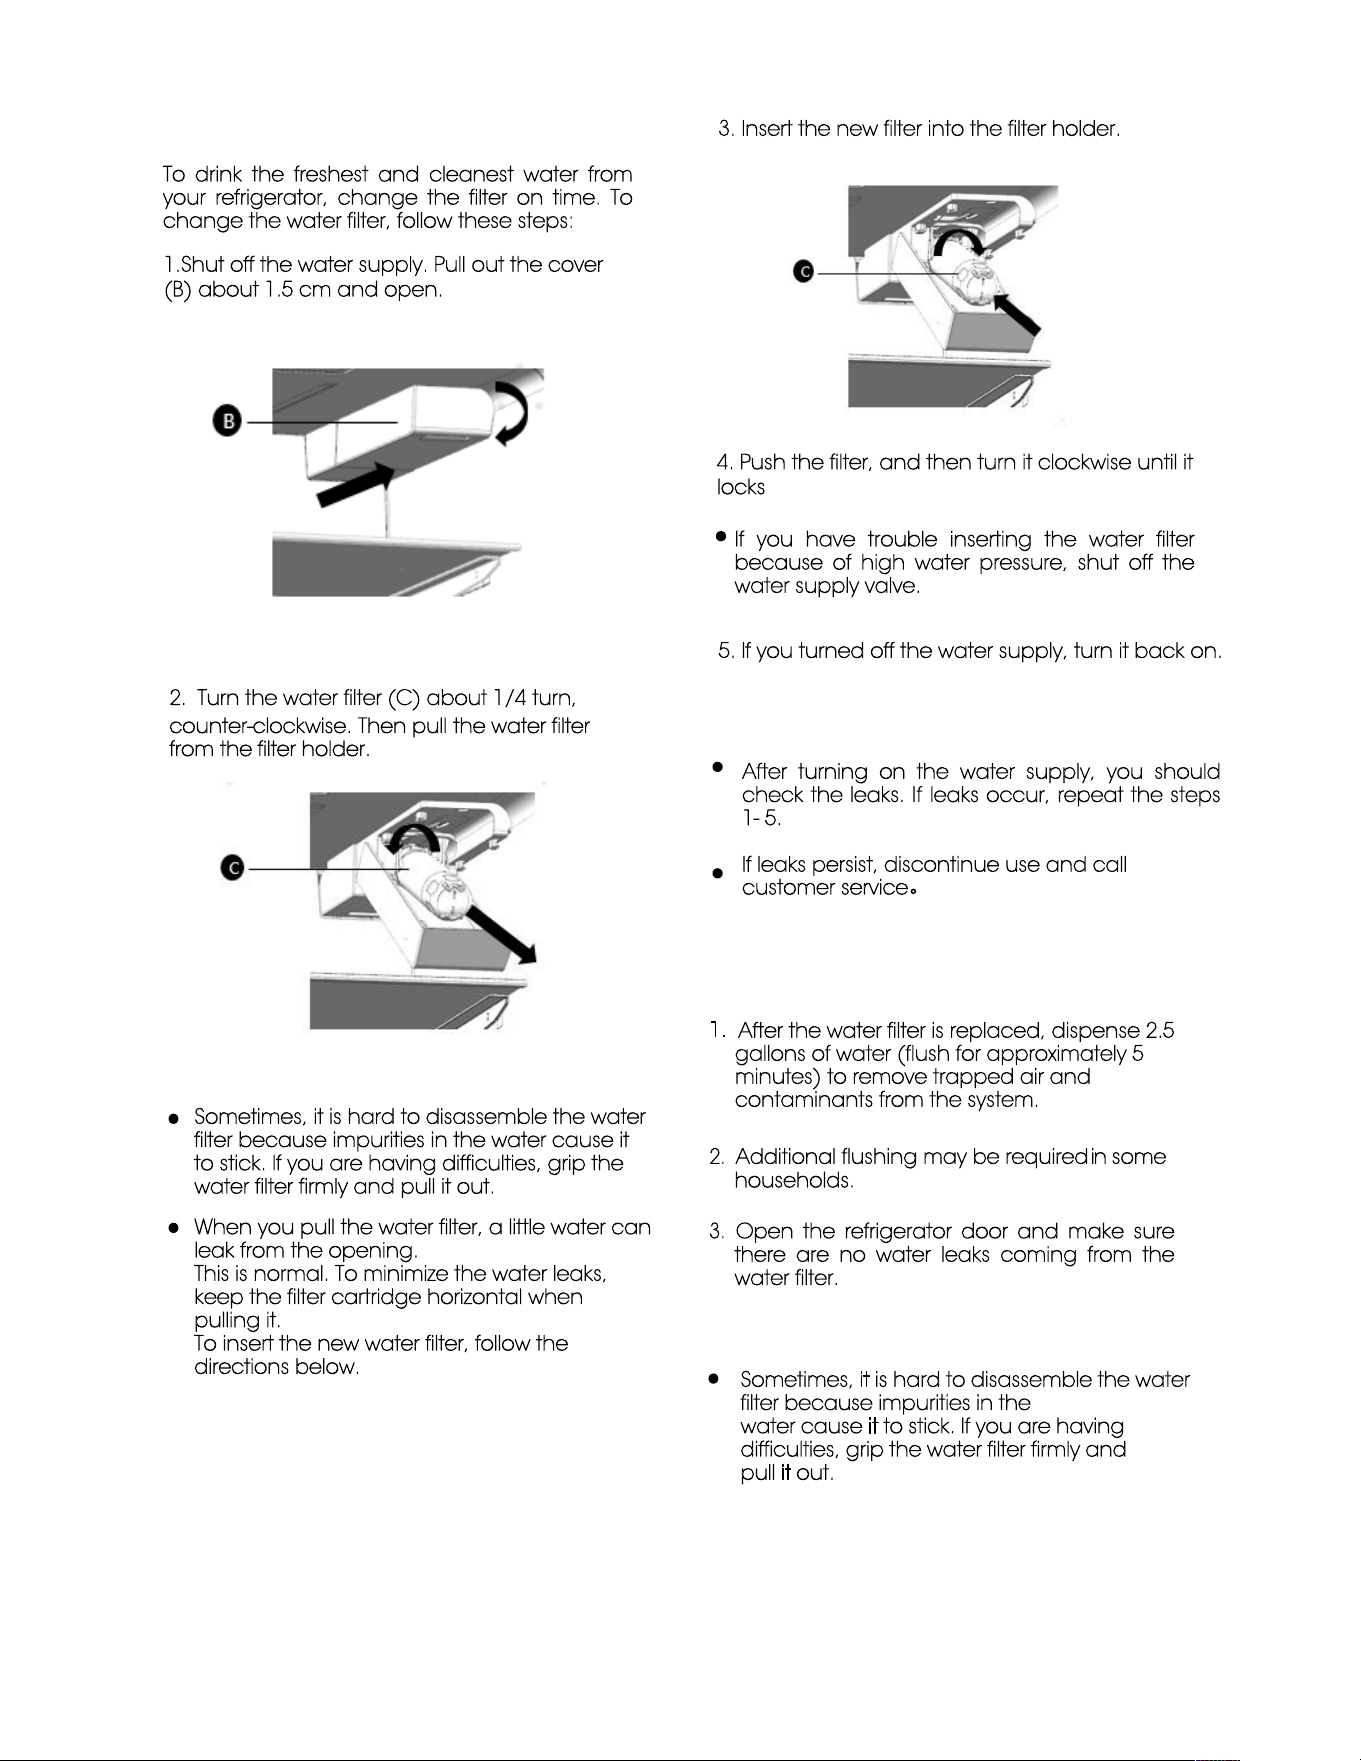
To drink the freshest and cleanest water from
your refrigerator, change the filter on time. To
change the water filter, follow these steps:
1.Shut off the water supply. Pull out the cover
(B) about 1.5 cm and open.
2. Turn the water filter (C) about 1/4 turn,
counter-clockwise. Then pull the water filter
from the filter holder.
Note:
Sometimes, it is hard to disassemble the water
filter because impurities in the water cause it
to stick. If you are having difficulties, grip the
water filter firmly and pull it out.
When you pull the water filter, a little water can
leak from the opening.
This is normal. To minimize the water leaks,
keep the filter cartridge horizontal when
pulling it.
To insert the new water filter, follow the
directions below.
3. Insert the new filter into the filter holder.
4. Push the filter, and then turn it clockwise until it
locks
If you have trouble inserting the water filter
because of high water pressure, shut off the
water supply valve.
5. If you turned off the water supply, turn it back on.
Note:
After turning on the water supply, you should
check the leaks. If leaks occur, repeat the steps
1- 5.
If leaks persist, discontinue use and call
customer service。
Removing any residual matter inside the water
supply line after installing the water filter
1.
After the water filter is replaced, dispense 2.5
gallons of water (flush for approximately 5
minutes) to remove trapped air and
contaminants from the system.
2.
Additional flushing may be required in some
households.
3.
Open the refrigerator door and make sure
there are no water leaks coming from the
water filter.
Note:
Sometimes, it is hard to disassemble the water
filter because impurities in the
water cause it to stick. If you are having
difficulties, grip the water filter firmly and
pull it out.
Do not dispense the entire 2.5 gallon
amount continuously. Depress and release
the dispenser pad for cycles of 30 seconds
ON and 60 seconds OFF.
Reverse osmosis water supply:
The pressure of the water supply coming out of
a reverse osmosis system going to the water
inlet valve of the refrigerator needs to be
between 30 and 100psi (207 and 700kPa). If a
reverse osmosis water system is connected to
your cold water supply, the water pressure to
the reverse osmosis system needs to be a
minimum of 40 to 60 psi (276 to 414 kPa). If the
water pressure to the reverse osmosis system is
less than 40 to 60 psi (276 to 414 kPa):
Check to see whether the sediment filter in
the reverse osmosis system is blocked.
Replace the filter if necessary.
Allow the storage tank on the reverse
osmosis system to refill after heavy usage.
If your refrigerator has a water filter, it may
further reduce the water
pressure when used
in conjunction with a reverse osmosis system. To
resolve it, remove the water filter.
Be sure to flush the dispenser thoroughly,
otherwise water may drip from the dispenser.
This means that there is still air in the line.
26
This product contains a light source of energy
efficiency class G on the top and side of the
refrigerating chamber.
27
28

29
Problem
Possible Cause & Solution
Appliance is
not working
correctly
Check whether the power cord is plugged into the power outlet properly.
Check the fuse or circuit of your power supply, replace if necessary.
The room temperature may be too low. Try setting the refrigerator or
freezer temperature to a colder level to solve this problem.
It is normal that the freezer is not operating during the defrost cycle, or
for a short time after the appliance is switched on to protect the
compressor.
Odors from the
compartments
The interior may need to be cleaned
Some food, containers or wrapping may cause odors.
Noise from the
appliance
The sounds below are quite normal:
•
Compressor running noises.
•
Air movement noise from the small fan motor in the freezer
compartment or other compartments.
•
Gurgling sound similar to water boiling.
•
Popping noise during automatic defrosting.
•
Clicking noise before the compressor starts.
•
Clicking noise when you get the water.
•
The motor running noises when you get ice.
•
Did you wait for 12 hours after installation of the water supply
line before making ice? If it is not sufficiently cool, it may take
longer to make ice, such as when first installed.
•
Is the water line connected and the water valve open?
•
Did you manually stop the ice
making f unction? Make sure you do
not set the “Ice Off” mode.
•
Is there any ice blocked with in the ice maker bucket?
•
compensate for the low pressure.
•
Is the freezer temperature too warm? Try setting the
freezer temperature lower.
•
Ice maker is not making the ice
fast enough. Please wait for at
least 90 minutes.
Water dispenser is
not functioning
Is the water pressure less than 30psi? Install a booster pump to
Other unusual noises are due to the reasons below and may need
you to check and take action:
The cabinet is not level.
The back of appliance is touching the wall.
Bottles or containers have fallen or are rolling.
30
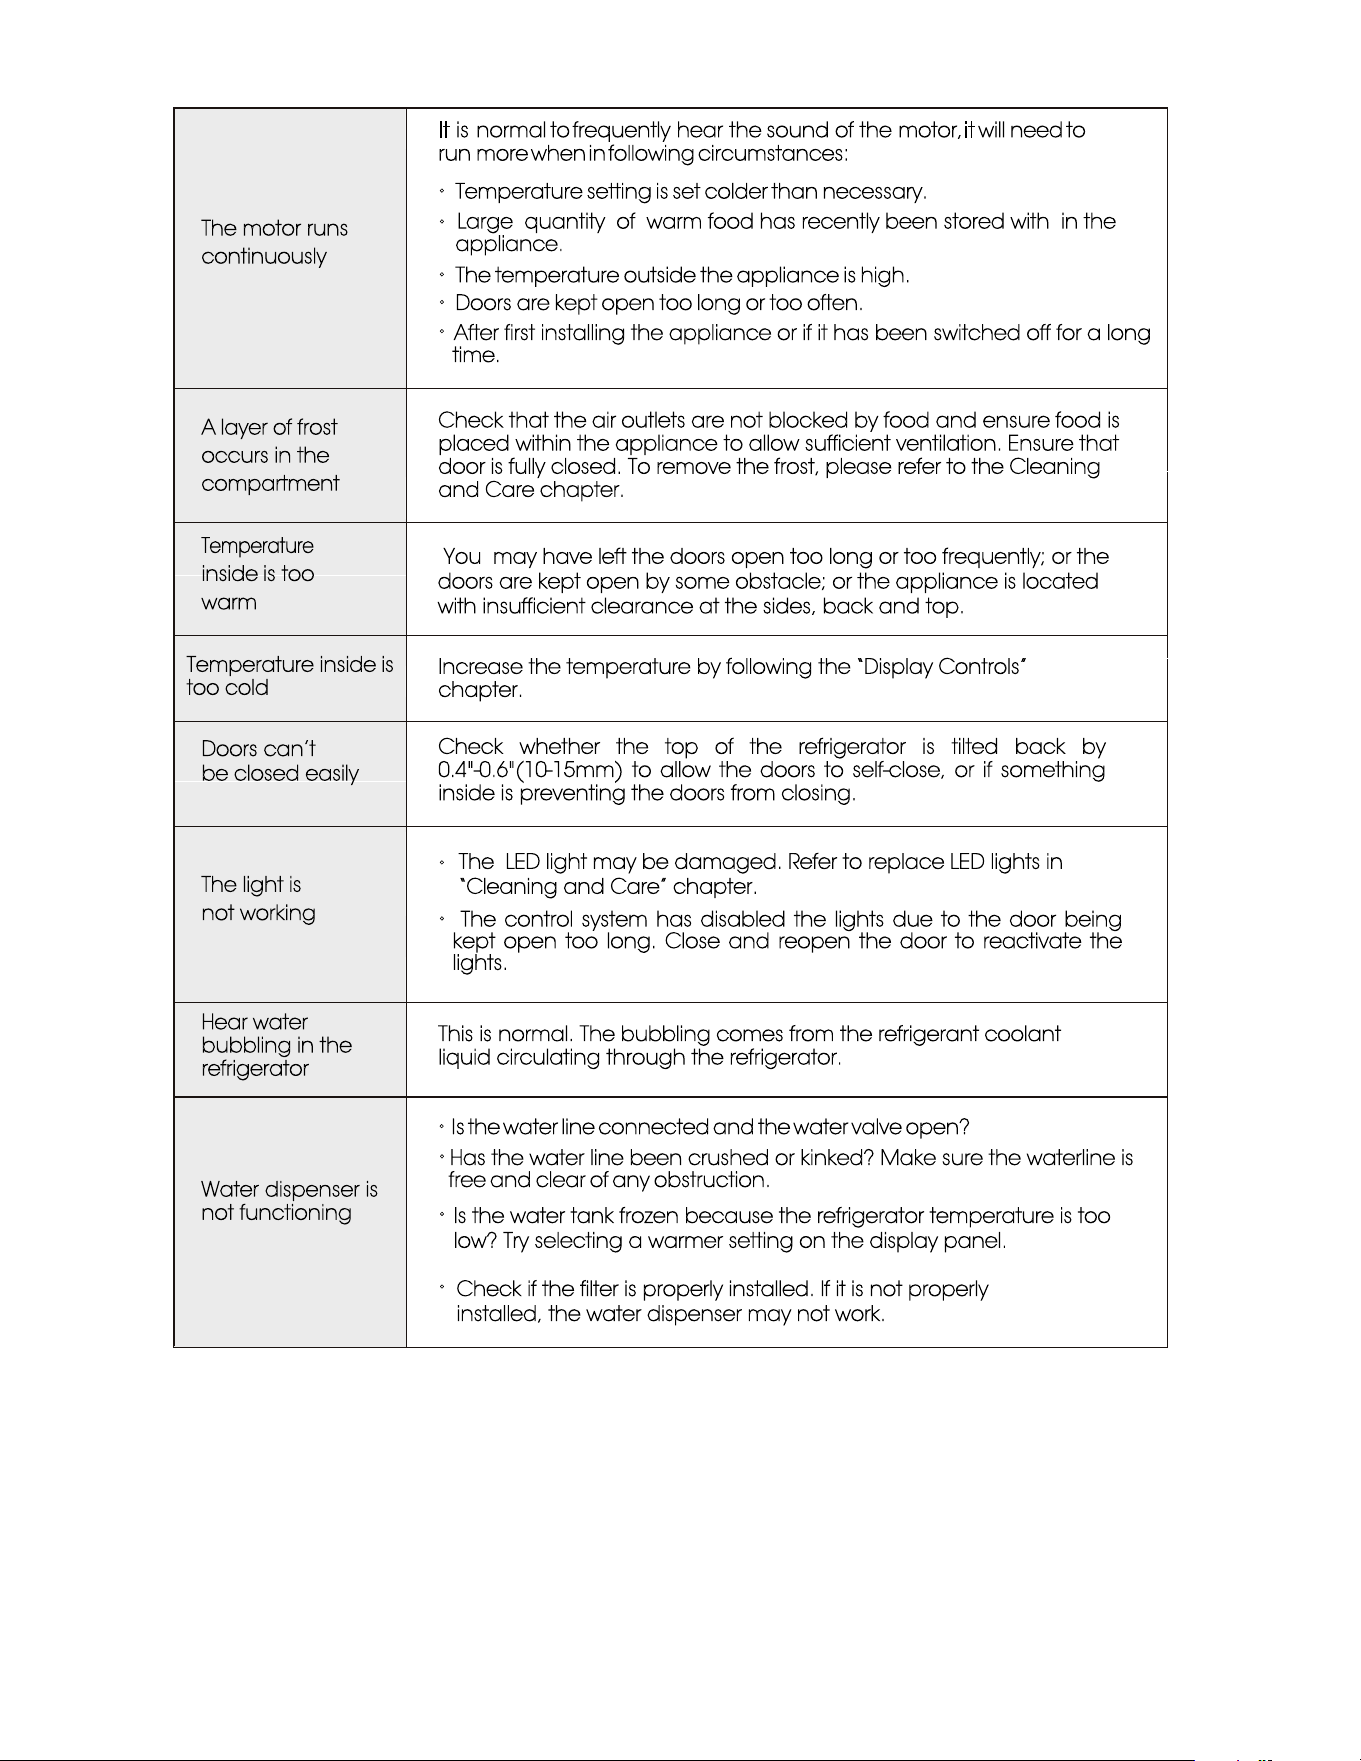
The motor runs
continuously
It is normal to frequently hear the sound of the motor, it will need to
run more when in following circumstances:
•
Temperature setting is set colder than necessary.
•
appliance.
•
The temperature outside the appliance is high.
•
Doors are kept open too long or too often.
•
time.
A layer of frost
occurs in the
compartment
Check that the air outlets are not blocked by food and ensure food is
placed within the appliance to allow sufficient ventilation. Ensure that
door is fully closed. To remove the frost, please refer to the Cleaning
and Care chapter.
Temperature
inside is too
warm
Temperature inside is
too cold
Increase the temperature by following the “Display Controls”
chapter.
Doors can’t
be closed easily
Check whether the top of the refrigerator is tilted back by
0.4"-0.6"(10-15mm) to allow the doors to self-close, or if something
inside is preventing the doors from closing.
The light is
not working
•
•
The control system has disabled the lights due to the door being
kept open too long. Close and reopen the door to reactivate the
lights.
Hear water
bubbling in the
refrigerator
This is normal. The bubbling comes from the refrigerant coolant
liquid circulating through the refrigerator.
Water dispenser is
not functioning
•
Is the water line connected and the water valve open?
•
free and clear of any obstruction.
•
•
Large quantity of warm food has recently been stored with in the
After first installing the appliance or if it has been switched off for a long
You may have left the doors open too long or too frequently; or the
doors are kept open by some obstacle; or the appliance is located
with insufficient clearance at the sides, back and top.
The LED light may be damaged. Refer to replace LED lights in
“Cleaning and Care” chapter.
Check if the filter is properly installed. If it is not properly
installed, the water dispenser may not work.
Is the water tank frozen because the refrigerator temperature is too
low? Try selecting a warmer setting on the display panel.
Has the water line been crushed or kinked? Make sure the waterline is
Hisense Service Help Line:
0191 387 0804

Hisense
life reimagined
Hisense UK�Ltd
* URXQG�IORRU
0 XQURH�&RXUW
: KLWH�5 RVH�2 IILFH�3 DUN
0 LOOVKDZ �3DUN�/ DQH
�/ HHGV�/ 6 ����( $