Loading ...
Loading ...
Loading ...

7
Installations
Be sure to read "Precautions" (☞ page 3) and "Precautions for installation" (☞ page 4) before
installation. Read the Installation Guide for the camera to be installed as well.
Step1
Make a hole of 160 mm {6-5/16 inches} diameter using a
specialized tool, etc.
Make a mounting hole in the ceiling using the
template (accessory).
Important:
• Make a hole precisely. When the opened
hole is bigger or deformed too much,
the ceiling mount bracket cannot be
stuck on the ceiling board securely.
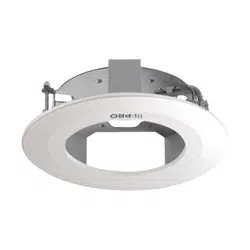
Step2
Position 2 of the spring hooks of the main body as shown
in the illustration below.
When the ceiling mount bracket is installed after positioning them in the opposite side, they may
become hard to pull out.
Main body
Move the hook head downward.
Spring hook
←
ø160 mm
{6-5/16 inches}
Ceiling
Loading ...
Loading ...
Loading ...