Loading ...
Loading ...
Loading ...
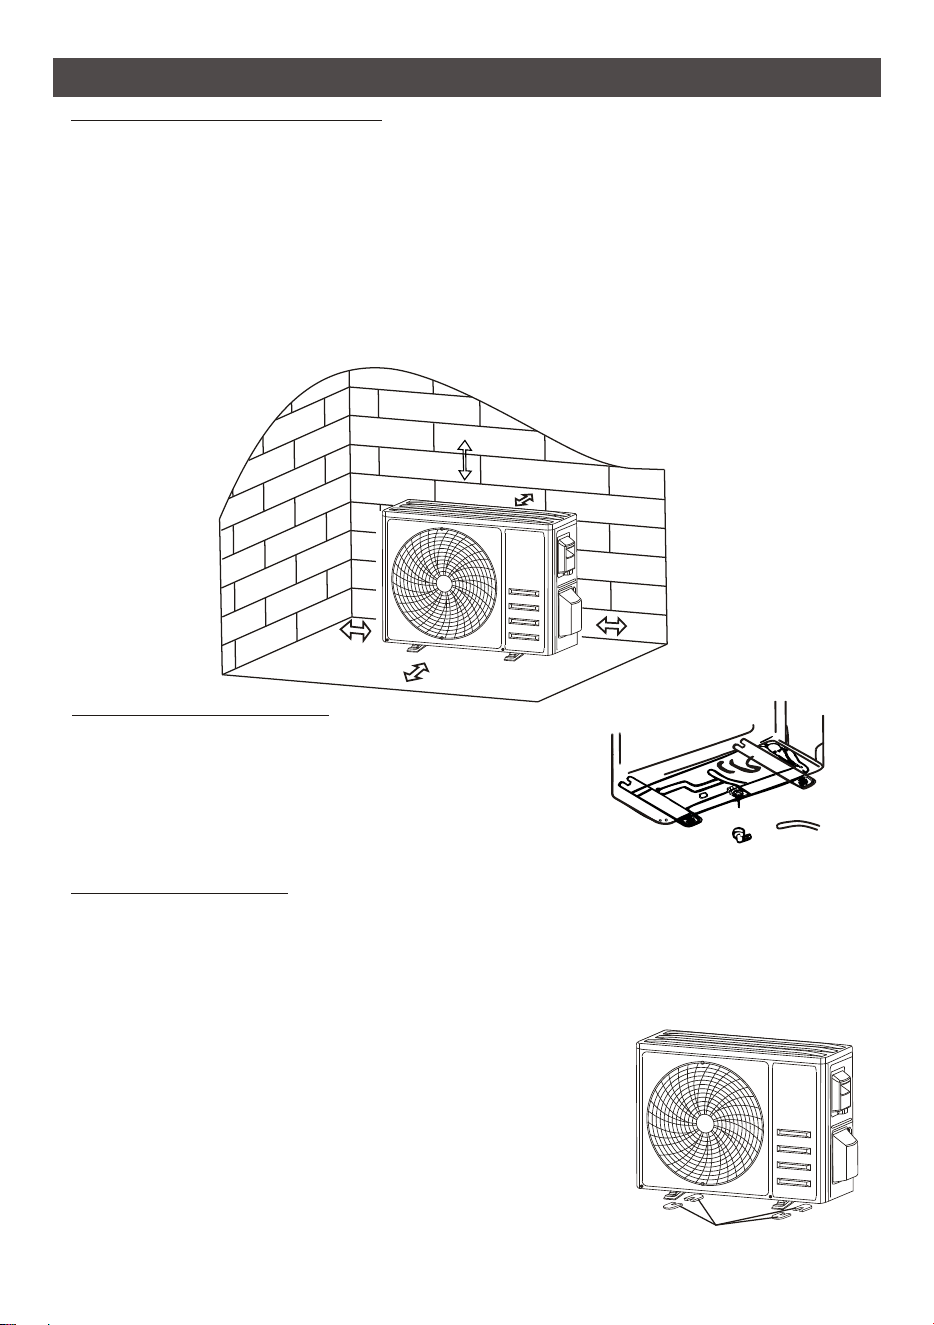
Step1: Select Installation Location
Select a site that allows for the following:
1.1 Do not install the outdoor unit near sources of heat, steam or flammable gas.
1.2 Do not install the unit in too windy or dusty places.
1.3 Do not install the unit where people often pass. Select a place where the air discharge and
operating sound will not disturb the neighbors.
1.4 Avoid installing the unit where it will be exposed to direct sunlight ( other wise use a protection,
if necessary, that should not interfere with the air flow).
1.5 Reserve the spaces as shown in the picture for the air to circulate freely.
1.6 Install the outdoor unit in a safe and solid place.
1.7 If the outdoor unit is subject to vibration, place rubber blankets onto the feet of the unit.
Step2: Install Drainage Hose
Step3: Fix Outdoor Unit
27
Drainage joint
Drainage hose
OUTDOOR UNIT INSTALLATION
Over 200cm
Over 30cm
Over 50cm
Over 30cm
Over 50cm
Install 4 rubber blankets (Optional)
2.1 This step only for heating pump models.
2.2 Insert
the drainage joint to the hole at the bottom
of the outdoor unit.
2.3 Connect the drainage hose to the joint and make the
connection well enough.
3.1 According to the
The outdoor unit can be fixed on a wall-mounting bracket.
Follow the instruction of the wall-mounting bracket to
wall-mounting bracket
wall-mounting bracket must be able to support at least
4 times of the weight of outdoor unit.
outdoor unit installation dimensions to mark the installation position for
expansion bolts .
3.2 Drill holes and clean the concrete dust and place the bolts .
3.3 If applicable install 4 rubber blankets on the hole before place the outdoor unit (Optional).
This will reduce vibrations and noise.
3.4 Place the outdoor unit base on the bolts and pre-drilled holes.
3.5 Use wrench to fix the outdoor unit firmly with bolts.
Note:
fix
the on the wall, and then fasten the
outdoor unit on it and keep it horizontal.
The
Loading ...
Loading ...
Loading ...