Loading ...
Loading ...
Loading ...
16
Instructions for Use
handle and twist the Lid clockwise to open the
Lid see OPEN LID in PREPARING FOR USE.
6. Place the Inner Pot in the Base. Add ingredients
to Inner Pot. NEVER LOAD INNER POT ABOVE
THE FULL CUP LINE (see IMPORTANT
SAFEGUARDS, p. 4).
7. ATTACHING LID: With the LCD Display facing
you, place the Lid on the Unit, aligning the Lid
Position Mark with the Open Mark (see Fig.C).
Twist the Lid counterclockwise about 30° (see
Fig. D). When the Lid is locked, the Release
Switch will move to the Closed position (see
Fig. E).
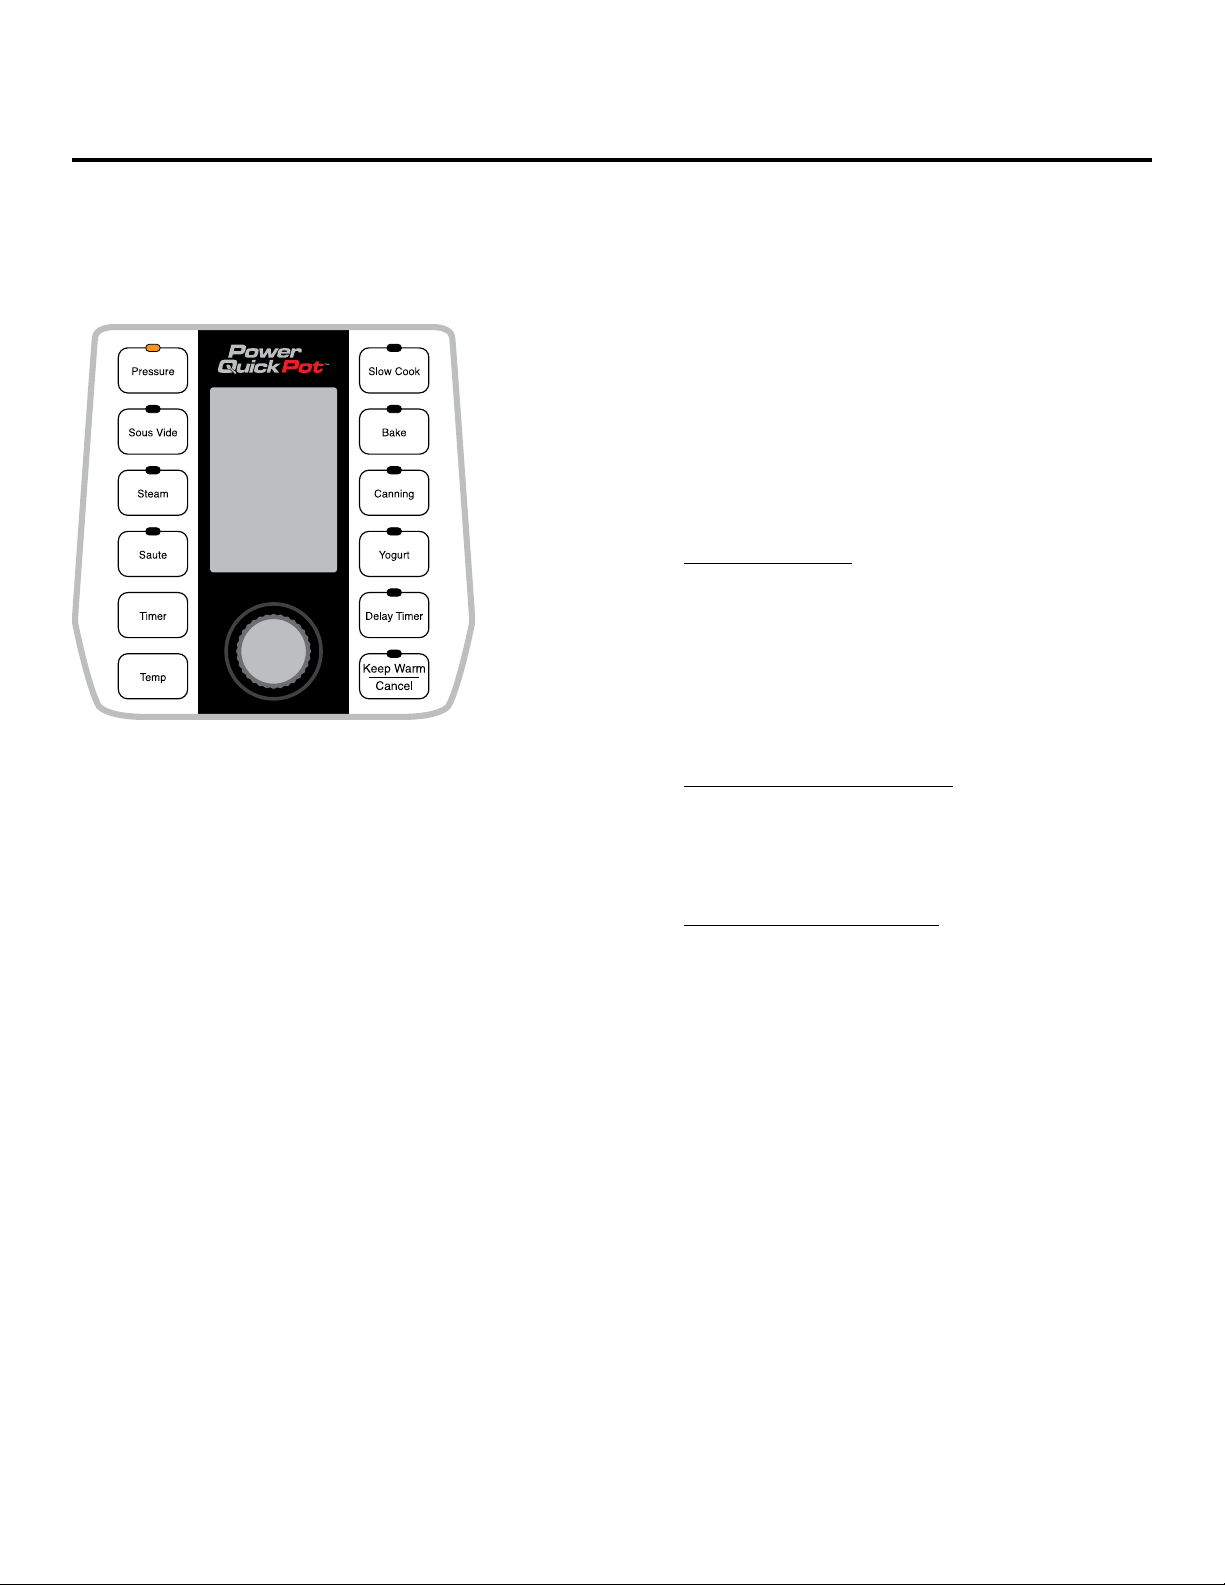
8. SELECT COOKING MODE: You can select
a preprogrammed setting (see part A, p. 18–19).
The LCD Display will turn blue when a program
is selected (see Fig. I).
9. SELECT COOKING TIME: When a cooking
preset button is pressed and a food type
is selected, the LCD Display will show
the default cooking time for that preset.
Some cooking presets feature multiple cooking
options. Turn the Program Dial to the left or right
to choose a preset subcategory. (see part B,
p. 18–19). Press the Program Dial to select
the subcategory.
10. Turn the Program Dial to the left or right
to switch between LOW, MED, or HIGH cooking
settings and press the Program Dial to select
(see part C, p. 18).
11. Alternatively, you can select the Timer (see part
D, p. 18–19) and Temperature (see part E, p.
18–19) Buttons to manually adjust the cooking
time and temperature for most presets.
B. OPERATING INSTRUCTIONS
IMPORTANT: Any function can be stopped
immediately by pressing the Cancel Button.
1. Review PREPARING FOR USE (see p. 14)
to be comfortable with the Unit.
2. Place the Power Quick Pot on a clean, at
surface.
3. Attach Condensation Collector to side
of the Unit (see Fig. B).
4. Attach the Power Cord rst into the Power
Quick Pot and then into a wall outlet (see
ATTACHING THE POWER CORD, p. 5). When
the Unit is rst plugged in, “----” will appear on
the LED Display. The Unit automatically powers
on when plugged in.
5. Open the Lid by sliding and letting go of
the Steam Release Switch from the Closed
position to the Open position. Then, grab the
Loading ...
Loading ...
Loading ...