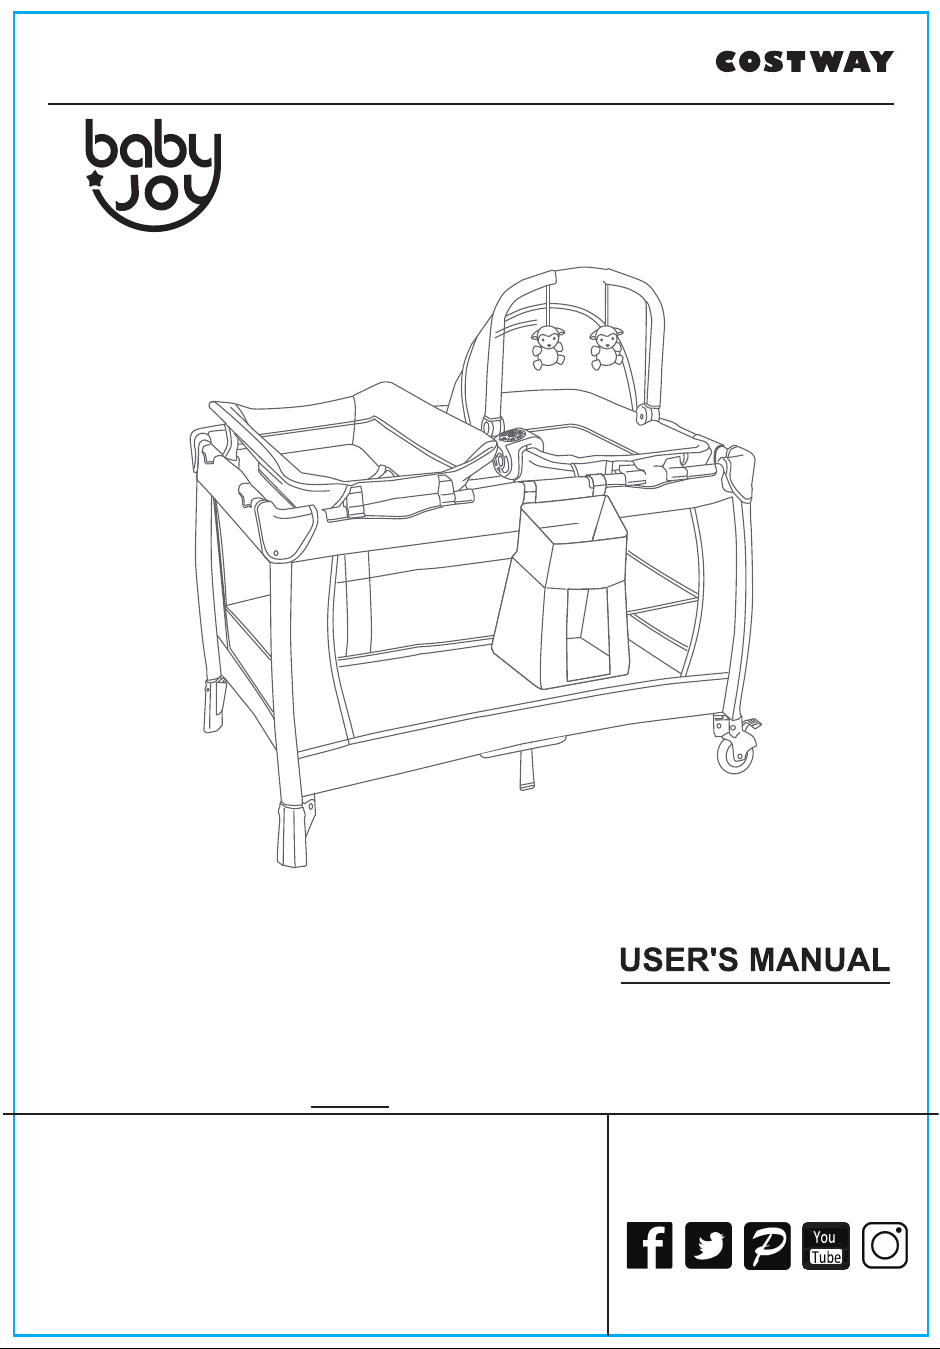
THIS INSTRUCTION BOOKLET CONTAINS IMPORTANT SAFETY INFORMATION. PLEASE READ AND KEEP FOR FUTURE REFERENCE.
Follow Costway
Please give us a chance to make it right and do better!
Contact our friendly customer service department for help first.
Replacements for missing or damaged parts will be shipped ASAP!
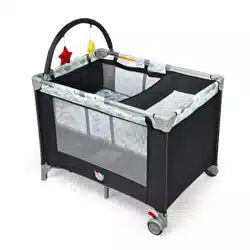
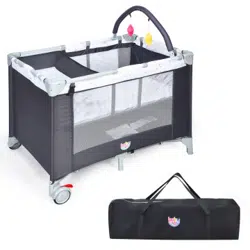
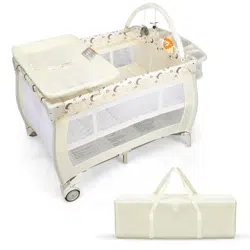
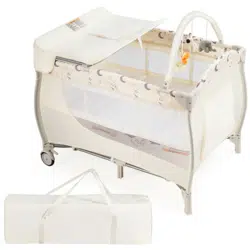
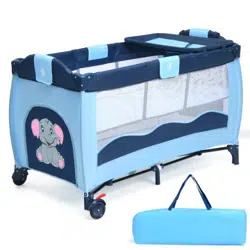
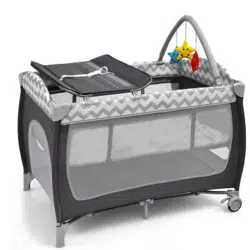
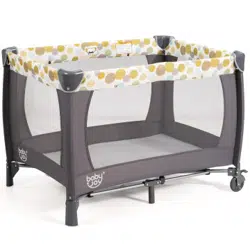
Baby Playard
BB0497
1
Please read all instructions carefully and keep it for future reference.
General Warnings:
Attention: To prevent possible injury by entanglement, remove this toy when the child starts
trying to get up on its hands and knees in a crawling position.
Danger! Keep all small parts and packaging materials for this product away from babies and
children, otherwise they may pose a choking hazard.
The product must be installed and used under the supervision of an adult.
Read through each step carefully and follow the proper order.
Remove all Packaging, separate and count all parts and hardware before Installation.
Please ensure that all parts are correctly installed, incorrect Installation can lead to a Danger.
We recommend that, where possible, all items are assembled near to the area in which
they will be placed in use, to avoid moving the product unnecessarily once assembled.
Ensure a secure surface during construction, and place the product always on a flat, steady
and stable surface.
WARNING
Playard Warnings
WARNING:
Failure to follow these warnings and
the instructions could result in serious injury or death.
This product including side rails, must be fully erected
prior to use. Make sure latches are secure.
SUFFOCATION HAZARD
INFANTS HAVE SUFFOCATED:
• In gaps between a mattress too small or too thick and
product sides
• On soft bedding
Never add a mattress, pillow, comforter, or padding.
Use only the mattress provided by manufacturer.
• The playard mattress/pad is specially designed to
prevent suffocation. The playard mattress/pad has a
solid base, which must be at least 40 in. long and 28
in. wide and not more than 1 in. thick in order to meet
safety standards. Using a thicker or a different sized
mattress/pad may allow a child’s head to get between
mattress/pad and the side of the playard causing
suffocation.
• To reduce the risk of SIDS, pediatricians recommend
healthy infants be placed on their back to sleep, unless
otherwise advised by your physician.
• ALWAYS place child on back to sleep.
mattress covers not sold and intended for that purpose.
They can cause suffocation.
• NEVER use a water mattress with this product.
FALL HAZARD:
Always check that the
bassinet is securely locked on the base/stand by pulling
upwards on the bassinet.
WARNING: STRANGULATION HAZARD:
NEVER LEAVE INFANT IN PRODUCT WITH SIDES DOWN.
Infant may roll into space between pad and loose mesh
side causing suffocation.
•
Strings can cause strangulation! NEVER place items
with a string around a child's neck such as hood strings
or attach strings to toys.
2
WARNING
• NEVER place the playard near a window where cords
from blinds or drapes can strangle a child.
• Child can become entrapped and die when improvised
netting or covers are placed on top of a playard. Never
• NEVER leave child in product with sides lowered. Be sure
sides are in raised and locked position whenever child is
in product.
WARNING:
warnings.
• The playard, including side rails, must be fully erected prior
to use.
• Make sure latches are secure.
• Discontinue use of the product when child is able to climb out or
has reached the height of 35 in. (890 mm), or 30lbs. (13.6kg)
• When child is able to pull to standing position, remove bumper
pads, large toys and other objects that could serve as steps for
climbing out.
• ALWAYS provide the supervision necessary for the continued
safety of your child. When used for playing, never leave child
unattended. Child in crib must be under supervision at all times.
• ALWAYS ensure that the playard, changing table, and the
Rock-A-Bye Bassinet are safe by checking regularly, before
placing the child in it, check that every part is properly secured
in place.
• NEVER leave the Bassinet in place when child is in playard.
• NEVER leave Changing Table in place when child is in
the playard.
• NEVER leave Rock-A-Bye Bassinet in place when child is
in the playard. Only one child can use the Playard/Nursery
Center at any time.
• NEVER use this product if there are any loose or missing
fasteners, loose joints, broken parts, or torn mesh/fabric. Check
before assembly and periodically during use.
•
This product is not intended for commercial use.
3
MAINTENANCE
WARNING
IMPORTANT!
To ensure safe operation of your playard,
please follow these instructions carefully. Please keep these
instructions for future reference.
IMPORTANT! Before assembly and each use, inspect this
product for damaged hardware, loose joints, missing parts or sharp
edges. NEVER use if any parts are missing or broken.
IMPORTANT! Adult assembly is required.
MAINTENANCE AND CLEANING
INSTRUCTIONS:
Use only household mild soap and warm
water.
DO NOT USE BLEACH.
DO NOT MACHINE WASH.
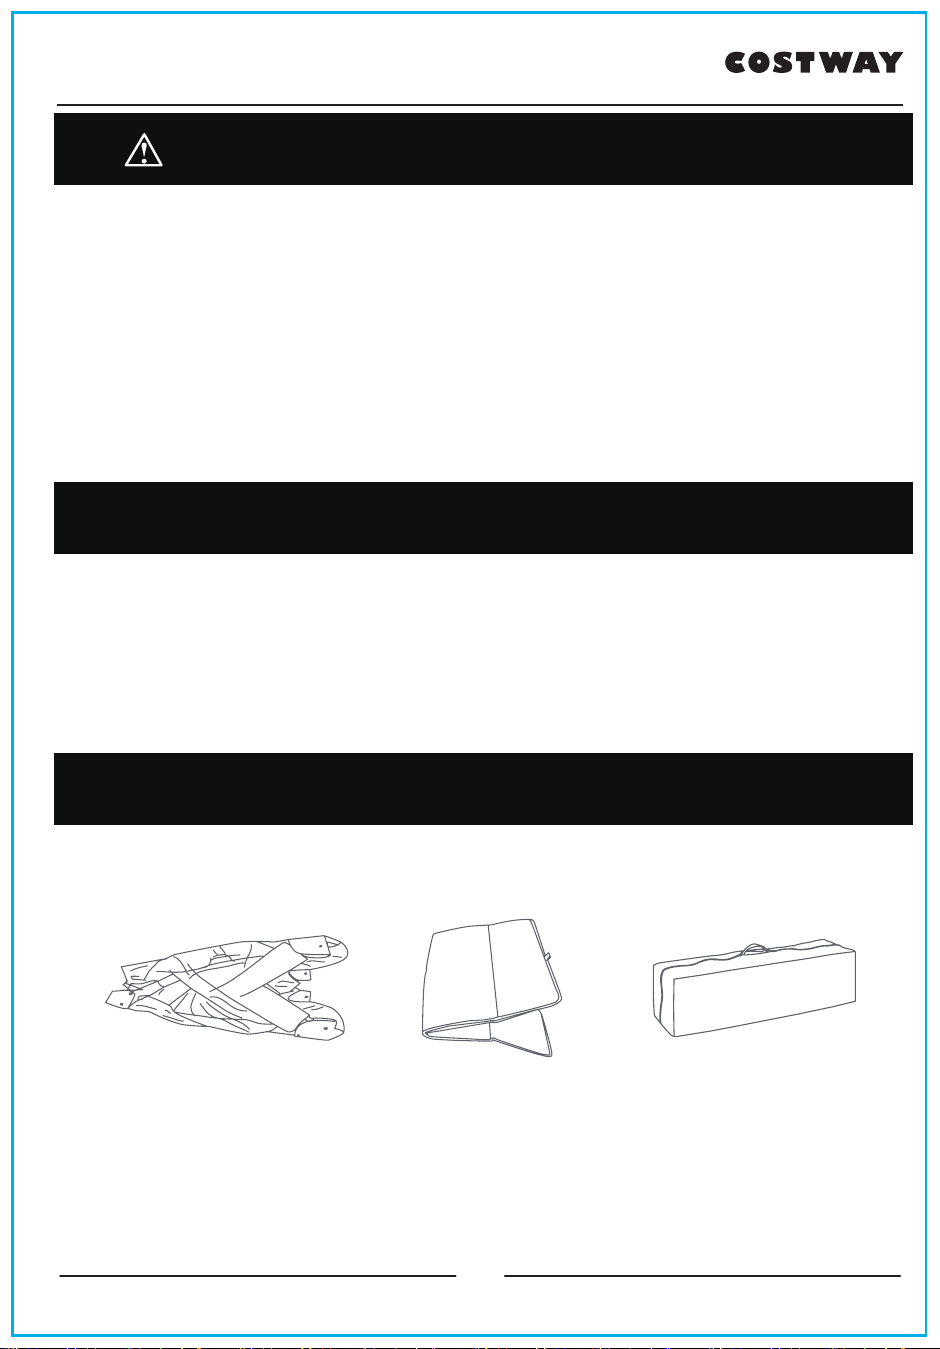
PARTS
Check the parts list on the back cover to make sure you have all the parts for this
model before assembling the playard.
Mattress Travel / Storage BagPlayard
4
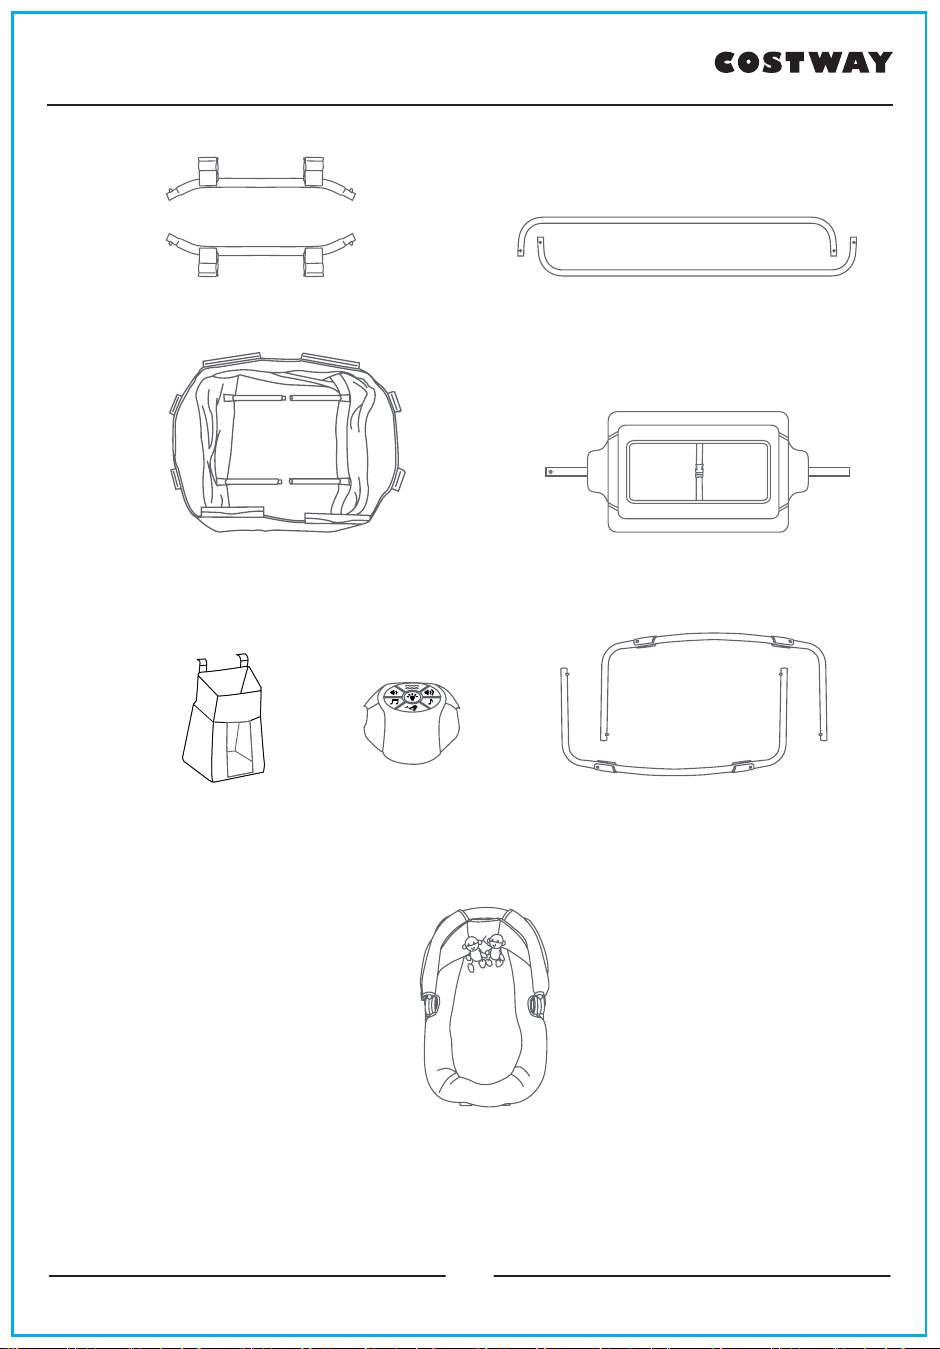
(2) Short Bar with Connectors
**Portable Rock-a-Bye bassinet
Large bassinet with metal support tubes
(2) Curved Connector Bar
*Music Center
Changing Table
(2) or (4) Rock-a-Bye bassinet Bars
* Parent Organizer
5
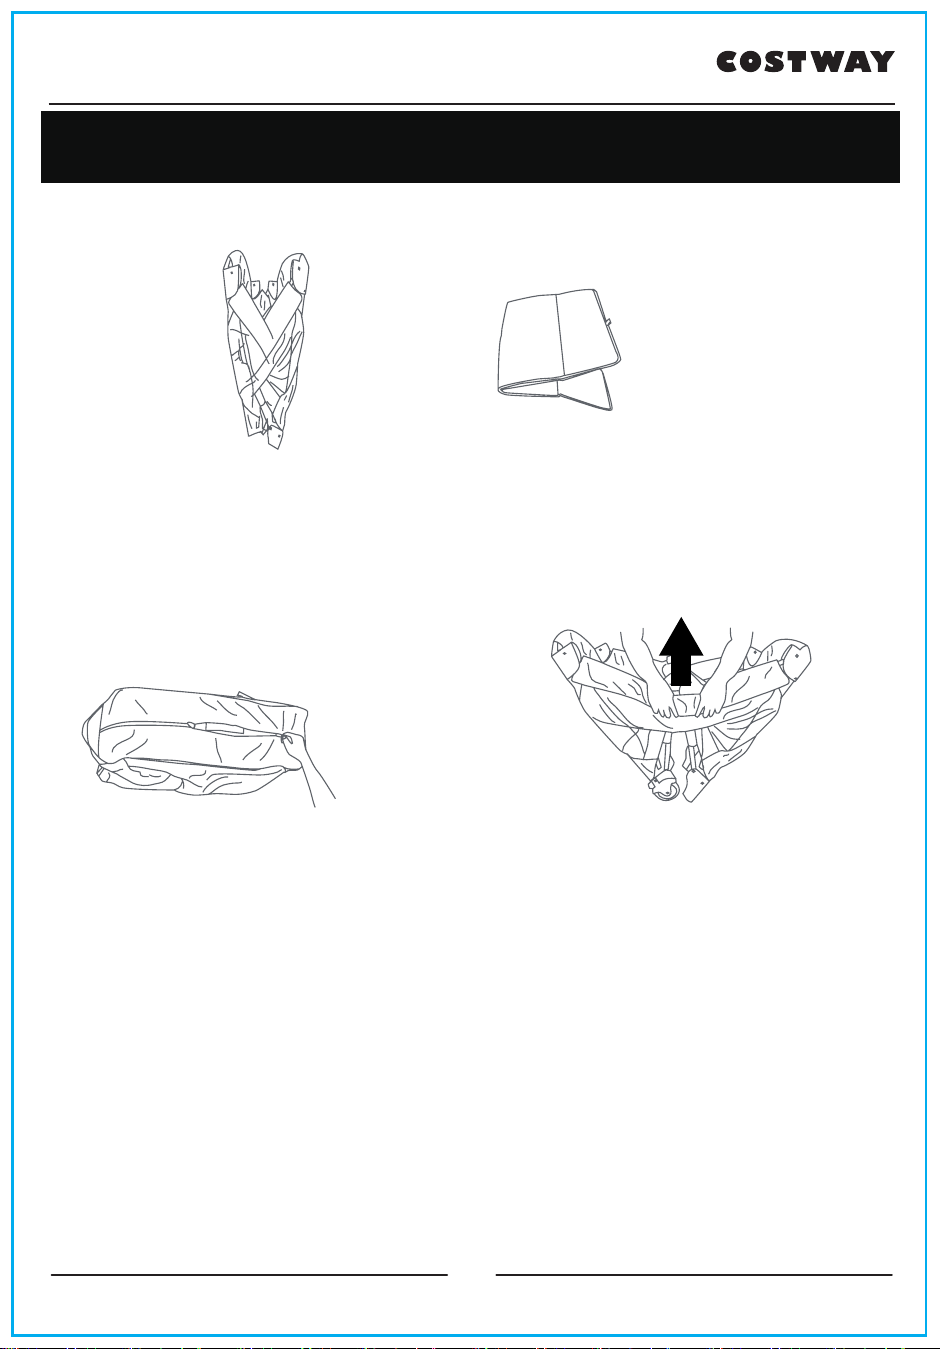
ASSEMBLY
TO ASSEMBLE PLAYARD
Playard
Mattress
Fig. 1
Fig. 2
ATTENTION: Playard must be fully assembled and securely locked before
installing or using other accessories.
1) • Unzip bag and remove Playard frame
(Fig. 1). Undo the Fasten straps and set the
Mattress aside.
DO NOT push center down yet.
2) • Top rails must be fully locked before lowering center. Pull up one rail at a
time, hold one hand on each side of the rail and pull up sharply, do not pull
from the middle where the center latch release is located, make sure both
tubes latch in place and each rail is rigid (Fig. 2).
IMPORTANT: The center must be raised while locking the rails. If one rail will
lock but the other side will not then, unlock the rail by squeezing the release
in the center and try again.
6
ASSEMBLY
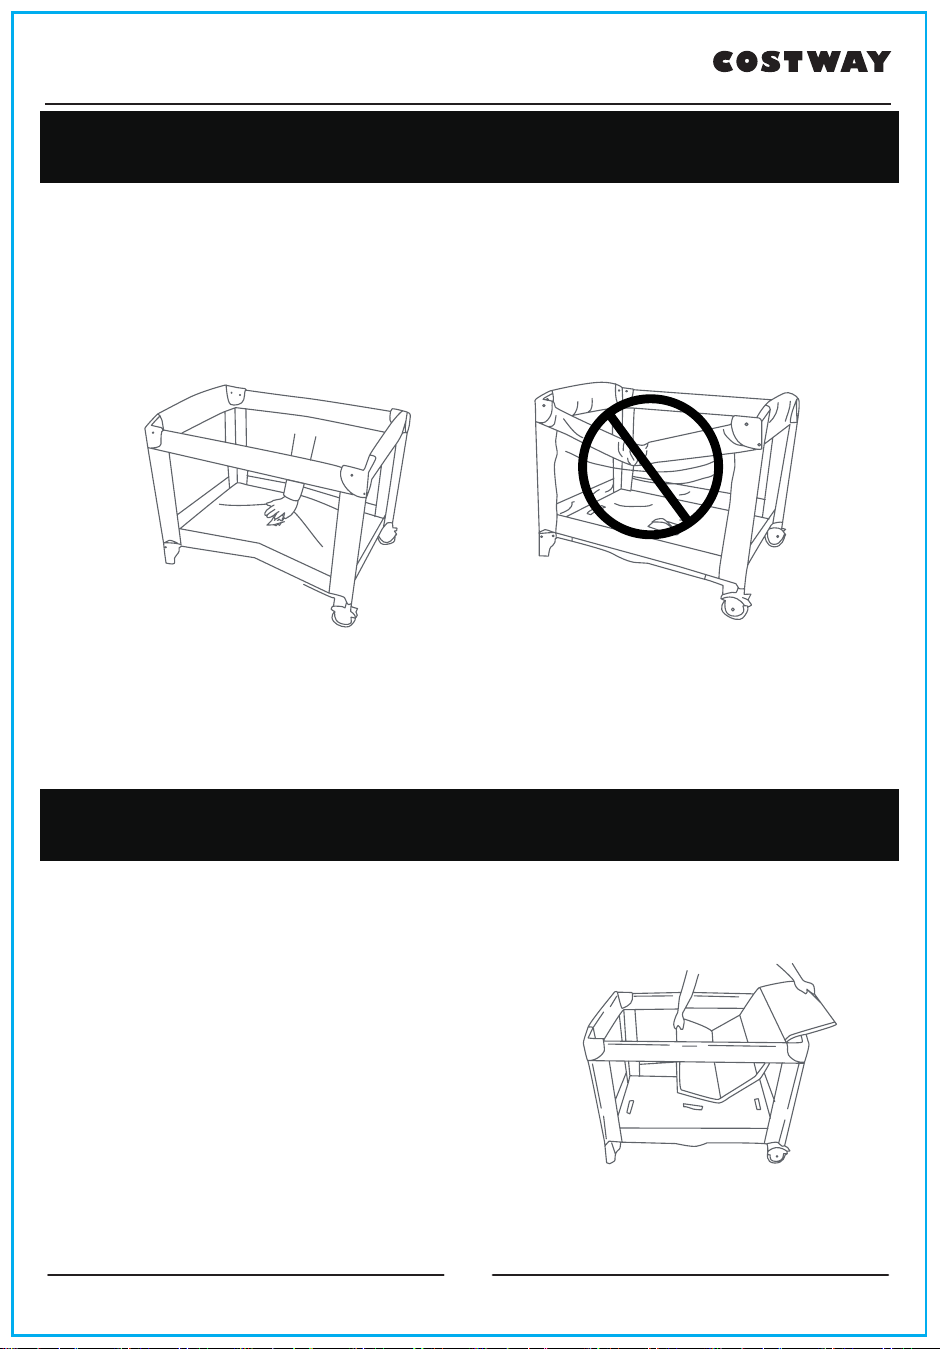
3) • Once all four (4) top rails are locked in place,
push down on the center handle (Fig. 3a).
The center mechanism automatically locks
in place.
IMPORTANT: Test each top rail by pushing
down slightly to confirm each is rigid and
securely in place before use (Fig. 3b).
Fig. 3a
Fig. 3b
ASSEMBLY
T
Fig. 4
o install mattress into the playard proceed to Step 4.
4) • Place the Mattress on the floor of the
Playard with the padded side facing up
(Fig. 4).
7
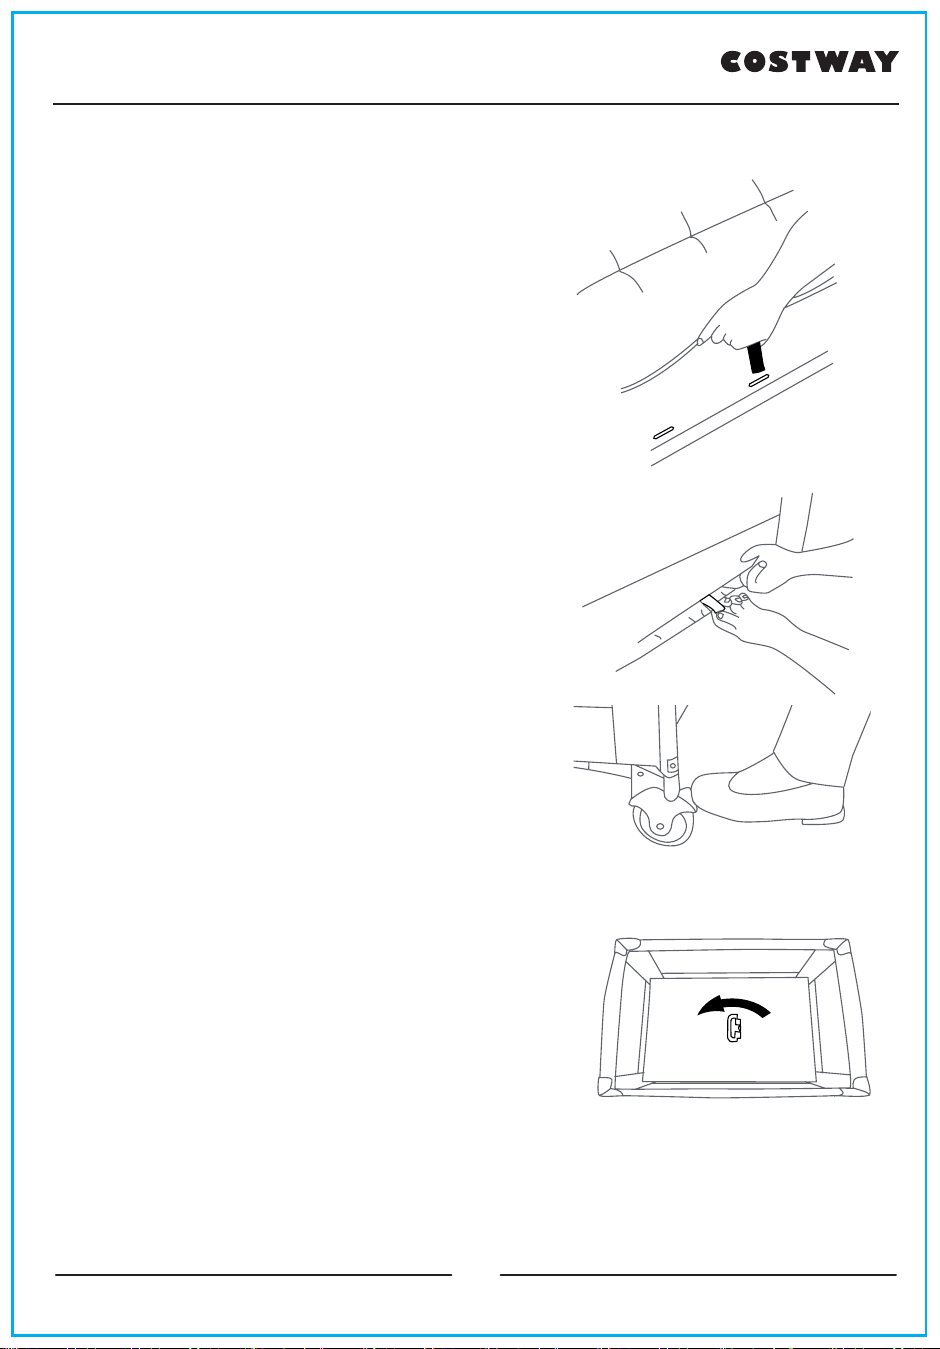
5) • Insert the hook & loop fasteners located on
the underside of the mattress through the
slots in the floor of each end of the playard
(Fig. 5a). Fasten the hook and loop fasteners
to the underside of the playard floor to prevent
the mattress from moving (Fig. 5b).
IMPORTANT: The handle located in the
center of the Playard floor MUST remain
raised (Approx. 45.7 cm or 18 inches) while
locking the side rails in place. If the center is
not raised the rails will NOT lock.
If you experience difficulty and one side of
the rail will lock but the other side will not
then, unlock the rail by squeezing the release
in the center and try again.
Fig. 5a
Fig. 5b
6) • To operate the brakes on the wheels, press
downward on the brake levers. To release, lift
upward on the lever (Fig. 6).
Fig. 6
FOLDING PLAYARD
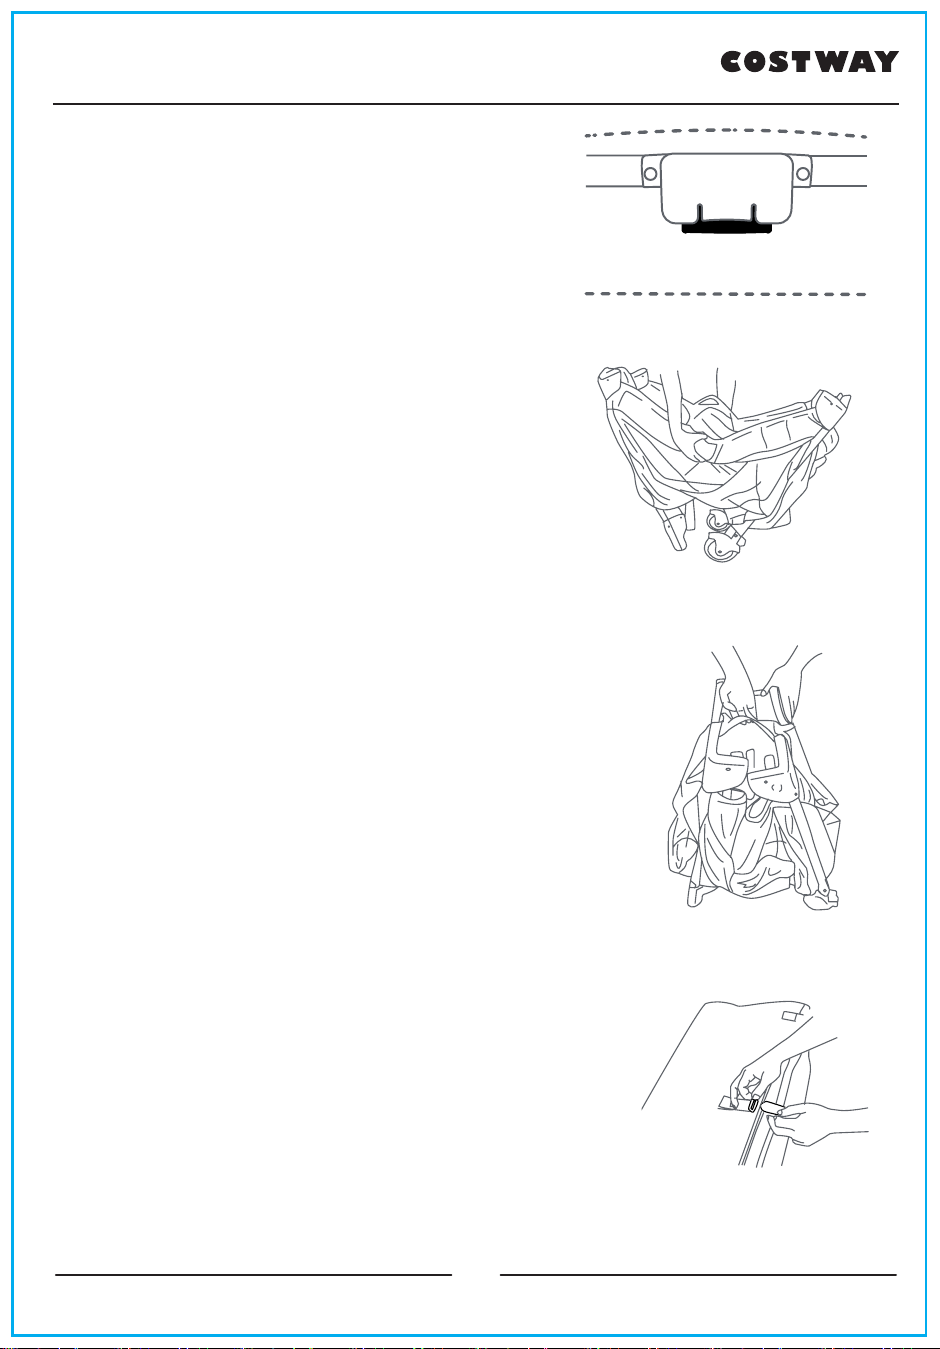
7) • Release the hook and loop fastener holding
the Mattress from underneath the Playard floor
or the Bassinet and set the mattress aside.
DO NOT unlock top rails yet, center of floor
handle must be raised before top rails will
unlock.
• Rotate the center handle counter-clockwise
90 degrees and raise the center as high as
the top rails (Fig. 7). Gather the Legs and
Wheels together towards the center as close
as possible so that they nearly touch.
Rotate before lifting
Fig. 7
8
Latch release
Fig. 8a
Tube
Tube
TOP RAIL
Center latch
8) • Locate the rail latch release in the center and
bottom side of each rail. Squeeze the lever
with two hands until the rail releases the two
tubes (Fig. 8a), then push down (Fig. 8b).
NOTE: If the top rail(s) do not release
completely, DO NOT FORCE! Lift the center
of floor higher. Both tubes must be released
for the top rail to fold.
Fig. 9
Fig. 8b
9) • Gather all four (4) corners and the center together
tightly (Fig. 9). Wrap Mattress around Playard frame
with padded side facing inward.
10) • Secure the hook and loop fasteners by feeding
them through the loops on the end of the mattress
then fold them back onto themselves (Fig. 10).
• Place folded Playard into carry bag so that the
handle comes through the opening between each
side of the zipper.
Fig. 10
9
WARNING
ACCESSORIES
Bassinet & Cradles Warnings:
WARNING: Failure to follow these warnings and
the instructions could result in serious injury or death.
WARNING FALL HAZARD: To help prevent falls,
do not use this product when the infant begins to push
up on hands and knees or has reached the height of
25 in. (635 mm), weight of 22 lbs. (10 kg), whichever
• ALWAYS
c
heck that the large bassinet is securely
locked on the base/stand by pulling upwards on the
large bassinet bed.
SUFFOCATION HAZARD
Infants have suffocated:
• In gaps between extra padding and sides of bassinet/
cradle and
• On soft bedding
Use only the pad provided by the manufacturer.
NEVER add a pillow, comforter, or another mattress
for padding.
• Always attach large bassinet securely. If the large bassinet
is not secured, at all locations child could get neck trapped
between large bassinet and playard frame.
• Do not place items with a string around a child's neck
strangulation! Do not suspend strings over the large
bassinet or attach strings to toys.
• NEVER
mattress covers not sold and intended for that purpose.
They can cause suffocation.
• Use the large bassinet with only one child at a time.
• NEVER place a child under the large bassinet.
10

WARNING
• The Playard must be fully assembled and installed before
using.
• The playard, including side rails, must be fully erected prior
to use. Make sure each latch is secure.
• NEVER leave the large bassinet in place when child is in
playard.
• NEVER place a child under the large bassinet.
• NEVER leave Changing Table in place when child is in the
playard.
• NEVER leave the Rock-A-Bye Bassinet in place when child
is in the playard. Only one child can use the Playard at any
time.
• To reduce the risk of SIDS, pediatricians recommend
healthy infants be placed on their back to sleep, unless
otherwise advised by your physician.
• ALWAYS place child on back to sleep.
• ALWAYS provide the supervision necessary for the
continued safety of your child. NEVER leave children
unattended.
• If a sheet is used with the mattress/pad, use only the one
provided by Babyjoy
the dimension of the playard mattress.
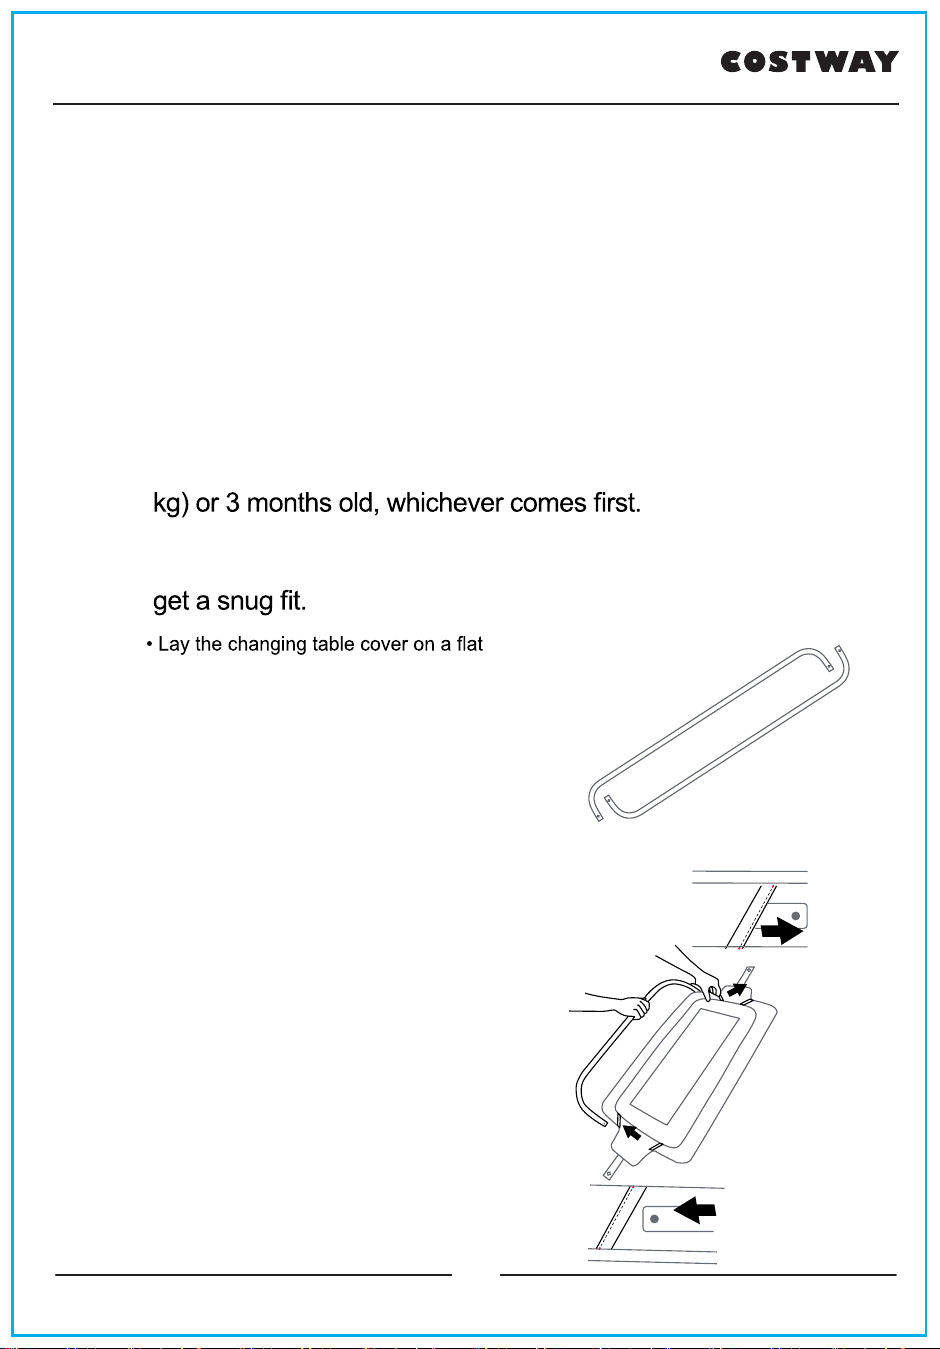
• Discontinue use of the large bassinet and the changing
table when child begins to push up on hands and knees or
has reached the height of 25 in. (635 mm), weight of 22 lbs.
(10 kgs) or 3 months old, whichever comes first.
• Child can become entrapped and die when improvised
netting or covers are placed on top of a playard. Never add
SUFFOCATION HAZARD:
Infant carrier
can roll over on soft surfaces and suffocate child. NEVER
place carrier on beds, sofas, or other soft surfaces.
FALL HAZARD: ALWAYS check that the large
bassinet is securely locked on the base/stand by pulling
upwards on the large bassinet.
11

ASSEMBLY
TO ASSEMBLE LARGE BASSINET
Bassinet with metal support tubes
ATTENTION:
Playard must be fully assembled and securely locked before installing
or using the Bassinet feature (See To Assemble Playard section). You will need to
remove the mattress from the bottom of the Playard to use inside your Bassinet.
Fig. 11a
Fig. 11b
11) • Connect opposing Mattress Support Tubes that are attached to the bottom of the
Bassinet (Fig. 11a).
• Before placing the Mattress into the Bassinet,
make sure Mattress Support tubes
are connected (Fig. 11b).
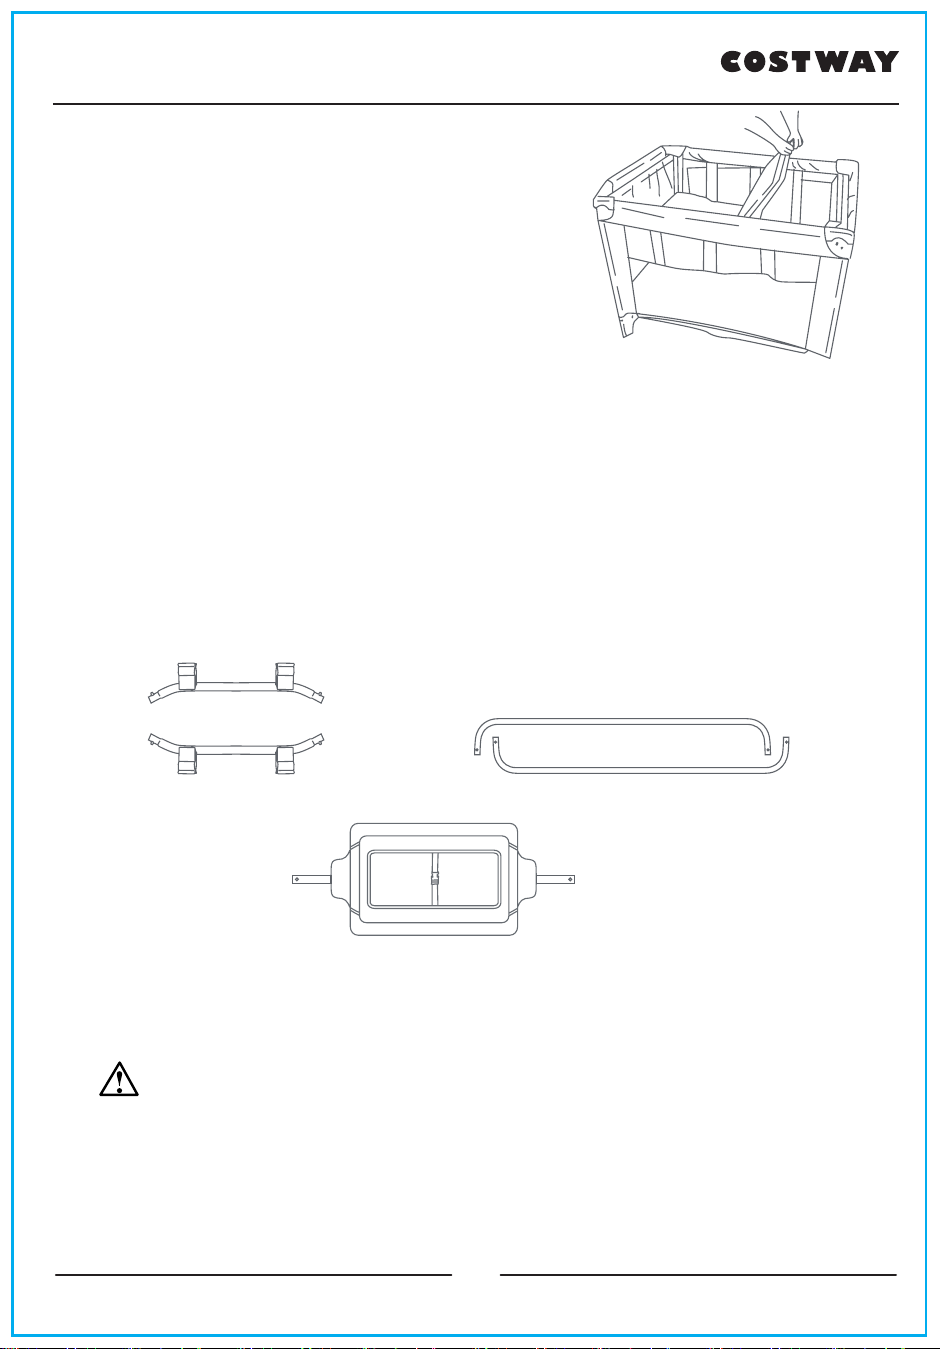
12) • Position the Bassinet over and down into the
fully assembled Playard. Secure in place by
clip until all are snapped into place (Fig. 12).
Fig. 12
12
13) • Place the Mattress into the Bassinet with the
padded side facing upward (Fig. 13).
Fig. 13
TO REMOVE LARGE BASSINET
• Remove Mattress from Bassinet. Disconnect opposing Mattress Support
Tubes. Unsnap all clips and lift Bassinet.
TO ASSEMBLE CHANGING TABLE
ATTENTION: Playard and large bassinet must be fully assembled and securely
locked before installing or using the changing table feature (See To Assemble
Playard and large bassinet section
Changing Table Assembly will require the following parts:
ACCESSORIES
Changing Table:
WARNING FALL HAZARD: Children may
suffer serious injuries after falling from changing
tables. Falls can happen quickly.
• STAY within arm’s reach.
• ALWAYS secure the changing table to the playard
frame.
(2) Short Bar with Connectors
(2) Curved Connector Bars
(1) Changing Table
13
SUFFOCATION HAZARD : Babies may
suffocate while sleeping on changing tables.
Changing tables are not designed for safe sleep.
• NEVER allow baby to sleep on changing table.
• NEVER leave the changing table in place when the child is
in the large bassinet or the playard. To prevent your child
from falls and other injuries, always use the safety belt when
children are on the changing table.
• Discontinue use of the large bassinet and the changing table
when child begins to push up on hands and knees or has
reached the height of 22 in. (558.8 mm), weight of 22 lbs. (10
• Do not use changing table if it is damaged or broken.
• ALWAYS use the restraint system. Adjust belt as needed to
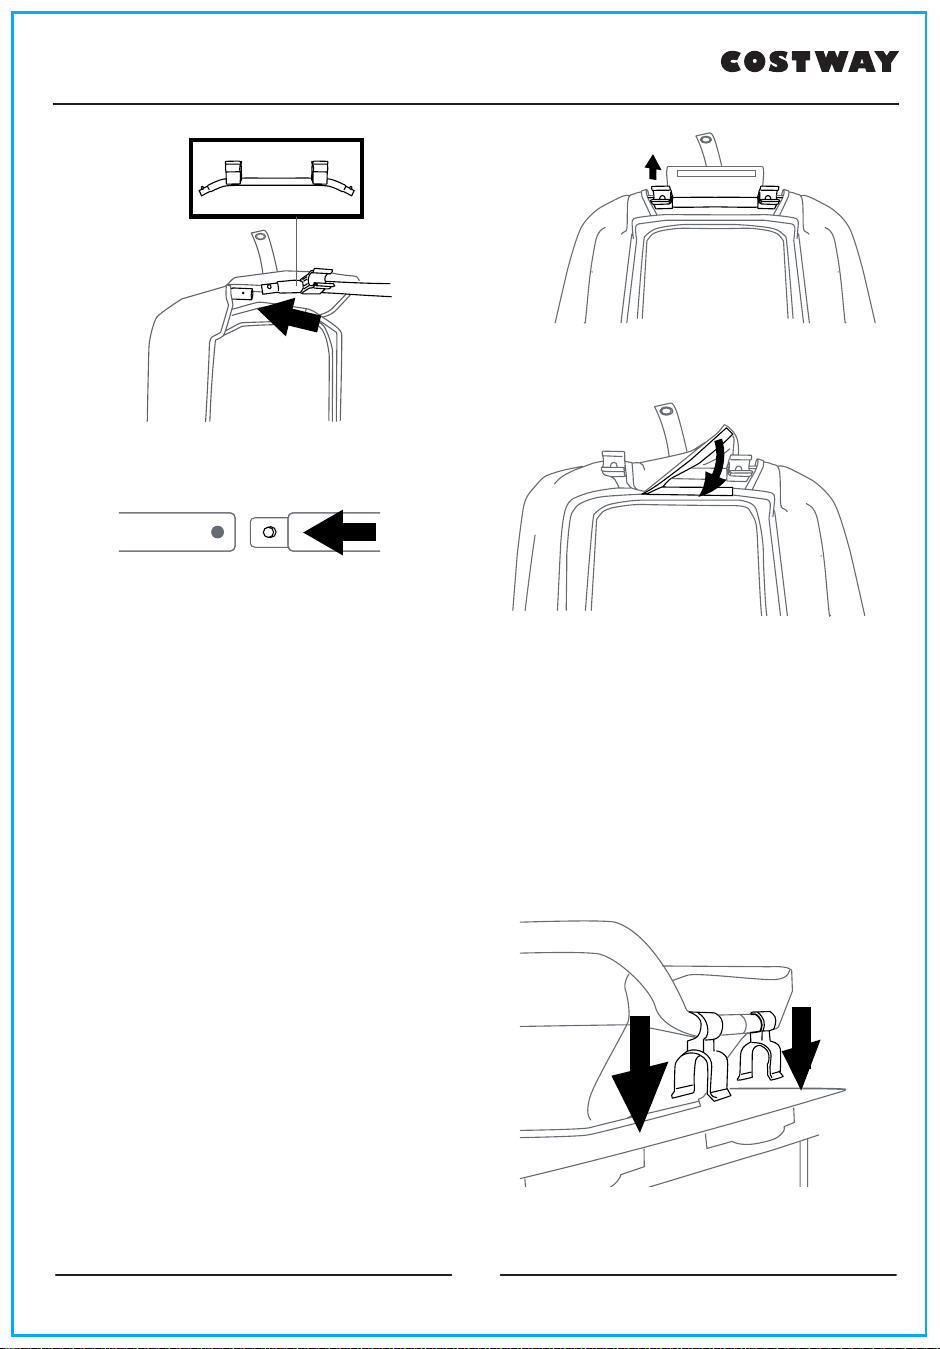
14)
surface with the back side facing up. Locate
the 2 Curved Connector Bars (Fig. 14a).
Insert the Curved Connector Bars into the
backside of the Changing Table covering
(Fig. 14b).
• Attach the Short Bars with the 2 Connectors
to the Curved Connector Bars (Fig. 14c).
Be sure the clips are faced up during this
preparation on the backside of the changing
table covering (Fig. 14d). Insert both
ends with the push pins into the Curved
Connector Bars. Ensure all pins click into
postion on all 4 connection points (Fig. 14e).
• Close the covering by using the hook and
loop fasteners on the flap. Flip the flaps over
the bars and fasten together (Fig.14f).
Fig. 14a
Fig. 14b
14
TO SECURE THE CHANGING TABLE TO THE PLAYARD
IMPORTANT! When the changing table is on the
upper position the changing table must be secured
to the playard frame by using the snap buttons
straps or fasteners provided.
Fig. 14c
Fig. 14d
Fig. 14e
Fig. 14f
15) • Locate the 4 clip fasteners on the bottom of
the changing table (Fig. 15a).
• To attach the changing table to the playard,
lower the changing table into the large
bassinet. Push down on the 4 clips to
secure it onto the large bassinet railing
(Fig. 15b). Secure the two snaps on the
strap down onto the Playard (Fig. 15c).
NOTE: DO NOT use changing table on
playard without the large bassinet and
securing the clips to playard.
Fig. 15a
15
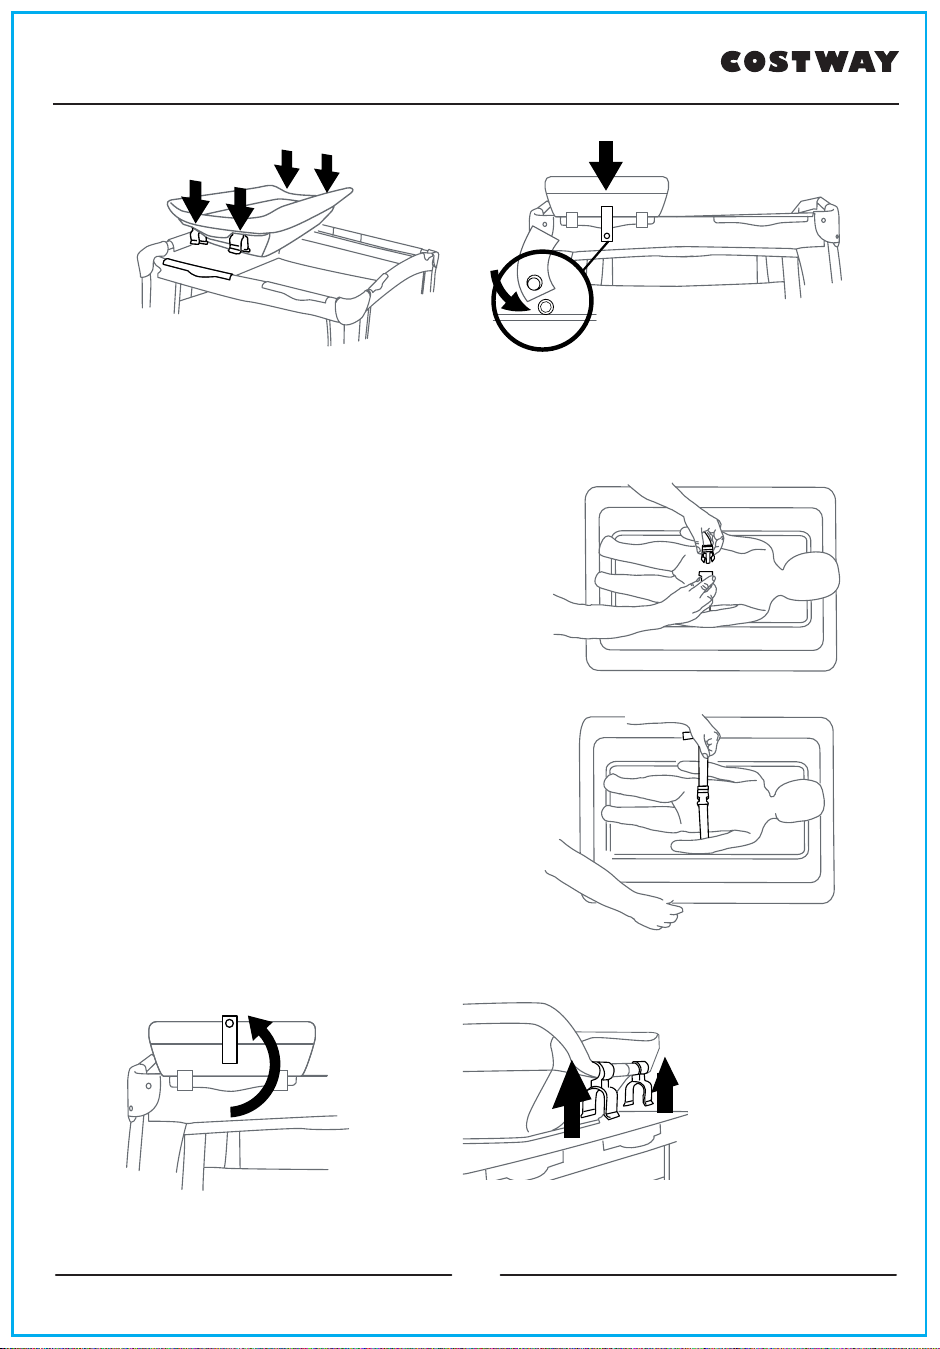
TO USE CHANGING TABLE RESTRAINT SYSTEM
16) • Place child on changing table, make sure
hand and arms are clear of the restraint.
Bring the restraint around the child’s waist
and clip the male and female ends of the
buckle together (Fig. 16a).
• Tighten strap until fits snug around child’s
waist (Fig. 16b).
DO NOT OVER TIGHTEN.
• To remove, unsnap the buckle.
ATTENTION: NEVER use changing table
if it is damaged or broken.
Fig. 16a
Fig. 16b
Fig. 15b
Fig. 15c
TO REMOVE CHANGING TABLE
17)
• Unsnap from the playard (Fig. 17a).
Locate all 4 clip/fasteners on the changing
table. Pull up on all 4 clips to release them
from the playard frame (Fig. 17b).
Fig. 17a
Fig. 17b
16
WARNING
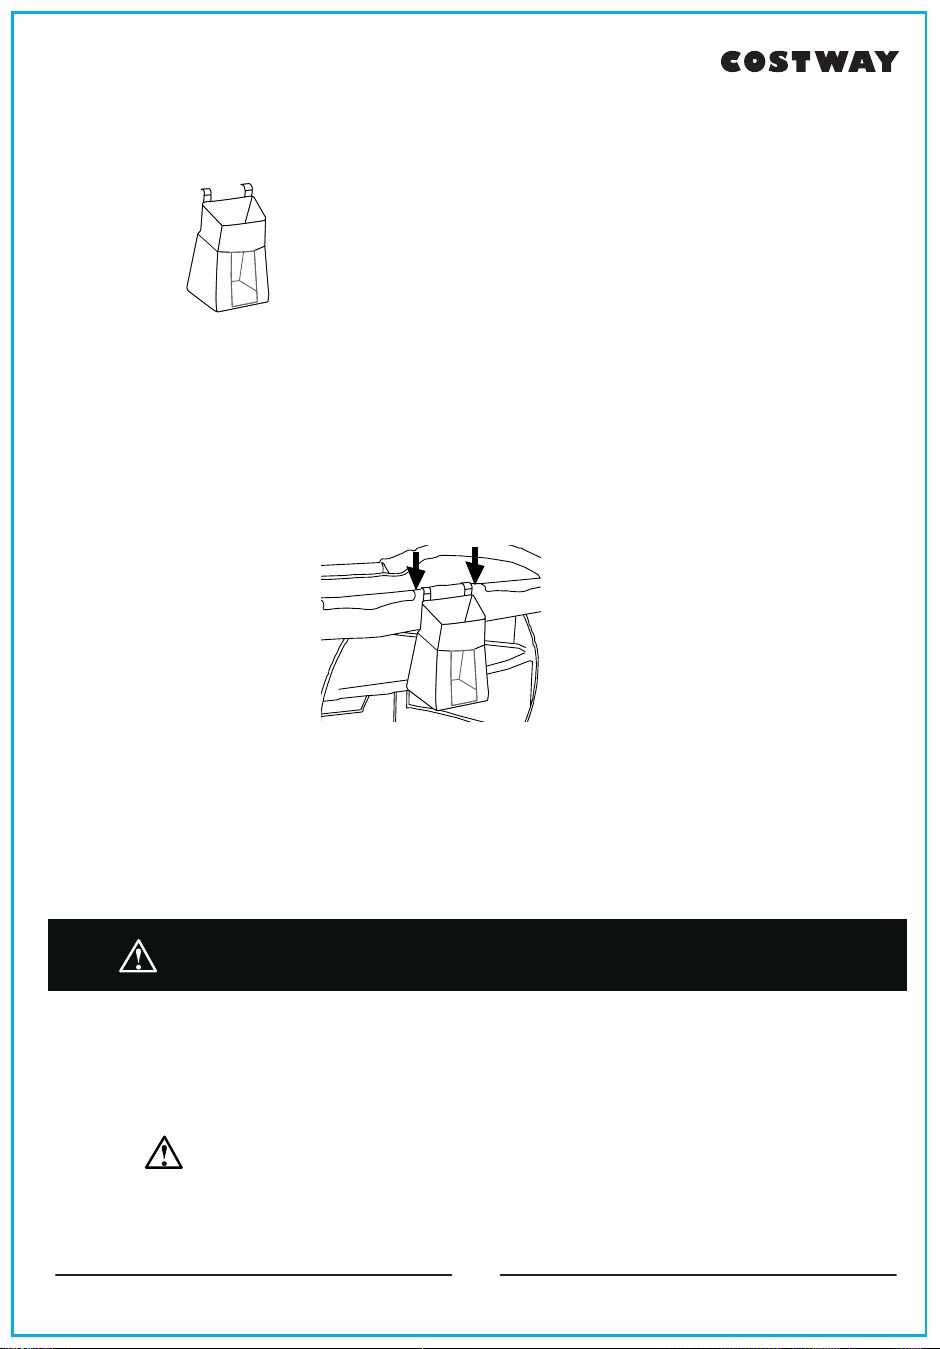
PARENT ORGANIZER ASSEMBLY
Fig. 18a
Parent Organizer
18)
•
Parent Organizer
• Connect the Parent Organizer to the Playard by sliding the two connecting clips
over an open portion of the top rail of the Playard (Fig. 18a).
NOTE: The Parent Organizer can only be installed on open sides of the Playard
ACCESSORIES
Warnings for Toy Accessories including Toybar / Mobile /
Canopy with toys:
WARNING:
• Possible entanglement injury.
• Keep out of baby’s reach.
17
where the connecting clips can easily be attached without interfering with other
features.
ASSEMBLY
• Remove Toybar/Mobile/Canopy with toys when baby
begins to push up on hands and knees. Recommended
use from birth to 5 months.
• Toys are not intended to be mouthed by the baby and
should be positioned clearly out of reach of the baby's face
and mouth.
•
ALWAYS attach all provided fasteners (strings, straps,
clamps, etc.) tightly to playard according to these
instructions. Check frequently.
• Do not add additional strings or straps to attach to any
other crib or playpen.
• The Toybar/Mobile/Canopy with toys is intended for visual
stimulation and not to be grasped by the child.
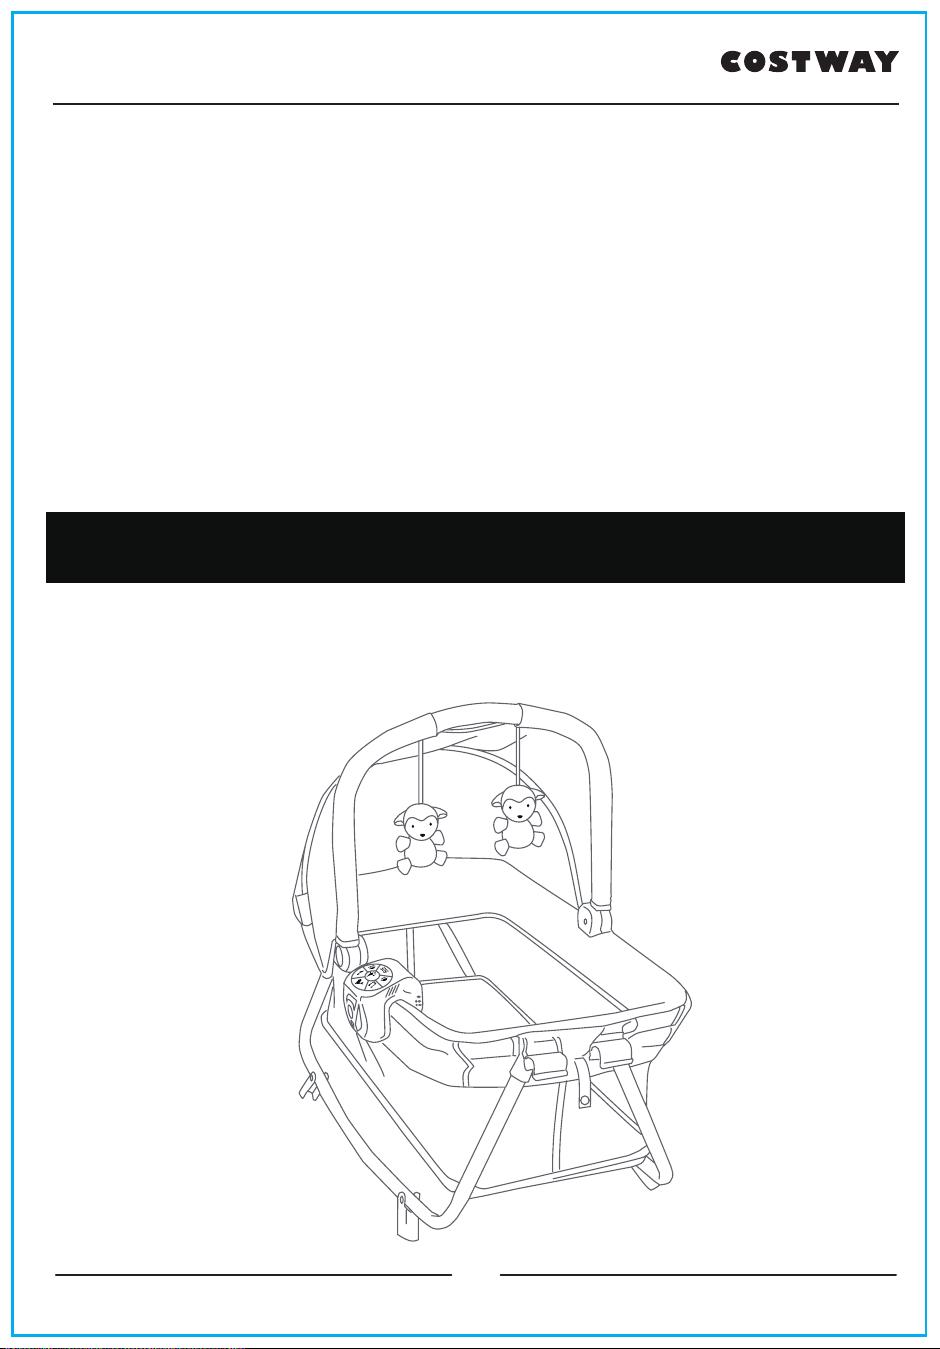
TO ASSEMBLE
PORTABLE ROCK-A-BYE BASSINET
18
WARNING
WARNING: Failure to follow these warnings
and the instructions could result in serious injury or
death.
FALL HAZARD: To prevent falls, stop
using the product when infant:
• Begins to wiggle out of position or turn over in the
product, head touches the upper edge of the product,
reached the height of 25 in. (635 mm), weight of 22
lbs.(10 kgs) (approximately 3 months of age).
• ALWAYS use restraint system if a restraint system is
provided with the product.
SUFFOCATION HAZARD
Infants have suffocated:
• In gaps between extra padding and sides of bassinet/
cradle and
• On soft bedding
Use only the pad
provided by the manufacturer.
NEVER add a pillow, comforter, or another mattress
for padding.
• When trapped between product and adjacent
surfaces.
• ONLY use ROCK-A-BYE BASSINET on playard when
it is securely attached.
• If a sheet is used with the pad, use only the one
BASSINET bassinet mattress.
• NEVER use ROCK-A-BYE BASSINET in different
Babyjoy
product.
WARNING:NEVER leave child unattended.
SUFFOCATION HAZARD: Infant
carrier can roll over on soft surfaces and suffocate
child. NEVER place carrier on beds, sofas, or other
soft surfaces.
19

WARNING
FALL HAZARD: Child’s activity can move
carrier. NEVER place carrier on counter tops, tables, or any
other elevated surface.
NEVER use this carrier as a means to transport an infant
in a motor vehicle. Infant carriers not intended for use as
infant restraint devices in motor vehicles.
• To reduce the risk of SIDS, pediatricians recommend healthy infants be placed on
their back to sleep, unless otherwise advised by your physician.
• FALL HAZARD - Always check that the Rock-A-Bye is securely locked on the
base/stand by pulling upwards on the Rock-A-Bye bed.
• The playard, including side rails, must be fully erected prior to use. MAKE SURE
EACH LATCH IS SECURE.
• Strings can cause strangulation! NEVER place items with a string around a child's
NEVER suspend strings over Rock-
A-Bye bassinet or attach strings to toys.
• WARNING: Possible entanglement injury with toys attached. Keep out of baby’s
reach.
• Do not use Rock-A-Bye bassinet or place on playard when baby begins to push
up on hands and knees.
• NEVER place product near a window where cords from blinds or drapes can
strangle a child.
• Always provide the supervision necessary for the continued safety of your child.
NEVER leave child unattended.
• NEVER
ers not sold
and intended for that purpose. They can cause suffocation.
• Use Rock-A-Bye bassinet with only one child at a time.
• DO NOT use large bassinet when using Portable Rock-A-Bye
Bassinet.
• NEVER place a child under the Rock-A-Bye bassinet.
• NEVER store the Rock-A-Bye bassinet in the playard while in use.
• The large bassinet must be fully assembled and installed before using.
• To help prevent heat build-up inside the playard and to avoid overheating your
child, when using the Rock-A-Bye Bassinet NEVER use an outdoor canopy.
• NEVER leave Portable Rock-A-Bye Bassinet in place when child is in the playard.
Only one child can use the Playard at any time.
• ALWAYS ensure that the playard, changing table, and Portable Rock-A-Bye
Bassinet are safe by checking regularly, before placing the child in it, that every
part is properly and securely in place.
• NEVER use this product if there are any loose or missing fasteners, loose joints,
broken parts, or torn mesh/fabric. Check before assembly and periodically during
use.
20
ASSEMBLY
ATTENTION: Playard and large bassinet must be fully assembled and securely
locked before installing or using the Portable Rock-a-Bye bassinet feature. (See To
Assemble Playard and large bassinet sections).
Rock-A-Bye Bassinet assembly will require the following parts:
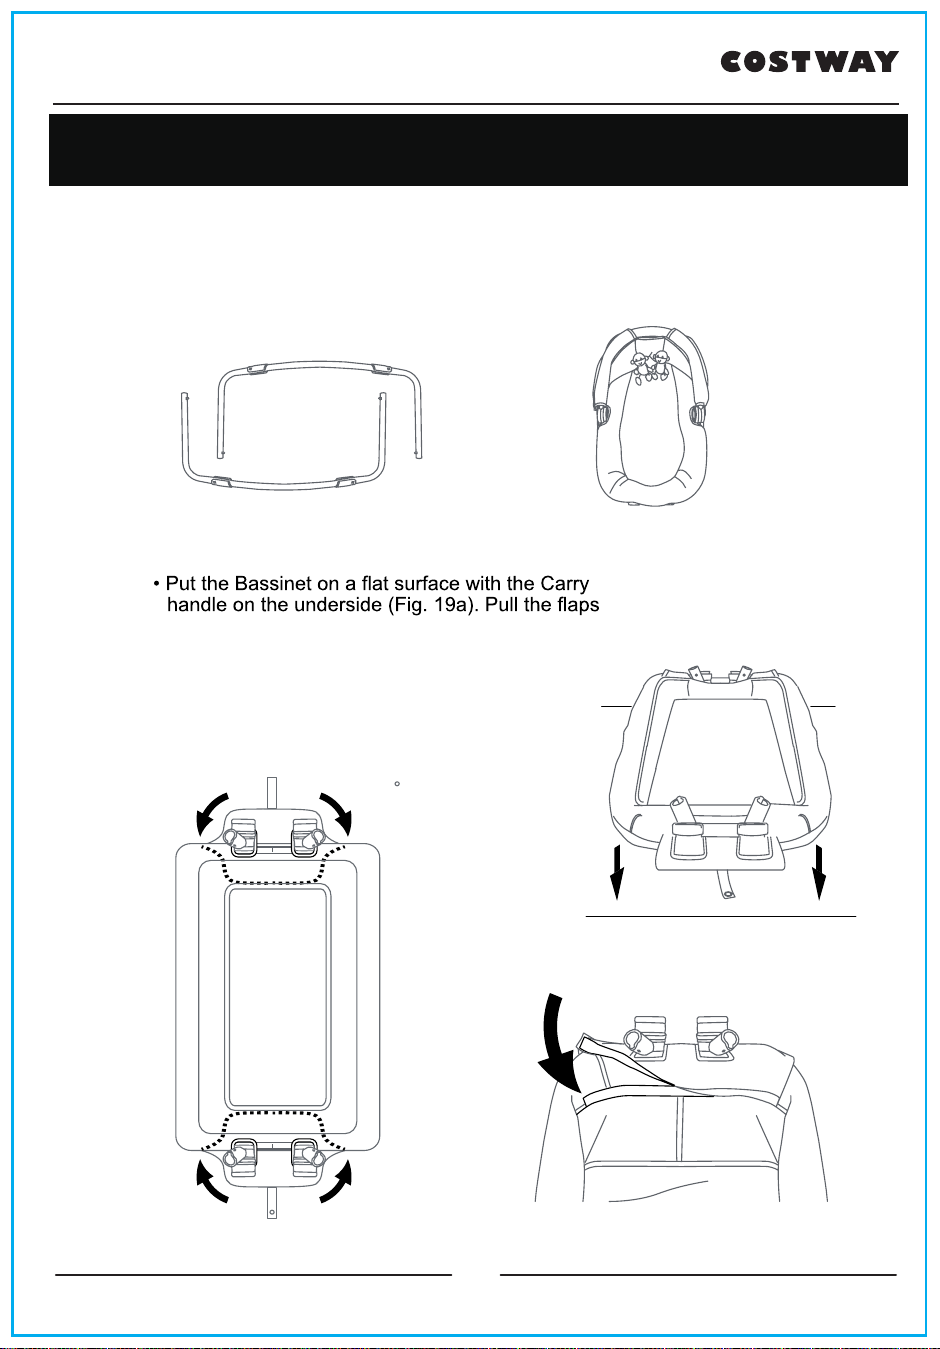
(2) Rock-a-Bye bassinet Bars Portable Rock-a-Bye bassinet
19)
of the fabric over the Bar housing as shown in
the diagram (Fig. 19b).
NOTE: Ensure that the fabric opening wraps
completely around the Bar housing.
• Use the hook and loop fasteners to close the
flap (Fig. 19c). Repeat on the opposite side.
Fig. 19a
Fig. 19b
Fig. 19c
21
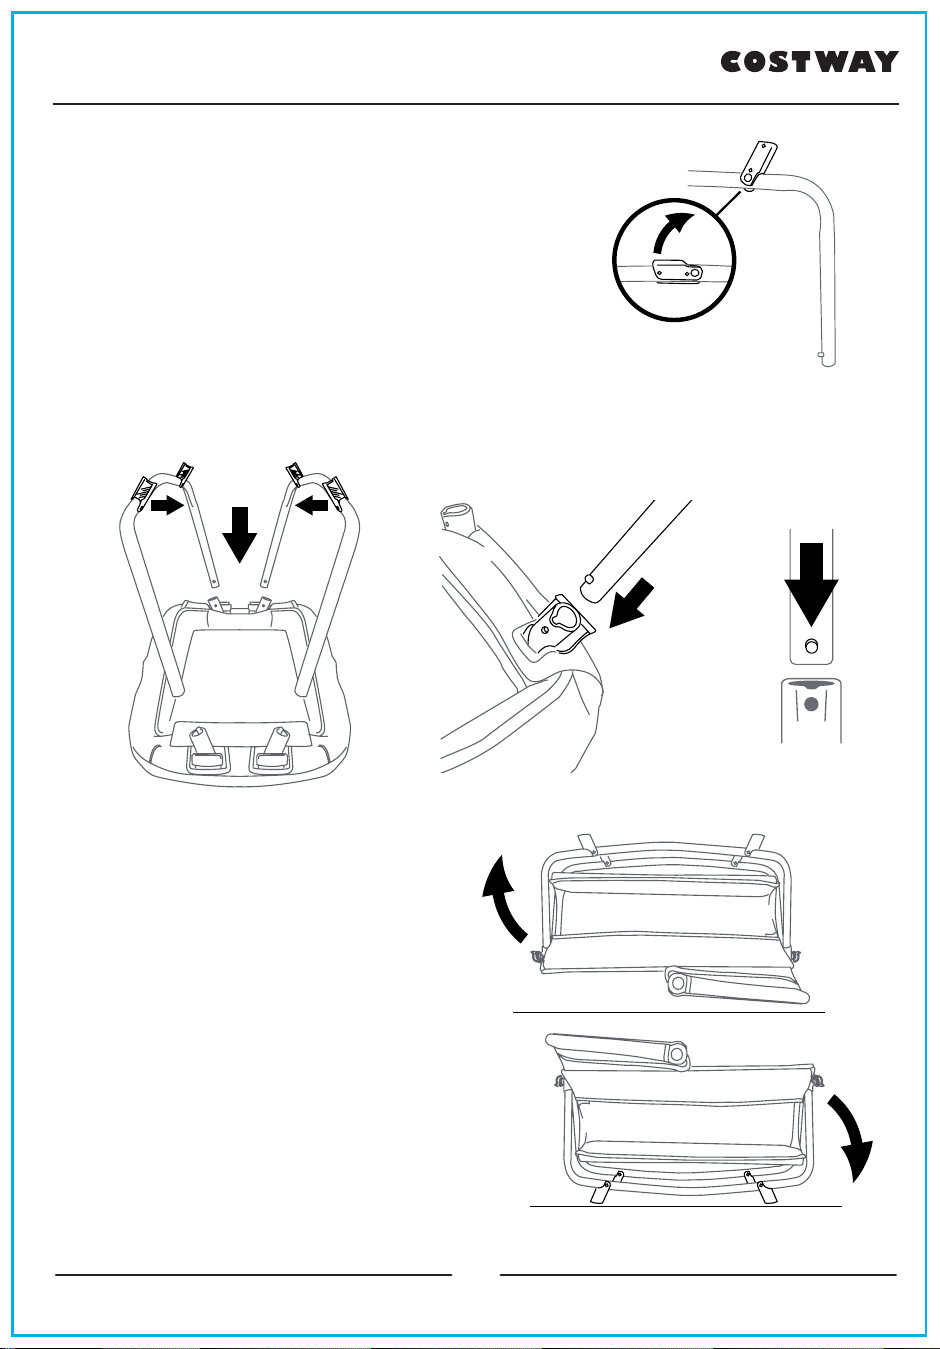
20) • To insert the Rock-A-Bye Bassinet Bars:
Open the 4 foot extensions on both Bars
(Fig. 20a). Before inserting them into the
housing check that the foot extensions all
point inward as seen in the diagram
(Fig. 20b).
• Insert the Bars into the housing by aligning
the push pin with the hole (Fig. 20c). Ensure
that the pins click into position (Fig. 20d).
NOTE: Look closely at the pin hole to be
sure the push pin has completely come
out of the hole. Repeat for all 4 connection
points.
Fig. 20a
• Rotate the entire Rock-A-Bye and
stand it on the foot extensions
(Fig. 20e).
CANOPY / CARRY HANDLE
Fig. 20c
Fig. 20d
Fig. 20e
Fig. 20b
22
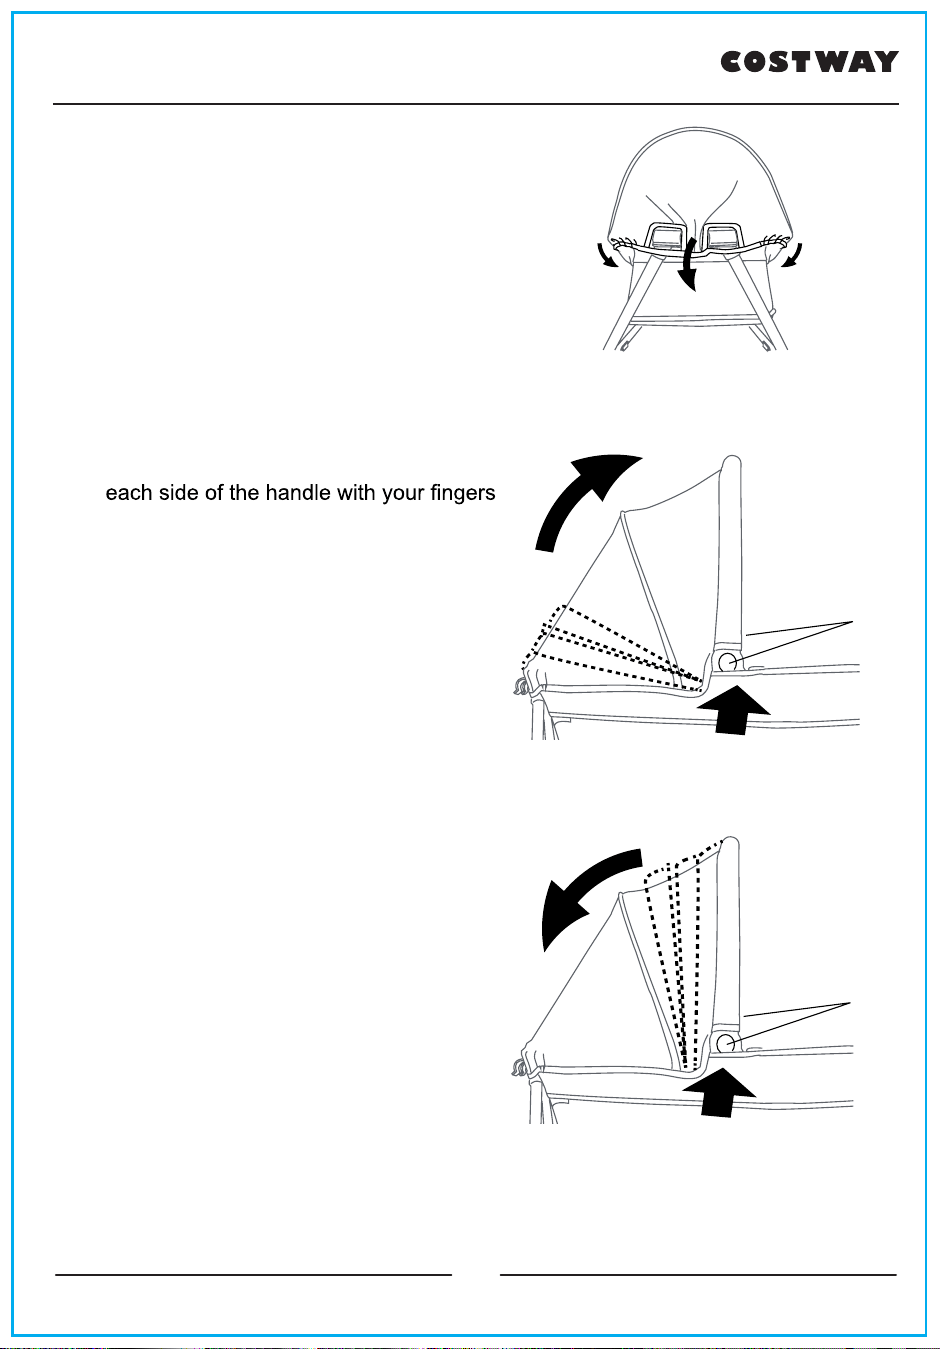
21) • The rear of the canopy has 2 fabric
openings. Pull both opening over the 2
clips at the rear of the bassinet frame.
Ensure to wrap the elastic completely
over the bassinet frame (Fig. 21a).
NOTE: Always complete the canopy
before attaching the bassinet to the
playard frame.
Fig. 21a
• To raise the handle, push both buttons on
while pulling it forward (Fig. 21b).
• To lower handle, push both buttons on
each side of the handle with your fingers
while pushing the handle backwards (Fig.
21c).
Fig. 21b
Fig. 21c
push
push
Fig. 21c
23
TO SECURE THE PORTABLE
ROCK-A-BYE BASSINET TO THE PLAYARD
IMPORTANT! When the Rock-A-Bye Bassinet is on the
upper position, it must be secured to the playard frame by
using the snap buttons, straps, or fasteners provided.
ROCKER FUNCTION
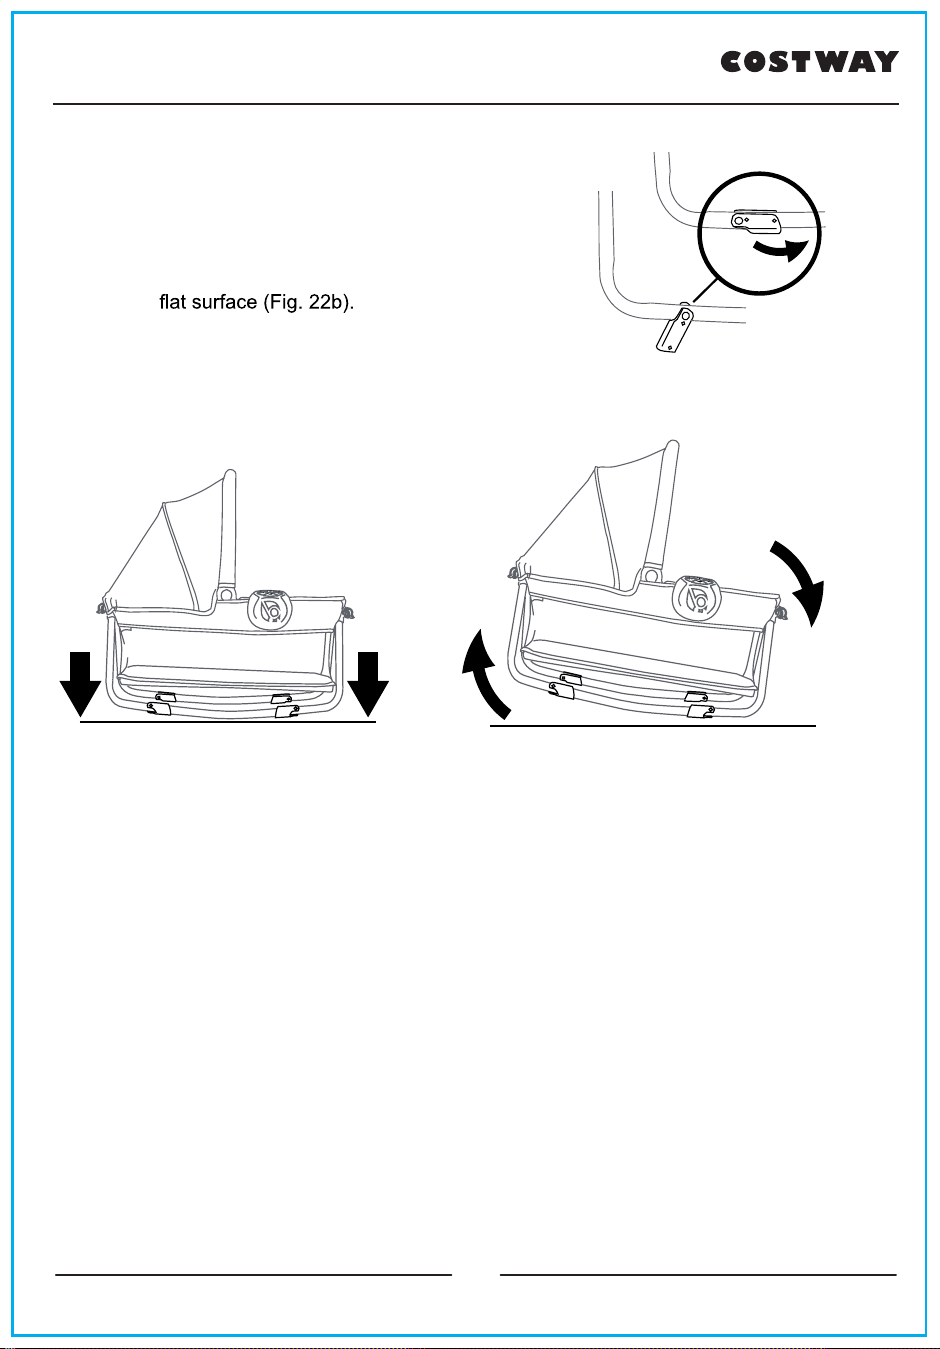
22) • Turn the bassinet over and close the 4
peg legs (Fig. 22a). Set Bassinet on a
NOTE: Rocking requires adult
assistance and supervision, this is not an
automatic rocking cradle (Fig. 22c).
NEVER use Bassinet on raised surface
such as Table, Bed or Chair. A fall can
occur.
Fig. 22a
Fig. 22b
Fig. 22c
Manually Rock The Bassinet
24
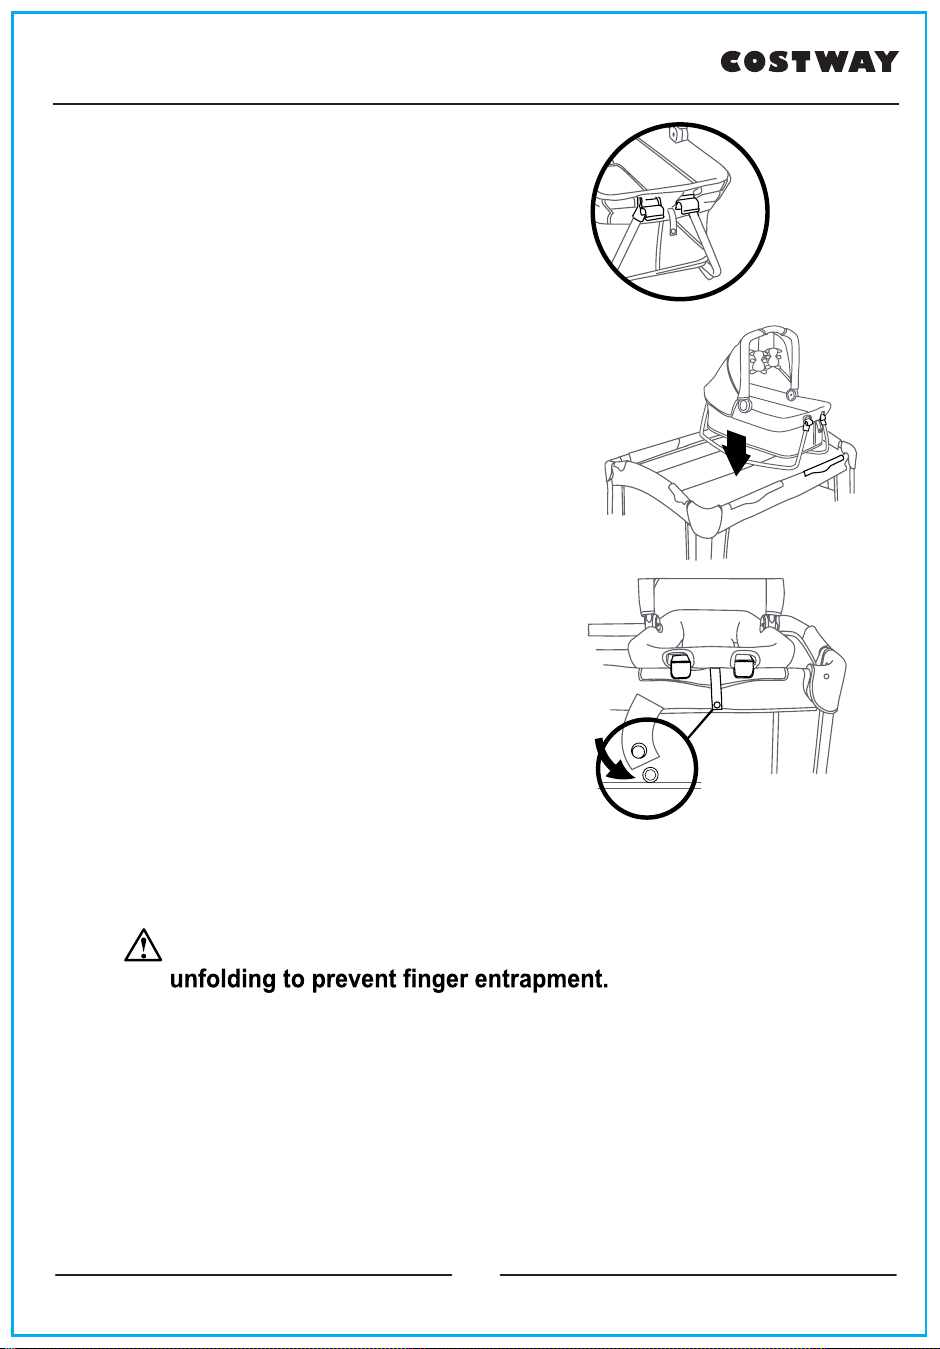
23) • Locate the 4 clip fasteners on the bottom of
the Rock-A-Bye Bassinet (Fig. 23a).
• To attach the Rock-A-Bye Bassinet to the
Playard, lower it into the large bassinet.
Push down on the 4 clips and secure it onto
the large bassinet railing (Fig. 23b). Secure
the two snaps on the strap down onto the
Playard (Fig. 23c).
ATTENTION: Playard and large bassinet
must be fully assembled and securely locked
before installing or using the Portable Rock-
a-Bye bassinet feature. (See To Assemble
Playard and large bassinet sections.)
• Reverse the step above to remove the Rock-A-
Bye Bassinet.
Fig. 23b
Fig. 23c
Fig. 23a
TO FOLD REMOVABLE ROCK-A-BYE BASSINET
WARNING:
Care must be taken when folding and
CAUTION:
Do not allow children near while folding
and unfolding.
25
OPERATION
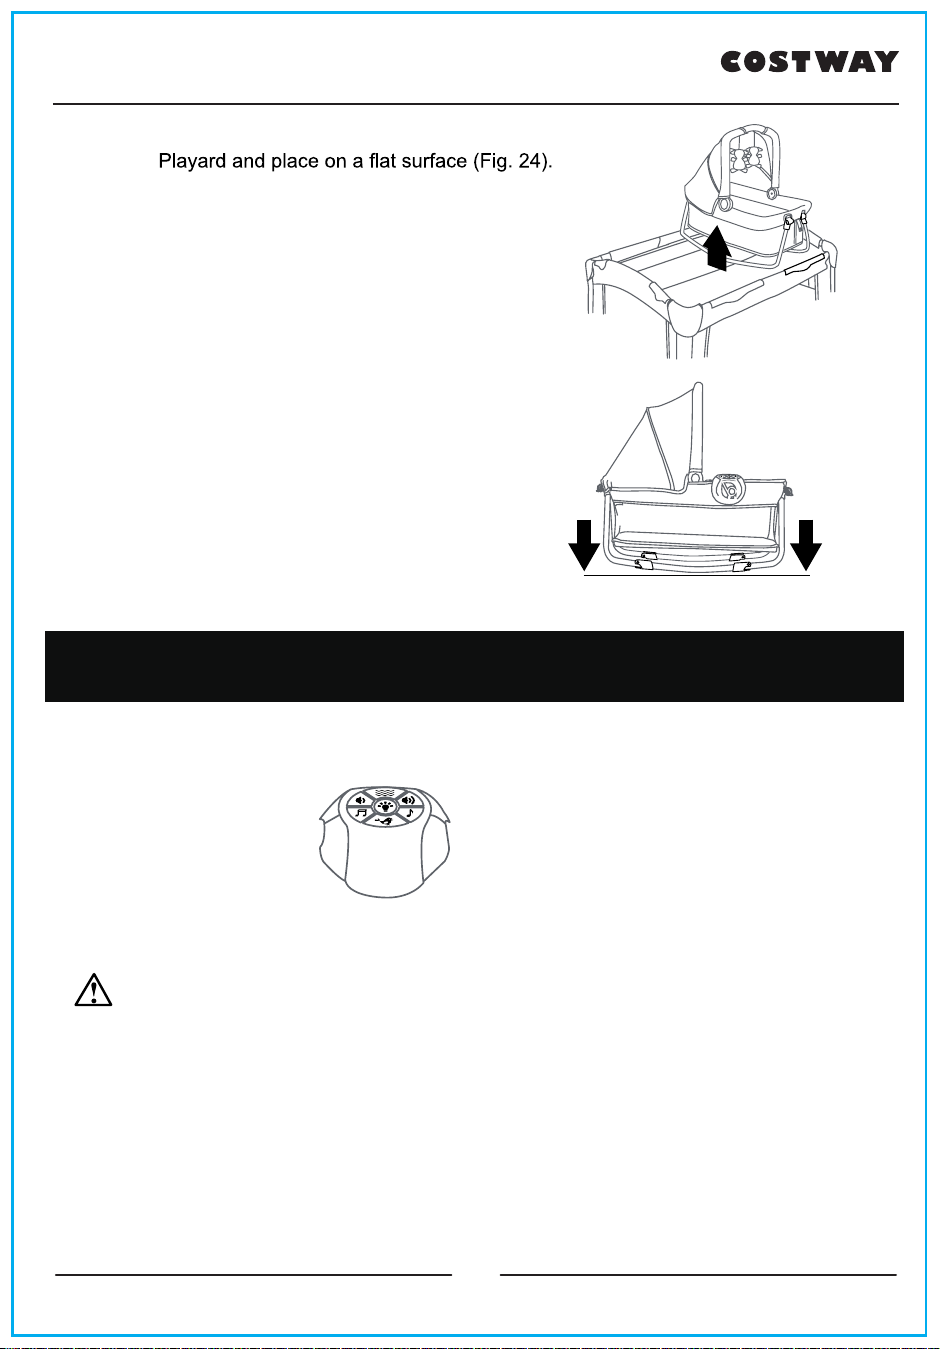
24) • Remove the Rock-A-Bye Bassinet from the
• To Fold Reverse the previous section: TO
ASSEMBLE Portable Rock-A-Bye Bassinet
MUSIC CENTER
*With Vibration
WARNING:
Keep batteries out of children's
reach. Old and new batteries should not be mixed.
Alkaline, standard carbon-zinc, and rechargeable nickel-
cadium batteries should not be mixed. Remove batteries
before storing music center for a long period of time.
Fig. 24
26
.
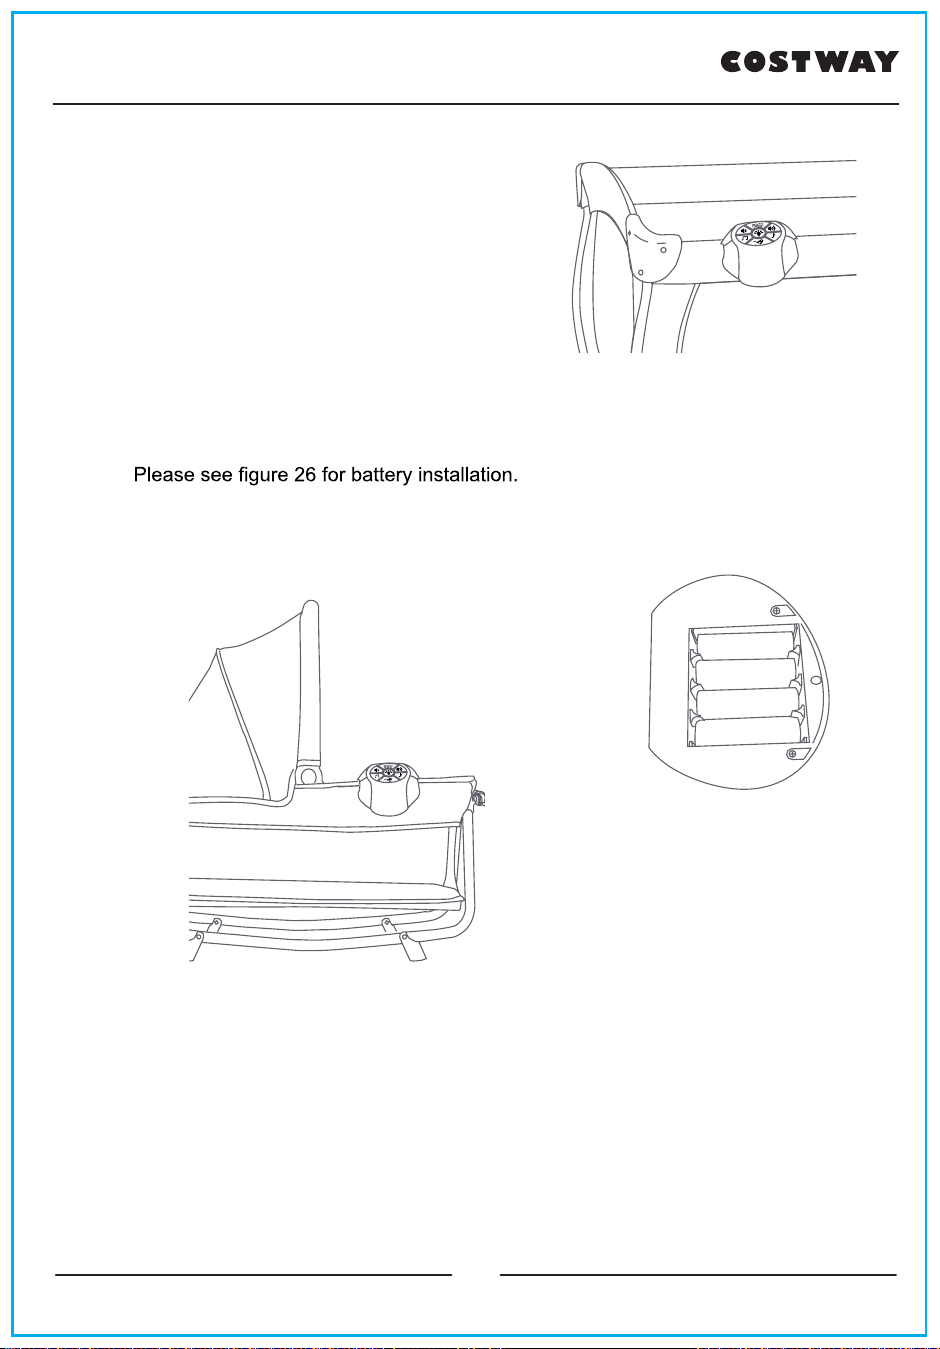
25) • The Music Center is designed to be
attached to the playard’s/bassinet’s long
rail (Fig 25).
Music Operation
26) • The Music Center requires 4 AA batteries.
Unscrew the battery door screws and
pull outward on the battery door. Install
batteries as shown. Re-install battery door
and secure with screws.
Fig. 25
_
+
_
_
+
+
_
+
Fig. 26
Fig. 25
27
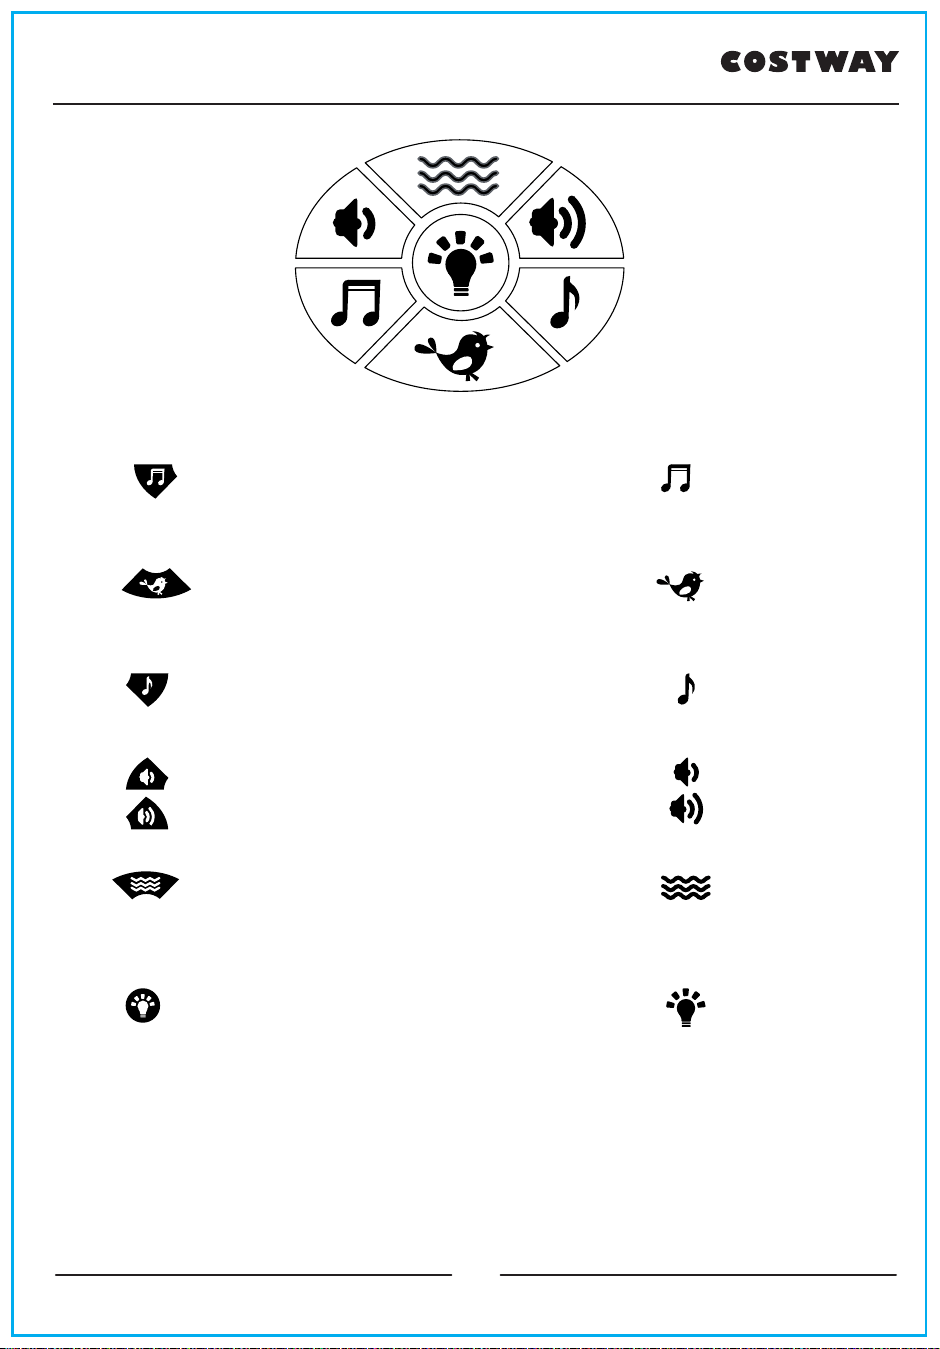
To listen to MUSIC, press the MUSIC button.
Press the button to change the song.
To listen to NATURE sounds, press the
NATURE button. Press the button to change
the sound.
MUSIC
NATURE SOUNDS
To listen to SLEEP music, press the SLEEP
button. Press the button to change the song.
These 2 buttons control the unit’s volume.
VIBRATION: To use the VIBRATION, press down
VIBRATION button once to activate the speed,
press again for faster speed. Press it again to
reduce the speed.
NIGHT LIGHT: To use the night light, press the
NIGHT LIGHT button.
VOLUME CONTROL
NIGHT LIGHT
VIBRATION
SLEEP MUSIC
28
OTHER
FCC Statement
This device complies with Part 15 of the FCC rules. Operation is subject to the following two
conditions:
1 this device may not cause harmful interference, and
2 this device must accept any interference received, including interference that may cause
undesired operation.
WARNING: Changes or modi cations to this
unit not expressly approved by the party responsible
for compliance could void the user’s authority to
operate the equipment.
NOTE: This equipment has been tested and found to comply with the limits for a Class
B digital device, pursuant to Part 15 of the FCC Rules. These limits are designed to
provide reasonable protection against harmful interference in a residential installation. This
equipment generates, uses and can radiate radio frequency energy and, if not installed
and used in accordance with the instructions, may cause harmful interference to radio
communications.
However, there is no guarantee that interference will not occur in a particular installation. If
this equipment does cause harmful interference to radio or television reception, which can
be determined by turning the equipment off and on, the user is encouraged to try to correct
the interference by one or more of the following measures:
• Reorient or relocate the receiving antenna.
• Increase the separation between the equipment and receiver.
• Connect the equipment into an outlet on a circuit different from that to which the receiver
is connected.
• Consult the dealer or an experienced radio/TV technician for help.
29
Welcome to visit our website and purchase our quality products!
Reward Points
Exclusive Customer Service
Personalized Recommenda�ons
Permanent Shopping Cart
Order History
We would like to extend our hear�elt thanks to
all of our customers for taking
�me to assemble
this product and giving us valuable feedbacks.
With your inspiring rating, COSTWAY will be more consistent to offer you
EASY SHOPPING EXPERIENCE, GOOD PRODUCTS and EFFICIENT SERVICE!
US office: Fontana, California
UK office: Ipswich
30
THIS INSTRUCTION BOOKLET CONTAINS IMPORTANT SAFETY INFORMATION. PLEASE READ AND KEEP FOR FUTURE REFERENCE.
Follow Costway
Please give us a chance to make it right and do better!
Contact our friendly customer service department for help first.
Replacements for missing or damaged parts will be shipped ASAP!
Baby Playard
BB0497