

Model No. DG100.V3
Thank you for purchasing a Dellonda product. Manufactured to a high standard, this product will,
if used according to these instructions, and properly maintained, give you years of trouble free performance.
www.dellonda.co.uk
127cc 16”/41cm Hand-Propelled Petrol Lawnmower - 4-Stroke
DG100.V3 Issue:1 03/07/2024
Important Information
Please read these instructions carefully. Note the safe operational requirements, warnings & cautions. Use the product correctly and with care
for the purpose for which it is intended. Failure to do so may cause damage and/or personal injury and will invalidate the warranty. Keep these
instructions safe for future use.
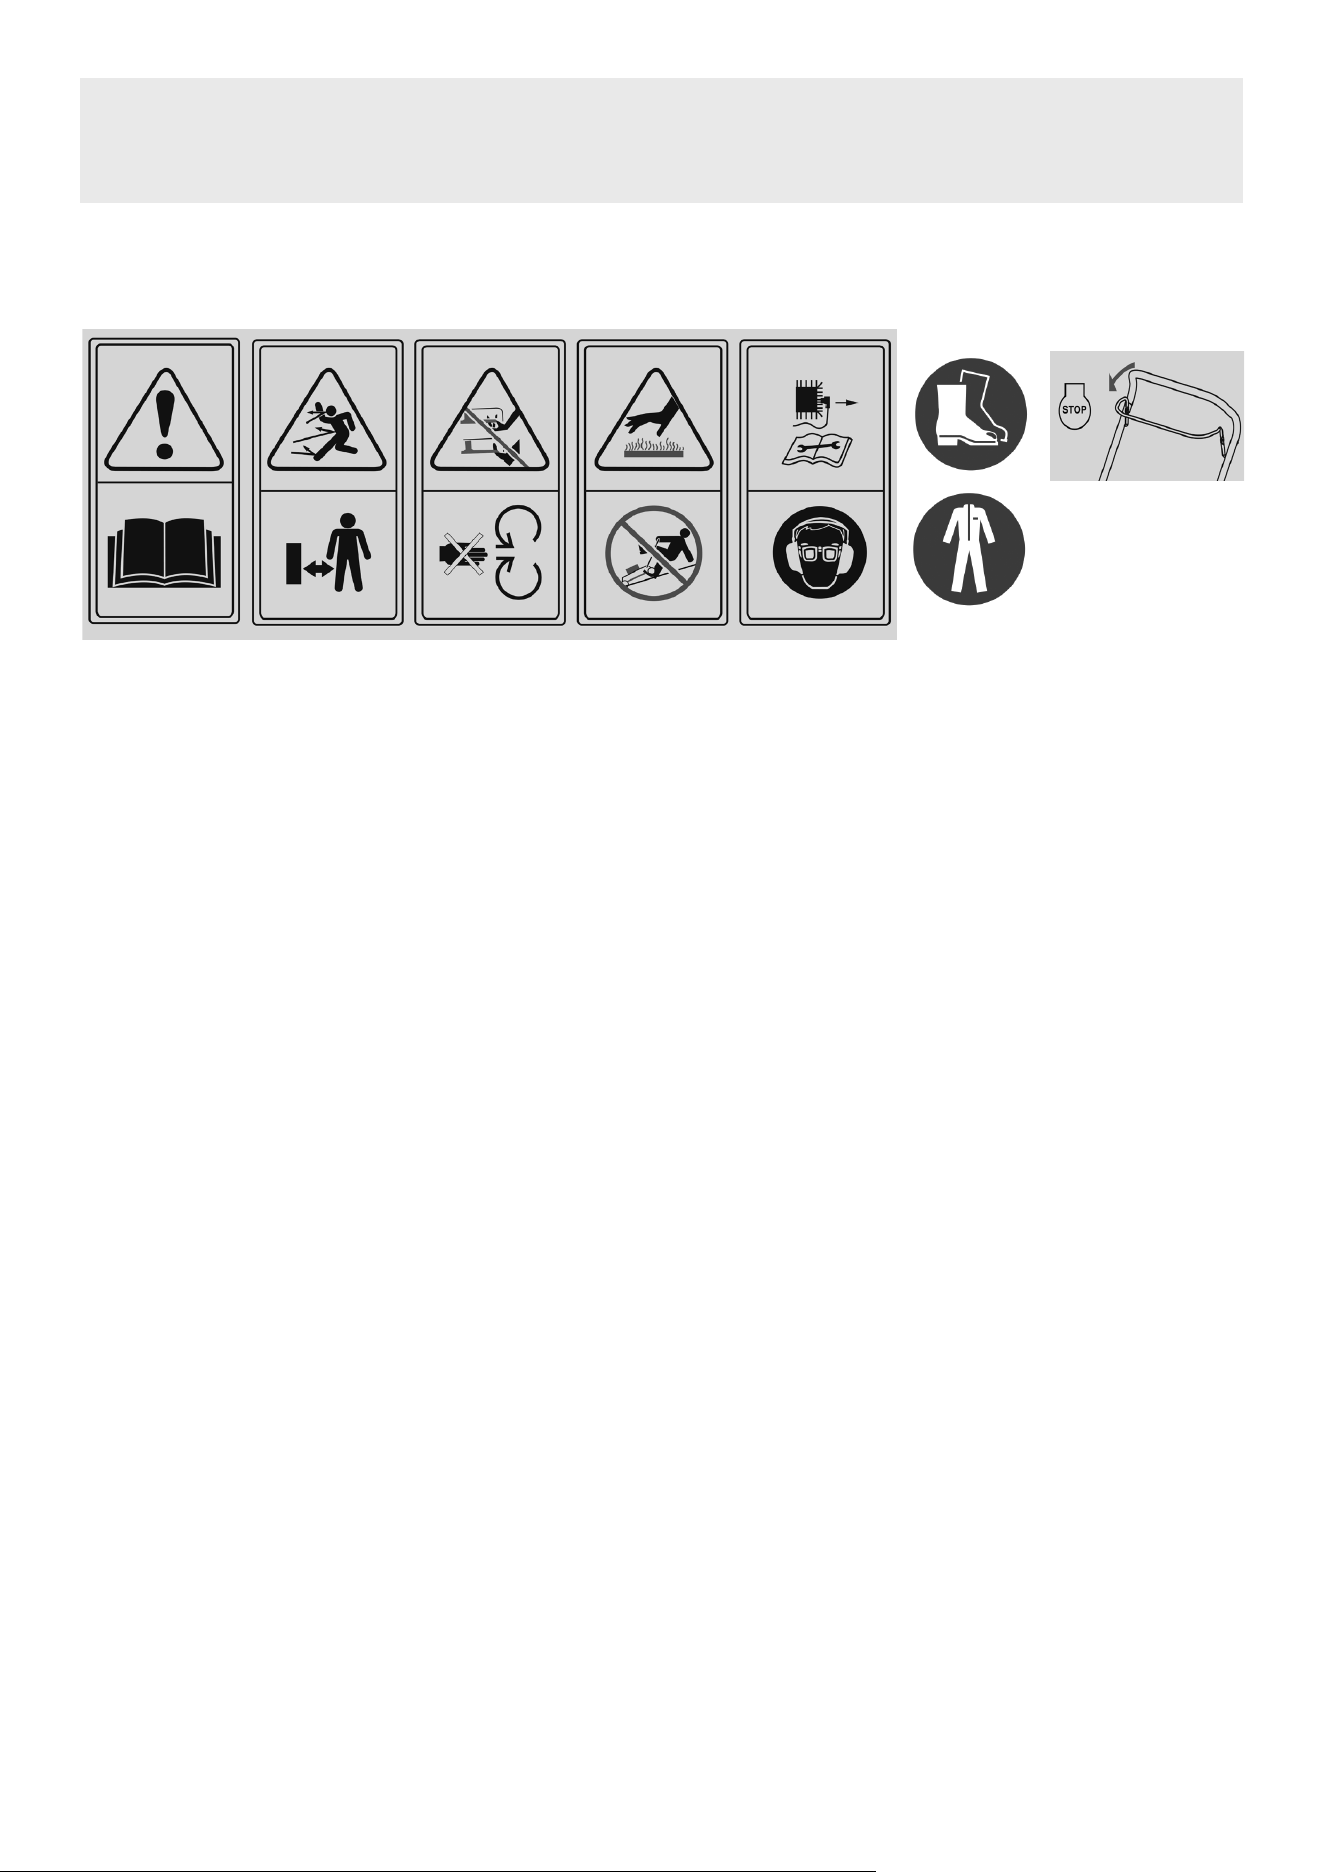
Wear
Safety
Footwear
Warning!
Live electrical
parts
Read manual
before use
Warning! Keep
bystanders away
Warning!
Keep away from
moving parts.
Warning!
DO NOT operate
on slopes
Wear ear
protection
Wear protective
clothing
Start/Stop Lever
Warning!
Ejected objects
Warning!
Keep hands and
feet away from
the blades
Warning!
Hot surfaces
Remove spark
plug connection
before
performing
maintenance
Safety Instructions
9 Read and fully understand instruction manual before using the lawnmower. Retain manual for future use and future users.
9 Users must be fully trained before using lawnmower.
WARNING! This product is used exclusively for mowing grass. DO NOT use it for any other purposes than those intended. Otherwise there
is a risk of damaging it or an injury.
9 Never allow children or persons who are not acquainted with the contents of this user’s manual to work with the machine.
9 The person operating the lawnmower is responsible for the safety of persons in the work area.
8 DO NOT operate the lawnmower in the near vicinity of other people, children or freely roaming animals.
WARNING! Always use PPE and especially ear protection as prolonged exposure to loud noises can damage hearing.
9 Before starting mowing, check the terrain where the lawnmower will be used and remove stones, wires, sticks, splinters, bones and other
foreign objects, which could become caught in it or deected or cause injuries.
WARNING! keep hands and feet away from moving blades. Be aware of the danger of being drawn in by moving parts.
WARNING! Be aware of live electrical parts and hot surfaces.
9 All nuts, pins and bolts must be properly tightened so that the machine is in a safe and operational condition.
8 DO NOT use the lawnmower without the grass catcher or protective cover.
8 DO NOT use the lawnmower with loose mowing blades. Always check in advance that all respective bolts are securely tightened. Blunt
blades must be sharpened evenly. Damaged blades must be replaced.
9 When working with the lawnmower wear long trousers and solid footwear.
9 Suitable/protective clothing (long trousers) and appropriate PPE must be worn: ear protection, safety, slip resistant foot protection.
9 DO NOT use whilst tired, ill or under the inuence of alcohol or other drugs.
8 DO NOT use indoors or an unventilated area due to danger from exhaust fumes. Never start the lawnmower in enclosed or poorly
ventilated areas where fumes could accumulate. Emissions from the engine contain carbon monoxide, which is life threatening.
9 ALWAYS inspect and risk assess the area to be worked prior to mowing. Review for items such as foreign objects (stones, toys, wires
sticks, bones), slope, ditches, drop-offs.
9 Proceed especially carefully when mowing in elevated terrain (on a slope). Be aware of the risk of overturning on too steep a slope.
8 DO NOT use where the gradient is more than 20
o
or motor seizure may occur. Always ‘travel’ along slope contours not up and down
slopes.
9 ALWAYS inspect the unit prior to use for loose ttings, fatigue and damage.
8 DO NOT lift the rear part of the grass ejection chute, cutting deck or the rear grass ejection chute while the engine is running.
9 Never modify the engine’s speed setting.
9 Never transport the lawnmower while its engine is running.
9 Stop the engine and disconnect the spark plug cap in the following cases:
- when performing any task whatsoever under the mowing deck or in the rear grass ejection chute.
- when performing maintenance, repairs or inspecting the machine.
- before carrying, lifting or transporting the lawnmower.
- when you leave the lawnmower without supervision or you are getting ready to adjust the mowing height.
- before removing and emptying the grass catcher.
- when an impact with a foreign object occurs, stop the engine and carefully inspect to ensure that there is no damage. In the event
of damage, take the lawnmower to a specialized service centre for repairs.
▲ DANGER! The mowing blade continues to rotate for several seconds after the engine is turned off.
9 If the lawnmower is vibrating abnormally (immediately identify and remedy the cause of the vibration).
9 For the purpose of ensuring safe operation, regularly check that the pins, bolts and nuts on the lawnmower are securely tightened.
9 Store fuel in a suitable container.
9 Only add fuel in an open and well ventilated location. When handling fuel, DO NOT smoke or use a mobile phone.
9 Only add fuel when the engine is turned off and has cooled. Never open the fuel tank or add fuel if the engine is hot or if it is running.
8 If fuel is spilled, DO NOT start the engine. Take the lawnmower away from the location where the fuel was spilled and take care to avoid
possible ignition. Continue with work only after the spilled fuel has evaporated and the fuel fumes have dissipated.
9 After adding fuel, securely tighten the fuel tank cap and the cap on the fuel canister.
9 Check oil level before rst and each use.
9 Only use the lawnmower when there is good visibility (daylight or good articial light.)
8 DO NOT use the mower without either the grass bag or deector tted.
8 DO NOT use the mower if there is a risk of lightning.
8 DO NOT use in the rain.
8 DO NOT leave the mower running without supervision.
9 Allow the unit to cool down completely before moving or storing.
9 Before carrying out any maintenance or adjustments, turn off the engine and disconnect the spark plug. Ensure all moving parts have
come to a complete standstill and cannot start again unexpectedly.
9 Use genuine replacement parts only.
9 Check for and replace worn or damaged parts using only genuine and approved parts.
9 Keep the lawnmower in good operating condition and perform regular maintenance. Keep lawnmower clean.
8 DO NOT modify the lawnmower in any way. DO NOT tamper with or modify safety features in any way.
• NOTE: This appliance can be used by children aged from 8 years and above and persons with reduced physical, sensory or mental capabilities
or lack of experience and knowledge if they have been given supervision or instruction concerning use of the appliance in a safe way and
understand the hazards involved. Children shall not play with the appliance. Cleaning and user maintenance shall not be made by children without
supervision.
Assembling the handle
• Locate the two lower handle arms onto the peg protruding from the mounting brackets (g.1).
• To set the required handle angle, determine which of the two hole options will provide the angle desired.
• Make sure the start/Stop cable is not wrapped around the handle and that it has not been kinked before beginning to hand tighten the connection
knobs.
• Locate the start cable end ferrule into the hole in the start handle.
• Align the holes in the handle with the determined holes and insert coach bolts from the inside surface of the bracket.
• Thread a clamp lever onto the protruding coach bolt and tighten down to x the handle in position. Repeat on both arms.
• Carefully align the upper handle xing holes to the xing holes in the lower arms, insert a coach bolt from inside surface of the handle.
• Thread a clamp lever onto the protruding coach bolts and tighten down x the upper handle in position. Repeat on both sides.
• Place the cable guide over the cable and clip it to the lower handle arm on the opposite side to the starting cable to avoid snagging of the start
cable when used.
Assembling the grass box
• Thread collection bag onto the metal frame.
• Press the plastic clips on the collection bag to the wire frame.
Preparation
• OIL LEVEL - NOTE: THE UNIT IS SUPPLIED WITHOUT ENGINE OIL.
• WARNING! Running an engine with low oil level will cause engine damage.
• Remove the oil ller cap. Use any good SAE30 or equivalent oil. Approximately 350ml of oil will be required on rst lling. Add oil slowly and
constantly check the dipstick until the correct level is achieved. Maximum oil volume is 400 ml. Wipe the dipstick clean each time to ensure an
accurate reading.
• Markings on the dipstick indicate maximum and minimum oil levels.
• DO NOT OVERFILL the oil tank, otherwise a large amount of smoke will come out of the exhaust when the lawnmower is started up.
• IMPORTANT INFORMATION: Check the oil level before every use of the lawnmower whilst on a level surface. Add oil if necessary. Add oil up to
the MAX level mark on the oil dipstick.
• IMPORTANT INFORMATION: Replace the oil after the rst 5 hours of operation and subsequently after every 25 hours of operation.
• ADD FUEL. DO NOT add fuel with the engine running or while the machine is hot.
• NOTE: Fuel tank capacity is 1.0L.
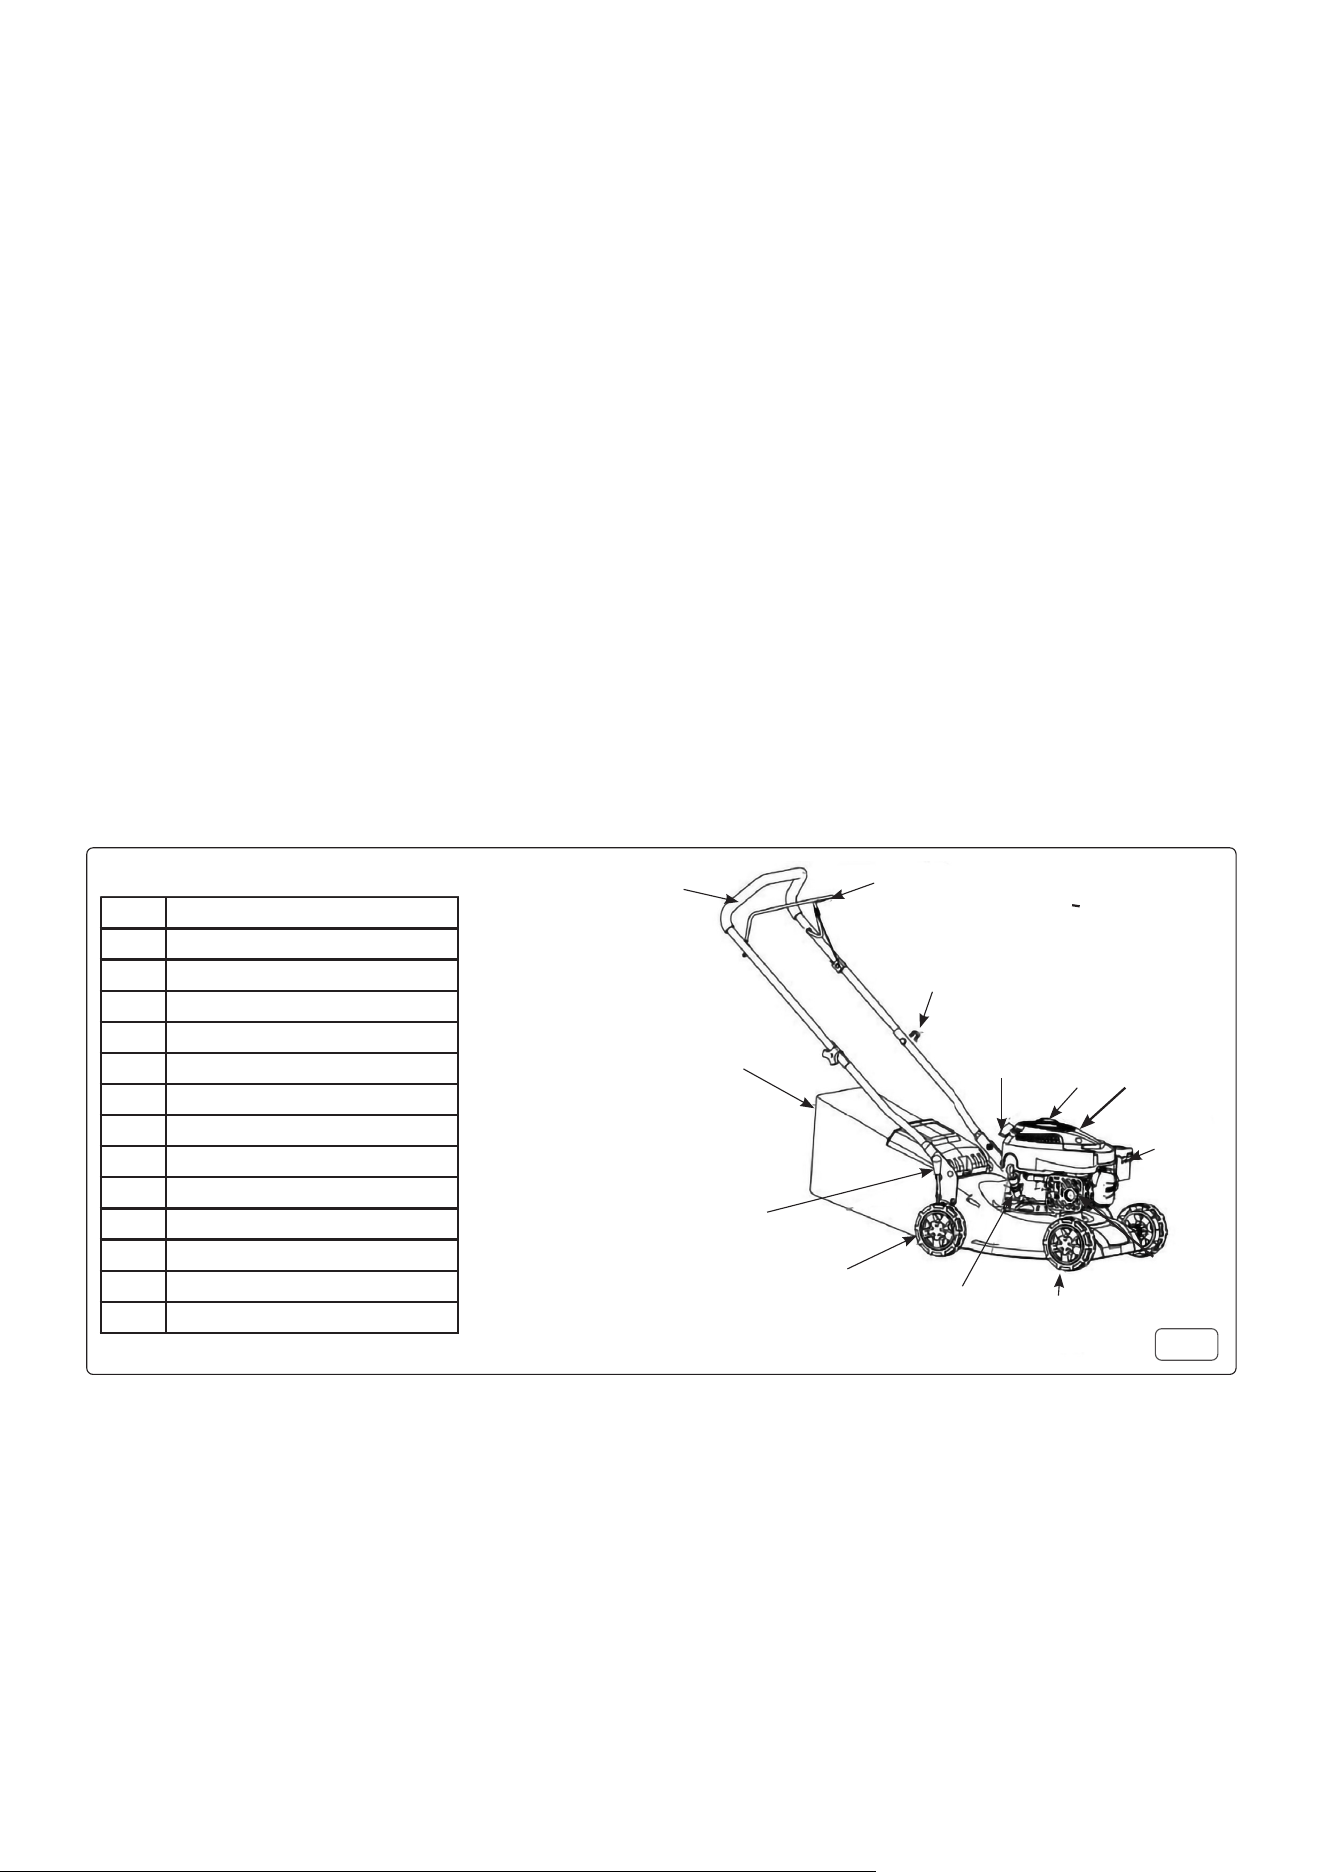
Item Description
1 Soft grip on handle
2 Start/ Stop lever
3 Connection knob
4 Recoil handle to start the engine
5 Grass bag
6 Cap with oil dipstick
7 Height adjustment lever
8 Rear wheel
9 Front wheel
10 Fuel tank cap
11 Air lter cover
12 Spark plug
13 Primer bulb (far side)
1
9
2
3
4
I0
11
5
7
8
6
12
13
Fig.1

4
• Ensure this carried out in a well ventilated environment with no sources of ignition / heat in the area. When handling fuel, DO NOT smoke or use a
mobile phone.
• With the machine on level surface and after unscrewing the fuel tank cap (Fig.1) add the fuel, pouring it in up to the collar of the fuel tank but DO
NOT overll it to avoid over-spill.
• Always add fresh, clean and approved lead-free petrol with an octane rating of at least 95.
• WARNING! In the event that you spill any oil or fuel on the lawnmower when relling, wipe it away immediately. DO NOT store or add fuel or handle
it in any way in the vicinity of an open re.
• WARNING! Fuels mixed with alcohol or fuels with ethanol or methane additives may bind moisture to themselves, which may result in separation
during storage and the formation of acids.
• Subsequently during storage the acid vapours may damage the fuel system of the lawnmower engine. These fuels must not be used in the
lawnmower.
• IMPORTANT INFORMATION: When not using the lawnmower for longer than 30 days, drain the fuel tank, start the engine and let it run until the
fuel lines and the carburettor are empty (the engine will stop on its own). This will prevent future engine problems.
• Before using it again, add fresh fuel into the fuel tank. For more information, see storage instructions.
Operation/Starting the mower
• Before starting the mower, ensure the safety instructions have been read, understood and applied and suitable PPE is being worn.
• Due to the vibrations of the product, it is recommended to take breaks at regular intervals.
• WARNING: DO NOT attempt to remove the grass box while the engine is running. Never open the ejector ap when the grass box has been
detached (to be emptied) and the engine is still running. The rotating blade can cause serious injuries!
• When initially starting the unit from cold, prime the unit by depressing the orange rubber priming bulb three or four times (Fig.1.13 ). This should
not be required when starting an already warmed up mower.
• If the engine stops due to lack of fuel, rell and depress priming bulb three or four times to restart.
• NOTE: if the engine won’t start after you have operated the starter several times, the engine may be ooded with excess fuel. Use following
procedure to clear and start a ooded engine.
• 1. Release the engine start/stop lever to stop engine.
• 2. Remove the spark plug, dry it, and then reinstall it.
• NOTE: Install the spark plug carefully by hand to avoid cross-threading. After the plug is seated tighten 1/8 to 1/4 turn with spark plug socket
spanner to compress the washer.
• Sharply pull the starter handle (g.1.4) to it’s extent and allow it to rewind gently under control. The engine should start after 2-4 pulls.
• CAUTION! A small amount of smoke may be emitted when the engine is started up for the rst time as the protective layers in the engine are
burnt off. This is completely normal and does not constitute a problem.
• To turn the engine off, release the start/Stop slowly. DO NOT let go or release quickly in an emergency as this can damage your engine.
• NOTE: The cutting blade may not stop immediately.
• The operator should not alter or tamper with any sealed adjustments for the engine speed control.
• MOWING
• ADJUST HEIGHT (Fig. 1.7)
• DO NOT attempt to adjust cutting height whilst spark plug boot is attached or the engine is running.
• The mowing height is set centrally using the central mowing height adjustment lever (Fig. 1.7).
• Select from 7 positions in the range of 25 to 70 mm. The middle mowing height is the most suitable for the majority of lawns.
• Lawn damage may result when the lowest height is set.
• For maximum effectiveness, it is recommended to trim the grass by no more than 1 /3 of its length. To mow overgrown grass, proceed step by
step and decrease the height setting by one step after each mowing. To keep a quality lawn, DO NOT use the lowest mowing height setting.
• WORKING TIPS
• Select your required height setting.
• Start the engine and allow it to run up to a steady, constant speed.
• Keep a rm grip on the upper handle with engine stop/start lever and push the unit forwards to start mowing.
• Walk, never run with the mower, be very careful when mowing uneven or rough ground.
• Mow across slopes, never up and down.
• Be careful when changing the direction of the mower on a slope.
• DO NOT mow excessively steep slopes.
• The best result will be achieved if the grass is dry. Wet grass will tend to clog the blade and the grass collection system.
• Grass grows at different rates at different time of the year. Never use the lowest cutting height for the rst cut of the season or in drought
conditions.
• Only about one third of the grass height should be cut.
• DO NOT cut high or wet grass. When you have been cutting for several minutes, please stop the mower, and clean the blade and the deck.
• DO NOT remove grass debris in the mower casing or on the blade by hand or with your feet. Instead use suitable tools such as a brush or broom.
• As soon as grass clippings start to trail the lawn mower, it is time to empty the grass bag.
• NOTE: Before taking off the grass bag, switch off the engine and wait until the blade has come to a stop.
• To take off the grass bag, use one hand to lift up ejector ap and the other to grab onto the carry handle. The ejector ap automatically falls down
after removing the grass bag and closes off the rear chute opening.
• Empty the grass debris in the grass bag, and ret grass Bag.
• MOWING WITH THE GRASS CATCHER
• When the grass catcher is installed, grass clippings are discharged into the grass catcher.
• In case of poor collection of mower grass, please increase the mowing height and check whether the lawn is wet.
• MOWING WITH REAR DISCHARGE
• Without the grass catcher installed, the grass catcher cover serves as a deector that directs the movement of the grass clippings towards the
ground. The cover is held rmly down by an applied spring. A row of grass clippings is thereby formed behind the lawnmower.
• To t the grass bag, lift the deector on the mower body and locate the hooks on the bag onto the mower body.
• If the grass bag is not tted, the tted, spring loaded deector will direct the cuttings towards the ground.
• DO NOT operate the mower without either the grass bag tted or the deector tted and facing downwards. DO NOT use the mower on slopes
with an inclination of more than 20° - otherwise motor seizure might occur.
• Cleaning
• WARNING! Before carrying out cleaning, maintenance or repairs, stop the engine and disconnect the spark plug.
• NOTE: If any grass residue is caught in the discharge chute, clean it using a brush. DO NOT remove grass debris in the mower casing or on the
blade by hand or with your feet. Instead use suitable tools such as a brush or broom. To ensure that the cut grass can be collected into grass box,
5
the discharge opening and inside the mower casing must be cleared of any blockage.
• The lawn mower should be cleaned thoroughly every time after it has been used.
• DO NOT allow grass cuttings and other debris to become dry and hard on any of the mower surfaces.
• Dried grass remnants and dirt may impair the mowing operation.
• Check that the grass chute is free of any residual grass. Remove any such residue.
• Check the underside of the lawn mower and the blade mount . For this purpose ,tilt the Lawn mower onto its left side (opposite the oil ller neck)
• NOTE: Before placing the lawn mower on its side, fully drain the fuel tank using a petrol extraction pump. DO NOT tilt the lawn mower by more
than 90
o
.
• Maintenance
• WARNING! Before carrying out cleaning, maintenance or repairs, stop the engine and disconnect the spark plug.
• OIL
• Replace the oil after the rst 5 hours of operation and subsequently after every 25 hours of operation.
• To change the motor oil, with suitable receptacle in place, remove the dip stick (Fig.1.6) and tilt the unit to fully drain it. Replace the dip stick after
draining and rell as described in the Preparation section. DO NOT overll. Start the engine and run for a short time. Stop the engine and after 1
minute, measure the oil level. Add oil if required.
• All nuts, pins and bolts must be properly tightened so that the machine is in a safe and operational condition. Regular maintenance is the basic
prerequisite for ensuring safety of the user, maintain the lawnmowers operating condition and high performance.
• Never store a machine with petrol in the fuel tank inside a building where the fumes could come within range of an open re, sparks or sources of
high temperature.
• Before storing in any enclosed area, allow the engine to cool down.
• To reduce the risk of a re, ensure that the lawnmower and in particular the engine, exhaust muer and also the location of spare fuel storage are
free of grass, leaves or excessive amounts of lubricant.
• Regularly inspect the condition of the deector and the grass catcher; replace if damaged.
• Drain the fuel in a well ventilated area when the engine has cooled down.
• Regularly inspect the lawnmower and ensure that all grass deposits are removed from the underside of the chassis.
• Regularly lubricate the axle of the chassis and the bearings using a suitable lubricant.
• In regular intervals, check that all nuts and bolts are tightened. Nuts and bolts that are worn out or incorrectly tightened may cause serious
damage to the engine or the frame.
• BLADE
• Regularly inspect the condition of the blades because they have a signicant effect on the performance of the lawnmower. Blades should always
be sharp and balanced. It is necessary to check the balance of the mowing blade every time that it is sharpened. To do this, insert a steel axle
(with a diameter of 2-3 mm) into the middle hole. If it is correctly levelled, the axis will remain in the horizontal position.
• If the blade does not remain in the horizontal position, replace it.
• When removing or installing the mowing blade, use thick work gloves.
• If the blade strongly impacts an obstacle, stop the lawnmower and take it to an authorized service centre.
• The blade is made from pressed steel. To achieve the best possible mowing results, regularly sharpen the blades, approximately after every 25
hours of operation.
• When removing the blade, remove the bolt, check the load bearing part of the blade. If the parts are worn out or damaged, replace them.
• WARNING! Always use only original spare parts. Poor quality spare parts may
cause serious damage to the lawnmower and create a safety hazard.
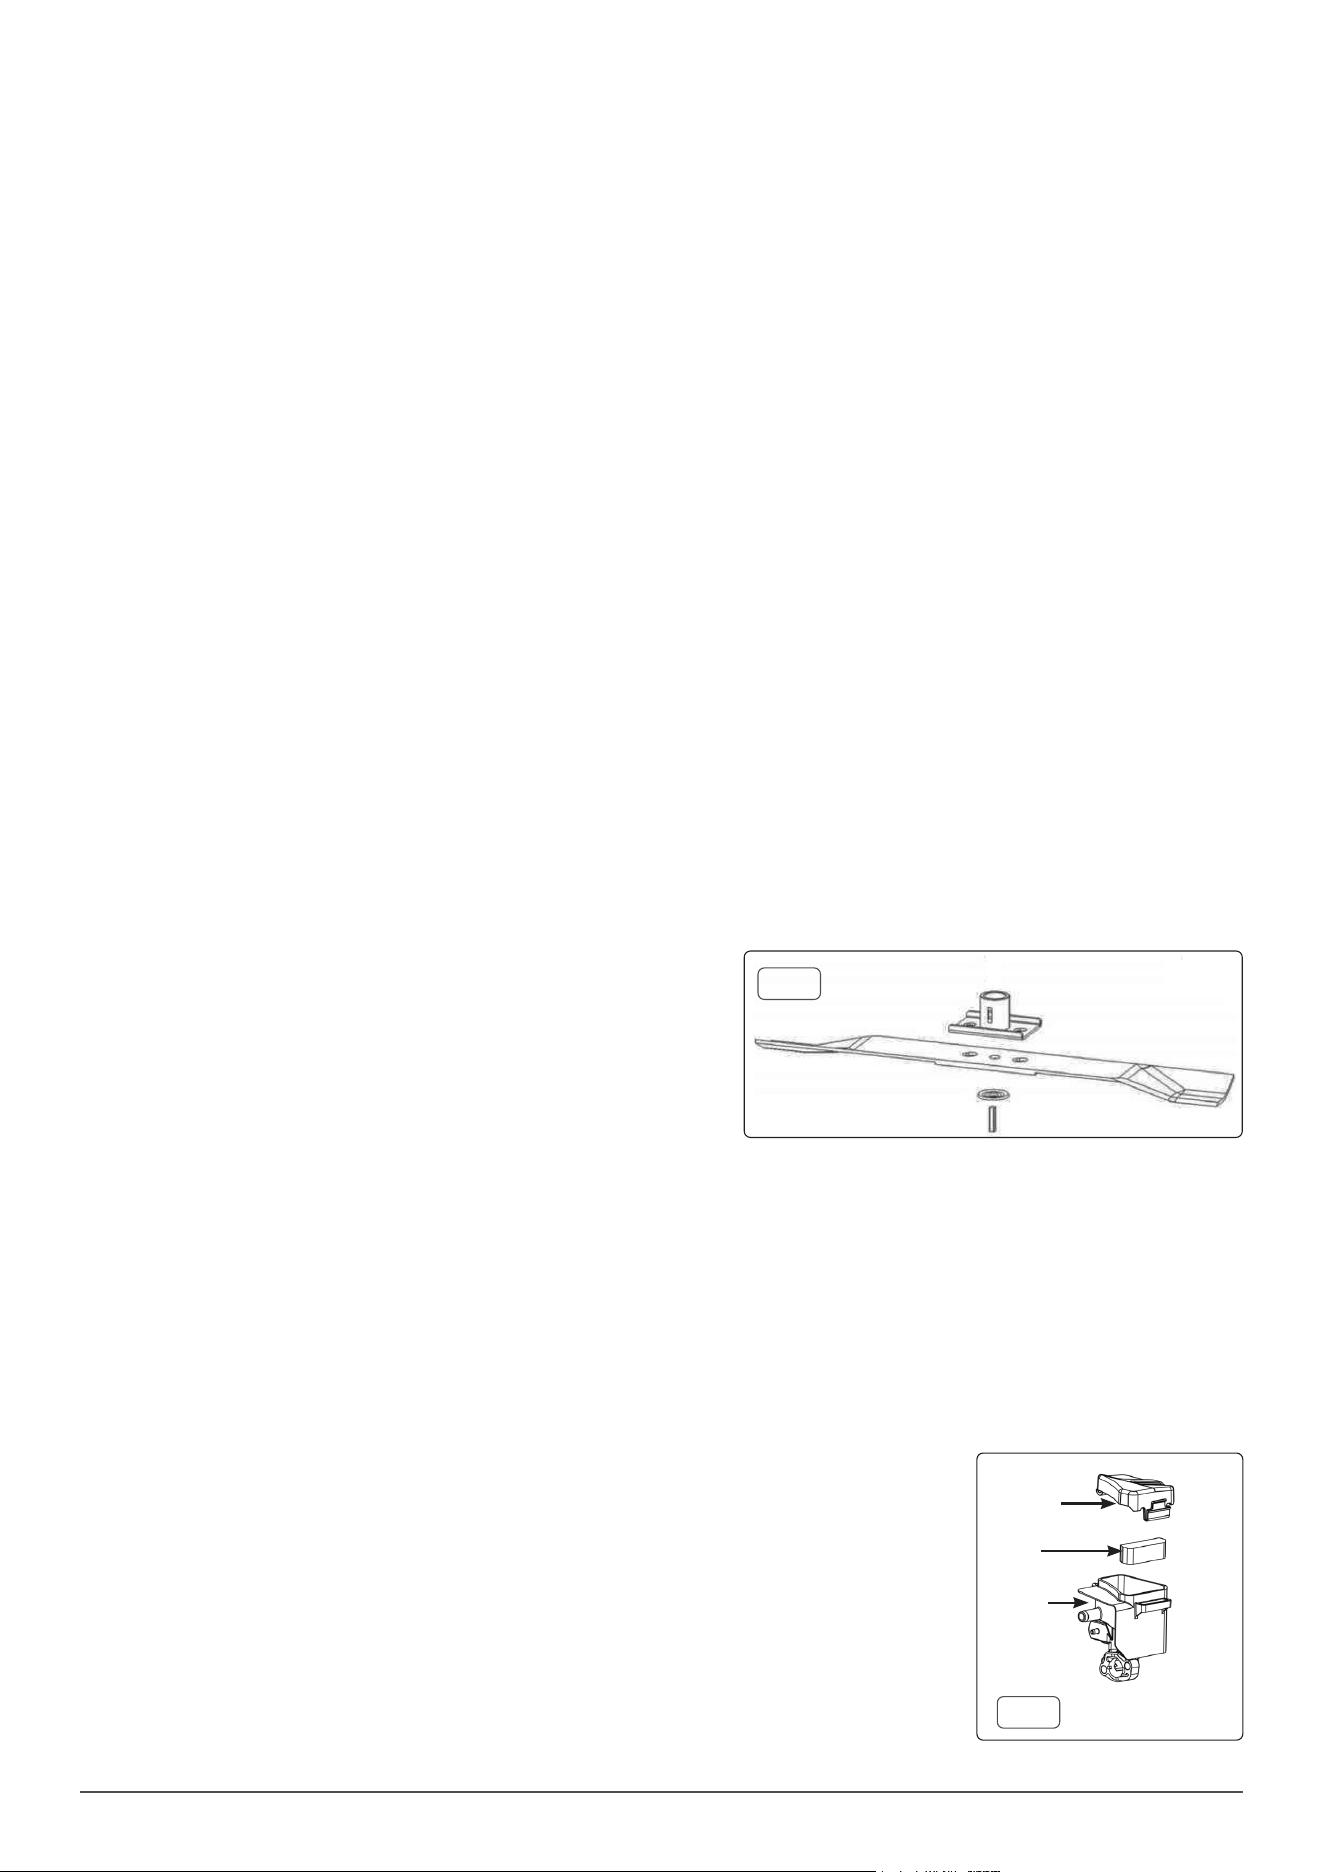
• REPLACING MOWER BLADES (Fig.2)
• For safety reasons you should only ever have your blade sharpened , balanced
and mounted by an authorised service workshop. For optimum results it is
recommended that the blade should be inspected once a year.
• WARNING! Before you remove the grass collection bag, stop the engine and wait
until the blade stops completely.
• WARNING! You will need garden gloves (not provided) and a spanner (not
provided} to remove the blade.
• NOTE! DO NOT invert the mower. Tip it slightly towards the oil ller pipe and reach under the deck
• WARNING! Always handle the blade with care, sharp edges could cause injury. USE GLOVES. Renew your metal blade after 50Hrs mowing or 2yrs
whichever is sooner regardless of condition
• WARNING! If the blade is cracked or damaged replace it with a new one.
• WARNING! DO NOT hold the blade by hand directly.
• NOTE! Maintain the sharpness of the blade when cutting grass. If the blade has worn excessively and become pitted and blunt, it should be
replaced or sharpened. The sharpness of the blade will affect the performance of the lawnmower.
• For safety reasons we recommend that the blade only be changed by someone qualied and authorized to do so.
• Hold the blade and unscrew the blade bolt counter-clockwise using a spanner wrench. Remove the washer and the blade.
• Fit a new blade or re-sharpen the blade, locate the blade on the two studs on the blade an and then replace the washer and bolts. Make
sure the blade is correctly located and then rmly tighten the bolt. DO NOT over-tighten. The up turn of the blade must project into the motor
compartment.
• AIR FILTER (Fig. 3)
• Clean the air lter regularly.
• Soiled air lter reduce the engine output by supplying too little air to the carburettor. If the air contains a lot of
dust, the air lter should be checked more frequently.
• Remove the air cleaner outside cover (A). Be careful to prevent dirt and debris from falling into the air cleaner
assembly.
• Separate the Air Filter (B) from the Air Filter Housing (C).
• lnspect the air lter. Clean dirty air lter with warm water and mild soap. Allow air lter to dry thoroughly before
re-installation
• lnstall the air lter into the mounting moulding inside the carburettor.
• Note: DO NOT use pressurized air or solvents to clean the lter. Pressurized air can damage the lter and
solvents will dissolve the lter.
• OIL CHANGE also refer to Preparation section above
• To change the motor oil, remove the dip stick (Fig.1.6) and tilt the unit to fully drain it into a suitable receptacle.
Replace the dip stick after draining and rell as described in the Preparation section and Fig.3. DO NOT overll.
Start the engine and run for a short time. Stop the engine and after 1 minute, measure the oil level. Add oil if required.
Fig.2
Fig.3
A
B
C

6
• SPARK PLUG
• Once the engine has cooled, remove spark plug cap (g.1.12).
• Clear dirt away from spark plug base.
• Unscrew spark plug using a spark plug wrench.
• Wipe spark plug with clean soft cloth and brush gently with a wire brush. If insulator is damaged replace the spark plug,
• Check the spark plug electrode gap with a feeler gauge. If the gap is not between 0.7 and 0.8mm, carefully and gently adjust the gap by gently
tapping with hard object.
• To avoid cross threading, rst start screwing the plug back in by hand. Once engaged, use a spark plug wrench to tighten the plug to compress
the washer. DO NOT over-tighten or you may damage the thread in the mower body.
• STORAGE
• The mower can be stored for short periods of time (up to 15 days) without signicant maintenance.
• Before storing always:
• Allow the engine to cool.
• Ensure grass bag is empty.
• Clean all debris from underside of deck.
• Store mower upright on a at and level surface.
• Store in a safe, clean and dry place which is not accessible by children or people who are not familiar with operation of petrol lawn mower.
• If the mower is being placed in storage for longer than 15 days the following steps must be undertaken. If not carried out, the next usage may not
start correctly or may need servicing.
• WARNING! DO NOT empty the petrol tank in enclosed areas, near re or when smoking. Petrol fumes can cause re or explosions.
• Fully drain fuel from the fuel tank and the carburettor using suction pump if available.
• Start the engine and allow it to run to use up any residual petrol.
• Change the oil by removing it from a warm engine and relling with fresh oil.
• Clean and dry entire machine to protect the paint work.
• Store in a safe, clean and dry place which is not accessible by children or people who are not familiar with operation of petrol lawn mower.
• TRANSPORTATION
• Before transporting the mower, drain all oil and fuel. When moving the mower, keep it level and restrained if possible.
• SPECIFICATION
ATTRIBUTE VALUE
Blade Style: Rotary
Cutting Width: 41cm/16”
Engine Size: 127cc
Engine Speed: 2800rpm
Engine Type: 4-Stroke
Fuel Tank: 1.0L
Grass Collection Volume: 45L
Height Adjustment: 25-75mm
Nett Weight: 20kg
Noise Level: 96dB
Noise Power/Pressure: 96/74dB(A)
Oil Reservoir: 0.4L
Power Source: Petrol
Propulsion Type: Propelled by hand
Rated Power: 2.0kW
Type: Push Lawn Mower
Vibration/Uncertainty: 3.0/1.5m/s²
Dellonda Limited
Kempson Way, Suffolk Business Park, Bury St Edmunds, Suffolk. IP32 7AR
01284 757575 suppor[email protected] www.dellonda.co.uk
Environment Protection and Waste Protection and Electrical Equipment Regulations (WEEE)
Recycle unwanted packaging materials. When this product is no longer required, or has reached the end of it’s useful life, please dispose of it in
an environmentally friendly way. Drain any fluids (if applicable) into approved containers, in accordance with local waste regulations. It is our
policy to continually improve products and we reserve the right to alter data, specifications and parts without prior notice. No liability is accepted
for incorrect use of this product. Guarantee is 12 months from purchase date, proof of which is required for any claim.
