Sunrise Alarm Clock User Manual
K8
ThreeDucksDirect@outlook.com
(EN)
ThreeDucksDirect@outlook.com
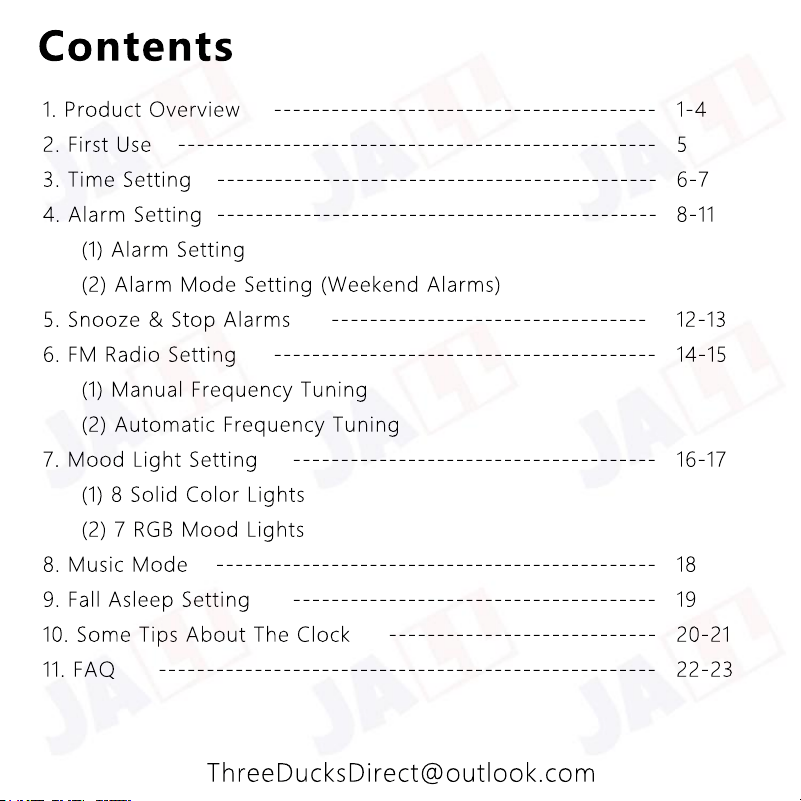
1. Product Overview ---------------------------------------- 1-4
2. First Use -------------------------------------------------- 5
3. Time Setting ---------------------------------------------- 6-7
4. Alarm Setting ---------------------------------------------- 8-11
(1) Alarm Setting
(2) Alarm Mode Setting (Weekend Alarms)
5. Snooze & Stop Alarms 5. Snooze & Stop Alarms --------------------------------- 12-13
6. FM Radio Setting ---------------------------------------- 14-15
(1) Manual Frequency Tuning
(2) Automatic Frequency Tuning
7. Mood Light Setting -------------------------------------- 16-17
(1) 8 Solid Color Lights
(2) 7 RGB Mood Lights
8. Music Mode 8. Music Mode ---------------------------------------------- 18
9. Fall Asleep Setting -------------------------------------- 19
10. Some Tips About The Clock ---------------------------- 20-21
11. FAQ ---------------------------------------------------- 22-23
Contents

ThreeDucksDirect@outlook.com
1
ThreeDucksDirect@outlook.com
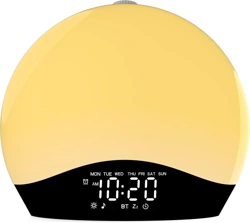
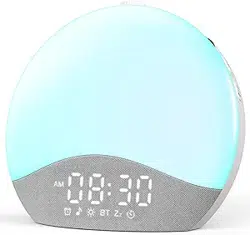
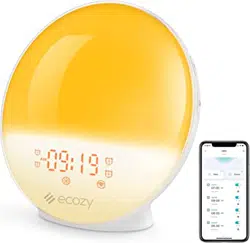
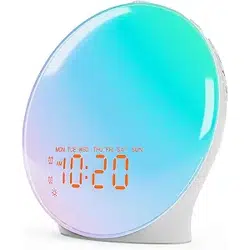
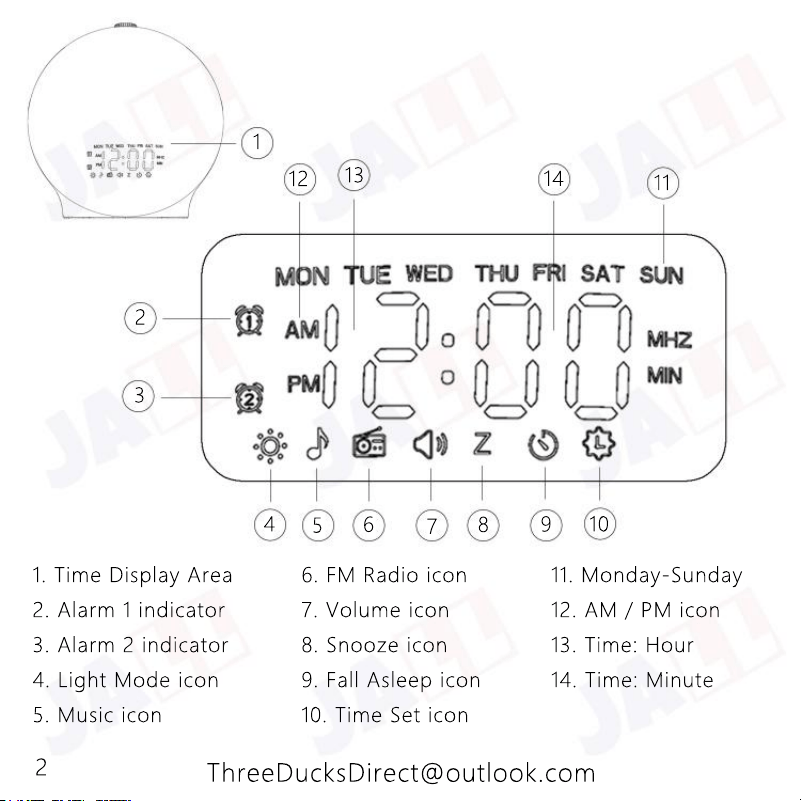
1. Time Display Area 6. FM Radio icon 11. Monday-Sunday
2. Alarm 1 indicator 7. Volume icon 12. AM / PM icon
3. Alarm 2 indicator 8. Snooze icon 13. Time: Hour
4. Light Mode icon 9. Fall Asleep icon 14. Time: Minute
5. Music icon 10. Time Set icon
1
2
3
4
5
6
7
8
9
10
11
14
13
12
2
ThreeDucksDirect@outlook.com
1
2
3
4
5
6
7
8
9
10
11
12
13
14
15
16
17
18
19
3
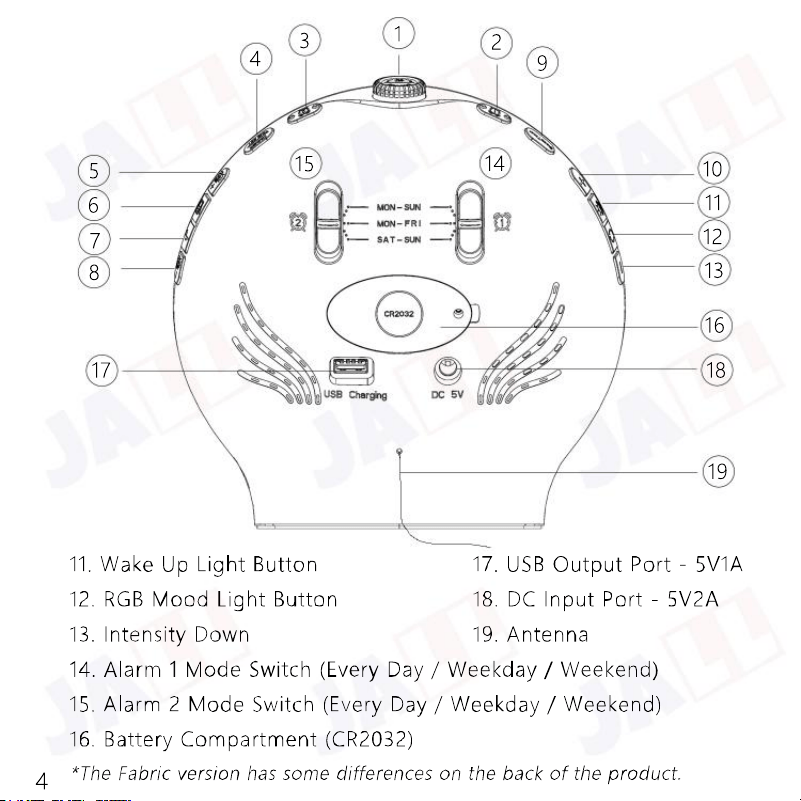
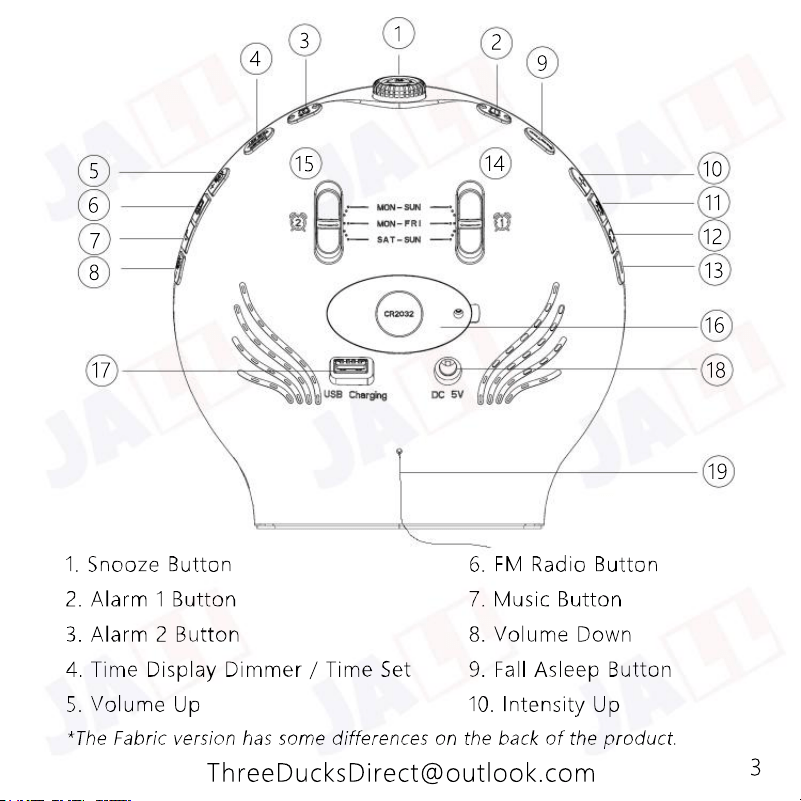
1
2
3
4
5
6
7
8
9
10
11
12
13
14
15
16
17
18
19
4
ThreeDucksDirect@outlook.com
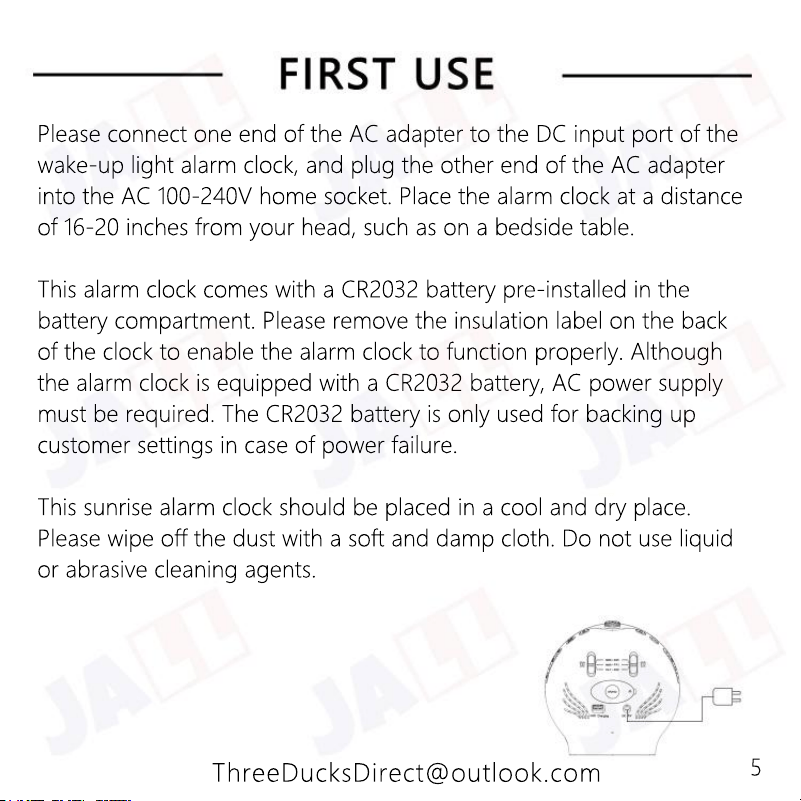
Please connect one end of the AC adapter to the DC input port of the
wake-up light alarm clock, and plug the other end of the AC adapter
into the AC 100-240V home socket. Place the alarm clock at a distance
of 16-20 inches from your head, such as on a bedside table.
This alarm clock comes with a CR2032 battery pre-installed in the
battery compartment. Please remove the insulation label on the back
of the clock to enable the alarm clock to function properly. Although
of the clock to enable the alarm clock to function properly. Although
the alarm clock is equipped with a CR2032 battery, AC power supply
must be required. The CR2032 battery is only used for backing up
customer settings in case of power failure.
This sunrise alarm clock should be placed in a cool and dry place.
Please wipe off the dust with a soft and damp cloth. Do not use liquid
or abrasive cleaning agents.
5

ThreeDucksDirect@outlook.com
Press and hold the Time Set button for 2 seconds to
start the time setting. Now, the “12H” (24H) on the
display area is flashing. Please rotate the Snooze
button to select the “12H” or “24H” time format.
Then click the Time Set button to confirm. And then
the “Hour” icon is flashing.
1. 12H/24H Time Format Setting
Please rotate the Snooze button to select the “Hour”.
Then click the Time Set button to confirm. And then
the “Minute” icon is flashing.
2. Time: “Hour”Setting
Note: in the process of setting the time, you only use the Time Set and
Snooze button.
6
ThreeDucksDirect@outlook.com
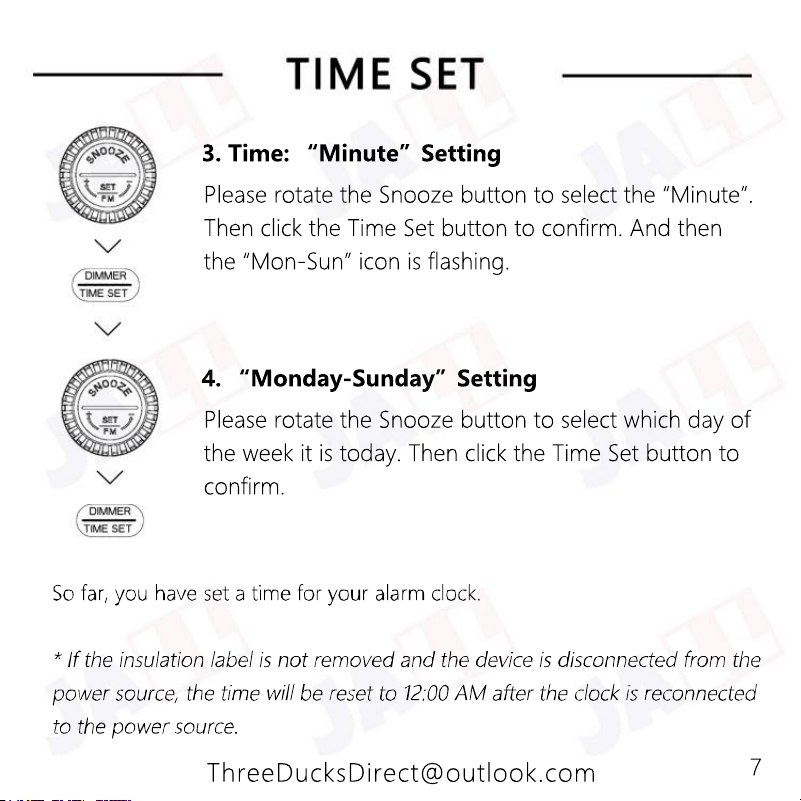
Please rotate the Snooze button to select the “Minute”.
Then click the Time Set button to confirm. And then
the “Mon-Sun” icon is flashing.
3. Time: “Minute”Setting
Please rotate the Snooze button to select which day of
the week it is today. Then click the Time Set button to
confirm.
4. “Monday-Sunday”Setting
7
ThreeDucksDirect@outlook.com
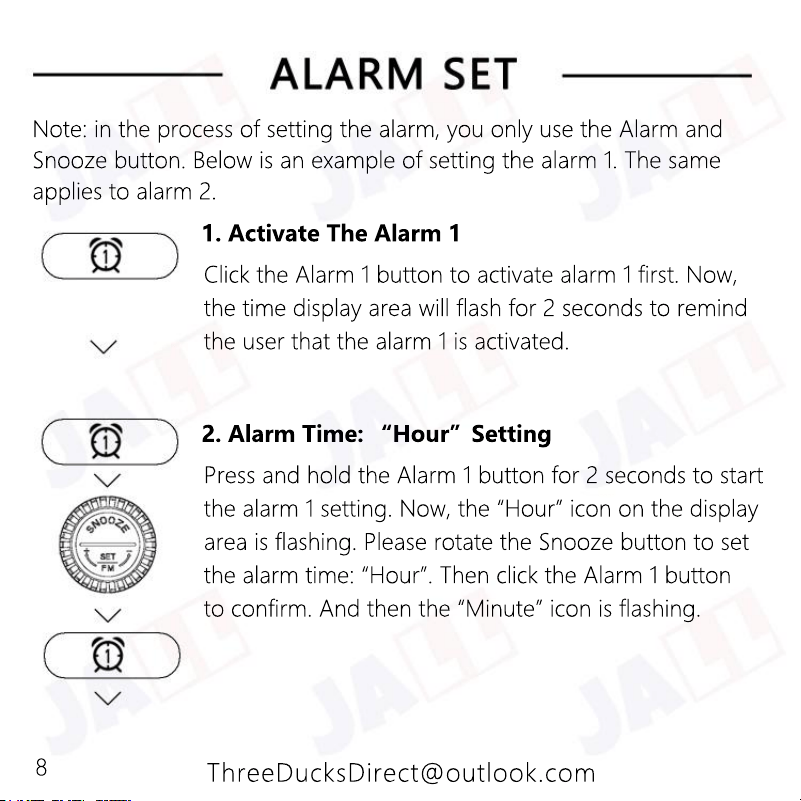
Click the Alarm 1 button to activate alarm 1 first. Now,
the time display area will flash for 2 seconds to remind
the user that the alarm 1 is activated.
1. Activate The Alarm 1
Press and hold the Alarm 1 button for 2 seconds to start
the alarm 1 setting. Now, the “Hour” icon on the display
area is flashing. Please rotate the Snooze button to set
the alarm time: “Hour”. Then click the Alarm 1 button
to confirm. And then the “Minute” icon is flashing.
2. Alarm Time: “Hour”Setting
Note: in the process of setting the alarm, you only use the Alarm and
Snooze button. Below is an example of setting the alarm 1. The same
applies to alarm 2.
8
ThreeDucksDirect@outlook.com
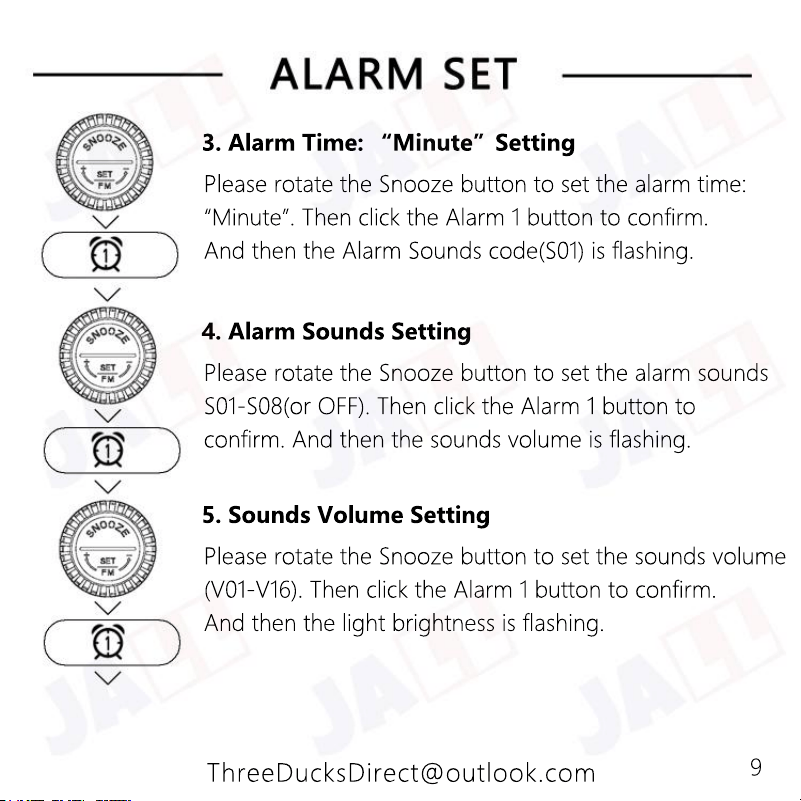
Please rotate the Snooze button to set the sounds volume
(V01-V16). Then click the Alarm 1 button to confirm.
And then the light brightness is flashing.
5. Sounds Volume Setting
Please rotate the Snooze button to set the alarm sounds
S01-S08(or OFF). Then click the Alarm 1 button to
confirm. And then the sounds volume is flashing.
4. Alarm Sounds Setting
Please rotate the Snooze button to set the alarm time:
“Minute”. Then click the Alarm 1 button to confirm.
And then the Alarm Sounds code(S01) is flashing.
3. Alarm Time: “Minute”Setting
9
ThreeDucksDirect@outlook.com
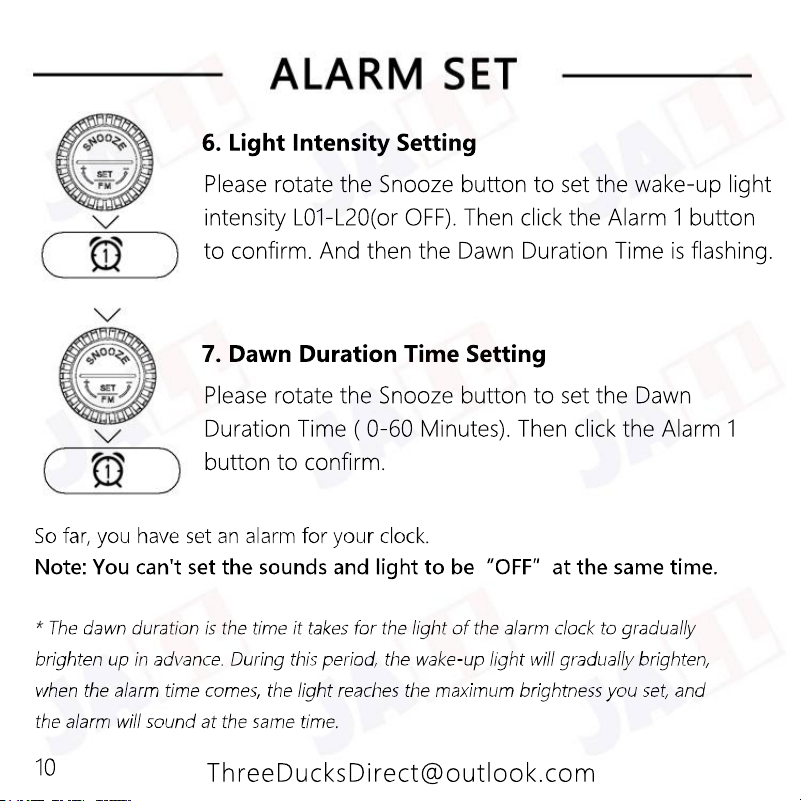
Please rotate the Snooze button to set the Dawn
Duration Time ( 0-60 Minutes). Then click the Alarm 1
button to confirm.
7. Dawn Duration Time Setting
Please rotate the Snooze button to set the wake-up light
intensity L01-L20(or OFF). Then click the Alarm 1 button
to confirm. And then the Dawn Duration Time is flashing.
6. Light Intensity Setting
10
ThreeDucksDirect@outlook.com
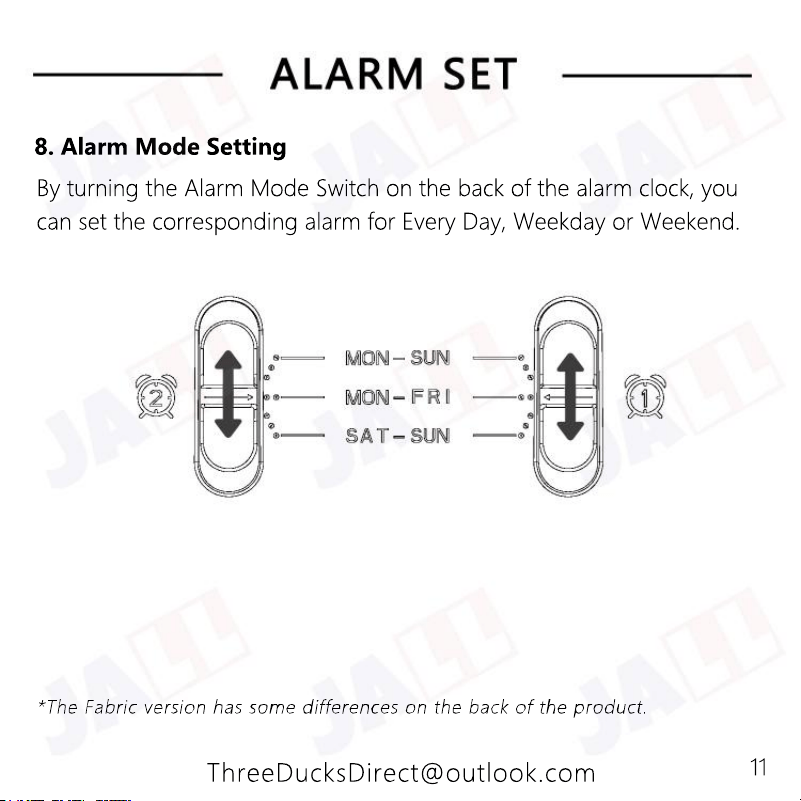
By turning the Alarm Mode Switch on the back of the alarm clock, you
can set the corresponding alarm for Every Day, Weekday or Weekend.
8. Alarm Mode Setting
11
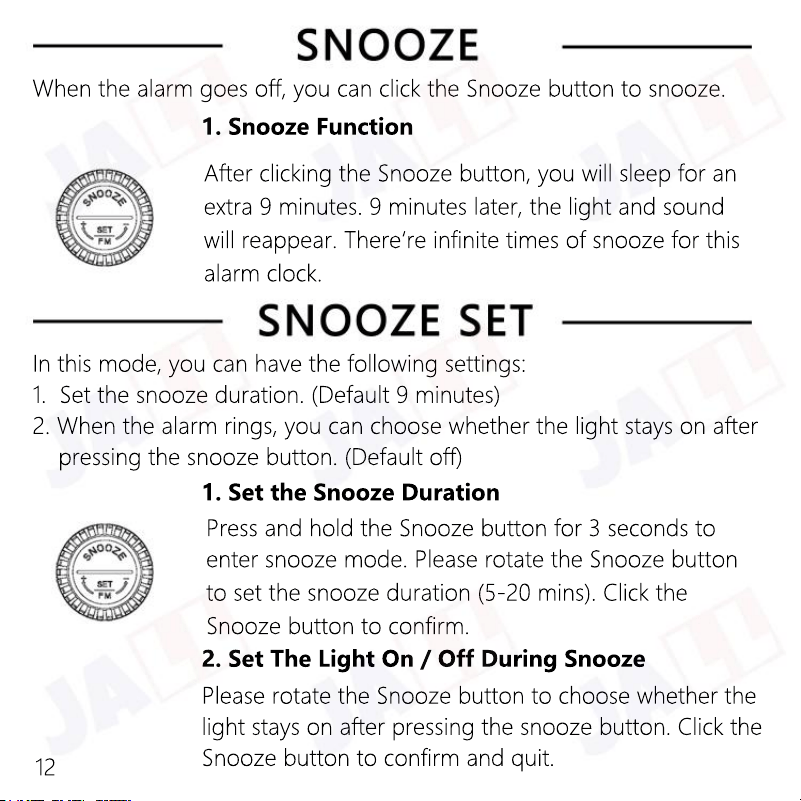
Please rotate the Snooze button to choose whether the
light stays on after pressing the snooze button. Click the
Snooze button to confirm and quit.
2. Set The Light On / Off During Snooze
Press and hold the Snooze button for 3 seconds to
enter snooze mode.
Please rotate the Snooze button
to set the snooze duration (5-20 mins).
Click the
Snooze button to confirm.
1. Set the Snooze Duration
In this mode, you can have the following settings:
1. Set the snooze duration. (Default 9 minutes)
2. When the alarm rings, you can choose whether the light stays on after
pressing the snooze button. (Default off)
After clicking the Snooze button, you will sleep for an
extra 9 minutes. 9 minutes later, the light and sound
will reappear. There‘re infinite times of snooze for this
alarm clock.
1. Snooze Function
When the alarm goes off, you can click the Snooze button to snooze.
12
ThreeDucksDirect@outlook.com
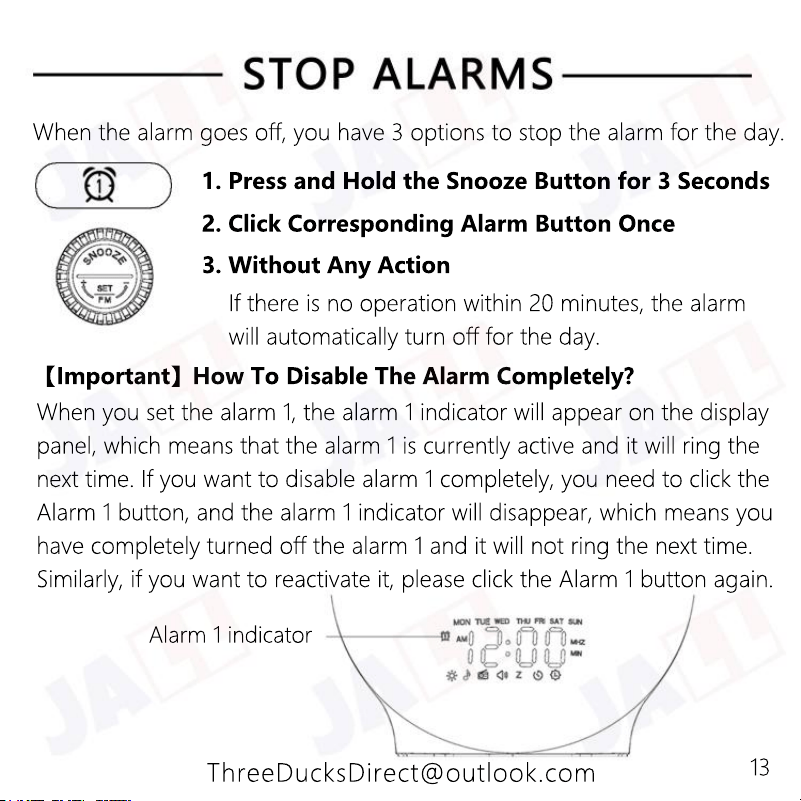
Alarm 1 indicator
When you set the alarm 1, the alarm 1 indicator will appear on the display
panel, which means that the alarm 1 is currently active and it will ring the
next time. If you want to disable alarm 1 completely, you need to click the
Alarm 1 button, and the alarm 1 indicator will disappear, which means you
have completely turned off the alarm 1 and it will not ring the next time.
Similarly, if you want to reactivate it, please click the Alarm 1 button again.
【Important】How To Disable The Alarm Completely?
If there is no operation within 20 minutes, the alarm
will automatically turn off for the day.
3. Without Any Action
2. Click Corresponding Alarm Button Once
1. Press and Hold the Snooze Button for 3 Seconds
When the alarm goes off, you have 3 options to stop the alarm for the day.
13
ThreeDucksDirect@outlook.com
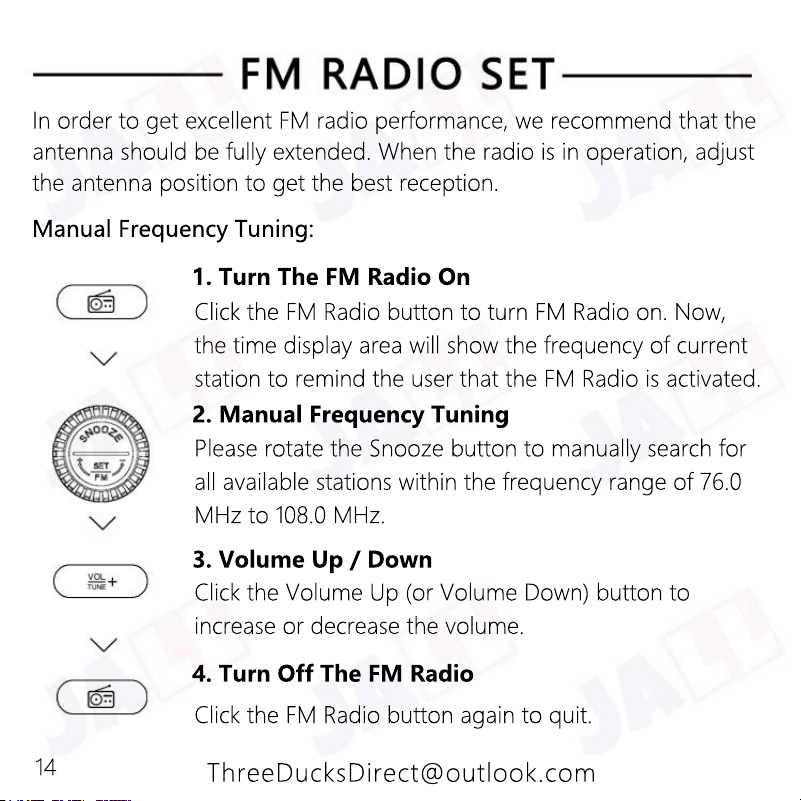
Click the FM Radio button again to quit.
4. Turn Off The FM Radio
Click the Volume Up (or Volume Down) button to
increase or decrease the volume.
3. Volume Up / Down
Please rotate the Snooze button to manually search for
all available stations within the frequency range of 76.0
MHz to 108.0 MHz.
2. Manual Frequency Tuning
Click the FM Radio button to turn FM Radio on. Now,
the time display area will show the frequency of current
station to remind the user that the FM Radio is activated.
1. Turn The FM Radio On
Manual Frequency Tuning:
In order to get excellent FM radio performance, we recommend that the
antenna should be fully extended. When the radio is in operation, adjust
the antenna position to get the best reception.
14
ThreeDucksDirect@outlook.com
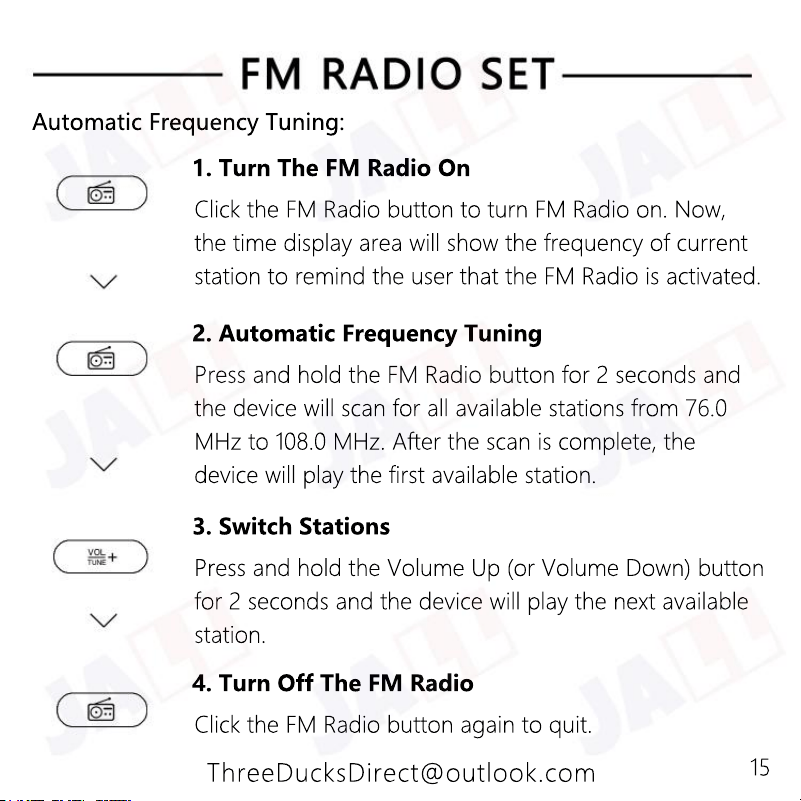
Click the FM Radio button again to quit.
4. Turn Off The FM Radio
Press and hold the Volume Up (or Volume Down) button
for 2 seconds and the device will play the next available
station.
3. Switch Stations
Press and hold the FM Radio button for 2 seconds and
the device will scan for all available stations from 76.0
MHz to 108.0 MHz. After the scan is complete, the
device will play the first available station.
2. Automatic Frequency Tuning
Click the FM Radio button to turn FM Radio on. Now,
the time display area will show the frequency of current
station to remind the user that the FM Radio is activated.
1. Turn The FM Radio On
Automatic Frequency Tuning:
15
ThreeDucksDirect@outlook.com
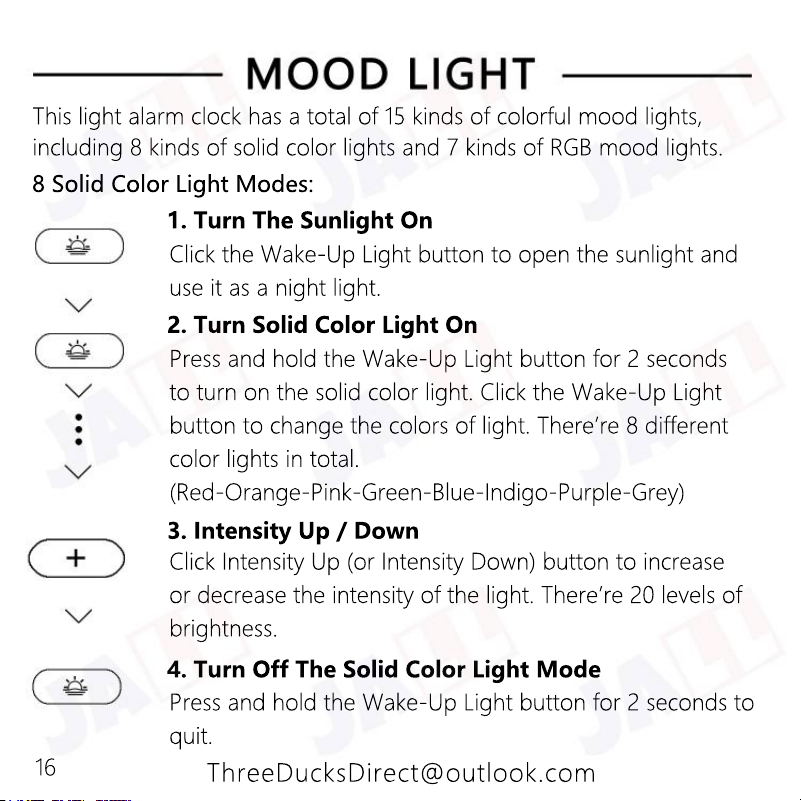
Press and hold the Wake-Up Light button for 2 seconds to
quit.
4. Turn Off The Solid Color Light Mode
Click Intensity Up (or Intensity Down) button to increase
or decrease the intensity of the light. There’re 20 levels of
brightness.
3. Intensity Up / Down
Press and hold the Wake-Up Light button for 2 seconds
to turn on the solid color light. Click the Wake-Up Light
button to change the colors of light. There’re 8 different
color lights in total.
(Red-Orange-Pink-Green-Blue-Indigo-Purple-Grey)
2. Turn Solid Color Light On
Click the Wake-Up Light button to open the sunlight and
use it as a night light.
1. Turn The Sunlight On
8 Solid Color Light Modes:
This light alarm clock has a total of 15 kinds of colorful mood lights,
including 8 kinds of solid color lights and 7 kinds of RGB mood lights.
16
ThreeDucksDirect@outlook.com
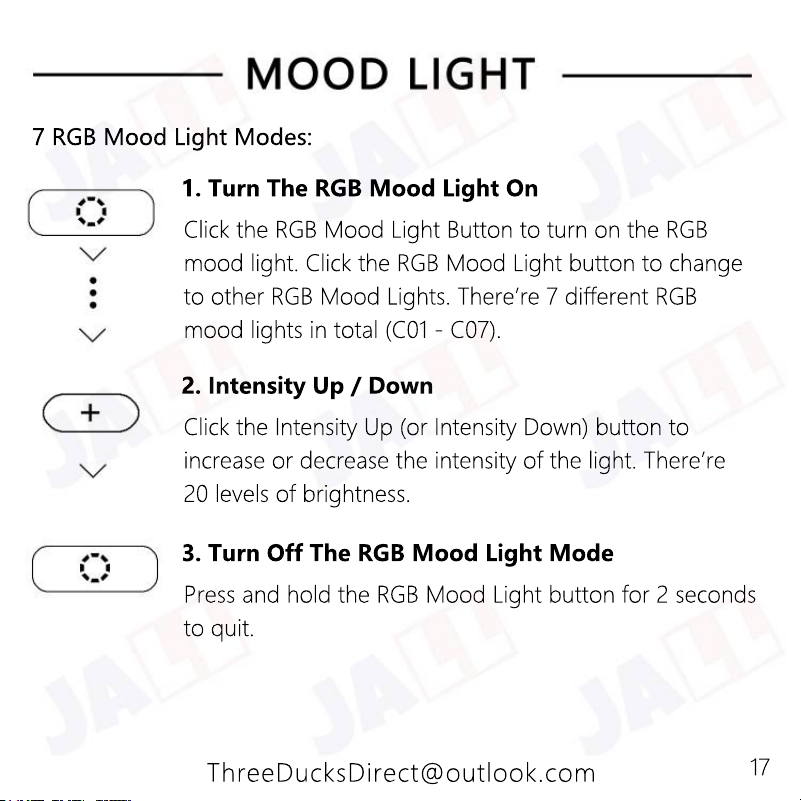
Press and hold the RGB Mood Light button for 2 seconds
to quit.
3. Turn Off The RGB Mood Light Mode
Click the Intensity Up (or Intensity Down) button to
increase or decrease the intensity of the light. There’re
20 levels of brightness.
2. Intensity Up / Down
Click the RGB Mood Light Button to turn on the RGB
mood light. Click the RGB Mood Light button to change
to other RGB Mood Lights. There’re 7 different RGB
mood lights in total (C01 - C07).
1. Turn The RGB Mood Light On
7 RGB Mood Light Modes:
17
ThreeDucksDirect@outlook.com
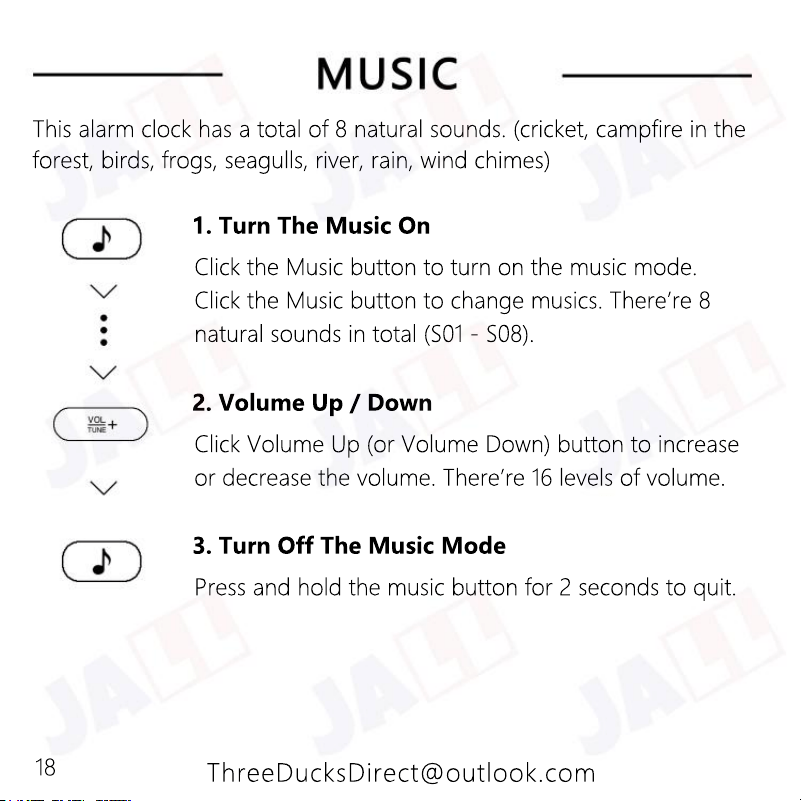
Press and hold the music button for 2 seconds to quit.
3. Turn Off The Music Mode
Click Volume Up (or Volume Down) button to increase
or decrease the volume. There’re 16 levels of volume.
2. Volume Up / Down
Click the Music button to turn on the music mode.
Click the Music button to change musics. There’re 8
natural sounds in total (S01 - S08).
1. Turn The Music On
This alarm clock has a total of 8 natural sounds. (cricket, campfire in the
forest, birds, frogs, seagulls, river, rain, wind chimes)
18
ThreeDucksDirect@outlook.com
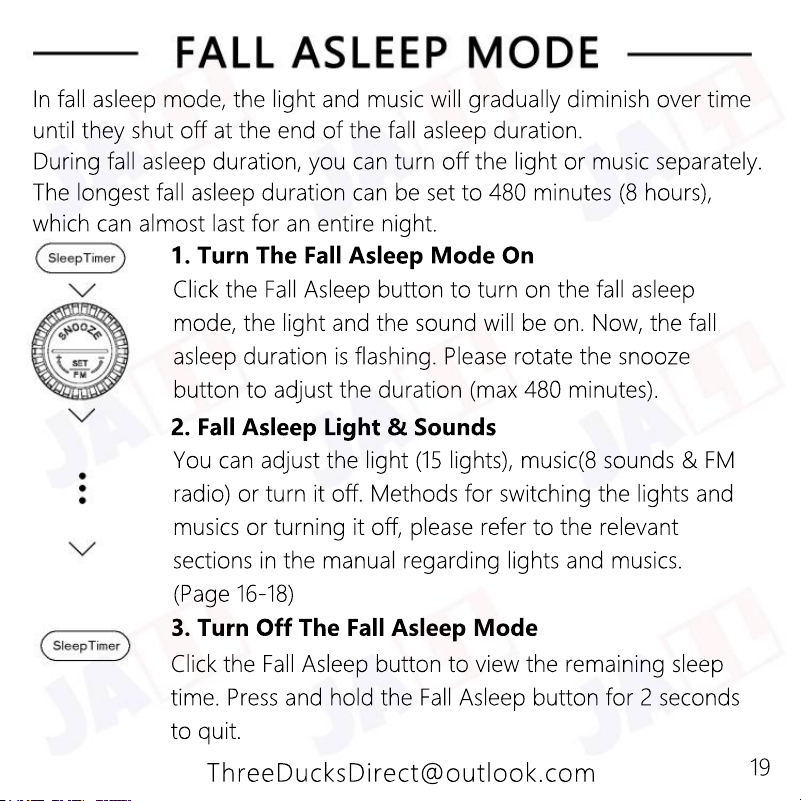
Click the Fall Asleep button to view the remaining sleep
time. Press and hold the Fall Asleep button for 2 seconds
to quit.
3. Turn Off The Fall Asleep Mode
You can adjust the light (15 lights), music(8 sounds & FM
radio) or turn it off. Methods for switching the lights and
musics or turning it off, please refer to the relevant
sections in the manual regarding lights and musics.
(Page 16-18)
2. Fall Asleep Light & Sounds
Click the Fall Asleep button to turn on the fall asleep
mode, the light and the sound will be on. Now, the fall
asleep duration is flashing. Please rotate the snooze
button to adjust the duration (max 480 minutes).
1. Turn The Fall Asleep Mode On
In fall asleep mode, the light and music will gradually diminish over time
until they shut off at the end of the fall asleep duration.
During fall asleep duration, you can turn off the light or music separately.
The longest fall asleep duration can be set to 480 minutes (8 hours),
which can almost last for an entire night.
19
ThreeDucksDirect@outlook.com
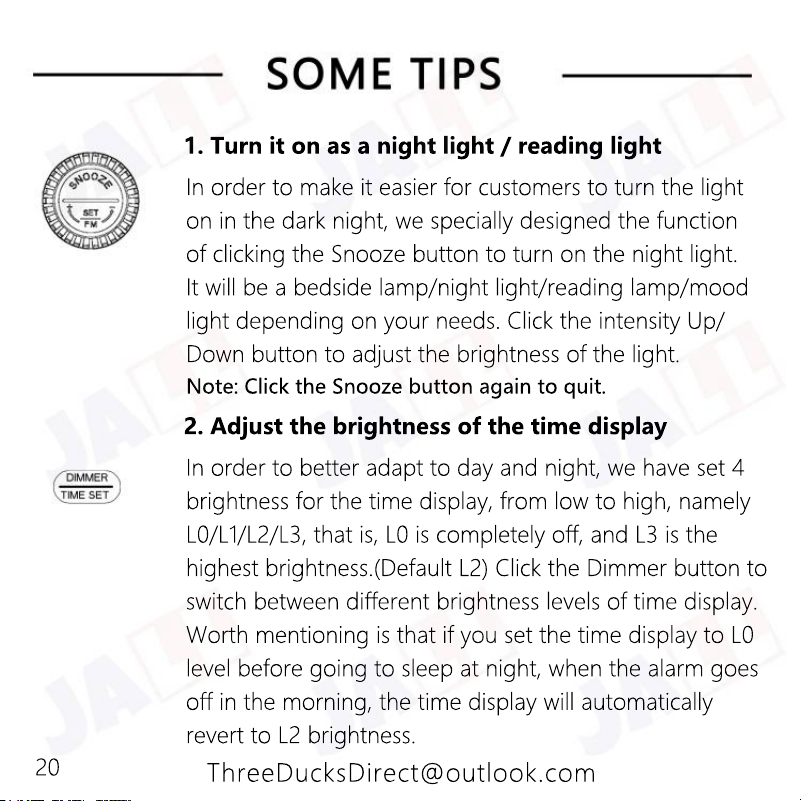
In order to better adapt to day and night, we have set 4
brightness for the time display, from low to high, namely
L0/L1/L2/L3, that is, L0 is completely off, and L3 is the
highest brightness.(Default L2) Click the Dimmer button to
switch between different brightness levels of time display.
Worth mentioning is that if you set the time display to L0
level before going to sleep at night, when the alarm goes
level before going to sleep at night, when the alarm goes
off in the morning, the time display will automatically
revert to L2 brightness.
2. Adjust the brightness of the time display
In order to make it easier for customers to turn the light
on in the dark night, we specially designed the function
of clicking the Snooze button to turn on the night light.
It will be a bedside lamp/night light/reading lamp/mood
light depending on your needs. Click the intensity Up/
Down button to adjust the brightness of the light.
Note: Click the Snooze button again to quit. Note: Click the Snooze button again to quit.
1. Turn it on as a night light / reading light
20
ThreeDucksDirect@outlook.com
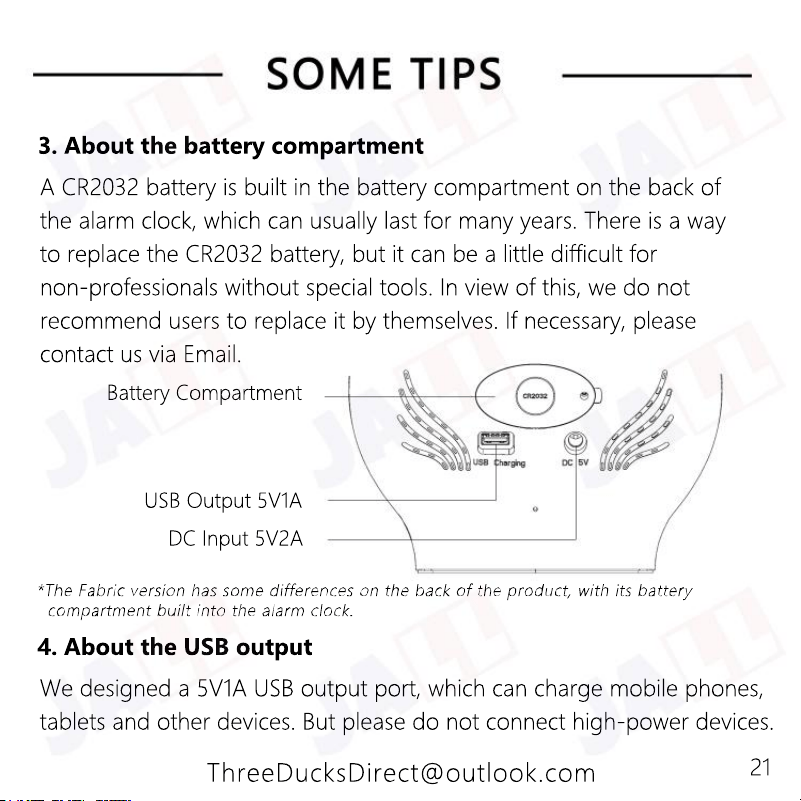
We designed a 5V1A USB output port, which can charge mobile phones,
tablets and other devices. But please do not connect high-power devices.
4. About the USB output
USB Output 5V1A
DC Input 5V2A
Battery Compartment
A CR2032 battery is built in the battery compartment on the back of
the alarm clock, which can usually last for many years. There is a way
to replace the CR2032 battery, but it can be a little difficult for
non-professionals without special tools. In view of this, we do not
recommend users to replace it by themselves. If necessary, please
contact us via Email.
3. About the battery compartment
21
Note : You can't set both light and sound to be“OFF”at the same time.
(1) When setting an alarm, the sound volume can be set to OFF, which
means that when the alarm goes off, there will be light but no sound.
(2) When setting an alarm, the light intensity can be set to OFF, which
means that when the alarm goes off, there will be sound but no light.
Q: Can I make it so that only the light comes on, not the alarm?
(or Can you set the alarm so there is only sound, no light?)
Please click the corresponding Alarm button to turn it off. So if you set
"Alarm 1", click the Alarm 1 button and it should shut off for that day.
Please refer to the page 13.
Q: How can I turn the alarm sound off once it has gone off?
(1) Perhaps the adapter is not inserted properly in the wall outlet. Plug
the adapter properly into the wall outlet.
(2) Perhaps there is a power failure. Check if the power supply works by
connecting another appliance.
If not, please contact us via Email for further help.
Q: This appliance doesn't work at all.
This section summarizes the most common issues you may have with the wake-up
light. If you’re unable to resolve the issue referring to the info below, please feel
free to contact ThreeDucksDirect@outlook.com for further assistance.
22
ThreeDucksDirect@outlook.com
I apologize for that. Please don’t worry, we are committed to providing
a lifetime warranty on this product. Please contact us via Email for a
brand new replacement.
Q: I received a product that was damaged/missing part/scratched
/dirty.
If not, please contact us via Email for further help.
(1) Please ensure that the alarm indicator is on. (Page 13)
(2) Please ensure that the Alarm Mode Switch is in the correct position.
(Page 11)
(3) Please ensure that the alarm is set correctly. (AM/PM error, Page 6)
Q: Why didn't my alarm go off?
You can turn the alarm off completely by clicking the Alarm button.
Please refer to the page 13.
Q: Can I completely turn off the alarm so it won't ring any more?
You can adjust the brightness of the time display, or turn it off by
clicking the Dimmer button. Please refer to the page 20.
Q: How can I completely turn off the time display?
23