1
Noise Engineering
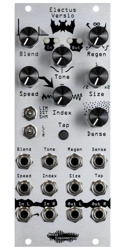
Electus Versio
Not quite a reverb, not quite a delay: the clocked
atmosphere generator you never knew you needed.
Type Stereo delay/
reverb/both?
Size 10 HP
Depth 1.5 inches
Overview
Not quite a reverb, not quite a delay, Electus is Desmodus’s more aggressive clocked
counterpart: more distortion, more in-your-face atmospheres, and synced delays for
creating your tails in a whole new way. Use it as a spacey clocked delay, as a reverb
that starts with some synced echoes, or as a completely new way to create evolving
spaces.
Not only is EV a unique atmosphere generator, it’s a stereo DSP platform. A simple USB
connection allows you to update EV to a variety of rmwares. Open-source support is
available, too, which allows you to write your own rmware! All info can be found on the
World of Versio page here.
Etymology
Electus -- from Latin: “to pass on”
Versio -- from Latin: “versatile”
“Passed Versatility”
Color code
On boot, the EV’s LEDs will shine with this color pattern to indicate that it is running the
current EV rmware:

2
Installation
To power your Noise Engineering module, turn o your case. Plug
one end of your ribbon cable into your power board so that the red
stripe on the ribbon cable is aligned to the side that says -12v and
each pin on the power header is plugged into the connector on the
ribbon. Make sure no pins are overhanging the connector! If they
are, unplug it and realign.
Line up the red stripe on the ribbon cable so that it matches the
white stripe and/or -12v indication on the board and plug in the
connector.
Screw your module into your case BEFORE powering on the
module. You risk bumping the module’s PCB against something
metallic and damaging it if it’s not properly secured when powered
on.
You should be good to go if you followed these instructions. Now
go make some noise!
A nal note. Some modules have other headers -- they may have
a dierent number of pins or may say NOT POWER. In general,
unless a manual tells you otherwise, DO NOT CONNECT THOSE
TO POWER.
Warranty
Noise Engineering backs all our products with a product warranty: we guarantee our
products to be free from manufacturing defects (materials or workmanship) for one year
from the date a new module is purchased from Noise Engineering or an authorized
retailer (receipt or invoice required). The cost of shipping to Noise Engineering is paid
by the user. Modules requiring warranty repair will either be repaired or replaced at
Noise Engineering's discretion. If you believe you have a product that has a defect that
is out of warranty, please contact us and we will work with you.
This warranty does not cover damage due to improper handling, storage, use, or abuse,
modications, or improper power or other voltage application.
All returns must be coordinated through Noise Engineering; returns without a Return
Authorization will be refused and returned to sender.
Please contact us for the current rate and more information for repairs for modules that
are not covered by our warranty.
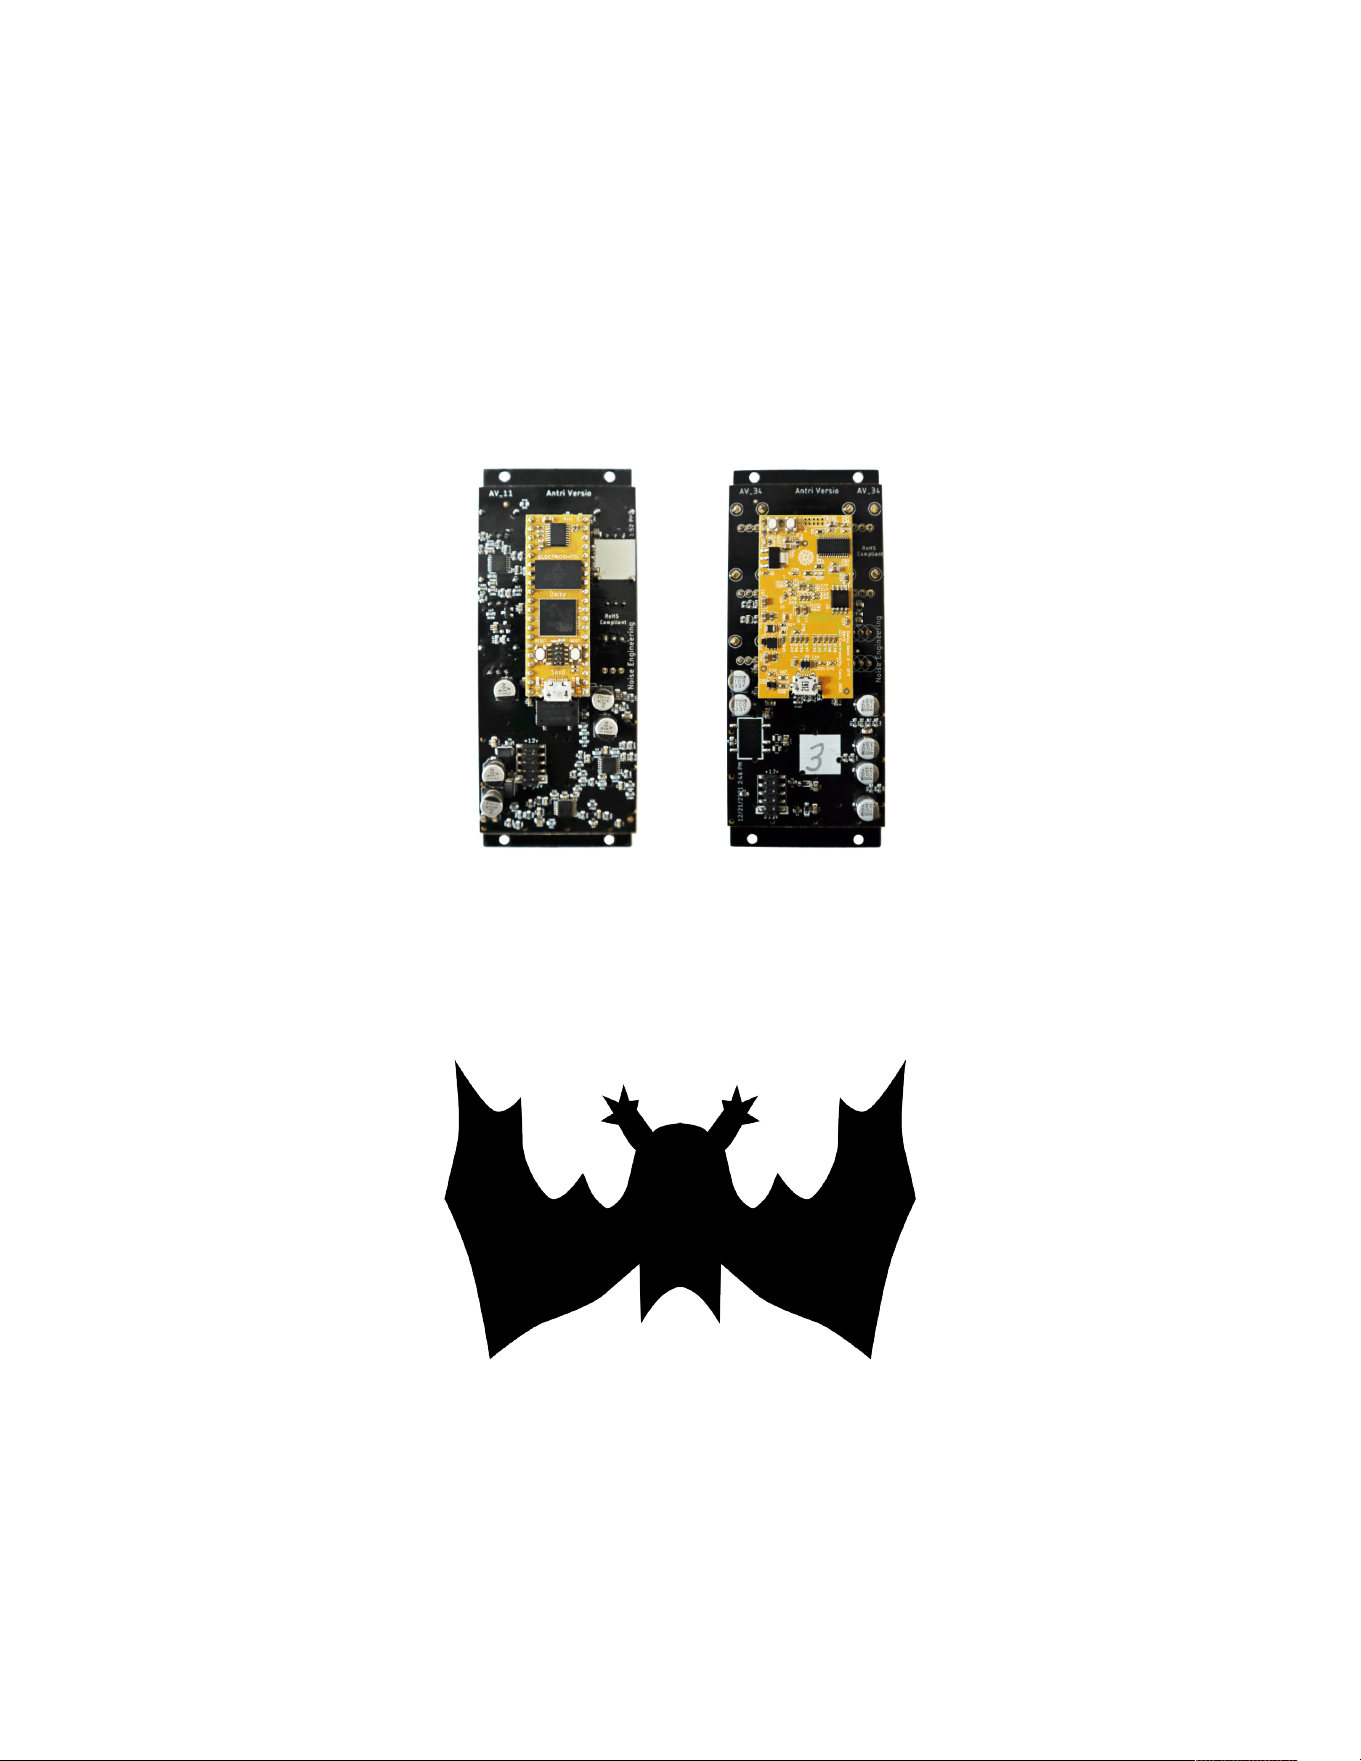
Power
If your Versio looks like the left picture, it requires 70mA +12v and 70mA -12v. If it looks
like the right picture, it requires 125mA +12v and 10mA -12v. Versio does not use the
+5v rail.
3
A note about EV’s
parameters
EV’s parameters are very similar to the original Desmodus.
In fact, the only parameters that perform a dierent function
are Tap (formerly FSU) and L/C/R (formerly BND/LRP/
JMP). Additionally, in clocked mode, Size acts as a clock
multiplier/divider.
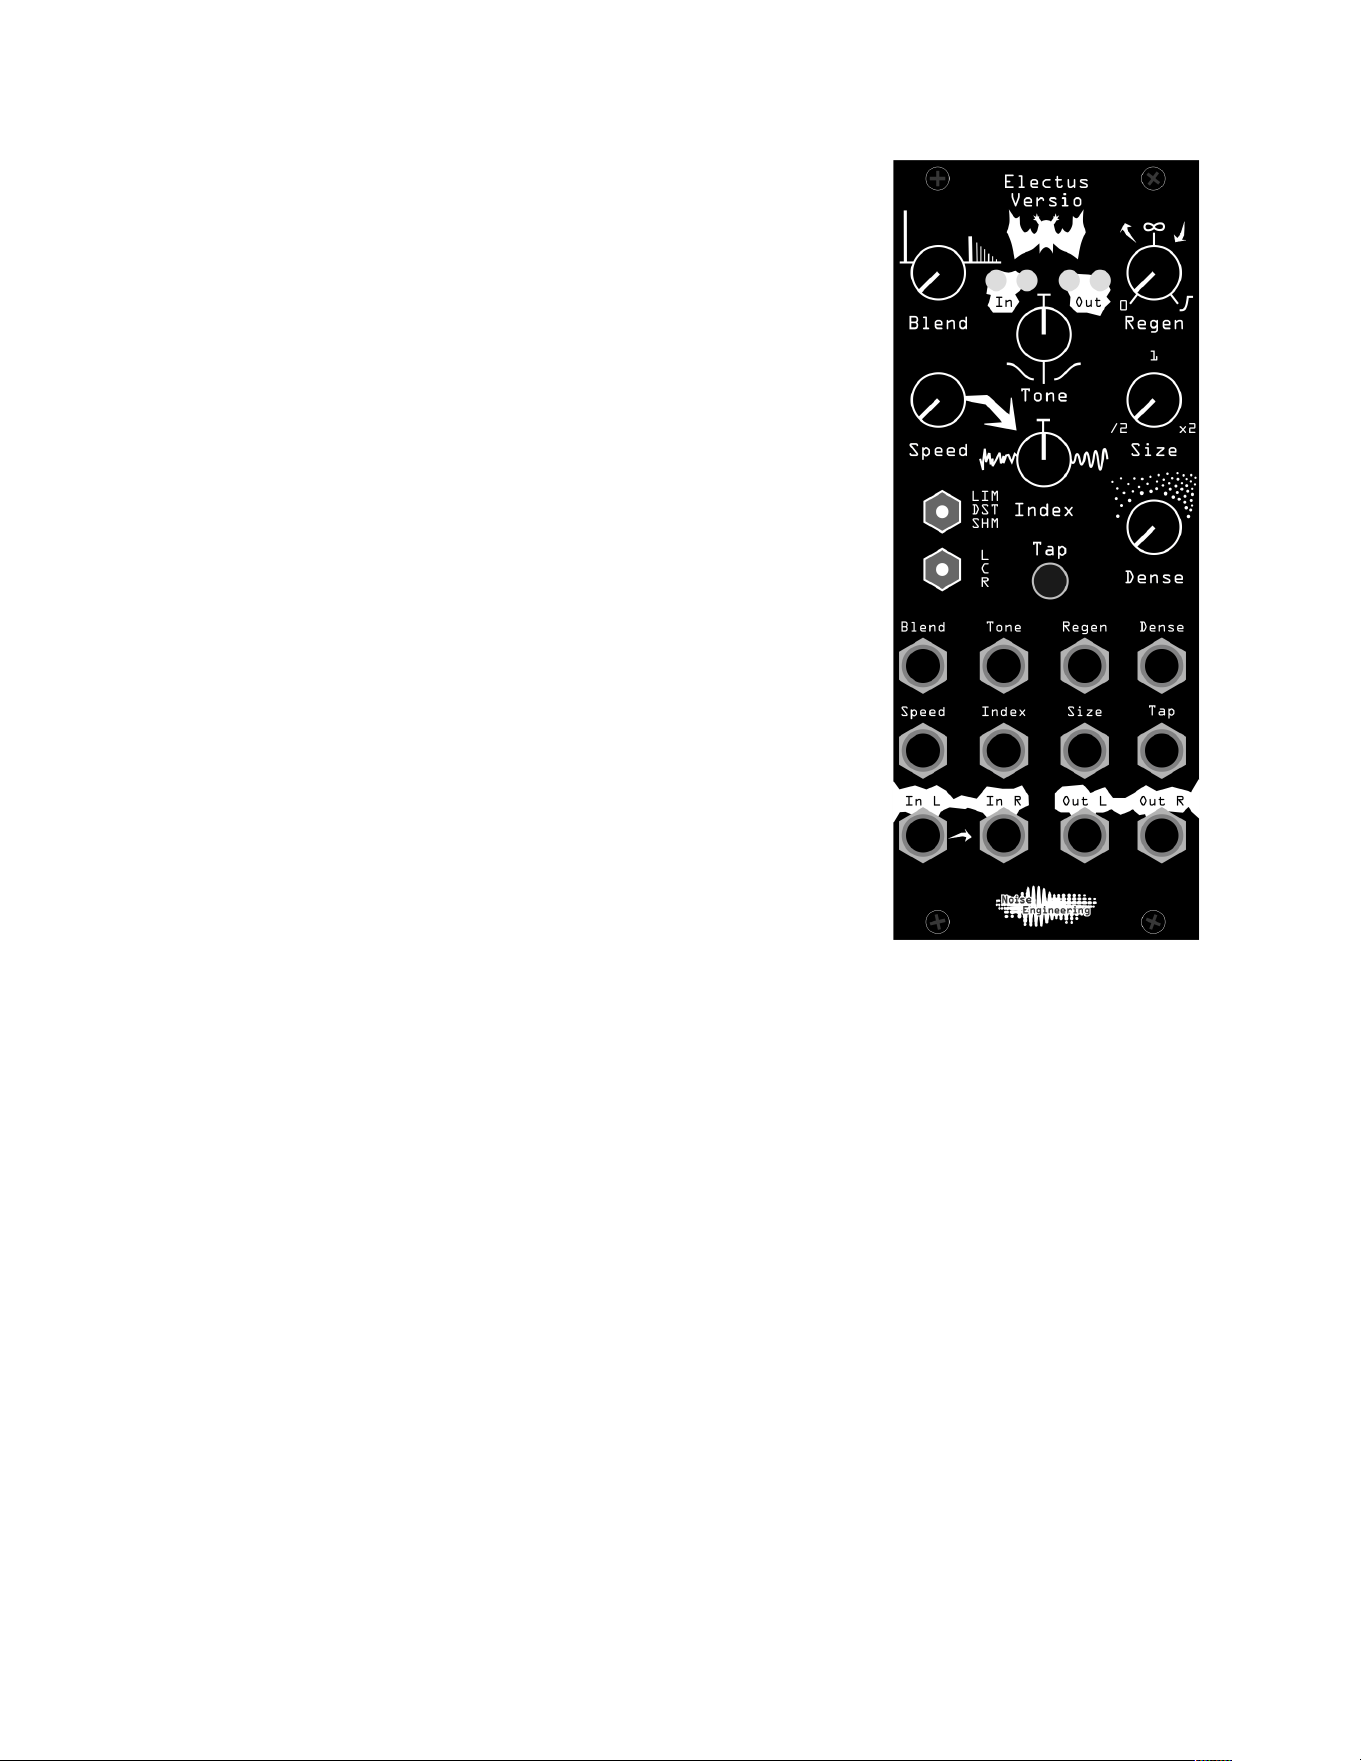
Interface
Blend: Dry/wet balance control. When turned fully left, the
unmodied input signal is passed through. Fully right, only
the processed signal is heard. Points in the middle give you
a mix of both.
Tone: A lter in the feedback loop. This is a bipolar control:
turning the knob to the left controls a lowpass lter, and to
the right controls a highpass lter. In the center, the lter is
disabled.
Regen: Amount of feedback. Regen controls a wide range
of tones and behaviors.
All the way to the left, feedback is minimized. As you turn up
to about 12:00, EV generates shorter, tamer tails and
delays. Past this point, the atmosphere reaches 100%
feedback, creating innite and evolving tails. Past 3:00, the tails are ducked by new
sounds at the input, creating sidechain-type eects.
Speed: The speed of the internal LFO.
Index: The amount of LFO sent to the delay lines that make up the eect. This is a
bipolar control: in the center the LFO is disabled; to the left, the LFO modulates the
delay lines randomly. To the right, the LFO modulates the delay lines with a sine wave.
Size: The delay time. When unclocked, it sets times from comb-like bursts at the left to
long, lush delays at the right. When clocked, it selects from the following clock divisions/
multiplications: 1/2, 5/8, 3/4, 7/8, 1/1, 15/4, 3/2, 7/4, 2/1
Dense: The spacing of the delay lines. To the left, the eect sounds like a delay, to the
right the delays are smeared into reverb.
Tap: Tap tempo. Tap in your desired clock rate, or use an external clock. Holding down
this button for about two seconds exits clocked mode and returns to free-running mode.
4

Interface (cont.)
LIM/DST/SHM: Atmosphere style.
• LIM (Limit): A clean atmosphere, using limiting to contain
feedback.
• DST (Distort): Instead of using limiting, clipping is used
to limit feedback creating a more distorted tail.
• SHM (Shimmer): A demonic pitch-shifting algorithm.
Adds a one-octave pitch shift that feeds back into the
input.
L/C/R: Reection structure: Changes how the delay lines
connect with each other.
In L/In R: Audio input. If R is not patched, the signal from L
is normaled to both inputs.
Out L/Out R: Stereo output pair.
5

Patch Tutorial
First patch:
For your rst patch, use a simple, short sound, like a pulse, snare, or click. Patch to In
L, and patch Out L and R to your mixer. Set the Blend, Index, Size, and Tone controls to
12:00 to start, and start in LIM mode.
To start, explore how Dense transforms your atmosphere between delay and reverb.
Play with Regen to change the size of your reverb, or the number of echoes in your
delay.
Next, tap in a tempo by hitting the Tap button, or patch a clock to Tap.
Use the Tone control to shape the atmosphere to your liking, and use the Index and
Speed controls to add some movement to your reverb.
Slow build
Set the atmosphere to DST. Set Size and Regen slightly above 12:00, and Dense fully
counterclockwise. Set Index, Blend, and Tone to 12:00. Patch Out L and R to your
mixer, and patch a short, plucky sound to the input. Slowly, the delay will build and
become more and more distorted. Play with Tone to shape the echoes as they distort.
Many forms
Set Index, Tone, Blend, and Size to 12:00. Set Regen to 11:00. Set Dense fully
counterclockwise. Patch in a short, percussive sound and patch Out L and R to your
mixer. Tap in a tempo, or patch a clock to Tap. Patch a slow LFO to the Dense CV input
and listen to how EV morphs from a delay to a reverb over time.
Delay sequence
Set Dense fully counterclockwise, and all other parameters to 12:00. Patch in a
percussive sound to the L In jack and patch Out L and R to your mixer. Patch a trigger
sequence to the Tap input and listen to the delay pattern that’s created.
Dark echos
Start with the “Delay sequence” patch, but with no triggers patched in, and Tone set to
11:00. This will lter the delays slightly, making them sound darker over time.
Experiment with dierent lter settings to create dark, ominous echos, or bright, cheery
delays past 12:00.
6

Updating Firmware
Any Versio module can accept any Versio rmware. All Versio module rmwares can be
updated by the user via our Customer Portal. Go to the Customer Portal to check out
alternate rmwares including Desmodus, Imitor, Ampla, and many more coming soon.
Transform your module into a reverb, delay, and so much more with the click of a
button. Change it back whenever you like.
Go to portal.noiseengineering.us
To update the rmware on your Versio:
1. Turn o the power to your case and unscrew Versio.
2. Remove the power connector on the back of Versio.
3. Plug a micro USB connector into the port on the pack of the module, and the other
end into your computer.
4. Follow the instructions in the ash app.
Design Notes
When we released Desmodus Versio, quite a few people asked for it to be clocked. To
be honest, a clocked reverb was not something we’d considered: it wasn’t how we ever
used Desmodus! But we batted the idea around (hah!) and eventually it grew legs (I
need to stop).
The problem that prevented Desmodus from tempo syncing was simply that the length
of the delay lines was too short to match most reasonable tempos. Why not make them
longer? The answer is a bit tricky. The platform we use, the Daisy Seed, has plenty of
memory to make them longer but the majority of the memory is too slow for the number
of delay lines in Desmodus (32 delays, up to 128 reads per output sample). Desmodus
splits the delay lines so some are in faster memory and some are in slower memory and
achieves a delicate balance for RAM performance. To increase the delay length the
number of delays had to be reduced. The main change with Electus was to reduce the
number of delays which required changing the structure of the delays. Electus uses only
16 or 20 delays (depending on the mode). That allows for the base delay time to be 8
times longer than in Desmodus, allowing the delays to be timed to a particular tempo.
Electus is the product of a lot of customers like you asking for a feature that we hadn’t
considered but turned out to be cool. Although it isn’t intended to be dramatically
dierent from Desmodus, we’ve been surprised at just how dierent it can sound. It’s a
bit more distorted, a little more like a delay, synced when you want it to be...some
sounds will be similar to what you get out of Desmodus, but denitely not the same.
Which eect is right for you? You be the judge -- check them both out for free with the
purchase of any Versio module by logging into the NE Customer Portal.
Special Thanks
All the customers who asked for this!
7
