Loading ...
Loading ...
Loading ...
English English5 6
Charge the Camera
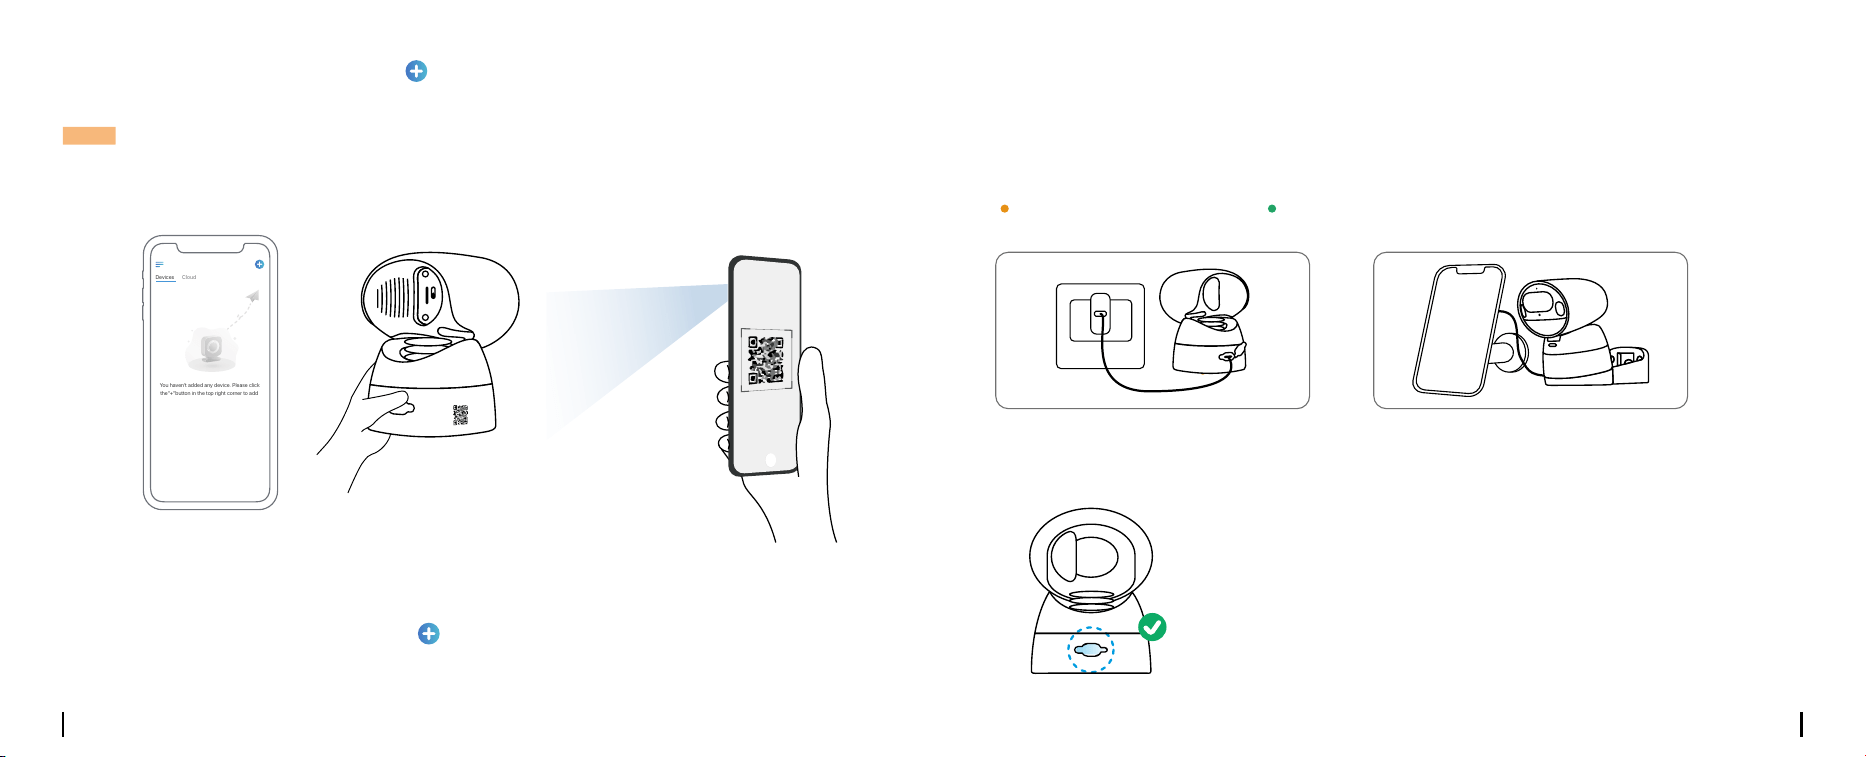
Step 3 Launch the Reolink App, click the “ ” button in the top right corner to add the camera.
Scan the QR code on the device and follow the onscreen instructions to nish initial setup.
NOTE: This device supports 2.4 GHz and 5 GHz Wi-Fi networks. It is recommended to connect the
device to 5 GHz Wi-Fi for a better network experience.
Charge the battery with a
power adapter. (not included).
Charge the battery with the Reolink
Solar Panel (Not included if you only
purchase the camera).
For better weatherproof performance, please
always cover the charging port with the rubber
plug after charging the camera.
Step 1 Download and install the Reolink Client: Go to https://reolink.com > Support > App&Client.
Step 2 Launch the Reolink Client, click the “ ” button, input the UID code of the camera to add it
and follow the onscreen instructions to nish initial setup.
Set up the Camera on PC (Optional)
Devices
Cloud
You haven't added any device. Please click
the"+"button in the top right corner to add
Orange LED: Charging Green LED: Fully charged
Charging Indicator:
It’s recommended to fully charge the camera before installing it.
Loading ...
Loading ...
Loading ...