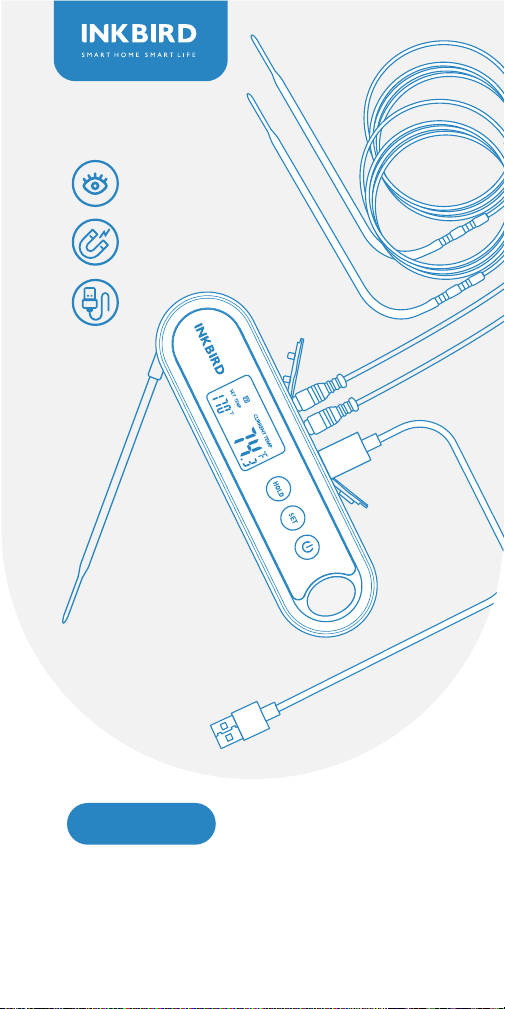
IHT-2XP
Digital Food Thermometer
With 2 External Probes


Contents
Instruction Menu
Parameter Setting Guide
Operating Functions Of The Built-In Probe
(unplugging the external probes)
BBQ Functions (plugging the external probes)
01
Features & Specifications
01
Overview
2
1
02
Product Diagram
3
03
Key Definition
4
03-19
Operation Instructions
5
21
Important Notes/Warning
7
20
Q&A About Abnormalities
6
22
Product Warranty
8
23
Meat Temperature &
Doneness Chart
9

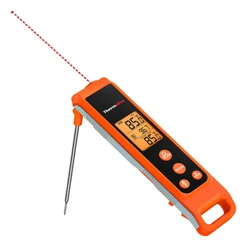
This instant-read food thermometer is designed with 2
sockets for external probes, in addition to a built-in probe.
Therefore, it’s available to measure temperature via 3
channels simultaneously. You can use it to measure
various food, such as steak, turkey, pork, chicken, fish,
and drinks, etc. It helps you cook at a precise tempera-
ture for each specific food, a good helper to create
perfect meals for your family and friends.
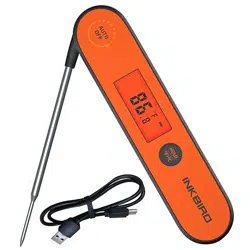
Product Name: Digital food thermometer with 2
external probes
Product Model: IHT-2XP
3 stainless steel probes for temperature measuring
Heat-resistant, waterproof probe cables
Temperature range of probes:-50.0℃ to 300℃(-58.0℉
to 572℉).
Measurement accuracy: ±0.5℃/±1.0℉
Readout time(Built-in Probe): 2 seconds
Auto-off/sleep mode
Clear backlit LCD screen
Selectable temperature units of ℃ and ℉
HOLD function to lock the measured temperature on
the LCD screen
ALARM function to alert you when the measured
temperature reaches the preset temperature for your
food
Temperature calibration range: -4.9℃~4.9℃/-9.9℉~
9.9℉
Waterproof to IPX5
Rechargeable lithium battery, more convenient to use;
It only takes 1 hour to get the battery fully charged
Easy to be stored with the attached hook and magnet
2-year product warranty
Overview
Features & Specifications
01
P1 P2
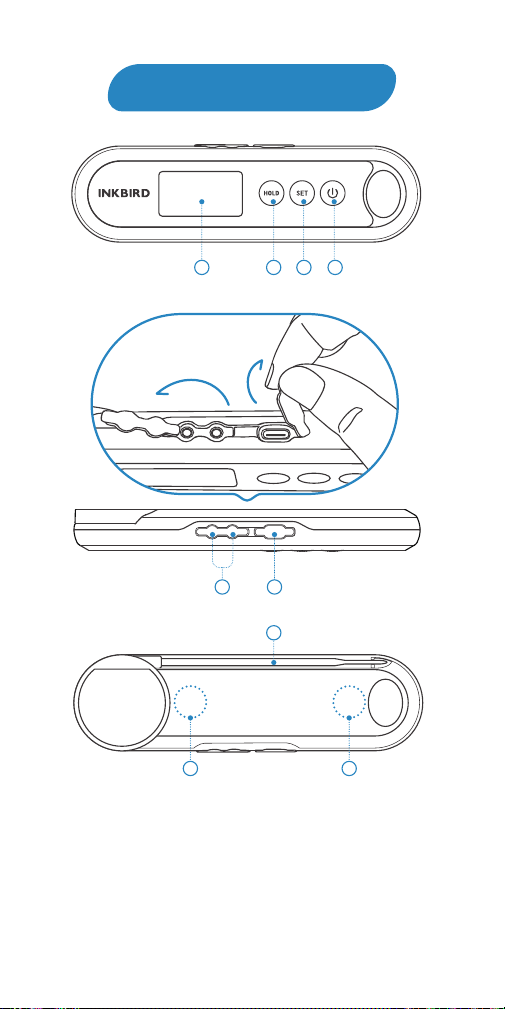
Product Diagram
02
➀ LCD Screen & Backlight
➁ HOLD/UP Button
➂ SET Button
➃ POWER/DOWN Button
1
5
6
7
8
2
3 4
P1
P2
8
➄ Probe 1/2 Sockets
➅ Battery Charge Port
➆ Built-in Probe
⑧ Magnetic Back

: Press and hold the button for 2 seconds to enter the
menu for function setting. During the setting process,
press the button to choose functions; press and hold the
button for 2 seconds to quit and save setting changes.
: Press the button to turn on the device. In normal
mode, press and hold the button for 2 seconds to turn off
the device. In setting mode, press the button to decrease
the value of parameters; long press the button to quickly
decrease the value of parameters.
: In normal mode, press the button to lock or unlock
the value of current temperature; press and hold the
button for 3 seconds to switch the display of 3 channels.
In setting mode, press the button to increase the value of
parameters; long press the button to quickly increase the
value of parameters.
Key Definition
Operation Instructions
Instruction Menu
03
CF
BEE
B LT
ALM
MENU
ITEMS
DIS-
PLAY
FUNCTIONS
SETTING
RANGE
DEFAULT
VALUES
Celsius / Fahrenheit
Key sound
Backlight active time
℃ or ℉ ℉
ON
10S
ON or OFF
5~60S
ON/OFF
Alarm function
for the built-in probe
OFF

04
ON or OFF
-50.0℃~300℃
-58.0℉~572℉
Alarm value
for the built-in probe
Temperature
calibration
for the built-in probe
-4.9℃~4.9℃
-9.9℉~9.9℉
77.0℃
170℉
0.0℃
0.0℉
ON
ON or OFF
-50.0℃~300℃
-58.0℉~572℉
Alarm function
for the external
probe1
Alarm value
for the external
probe1
Temperature
calibration
for the external
probe1
-4.9℃~4.9℃
-9.9℉~9.9℉
77.0℃
170℉
0.0℃
0.0℉
ON
-50.0℃~300℃
-58.0℉~572℉
Temperature
calibration
for the external
probe2
Alarm value
for the external
probe2
Alarm function
for the external
probe2
-4.9℃~4.9℃
-9.9℉~9.9℉
77.0℃
170℉
0.0℃
0.0℉
ALM1
ALM2
CA1
TS1
CA2
TS2
TS
CA
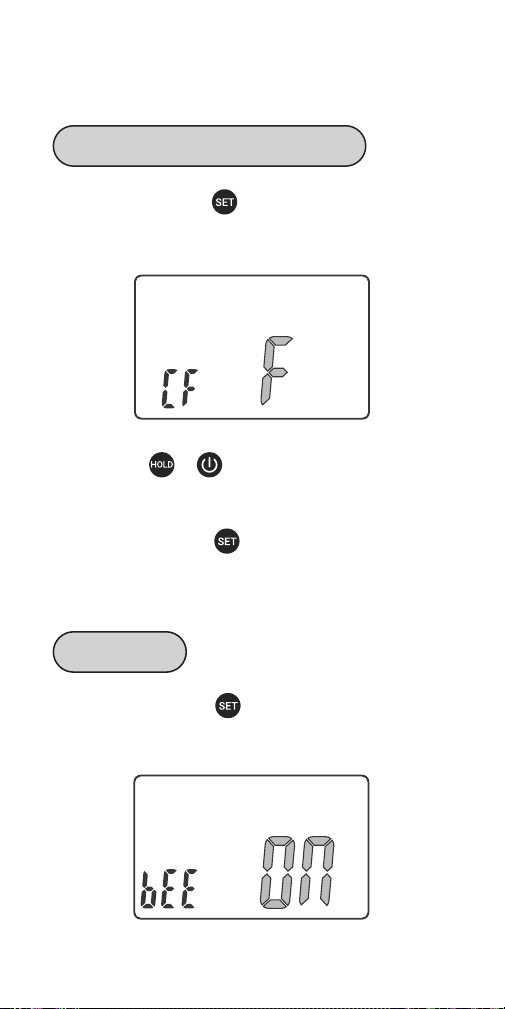
Step 1: press and hold button for 2 seconds to enter
the menu for function setting, then press the button to
choose CF function.
Step 1: press and hold button for 2 seconds to enter
the menu for function setting, then press the button to
choose BEE function.
Step 2: press or button to choose ℃ or ℉.
NOTE: All parameters will be restored to their default
values once you change the temperature unit.
Step 3: press and hold button for 2 seconds to quit
and save changes. (All changes will be automatically
saved if there is no operation in 30 seconds.)
05
Parameter Setting Guide
Temperature Display Unit of ℃/℉
Key Sound
Step 2: press or button to choose ON or OFF.
Step 3: press and hold button for 2 seconds to quit
and save changes. (All changes will be automatically
saved if there is no operation in 30 seconds.)
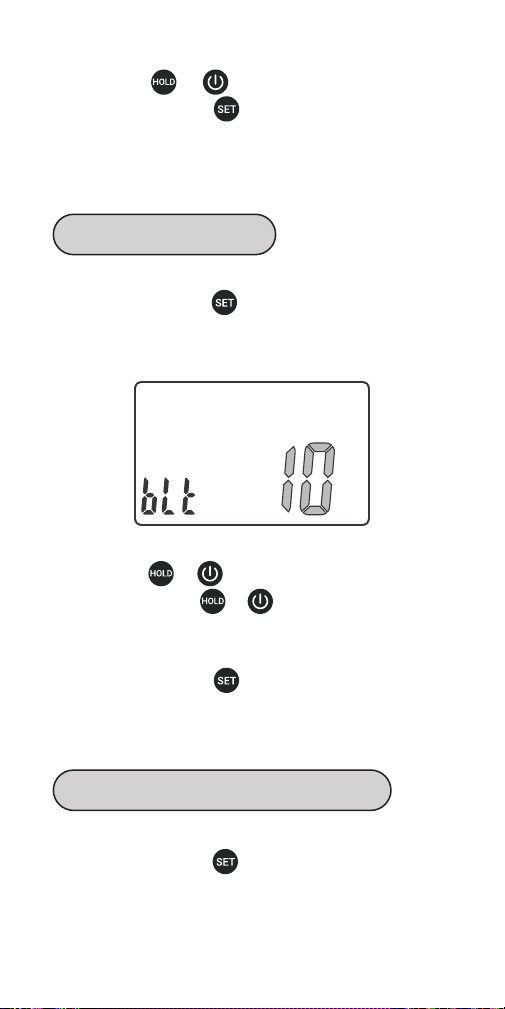
Step 1: press and hold button for 2 seconds to enter
the menu for function setting, then press the button to
choose BLT function.
Step 2: press or button to decrease or increase
the value; long press or button to quickly
decrease or increase the value. (The active time of the
backlight is adjustable from 5 to 60 seconds.)
Step 3: press and hold button for 2 seconds to quit
and save changes. (All changes will be automatically
saved if there is no operation in 30 seconds.)
Step 1: press and hold button for 2 seconds to enter
the menu for function setting, then press the button to
choose ALM function.
06
Backlight Active Time
Alarm Function for the Built-in Probe
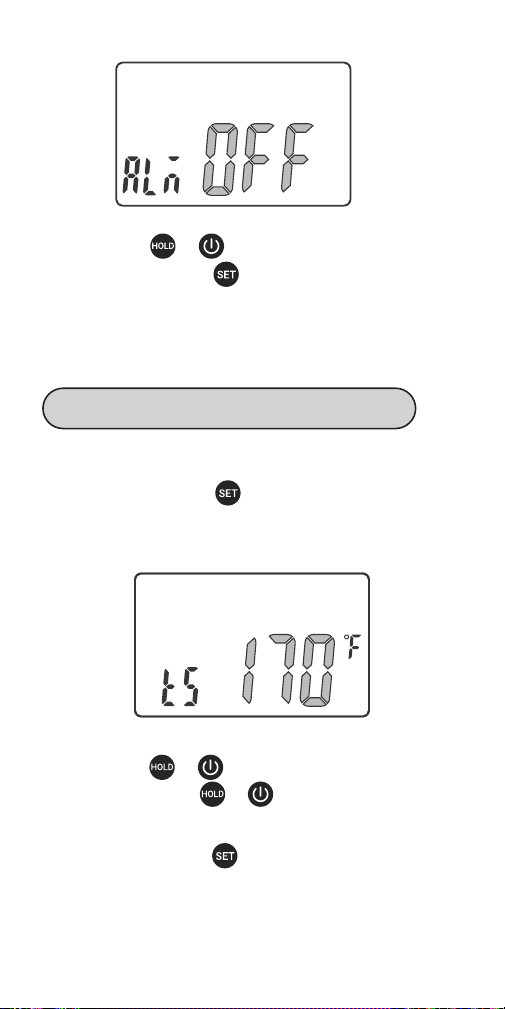
Step 1: press and hold button for 2 seconds to enter
the menu for function setting, then press the button to
choose TS function.
Step 2: press or button to choose ON or OFF.
Step 3: press and hold button for 2 seconds to quit
and save changes. (All changes will be automatically
saved if there is no operation in 30 seconds.)
Step 2: press or button to decrease or increase
the value; long press or to quickly decrease or
increase the value.
Step 3: press and hold button for 2 seconds to quit
and save changes. (All changes will be automatically
saved if there is no operation in 30 seconds.)
07
Alarm Value Setting for the Built-in Probe
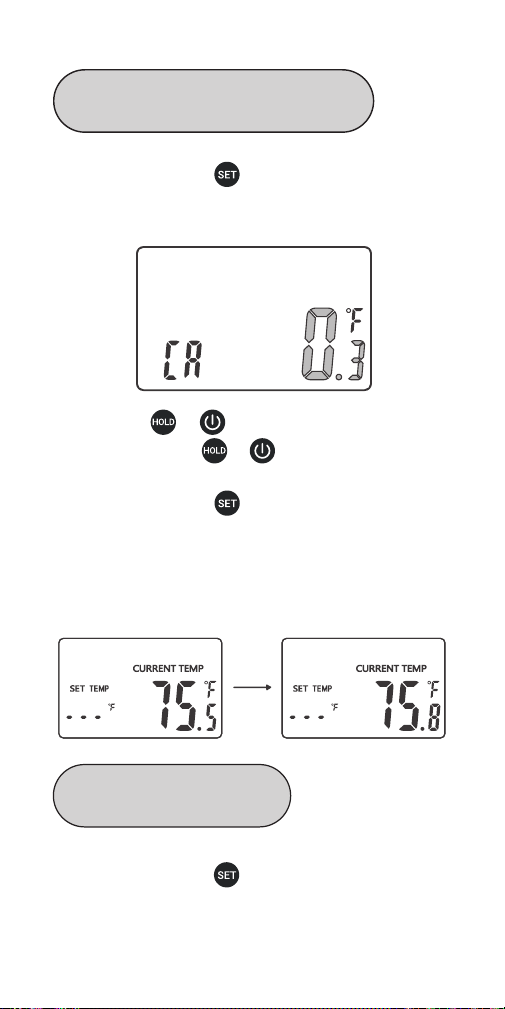
Step 1: press and hold button for 2 seconds to enter
the menu for function setting, then press the button to
choose CA function.
Step 1: press and hold button for 2 seconds to enter
the menu for function setting, then press the button to
choose ALM1 function.
Step 2: press or button to decrease or increase
the value; long press or to quickly decrease or
increase the value.
Step 3: press and hold button for 2 seconds to quit
and save changes. (All changes will be automatically
saved if there is no operation in 30 seconds.)
When the current temperature is 75.5℉, the screen
displays 75.8℉ after setting the CA value as 0.3℉.
08
Temperature Calibration for the
Built-in Probe
Alarm Function for P1
(the External Probe 1)
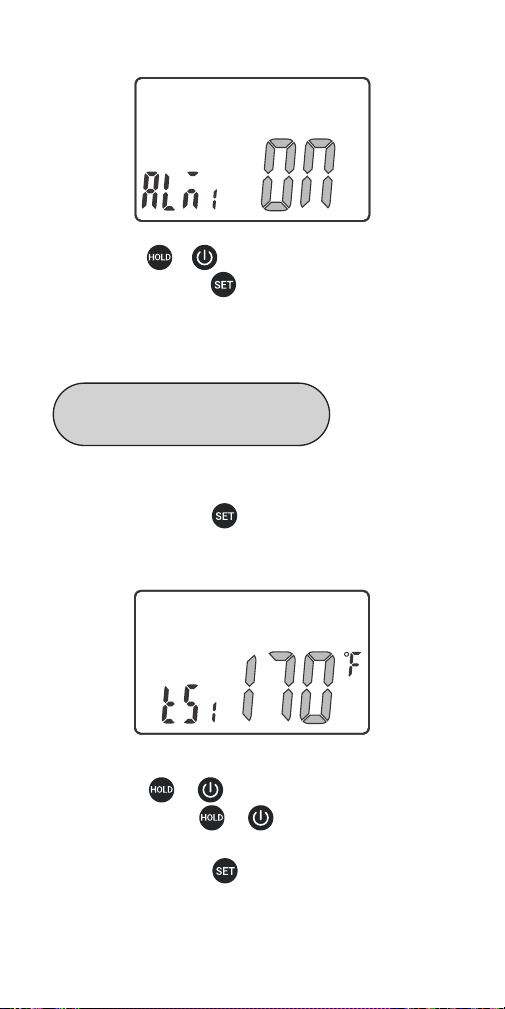
Step 1: press and hold button for 2 seconds to enter
the menu for function setting, then press the button to
choose TS1 function.
Step 2: press or button to decrease or increase
the value; long press or to quickly decrease or
increase the value.
Step 3: press and hold button for 2 seconds to quit
and save changes. (All changes will be automatically
saved if there is no operation in 30 seconds.)
Step 2: press or button to choose ON or OFF.
Step 3: press and hold button for 2 seconds to quit
and save changes. (All changes will be automatically
saved if there is no operation in 30 seconds.)
09
Alarm Value Setting for P1
(the External Probe 1)
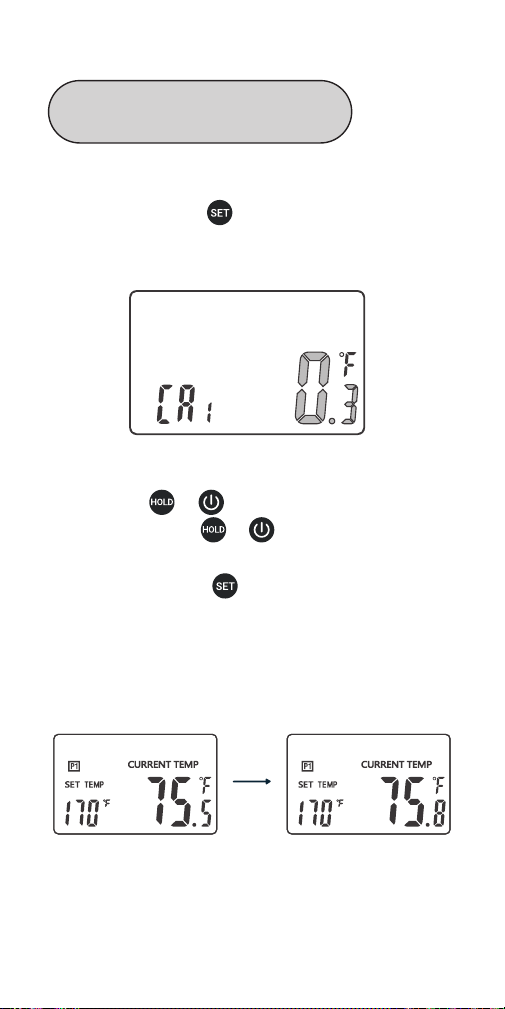
Step 1: press and hold button for 2 seconds to enter
the menu for function setting, then press the button to
choose CA1 function.
Step 2: press or button to decrease or increase
the value; long press or to quickly decrease or
increase the value.
Step 3: press and hold button for 2 seconds to quit
and save changes. (All changes will be automatically
saved if there is no operation in 30 seconds.)
When the current temperature is 75.5℉, the screen
displays 75.8℉ after setting the CA1 value as 0.3℉.
10
Temperature Calibration for P1
Probe(the External Probe 1)
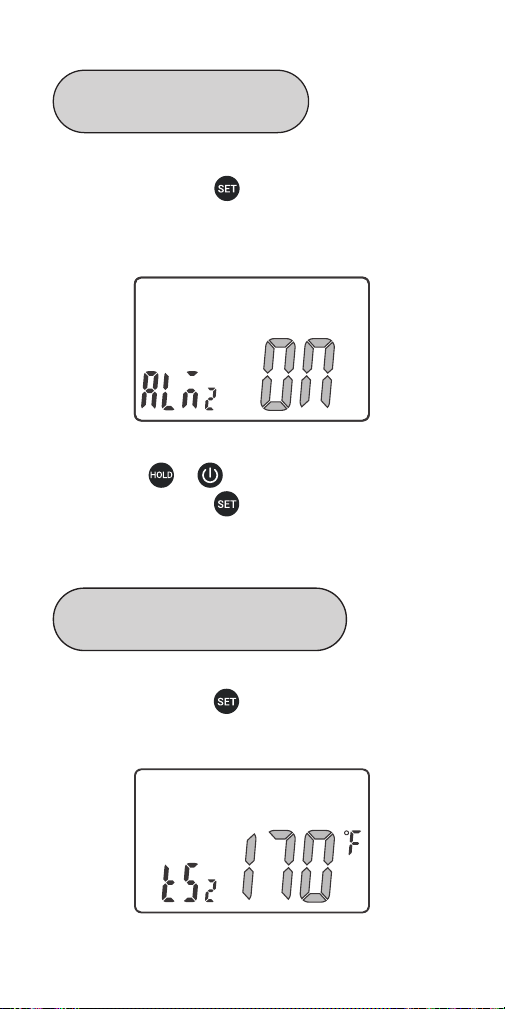
Step 1: press and hold button for 2 seconds to enter
the menu for function setting, then press the button to
choose ALM2 function.
Step 2: press or button to choose ON or OFF.
Step 3: press and hold button for 2 seconds to quit
and save changes. (All changes will be automatically
saved if there is no operation in 30 seconds.)
Step 1: press and hold button for 2 seconds to enter
the menu for function setting, then press the button to
choose TS2 function.
11
Alarm Value Setting for P2
(the External Probe 2)
Alarm Function for P2
(the External Probe 2)
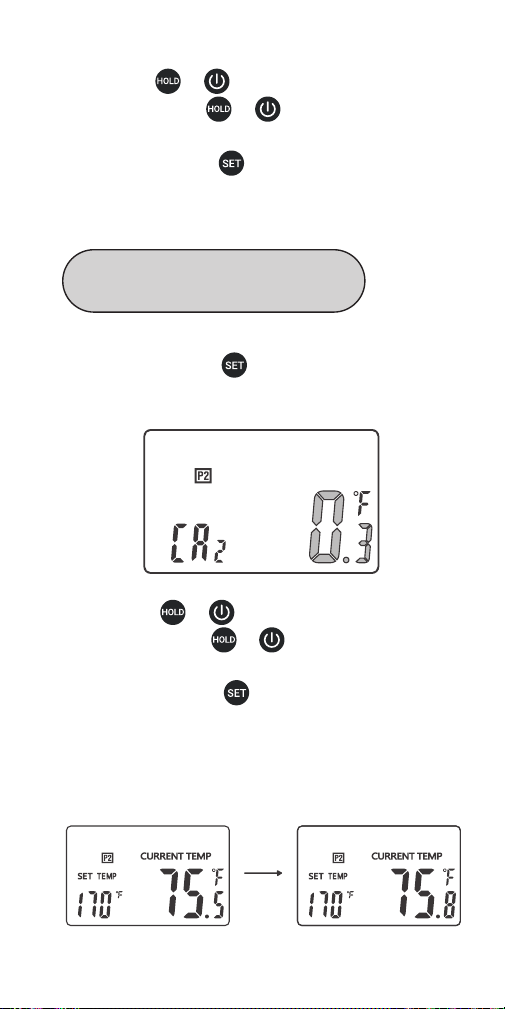
Step 1: press and hold button for 2 seconds to enter
the menu for function setting, then press the button to
choose CA2 function.
Step 2: press or button to decrease or increase
the value; long press or to quickly decrease or
increase the value.
Step 3: press and hold button for 2 seconds to quit
and save changes. (All changes will be automatically
saved if there is no operation in 30 seconds.)
Step 2: press or button to decrease or increase
the value; long press or to quickly decrease or
increase the value.
Step 3: press and hold button for 2 seconds to quit
and save changes. (All changes will be automatically
saved if there is no operation in 30 seconds.)
When the current temperature is 75.5℉, the screen
displays 75.8℉ after setting the CA2 value as 0.3℉.
12
Temperature Calibration for
P2 (the External Probe 2)
Operating Functions Of The
Built-In Probe (unplugging the
external probes)
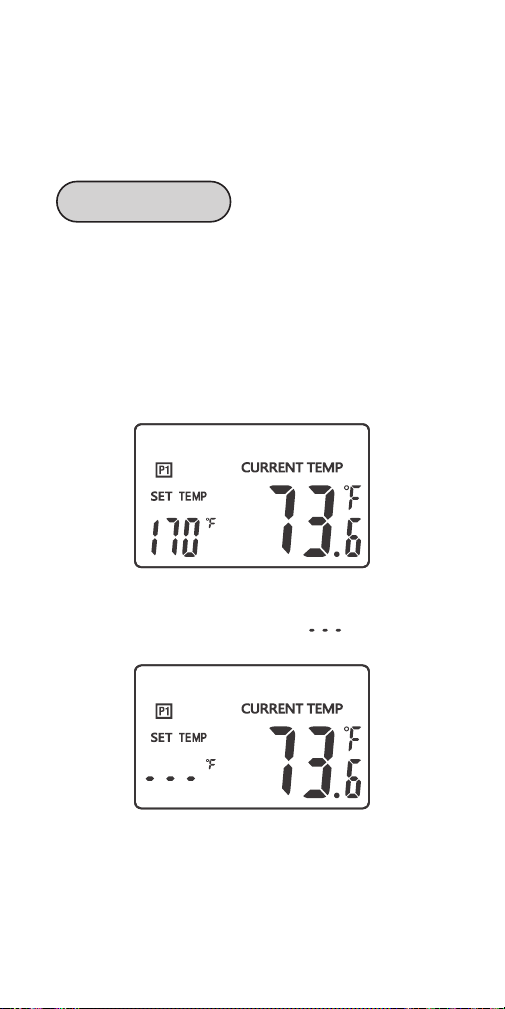
Without plugging the external probes, the built-in probe is
the current channel. The LCD screen displays data of the
current channel in priority.
When ALM=ON (the alarm function is on), the screen
displays SET TEMP and the alarm value of the probe.
When ALM=OFF (the alarm function is off), the screen
displays SET TEMP and “ ”.
13
Screen Display
Automatically: The device is automatically turned on by
unfolding the built-in probe. It is turned off when you fold
the probe back.
Manually: Press button to turn on the device.
Regardless of the probe being folded or unfolded, you
can press and hold button for 2 seconds to turn off
the device.
Auto Reboot: In probe being unfolded state, the device
will automatically sleep if there is no operation or no
dynamic of current temperature over 3 minutes. In that
situation, if the temperature suddenly changes, the device
will automatically return to work.
When you set ALM as OFF, the alarm function is off, and
the screen only displays the current measured tempera-
ture.
When you set ALM as ON, the alarm function is on, and
the screen displays the alarm value (TS) and the current
measured temperature.
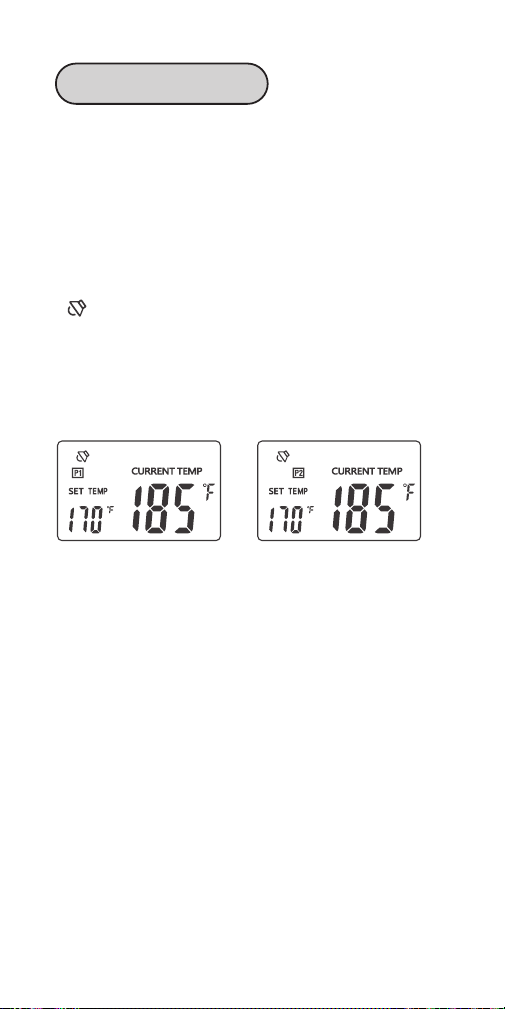
A symbol will appear on the screen if the current
temperature reaches the alarm value (TS). Meanwhile,
the device will alarm you with a “bi-bi-bi” sound repeating
at an interval of 2 seconds. And the backlight will keep
active for 30 seconds.
14
Turn On/Off
Alarm Function

How To Cancel The Alarm: ➀ Press any button to cancel
the alarm; ➁The alarm will automatically stop if the
temperature goes lower than the alarm value.
Backlight helps you check data conveniently. Without any
operation, the backlight will keep activated for the time of
BLT parameter, then be off automatically . You can press
any button to activate it when it’s off. If you unfold the
probe, the backlight will be activated automatically when
the probe detects a temperature change.
15
Backlight
BBQ FUNCTIONS
(plugging the external probes)
When you plug the external probe P1, the P1 probe is the
current channel. The LCD screen displays data of the
current channel in priority. P1 symbol appears on the
screen.
When ALM1=ON (the alarm function of P1 probe is on),
the screen displays SET TEMP and the alarm value of P1
probe.
When ALM1=OFF (the alarm function of P1 probe is off),
the screen displays SET TEMP and “ ”.
When you plug the external probe P2, the P2 probe is the
current channel. The LCD screen displays data of the
current channel in priority. P2 symbol appears on the
screen.
16
Screen Display
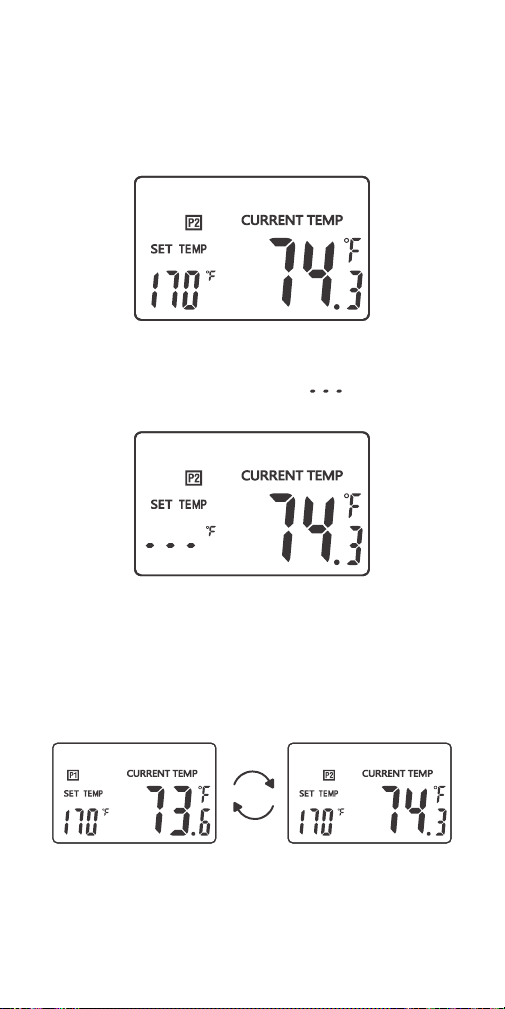
When ALM2=ON (the alarm function of P2 probe is on),
the screen displays SET TEMP and the alarm value of P2
probe.
When ALM2=OFF (the alarm function of P2 probe is off),
the screen displays SET TEMP and “ ”.
When you plug both external probes simultaneously, both
external probes are current channels. The LCD screen
alternately displays data of both external probes at a
frequency of 0.5Hz.
17
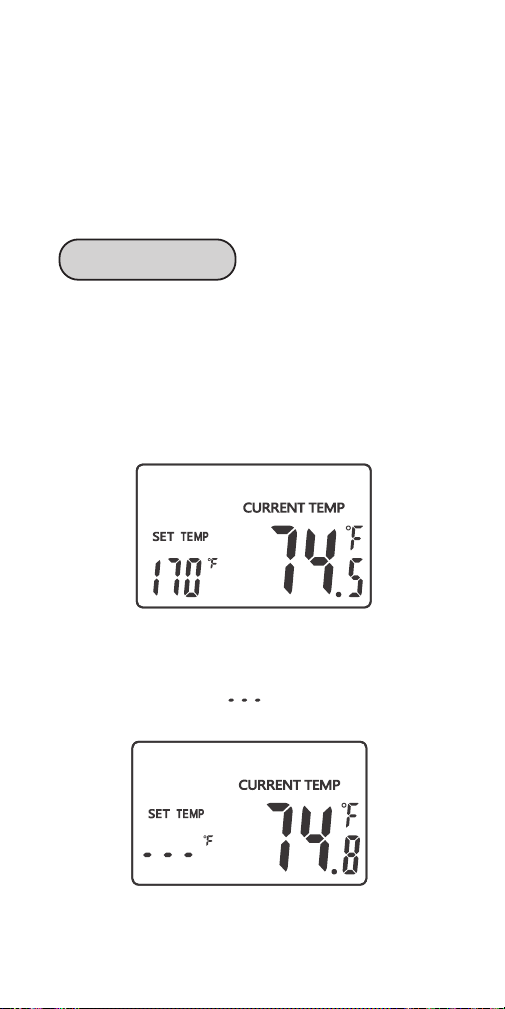
When you set ALM1 (or ALM2) as OFF, the alarm function
of P1 (or P2) probe is off, and the screen only display the
current measured temperature.
When you set ALM1 (or ALM2) as ON, the alarm function
of P1 (or P2) probe is on, and the screen displays the
alarm value of P1(or P2) probe (TS1/2) and the current
measured temperature.
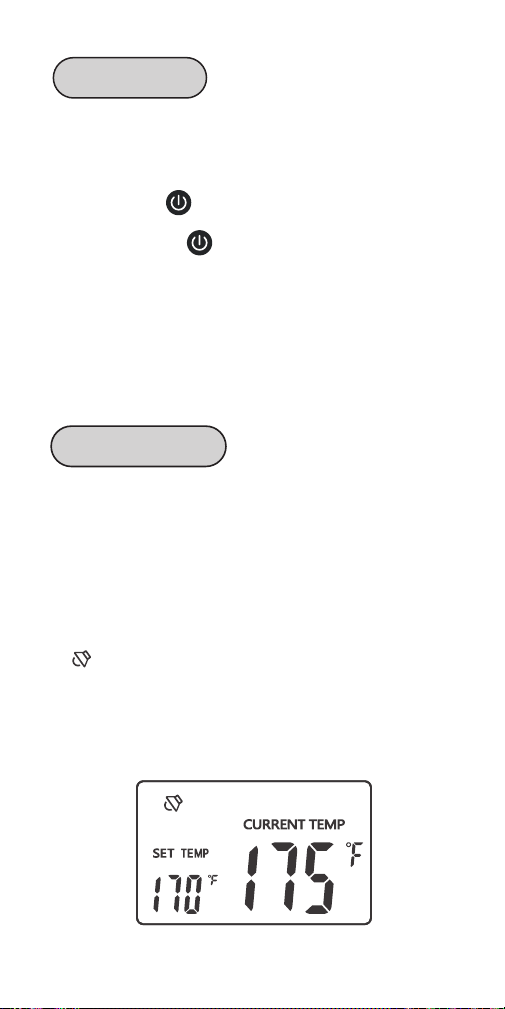
A symbol will appear on the screen if the current
temperature reaches the alarm value (TS1/TS2).
Meanwhile, the device will alarm you with a “bi-bi-bi”
sound repeating at an interval of 2 seconds. And the
backlight will be activated for 60 seconds.
How To Cancel The Alarm:
➀ Press any button to cancel the alarm;
➁ The alarm will automatically stop if the temperature
goes lower than the alarm value.
Note:
When you use the external probes, please
1. Place the external probes inside the oven if you use an
oven;
2. Make sure the external probes are inserted into the
thickest center part of the meat; Avoid bones and fat;
3. Make sure the probe cables stay away from extrusion
and fire;
4. Place or hang the thermometer away from the fire.
18
Alarm 1&2 Function

Backlight helps you check data conveniently. Without any
operation, the backlight will keep activated for the time of
BLT parameter, then be off automatically . You can press
any button to activate it when it’s off. If you unfold the
probe, the backlight will be activated automatically when
the probe detects a temperature change.
Press and hold button for 3 seconds to switch to
display data of the built-in probe. The screen will
automatically return to display data of the current
channels in 20 seconds if there is no more manual
switchover.
19
Backlight
Display Switch Over

Q&A About Abnormalities
Q1: What can you do if the screen displays “Er”, “---“ or
other unnormal values?
Answer: Please contact INKBIRD in time.
Q2: What can you do if the screen do not display any
value about P1 after inserting an external probe into the
P1 jack?
Answer: Please do as follows:
➀unplug the external probe;
➁insert it into the P1 jack again with steady force;
➂rotate the jack plug to make sure that it has good
contact with the P1 jack.
If the display problem is still unsolved, or the screen
displays “Er1”, please contact INKBIRD.
Q3: What can you do if the screen do not display any
value about P2 after inserting an external probe into the
P2 jack?
Answer: Please do as follows:
➀unplug the external probe;
➁insert it into the P2 jack again with steady force;
➂rotate the jack plug to make sure that it has good
contact with the P2 jack.
If the display problem is still unsolved, or the screen
displays “Er2”, please contact INKBIRD.
Q4: Why can’t you turn on/off the thermometer by
folding/unfolding the probe?
Answer: Please make sure both external probes are not
plugging in both jacks. The unfold-to-turn-on function
can only work without external probes.
Q5: Can you use the thermometer while the battery is
charging?
Answer: Yes.
20

21
Important Notes/Warning
Please do not allow the probes or the probe cables to
touch the fire, or it may result in burning and fusing.
Please insert the probe deep enough into the meat if
the display reading value is too high or increases too
quickly.
To detect the temperature of the meat, probes should
be inserted into the thickest part of the meat. Avoid
bones and fat.
Please wear gloves when you clean or use the probes.
Do not touch the probes or cables immediately after use,
or it may result in scalding or stab wounds.
Please keep the probes away from children to avoid
possible harm.
Please clean and air-dry the probes after use.
Please do not immerse the thermometer in the water,
though it can be rinsed with water.
Please do not clean the jack plug of each probe with
water, or it may cause bad contact.
Please do not use the stainless steel probes in
microwave ovens.
Please do not use the product beyond the temperature
range from -50℃ to 300℃ (-58℉ to 572℉), or it may
cause damages.
Children aged 12 or under 12 should use it with
parental guidance.

This item carries a 2-year warranty against defects in
either components or workmanship. During this period,
products that prove to be defective will, at the discretion
of INKBIRD, be either repaired or replaced without charge.
22
Product Warranty

23
Meat Temperature &
Doneness Chart
MEAT Rare M.Rare Medium M.Well Done
Beef
49℃/
120℉
54℃/
130℉
60℃/
140℉
66℃/
150℉
77℃/170℉
49℃/
120℉
54℃/
130℉
60℃/
140℉
66℃/
150℉
77℃/170℉
49℃/
120℉
54℃/
130℉
60℃/
140℉
66℃/
150℉
77℃/170℉
63℃/145℉
74℃/165℉
74℃/165℉
63℃/145℉
75℃/167℉
102℃~110℃/
216℉~230℉
52℃~80℃/
126℉~176℉
20℃~30℃/
68℉~86℉
Veal
Lamb
Pork
Chicken
Turkey
Fish
Hambur-
ger
BBQ
Smoke
Hot
Smoke
Cold
Smoke


V3.0
INKBIRD TECH.C.L.
Factory address: 6th Floor, Building 713, Pengji
Liantang Industrial Area, NO.2 Pengxing Road,
Luohu Disctrict, Shenzhen, China
Office address: Room 1803, Guowei Building,
NO.68 Guowei Road, Xianhu Community,
Liantang, Luohu District,Shenzhen, China

产品尺寸:80*160mm
修改内容: 1.去掉联系电话 2.添加版本号
2022.04.08 修改内容:1.更改公司信息 2.添加法国标识
3. 更新版本号