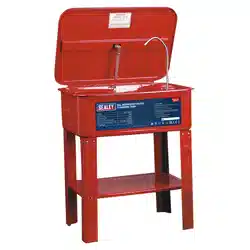
15L BENCH/PORTABLE PARTS WASHER
MODEL NO: SM21.V4
Thank you for purchasing a Sealey product. Manufactured to a high standard, this product will, if used according to these
instructions, and properly maintained, give you years of trouble free performance.
IMPORTANT: PLEASE READ THESE INSTRUCTIONS CAREFULLY. NOTE THE SAFE OPERATIONAL REQUIREMENTS, WARNINGS & CAUTIONS. USE
THE PRODUCT CORRECTLY AND WITH CARE FOR THE PURPOSE FOR WHICH IT IS INTENDED. FAILURE TO DO SO MAY CAUSE DAMAGE AND/OR
PERSONAL INJURY AND WILL INVALIDATE THE WARRANTY. KEEP THESE INSTRUCTIONS SAFE FOR FUTURE USE.
1. SAFETY
1.1. ELECTRICAL SAFETY
WARNING! It is the user’s responsibility to check the following:
9 Check all electrical equipment and appliances to ensure that they are safe before using. Inspect power supply leads, plugs
and all electrical connections for wear and damage. Sealey recommend that an RCD (Residual Current Device) is used with
all electrical products.
Electrical safety information. It is important that the following information is read and understood:
9 Ensure that the insulation on all cables and on the appliance is safe before connecting it to the power supply.
9 Regularly inspect power supply cables and plugs for wear or damage and check all connections to ensure that they are secure.
Important: Ensure that the voltage rating on the appliance suits the power supply to be used and that the plug is tted with the correct fuse.
8 DO NOT pull or carry the appliance by the power cable.
8 DO NOT pull the plug from the socket by the cable.
8 DO NOT use worn or damaged cables, plugs or connectors. Ensure that any faulty item is repaired or is replaced immediately
by a qualied electrician.
If the cable or plug is damaged during use, switch off the electricity supply and remove from use.
Ensure that repairs are carried out by a qualied electrician.
1.2. GENERAL SAFETY
WARNING! Ensure Health & Safety, local authority, and general workshop practice regulations are adhered to when using this equipment.
9 Familiarise yourself with product application and limitations, as well as the specific potential hazards peculiar to the cleaning tank.
WARNING! Disconnect the cleaning tank from the mains power before changing accessories, servicing or performing any maintenance.
9 Maintain the cleaning tank in good condition (use an authorised service agent).
9 Replace or repair damaged parts. Use genuine parts only. Non-authorised parts may be dangerous and will invalidate the warranty.
WARNING! DO NOT modify the lid or prop it open. Keep the lid and holding screws in place, tight and in good working order.
9 Locate the cleaning tank in an adequate working area for its function. Ensure the cleaning tank is stood on a firm level surface. Keep area
clean and tidy and free from unrelated materials. Ensure the area is well ventilated and has adequate lighting.
9 Keep the cleaning tank away from heat sources such as heater, sparks, open flames etc.
9 Keep the tank clean. Remove and clean the filter regularly for best and safest performance.
9 Ensure there are no flammable or combustible materials near the work area.
WARNING! Always wear approved eye or face protection when operating the cleaning tank.
9 Remove ill fitting clothing. Remove ties, watches, rings and other loose jewellery, and contain long hair.
9 Wear appropriate protective clothing.
9 Maintain correct balance and footing. Ensure the floor is not slippery and wear non-slip shoes.
9 Keep children and unauthorised persons away from the working area.
9 Avoid accidental starting of the cleaning tank. Ensure that it is unplugged from the mains supply when not in use.
9 Incase of fire in parts unit, close the lid, do not attempt to remove parts, or the cleaning tank.
8 DO NOT use the cleaning tank for any purpose other than for which it is designed.
8 DO NOT use cleaning tank in wet or damp locations or areas where there is condensation.
8 DO NOT use the cleaning tank where there are flammable liquids, solids or gases.
8 DO NOT allow untrained persons to operate the cleaning tank.
8 DO NOT over fill the cleaning tank with solvent. Full capacity should be just below the parts tray.
8 DO NOT operate the cleaning tank if any parts are missing or damaged as this may cause failure or possible personal injury.
8 DO NOT modify or jam the cleaning tank lid open. Retain the lid open by use of the attached elbow strut only.
8 DO NOT use any solvent with a flash point below 105°F. Use only Sealey solvent, contact your local Sealey stockist for details.
8 DO NOT leave the cleaning tank operating unattended.
8 DO NOT operate the cleaning tank when you are tired, under the influence of alcohol, drugs or intoxicating medication.
9 The tank is not suitable for paint thinners, gun wash or air drying.
9 When not in use switch the cleaning tank off, remove plug from the power supply.
9 Dispose of waste liquids in accordance with local authority regulations.
WARNING! DO NOT allow uncontrolled discharge of fluids thus polluting the environment.
Refer to
instructions
Wear eye
protection
Wear protective
gloves
SM21.V4 Issue 3 14/05/24
Original Language Version
© Jack Sealey Limited
2. INTRODUCTION
One-piece tank with triple baked nish and fully sealed magnetic drive pump unit with replaceable impeller. Smaller capacity tank is
suitable for benchtop mounting. Recirculated uid is ltered before entering the pump and is directed over the workpiece with a exible
metal delivery nozzle. Includes removable shelf.
3. SPECIFICATION
MODEL NO: SM21.V4 Overall Dimensions (W x D x H): 395 x 290 x 225mm
Fuse Rating: 3A Plug Type: 3-Pin BS
Max / Min Working Capacity: 15L/ 7L Pump Output/hr: 90L
Motor Power: 26W Supply: 230V
Nett Weight: 7kg Tank Dimensions (W x D x H): 395 x 290 x 210mm
4. OPERATION
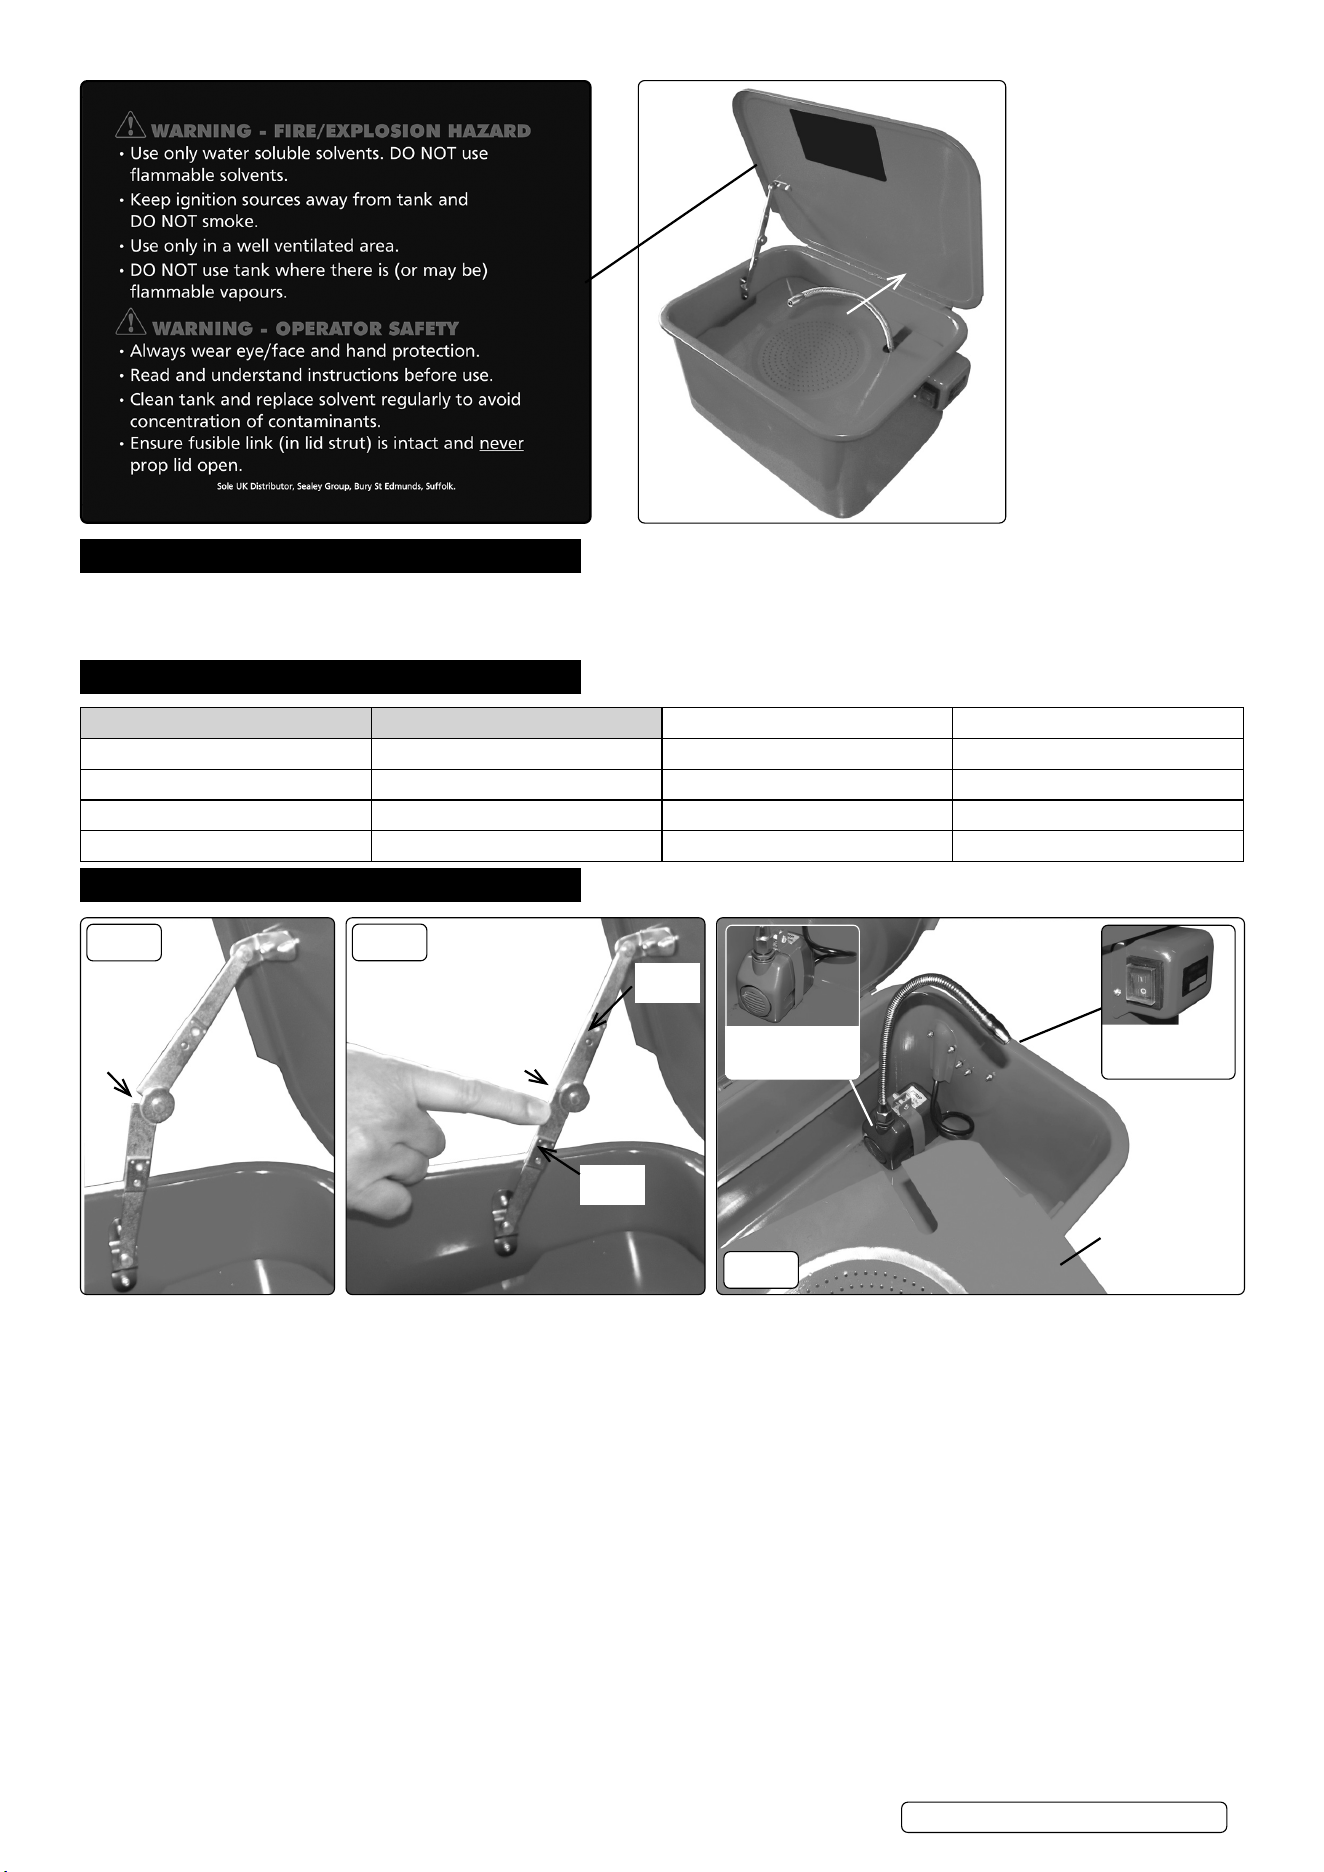
8
FIG.1
Fusible
link
Fusible
link
9
FIG.2
Removable
drainer
Removable
inlet grille
“I” (on) “O” (off)
Switch
FIG.3
WARNING! Ensure that you have read, understood and apply the chapter 1 safety instructions before using the cleaning tank.
4.1. Check that the washer power switch is in the off position, and that the unit is unplugged from the mains power supply.
4.2. Check that the lid will close under its own weight by opening fully and releasing. Free up if necessary.
4.3. Open the lid fully and ensure the “over centre” link engages (g.1 and g.2). Fill the tank to appropriate capacity; between a minimum
of 7ltrs and a maximum of 15ltrs with a Sealey solvent or a general purpose degreaser. Contact your local Sealey stockist for supply.
DO NOT use any other type of solvent. CAUTION! Ensure that you follow any instructions provided with the solvent.
4.4. If fitted, remove the internal tray to ensure the pump is immersed correctly in the solvent. Replace the internal tray.
4.5. Plug the unit into the mains power supply and switch the unit on (fig.3). Check that the solvent flows freely through the flexible spout.
4.6. Place parts to be cleaned onto the internal cleaning tray. Ensure any splash back stays inside the tank. For ground-in dirt etc, leave the
parts to soak in the bottom of the tank. Brush parts with the cleaning brush if required. Turn off the pump and leave the parts to drain on
the shelf.
4.7. When complete, turn the washer off and unplug from the mains power supply.
WARNING! DO NOT allow uncontrolled discharge of fluids, thus polluting the environment. Dispose of waste liquids according to local
authority regulations.
4.8. Keep the cleaning tank clean. Remove and clean the filter regularly (fig.3) for the best and safest performance.
N.B. This cleaning tank has an anti-re device built into it (g.1 and g.2). In the event of a re and subsequent increase in temperature
locally, the low melting point solder in the fusible links turns from solid to liquid allowing the lid to close under gravity.
DO NOT prop the lid open with anything other than the tted fused linkage. Use your nger (g.2) to ensure full engagement. Once
actuated, the re detection device cannot be re-used and must be replaced. When cleaning parts ensure that nothing in the tank,
including the parts basket and the exible spout, is in a position that would prevent the lid from closing fully, if and when the fusible link
activates.
SM21.V4 Issue 3 14/05/24
Original Language Version
© Jack Sealey Limited

5. MAINTENANCE
5.1. Check that the cleaning tank power switch is in the off position, and that the unit is unplugged from the mains power supply before any
maintenance activity.
5.2. Check that the lid will close under its own weight by opening fully and releasing. Free up if necessary.
5.3. Keep the cleaning tank and drainer clean, see fig.5 for ease of access.
5.4. Remove the inlet grille and clean regularly (fig.4) for the best and safest performance.
5.5. Replenish the cleaning agent when it has become contaminated. This must be at user discretion.
SM21.V4 Issue 3 14/05/24
Original Language Version
© Jack Sealey Limited
Sealey Group, Kempson Way, Suffolk Business Park, Bury St Edmunds, Suffolk. IP32 7AR
01284 757500 sales@sealey.co.uk www.sealey.co.uk
ENVIRONMENT PROTECTION
Recycle unwanted materials instead of disposing of them as waste. All tools, accessories and packaging should be
sorted, taken to a recycling centre and disposed of in a manner which is compatible with the environment. When
the product becomes completely unserviceable and requires disposal, drain any uids (if applicable) into approved
containers and dispose of the product and uids according to local regulations.
REGISTER YOUR
PURCHASE HERE
Note: It is our policy to continually improve products and as such we reserve the right to alter data, specications and component parts
without prior notice. Please note that other versions of this product are available. If you require documentation for alternative versions, please
email or call our technical team on technical@sealey.co.uk or 01284 757505.
Important: No Liability is accepted for incorrect use of this product.
Warranty: Guarantee is 12 months from purchase date, proof of which is required for any claim.
WEEE REGULATIONS
Dispose of this product at the end of its working life in compliance with the EU Directive on Waste Electrical and Electronic
Equipment (WEEE). When the product is no longer required, it must be disposed of in an environmentally protective way. Contact
your local solid waste authority for recycling information.