14L PORTABLE BUCKET PARTS WASHER
WITH BRUSH
MODEL NO: SM220
Thank you for purchasing a Sealey product. Manufactured to a high standard, this product will, if used according to these
instructions, and properly maintained, give you years of trouble free performance.
IMPORTANT: PLEASE READ THESE INSTRUCTIONS CAREFULLY. NOTE THE SAFE OPERATIONAL REQUIREMENTS, WARNINGS & CAUTIONS. USE
THE PRODUCT CORRECTLY AND WITH CARE FOR THE PURPOSE FOR WHICH IT IS INTENDED. FAILURE TO DO SO MAY CAUSE DAMAGE AND/OR
PERSONAL INJURY AND WILL INVALIDATE THE WARRANTY. KEEP THESE INSTRUCTIONS SAFE FOR FUTURE USE.
1. SAFETY
1.1. ELECTRICAL SAFETY
WARNING! It is the user’s responsibility to check the following:
Check all electrical equipment and appliances to ensure that they are safe before using. Inspect power supply leads, plugs and all
electrical connections for wear and damage. Sealey recommend that an RCD (Residual Current Device) is used with all electrical
products.
If the product is used in the course of business duties, it must be maintained in a safe condition and routinely PAT (Portable Appliance
Test) tested.
Electrical safety information: it is important that the following information is read and understood.
1.1.1. Ensure that the insulation on all cables and on the appliance is safe before connecting it to the power supply.
1.1.2. Regularly inspect power supply cables and plugs for wear or damage and check all connections to ensure that they are secure.
1.1.3. Important: Ensure that the voltage rating on the appliance suits the power supply to be used and that the plug is tted with the correct
fuse - see fuse rating in these instructions.
8 DO NOT pull or carry the appliance by the power cable.
8 DO NOT pull the plug from the socket by the cable.
8 DO NOT use worn or damaged cables, plugs or connectors. Ensure that any faulty item is repaired or
replaced immediately by a qualied electrician.
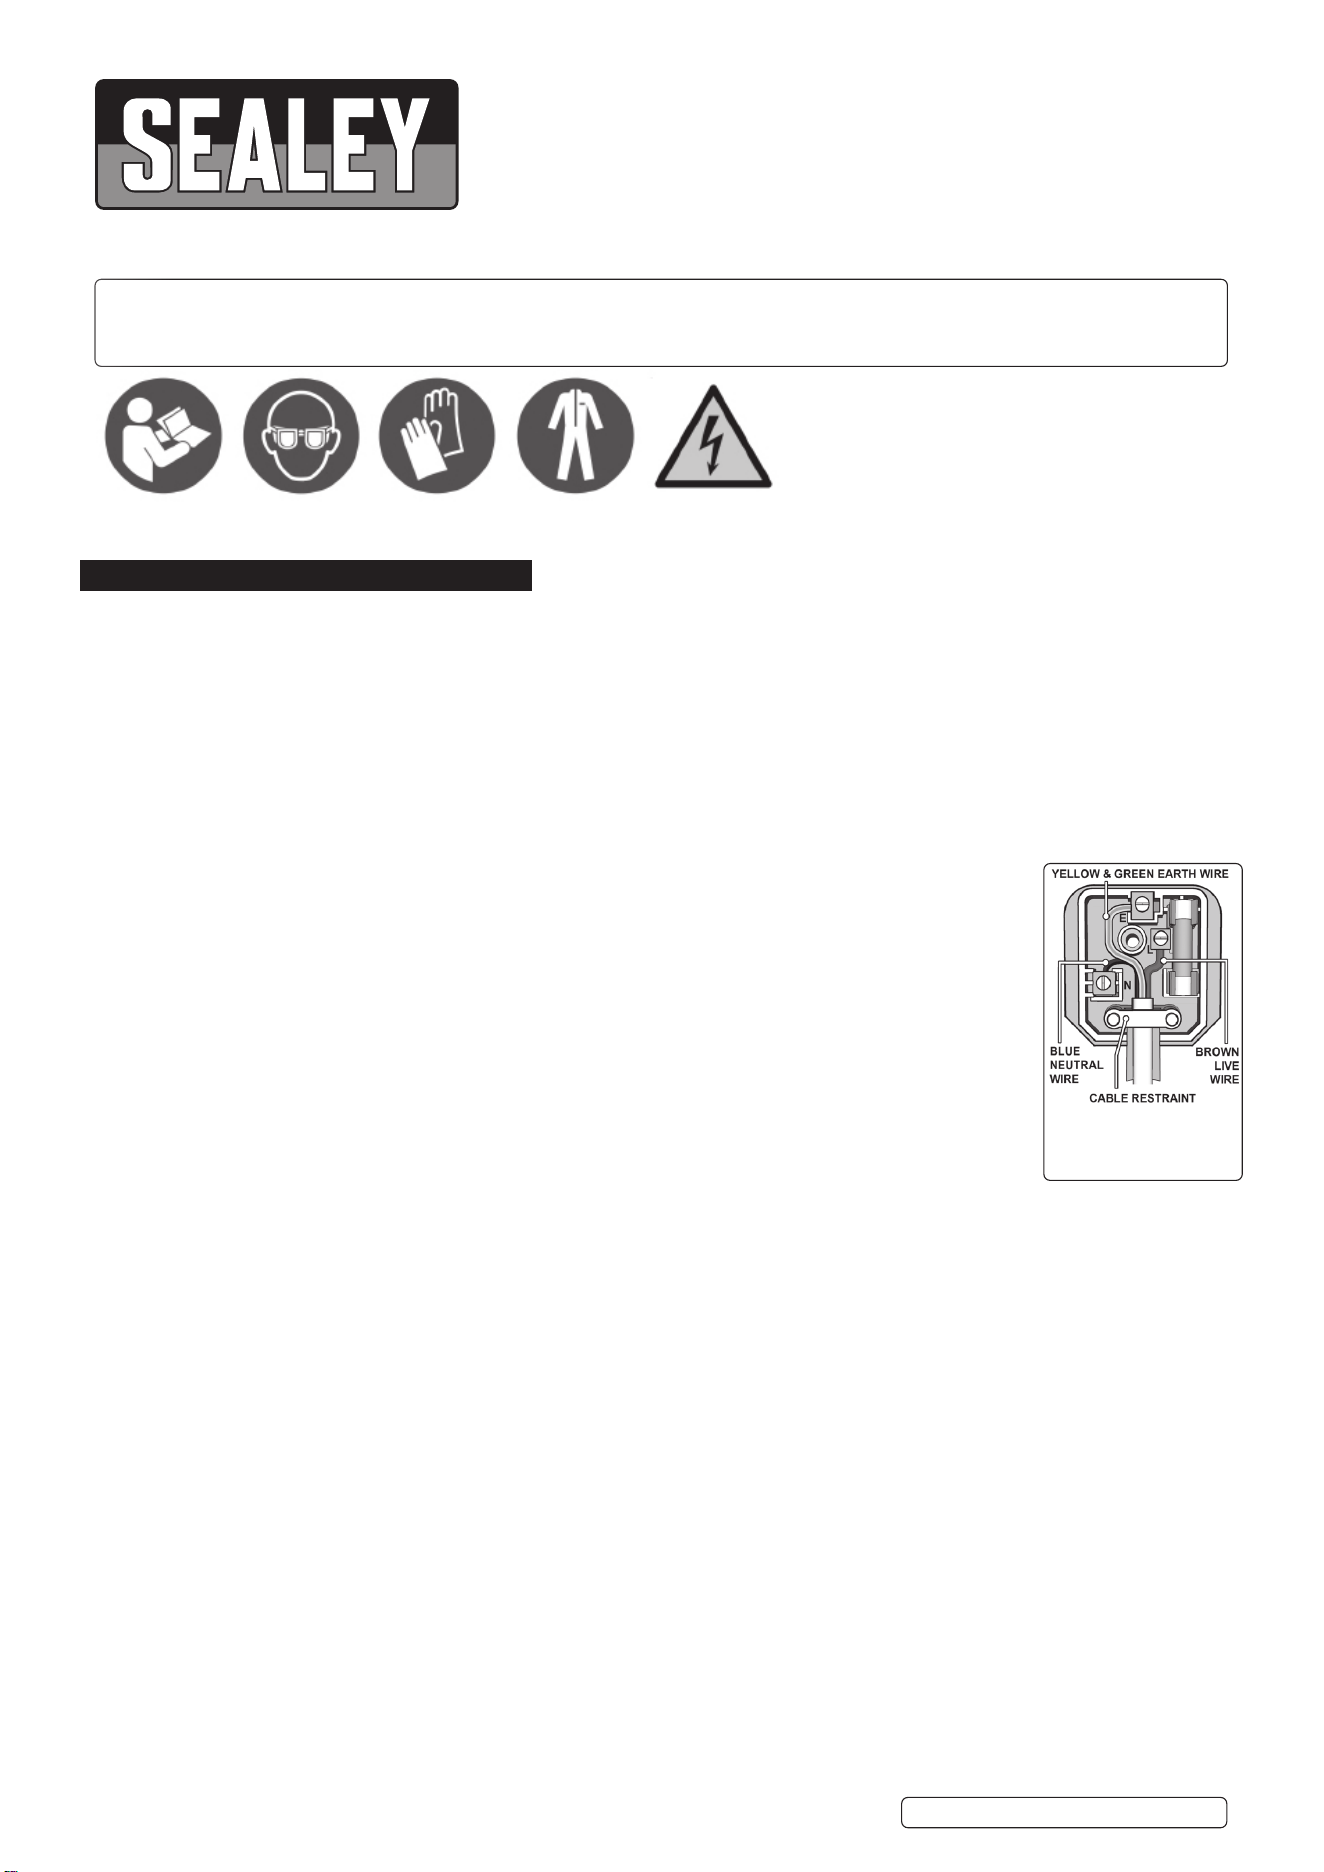
1.1.4. This product is tted with a BS1363/A 3 pin plug.
If the cable or plug is damaged during use, switch the electricity supply and remove from use.
Ensure that repairs are carried out by a qualied electrician.
Replace a damaged plug with a BS1363/A 3 pin plug. If in doubt contact a qualied electrician.
A) Connect the GREEN/YELLOW earth wire to the earth terminal ‘E’.
B) Connect the BROWN live wire to the live terminal ‘L’.
C) Connect the BLUE neutral wire to the neutral terminal ‘N’.
Ensure that the cable outer sheath extends inside the cable restraint and that the restraint is tight.
Sealey recommend that repairs are carried out by a qualied electrician.
WARNING! The supply cord cannot be replaced. If the cord is damaged the appliance should be scrapped.
NOTE: The pump is to be supplied by an isolating transformer or supplied through a residual current device having a rated residual
operating current not exceeding 30mA.
1.2. GENERAL SAFETY
WARNING! Ensure Health & Safety, local authority, and general workshop practice regulations are adhered to when using this equipment.
9 Familiarise yourself with product application and limitations, as well as the specific potential hazards peculiar to the washer.
WARNING! Disconnect the washer from the mains power before changing accessories, servicing or performing any maintenance.
8 DO NOT unplug machine with wet hands.
9 Maintain the washer in good condition (use an authorised service agent).
9 Replace or repair damaged parts. Use genuine parts only. Non-authorised parts may be dangerous and will invalidate the warranty.
9 Locate the washer in an adequate working area for its function. Ensure the washer stands on a firm level surface. Keep area clean and
tidy and free from unrelated materials. Ensure the area is well ventilated and has adequate lighting.
9 Keep the washer away from heat sources such as heater, sparks, open flames etc.
9 Keep the washer clean. Remove and clean regularly for best and safest performance.
9 Ensure there are no flammable or combustible materials near the work area.
WARNING! Always wear approved eye or face protection when operating the washer along with protective gloves (see Sealey Catalogue
for suitable gloves, we recommend part no. SSP32).
9 Remove ill fitting clothing. Remove ties, watches, rings and other loose jewellery, and contain long hair.
9 Wear appropriate protective clothing.
9 Maintain correct balance and footing. Ensure the floor is not slippery and wear non-slip shoes.
9 Keep children and unauthorised persons away from the working area.
9 Avoid accidental starting of the washer. Ensure that it is unplugged from the mains supply when not in use.
8 DO NOT use the washer for any purpose other than for which it is designed.
8 DO NOT use the washer where there are flammable liquids, solids or gases.
8 DO NOT allow untrained persons to operate the washer.
8 DO NOT operate the washer if any parts are missing or damaged as this may cause failure or possible personal injury.
Refer to
instructions
Electrical shock
hazard
Wear eye
protection
Wear protective
gloves
Wear protective
clothing
Replacement fuse
rating: 13A
SM220 Issue 2 (1,F) 10/07/23
Original Language Version
© Jack Sealey Limited
8 DO NOT leave the washer operating unattended.
8 DO NOT operate the washer when you are tired, under the influence of alcohol, drugs or intoxicating medication.
9 The tank is not suitable for paint thinners, gun wash or air drying.
9 When not in use switch the washer off, remove plug from the power supply.
9 Dispose of waste liquids in accordance with local authority regulations.
WARNING! DO NOT allow uncontrolled discharge of fluids thus polluting the environment.
WARNING! The pump must be disconnected when adjusting the flow control.
9 This appliance shall not be used by children. Cleaning and user maintenance shall not be carried out by children.
9 The appliance shall be disconnected from its power source during service and when replacing parts and, if that the removal of the plug is
foreseen, it shall be clearly indicated that the removal of the plug has to be such that an operator can check from any of the points to
which he has access that the plug remains removed.
9 Always disconnect the appliance from the supply before assembling, disassembling or cleaning.
9 Appliances can be used by persons with reduced physical, sensory or mental capabilities or lack of experience and knowledge if they
have been given supervision or instruction concerning use of the appliance in a safe way and if they understand the hazards involved.
9 Children shall not play with this appliance.
8 DO NOT leave outside during freezing weather conditions.
2. INTRODUCTION
Lightweight and easy to move around the garage or workshop. Great for parts cleaning with any non-corrosive, water-based cleaning
solutions. Simple to use with any 14L bucket, such as Sealey Model No. BM16 (bucket not included). Ideal for degreasing and cleaning
small parts and tools with the hard bristle brush. Unique channel drainage system to simply catch waste material, and the variable
speed pump sits in the bucket to pump the cleaning solution direct to the head of the brush for eective cleaning.
3. SPECIFICATION
Model No: ................................................................................................SM220
Maximum Working Capacity ................................................................... 300mm
Minimum Working Capacity ....... Keep pump covered by water when operating
Motor Power .................................................................................................16W
Overall Dimensions(W x D x H): ......................................... 361 x 361 x 145mm
Plug Type: .............................................................................................3-Pin BS
4. OPERATION
WARNING! Ensure that you have read, understood and apply the section 1 safety instructions before using the cleaner.
4.1. Check that the unit is unplugged from the mains power supply.
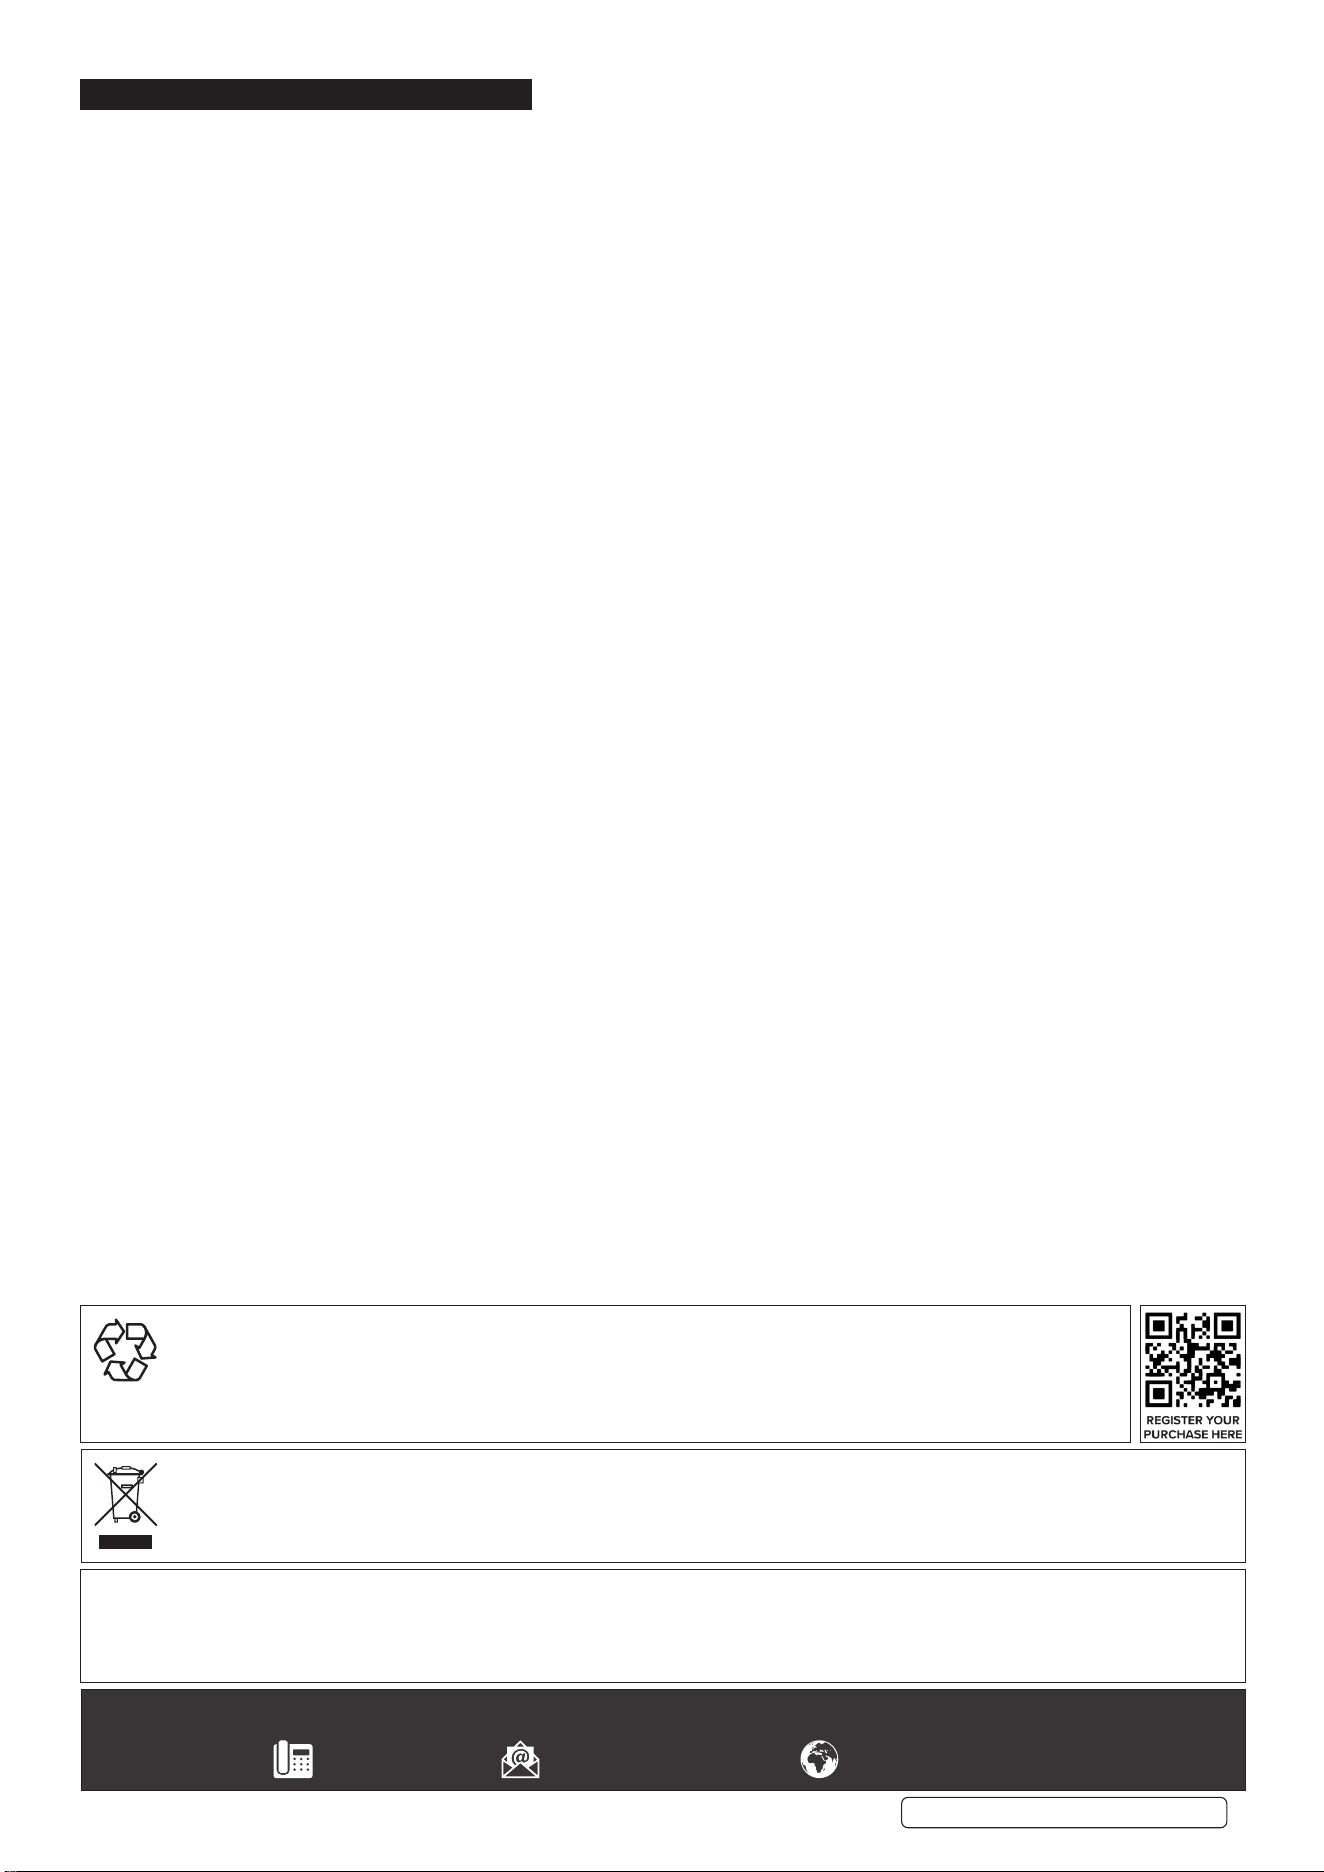
4.2. The pump’s output flow can be adjusted by rotating the controller on the side of the unit. Rotate anticlockwise to increase flow, and
clockwise to decrease (fig.2).
8 DO NOT attempt to adjust the flow rate while the unit is plugged in and / or immersed in the cleaning solvent.
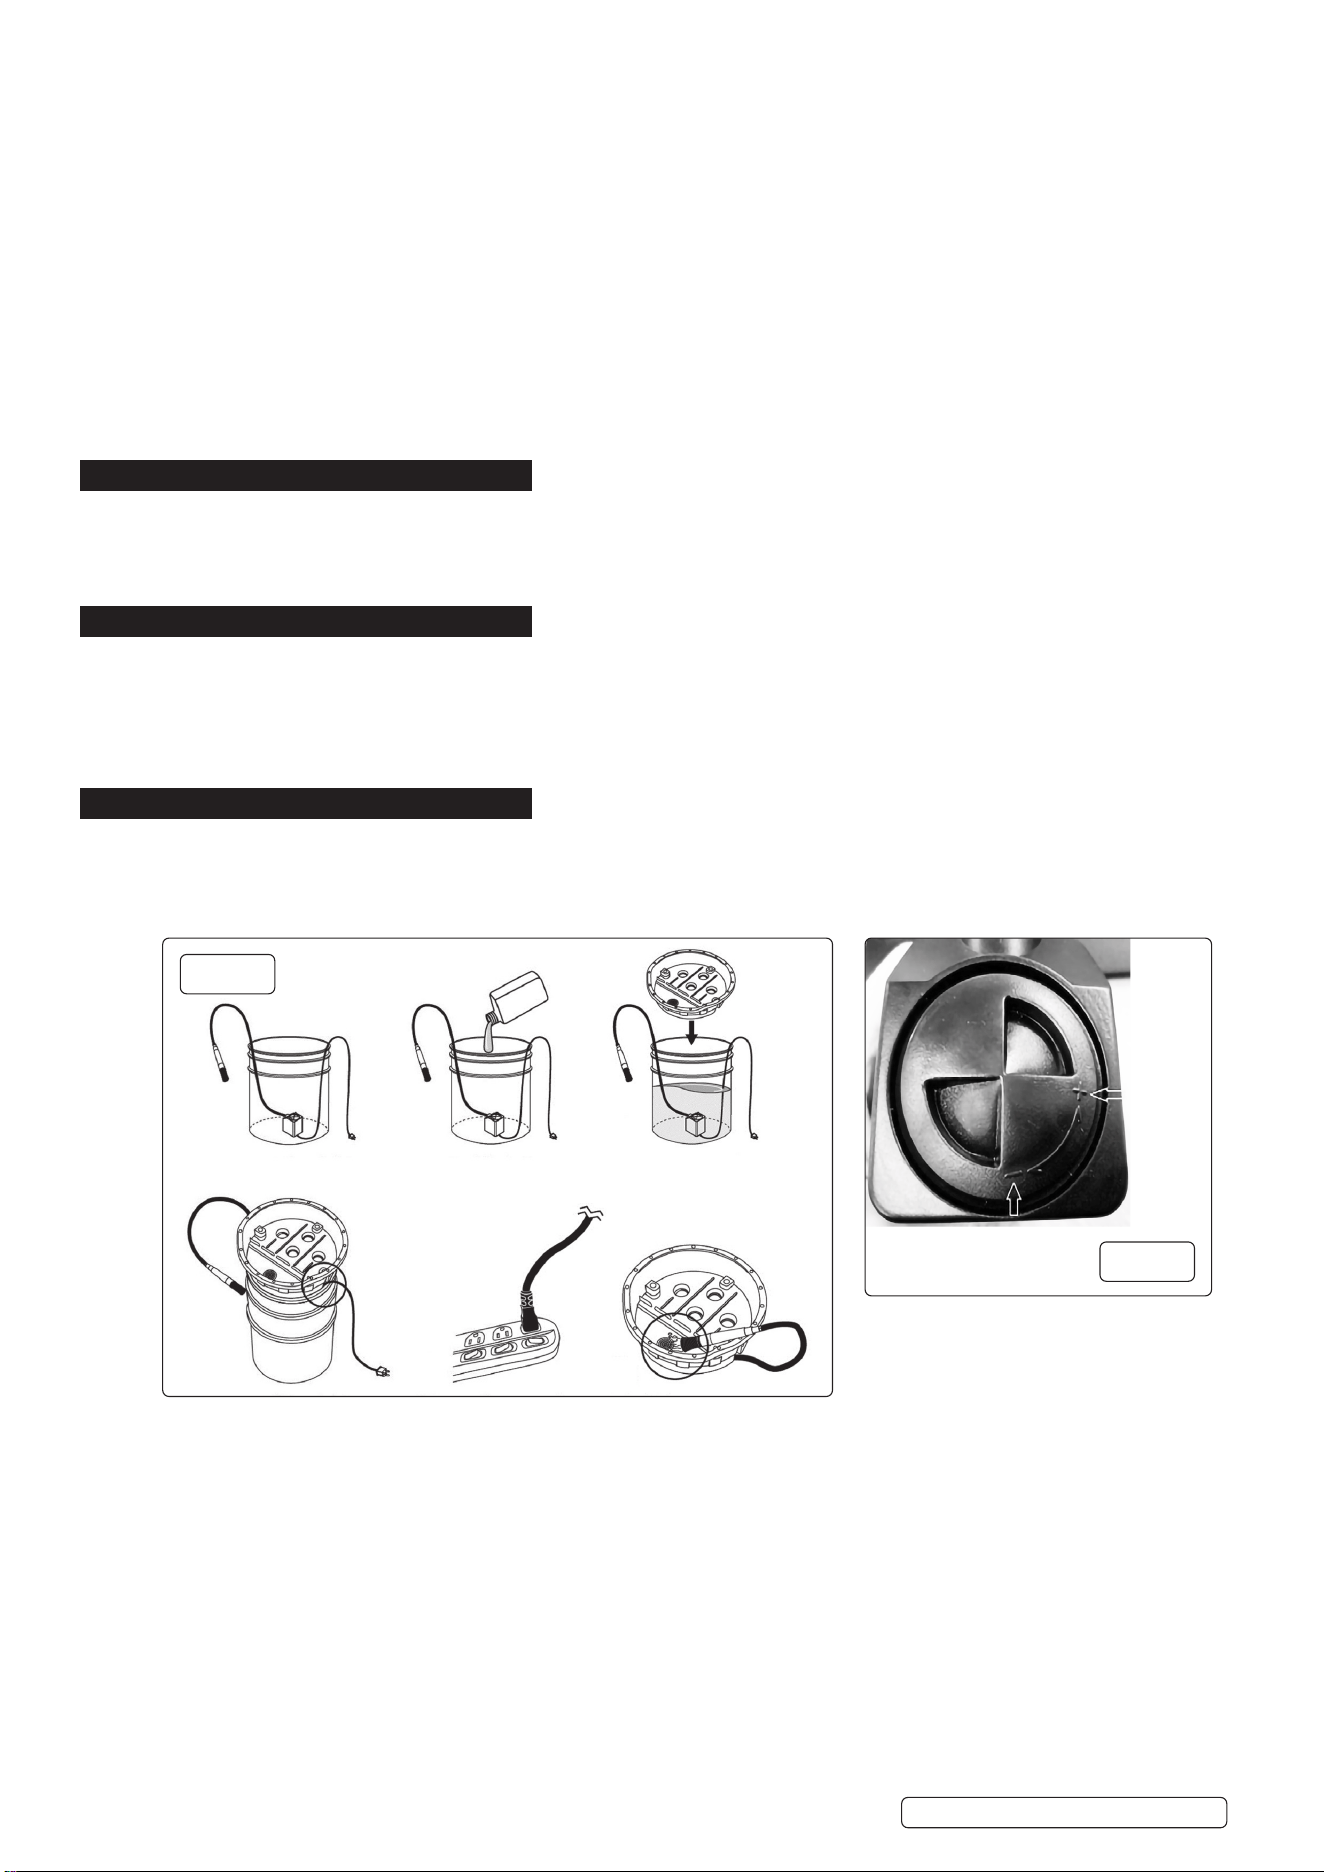
4.3. Locate the pump securely in the base of the fluid container (fig.1.1). The pump has four suction cups on it’s base to facilitate this.
4.4. Fill the tank to appropriate capacity (depending on fluid container size) with Sealey soluble solvent (Part nos: AK20, AK2001, AK25 and
AK2501) or a general purpose water-soluble degreaser (contact your local Sealey Stockist for supply) (fig.1.2,)
8 DO NOT use any other type of aggressive solvent (petroleum, toluene or thinners etc.)
WARNING: Ensure that you follow any instructions provided with the solvent.
4.5. Place bowl onto the container ensuring that both the hose and the power cord are located in the slots in the bowl body (fig.1.3,fig.1.4).
4.6. Connect the power cable to the power supply (fig.1.5).
4.7. Place the brush inside the bowl and turn the power on. Fluid will now flow out of the brush head.
4.8. Place parts to be cleaned onto the cleaning tray. Use brush to remove dirt gently from parts to be cleaned. Ensure any splash back stays
inside the bowl (fig.1.6).
4.9. The brush can be placed temporarily in the pocket moulded into the lid. Ensure that the pump is switched off beforehand.
4.10. When complete, turn the power off and unplug from the mains power supply.
4.11. The cleaning fluid can be re-used until it gets too dirty to be effective, at which point it needs changing.
WARNING! DO NOT allow uncontrolled discharge of fluids, thus polluting the environment. Dispose of waste liquids according to local
authority regulations.
g.1
1.1 1.2
1.3
1.4
1.5 1.6
Increase
Flow
Decrease
Flow
g.2
SM220 Issue 2 (1,F) 10/07/23
Original Language Version
© Jack Sealey Limited
5. MAINTENANCE
5.1. For regular maintenance or If any blockage is observed, turn off the power source and remove the plug from the socket.
5.2. Remove the unit from the bucket / barrel. Hold over the bucket / barrel to allow any excess liquid to drain from the unit and dry it o.
5.3. Unscrew the hex. hose tting from the outlet side of the unit body and remove the hose assembly from the unit’s body.
5.4. Use clean water/solvent to ush through the hose and brush assembly.
5.5. Remove the housing of the ow control (g.2) from the unit body by gently prising it away using a thin straight bladed screw driver or
similar.
5.6. Use clean water/solvent to ush through the impeller assembly.
5.7. Re-assemble unit ensuring that the hose tting and ‘O’ ring seal produce a water-tight t.
ENVIRONMENT PROTECTION
Recycle unwanted materials instead of disposing of them as waste. All tools, accessories and packaging should be sorted,
taken to a recycling centre and disposed of in a manner which is compatible with the environment. When the product
becomes completely unserviceable and requires disposal, drain any fluids (if applicable) into approved containers and
dispose of the product and fluids according to local regulations.
WEEE REGULATIONS
Dispose of this product at the end of its working life in compliance with the EU Directive on Waste Electrical and Electronic Equipment
(WEEE). When the product is no longer required, it must be disposed of in an environmentally protective way. Contact your local solid
waste authority for recycling information.
Sealey Group, Kempson Way, Suffolk Business Park, Bury St Edmunds, Suffolk. IP32 7AR
01284 757500 sales@sealey.co.uk www.sealey.co.uk
Note: It is our policy to continually improve products and as such we reserve the right to alter data, specifications and component parts without prior
notice.
Important: No Liability is accepted for incorrect use of this product.
Warranty: Guarantee is 12 months from purchase date, proof of which is required for any claim.
SM220 Issue 2 (1,F) 10/07/23
Original Language Version
© Jack Sealey Limited