Loading ...
Loading ...
Loading ...
17
SERVICE AND MAINTENANCE
Use a clean lubricating oil (#30 weight motor oil is suitable) and a clean general
purpose grease (grease containing a metal lubricant is preferred, if available).
• Remove the wheels, clean the wheel shaft and apply a thin coating of grease
to the wheel shaft.
• Grease the back, front and sides of the depth regulator lever.
• Remove the tines and clean the tine shaft. Use a file or sandpaper to gently
remove any rust, burrs or rough spots (especially around holes in the shaft).
Apply grease to the ends of the shaft before installing the tines.
• Oil the threads on the handlebar height adjustment screws and the
handlebar attaching screws.
Transmission Gear Oil
Check the transmission gear oil after every 30 hours of operation or whenever you
notice any oil leak. Operating the tiller when the transmission is low on oil can result
in severe damage.
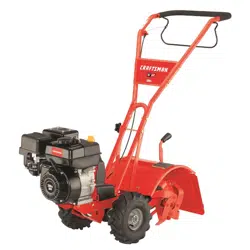
To Check the Transmission Gear Oil Level:
1. Check the gear oil level when the transmission is cool. Gear oil will expand in
warm operating temperatures and this expansion will provide an incorrect
oil level reading.
2. With the tiller on level ground, pull the Depth Regulator Lever all the way up.
3. Clean the area around the oil fill plug. See Figure 24.
Oil Fill Plug
Figure 24
4. Remove the oil fill plug from the transmission housing and look inside the oil
fill hole to locate the main drive shaft situated below the hole. See Figure 24.
5. The gear oil level is correct if the gear oil is approximately halfway up the
side of the main drive shaft.
6. If the gear oil level is low, add gear oil as described next. If the gear oil level
is okay, securely replace the oil fill plug.
7. When adding gear oil, use Mobil 1® Synthetic 75W 140.
8. While checking frequently to avoid overfilling, slowly add gear oil into the oil
fill hole until it reaches the halfway point on the drive shaft.
9. Securely replace the oil fill plug.
Belt Replacement
If the drive belt or reverse drive belt needs to be replaced, see your local authorized
dealer or refer to the Replacement Parts Section for ordering information. Use only a
factory-authorized belt as an “over- the-counter” belt may not perform satisfactorily. The
procedure requires average mechanical ability and commonly available tools.
NOTE: When reinstalling the belt cover, be sure to engage the bail and hold
it so that the drive belt is tight before attempting to reinstall the belt cover.
This will enable the belt to fall under the belt keeping mechanism built into
the belt cover. Failure to do so could damage the belt and/or belt cover.
Tines
The bolo tines will wear with use and should be inspected at the beginning of
each tilling season and after every 30 operating hours. The tines can be replaced
either individually or as a complete set. See the Replacement Parts Section for tine
identification and part numbers.
Tine Inspection
With use, the tines will become shorter, narrower and pointed. Badly worn tines will
result in a loss of tilling depth, and reduced effectiveness when chopping up and turning
under organic matter.
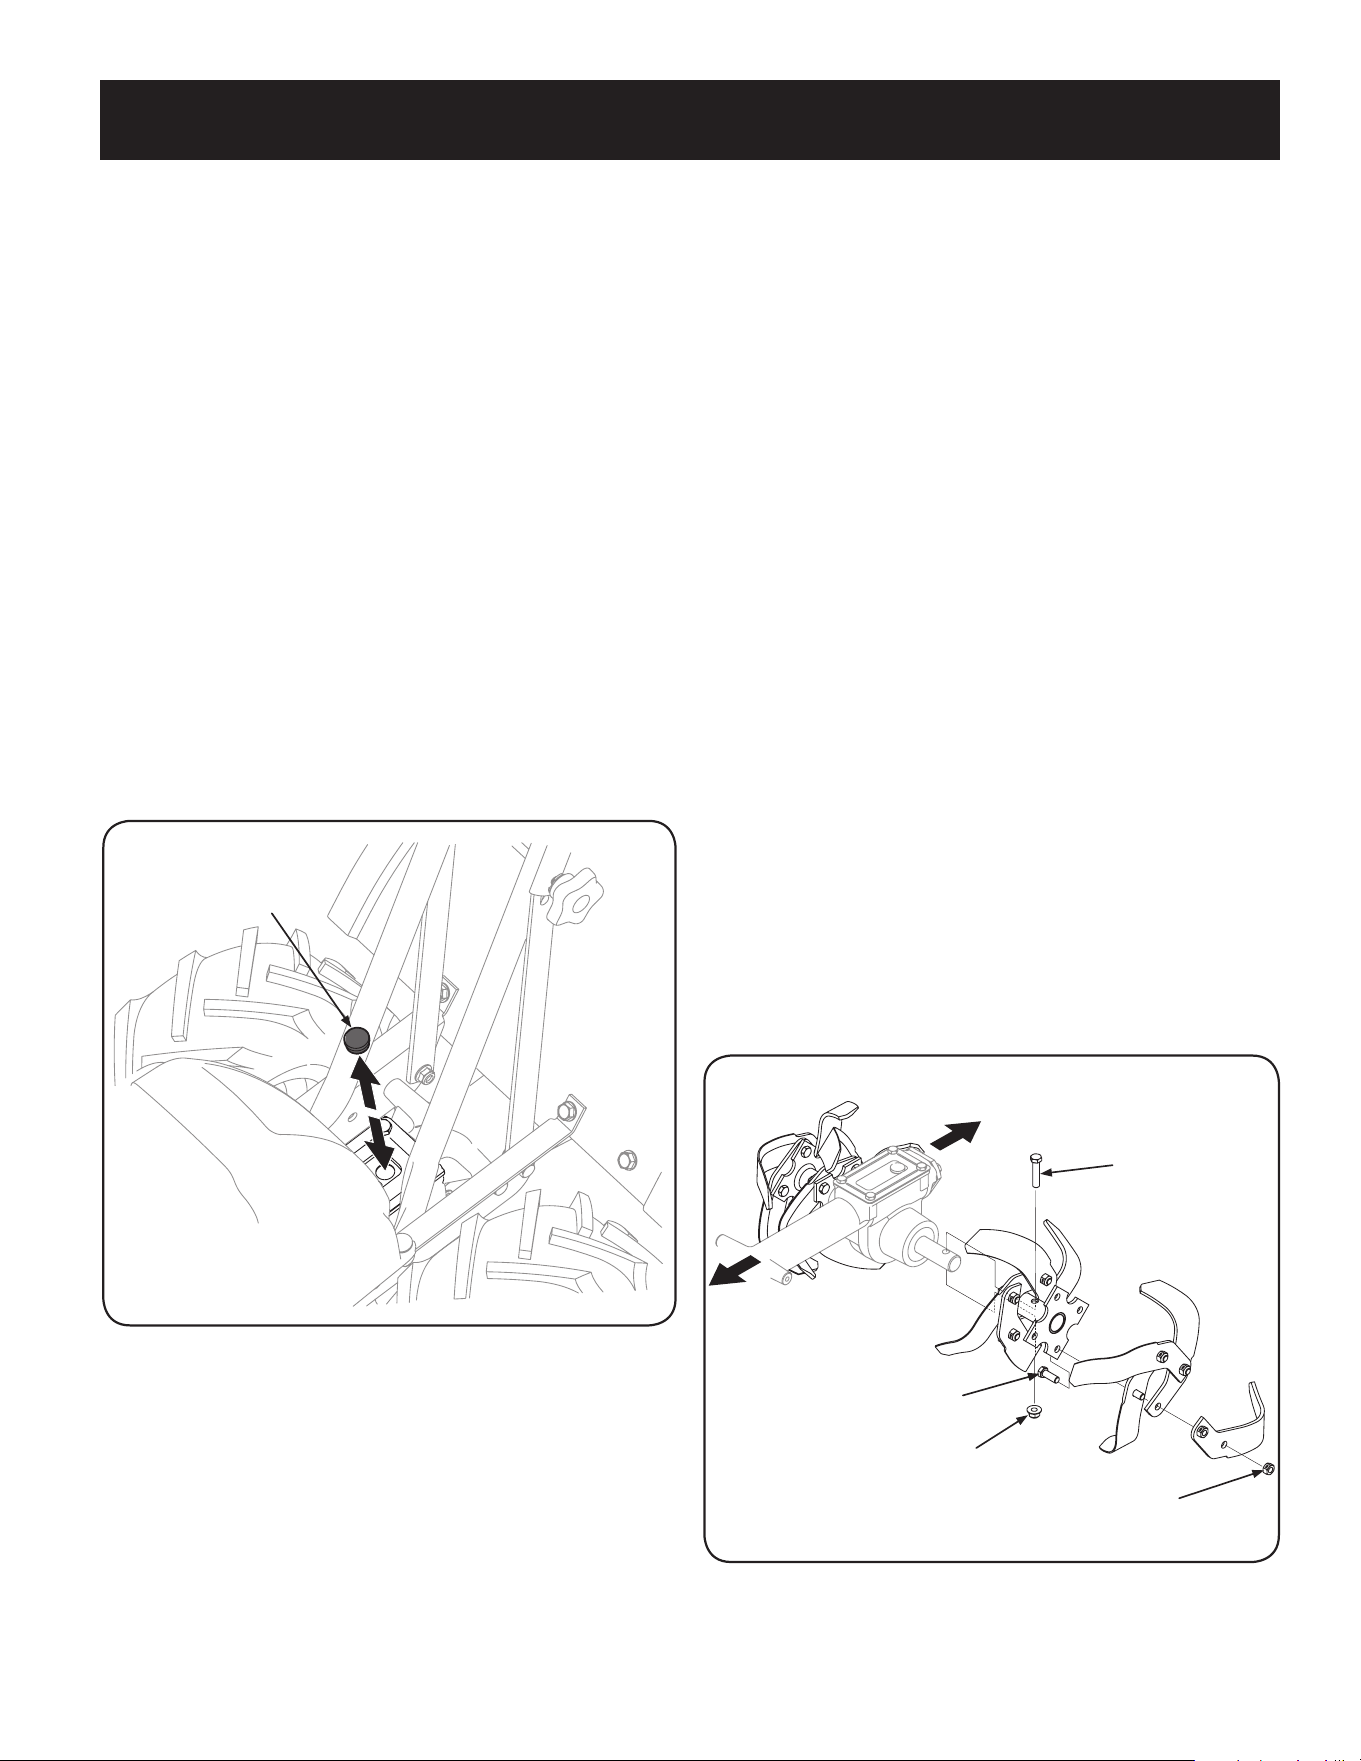
Refer to Figure 25 for the following tine procedures.
Front/Forward
Rear/Operator
Hex Screw
Flange Lock Nut
Hex Lock Nut
Hex Screw
Figure 25
Loading ...
Loading ...
Loading ...