Loading ...
Loading ...
Loading ...

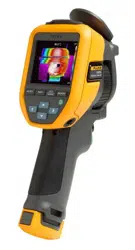
Thermal Imager
Basic Operation
9
Laser Pointer
The Imager has a laser pointer. The laser pointer is a sighting aid and is offset from the
infrared camera. As a result, it may not always represent the exact center of the infrared or
visible image.
The laser dot does not appear on an infrared-only image, but does on visible-only or
AutoBlend images. The laser dot cannot be seen in the visible channel of the IR-Fusion
image if obscured by the center point marker graphic.
Pull the secondary trigger to turn on laser pointer, release the secondary trigger to turn off
the laser pointer.
Capture Image
In normal operation (video is off), use the primary (green) trigger to capture a thermal image.
The captured image goes into a memory buffer. You can view and annotate the image in the
memory buffer before you store the image.When video is on, the primary trigger is the start/
stop for video recording.
To capture an image:
1. Focus on a target.
2. Pull and release the Primary Trigger or double tap on the display to capture and freeze
the image.
The image is in the memory buffer for you to save or edit the image.
Depending on the selected file format settings, the Imager shows the captured image
and a menu bar. The menu bar shows the available options. You can add text or audio
notes, create an IR-PhotoNote, or flag the image. To edit an image, see Image
Annotation.
Note
Asset ID tags, flags, and notes can be saved with images captured in .is2 file format
only. To select .is2 file format, see Settings Menu.
3. To assign an asset ID tag to the image, tap Scan Asset ID, or tap Remove Asset ID to
remove an asset ID tag from the image. See Asset Identification (Asset ID).
4. Tap Save.
1.888.610.7664 sales@GlobalTestSupply.com
Fluke-Direct.com
Loading ...
Loading ...
Loading ...