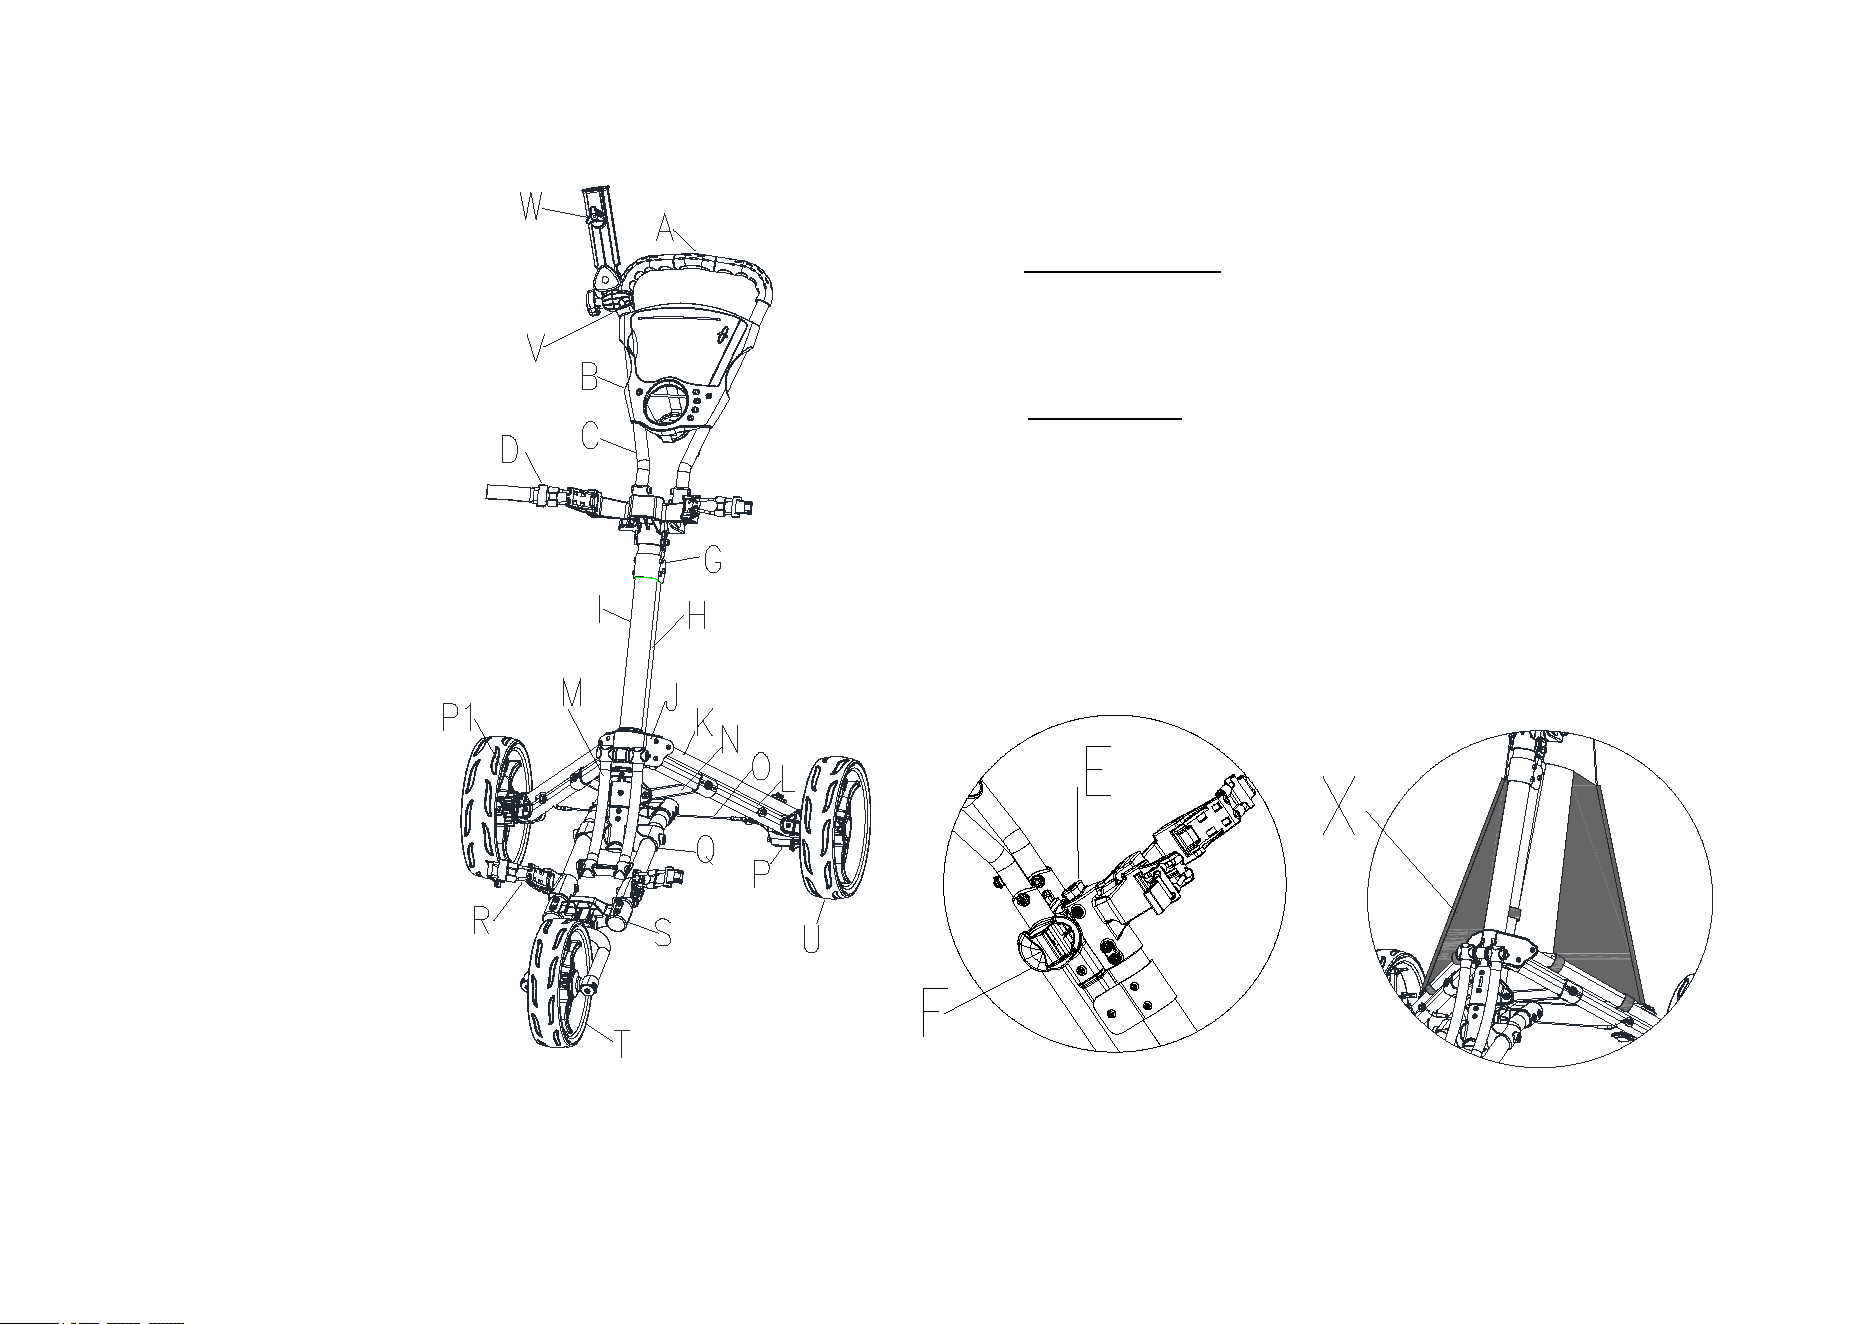
A
TPR handle grip
B
Scorecard holder
C
Handle tube
D
Upper bag holder bracket
E
Push button system
F
Adjustable handle mechanism
G
Joint
H
Connecting rods
I
Main upper frame tube
J
Leg bracket
K
2 holes leg frame
L
4 holes leg frame
M
Slippery connecting rods
N
Weight stabilizer
O
Anti-splay wire
P
Right wheel locking mechanism
P1
Left wheel locking mechanism
Q
Main lower frame tube
R
Adjustable bag elastic rope
S
Lower bag holder bracket
T
Front wheel assembly
U
Main wheel
V
Umbrella holder base
W
Umbrella holder
X
Bottom bracket bag
PARTS LIST
338070
MAINTENANCE
To clean to the cart, wipe with a soft, dry cloth. Car polish may be
used to maintain finish. Lubricate moving parts every 6 months.
Warning:
For your own safety, please read and understand these warnings and
keep this user guide for future reference.
Always make sure the cart is fully extended and locked before use.
Always make sure the cart is folded and locked properly before lifting or
transporting.
Do not run while using this product.
Do not use accessories other than those designed for use with this cart.
Keep all packing materials away from children and recycle where possible
or where required by law.
USE THE BRAKE
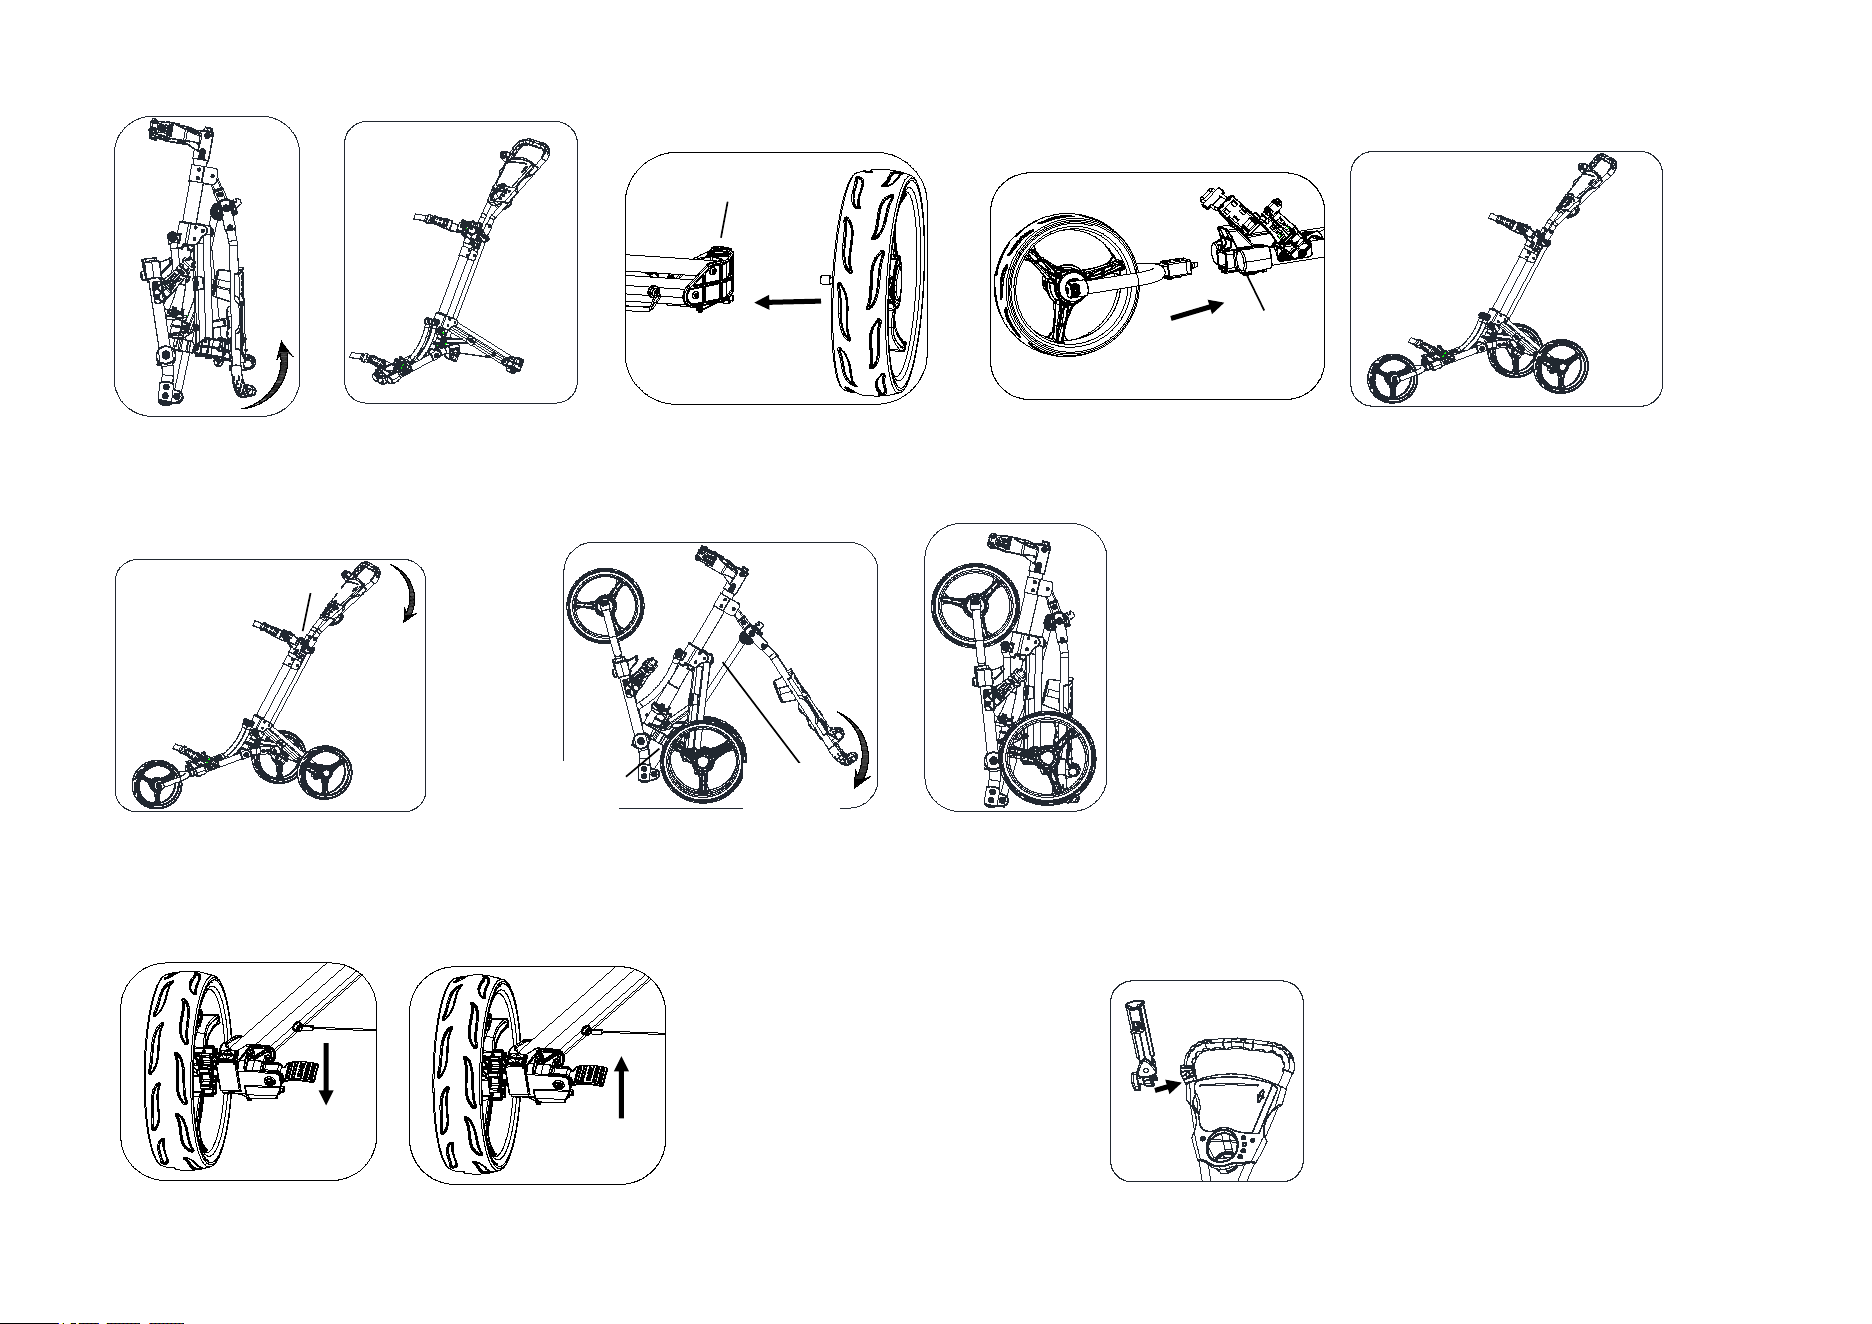
Fig.7
Fig.8
Fig.1
Pull the handle up until you hear the cart
'Click' as in Fig.1 and Fig. 1-1.
Press the button and insert
the rear wheels as in Fig.2.
UNFOLDING
Press the button and insert
the front wheel as in Fig.3.
FOLDING
Press the button and fold the
cart in the direction of the
arrow as in Fig.4.
Push on the brake pedal to
stop the rear wheel and pull
off to release as in Fig.7﹠8.
Fig.2
Fig.3
Fig.4
Fig.5
The connecting rod will insert into the plastic bracket
when folding is completed as Fig. 5/6.
Fig.6
Button
Button
Button
Connecting
Holding
slot
Fig.1-1
Fig.3-1
The cart is unfolded
completely as in Fig.3-1.
UMBRELLA HOLDER
To put in use:
Simply attach the umbrella holder
onto the cart.
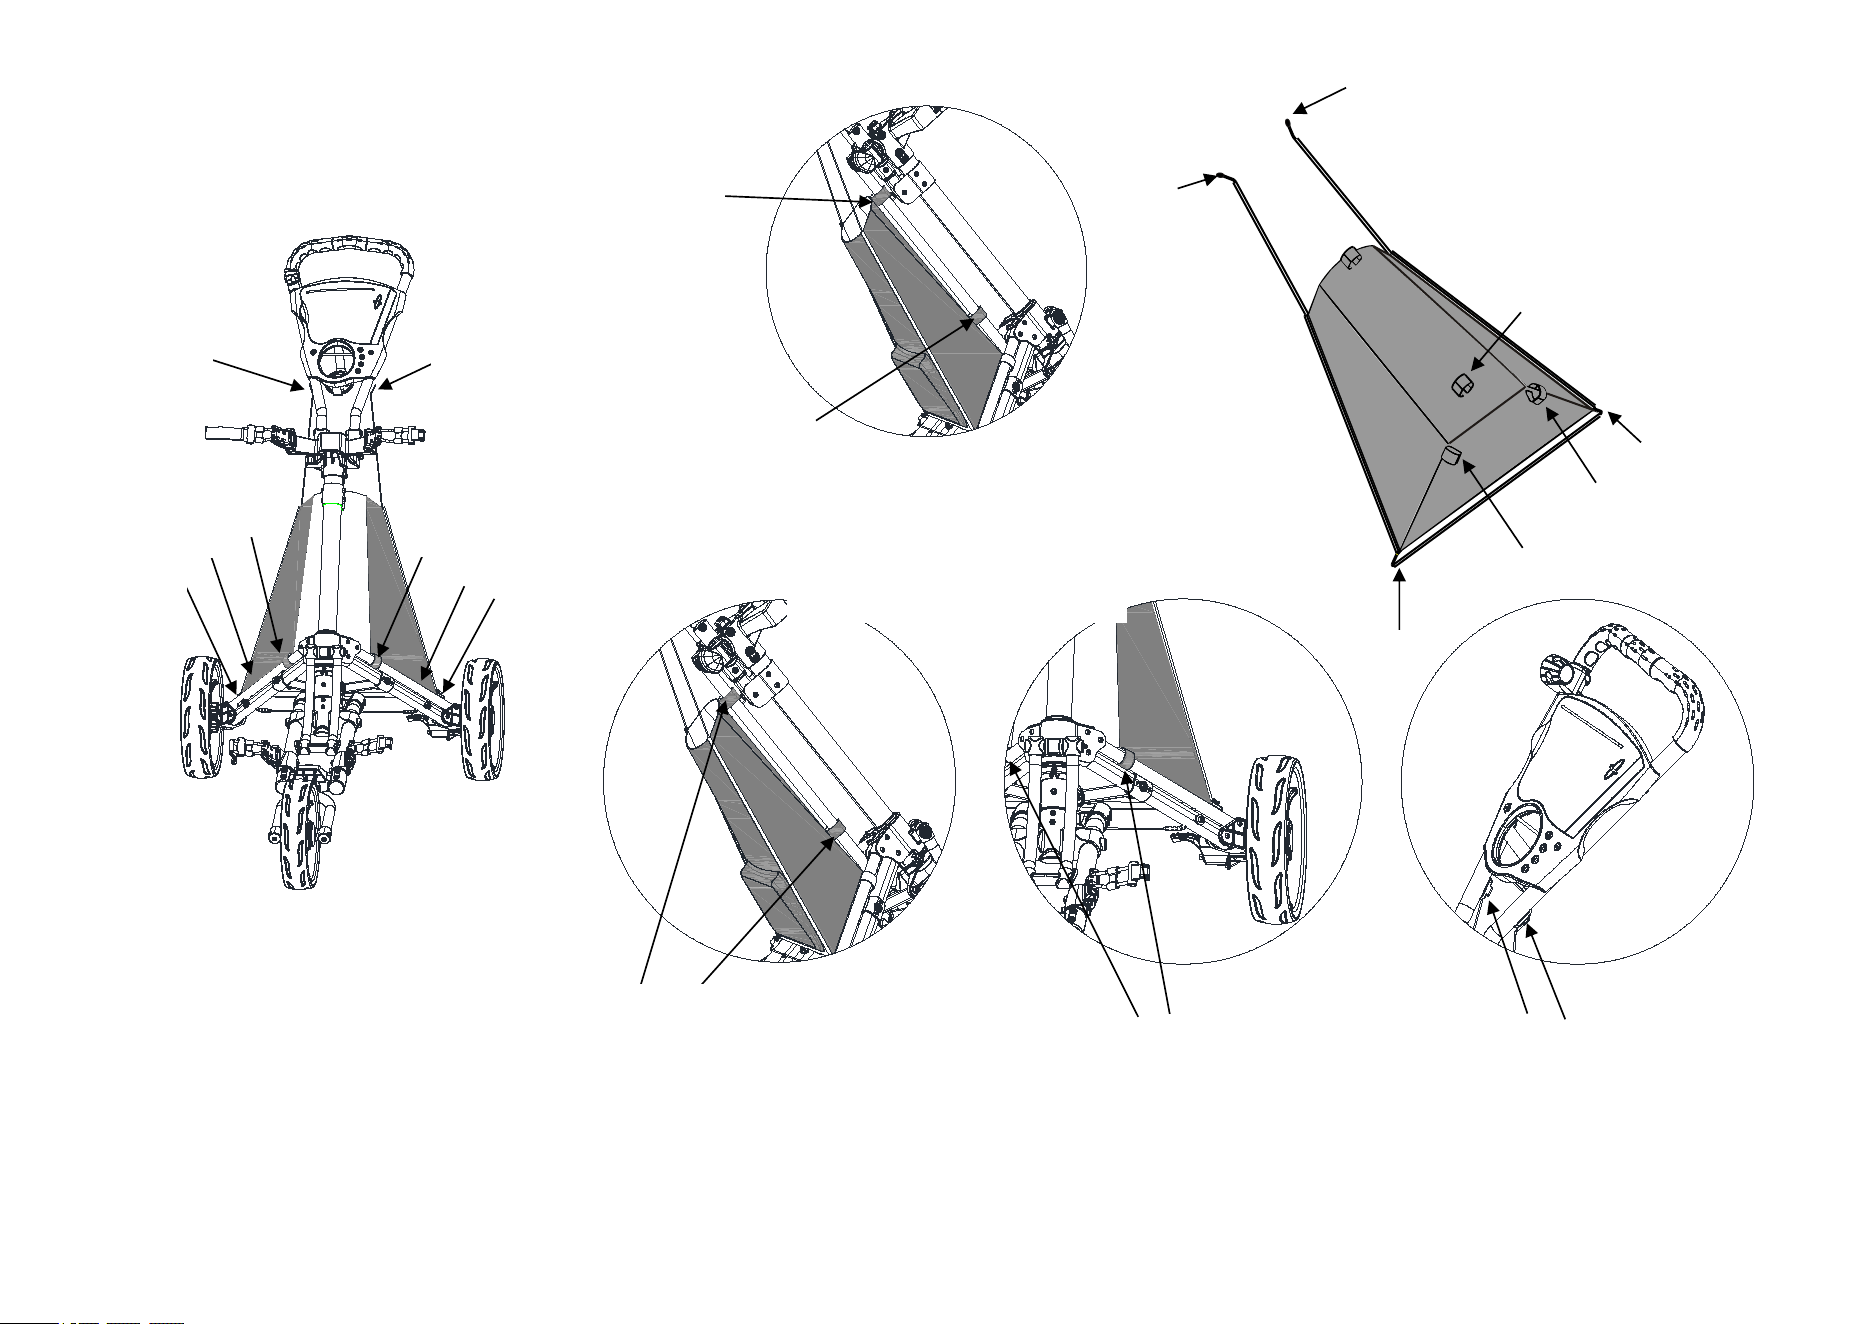
Install the Storage Bag
1
2
9
10
3
8
4
7
Point 1, First step: Fixed the velcro strap on the
connecting rod,upper the plastic ,Point 1 strap is fixed
inner of brake line. And check the two sides elastic strap
the same length.
Point 2, Fixed the second velcro strap on the lower
connecting rod, and only fix the velcro, so it can slide
down and up when folding, not fixed tightly, otherwise, it
will affect the folding trolley.
Point 3 & 4, Fixed velcro strap on
the 2 holes leg frame,then pull the
elastic strap and click into Point 5 &
6 on the 2 holes leg frame.
Point 7 & 8, Click the elastic
strap under the scorecard
holder.And check the elastic
strap is the same.
Point 1, First step: Fixed the velcro
strap on the connecting rod,upper the
plastic. And check the two sides
elastic strap the same length.
5
6
2
3
6
4
7
5
8
Right
Left
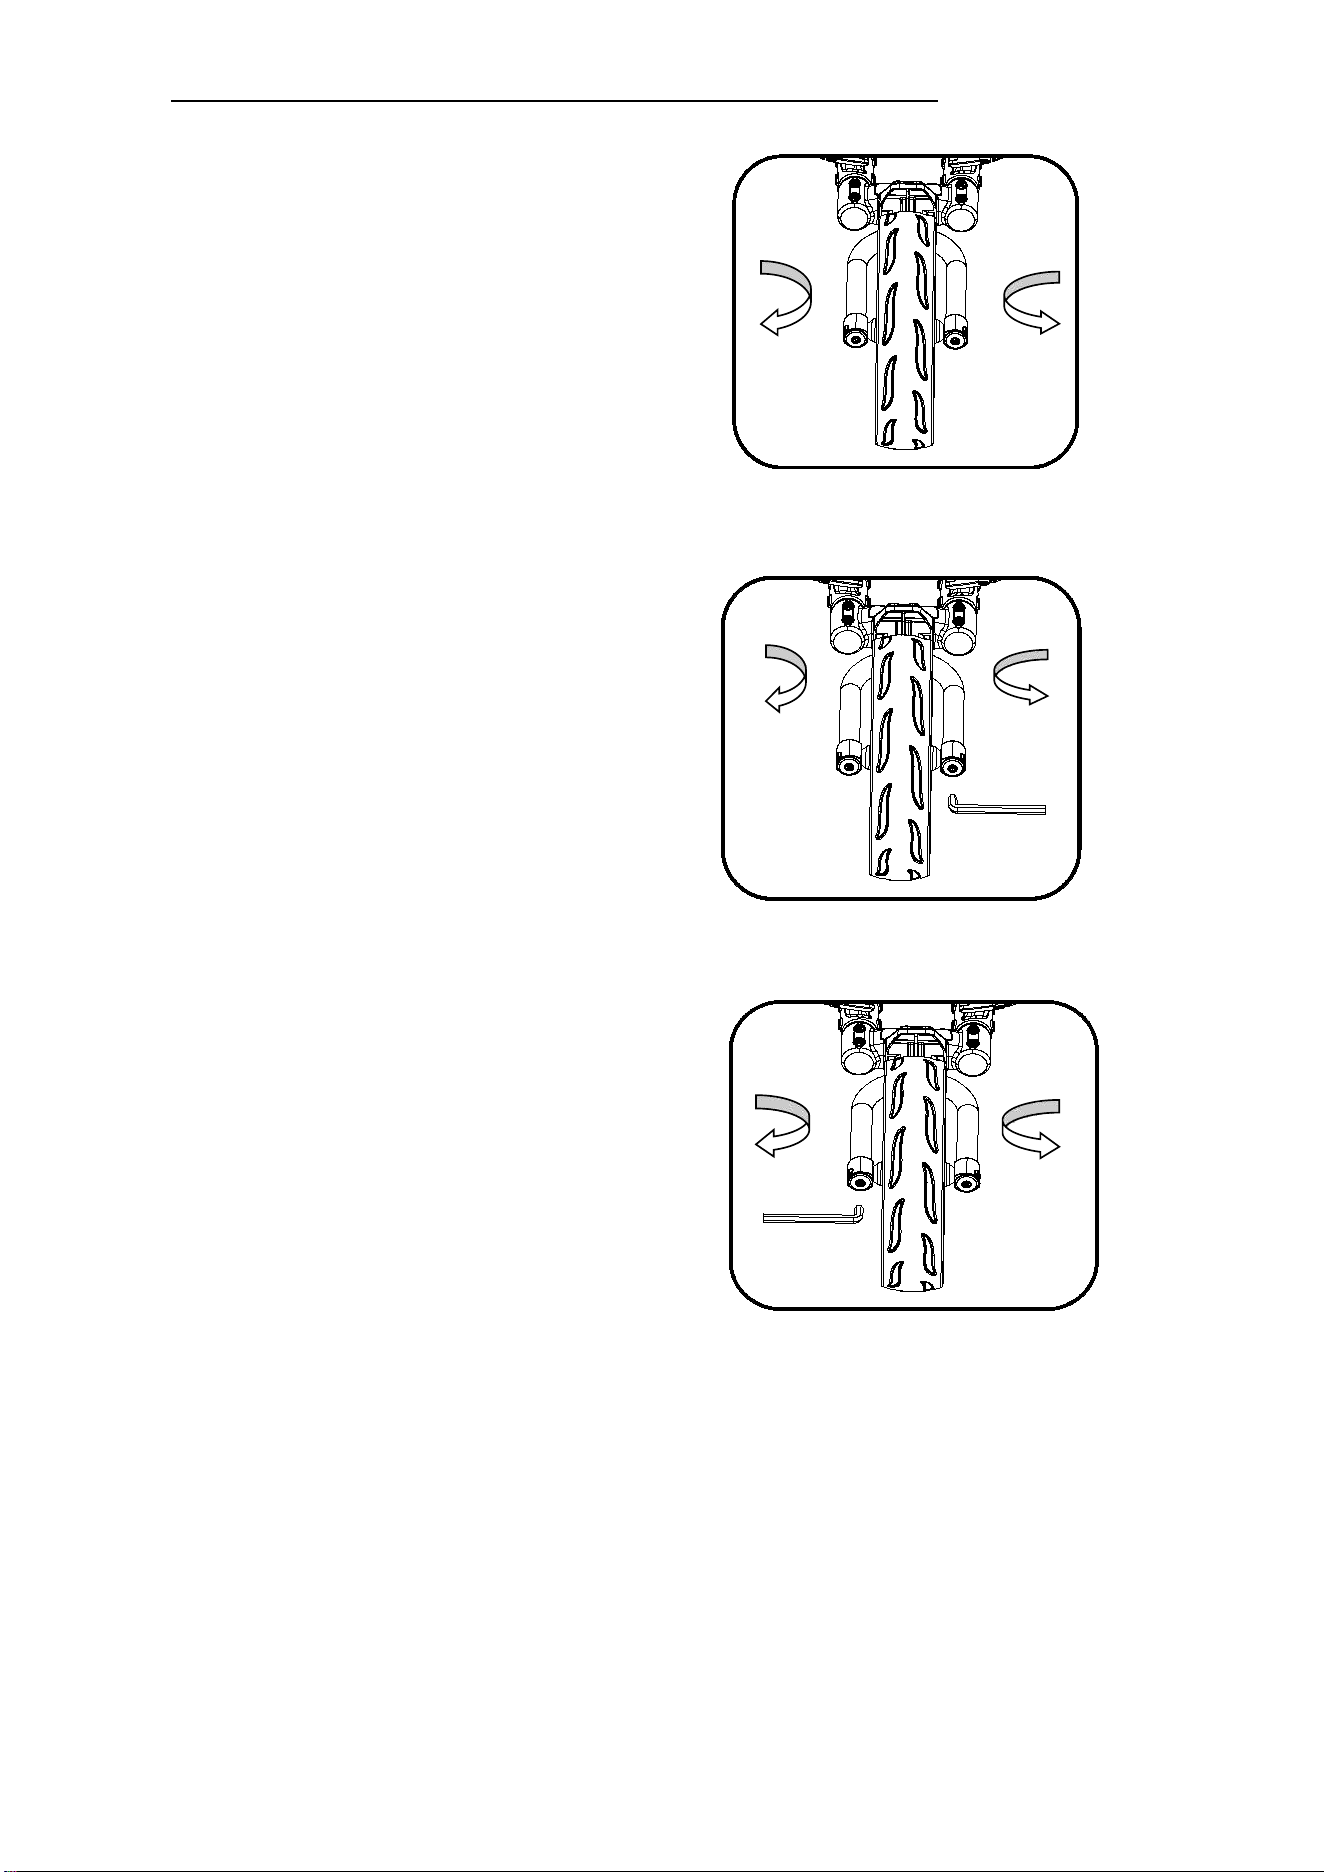
If during use, you find that the cart
alignment is off, please see the
instructions below to correct this problem.
In order for the cart to be perfectly aligned,
the front wheel should be in the center of
the fork as in Fig.1
CART VEERING TO LEFT (Fig. 2)
If the cart veers to the left, face the front
wheel and use the allen wrench provided to
make the adjustments. You can either
screw the left bolt clockwise, or the right bolt
counterclockwise. Please continue doing so
until the front wheel is centered between the
front fork.
CART VEERING TO RIGHT (Fig. 3)
If the cart veers to the right, face the front
wheel and use the allen wrench provided to
make the adjustments. You can either screw
the left bolt counterclockwise, or the right bolt
clockwise. Please continue doing so until the
front wheel is centered between the front fork.
Fig .1
Fig .2
Fig .3
Left
Right
Left
Right
Front Wheel Adjustment Mechanism