Loading ...
Loading ...
Loading ...
19
To Convert Oven Bake Burner (Natural Gas to
Propane Gas)
1. Remove the oven racks.
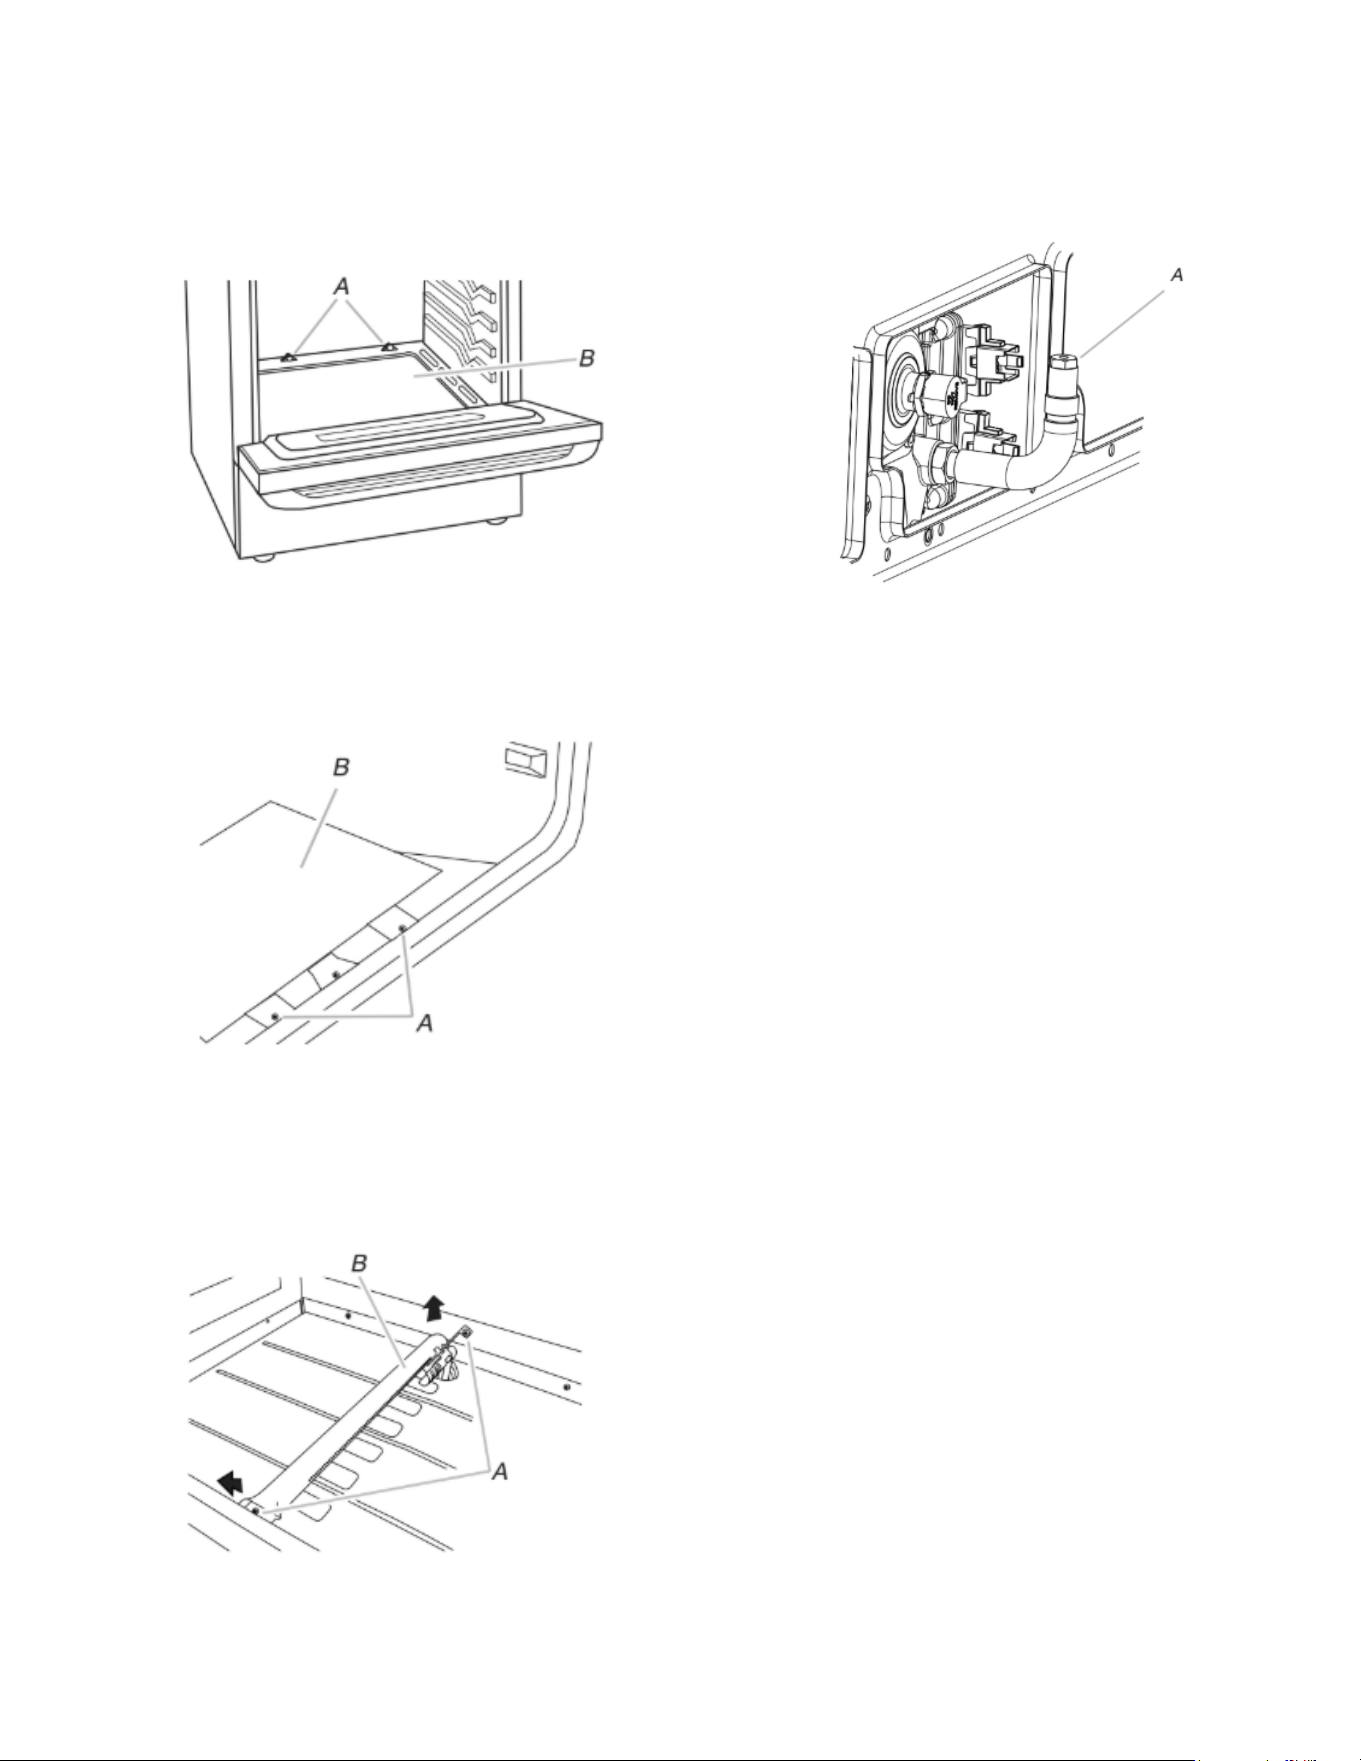
2. Remove 2 screws at the rear of the oven bottom.
3. Lift the rear of the oven bottom up and back until the front of
the panel is away from the front frame. Remove from oven
and set it aside on a covered surface.
A. Screws
B. Oven bottom
4. Remove 2 screws from the front tabs of the flame spreader.
Lift the front of the flame spreader and pull forward to remove
tabs from rear of oven and set it aside on a covered surface.
A. Screws
B. Flame spreader
5. Remove 2 screws from the bake burner.
6. Slide the front of the bake burner to the side to remove tab
from front of oven. Lift the back of the bake burner off the oven
orifice, and set the bake burner aside.
A. Screws
B. Bake burner
7. Use a 3/8" (1 cm) nut driver or combination wrench and turn
the Natural gas bake burner orifice spud counterclockwise to
remove. The spud will be stamped with a “49.”
8. Replace the “49” spud with a “57” spud. Install the Propane
gas bake burner orifice spud, turning it clockwise until snug.
IMPORTANT: Do not overtighten.
A. Orifice spud
9. Position the back of the bake burner over the oven orifice, and
slide the tab on front of the bake burner into the front of the
oven.
10. Reattach the bake burner with 2 screws.
11. Insert the tabs on the rear of the flame spreader into the rear
of the oven.
12. Reattach the front tabs of the flame spreader to the oven with
2 screws.
13. Position the front of the oven bottom panel toward the front
frame and lower the rear of the oven bottom panel into the
oven.
14. Reattach the oven bottom panel with 2 screws.
Complete Installation (Natural Gas to Propane
Gas)
1. Refer to the “Make Gas Connection” section for properly
connecting the range to the gas supply.
2. Refer to the “Electronic Ignition System” section for proper
burner ignition, operation and burner flame adjustments.
IMPORTANT: You may have to adjust the “LO” setting for
each cooktop burner.
Checking for proper cooktop, bake burner flame is very
important. The small inner cone should have a very distinct
blue flame 1/4" (0.64 cm) to 1/2" (1.3 cm) long. The outer cone
is not as distinct as the inner cone. Propane gas flames have
a slightly yellow tip.
3. Refer to “Complete Installation” in the “Installation
Instructions” section of this manual to complete this
procedure.
NOTE: Make sure to save the orifices that have just been
replaced in the conversion.
Loading ...
Loading ...
Loading ...