THIS INSTRUCTION BOOKLET CONTAINS IMPORTANT SAFETY INFORMATION. PLEASE READ AND KEEP FOR FUTURE REFERENCE.
EN
DE
FR
ES
IT
PL
With your inspiring rating, COSTWAY will be more consistent to offer you EASY
SHOPPING EXPERIENCE, GOOD PRODUCTS and EFFICIENT SERVICE!
Mit Ihrer inspirierenden Bewertung wird COSTWAY konsistenter sein, um Ihnen EIN
SCHÖNES EINKAUFSERLEBNIS, GUTE PRODUKTE und EFFIZIENTEN SERVICE zu
bieten!
Avec votre évaluation inspirante, COSTWAY continuera à fournir une EXPÉRIENCE
D’ACHAT PRATIQUE, des PRODUITS DE QUALITÉ et un SERVICE EFFICACE !
Con su calificación inspiradora, COSTWAY será más consistente para ofrecerle
EXPERIENCIA DE COMPRA FÁCIL, BUENOS PRODUCTOS y SERVICIO EFICIENTE.
Con la tua valutazione incoraggiante, COSTWAY sarà più coerente per offrirti ESPE-
RIENZA DI ACQUISTO FACILE, BUONI PRODOTTI e SERVIZIO EFFICIENTE!
Dzięki twojej opinii COSTWAY będzie mógł oferować jeszcze WYGODNIEJSZE
ZAKUPY, LEPSZE PRODUKTY i SPRAWNIEJSZĄ OBSŁUGĘ KLIENTA.
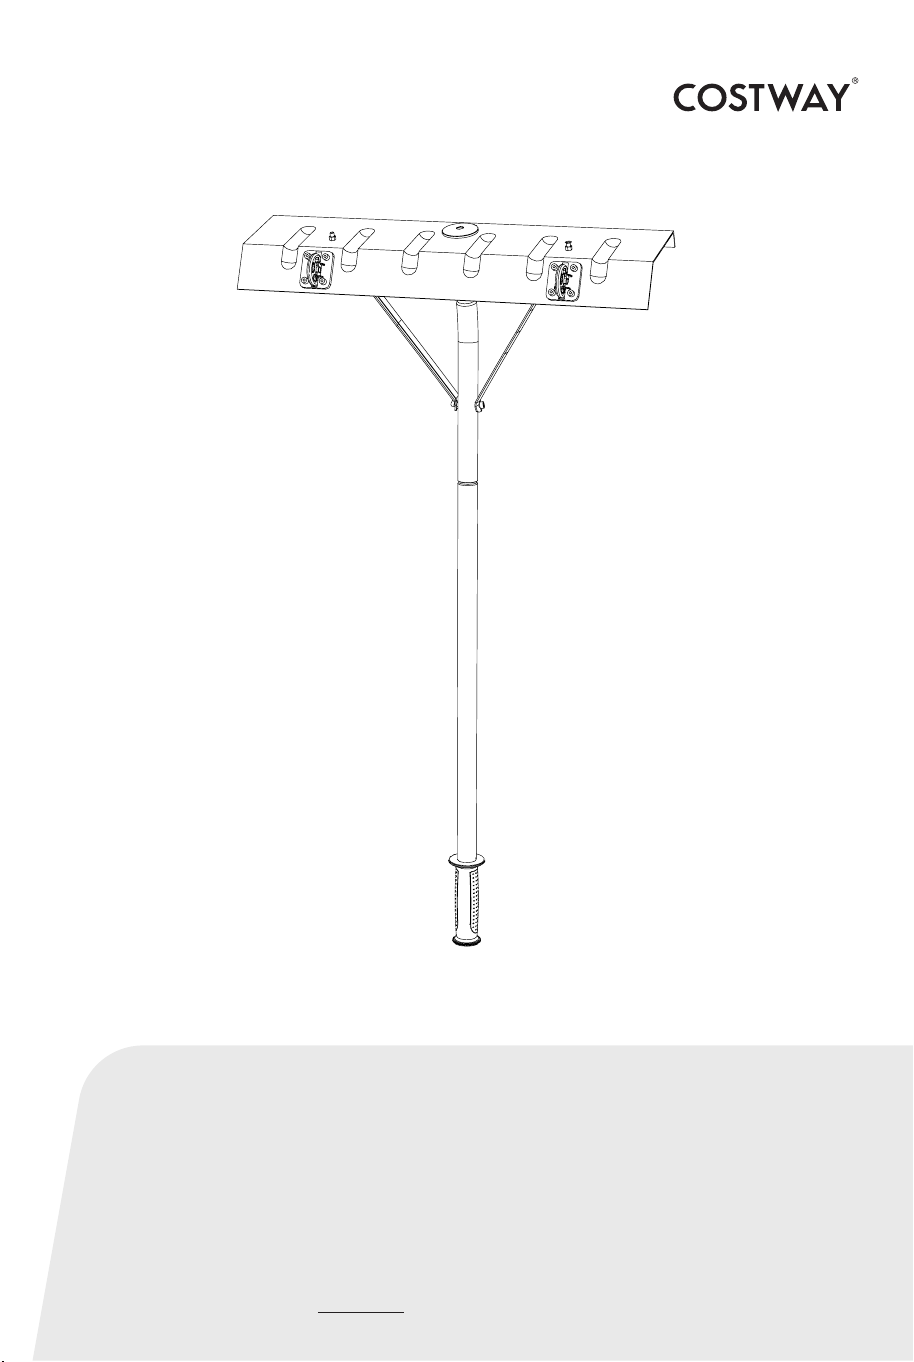
Snow Roof Rake
NP10216
USER’S MANUAL
US office: Fontana UK office: Ipswich AU office: Truganina
DE office: Hamburg
FR office: Saint Vigor d'Ymonville
PL office: Gdańsk
02
7
10
98 11 12
1
2
3
4
5
6
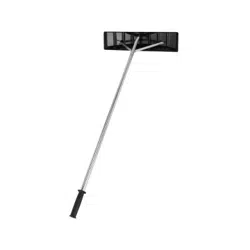
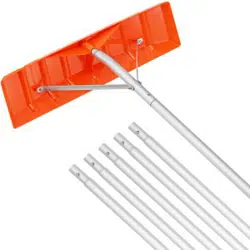
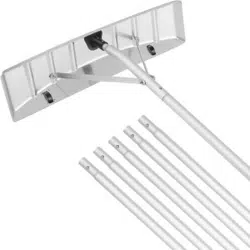
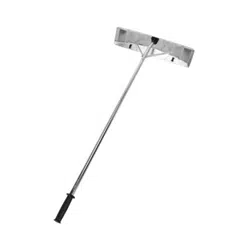
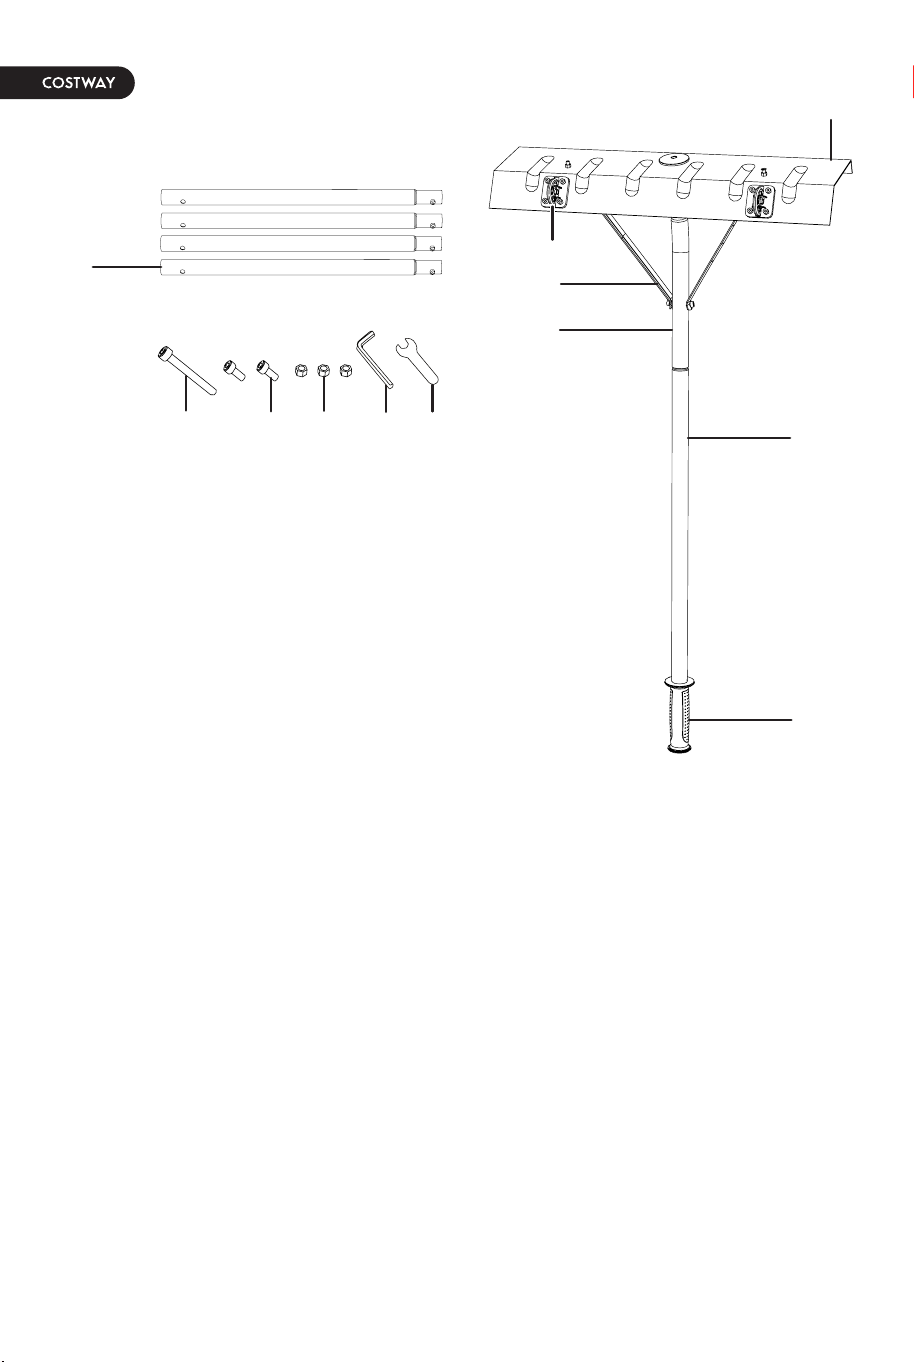
Know Your Roof Rake
1. Roof rake head
2. Roller wheels (2)
3. Metal braces (2)
4. Pole adapter
5. Handle grip
6. Pole handle
7. Pole extensions (4)
8. Long bolt
9. Short bolts (2)
10. Nuts (3)
11. Hex wrench
12. Open wrench
03
Roof Rake Head Assembly
The assembly of the roof rake head requires hardware (nuts and
bolts) included in the pack. Use the equipped open wrench for nuts
and the hex wrench for bolts. Make sure to tighten the hardware
connections for a secure assembly.
1. Depress the small buttons on the pole adapter and insert the pole
adapter into the connector on the back of the roof rake head. Push firmly
until the two small buttons pop up in the holes on the connector (Fig. 1).
Fig. 1
Connector
Rake head
Pole adapter
Small buttons
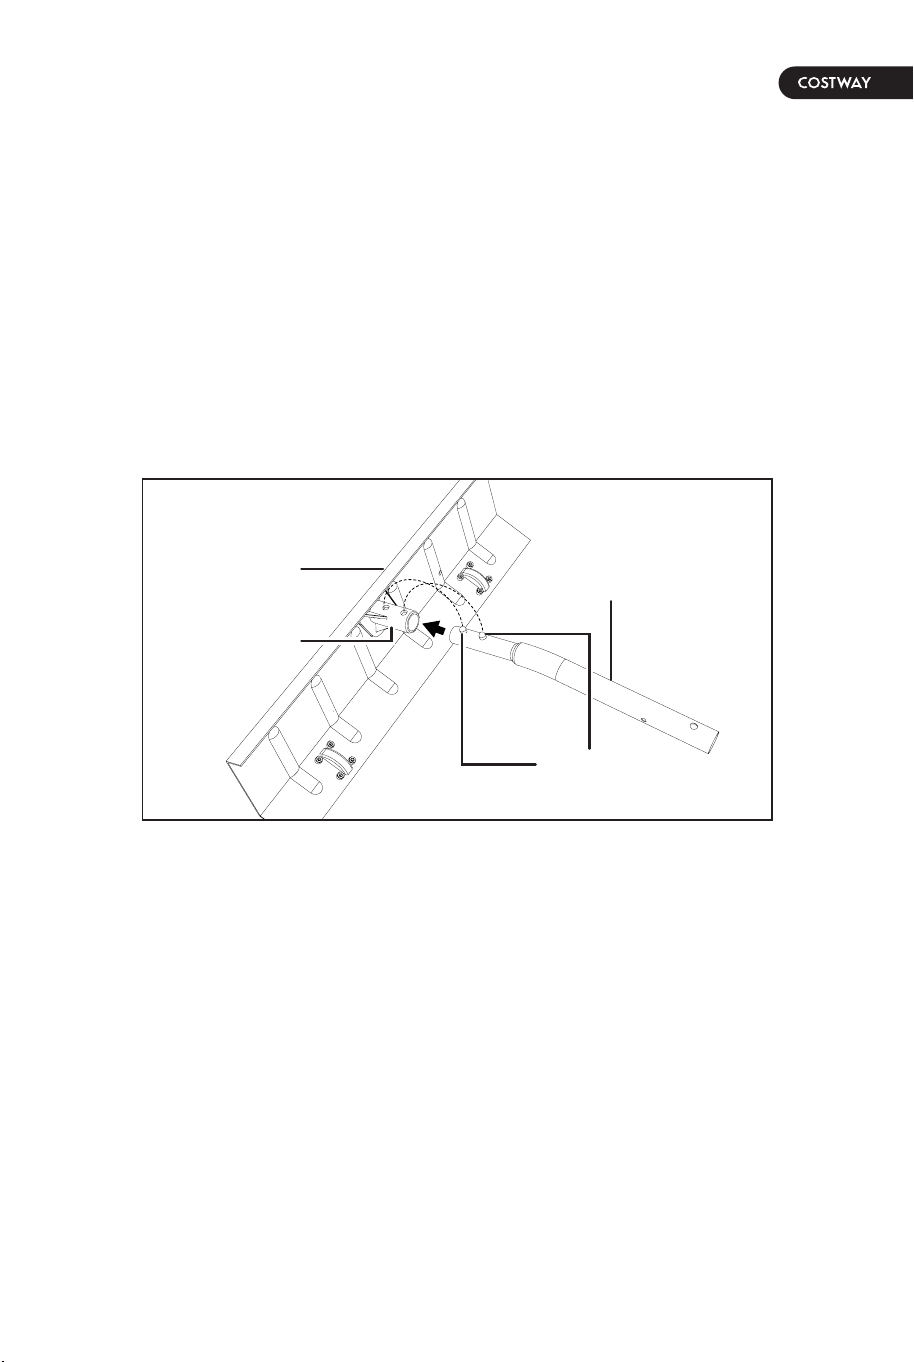
02
7
10
98 11 12
1
2
3
4
5
6
Know Your Roof Rake
1. Roof rake head
2. Roller wheels (2)
3. Metal braces (2)
4. Pole adapter
5. Handle grip
6. Pole handle
7. Pole extensions (4)
8. Long bolt
9. Short bolts (2)
10. Nuts (3)
11. Hex wrench
12. Open wrench
03
Roof Rake Head Assembly
The assembly of the roof rake head requires hardware (nuts and
bolts) included in the pack. Use the equipped open wrench for nuts
and the hex wrench for bolts. Make sure to tighten the hardware
connections for a secure assembly.
1. Depress the small buttons on the pole adapter and insert the pole
adapter into the connector on the back of the roof rake head. Push firmly
until the two small buttons pop up in the holes on the connector (Fig. 1).
Fig. 1
Connector
Rake head
Pole adapter
Small buttons
04 05
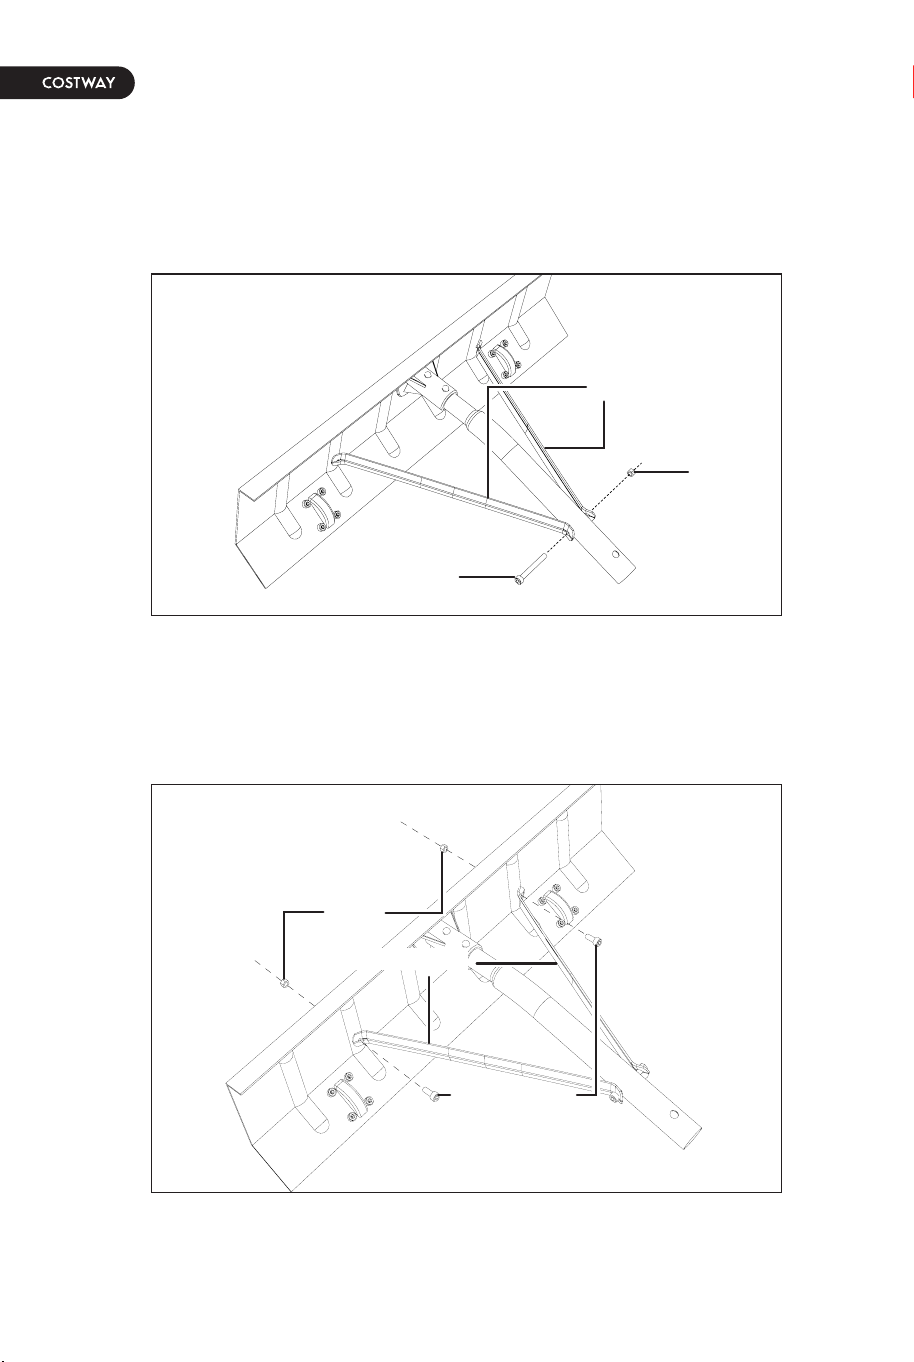
2. Align the holes of the metal braces with the hole on the end of the
pole adapter. Secure with the long bolt and one nut (Fig. 2).
Fig. 2
Metal braces
Long bolt
Nut
3. Connect the metal braces to the rake head with 2 small
bolts and the remaining nuts, as shown (Fig. 3).
Fig. 3
Metal braces
Nuts
Short bolts
Connecting the Poles
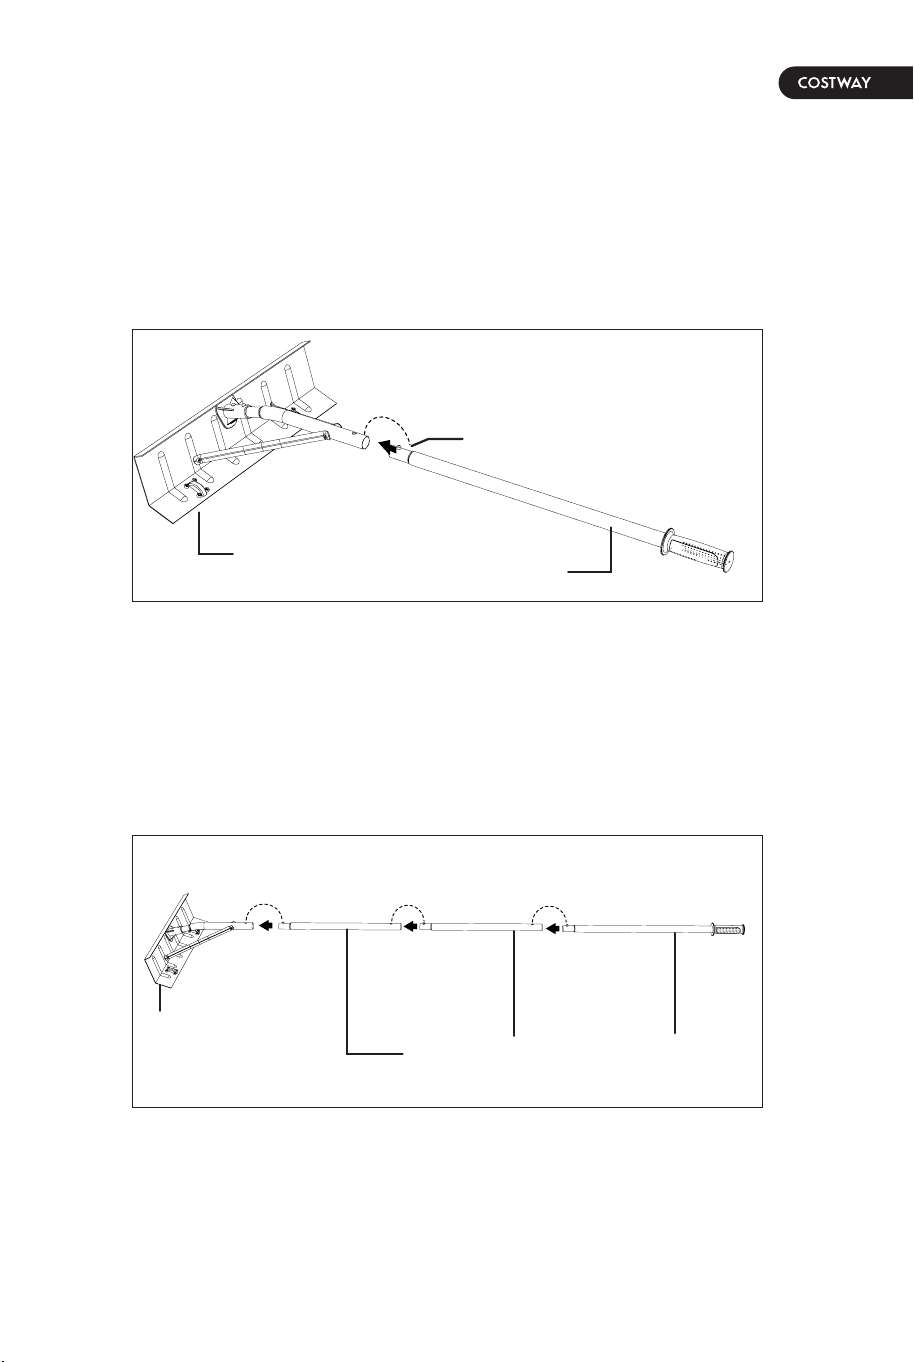
1. To connect the roof rake head assembly with the pole handle, depress
the small button at the end of the pole handle and insert it into the end
of the pole adapter. Make sure the small button pops up in the hole on
the pole adapter so the assembly is secured (Fig. 4).
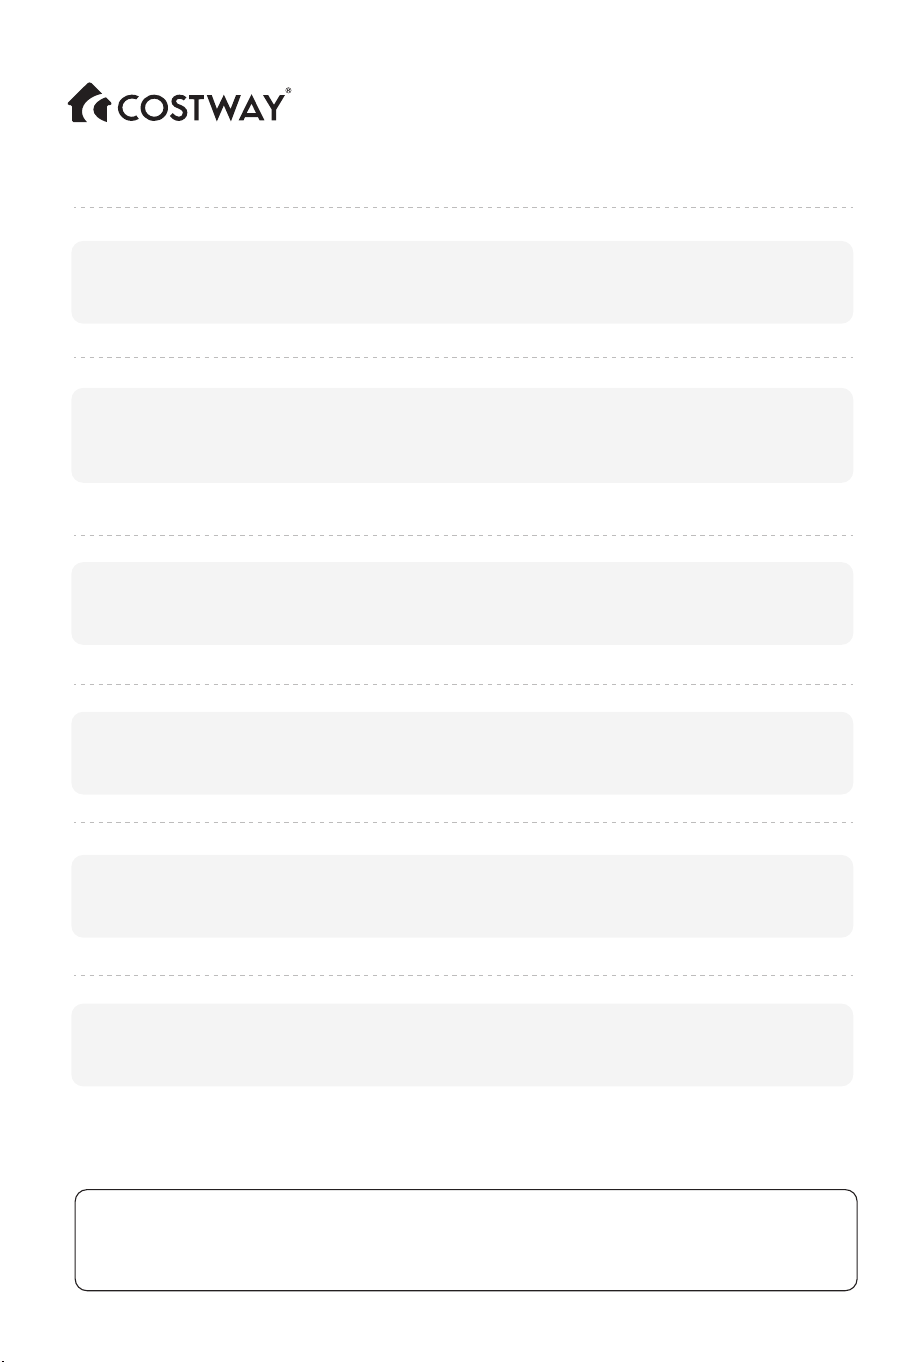
2. If additional reach is needed, connect the provided pole extensions
between the pole handle and the rake head assembly. Make sure the
small buttons pop up in the hole on the pole so the assembly is secured
(Fig. 5).
NOTE: Make sure the pole handle is the last piece of the assembly.
NOTE: Only connect the minimum number of pole extensions needed to
reach the roof. This will minimize the weight of the roof rake and reduce
the effort required.
Fig. 4
Roof rake
head assembly
Small button
Pole handle
Fig. 5
Roof rake
head assembly
Pole handle
Pole Extensions
04 05
2. Align the holes of the metal braces with the hole on the end of the
pole adapter. Secure with the long bolt and one nut (Fig. 2).
Fig. 2
Metal braces
Long bolt
Nut
3. Connect the metal braces to the rake head with 2 small
bolts and the remaining nuts, as shown (Fig. 3).
Fig. 3
Metal braces
Nuts
Short bolts
Connecting the Poles
1. To connect the roof rake head assembly with the pole handle, depress
the small button at the end of the pole handle and insert it into the end
of the pole adapter. Make sure the small button pops up in the hole on
the pole adapter so the assembly is secured (Fig. 4).
2. If additional reach is needed, connect the provided pole extensions
between the pole handle and the rake head assembly. Make sure the
small buttons pop up in the hole on the pole so the assembly is secured
(Fig. 5).
NOTE: Make sure the pole handle is the last piece of the assembly.
NOTE: Only connect the minimum number of pole extensions needed to
reach the roof. This will minimize the weight of the roof rake and reduce
the effort required.
Fig. 4
Roof rake
head assembly
Small button
Pole handle
Fig. 5
Roof rake
head assembly
Pole handle
Pole Extensions
THIS INSTRUCTION BOOKLET CONTAINS IMPORTANT SAFETY INFORMATION. PLEASE READ AND KEEP FOR FUTURE REFERENCE.
EN
DE
FR
ES
IT
PL
With your inspiring rating, COSTWAY will be more consistent to offer you EASY
SHOPPING EXPERIENCE, GOOD PRODUCTS and EFFICIENT SERVICE!
Mit Ihrer inspirierenden Bewertung wird COSTWAY konsistenter sein, um Ihnen EIN
SCHÖNES EINKAUFSERLEBNIS, GUTE PRODUKTE und EFFIZIENTEN SERVICE zu
bieten!
Avec votre évaluation inspirante, COSTWAY continuera à fournir une EXPÉRIENCE
D’ACHAT PRATIQUE, des PRODUITS DE QUALITÉ et un SERVICE EFFICACE !
Con su calificación inspiradora, COSTWAY será más consistente para ofrecerle
EXPERIENCIA DE COMPRA FÁCIL, BUENOS PRODUCTOS y SERVICIO EFICIENTE.
Con la tua valutazione incoraggiante, COSTWAY sarà più coerente per offrirti ESPE-
RIENZA DI ACQUISTO FACILE, BUONI PRODOTTI e SERVIZIO EFFICIENTE!
Dzięki twojej opinii COSTWAY będzie mógł oferować jeszcze WYGODNIEJSZE
ZAKUPY, LEPSZE PRODUKTY i SPRAWNIEJSZĄ OBSŁUGĘ KLIENTA.
Snow Roof Rake
NP10216
USER’S MANUAL
US office: Fontana UK office: Ipswich AU office: Truganina
DE office: Hamburg
FR office: Saint Vigor d'Ymonville
PL office: Gdańsk