

AXISM30NetworkCameraSeries
TableofContents
Aboutthismanual..........................................3
Productoverview...........................................4
Howtoaccesstheproduct....................................5
Howtoaccesstheproductfromabrowser...........................5
Aboutsecurepasswords..........................................5
Setup.....................................................7
Productwebpageoverview........................................7
Imagequality...................................................9
Privacymasks..................................................12
Overlays.......................................................12
PTZ(PanTiltZoom)..............................................13
Streamingandstorage...........................................14
Events........................................................15
Applications....................................................17
Troubleshooting............................................19
Howtoresettofactorydefaultsettings.............................19
Howtocheckthecurrentrmware.................................19
Howtoupgradethermware.....................................19
Technicalissues,cluesandsolutions................................20
Performanceconsiderations.......................................
21
Specications..............................................23
LEDindicators..................................................
23
SDcardslot....................................................
23
Buttons.......................................................
23
Connectors....................................................
23
2

AXISM30NetworkCameraSeries
Aboutthismanual
Aboutthismanual
Thisusermanualdescribesmultipleproducts.Someoftheinstructionsmaynotberelevantforyourproduct.
3
AXISM30NetworkCameraSeries
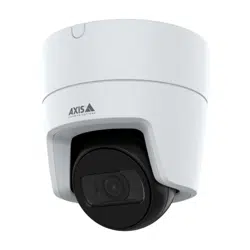
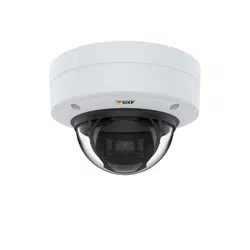
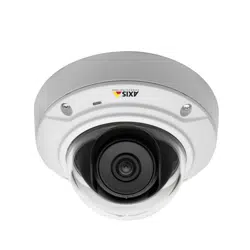
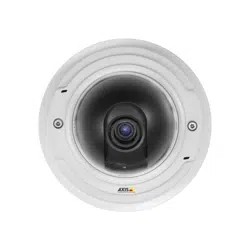
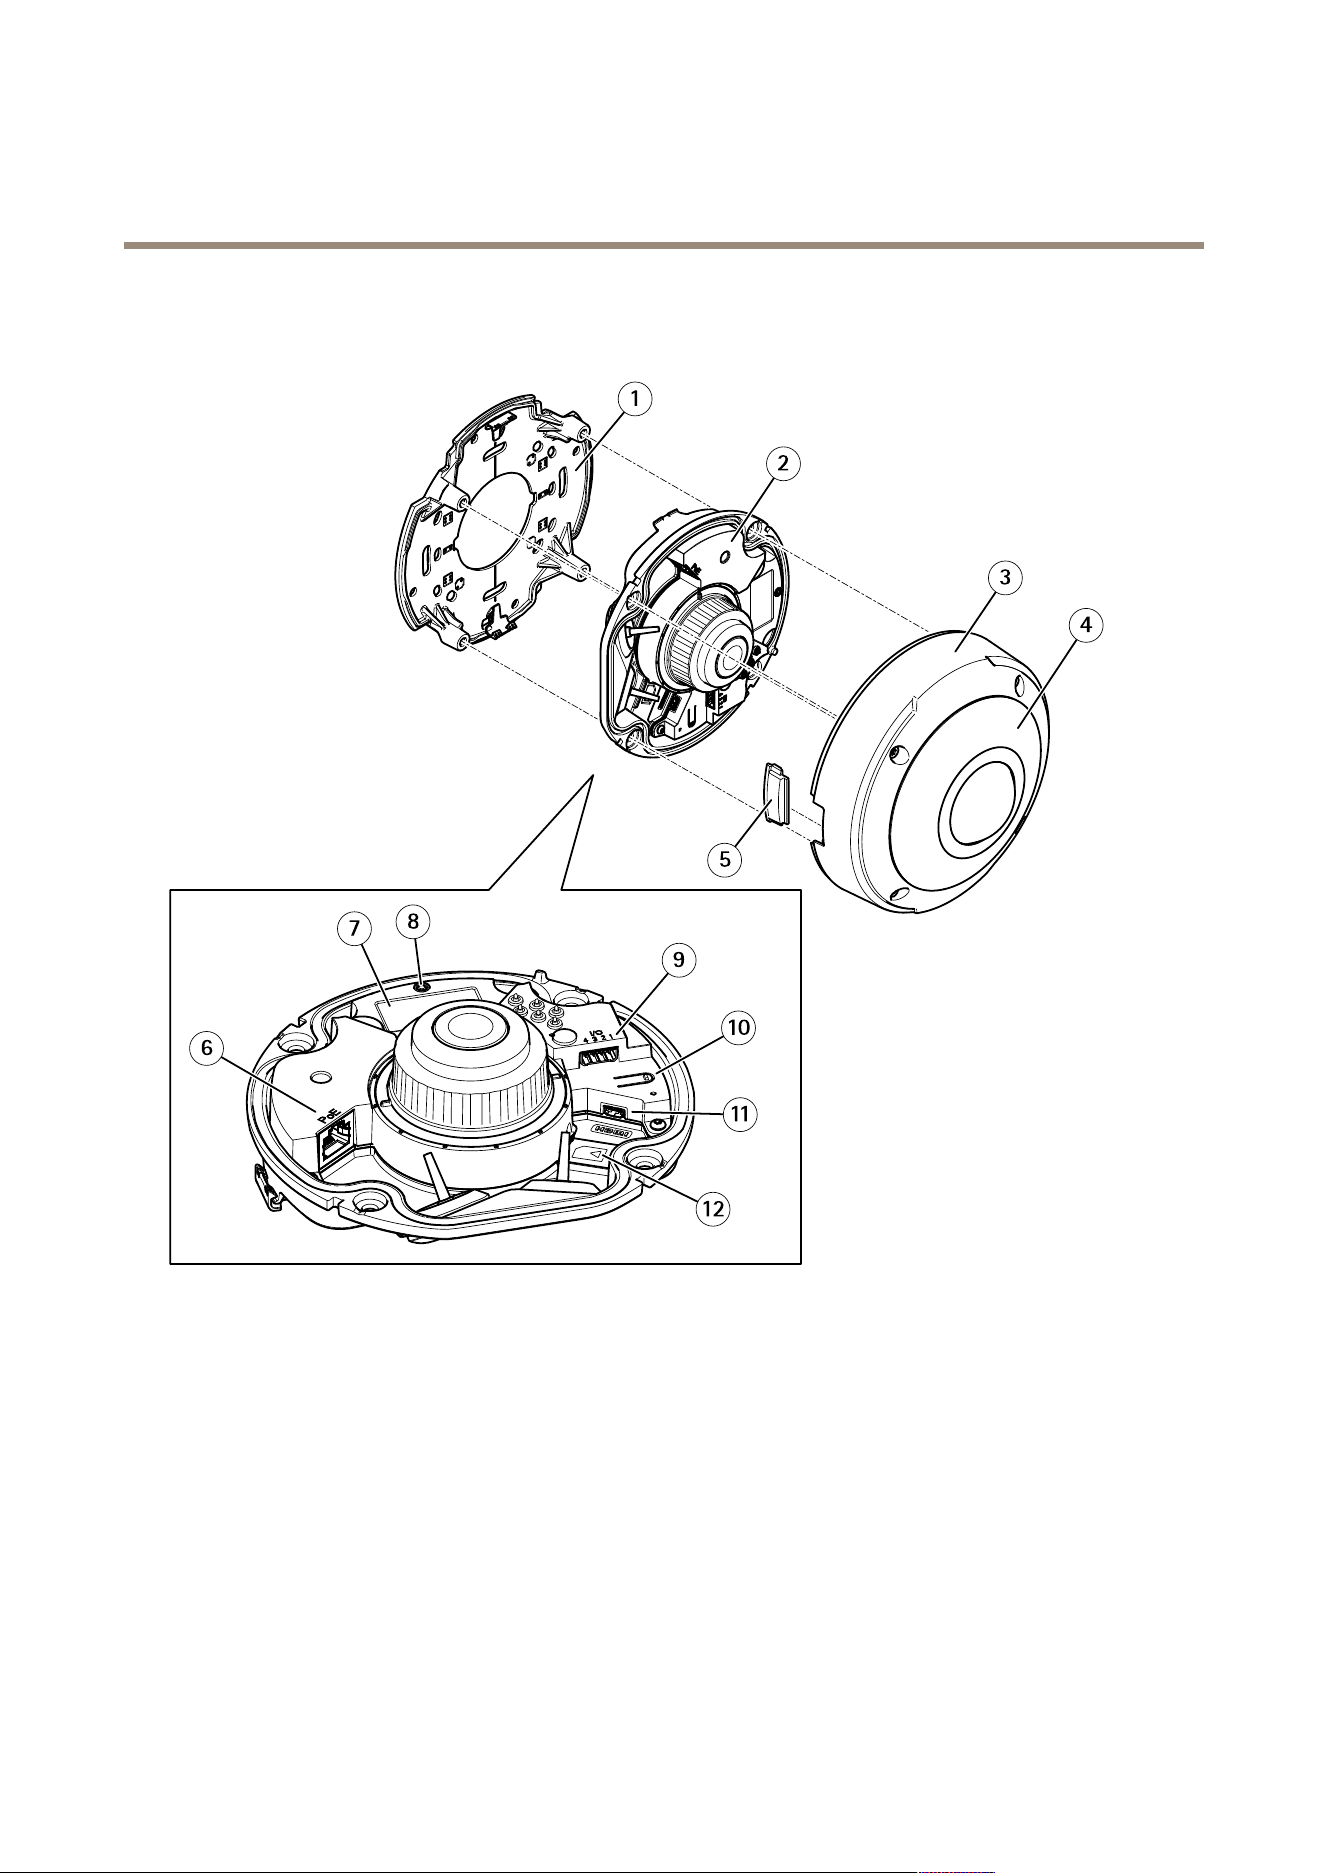
Productoverview
Productoverview
1
Mountingbracket
2
Cameraunit
3
Cover
4
IRillumination
5
Lid
6
Networkconnector(PoE)
7
Partnumber(P/N)&Serialnumber(S/N)
8
StatusLEDindicator
9
I/Oconnector
10
Controlbutton
11
HDMIconnector
12
SDcardslot
4

AXISM30NetworkCameraSeries
Howtoaccesstheproduct
Howtoaccesstheproduct
AXISIPUtilityandAXISDeviceManagerarerecommendedmethodsforndingAxisproductsonthenetworkandassigningthemIP
addressesinWindows®.Bothapplicationsarefreeandcanbedownloadedfromaxis.com/support
Theproductcanbeusedwiththefollowingbrowsers:
•Windows
®
:Chrome
TM
(recommended),Firefox
®
,Edge
®
,orOpera
®
•OSX
®
:Chrome
TM
(recommended)orSafari
®
•Otheroperatingsystems:Chrome
TM
orFirefox
®
.
Ifyouneedmoreinformationaboutrecommendedbrowsers,gotoaxis.com/browser-support
Howtoaccesstheproductfromabrowser
1.Startawebbrowser.
2.EntertheIPaddressorhostnameoftheAxisproductinthebrowser’saddresseld.
ToaccesstheproductfromaMaccomputer(OSX),gotoSafari,clickonBonjourandselecttheproductfromthe
drop-downlist.ToaddBonjourasabrowserbookmark,gotoSafari>Preferences.
IfyoudonotknowtheIPaddress,useAXISIPUtilitytolocatetheproductonthenetwork.Forinformationabout
howtodiscoverandassignanIPaddress,seethedocumentHowtoassignanIPaddressandaccessyourdeviceonthe
productpageataxis.com.
3.Enteryourusernameandpassword.Ifthisisthersttimetheproductisaccessed,therootpasswordmustrstbe
congured.
4.Theproduct’sliveviewpageopensinyourbrowser.
Aboutsecurepasswords
Important
Axisdevicessendtheinitiallysetpasswordincleartextoverthenetwork.Toprotectyourdeviceaftertherstlogin,set
upasecureandencryptedHTTPSconnectionandthenchangethepassword.
Thedevicepasswordistheprimaryprotectionforthedataandservices.Axisdevicesdonotimposeapasswordpolicyastheymaybe
usedinvarioustypesofinstallations.Toprotectyourdatawerecommendthatyou:
•Changethedefaultpasswordthatcomeswiththedevices.
•Useapasswordwithatleast8characters,preferablycreatedbyapasswordgenerator.
•Don’texposethepassword.
•Changepasswordatarecurringinterval,atleastonceayear.
Setasecurepasswordfortherootaccount
Important
Thedefaultadministratorusernamerootcannotbedeleted.Ifthepasswordforrootislost,thedevicemustberesetto
thefactorydefaultsettings.
1.Makesuretofollowtheinstructionsaboutsecurepasswords.SeeAboutsecurepasswordsonpage5.
2.Typeapasswordandthenretypeittoconrmthespelling.
5

AXISM30NetworkCameraSeries
Howtoaccesstheproduct
3.ClickCreatelogin.Thepasswordhasnowbeencongured.
6

AXISM30NetworkCameraSeries
Setup
Setup
Productwebpageoverview
1
Liveviewcontrolbar
2
Liveview
3
Productname
4
Controls
5
Videocontrolbar
6
Settingstoggle
7
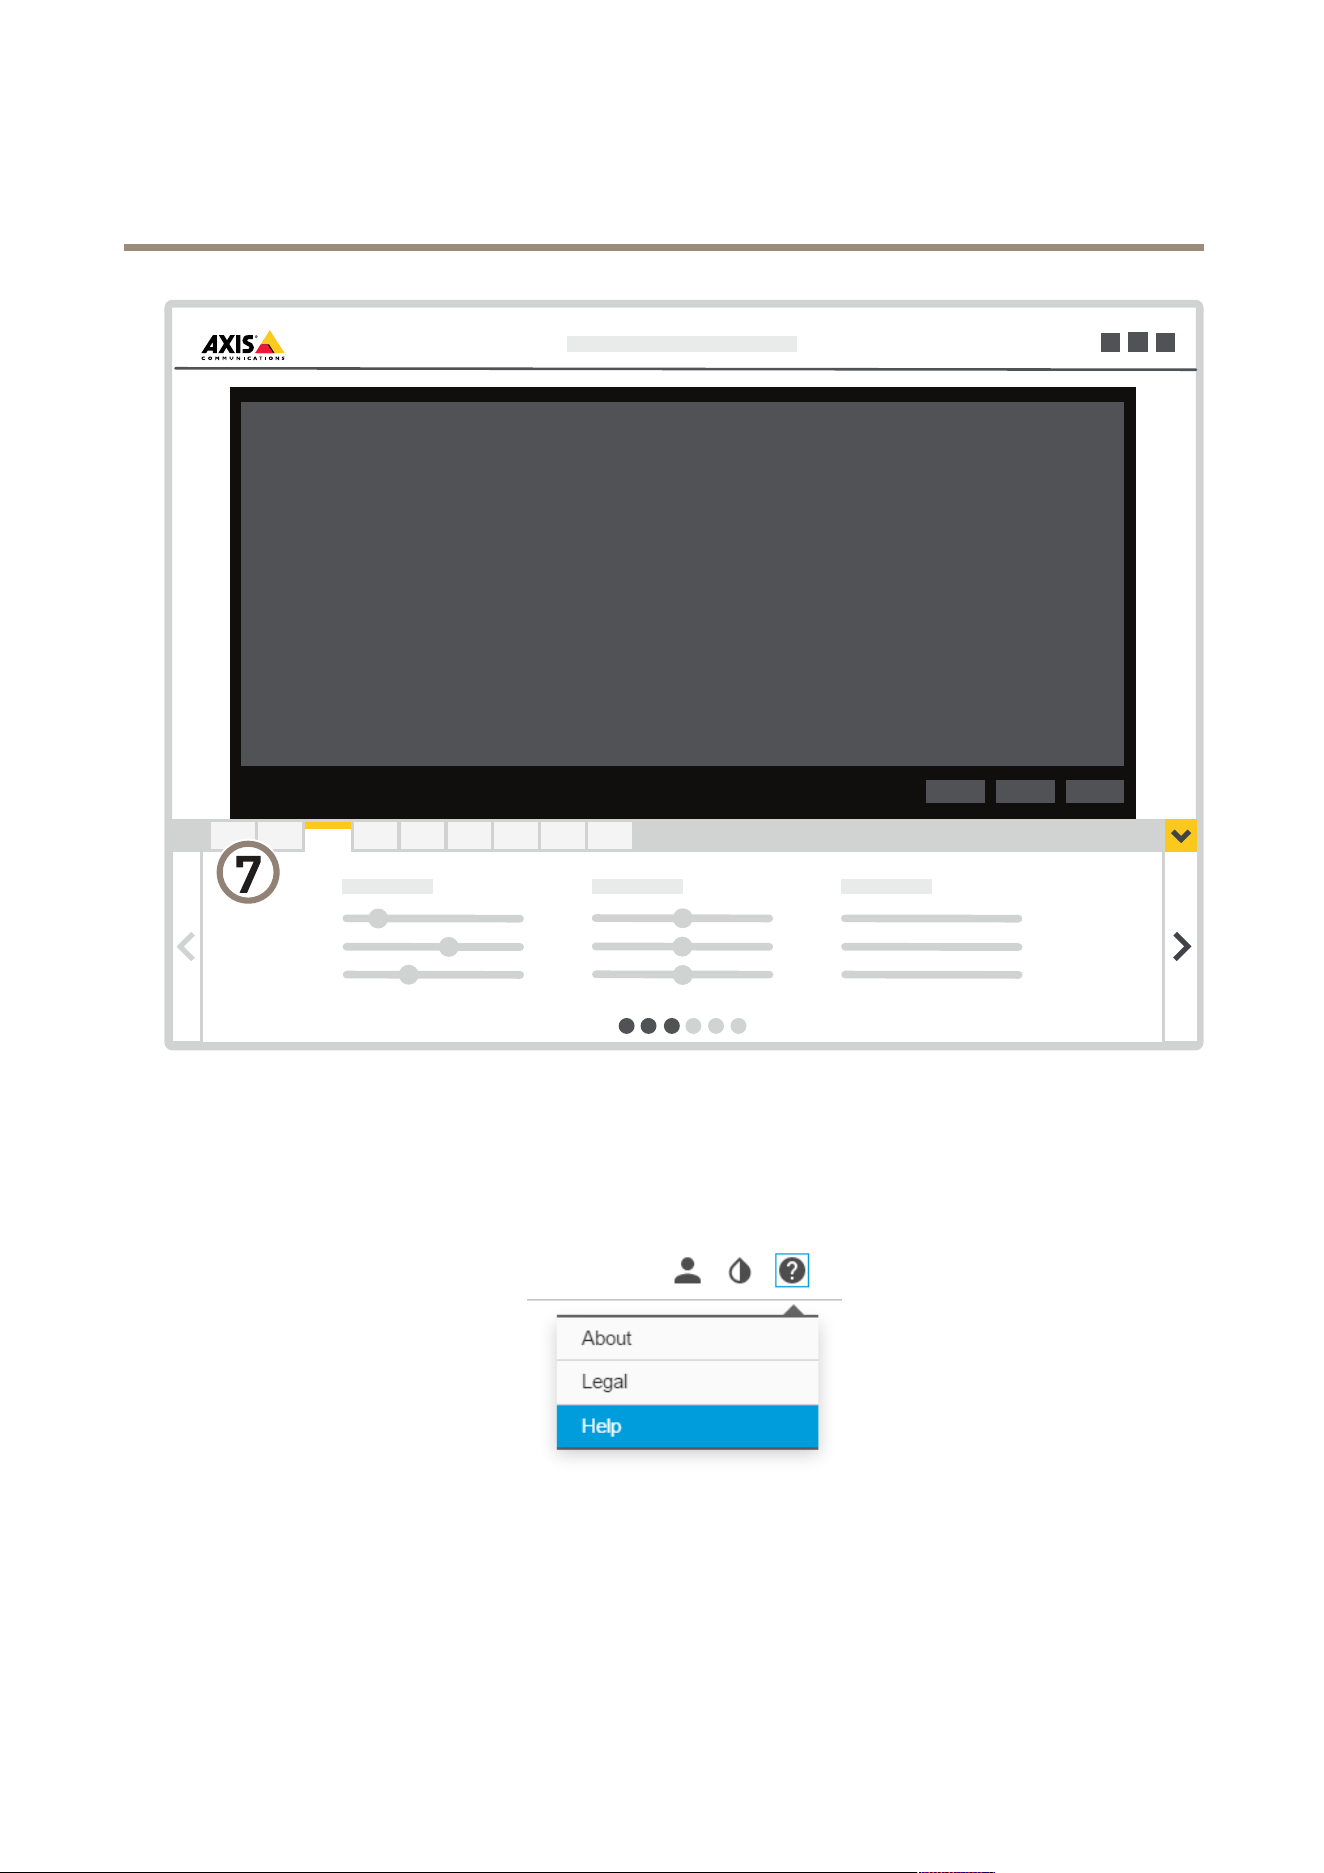
AXISM30NetworkCameraSeries
Setup
7
Settingstabs
Abouttheproduct'sbuilt-inhelp
Youcanaccessthebuilt-inhelpfromtheproduct’swebpage.Thehelpprovidesmoredetailedinformationontheproduct’s
featuresandtheirsettings.
8
AXISM30NetworkCameraSeries
Setup
Imagequality
Aboutcapturemodes
Acapturemodeisoneofthepossibleviewsforthisproductandcanbeaccessedfromthedrop-downlistintheproduct’slive
streamview.
Inthetablebelow,youcanseethehighestandlowestavailableresolutionfordifferentviewsineachcapturemode.
Note
Oneofthecapturemodesfortheseproductsonlyallowoverview.
View
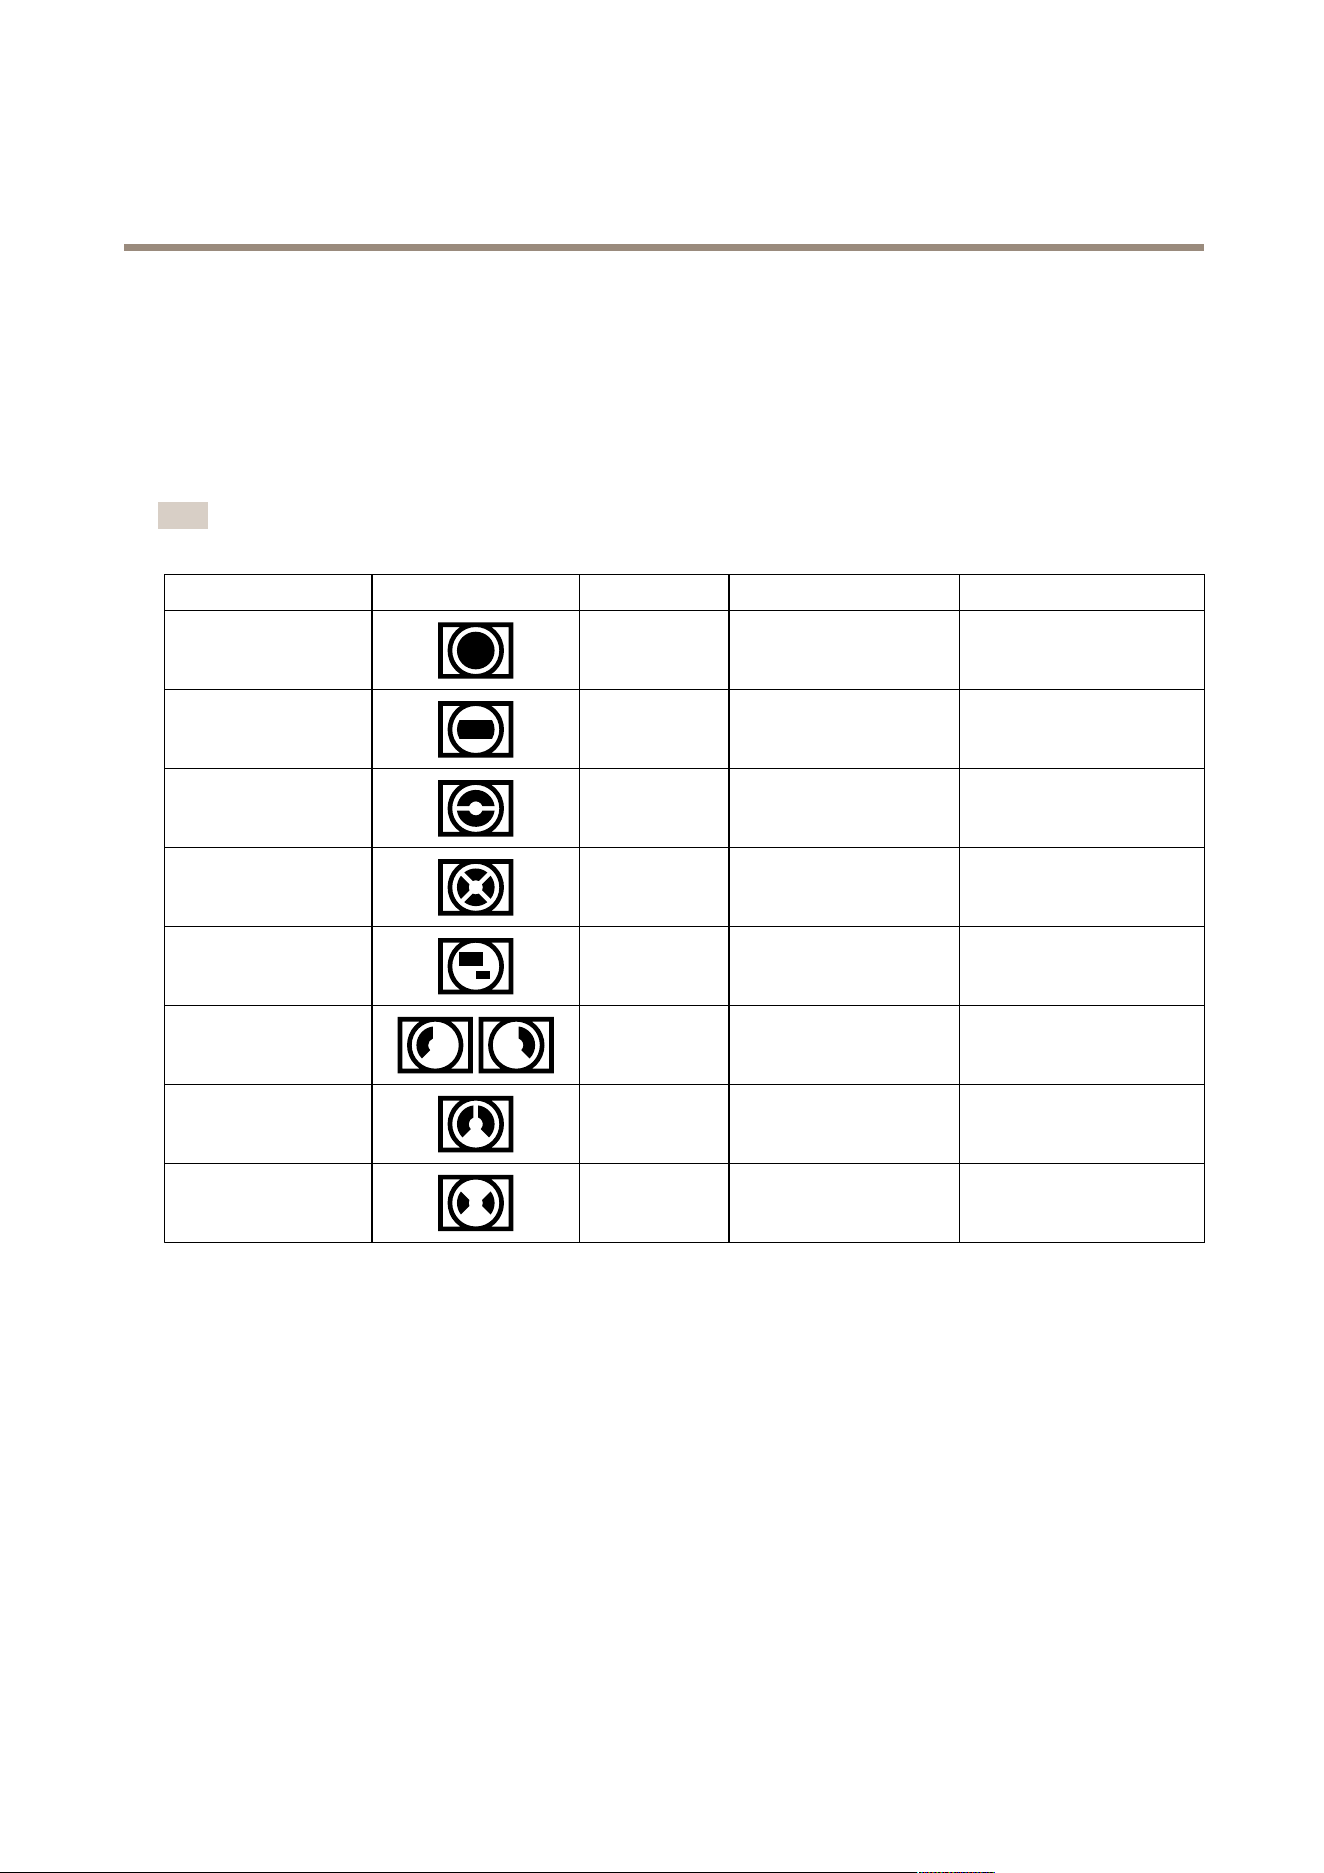
Symbol
AspectratioResolutionsM3057-PLVEResolutionsM3058-PLVE
Overview
1:1
2048x2048to160x1602992x2992to160x160
Panorama
8:3
32:9
2560x960to192x72
2560x720to1280x360
3584x1344to192x72
3584x1008to1280x360
DoublePanorama
4:3
16:9
2560x1920to320x240
2560x1440to256x144
3584x2668to320x240
3584x2016to256x144
QuadView
4:3
16:9
2560x1920to320x240
2560x1440to256x144
3584x2668to320x240
3584x2016to256x144
ViewAreas1-4
4:3
16:9
1920x1440to320x240
2048x1152to256x144
2048x1536to320x240
2048x1152to256x144
PanoramaCorner
Left/Right
8:3
2:1
2304x864to192x72
2368x1184
3200x1200to192x72
3200x1600
DoublePanorama
Corner
4:3
1:1
1920x1440to320x240
2048x2048to480x480
2560x1920to320x240
2880x2880to480x480
Corridor
4:3
16:9
2560x1920to320x240
2560x1440to256x144
2560x1920to320x240
2560x1440to256x144
Howtoselectcapturemode
Whichcapturemodetochoosedependsontherequirementsofframerateandresolutionforthespecicsurveillancesetup.For
specicationsaboutavailablecapturemodes,seetheproduct’sdatasheet.Tondthelatestversionofthedatasheet,gotoaxis.com
Howtoselectexposuremode
Therearedifferentexposuremodeoptionsinthecamerathatadjustsaperture,shutterspeed,andgaintoimproveimagequalityfor
specicsurveillancescenes.GotoSettings>Image>Exposureandselectbetweenthefollowingexposuremodes:
•Formostusecases,selectAutomaticexposure.
•Forenvironmentswithcertainarticiallighting,forexampleuorescentlighting,selectFlicker-free.
Selectthesamefrequencyasthepowerlinefrequency.
•Forenvironmentswithcertainarticiallightandbrightlight,forexampleoutdoorswithuorescentlightingatnightand
sunduringdaytime,selectFlicker-reduced.
9

AXISM30NetworkCameraSeries
Setup
Selectthesamefrequencyasthepowerlinefrequency.
•Tolockthecurrentexposuresettings,selectHoldcurrent.
HowtooptimizeIRillumination
Inmostcases,theexposureoftheimageisautomaticallyadjustedtoobtainoptimalimagequality.Sometimesifthecamerais
placedclosetoawalloracorner,itmightresultinsaturatingpartsoftheimage.Whenthishappens,theLED’sclosesttothewallor
cornerareautomaticallydimmedtoavoidsaturatingtheimage.
Dependingontheinstallationenvironmentandtheconditionsaroundthecamera,e.g.externallightsourcesinthescene,itis
sometimespossibletoachievebetterIR-illuminationbymanuallysettingtheintensityoftheLED’s.
1.GotoSettings>Image>Dayandnight,andturnonAllowIRillumination.
2.TurnonLiveviewcontrol.
3.Intheliveview,clickonIRilluminationandturnonIRlightandManualintensity.
4.AdjustLEDintensity.
HowtobenetfromIRlightinlow-lightconditionsusingnightmode
Yourcamerausesvisiblelighttodelivercolorimagesduringtheday.Aslightdiminishes,youcansetthecameratoautomatically
shifttonightmode.Innightmodethecamerausesbothvisiblelightandnear-infraredlighttodeliverblack-and-whiteimages.
Sincethecamerausesmoreoftheavailablelightitcandeliverbrighter,moredetailed,images.
1.GotoSettings>Image>Dayandnight,andmakesurethattheIRcutlterissettoAuto.
Howtoreducenoiseinlow-lightconditions
Toreducenoiseinlow-lightconditions,youcanadjustoneormoreofthefollowingsettings:
•Makesurethattheexposuremodeisautomatic.
Note
Increasingthemaxshuttervaluecanresultinmotionblur.
•Theshutterspeedshouldbeasslowaspossible,whichmeansyoushouldsetmaxshuttertothehighestpossiblevalue.
•Reducesharpnessintheimage.
Howtoreducemotionblurinlow-lightconditions
Toreducemotionblurinlow-lightconditions,youcanadjustoneormoreofthefollowingsettings:
Note
Imagenoisewillincreaseifyouincreasethegain.
•Increaseshutterspeedandgain.GotoSettings>Image>ExposureandsetMaxshuttertoalowervalue,andMaxgain
toahighervalue.
Ifyouarestillexperiencingmotionblur,youcantryoneofthefollowing:
•Increasethelightlevelinthescene.
•Mountthecamerasothatobjectsmovetowarditorawayfromitratherthansideways.
10
AXISM30NetworkCameraSeries
Setup
Howtomaximizedetailsinanimage
Important
Ifyoumaximizedetailsinanimage,bitrateincreasesandmightleadtoreducedframerate.
•Setcompressionaslowaspossible.
•SelectMJPEGstreaming.
•TurnofftheZipstreamfunctionality.
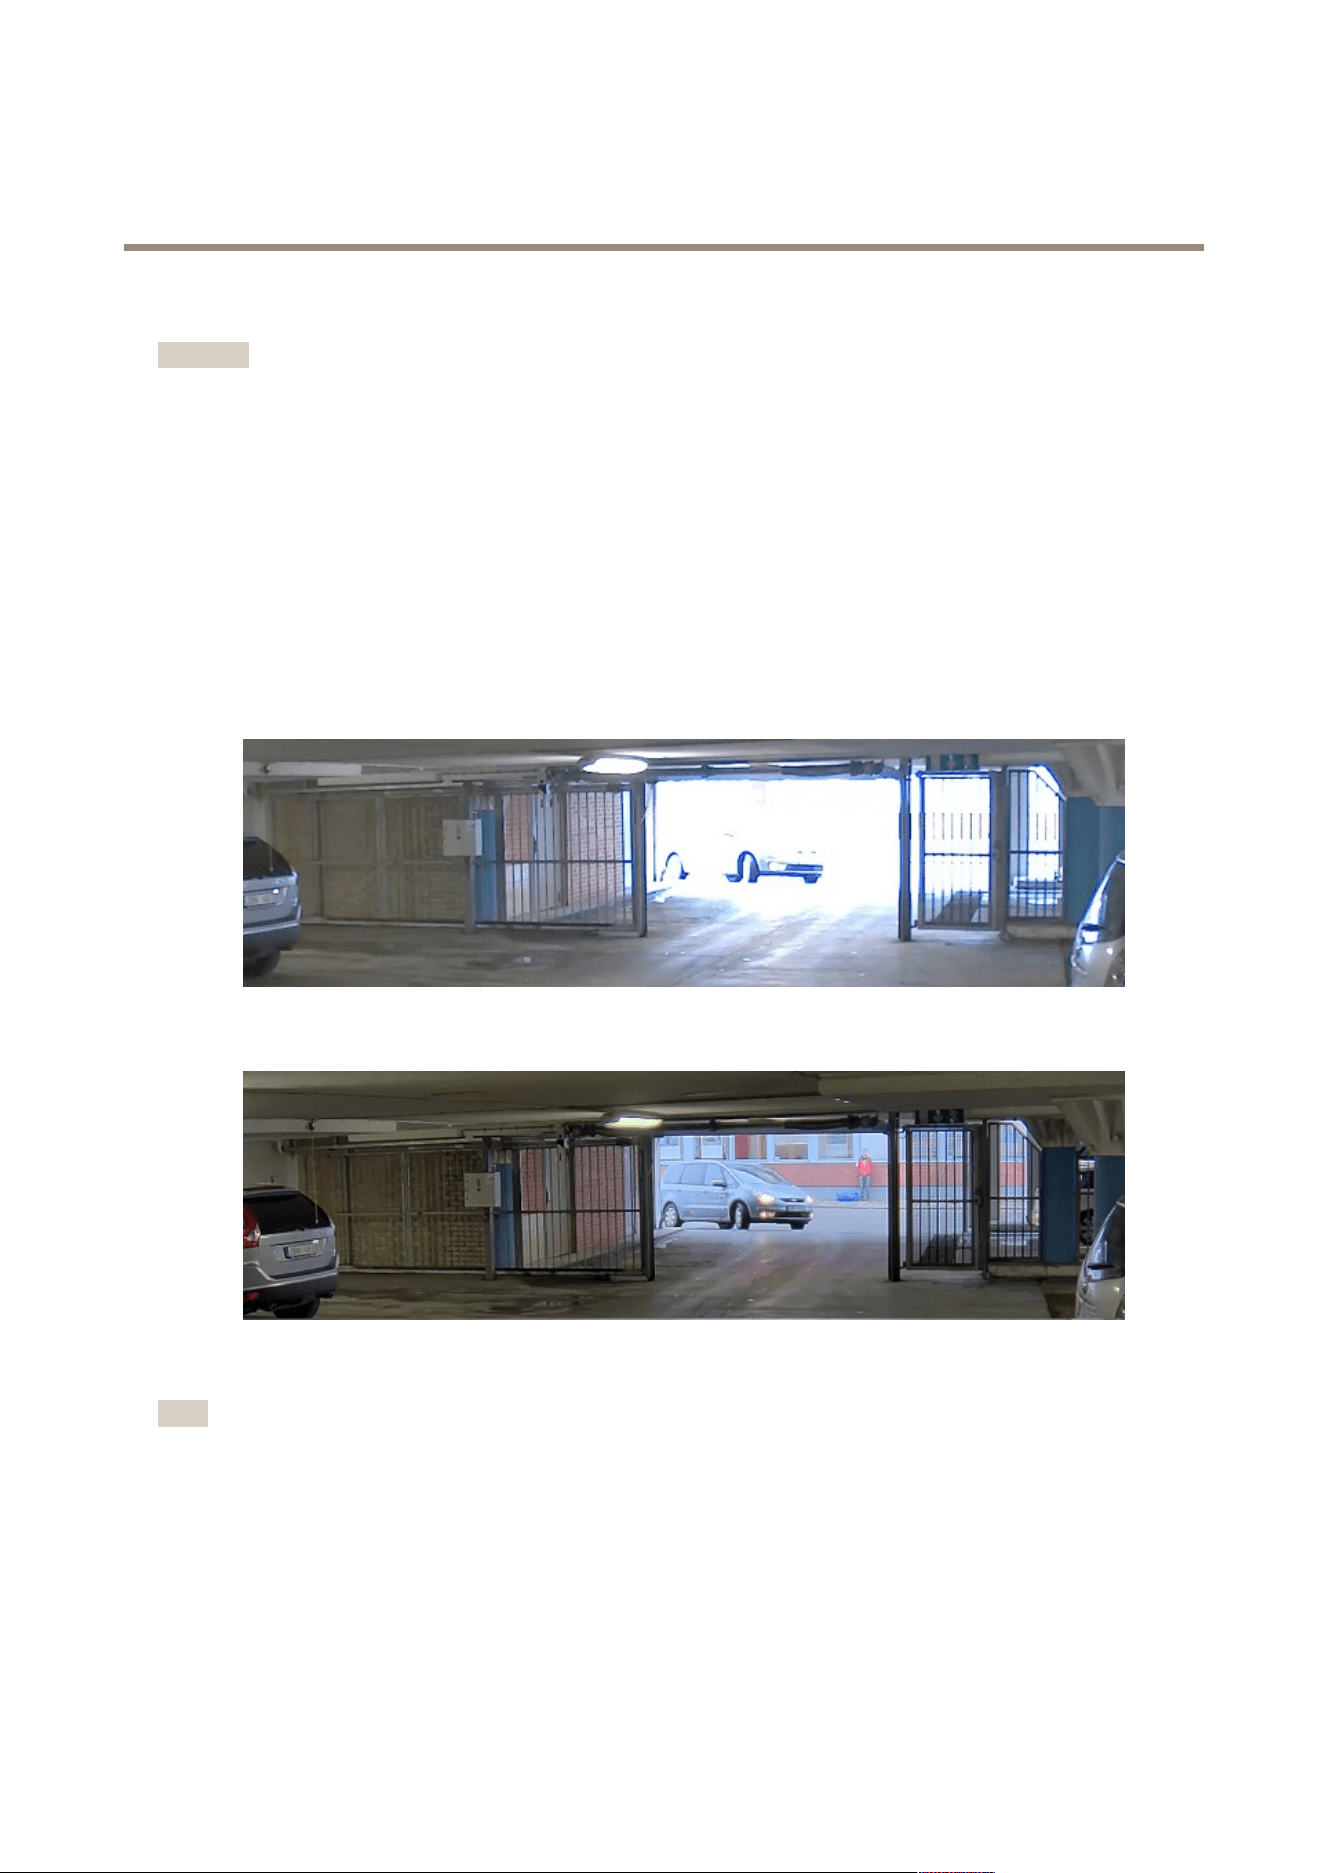
Howtohandlesceneswithstrongbacklight
Tomakebothdarkandbrightareasoftheimagevisible,turnonWDR.
1.GotoSettings>Image.
2.TurnonWDRunderWidedynamicrange.
ImagewithoutWDR.
ImagewithWDR.
Note
IfyouuseWDR,youmayexperiencesomeWDRartifactsintheimage.
FindoutmoreaboutWDRandhowtouseitataxis.com/web-articles/wdr
Aboutviewarea
Aviewareaisacroppedpartofthefullview.Youcanstreamandstoreviewareasinsteadofthefullviewtominimizebandwidth
andstorageneeds.PTZisenabledforallviewareas.Byusingviewareasyoucancreatepresetpositionsandalsoremovepartsof
thefullview,forexample,thesky.
11

AXISM30NetworkCameraSeries
Setup
Privacymasks
Howtohidepartsoftheimagewithprivacymasks
Whatisaprivacymask?
Aprivacymaskisauser-denedareathatpreventsusersfromviewingapartofthemonitoredarea.Inthevideostream,privacy
masksappearasblocksofsolidcolor.
Aprivacymaskisauser-denedareathatcoversapartofthemonitoredarea.Inthevideostream,privacymasksappeareitheras
blocksofsolidcolororwithamosaicpattern.
You’llseetheprivacymaskonallsnapshots,recordedvideo,andlivestreams.
YoucanusetheVAPIX®applicationprogramminginterface(API)toturnofftheprivacymasks.
Important
Usingmultipleprivacymasksmayaffecttheproduct’sperformance.
Note
Privacymasksmayappearwarpedinsomeviewmodes.
Note
IfyouviewthevideostreamoverHDMIandrestarttheproduct,theprivacymaskswilldisappear.Toshowtheprivacy
masksagain,restartthevideostream.
Howtocreateaprivacymask
Tocreateaprivacymask,gotoSettings>Privacymask.
Overlays
Aboutoverlays
Note
ImageandtextoverlaywillnotbedisplayedonvideostreamoverHDMI.
Overlaysaresuperimposedoverthevideostream.Theyareusedtoprovideextrainformationduringrecordings,suchasatimestamp,
orduringproductinstallationandconguration.
Howtoshowatextoverlaywhenthecameradetectsmotion
Thisexampleexplainshowtodisplaythetext“Motiondetected”whenthecameradetectsmotion:
MakesuretheAXISVideoMotionDetectionapplicationisrunning:
1.GotoSettings>Apps>AXISVideoMotionDetection.
2.Starttheapplicationifitisnotalreadyrunning.
3.Makesureyouhavesetuptheapplicationaccordingtoyourneeds.
Addtheoverlaytext:
4.GotoSettings>Overlay.
5.SelectCreateoverlayandconrmTextoverlay.
6.Enter#Dinthetexteld.
12

AXISM30NetworkCameraSeries
Setup
7.Choosealignment,textsizeandappearance.
8.Includethetextoverlay.
Createanactionrule:
9.GotoSystem>Events>Actionrules.
10.CreateanactionrulewithAXISVideoMotionDetectionastrigger.
11.Fromthelistofactions,selectOverlaytext.
12.Type“Motiondetected”.
13.Settheduration.
Note
Ifyouupdatetheoverlaytextitwillbeautomaticallyupdatedonallvideostreamsdynamically.
PTZ(PanTiltZoom)
Howtolimitzoommovements
Inthisexample,thecameraissurveillingaparkinglotwithnearbyapartmentbuildings.Setzoomlimitstoensureprivacyforresidents.
Tolimitzoommovements,gotoSettings>PTZ>Limits.
Aboutguardtours
Aguardtourdisplaysthevideostreamfromdifferentpresetpositionseitherinapredeterminedorrandomorder,andforcongurable
periodsoftime.Oncestarted,aguardtourcontinuestorununtilstopped,evenwhentherearenoclients(webbrowsers)viewingthe
images.
Howtocreateaguardtourwithpresetpositions
1.GotoSettings>PTZ>Guardtours
2.Click+.
3.SelectPresetposition.
4.Toedittheguardtour’sproperties,click
5.Typeanamefortheguardtourandspecifythepauselengthinminutesbetweeneachtour.
6.Ifyouwanttheguardtourtogotothepresetpositionsinarandomorder,turnonShufe.
7.ClickDone.
8.ClickAddtoaddthepresetpositionsthatyouwantinyourguardtour.
9.ClickDonetoexittheguardtoursettings.
10.Toscheduletheguardtour,gotoSystem>Events.
13

AXISM30NetworkCameraSeries
Setup
Streamingandstorage
Howtochoosevideocompressionformat
Decidewhichcompressionmethodtousebasedonyourviewingrequirements,andonthepropertiesofyournetwork.The
availableoptionsare:
MotionJPEG
MotionJPEGorMJPEGisadigitalvideosequencethatismadeupofaseriesofindividualJPEGimages.Theseimagesarethen
displayedandupdatedataratesufcienttocreateastreamthatshowsconstantlyupdatedmotion.Fortheviewertoperceivemotion
videotheratemustbeatleast16imageframespersecond.Fullmotionvideoisperceivedat30(NTSC)or25(PAL)framespersecond.
TheMotionJPEGstreamusesconsiderableamountsofbandwidth,butprovidesexcellentimagequalityandaccesstoeveryimage
containedinthestream.
H.264orMPEG-4Part10/AVC
Note
H.264isalicensedtechnology.TheAxisproductincludesoneH.264viewingclientlicense.Installingadditionalunlicensed
copiesoftheclientisprohibited.Topurchaseadditionallicenses,contactyourAxisreseller.
H.264can,withoutcompromisingimagequality,reducethesizeofadigitalvideolebymorethan80%comparedtotheMotion
JPEGformatandbyasmuchas50%comparedtotheMPEG-4standard.Thismeansthatlessnetworkbandwidthandstoragespace
arerequiredforavideole.Orseenanotherway,highervideoqualitycanbeachievedforagivenbitrate.
Howtoreducebandwidthandstorage
Important
Ifyoureducethebandwidthitcanresultinlossofdetailsinthepicture.
1.GotoliveviewandselectH.264.
2.GotoSettings>Stream.
3.Dooneormoreofthefollowing:
-TurnontheZipstreamfunctionalityandselectthedesiredlevel.
-TurnondynamicGOPandsetahighGOPlengthvalue.
-Increasethecompression.
-TurnondynamicFPS.
Howtoviewlivevideostreamonamonitor
YourcameracantransmitlivevideostreamtoanHDMImonitorwithoutanetworkconnection.Themonitorcanbeusedfor
surveillancepurposesorforpublicviewinge.g.inastore.
1.ConnectanexternalmonitorusingtheHDMIconnector.
2.ChangetheHDMIsettingsunderSettings>Stream>HDMI.
Howtosetupnetworkstorage
Tostorerecordingsonthenetwork,youneedtosetupnetworkstorage:
1.GotoSettings>System>Storage.
2.ClickSetupunderNetworkstorage.
14

AXISM30NetworkCameraSeries
Setup
3.EntertheIPaddressofthehostserver.
4.Enterthenameofthesharedlocationonthehostserver.
5.Movetheswitchifthesharerequiresalogin,andenterusernameandpassword.
6.ClickConnect.
Howtorecordandwatchvideo
Torecordvideoyoumustrstsetupnetworkstorage,seeHowtosetupnetworkstorageonpage14,orhaveanSDcardinstalled.
1.Gotothecamera’sliveview.
2.ClickonRecordoncetostartrecordingandonemoretimetostoprecording.
Towatchyourrecording:
1.ClickonStorage>Gotorecordings.
2.Selectyourrecordinginthelistanditwillplayautomatically.
Events
Aboutevents
Theeventpagesallowyoutocongureyourproducttoperformactionswhendifferenteventsoccur.Forexample,theproduct
canstartarecordingorsendanemailnoticationwhenmotionisdetected.Thesetofconditionsthatdeneshowandwhen
theactionistriggerediscalledanactionrule.
Howtotriggeranaction
1.GotoSettings>System>Eventstosetupanactionrule.Theactionruledeneswhenthecamerawillperformcertain
actions.Actionrulescanbesetupasscheduled,recurring,orforexample,triggeredbymotiondetection.
2.SelectwhatTriggermustbemettotriggertheaction.Ifyouspecifymorethanonetriggerfortheactionrule,all
ofthemmustbemettotriggertheaction.
3.SelectwhichActionthecamerashouldperformwhentheconditionsaremet.
Note
Ifyoumakechangestoanactiveactionrule,theactionruleneedstoberestartedforthechangestotakeeffect.
Howtorecordvideowhenthecameradetectsmotion
ThisexampleexplainshowtosetupthecameratostartrecordingtotheSDcardvesecondsbeforeitdetectsmotionandto
stoponeminuteafter.
MakesuretheAXISVideoMotionDetectionapplicationisrunning:
1.GotoSettings>Apps>AXISVideoMotionDetection.
2.Starttheapplicationifitisnotalreadyrunning.
3.Makesureyouhavesetuptheapplicationaccordingtoyourneeds.
Createanactionrule:
4.GotoSettings>System>Eventsandaddanactionrule.
5.Typeanamefortheactionrule.
15

AXISM30NetworkCameraSeries
Setup
6.Fromthelistoftriggers,selectApplicationsandthenselectAXISVideoMotionDetection(VMD).
7.Fromthelistofactions,selectRecordvideo.
8.Selectanexistingstreamproleorcreateanewone.
9.Setthepre-triggertimeto5seconds.
10.Setthepost-triggertimeto60seconds.
11.SelectSDcardfromthelistofstorageoptions.
12.ClickOk.
HowtorecordvideowhenaPIRdetectorsensesmotion
ThisexampleexplainshowtoconnectanAxisPIRdetectortothecamera,andsetupthecameratostartrecordingwhenthe
detectorsensesmotion.
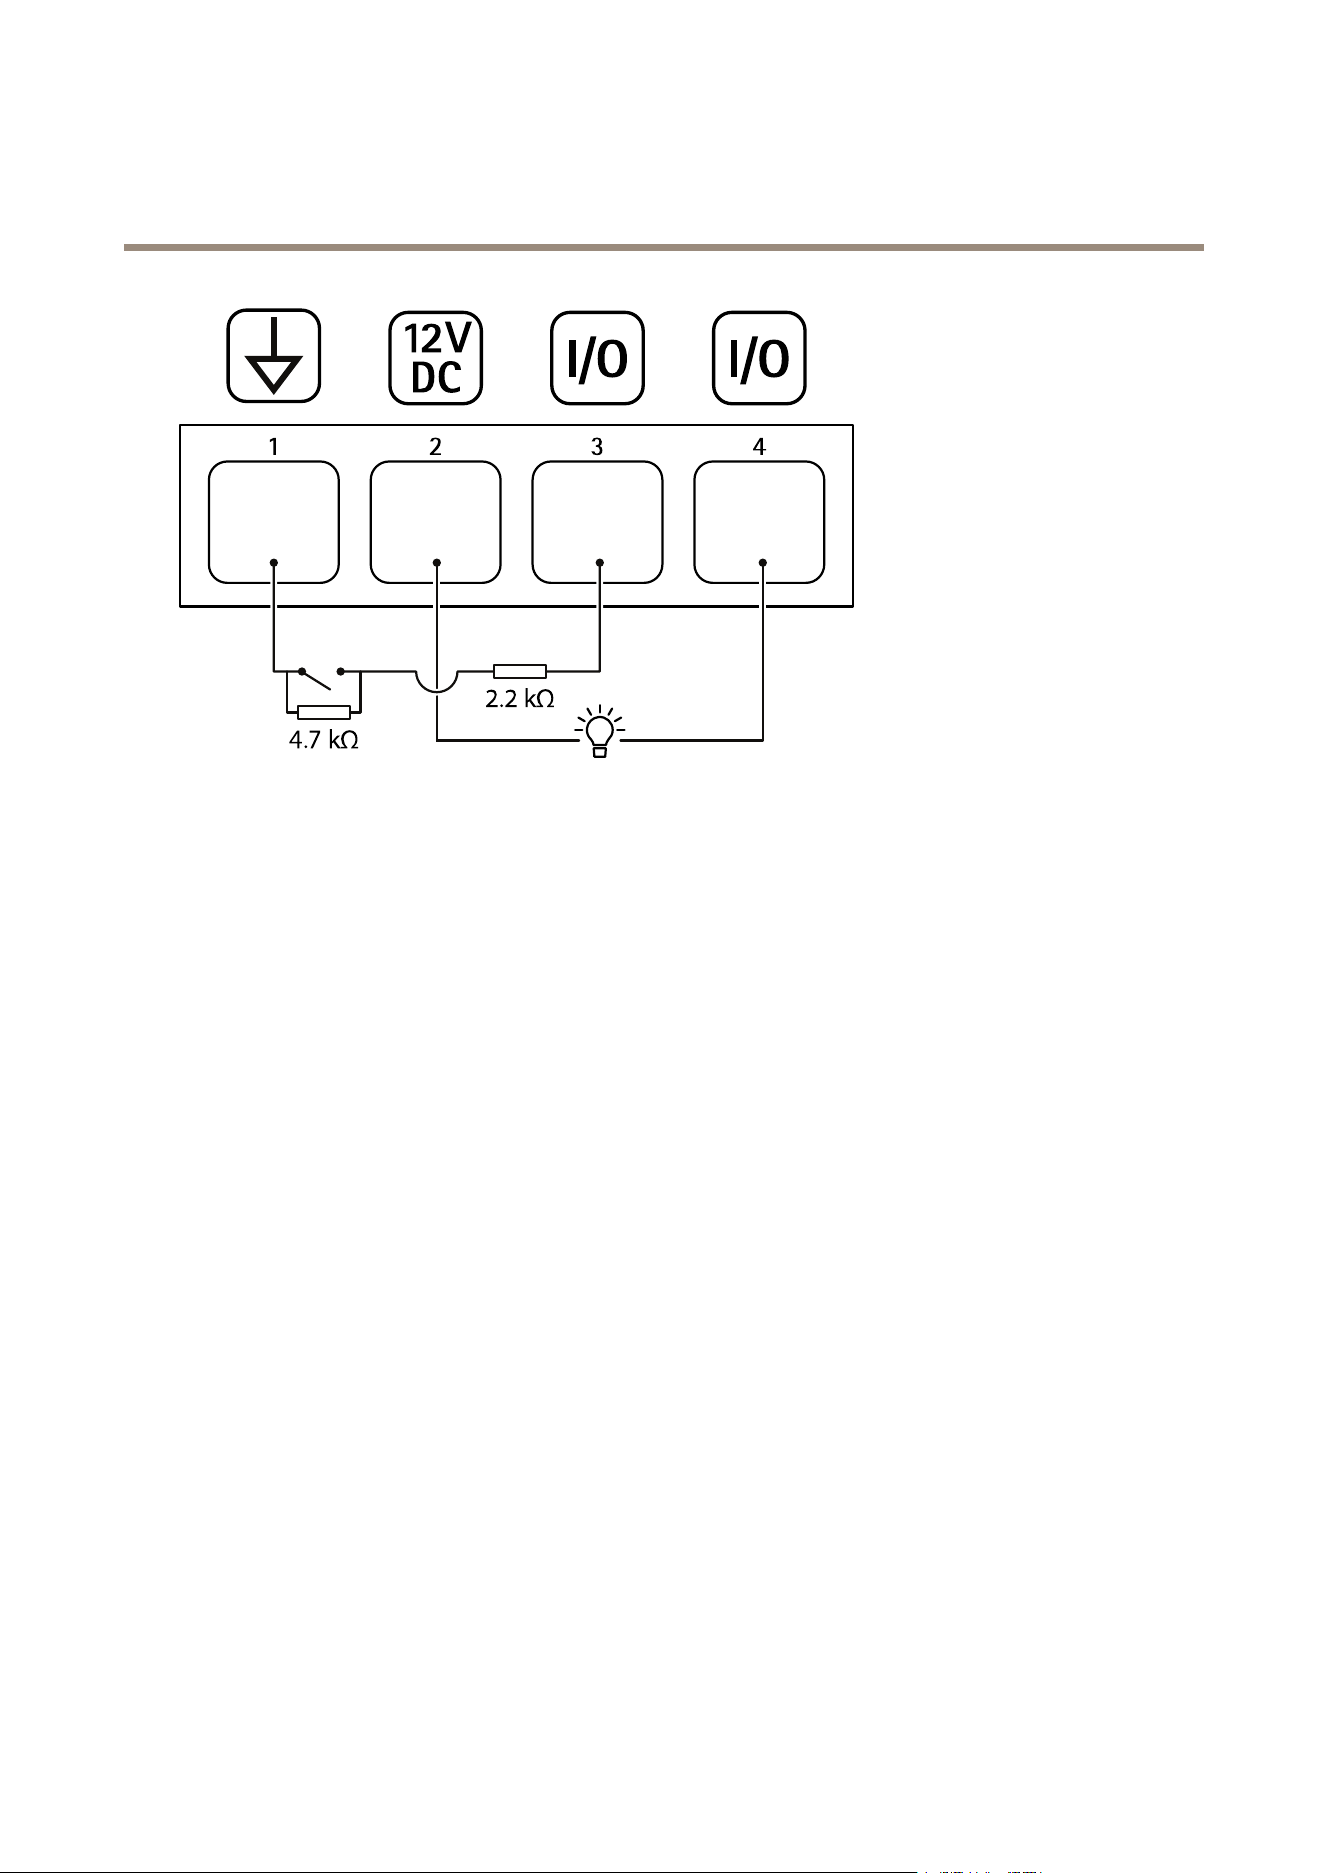
Requiredhardware
•3–wirecable(ground,power,I/O)
•AxisPIRdetector
NO NO
NO
TICE TICE
TICE
Disconnectthecamerafrompowerbeforeconnectingthewires.Reconnecttopowerafterallconnectionsaredone.
Connectthewirestothecamera’sI/Oconnector
Note
ForinformationontheI/Oconnector,seeConnectorsonpage23
1.Connectthegroundwiretopin1(GND/-).
2.Connectthepowerwiretopin2(12VDCoutput).
3.ConnecttheI/Owiretopin3(I/Oinput).
ConnectthewirestothePIRdetector’sI/Oconnector
1.Connecttheotherendofthegroundwiretopin1(GND/-).
2.Connecttheotherendofthepowerwiretopin2(DCinput/+).
3.ConnecttheotherendoftheI/Owiretopin3(I/Ooutput).
ConguretheI/Oportinthecamera’swebpage
1.GotoSettings>System>I/Oports.
2.Givetheinputmoduleadescriptivename.
16

AXISM30NetworkCameraSeries
Setup
3.TomakethePIRdetectorsendasignaltothecamerawhenitsensesmotion,selectClosedcircuitinthedrop-downlist.
TotriggerthecameratostartrecordingwhenitreceivesasignalfromthePIRdetector,youneedtocreateanactionruleinthe
camera’swebpage.
Howtodetecttamperingwithinputsignal
Thisexampleexplainshowtotriggeranalarmwhentheinputsignalhasbeencutorshort-circuited.Formoreinformationaboutthe
I/Oconnector,seepage24.
1.GotoSettings>System>I/OPortsandenableSupervisedI/O.
Createanactionrule:
1.GotoSettings>System>Eventsandcreateanactionrule.
2.Typeanamefortheactionrule.
3.Fromthelistoftriggers,selectInputSignalandthenDigitalinputport.SelectInput1andsetTamperedtoYes.
4.Fromthelistofschedules,selectAlways.
5.Fromthelistofactions,selectSendNoticationandthenselectarecipientorcreateanewrecipient.
6.ClickOK.
Howtoautomaticallysendanemailifsomeonespraypaintsthelens
1.GotoSystem>Detectors.
2.SelectAlarmfordarkimages.Thiswilltriggeranalarmifthelensissprayed,covered,orrenderedseverelyoutoffocus.
3.SettheMinimumduration.Thevalueindicatesthetimethatmustpassbeforeanemailissent.
4.ClickSave.
Createanactionrule:
5.GotoEvents>Actionrulesandaddanactionrule.
6.Enteranamefortheactionrule.
7.Fromthelistoftriggers,selectDetectorsandthenselectTampering.
8.Fromthelistofactions,selectSendNoticationandthenselectarecipientfromthelistorclickNewRecipient
tocreateanewrecipient.
9.EnterSubjectandMessagefortheemail.
10.ClickOk.
Applications
Aboutapplications
AXISCameraApplicationPlatform(ACAP)isanopenplatformthatenablesthirdpartiestodevelopanalyticsandotherapplications
forAxisproducts.Tondoutmoreaboutavailableapplications,downloads,trialsandlicenses,gotoaxis.com/applications
TondtheusermanualsforAxisapplications,gotoaxis.com
17

AXISM30NetworkCameraSeries
Setup
Note
•Severalapplicationscanrunatthesametimebutsomeapplicationsmightnotbecompatiblewitheachother.Certain
combinationsofapplicationsmightrequiretoomuchprocessingpowerormemoryresourceswhenruninparallel.Verify
thattheapplicationsworktogetherbeforedeployment.
18

AXISM30NetworkCameraSeries
Troubleshooting
Troubleshooting
Howtoresettofactorydefaultsettings
Important
Resettofactorydefaultshouldbeusedwithcaution.Aresettofactorydefaultresetsallsettings,includingtheIPaddress,to
thefactorydefaultvalues.
Toresettheproducttothefactorydefaultsettings:
1.Disconnectpowerfromtheproduct.
2.Pressandholdthecontrolbuttonwhilereconnectingpower.SeeProductoverviewonpage4.
3.Keepthecontrolbuttonpressedfor15–30secondsuntilthestatusLEDindicatorashesamber.
4.Releasethecontrolbutton.TheprocessiscompletewhenthestatusLEDindicatorturnsgreen.Theproducthasbeenreset
tothefactorydefaultsettings.IfnoDHCPserverisavailableonthenetwork,thedefaultIPaddressis192.168.0.90
5.UsetheinstallationandmanagementsoftwaretoolstoassignanIPaddress,setthepassword,andaccessthevideostream.
Theinstallationandmanagementsoftwaretoolsareavailablefromthesupportpagesonaxis.com/support
1.Pressandholdthecontrolbuttonandthepowerbuttonfor15–30secondsuntilthestatusLEDindicatorashesamber.
SeeProductoverviewonpage4.
2.ReleasethecontrolbuttonbutcontinuetoholddownthepowerbuttonuntilthestatusLEDindicatorturnsgreen.
3.Releasethepowerbuttonandassembletheproduct.
4.Theprocessisnowcomplete.Theproducthasbeenresettothefactorydefaultsettings.IfnoDHCPserverisavailableon
thenetwork,thedefaultIPaddressis192.168.0.90
5.UsingtheinstallationandmanagementsoftwaretoolstoassignanIPaddress,setthepasswordandaccessthevideo
stream.
Itisalsopossibletoresetparameterstofactorydefaultthroughthewebinterface.GotoSettings>System>Maintenanceand
clickDefault.
Howtocheckthecurrentrmware
Firmwareisthesoftwarethatdeterminesthefunctionalityofnetworkdevices.Oneofyourrstactionswhentroubleshootinga
problemshouldbetocheckthecurrentrmwareversion.Thelatestversionmaycontainacorrectionthatxesyourparticular
problem.
Tocheckthecurrentrmware:
1.Gototheproduct’swebpage.
2.Clickonthehelpmenu.
3.ClickAbout.
Howtoupgradethermware
Important
Preconguredandcustomizedsettingsaresavedwhenthermwareisupgraded(providedthatthefeaturesareavailablein
thenewrmware)althoughthisisnotguaranteedbyAxisCommunicationsAB.
19

AXISM30NetworkCameraSeries
Troubleshooting
Important
Makesurethecoverisattachedduringupgradetoavoidinstallationfailure.
Important
Makesuretheproductremainsconnectedtothepowersourcethroughouttheupgradeprocess.
Note
Whenyouupgradetheproductwiththelatestrmware,theproductreceivesthelatestfunctionalityavailable.Alwaysread
theupgradeinstructionsandreleasenotesavailablewitheachnewreleasebeforeupgradingthermware.Tondthelatest
rmwareandthereleasenotes,gotoaxis.com/support/rmware
1.Downloadthelatestrmwareletoyourcomputer,availablefreeofchargeataxis.com/support/rmware
2.Logintotheproductasanadministrator.
3.GotoSettings>System>Maintenance.Followtheinstructionsonthepage.Whentheupgradehasnished,the
productrestartsautomatically.
AXISDeviceManagercanbeusedformultipleupgrades.Findoutmoreataxis.com/products/axis-device-manager
Technicalissues,cluesandsolutions
Ifyoucan’tndwhatyou’relookingforhere,trythetroubleshootingsectionataxis.com/support
Problemsupgradingthermware
FirmwareupgradefailureIfthermwareupgradefails,theproductreloadsthepreviousrmware.Themostcommonreason
isthatthewrongrmwarelehasbeenuploaded.Checkthatthenameofthermwarele
correspondstoyourproductandtryagain.
ProblemssettingtheIPaddress
Theproductislocatedona
differentsubnet
IftheIPaddressintendedfortheproductandtheIPaddressofthecomputerusedtoaccessthe
productarelocatedondifferentsubnets,youcannotsettheIPaddress.Contactyournetwork
administratortoobtainanIPaddress.
TheIPaddressisbeingused
byanotherdevice
DisconnecttheAxisproductfromthenetwork.Runthepingcommand(inaCommand/DOS
window,typepingandtheIPaddressoftheproduct):
•Ifyoureceive:Replyfrom<IPaddress>:bytes=32;time=10...
thismeansthattheIPaddressmayalreadybeinusebyanotherdeviceonthenetwork.
ObtainanewIPaddressfromthenetworkadministratorandreinstalltheproduct.
•Ifyoureceive:Requesttimedout,thismeansthattheIPaddressisavailable
forusewiththeAxisproduct.Checkallcablingandreinstalltheproduct.
PossibleIPaddressconict
withanotherdeviceonthe
samesubnet
ThestaticIPaddressintheAxisproductisusedbeforetheDHCPserversetsadynamicaddress.
ThismeansthatifthesamedefaultstaticIPaddressisalsousedbyanotherdevice,theremay
beproblemsaccessingtheproduct.
Theproductcannotbeaccessedfromabrowser
Cannotlogin
WhenHTTPSisenabled,ensurethatthecorrectprotocol(HTTPorHTTPS)isusedwhenattempting
tologin.Youmayneedtomanuallytypehttporhttpsinthebrowser’saddresseld.
Ifthepasswordfortheuserrootislost,theproductmustberesettothefactorydefaultsettings.
SeeHowtoresettofactorydefaultsettingsonpage19.
20

AXISM30NetworkCameraSeries
Troubleshooting
TheIPaddresshasbeen
changedbyDHCP
IPaddressesobtainedfromaDHCPserveraredynamicandmaychange.IftheIPaddresshasbeen
changed,useAXISIPUtilityorAXISDeviceManagertolocatetheproductonthenetwork.Identify
theproductusingitsmodelorserialnumber,orbytheDNSname(ifthenamehasbeencongured).
Ifrequired,astaticIPaddresscanbeassignedmanually.Forinstructions,gotoaxis.com/support
Certicateerrorwhenusing
IEEE802.1X
Forauthenticationtoworkproperly,thedateandtimesettingsintheAxisproductmustbe
synchronizedwithanNTPserver.GotoSettings>System>Dateandtime
Theproductisaccessiblelocallybutnotexternally
Routerconguration
CheckthatyourrouterallowsincomingdatatrafctotheAxisproduct.Theroutermustsupport
UPnP
®
.
Firewallprotection
ChecktheInternetrewallwithyournetworkadministrator.
Problemswithstreaming
MulticastH.264only
accessiblebylocalclients
Checkifyourroutersupportsmulticasting,oriftheroutersettingsbetweentheclientandthe
productneedtobecongured.TheTTL(TimeToLive)valuemayneedtobeincreased.
NomulticastH.264
displayedintheclient
CheckwithyournetworkadministratorthatthemulticastaddressesusedbytheAxisproduct
arevalidforyournetwork.
Checkwithyournetworkadministratortoseeifthereisarewallpreventingviewing.
PoorrenderingofH.264
images
Ensurethatyourgraphicscardisusingthelatestdriver.Thelatestdriverscanusuallybe
downloadedfromthemanufacturer’swebsite.
Colorsaturationisdifferent
inH.264andMotionJPEG
Modifythesettingsforyourgraphicsadapter.Gototheadapter’sdocumentationformore
information.
Lowerframeratethan
expected
•SeePerformanceconsiderationsonpage21.
•Reducethenumberofapplicationsrunningontheclientcomputer.
•Limitthenumberofsimultaneousviewers.
•Checkwiththenetworkadministratorthatthereisenoughbandwidthavailable.
•Lowertheimageresolution.
•Themaximumframespersecondisdependentontheutilityfrequency(60/50Hz)of
theAxisproduct.
Performanceconsiderations
Whensettingupyoursystem,itisimportanttoconsiderhowvarioussettingsandsituationsaffecttheperformance.Somefactors
affecttheamountofbandwidth(thebitrate)required,otherscanaffecttheframerate,andsomeaffectboth.Iftheloadonthe
CPUreachesitsmaximum,thisalsoaffectstheframerate.
Thefollowingfactorsarethemostimportanttoconsider:
•Highimageresolutionorlowercompressionlevelsresultinimagescontainingmoredatawhichinturnaffectsthe
bandwidth.
•RotatingthelensmanuallywillresultinbetterperformancecomparedtorotatingtheimagefromtheGUI.
•Removingorattachingthecoverwillrestartthecamera.
•AccessbylargenumbersofMotionJPEGorunicastH.264clientsaffectsthebandwidth.
•Simultaneousviewingofdifferentstreams(resolution,compression)bydifferentclientsaffectsbothframerateand
bandwidth.
Useidenticalstreamswhereverpossibletomaintainahighframerate.Streamprolescanbeusedtoensurethat
streamsareidentical.
21

AXISM30NetworkCameraSeries
Troubleshooting
•AccessingMotionJPEGandH.264videostreamssimultaneouslyaffectsbothframerateandbandwidth.
•Heavyusageofeventsettingsaffectstheproduct’sCPUloadwhichinturnaffectstheframerate.
•UsingHTTPSmayreduceframerate,inparticularifstreamingMotionJPEG.
•Heavynetworkutilizationduetopoorinfrastructureaffectsthebandwidth.
•Viewingonpoorlyperformingclientcomputerslowersperceivedperformanceandaffectsframerate.
•RunningmultipleAXISCameraApplicationPlatform(ACAP)applicationssimultaneouslymayaffecttheframerateand
thegeneralperformance.
22

AXISM30NetworkCameraSeries
Specifications
Specifications
Tondthelatestversionoftheproduct’sdatasheet,gototheproductpageonaxis.comandlocateSupport&Documentation.
LEDindicators
Note
TheStatusLEDcanbeconguredtoashwhileaneventisactive.
StatusLED
Indication
Unlit
Connectionandnormaloperation.
GreenShowssteadygreenfor10secondsfornormaloperationafterstartupcompleted.
Amber
Steadyduringstartup.Flashesduringrmwareupgradeorresettofactorydefault.
Amber/RedFlashesamber/redifnetworkconnectionisunavailableorlost.
RedFirmwareupgradefailure.
SDcardslot
NO NO
NO
TICE TICE
TICE
•RiskofdamagetoSDcard.Donotusesharptools,metalobjects,orexcessiveforcewheninsertingorremovingthe
SDcard.Useyourngerstoinsertandremovethecard.
•Riskofdatalossandcorruptedrecordings.DonotremovetheSDcardwhiletheproductisrunning.UnmounttheSDcard
fromtheproduct’swebpagebeforeremoval.
ThisproductsupportsmicroSD/microSDHC/microSDXCcards.
ForSDcardrecommendations,seeaxis.com
microSD,microSDHC,andmicroSDXCLogosaretrademarksofSD-3CLLC.microSD,microSDHC,microSDXCare
trademarksorregisteredtrademarksofSD-3C,LLCintheUnitedStates,othercountriesorboth.
Buttons
Controlbutton
Thecontrolbuttonisusedfor:
•Resettingtheproducttofactorydefaultsettings.SeeHowtoresettofactorydefaultsettingsonpage19.
•ConnectingtoanAXISVideoHostingSystemservice.Toconnect,pressandholdthebuttonforabout3secondsuntilthe
statusLEDashesgreen.
Connectors
HDMIconnector
UsetheHDMI
TM
connectortoconnectadisplayorpublicviewmonitor.
23

AXISM30NetworkCameraSeries
Specifications
Networkconnector
RJ45EthernetconnectorwithPoweroverEthernet(PoE).
I/Oconnector
UsetheI/Oconnectorwithexternaldevicesincombinationwith,forexample,motiondetection,eventtriggering,andalarm
notications.Inadditiontothe0VDCreferencepointandpower(DCoutput),theI/Oconnectorprovidestheinterfaceto:
Digitalinput-Forconnectingdevicesthatcantogglebetweenanopenandclosedcircuit,forexamplePIRsensors,door/window
contacts,andglassbreakdetectors.
Supervisedinput-Enablespossibilitytodetecttamperingonadigitalinput.
Digitaloutput-ForconnectingexternaldevicessuchasrelaysandLEDs.ConnecteddevicescanbeactivatedbytheVAPIX®
ApplicationProgrammingInterfaceorfromtheproduct’swebpage.
4-pinterminalblock
FunctionPinNotes
Specications
DCground
1
0VDC
DCoutput
2
Canbeusedtopowerauxiliaryequipment.
Note:Thispincanonlybeusedaspowerout.
12VDC
Maxload=25mA
DigitalInputor
SupervisedInput
3
Connecttopin1toactivate,orleaveoating(unconnected)
todeactivate.Tousesupervisedinput,installend-of-line
resistors.Seeconnectiondiagramforinformationabouthow
toconnecttheresistors.
0tomax30VDC
DigitalOutput
4
Connecttopin1toactivate,orleaveoating(unconnected)
todeactivate.Ifusedwithaninductiveload,e.g.,arelay,
connectadiodeinparallelwiththeload,toprotectagainst
voltagetransients.
0tomax30VDC,opendrain,
100mA
Example
24
AXISM30NetworkCameraSeries
Specifications
1
DCground
2
DCoutput12V,max25mA
3
I/Osupervisedinput
4
I/Odigitaloutput
25

UserManualVer.M1.16
AXISM30NetworkCameraSeries
Date:April2018
©AxisCommunicationsAB,2018
PartNo.T10123211