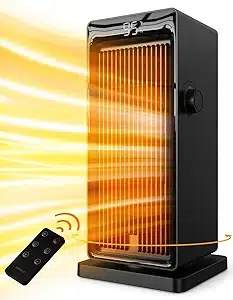

Space Heater
Product Manual
Please read the manual carefully before use and keep
it properly for future reference.
US
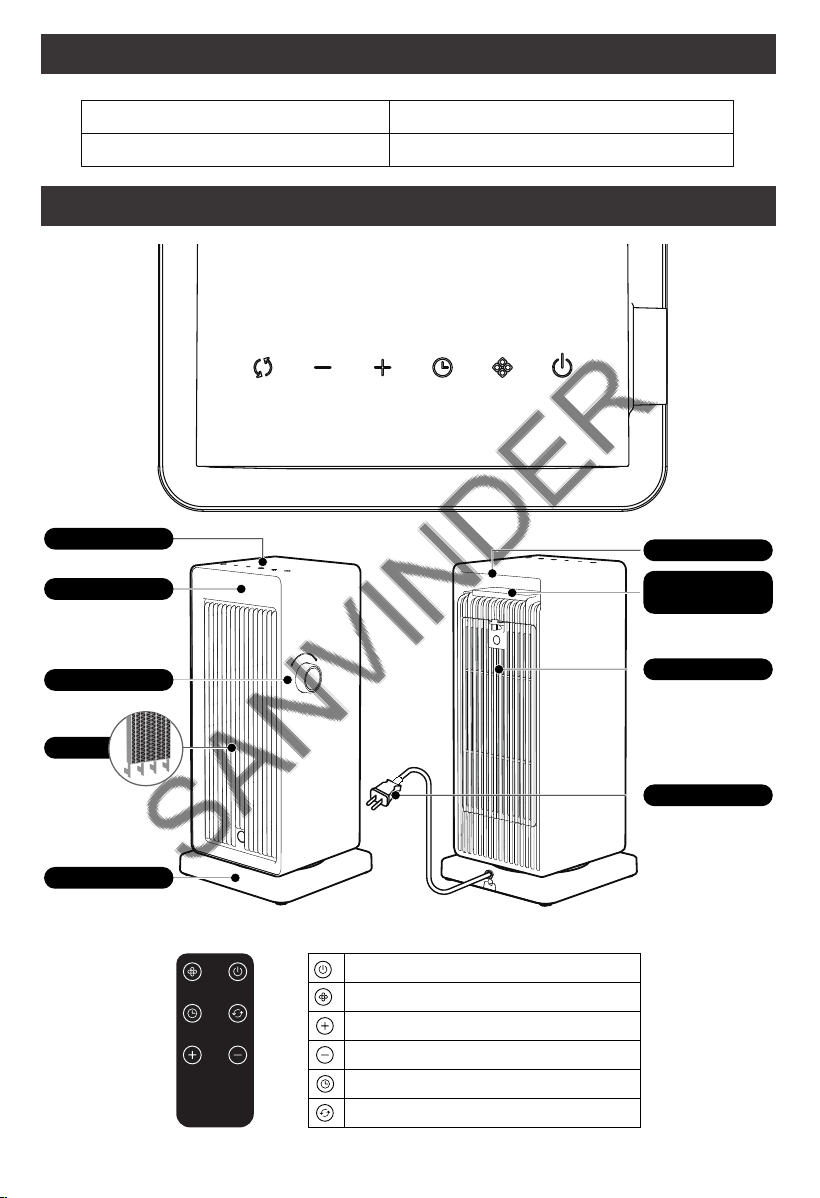
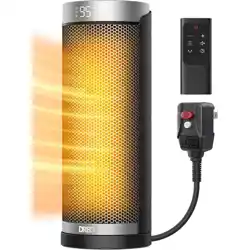
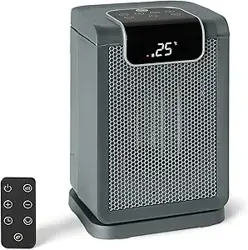
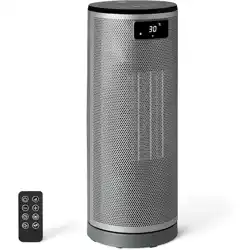
STRUCTURE
1
SPECIFICATIONS
Model : DH-QN19
Rated Voltage : 120V~
Rated Power : 1500W
Rated Frequency : 60Hz
Handle
Power Cord
Base
PTC
Dust Cover
Remote
Control Slot
Rotary Knob
Digital Display
Control Panel
WARNING: DO NOT COVER
OSC TIMER MODE POWER
ON/OFF
Mode button
Temperature/Timer increase
Temperature/Timer decrease
Timer button
Swing button
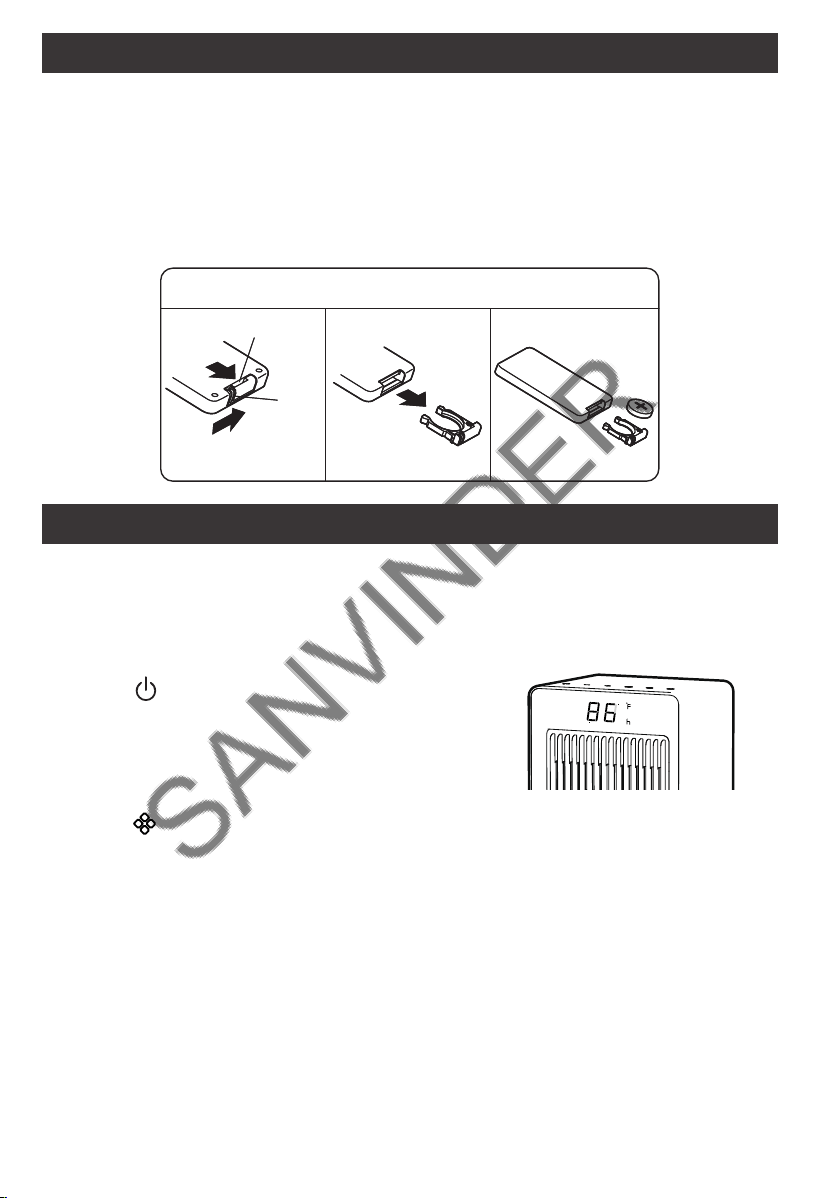
How to change the battery
1. Please push the locking latch in the direction of arrow A, and pull out the pull notch in the
direction of Arrow B at the same time.
2. Use 1 'CR2025' Lithium battery (included).
3. Insert the batteries, and make sure that the positive terminals are in the correct position.
4. Install back the cover.
Before use, please check all the parts are completed and undamaged.
Also, check the applied voltage matches the label (120V~, 60Hz).
1. After plugging, the heater is in the ‘stand-by’ Mode. The digital display shows ‘--’.
2. Power Buon
Press “ ” on the control panel, and the heater
runs at default mode (High-Heat Mode, the digital
display shows 95°F), and the red indicator light is
on. Press again to turn off.
2
REMOTE CONTROL
INSTRUCTION
3. Switching Modes
Press “ ” shortly to switch between modes in the following sequence: High Heat (HI) →
Low Heat (LO) → ECO mode → Natural Wind → High Heat (HI), and so on.
In ECO mode, you could press ‘+’ or ‘-’ to set the temperature between 59°F-95°F. One press
to change 1°F. Long press to change the temperature continuously. Please kindly note these:
1. In ECO mode, the machine monitors the room temperature. When the temperature reaches
the desired level, it stops blowing warm air. Every 5 minutes, it activates the fan for
30 seconds to promote air circulation and monitors the indoor temperature. If the
temperature drops below the set level, it resumes blowing warm air.
Baery installation
B
B
A
Pull Notch
Locking
latch

INSTRUCTION
3
4. Oscillating Function
Press “ ” it will oscillate automatically, press again to stop.
5. Timer Seing
When the heater is running, press “ ” for the timer setting. Press ‘+’ or ‘-’ to set the timer
from 0h to 24h. In timer mode, a short press displays the remaining time, while a long press
cancels the timer function. When time's up, the heater turns off automatically.
Note:
● When the heater is covered or blocked by objects while it’s heating, it might stop
automatically due to overheating.
● With built-in tip-over protection, the heater will stop automatically when it is tilted.
● When it turns off, the PTC will stop heating immediately, it has a 15s count-down for
cooling PTC while the fan still blows air during PTC cooling.
● If the heater is turned off because of overheating, after it cools down, unplug the heater
then re-plug it to restart.
7. Memory Function
The heater will record the temperature and mode setting for the last time. It will run as
previously set. (not including timer setting and oscillation setting).
★After unplugging, the Memory setting will back to the default setting.
6. Adjustable Direction
Rotate the Rotary Knob on the side to adjust the wind direction.
Down Up

4
IMPORTANT INSTRUCTIONS
When using electrical appliances, basic precautions should always be followed to reduce the
risk of fire, electric shock, and injury to persons, including the following:
1) Read all instructions before using this heater.
2) This heater is hot when in use. To avoid burns, do not let bare skin touch hot surfaces. If
provided, use handles when moving this heater. Keep combustible materials, such as
furniture, pillows, bedding, papers, clothes, and curtains at least 3 feet (0.9 m) from the
front of the heater and keep them away from the sides and rear.
3) Extreme caution is necessary when any heater is used by or near children or invalids and
whenever the heater is left operating and unattended.
4) Always unplug heater when not in use. (This item may be omitted if the heater is provided
with a clock-operated switch).
5) Do not operate any heater with a damaged cord or plug or after the heater malfunctions,
has been dropped or damaged in any manner. Discard heater, or return to authorized
service facility for examination and/or repair.
6) Do not use outdoors. (Omitted if the heater is intended for outdoor use.)
7) This heater is not intended for use in bathrooms, laundry areas and similar indoor locations.
Never locate heater where it may fall into a bathtub or other water container.
8) Do not run cord under carpeting. Do not cover cord with throw rugs, runners, or similar
coverings. Do not route cord under furniture or appliances. Arrange cord away from traffic
area and where it will not be tripped over.
9) To disconnect heater, turn controls to off, then remove plug from outlet.
10) Connect to properly grounded outlets only. (This item may be omitted if the heater is not
provided with a grounding type attachment plug.)
11) Do not insert or allow foreign objects to enter any ventilation or exhaust opening as this
may cause an electric shock or fire, or damage the heater.
12) To prevent a possible fire, do not block air intakes or exhaust in any manner. Do not use on
soft surfaces, like a bed, where openings may become blocked.
13) A heater has hot and arcing or sparking parts inside. Do not use it in areas where gasoline,
paint, or flammable liquids are used or stored.
14) Use this heater only as described in this manual. Any other use not recommended by the
manufacturer may cause fire, electric shock, or injury to persons.
15) Always plug heaters directly into a wall outlet/receptacle. Never use with an extension
cord or relocatable power tap (outlet/power strip).
16) This heater may include an audible (a visual) alarm to warn that parts of the heater are
getting excessively hot. If the alarm sounds (flashes), immediately turn the heater off and
inspect for any objects on or adjacent to the heater that may cause high temperatures.
DO NOT OPERATE THE HEATER WITH THE ALARM SOUNDING (FLASHING). (Omitted if an alarm
is not required per Alarms.)
17)
"SAVE THESE INSTRUCTIONS"

5
This device complies with part 15 of the FCC Rules. Operation is subject to the following two
conditions: (1) This device may not cause harmful interference (2) this device must accept any
interference received, including interference that may cause undesired operation.
Warning: Any changes or modifications to this unit not expressly approved by the party responsible
for compliance could void the user's authority to operate the equipment.
NOTE: This equipment has been tested and found to comply with the limits for a Class B digital
device, pursuant to part 15 of the FCC Rules. These limits are designed to provide reasonable
protection against harmful interference in a residential installation. This equipment generates, uses
and can radiate radio frequency energy and, if not installed and used in accordance with the
instructions, may cause harmful interference to radio communications. However, there is no
guarantee that interference will not occur in a particular installation. If this equipment does cause
harmful interference to radio or television reception, which can be determined by turning the
equipment off and on, the user is encouraged to try to correct the interference by one or more of
the following measures:
—Reorient or relocate the receiving antenna.
—Increase the separation between the equipment and receiver.
—Connect the equipment into an outlet on a circuit different from that to which the receiver is
connected.
—Consult the dealer or an experienced radio/TV technician for help.
CLEANING AND MAINTENANCE
1. Before cleaning, ensure theheateris turned off by removing the power plug from the
power outlet.
2. Allow the heaterand all accessories to cool completely before disassembling and cleaning.
3. Please clean it with soft cloth and neutral detergent when you found dirt on its surface to
avoid discoloration or breakage.
4. DO NOT rinse directly with water.
5. Any other cleaning and maintenanceserviceshould be performed by an authorized
service representative.
6. Please store the heater in original package and keep it in cool and dry place when not in
use.
IMPORTANT INSTRUCTIONS
6
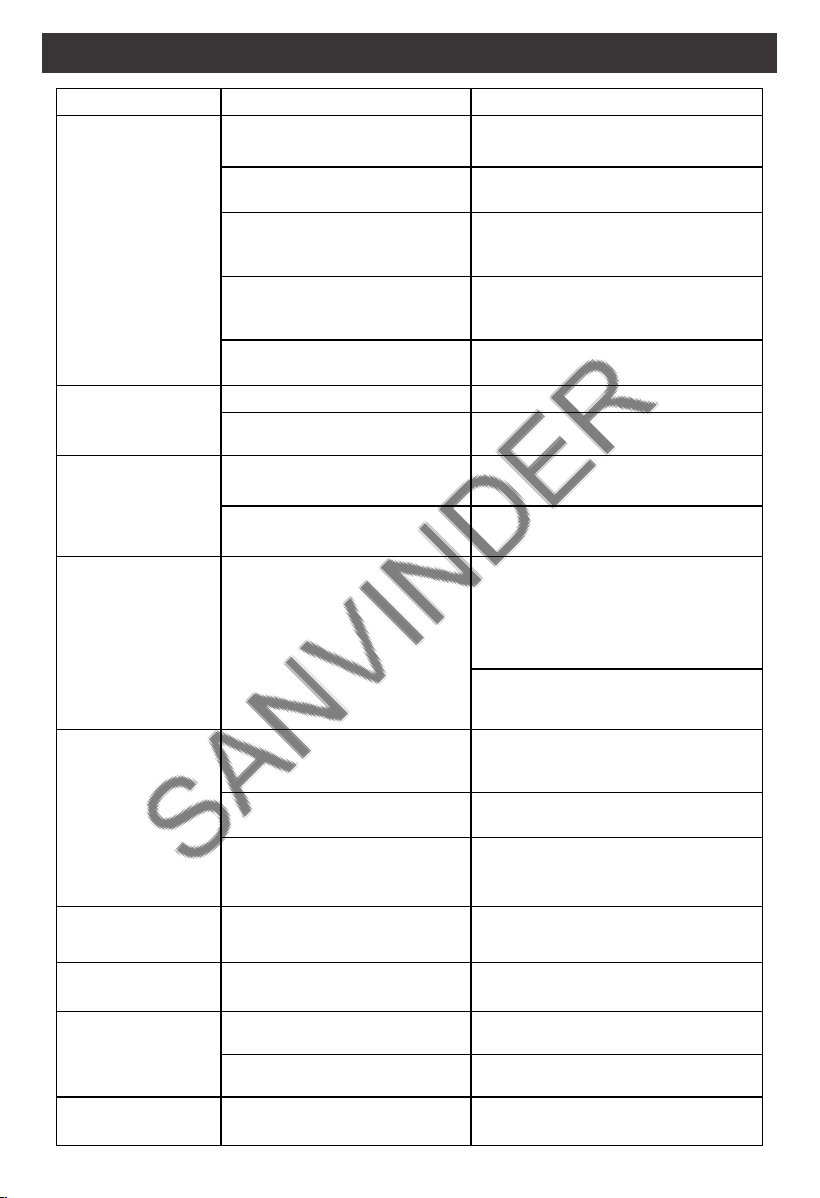
Unpleasant odor
The heater will emit some
odor in the first use.
Place the heater in a ventilated
environment before use.
The product is made from safe
flame-retardant material, so it's
normal to have some smells in the
first use. The odor will disappear
naturally after repeated use.
The remote control
doesn't work
Haven't pulled out the plastic
sheet in the remote control
before use.
Pull out the plastic sheet.
Replace the remote control battery.
Get closer to the machine and aim
at the infrared receiver in the front
of the machine.
The battery is running out of
power.
Beyond controllable distance.
Unable to find the
remote control
Check the beneath of the
control panel
Take out the remote control beneath
the control panel.
Plug wire overheats,
melts; Trip-out
Use the same power strip with
other high-power appliances.
Use the wall outlet instead of the
power strip.
Fault code on the
LED display
E2 - Temperature sensor is
shorted out.
Unplug it and contact Customer
Support.
Unplug it and contact Customer
Support.
Contact Customer Support.
E1 - Temperature sensor is
disconnected.
Unable to oscillate
Some electronic parts inside
the heater are damaged.
TROUBLE SHOOTING
Unable to start /
Stop working /
Frequent
sudden stops
Loud noise
Not enough heating
Low Heating Mode or Fan-only
Mode is on.
The space is too large to heat.
Set the temperature higher or have
the High Heating mode set.
Ensure a proper space for use; Users
get closer to the heater.
The plug is not properly in.
Overheat Protection has
been activated.
Something is closed to or
covering the heater.
The set temperature is lower
than the ambient temperature.
Make sure the thermostat is set at a
higher temperature than the ambient
temperature.
Unable to troubleshoot
the problem.
The fan goes wrong. Contact Customer Support.
Check and remove anything in the
air inlet.
Something blocks the air inlet
or outlet.
Contact Customer Support.
Connect the plug to a live electrical
outlet.
Turn off the heater, unplug it, and
let it cool for 5-10 minutes.
Check and remove anything on or
adjacent to the heater. Wait 5-10
minutes before re-plugging it.
Existing Problems Possible Causes Solution