
Loading ...
Loading ...
Loading ...
Model:FFSGS6265-20
Model:FFSGS6272-24 FFSGS6290-24
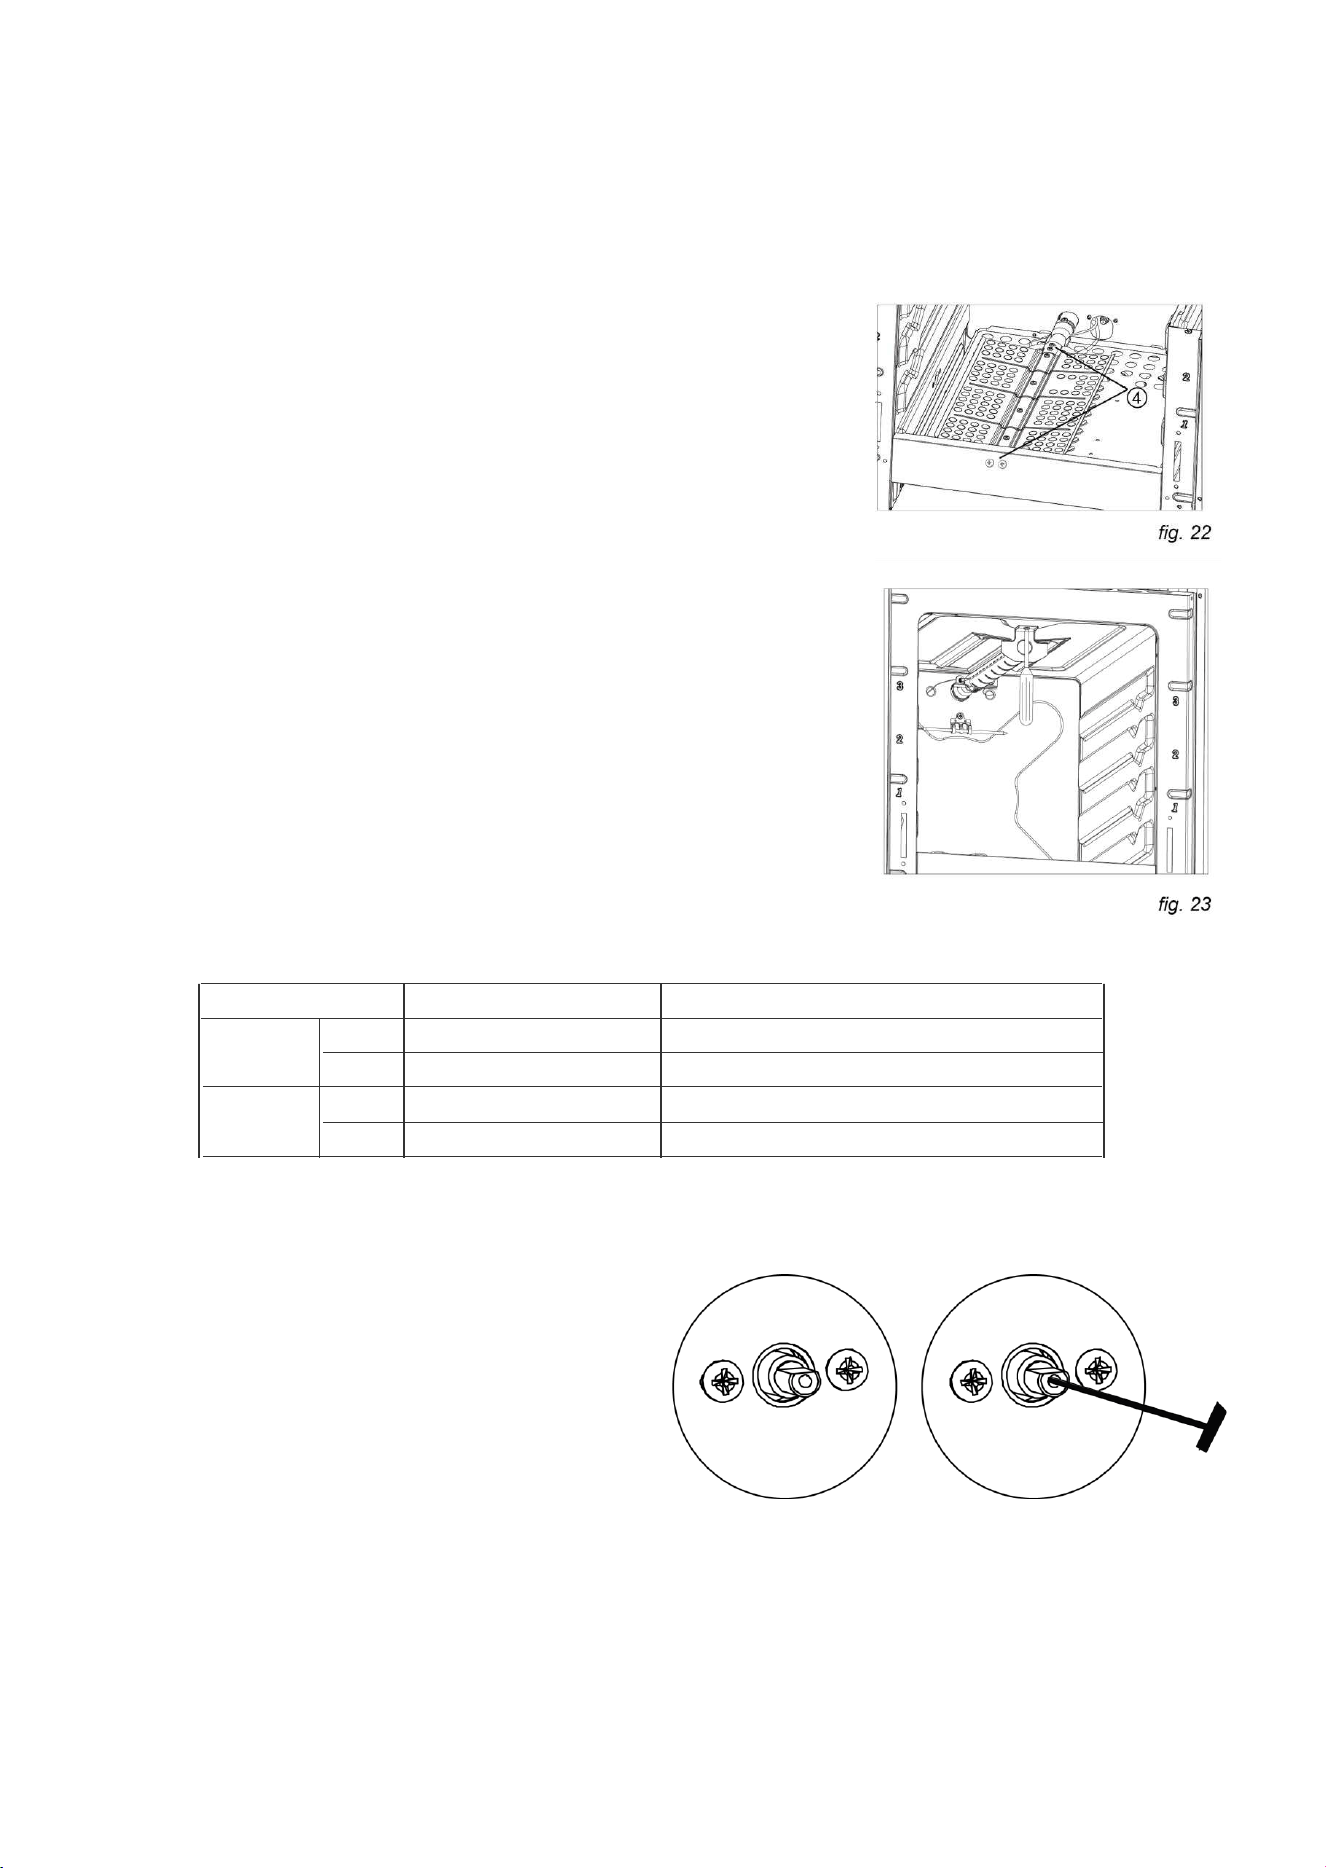
REPLACING THE OVEN / BROILER BURNER INJECTORS
To replace the OVEN burner injector:
a) Lift and remove the lower panel inside the oven.
b) Remove the burner securing screws (total 4) (fig. 22)
c) Withdraw the burner and rest it inside the oven.
Take care as not to damage the wire to the ignition electrode
as well as the thermocouple.
d) Using a 7 mm box spanner, unscrew the injector and replace it
using the new LPG injector.
e) Replace the burner repeating the above steps in reverse order.
To replace the BROIL burner injector:
a) Remove the burner by unscrewing the front screw (fig. 23)
b) Gently suspend the burner as shown in figure 24.
Take care as not to damage the wire to the ignition electrode
as well as the thermocouple.
c) Using a 7 mm box spanner, unscrew the injector (indicated in
figure 24) and replace it using the new LPG injector.
d) Replace the burner repeating the above steps in reverse order.
SETTING THE BURNER MINIMUM SETTING
When switching from one type of gas to another, the minimum flow rate must also be correct: the flame should not go out even
when passing suddenly from maximum to minimum flame.
1) Light the burner.
2) Set the top burner valve to the minimum position.
3) Remove the knob by pulling straight out.
4) Locate the bypass screw (see illustration).
Single valve stems are hollow, the bypass screws is
located inside the stem.
Insert the flat head screwdriver (2.5mm x 75mm) into the
stem center and turn the bypass screw clockwise to adjust
the flame.
DO NOT OVERTIGHTEN.
5) Replace the knob.
6) Repeat for each of the other burners.
25
Oven
Broil
NG
LPG
1.24
0.8
NG
LPG
1.3
0.84
1.24
0.8
1.3
0.84
Loading ...
Loading ...
Loading ...