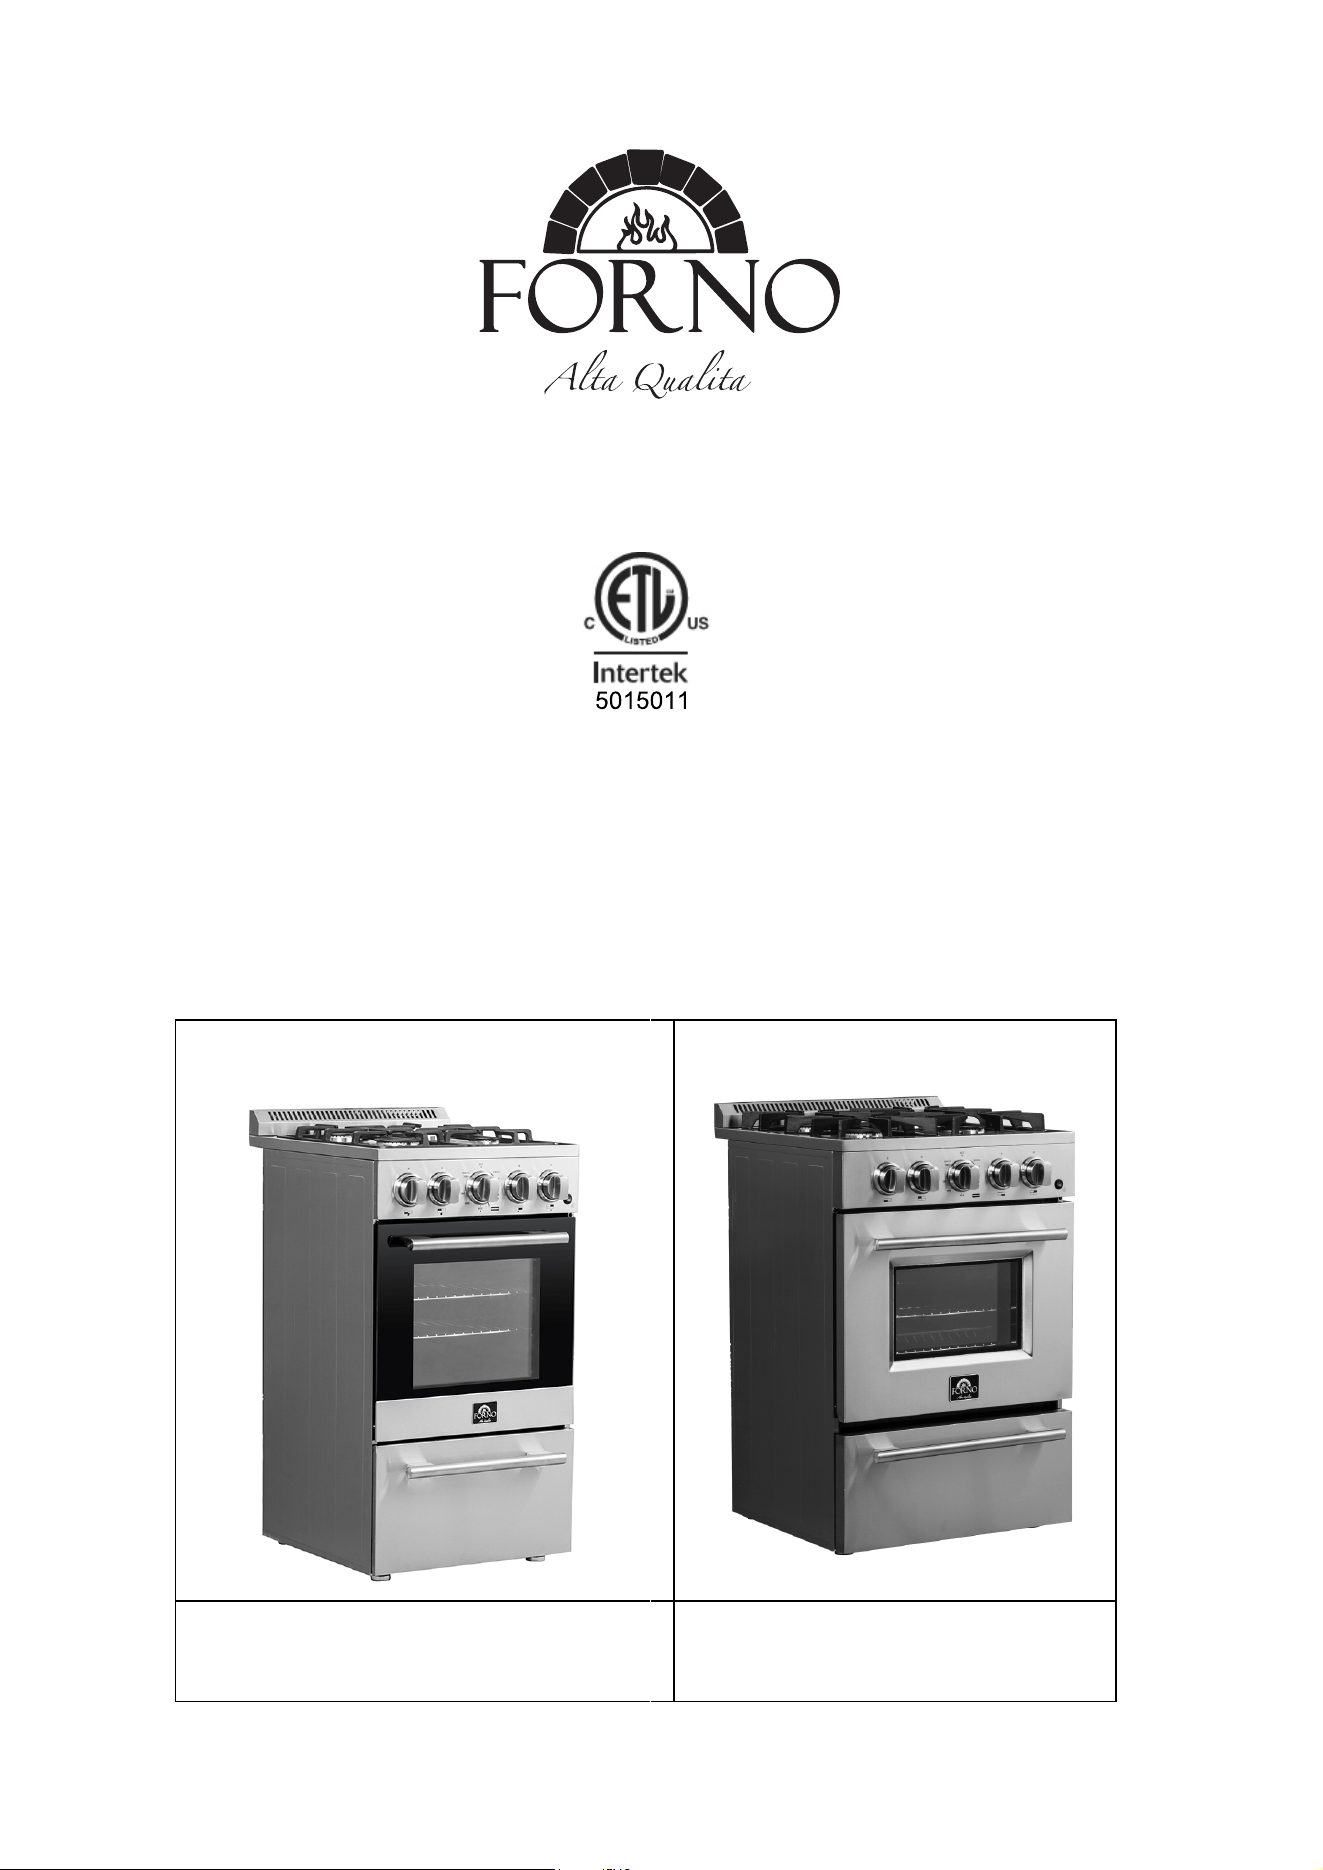
FREESTANDING GAS RANGE
INSTALLATION GUIDE
SPECIFICATIONS, INSTALLATION, AND MORE
MODEL NUMBERS:
FFSGS6265-20
FFSGS6272-24
Conforms to CSA / ANSI STD Z21.1
Certified to CSA STD 1.1
FFSGS6290-24
08/2023
COOKTOP
BEFORE USING YOUR GAS RANGE
3
6
8
12
ELECTRICAL GROUNDING INSTRUCTIONS
17
CHOICE OF BURNER
18
INSTALLATION INSTRUCTIONS
18
19
19
GAS AND ELECTRIC CONNECTION
20
HOW TO INSTALL THE BACKSPLASH
20
HOW TO LEVEL THE RANGE
21
23
23
USING THE OVEN FOR THE FIRST TIME
IGNITION OF THE OVEN BURNER
IGNITION OF THE BROIL BURNER
OVEN LIGHT
CONVECTION BAKE
25
26
27
28
28
29
29
31
12
13
IMPORTANT PRECAUTIONS AND RECOMMENDATIONS
15
2
22
IMPORTANT SAFETY INFORMATION
WIRE DIAGRAM
GAS CONNECTION
CONVERSION FROM NATURAL GAS (NG) TO PROPANE(LPG)
SETTING THE PRESSURE REGULATOR
REPLACING THE OVEN / BROILER BURNER INJECTORS
SETTING THE BURNER MINIMUM SETTING
25
HOW TO USE THE GAS OVEN
OVEN BURNER
OVEN THERMOSTAT
26
26
26
BROILING
CARE & MAINTENANCE
OVEN RACK INSTALLATION AND REMOVAL
REMOVABLE STORAGE DRAWER
GENERAL RECOMMENDATION
CORRECT REPLACEMENT OF THE BURNERS
31
32
32
33
REMOVING THE OVEN DOOR
33
REPLACING THE OVEN LIGHT
33
TROUBLESHOOTING GUIDE
34
35
CUSTOMER CARE
CONSUMER INFORMATION
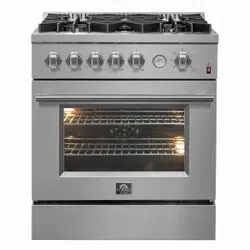
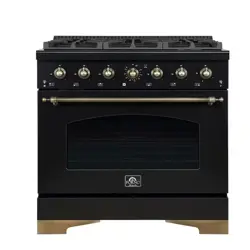
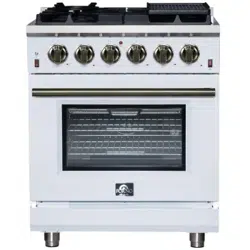
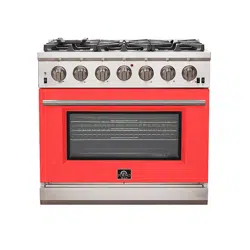
FEATURES OF YOUR RANGE
PRODUCT DIMENSIONS AND CABINETS
CABINET INSTALLATION
CONTENTS
AIR FRYER
30
STEAM CLEAN
30
4
WARRANTY
3
Thank you for purchasing a FORNO product. Please read the entire instruction manual before operating
your new appliance for the first time. Whether you are an occasional user or an expert , it will be beneficial
to familiarize yourself with the safety practices, features, operation and care recommendations of your
appliance.
Both the model and serial number are listed inside the product. For warranty purposes, you will also need
the serial number, the date of purchase & a copy of your proof of purchase.
Record this information below for future reference.
Use these number in any correspondance or
service calls concerning your product.
If you received a damaged product,
immediately contact FORNO.
Save time and money. Before you call for
service,
check the Troubleshooting Guide. It
lists the causes of minor operating problems
that you can correct yourself.
SERVICE IN CANADA & UNITED STATES
CUSTOMER CARE
If there is a problem, please contact FORNO customer service. Please note that troubleshooting
with a customer service representative will be needed before being able to send a service
provider. All warranty work needs to be authorized by FORNO customer service. All our
authorized service providers are carefully selected and rigorously trained by us.
Keep the instruction manual handy to answer your questions. You can also find all the information
you need online at www.forno.ca.
If you don't understand something or need more assistance, please email: info@forno.ca

4
What this limited warranty covers:
The Warranty coverage provided by Forno Appliances in this statement applies exclusively to the original Forno
appliance (“Product”) sold to the consumer (“Purchaser”) by an authorized Forno dealer/distributor/retailer,
purchased and installed in the United States or Canada, and which has always remained within the original
country of purchase (the United States or Canada). Warranty coverage is activated on the date of the Product's
original retail purchase and has a duration of two (2) years.
Warranty coverage is non-transferable. In the event of replacement of parts or of the entire product, the
replacement Product (or parts) shall assume the remaining original Warranty activated with the original retail
purchase document. This Warranty shall not be extended with respect to such replacement. Forno Appliances
will repair or replace any component/part which fails or proves defective due to materials and/or workmanship
within 2 years of the date of the original retail purchase and under conditions of ordinary residential,
non-commercial use. Repair or replacement will be free of charge, including labor at standard rates and shipping
expenses. Purchaser is responsible for making the Product reasonably accessible for service. Repair service
must be performed by a Forno Authorized Service company during normal working hours.
IMPORTANT
Retain proof of original purchase to establish warranty period. Forno’s liability on any claim of any kind, with
respect to the goods and/or services provided, shall in no event exceed the value of the goods or service or part
there of which has given rise to the claim.
30-Day Cosmetic Warranty
The Purchaser must inspect the product at the time of delivery. Forno warrants that the Product is free from
manufacturing defects in materials and workmanship for a period of thirty (30) days from date of the original retail
purchase of the Product.
This coverage includes:
- Paint blemishes
- Chips
- Macroscopic finish defects
Cosmetic warranty does NOT cover:
> issues resulting from incorrect transport, handling and/or installation (e.g.: dents, broken, warped or deformed
structures or components, cracked or otherwise damaged glass components);
> slight color variations on painted/enameled components;
> differences caused by natural or artificial lighting, location or other analogous factors;
> stains/corrosion/discoloration caused by external substances and/or environmental factors;
> labor costs, display, floor, B-stock, out- of-box,“as is” appliances and demo units.
How to receive service
To receive warranty services, the Purchaser must contact the Forno Support department in order to determine
the problem and the required service procedures. Troubleshooting with a customer service representative will be
necessary before moving forward with the service. Model number, serial number and date of original retail
purchase will be requested.
Warranty

THERE ARE NO EXPRESS
WARRANTIES OTHER THAN THOSE LISTED AND DESCRIBED ABOVE, AND NO
WARRANTIES, EITHER EXPRESS OR IMPLIED, INCLUDING, BUT NOT LIMITED TO, ANY IMPLIED
WARRANTIES OF MERCHANTABILITY OR FITNESS FOR A PARTICULAR PURPOSE THAT SHALL APPLY
AFTER THE EXPRESS WARRANTY PERIODS STATED ABOVE, AND NO OTHER EXPRESS WARRANTY OR
GUARANTEE GIVEN BY ANY PERSON, FIRM OR CORPORATION WITH RESPECT TO THIS PRODUCT
SHALL BE BINDING ON FORNO. FORNO SHALL NOT BE LIABLE FOR LOSS OF REVENUE OR PROFITS,
FAILURE TO REALIZE SAVINGS OR OTHER BENEFITS, TIME AWAY FROM WORK, MEALS, LOSS OF FOOD
OR BEVERAGES, TRAVELING OR HOTEL EXPENSES, EXPENSES TO RENT OR PURCHASE APPLIANCES,
REMODELING/CONSTRUCTION EXPENSES IN EXCESS OF DIRECT DAMAGES WHICH ARE UNDENIABLY
CAUSED EXCLUSIVELY BY FORNO OR ANY OTHER SPECIAL, INCIDENTAL OR CONSEQUENTIAL
DAMAGES CAUSED BY THE USE, MISUSE OR INABILITY TO USE THIS PRODUCT, REGARDLESS OF THE
LEGAL THEORY ON WHICH THE CLAIM IS BASED, AND EVEN IF FORNO HAS BEEN ADVISED OF THE
POSSIBILITY OF SUCH DAMAGES. NOR SHALL RECOVERY OF ANY KIND AGAINST FORNO BE GREATER
IN AMOUNT THAN THE PURCHASE PRICE OF THE PRODUCT SOLD BY FORNO AND CAUSING THE
ALLEGED DAMAGE.WITHOUT PREJUDICE TO THE FOREGOING, PURCHASER ASSUMES ALL RISK AND
LIABILITY FOR LOSS, DAMAGE OR INJURY TO PURCHASER AND PURCHASER’S PROPERTY AND TO
OTHERS AND THEIR
PROPERTY ARISING FROM THE USE, MISUSE, OR INABILITY TO USE THIS PRODUCT
SOLD BY FORNO THAT IS NOT A
DIRECT RESULT OF NEGLIGENCE ON THE PART OF FORNO THIS
LIMITED WARRANTY SHALL NOT EXTEND TO ANYONE OTHER THAN THE ORIGINAL PURCHASER OF
THIS PRODUCT, IS NON-TRANSFERABLE, AND STATES YOUR EXCLUSIVE REMEDY.
> Use of the Product in any non-residential,
commercial application.
> Use of the Product for anything other than its
intended purpose.
> Repair services provided by anyone other than a
Forno Authorized Service
agency.
> Damages or repair services to correct services
provided by unauthorized parties or the use of
unauthorized parts.
> Installation not in accordance with
local/state/city/county fire codes, electrical codes, gas
codes, plumbing codes, building codes, laws or
regulations.
> Defects or damage due to improper storage of the
Product.
> Defects,damage or missing parts on products sold
out of the original factory packaging or from displays.
> Service calls or repairs
to correct an incorrect
installation of the Product and/or related accessories.
> Replacement of parts/service calls to connect,
convert or otherwise repair the electrical wiring and/or
gas line in order to properly use the product.
> Replacement of parts/service calls to provide
instructions and information
on the use of the Product.
> Replacement of parts/service calls to correct issues
arising from the product being used in a manner other
than what is normal and customary for residential use.
> Replacement of parts/service calls due to wear and
tear of components such as seals, knobs, pan
supports, shelving, cutlery baskets, buttons, touch
displays, scratched or broken ceramic-glass tops.
> Replacement of parts/service calls for lack
of/improper maintenance, including but not limited to:
build up of residues, stains,
scratches, discoloration,
corrosion.
> Defects and damages arising from accidents,
alteration, misuse, abuse or improper installation.
> Defects and damages arising from Product
transport, logistics and handling.
Inspection of the
product must be made at time of delivery. Following
receipt and inspection, the selling dealer/delivery
company must be notified of any issues arising from
handling, transport and logistics.
> Defects and damages arising from external forces
beyond the control of Forno Appliances, including but
not limited to wind, rain, sand, fires,
floods,
mudslides,
freezing temperatures, excessive moisture or
extended exposure to humidity, power surges,
lightning, structural failures surrounding the appliance
and other acts of God.
> Products whose serial number has been
altered/damaged/tampered with. In no case shall
Forno be held liable or responsible for damage to
surrounding property, including furniture, cabinetry,
flooring, panels, and other structures surrounding the
Product. Forno is neither liable nor responsible for the
Product if it is located in a remote area or an area
where certified trained technicians are not reasonably
available. Purchaser must bear any transportation and
delivery costs of the Product to the nearest Authorized
Service Center or the additional travel expenses of a
certified trained technician
Warranty Exclusions: What Is Not Covered.
5
- WHAT TO DO IF YOU SMELL GAS
• Do not try to light any appliance.
• Do not touch any electrical switch.
• Do not use any phone in your building.
• Immediately call your gas supplier from a neighbor’s phone. Follow the gas supplier’s
instructions.
• If you cannot reach your gas supplier, call the fire department.
Your safety and the safety of others are very important.
We have provided many important safety messages in this manual and on your appliance.
Always read and obey all safety messages.
This is a safety alert symbol. It will alert you to potential personal or property safety hazards.
Obey all safety messages to avoid any property damage, personal injury or death.
WARNING indicates a potentially hazardous situation which, if not avoided, could result in
serious injury or death.
CAUTION indicates a moderate hazardous situation which, if not avoided, could result in
minor or moderate injury.
All safety messages will alert you what the potential hazard is, tell you how to reduce the
chance of injury, and let you know what can happen if the instructions are not followed.
6
CONSUMER INFORMATION

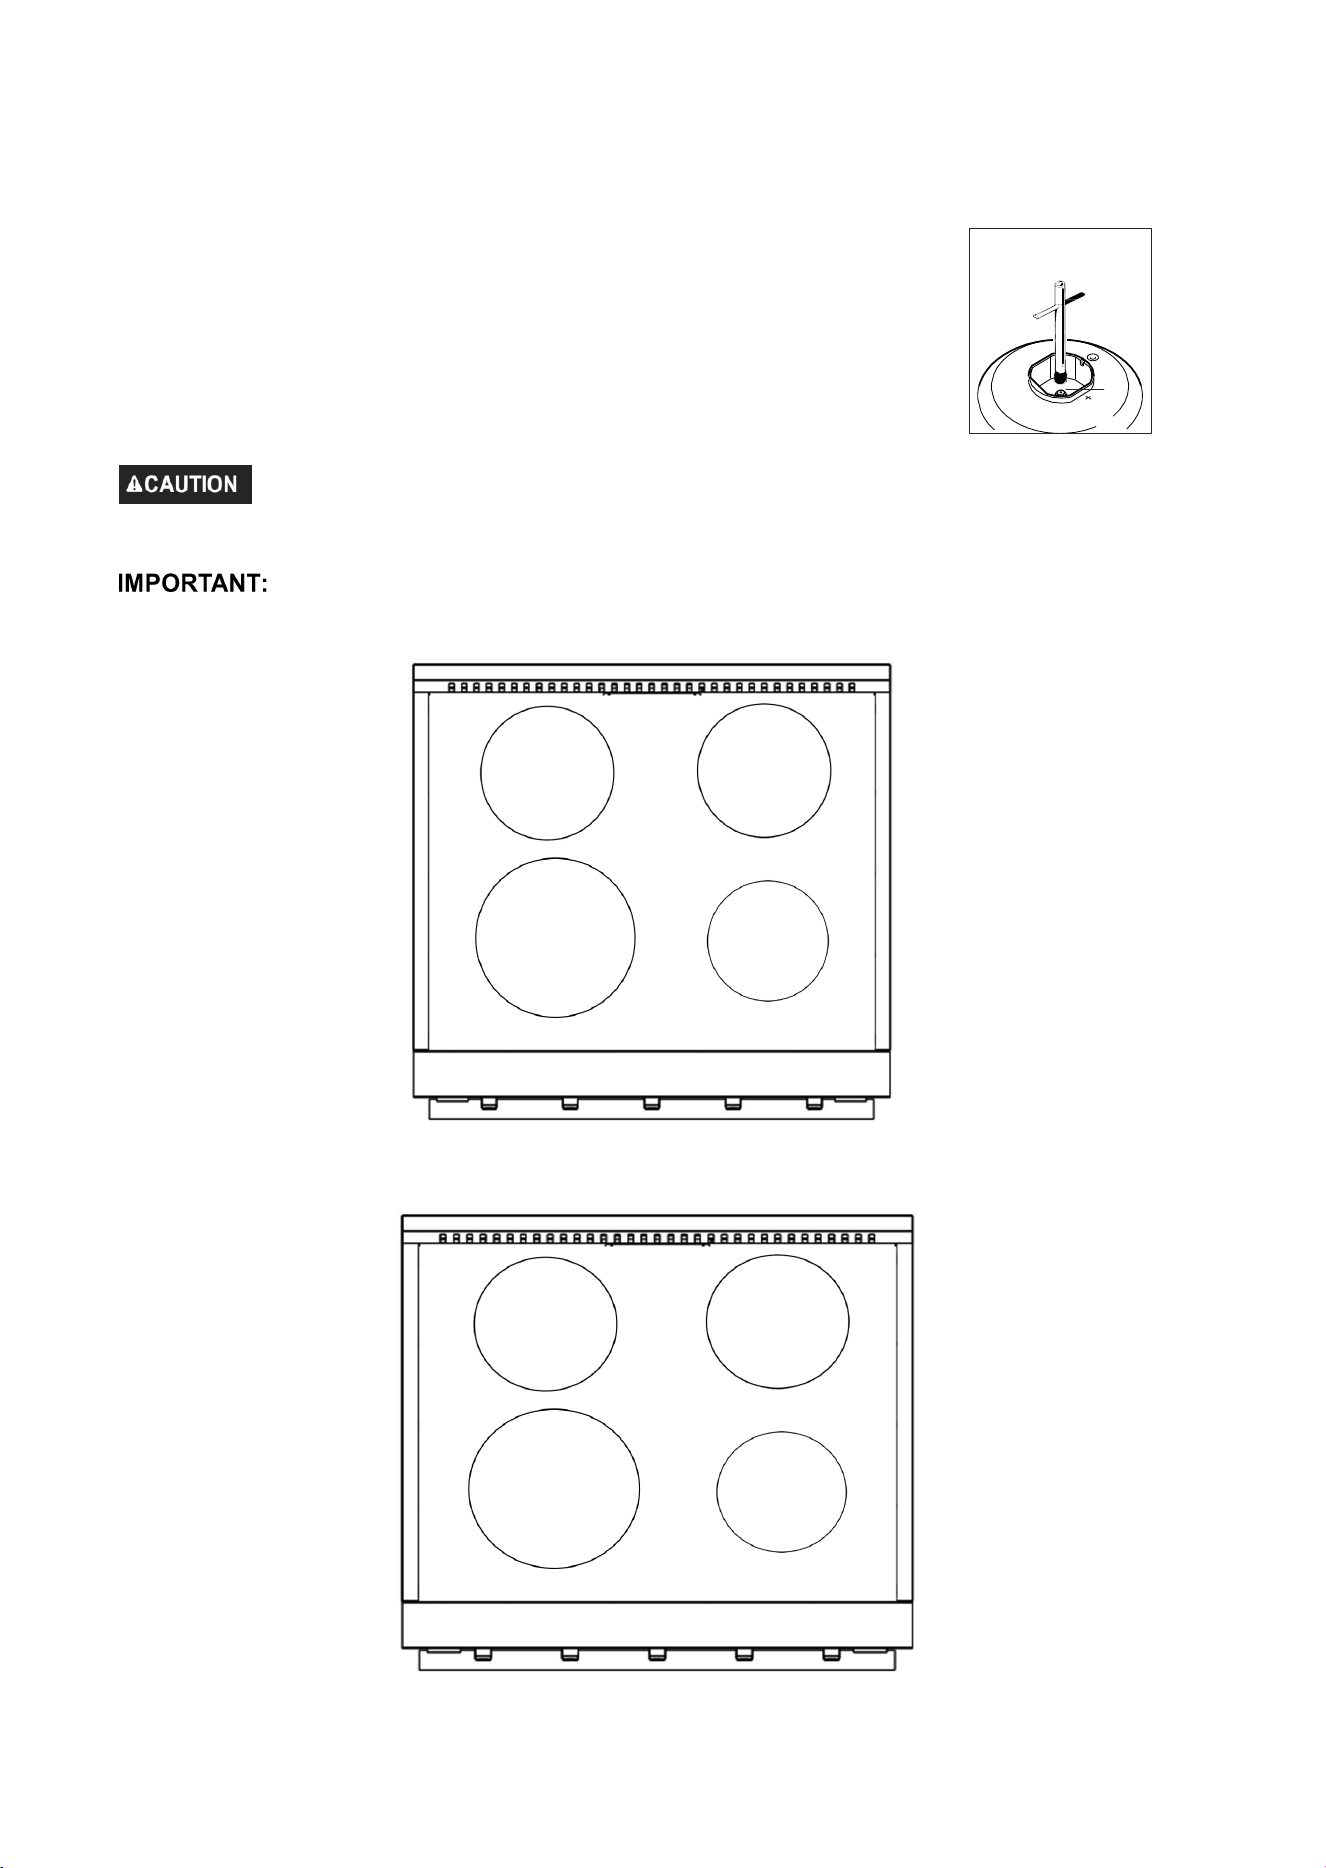
ANTI-TIP DEVICE
Safely tilt the front of the range upward slightly
and move back against wall. Making sure the pin
slides under bracket.
5
WARNING
This product can expose you to chemicals including carbon monoxide, which is known to the
State of California to cause developmental harm.
For more information go to www.P65Warnings.ca.gov
WARNING
Never operate the top surface cooking section of the appliance unattended
Failure to follow this warning statement may result in fire, explosion or burn hazard that could
cause property damage, personal injury or death.
If a fire should occur, keep away from the appliance and immediately call your fire
department. DO NOT ATTEND TO EXTINGUISH AN OIL/GREASE FIRE WITH WATER
The installation must conform with local codes or, in the absence of local codes, with the National
Fuel Gas Code, ANSI Z223.1/NFPA 54 or, in Canada, the Natural Gas and Propane Installation
Code, CSA B149.1.
7
Read all safety instructions before using the product. Failure to follow these
instructions may result in fire, electrical shock, serious injury or death.
1. Use this range for its intended purpose as described in this instruction manual.
2. Have your range installed and properly grounded by a qualified installer in accordance with
the provided installation instructions.
3. Any adjustment and service should be performed only by a qualified gas range installer or
service technician. Do not attempt to repair or replace any part of your range unless it is
specifically recommended in this manual.
4.
Your range is shipped from the factory set for use with natural gas. It can be converted for
use with either. If required, these adjustments must be made by a qualified technician in
accordance with the installation instructions and local codes. The agency performing this
work assumes responsibility for the conversion.
5. Have the installer show you the location of the range gas shut-off valve and how to turn it off
if necessary.
6. Plug your range into a 120-volt grounded outlet only. Do not removed the round grounding
prong from the plug. If in doubt about the grounding of the home electrical system, it is your
responsibility and obligation to have an ungrounded outlet in accordance with the National
Electrical Code. Do not use an extension code with this range.
7. Before performing any service, unplug the range or disconnect the power supply at the
household distribution panel by removing the fuse or switching off the circuit breaker.
8. Be sure all packing materials are removed from the range before operating to prevent
ignition of these materials.
9. Avoid scratching or impacting glass visible window. Doing so may lead to glass breakage.
Do not cook on a product with broken glass. Shock, fire, or cuts may occur.
10. Do not leave children alone or unattended in an area where an appliance is in use. They
should never be allowed to climb, sit or stand on any part of the range.
11. Do not store items of interest to children in cabinets above an oven-children
who climb onto the oven to reach items could be seriously injured.
12. Never block the vents (air openings) of the range. They provide the air inlets and outlets
that are necessary for the range to operate properly with correct combustion. Air openings are
located at the rear of the cooktop, at the top and bottom of the oven door, and at the bottom of
the range.
13. Use only dry pot holders--moist or damp pot holders on hot surfaces may result in burns
from steam. Do not let pot holders touch surface burners, burner grate, or oven heating
element. Do not use a towel or other bulky fabrics in place of pot holders.
8
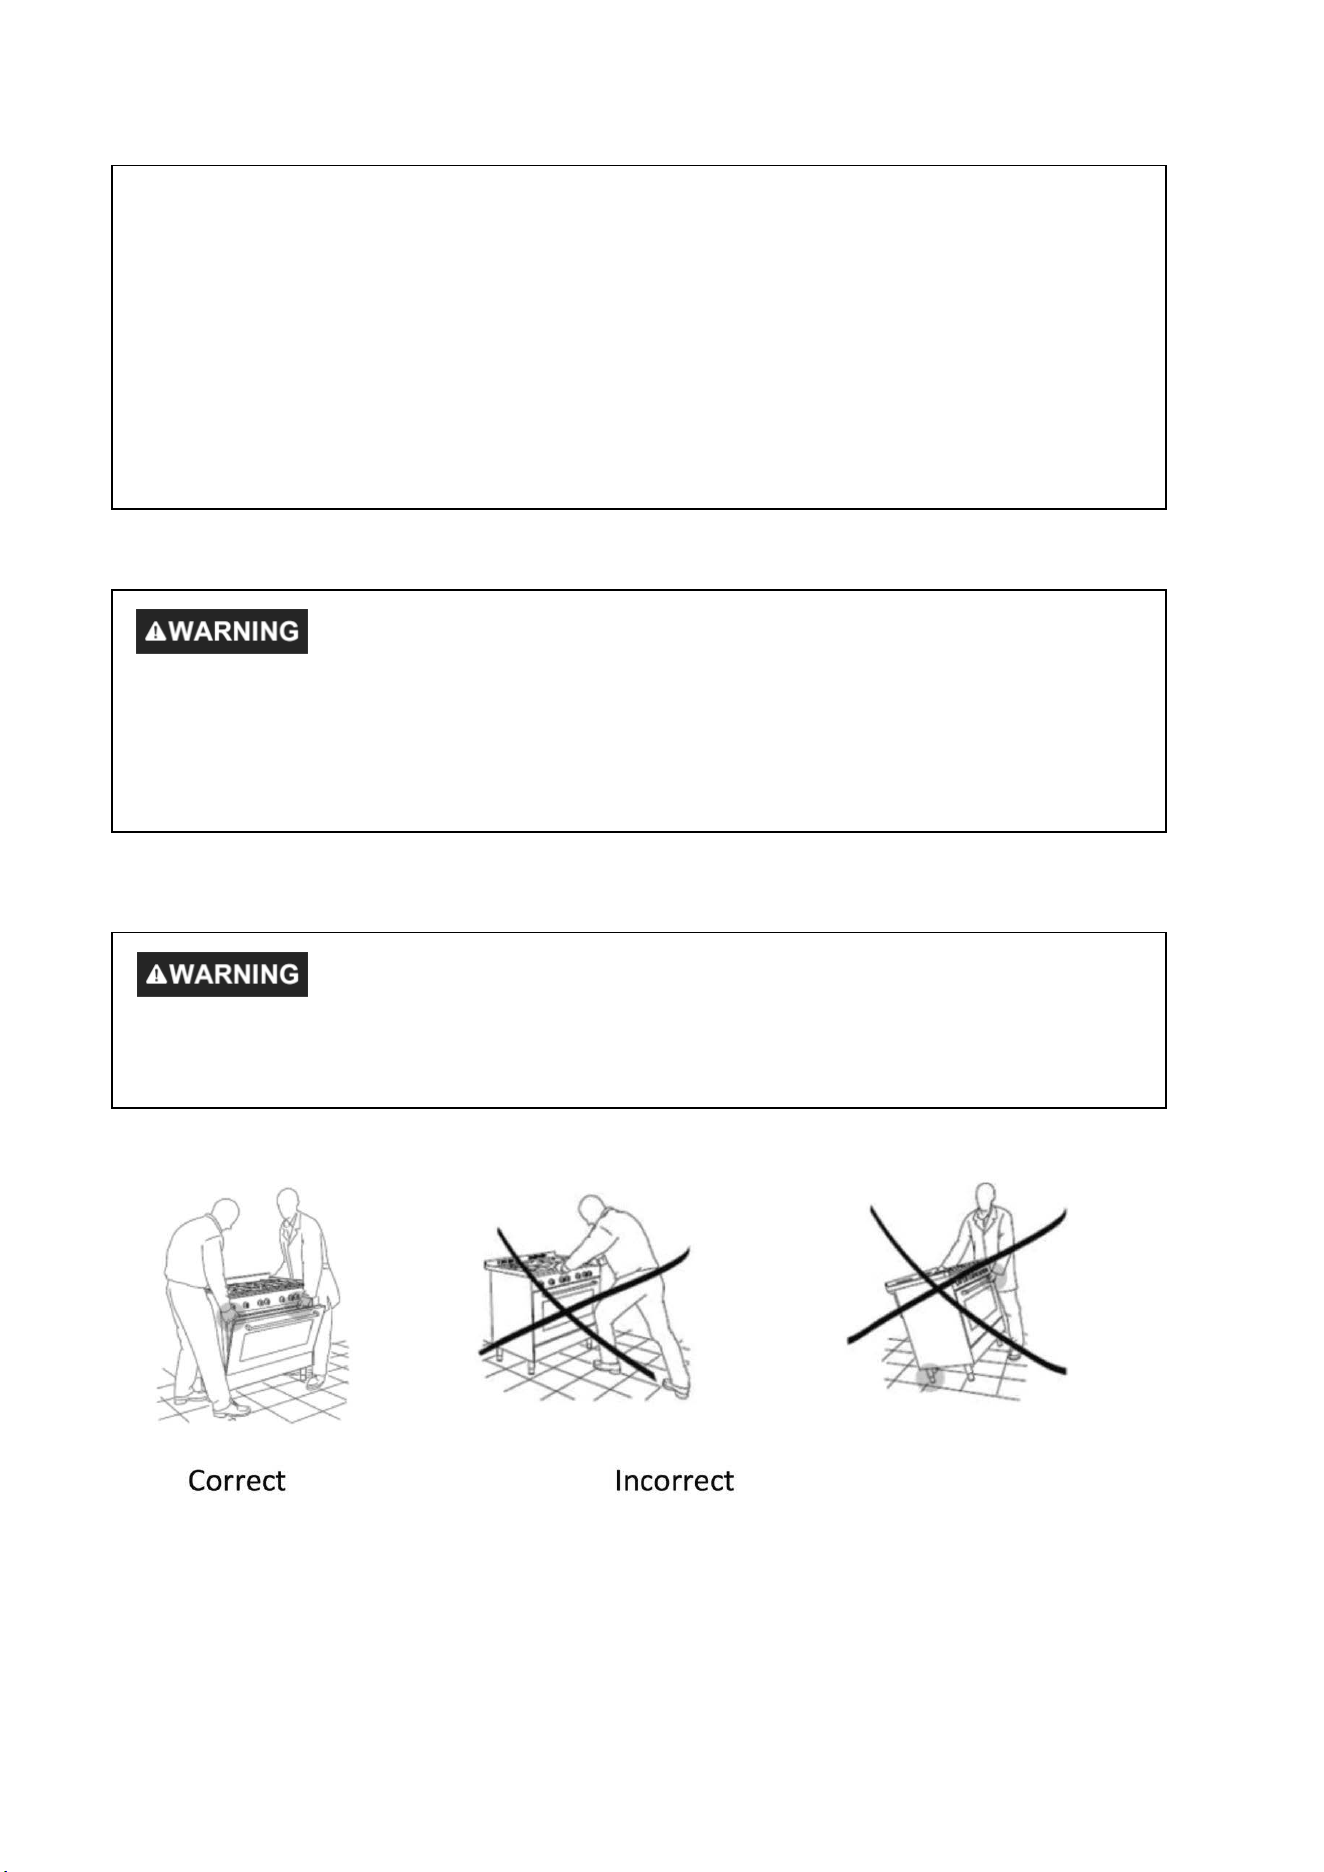
Extremely Heavy.
Proper equipment and adequate manpower are needed when move the range to avoid
personal injury or damage to the unit or the floor.
Failure to follow this advice may result in damage or personal injury.
DO NOT carry or lift the cooking range by the oven door handle or the control panel!
14. Do not touch the heating elements or the interior surface of the oven. These surfaces may
be hot enough to burn even though they are dark in color. During and after use, do not touch, or
let clothing or other flammable materials contact any interior area of the oven; allow sufficient
time for cooling first. Other surfaces of the appliance may become hot enough to cause burns.
Potentially hot surfaces include the burners, grates, oven vent opening, surfaces near the
opening, crevices around the oven door, metal trim parts above the door, any backguard, or
high shelf surface.
15. Do not heat unopened food containers. Pressure could build up and the container could
burst, causing any injury.
9
Cook food thoroughly to help protect against foodborne illness. Minimum safe food temperature
recommendations can be found at www.IsItDoneYet.gov and www.fsis.usda.gov. Use a food
thermometer to take food temperatures and check several locations.
Do not allow anyone to climb, stand or hang on the oven door, drawer or cooktop. They could
damage the range or tip it over causing severe injury or death.
Keep the ventilator hood and grease filter clean to maintain good venting and to avoid grease
fires. Turn the ventilator OFF in case of a fire or when intentionally "flaming" liquor or other
spirits on the cooktop. The blower if in operation, could spread the flames.
Do not store or use flammable materials in an oven or near the cooktop, including paper,
Do not use water on grease fires. Never pick up a flaming pan. Turn the controls off. Smother a
flaming pan on a surface unit by covering the pan completely with a well-fitting lid, cookie sheet
or flat tray. Use a multi-purpose dry chemical or foam-type fire extinguisher.
If there is a fire in the oven during baking, smother the fire by closing the oven door and
turning the oven off or by using a multi-purpose dry chemical or foam-type fire extinguisher.
If there is a fire in the oven during self-clean, turn the oven off and wait for the fire to go out.
Do
not
force the door open. Introduction
of
fresh
air
at
self-clean temperatures may lead to a
burst of flame from the oven. Failure to follow this instruction may result in severe burns.
10
Do not store or use flammable materials in an oven or near the cooktop, including paper,
plastic, pot holders, linens, wall coverings, curtains, drapes and gasoline or other flammable
vapors and liquids.
Never wear loose-fitting or hanging garments while using the appliance. These garments may
ignite if they contact hot surfaces causing severe burns.
Do not let cooking grease or other flammable materials accumulate in or near the range.
Grease in the oven or on the cooktop may ignite.

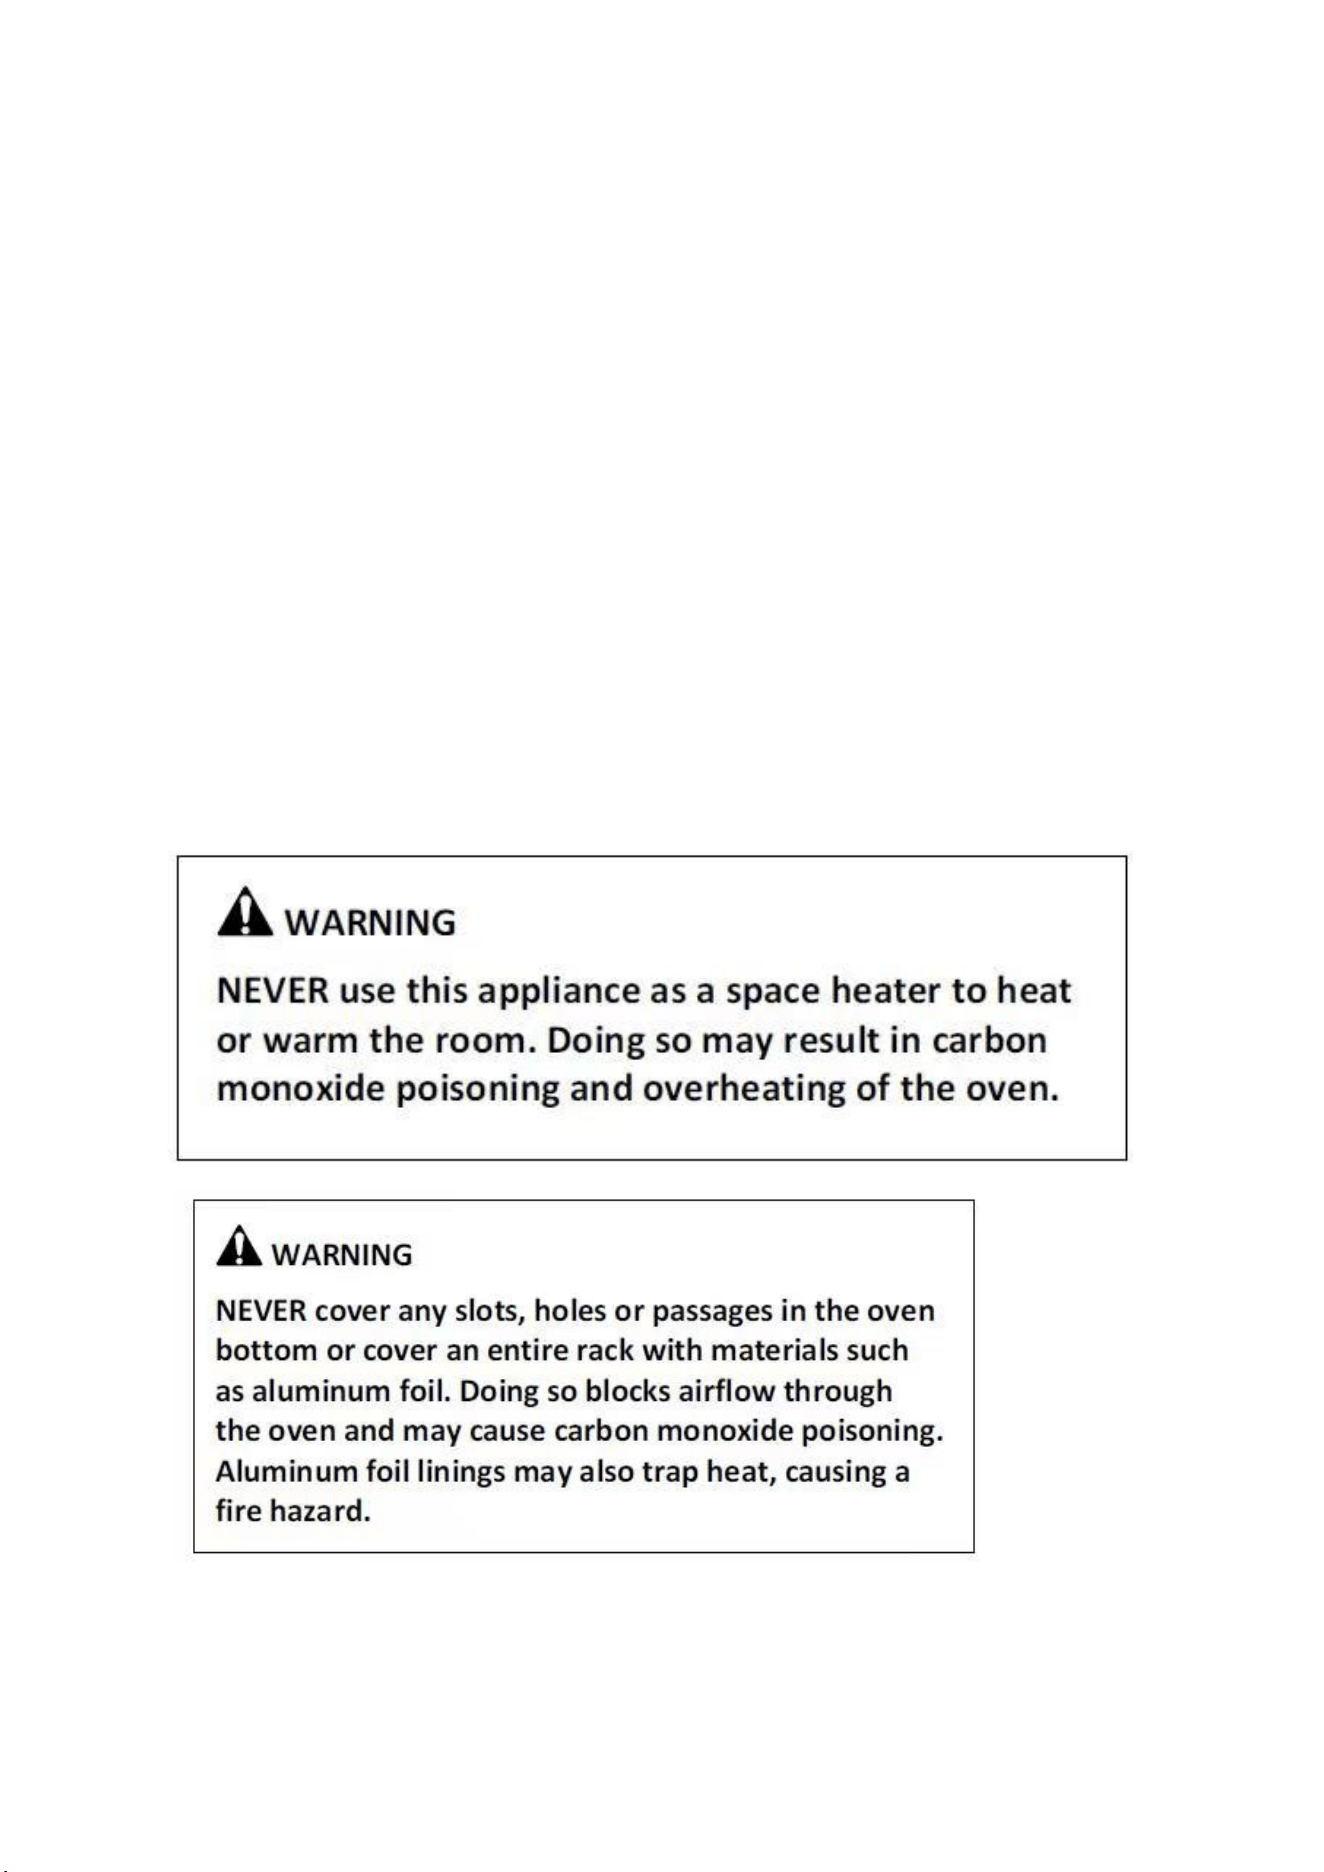
NEVER cover any slots, holes, or passages in the oven bottom or cover an entire rack with
materials such as aluminum foil or oven liners. Doing so blocks air flow through the oven and may
cause carbon monoxide poisoning. Never place foil or oven liners on the oven bottom. They can trap
heat causing risk of smoke or fire.
Stand away from the range when opening the oven door. Escaping hot air or steam can cause
burns to hands, face and/or eyes.
Never place cooking utensils, pizza or baking stones, or any type of foil or liner on the oven floor.
These items can trap heat or melt, resulting in damage to the product and risk of shock, smoke or
fire.
Place oven racks in desired location while oven is cool. If the rack must be moved while the oven is
hot, be careful to avoid touching hot surfaces.
Do not leave items such as paper, cooking utensils, or food in the oven when not in use. Items stored
in an oven can ignite.
Do not leave items on the cooktop near the oven vent. Items may overheat resulting in a risk of fire
or burns.
Never broil with the door open. Open-door broiling is not advised due to overheating of control knobs.
Never leave the surface burners unattended at medium or high heat settings. Foods, especially oily
foods, may ignite resulting in fire that could spread to surrounding cabinets.
Never leave oil unattended while frying. If allowed to heat beyond its smoking point, oil may ignite
resulting in fire that may spread to surrounding cabinets. Use a deep fat thermometer whenever
possible to monitor oil temperature.
To avoid oil spillover and fire, use the minimum amount of oil when frying in a shallow pan and
avoid cooking frozen foods with excessive amounts of ice.
Use proper pan size and avoid pans that are unstable or easily tipped. Select cookware that
matches the size of the burner. Burner flames should be adjusted so that they do not extend
beyond the bottom of the pan. Excessive flames may be hazardous.
When using glass/ceramic cookware, make sure it is suitable for cooktop use; others may break
because of a sudden change in temperature.
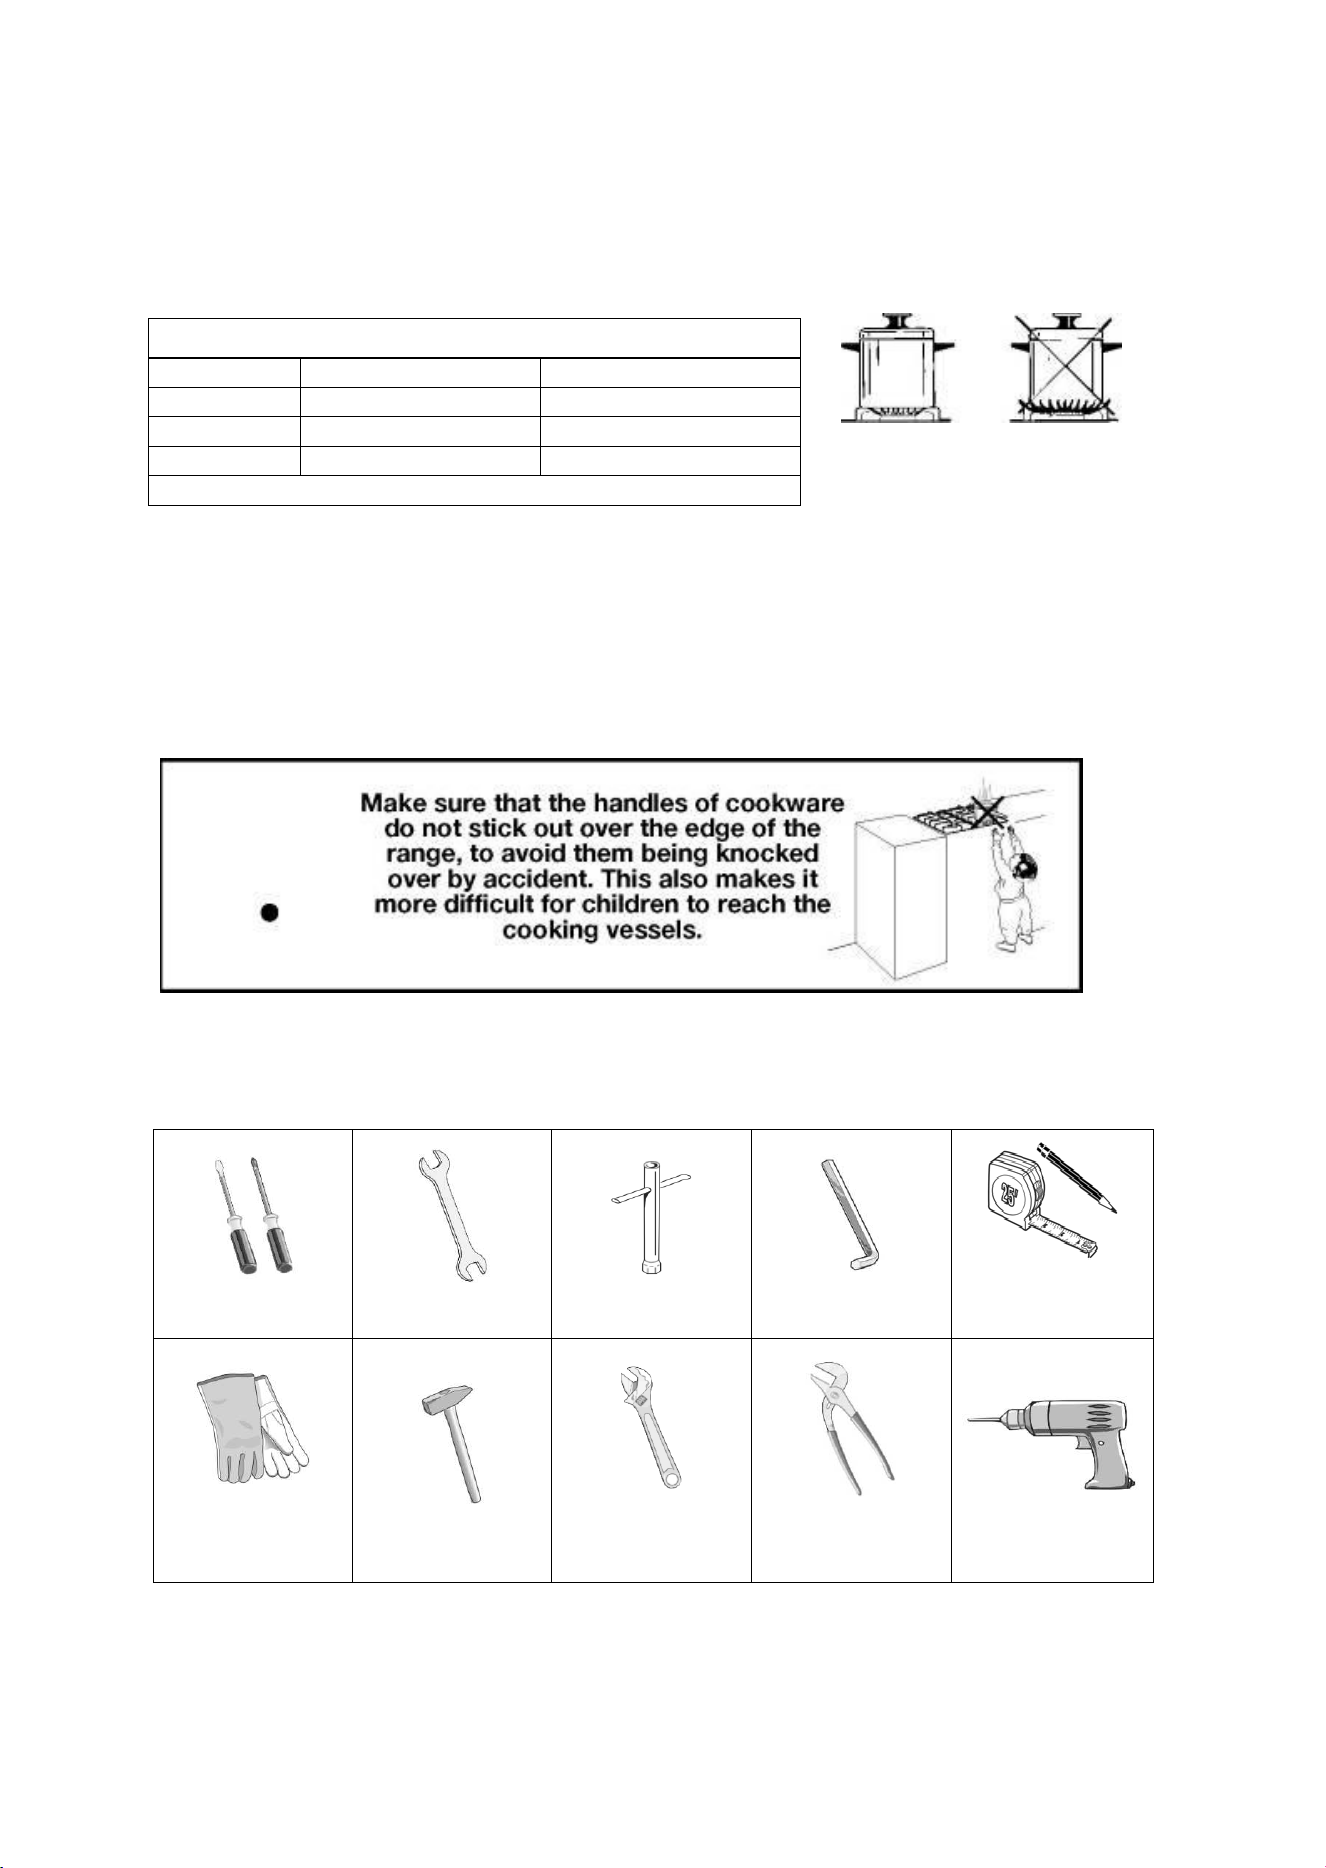
To minimize the possibility of burns, ignition of flammable materials and spillage, cookware handles
should be turned toward the center of the range without extending over nearby burners.
Do not use a wok with a round metal support ring. The ring may trap heat and block air to the burner
resulting in a carbon monoxide hazard.
Do not attempt to lift the cooktop. Doing so may damage the gas tubing to the surface burners
resulting in a gas leak and risk of fire.
Do not use aluminum foil to cover the grates or line any part of the cooktop. Doing so may result in
carbon monoxide poisoning, overheating of the cooktop surfaces, or a potential fire hazard.
11
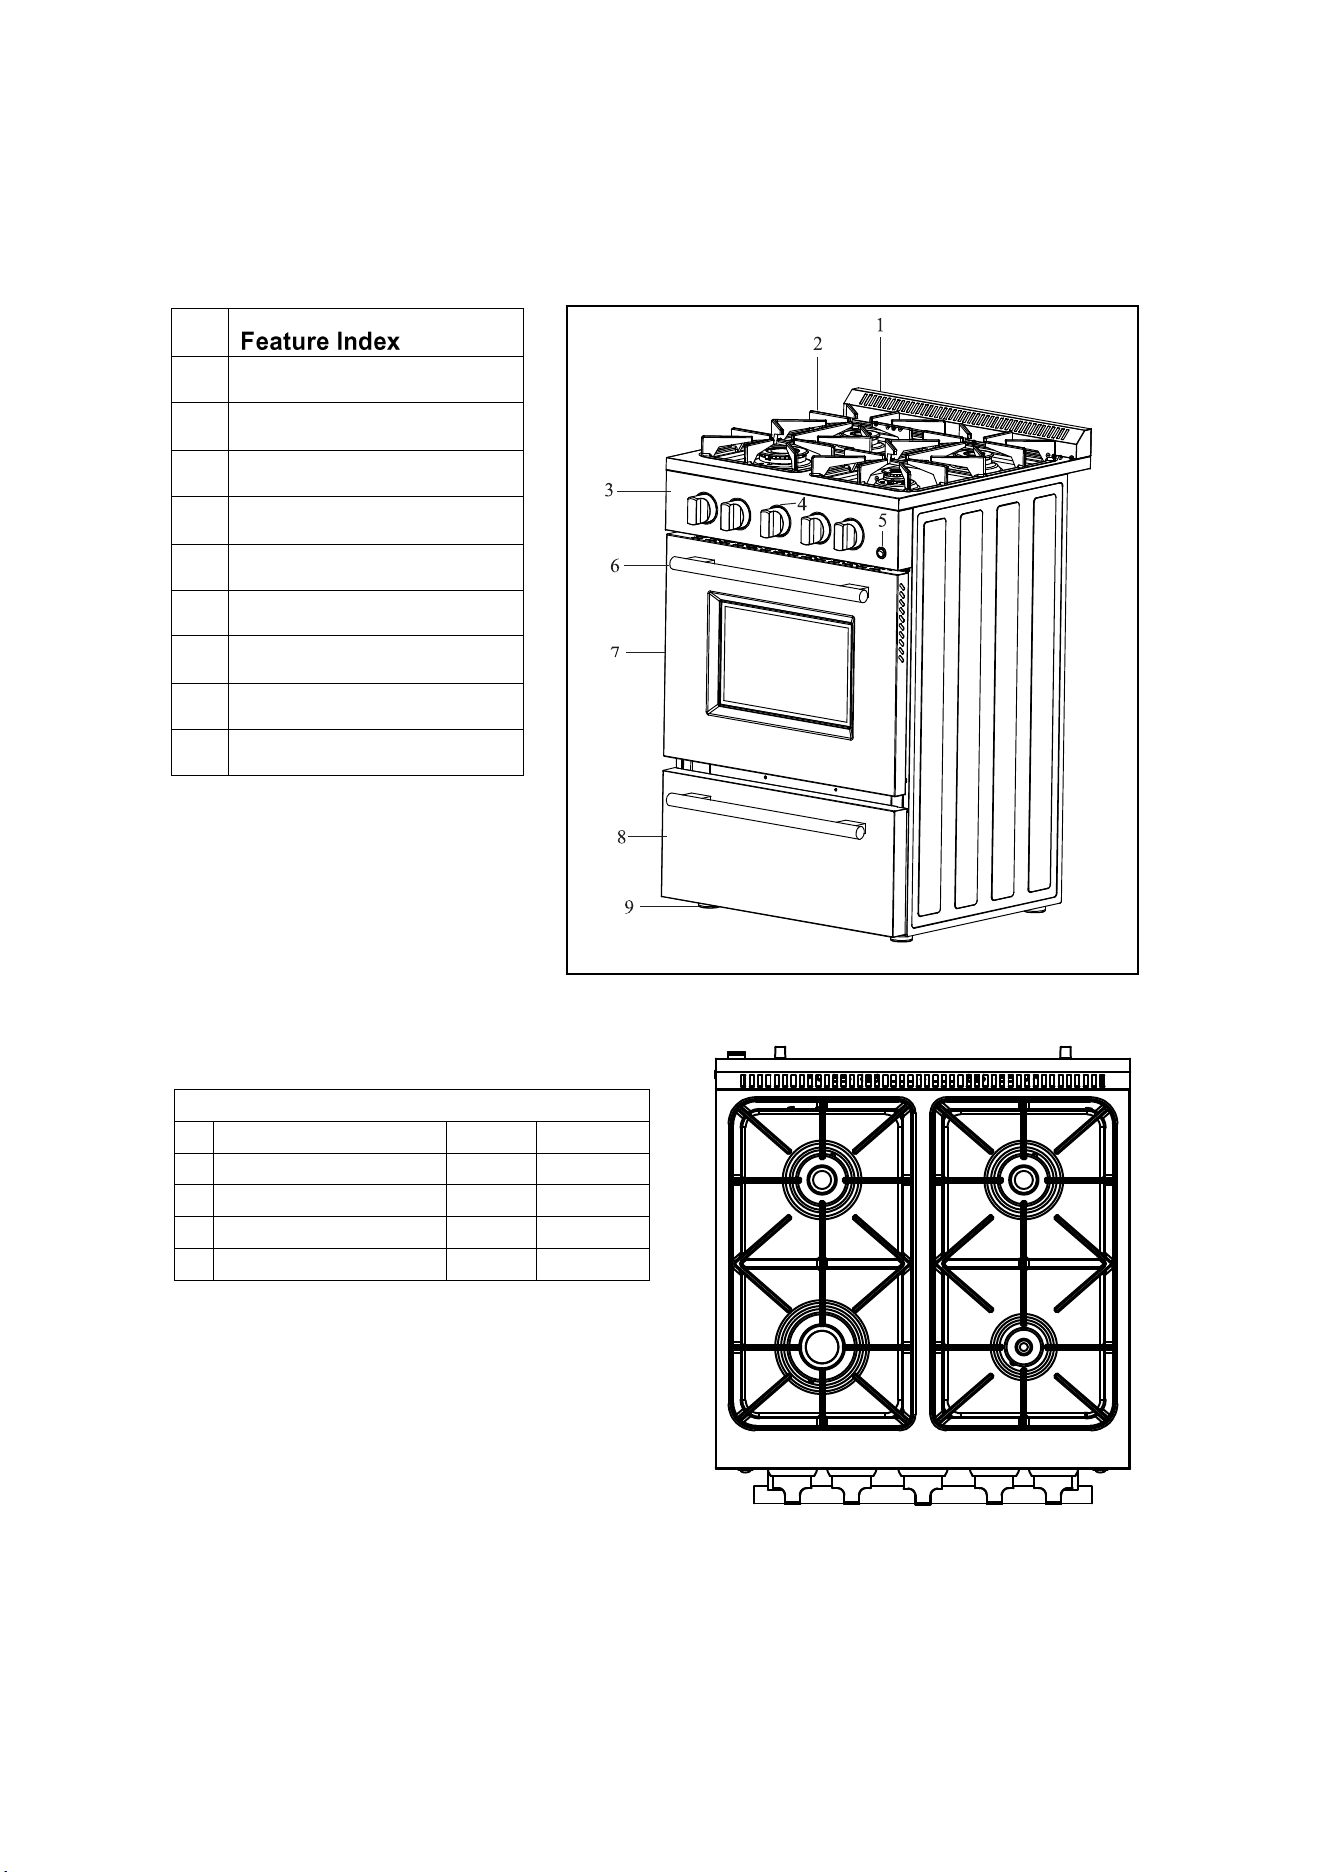
Not all features are on all models.Appearance may vary.
12
1 Oven Vents
2
Cooktop Burner Grates
3
4
5
Control Panel
6
7
8
Oven Lights
9
Oven/Broil Burner
Oven Door
Drawer
Handle
Leveling System
1
COOKTOP
BTU/hr Ratings
20” 24”
1 Auxiliary 2700 6000
2 Right Semi-rapid 5000 9000
3 Left Semi-rapid 5000 9000
4 Rapid 8500 14000
Note:
-The electric gas-lighting device is incorporated
into the knobs.
CAUTION:
If
the burner is accidentally extinguished,
t
urn the gas off at the control knob and wait
at least 1 minute before attempting to
relight.
CAUTION:
Gas appliances produce heat and humidity
in the environment in which they are
installed.
Ensure that the cooking area is well
ventilated following national/local codes.
2
3
4
FEATURES OF YOUR RANGE
13
BEFORE USING YOUR GAS RANGE
WARNING!!
Before Using Your Gas Range
√Remove the exterior and interior packing.
√Remove the protective film on steel and aluminum parts
√Check to be sure you have all of the parts listed below
● 1 Backsplash
● LP Gas Conversion Packet(injectors for LP gas, 6pcs)
● 1 Anti-tip bracket
● 2 Pan supports
● 2 Oven racks
● 4 Caps and bases in the burner assembly
● 1 Air Fry Basket(for FFSGS6272-24 FFSGS6290-24)
● 1 Broiler Tray(for FFSGS6272-24 FFSGS6290-24)
● 1 Regulator(Pre-installed)
● 5 Screws for Backsplash
● 1 Manual
√ Clean the interior surface with lukewarm water using a soft cloth
√ Have the installer show you the location of the range’s gas shut-off valve and how to shut it
off if necessary.
√ Have your range installed and properly grounded by a qualified installer in accordance with
the installation instructions.
√ Do not attempt to repair or replace any part of your range unless it is specifically
recommended in this manual.
√ Be sure your range is correctly adjusted by a qualified service technician or installer for the
type of gas (natural or LP) that is being used.
√ Do not remove permanently affixed labels, warnings, or plates from the product. This may
void the warranty.
√
The installer should leave these instructions with the consumer who should retain for local
inspector’s use and for future reference.
√ Please observe all local and national codes and ordinances.
HAVE THIS RANGE INSTALLED BY A QUALIFIED INSTALLER.
Improper installation, adjustment, alteration, services, or maintenance can cause injury
or property damage. Consult a qualified installer, service agency, or the gas supplier.
Important:
This appliance is designed and manufactured solely for the cooking of domestic (household) food and
is not suitable for any non-domestic application and therefore CANNOT be used in a commercial
environment.
T
he
appliance guarantee will be void if the appliance is used within a non-domestic environment i.e. a
semi commercial, commercial or communal environment.
Read the instructions carefully before installing and using the appliance.
CAUTION: this appliance must only be installed in a permanently ventilated room in
compliance with the applicable regulations.
It is advised to follow these instructions:
√ Clean the interior of the oven with a clean cloth soaked in water and detergent (neutral, then dry
carefully).
√ Furnish the interior of the oven by inserting the shelves and tray.
√ Turn the oven on to the maximum temperature to eliminate any possible traces of grease from
the oven burner. The same operation should be followed for the broiler burner.
** NOTE **
This appliance can be used with LP gas and NG gas. It is shipped from the factory adjusted for use with NG (Natural
Gas). Conversion orifices are included. Follow the instruction packaged with the orifices for gas conversion.
14

15
IMPORTANT PRECAUTIONS AND RECOMMENDATIONS
√ After having unpacked the appliance, check to ensure that it is not damaged and that
the oven door closes correctly. In case of doubt, do not use it and consult your supplier
or a professionally qualified technician.
√ Packing elements (i.e. plastic bags, polystyrene foam, nails, packing straps, etc.)
should not be left around within easy reach of children, as these may cause serious
injuries.
√ The packaging material is recyclable and is marked with the recycling symbol
.
√ Do not attempt to modify the technical characteristics of the appliance as this may
cause danger to users.
√ Do not carry out cleaning or maintenance operations on the appliance without having
previously disconnected it from the electric power supply.
√ If you should decide not to use this appliance any longer (or decide to substitute an
older model), before disposing of it, it is recommended that it be made inoperative in
an appropriate manner in accordance to health and environmental protection
regulations, ensuring in particular that all potentially hazardous parts be made
harmless, especially in relation to children who could play with unused appliances.
√ Remove the door before disposal to prevent entrapment..
√ After use, ensure that the knobs are in OFF position.
√ Do not allow children or other unqualified people to use the appliance without your
supervision.
√ During and after use of the range, certain parts will become very hot. Do not touch hot
parts.
√ Keep children away from the range when it is in use
√ Fire risk! Do not store flammable material in the oven or in the bottom drawer.
√ Make sure that electrical cables connecting other appliances in the proximity of the
range cannot come into contact with the hob or become entrapped in the oven door.
√ Do not line the oven walls top and bottom with aluminium foil. Do not place shelves,
pans, baking trays, broil tray or other cooking utensils on the base of the oven
chamber.
√ The manufacturer declines all liability for injury to persons or damage to property
caused by incorrect or improper use of the appliance.
√ To avoid any possible hazard, the appliance must be installed by qualified personnel
only. Any repairs by unqualified persons may result in electric shock or short circuit. In
order to avoid possible injuries to your body or to the appliance, do not attempt any
repairs by yourself. Such work should be carried out by qualified service personnel
only.
√ Danger of burns! The oven and cooking accessories may become very hot during
operation. Make sure children are kept out of reach and warn them accordingly. To
avoid burns use kitchen clothes and gloves when handling hot parts or utensils.
√ Stand away from the range when opening oven door. Hot air or steam which escapes
can cause burns to hands, face, and/or eyes.
√ Never clean the oven with a high-pressure steam cleaning device, as it may provoke
a short circuit.
√ This appliance is intended for use in your household. Never use the appliance for any
other purpose!

16
IMPORTANT PRECAUTIONS AND RECOMMENDATIONS FOR USE OF
ELECTRICAL APPLIANCES
Use of any electrical appliance implies the necessity to follow a series of fundamental rules.
In particular:
✓ Never touch the appliance with wet hands or feet;
✓ Do not operate the appliance barefooted;
✓ Do not allow children or disabled people to use the appliance without your supervision.
The manufacturer cannot be held responsible for any damages caused by improper,
incorrect or unreasonable use of the appliance
GENERAL INFORMATION
WARNING!!
1. This appliance shall not be used for space heating. This information is based on safety
considerations.
2. AlI openings in the wall behind the appliance and in the floor under the appliance shall be
sealed.
3. Keep appliance area clear and free from combustible materials, gasoline, and other
flammable vapors.
4. Do not obstruct the flow of combustion and ventilation air.
5. Disconnect the electrical supply to the appliance before servicing.
6. When removing appliance for cleaning and/or service;
A. Shut off gas at main supply.
B. Disconnect AC power supply.
C. Disconnect gas line to the inlet pipe.
D. Carefully remove the range by pulling outward.
CAUTION: Range is heavy; use care in handling.
7. The misuse of oven door (e.g. stepping, sitting, or leaning on them) can result in potential
hazards and/or injuries.
8. When installing or removing the range for service, a rolling lift jack should be used. Do not
push against any of the edges of the range in an attempt to slide it into or out of the
installation. Pushing or pulling a range (rather than using a lift jack) also increases the
possibility of bending the leg spindles or the internal coupling connectors.
9.
The appliance and its individual shut-off valve must be disconnected from the gas supply
piping system during any pressure testing of that system at test pressures in excess of
1/2 psi (3.5 kPa).
17
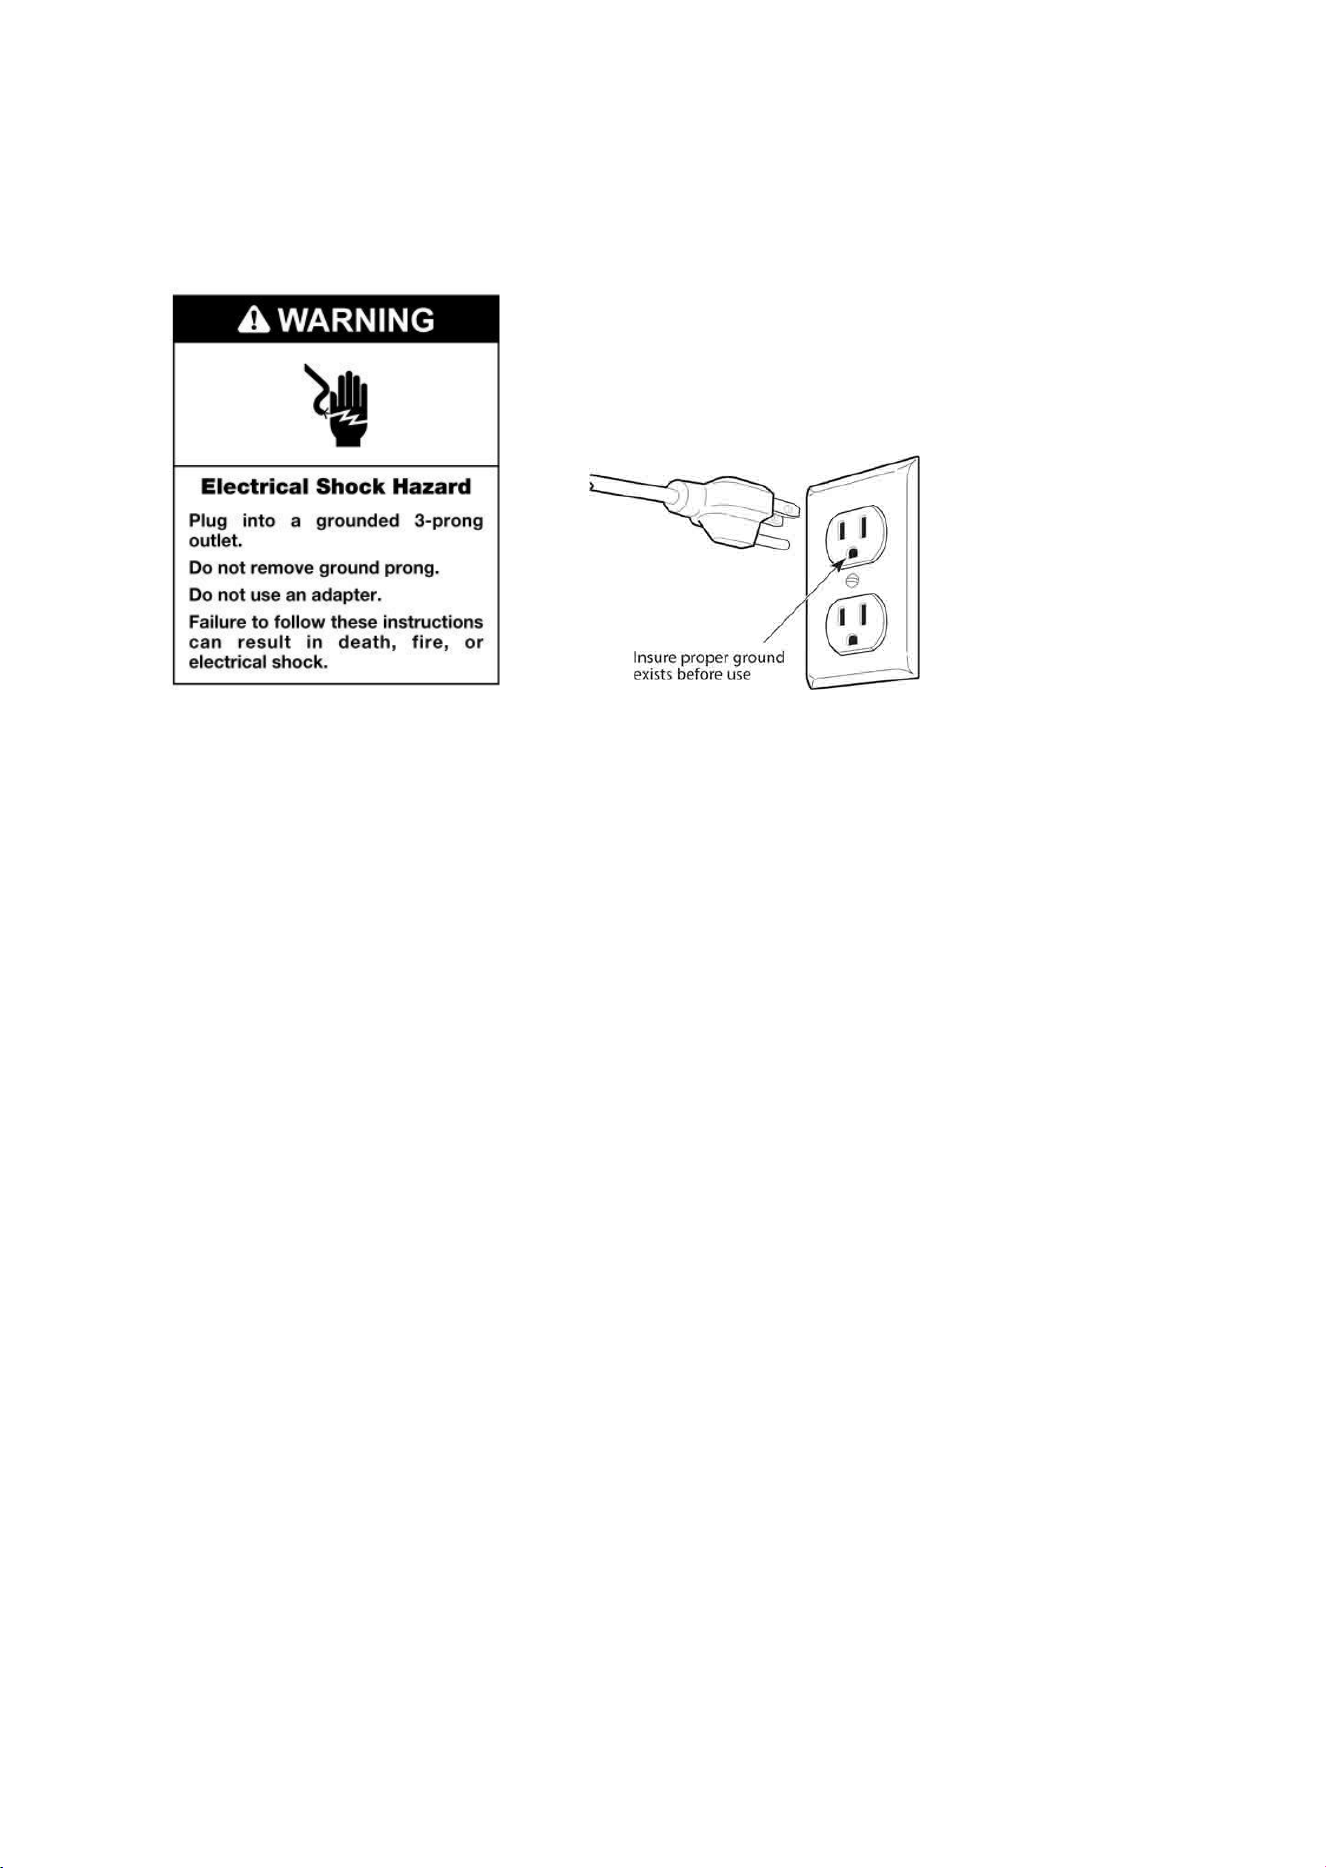
This appliance is equipped with a three-prong grounding plug for your protection against
shock hazard and should be plugged directly into a properly grounded socket. Do not cut or
remove the grounding prong from the plug.
The gas range must be installed with all electrical connections in accordance with state
and local codes. A standard electrical supply (120 V AC only, 60 Hz), properly grounded in
accordance with the National Electrical Code and local codes and ordinances is required.
Do not under any circumstances cut or remove the third (ground) prong from the
power plug. Electrical installation should comply with national and local codes.
REPLACEMENT PARTS
Only authorized replacement parts may be used in performing service on the range.
Replacement parts are available from factory authorized parts distributors. Contact
the nearest parts distributor in your area.
CARBON MONOXIDE WARNING:
Carbon Monoxide is a possible danger when using any gas powered
appliance.
All gas appliances MUST be installed by a licensed professional who is
familiar with the Carbon Monoxide levels appropriate for each appliance.
The American Gas Association publishes CO emissions for appliances and
heating equipment through the CSA/ANSI Std. Z21.1
The EPA reports that a maximum CO (Carbon Monoxide) level of 9 PPM
over a 24 hour period is the residential interior ambient level standard.
( A properly ventilated home will have a normal CO level of less than 5
PPM.)
NON-VENTED GAS COOKING APPLIANCES:
In a residential application are normally used for a short period of time.
The CO generated during the operation will disperse to the air in the home
and be purged to the outside through the normal air exchange.
ELECTRICAL GROUNDING INSTRUCTIONS
FOR PERSONAL SAFETY, THIS APPLIANCE MUST BE PROPERLY GROUNDED.
18
CHOICE OF BURNER
The symbols printed on the panel above the gas knobs indicate the correspondence between the
knob and the burner.
The most suitable burner is to be chosen according to the diameter and volume capacity of the
container to be warmed.
It is important that the diameter of the pots or pans suitably match the heating potential of the burners
in order not to jeopardize the efficiency of the burners, bringing about a waste of gas fuel.
A small diameter pot or pan placed on a large burner does not necessarily mean that boiling
conditions are reached quicker.
DIAMETERS OF PANS WHICH MAY BE USED ON THE TOP BURNERS
BURNER MINIMUM MAXIMUM
Auxiliary 4" 23/32 (12 cm) 5" 1/2 (14 cm)
Semirapid 6" 19/64 (16 cm) 9" 7/16 (24 cm)
Rapid 9" 7/16 (24 cm) 10" 15/64 (26 cm)
Do not use pans with concave or convex bases
INSTALLATION INSTRUCTIONS
YOU NEED TOOLS FOR INSTALLATION. (not supplied with the range)
Screwdriver Wrench Socket wrench Allen key
Tape measure
&Pencil
Protective
gloves
Hammer
Adjustable
wrench
Adjustable
pliers
Drill
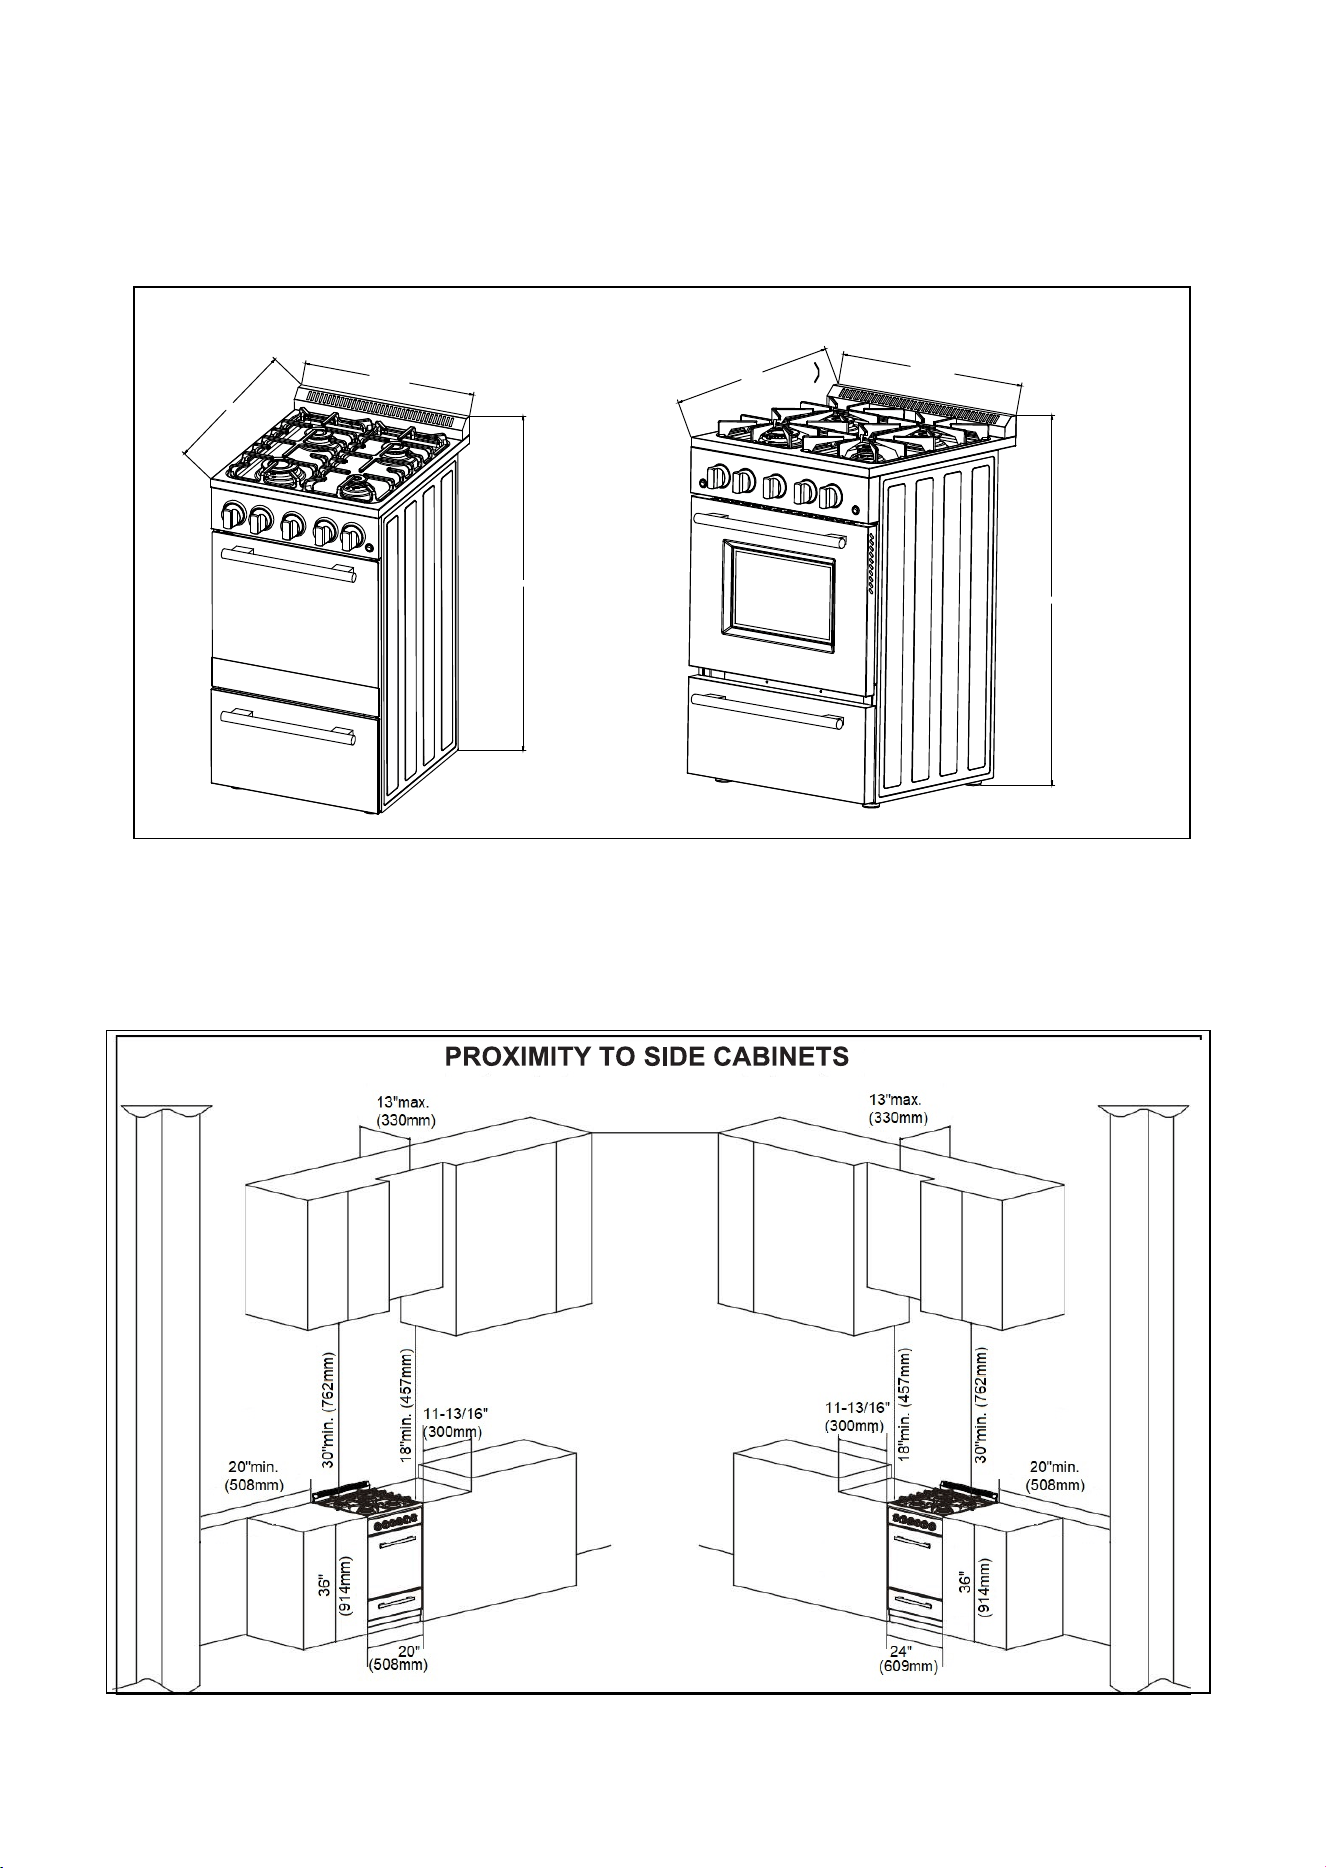
PRODUCT DIMENSIONS AND CABINETS
CABINET INSTALLATION
19
Model FFSGS626
5
-20
Model FFSGS6272-24 FFSGS6290-24
" 37 25/32
960mm
37 25/32"
960mm
19 1/2"
495mm
22"
562mm
589mm
23 7/16"
23 3/16"
595mm

GAS AND ELECTRIC CONNECTION
HOW TO INSTALL THE BACKSPLASH
A
Align the backsplash to rear part of
the cooktop. As shown in the diagram
B
Secure the backsplash to the cooktop
from the back using the Philips head
screws provided. As shown in the
diagram
C
Secure the backsplash from the bottom
using the Philips head screws provided.
As shown in the diagram
20
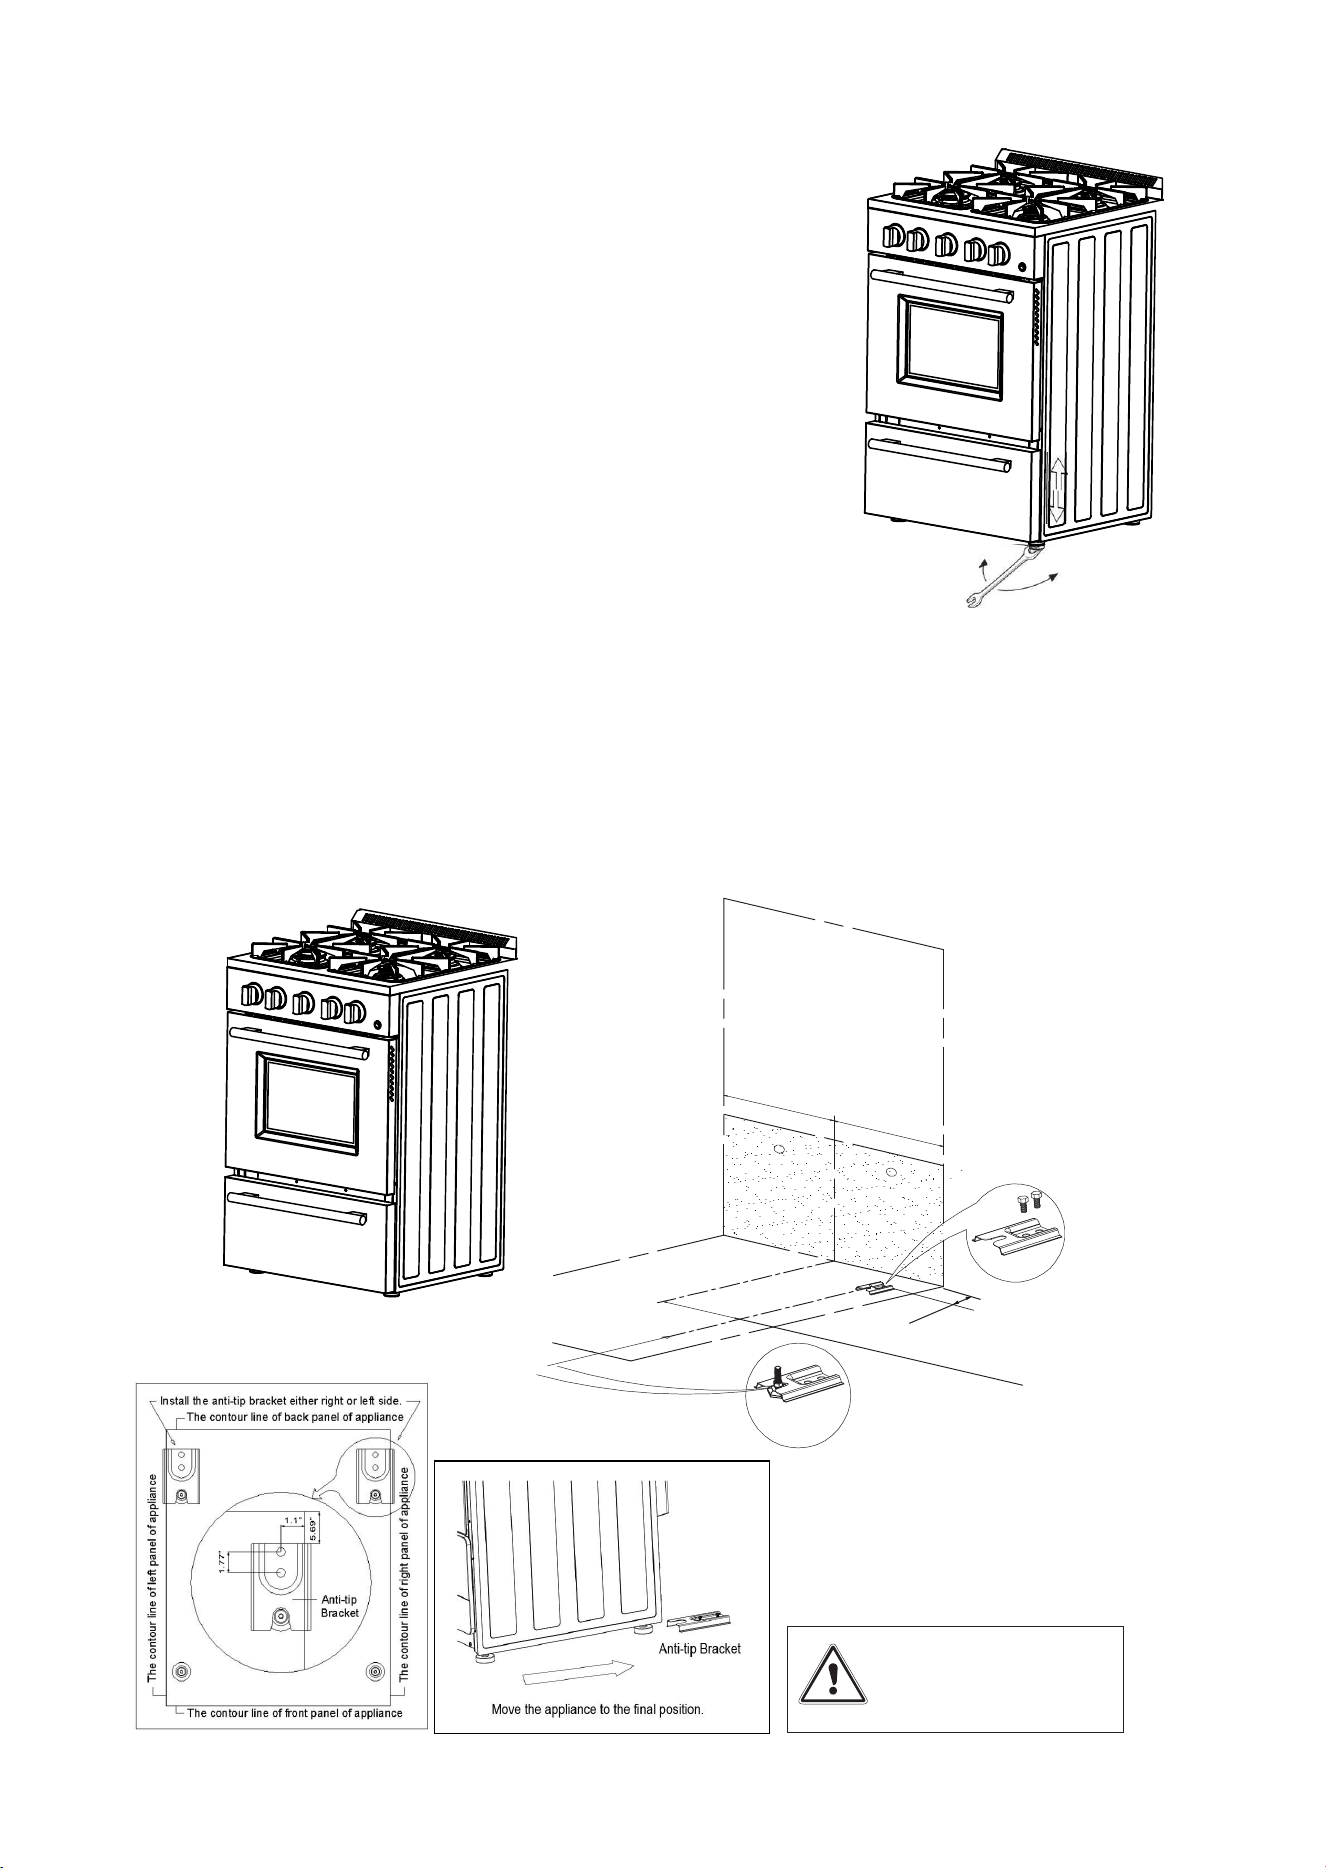
HOW TO LEVEL THE RANGE
The range is equipped with 4 LEVELLING LEGS
and may be leveled by screwing or un-screwing
the feet with a spanner tool.
ANTI-TIP
STABILITY DEVICE INSTALLATION INSTRUCTIONS
YOU MUST USE T H E
ANTI-TIP / STABILITY
BRACKET TO PREVENT
UNIT FROM TIPPING.
0~0.5"
7.7"
21
ANTI-TIP BRACKET INSALLATION
To reduce the risk of tipping the range by abnormal usage or improper door loading, the range must
be secured by properly installing the anti-tip device packed with the appliance.
Place the anti-tip bracket on the floor as shown figure. Anti-tip bracket can be installed on either
right or left side.
Make the locations of 2 holes of ant-tip bracket on the floor.
Use a 5/16” masonry drill bit and insert plastic anchor.
Secure bracket to floor using screws supplied.
Slide appliance into position.
NOTE: If range is relocated, the bracket must be removed and installed in new location.
screws (not provided)

GA
S
CONNECTION
ATTENTION:
The
regulator is pre-installed
b
y
th
e
fa
ctory
for your convenience.
The following instructions are for information purposes only or in the instance a part must be
replaced.
ALL REPAIR / PART REPLACEMENTS AND CONNECTIONS MUST BE DONE BY AN EXPERIENCED
LICENSED PROFESSIONAL.
WARNING
Check th
e right
positioning of the gas regulator. The
a
rrow
o
n
th
e back of the gas regulator must be
oriented toward the connector.
1/2" G cylindrical
1/2" G cylindrical
(ISO 228-1) male
1/2" G cylindrical
1/2" NPT
1/2" NPT
1/2" NPT
(conical)
female
(ISO 228-1) male
(ISO 228-1) female
male
Connector
Gas Inlet Pipe
Gasket
Gasket
Gas Supply
Pipe
Pressure
regulator
WARNING:
Ensure the correct positioning of the gas
regulator.
The arrow on the gas regulator must be
oriented toward the inlet pipe of the
range.
Arrow
22
CONVERSIO
N FROM NATURAL GAS (NG) TO
PROPANE
(LPG)
Every range is provided with a set of injectors for the various types of gas.
Select the injectors to be replaced according to the “INJECTORS TABLE”.
The nozzle diameters, expressed in hundredths of a millimeter, are marked on the body of each
injector.
Any conversion required must be performed by your dealer or a qualified licensed plumber or gas
service company.
Please provide the service person with this manual before work is started on the range.
(Gas
conversions are the
responsibility
of
the dealer or end user.)
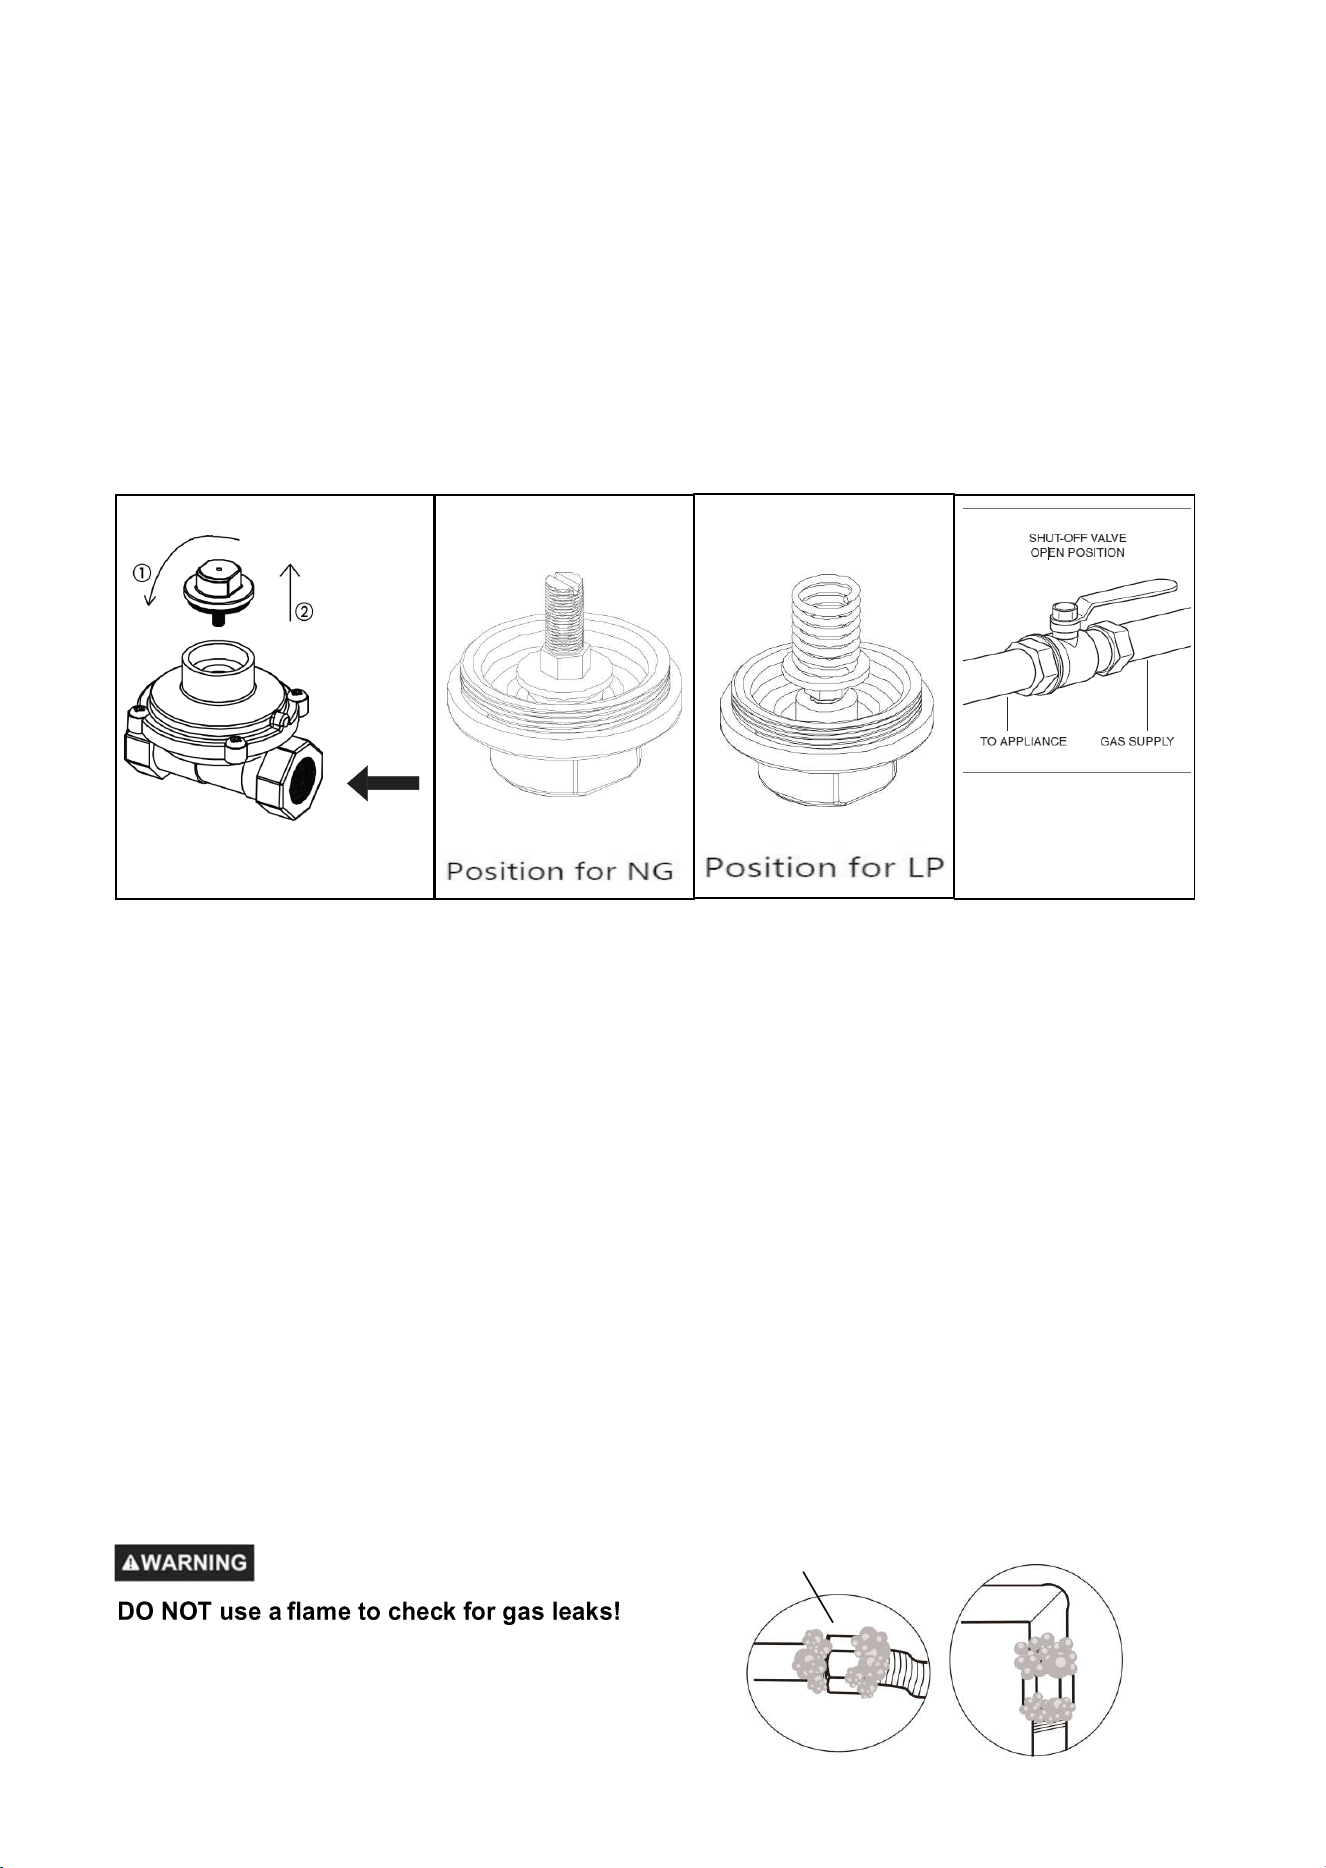
SETTING
THE PRESSURE REGULATOR
ST
EP 1
S
T
EP 2 ST
EP 3
Step 1: Open the regulator cover by turning the cover in a counter-clockwise direction.
Step 2: See the pressure screw installed in the cover. This is the Natural Gas position.
Step 3: Carefully unscrew the pressure screw and remove it along with the spring below.
Invert the position of the pressure screw and spring Reinstall the pressure screw as
showing in the image above.
Step 4: Re-Install the regulator cover by screwing into place in a clockwise direction.
Ensure the cover securely closed before installing the regulator and connecting to the
gas supply. DO NOT OVERTIGHTEN
23
P
Save the orifices removed from the appliance for future use.
GAS INLET
Pressure Regulator
Gas Shut-off Valve
Pressure regulator can withstand a maximum input pressure of 0.5 psi (3.5 kPa), and is set at 5"
WC outlet pressure when used on NATURAL GAS and 10" WC outlet pressure when used on
LIQUID PROPANE.
Step 5: Before operating the range after the gas conversion, always check for leaks with a
soapy water solution or other acceptable method in at gas connections installed between
the gas inlet pipe of the range, gas regulator, and the manual shut-off valve.
Use soapy solutions to check for leakage on all joints.
COOKTOP BURNERS
a. Remove cooking grates, burner caps and inner burner rings.
b. Lift off outer burner heads and burner bases.
c. Remove the factory installed natural gas nozzles from the center
of the nozzle holders using a 7mm socket wrench. Replace the LP
nozzle in each nozzle holder. Tighten each nozzle until snug. Use
caution not to over tighten.
Care should be taken when removing and replacing gas
components. Use proper support to prevent damage to components.
Each nozzle has a number indicating its flow diameter printed on the body. Consult
the table below for matching nozzles and burners.
Socket Wrench
Model:FFSGS6265-20
5000BTU
NG:1.0
LPG:0.68
2700BTU
NG:0.73
LPG:0.53
8500BTU
NG:1.3
LPG:0.9
Model:FFSGS6272-24 FFSGS6290-24
5000BTU
NG:1.0
LPG:0.68
9000BTU
NG:1.35
LPG:0.9
6000BTU
NG:1.12
LPG:0.74
14000BTU
NG:1.75
LPG:1.13
9000BTU
NG:1.35
LPG:0.9
24
Model:FFSGS6265-20
Model:FFSGS6272-24 FFSGS6290-24
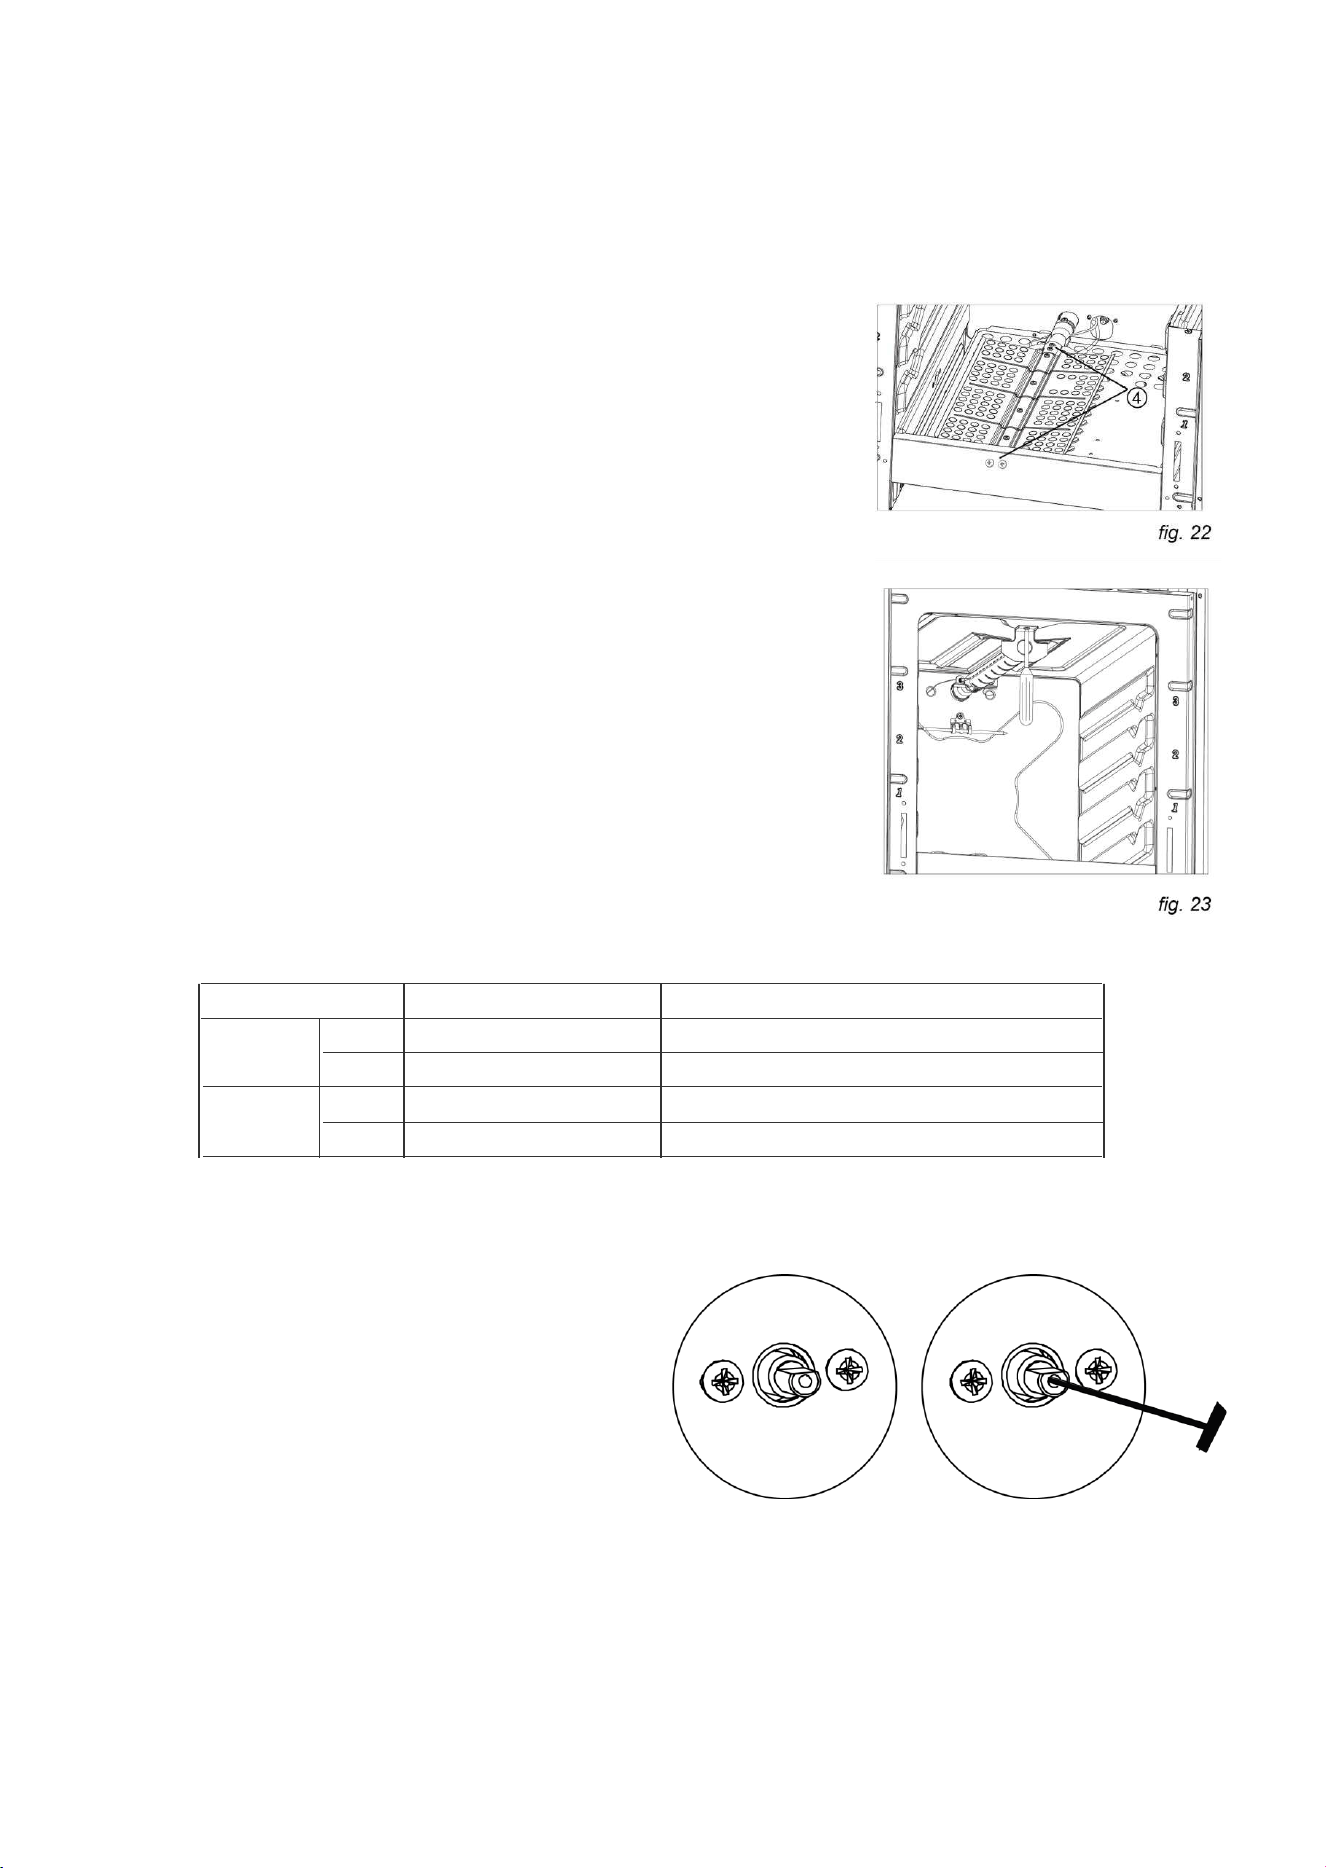
REPLACING THE OVEN / BROILER BURNER INJECTORS
To replace the OVEN burner injector:
a) Lift and remove the lower panel inside the oven.
b) Remove the burner securing screws (total 4) (fig. 22)
c) Withdraw the burner and rest it inside the oven.
Take care as not to damage the wire to the ignition electrode
as well as the thermocouple.
d) Using a 7 mm box spanner, unscrew the injector and replace it
using the new LPG injector.
e) Replace the burner repeating the above steps in reverse order.
To replace the BROIL burner injector:
a) Remove the burner by unscrewing the front screw (fig. 23)
b) Gently suspend the burner as shown in figure 24.
Take care as not to damage the wire to the ignition electrode
as well as the thermocouple.
c) Using a 7 mm box spanner, unscrew the injector (indicated in
figure 24) and replace it using the new LPG injector.
d) Replace the burner repeating the above steps in reverse order.
SETTING THE BURNER MINIMUM SETTING
When switching from one type of gas to another, the minimum flow rate must also be correct: the flame should not go out even
when passing suddenly from maximum to minimum flame.
1) Light the burner.
2) Set the top burner valve to the minimum position.
3) Remove the knob by pulling straight out.
4) Locate the bypass screw (see illustration).
Single valve stems are hollow, the bypass screws is
located inside the stem.
Insert the flat head screwdriver (2.5mm x 75mm) into the
stem center and turn the bypass screw clockwise to adjust
the flame.
DO NOT OVERTIGHTEN.
5) Replace the knob.
6) Repeat for each of the other burners.
25
Oven
Broil
NG
LPG
1.24
0.8
NG
LPG
1.3
0.84
1.24
0.8
1.3
0.84

26
OVEN BURNER
Carries out normal “oven cooking”.
The gas flow to the burner is regulated by a thermostat which allows to maintain the desired oven
temperature.
The control of the temperature is assured by a thermostatic probe positioned inside the oven.
The probe must be always kept in its housing, in a clean condition, as an incorrect position or a dirty
probe may cause an alteration in the control of the temperature.
OVEN THERMOSTAT
The numbers printed on the control panel indicate the increasing oven temperature value (°F).
To regulate the temperature, set the chosen number onto the control knob indicator.
The position BROIL serves only to turn on the broil burner.
NOTE: When the range will not be used for long periods of time, set the gas knobs to their
positions and also close the gas shut-off valve placed on the main gas supply line.
VERY IMPORTANT: The oven/broil shall be used always with the door closed.
GAS OVEN SETTING
Number printed on the knob
Temperature
in
Corresponding
temperature
in
300 149
350 177
400 204
450 232
500 260
C
HOW TO USE THE GAS OVEN
GENERAL FEATURES
The gas oven is provided with two burners:
Oven burner, mounted on the lower part of the oven:
Broil burner, mounted on the upper part of the oven:
USING THE OVEN FOR THE FIRST TIME
It is advised to follow these instructions
1. Insert shelves and broiler grid and tray
2. Turn the oven on to the maximum temperature position (500F) to eliminate possible traces of
grease from the oven burner. The same operation should be followed for the broiler burner (knob
on position BROIL)
3. Unplug the power cord, let the oven cool down, then clean the interior of the oven with cloth
soaked in water and detergent (neutral) then dry carefully.
2
7
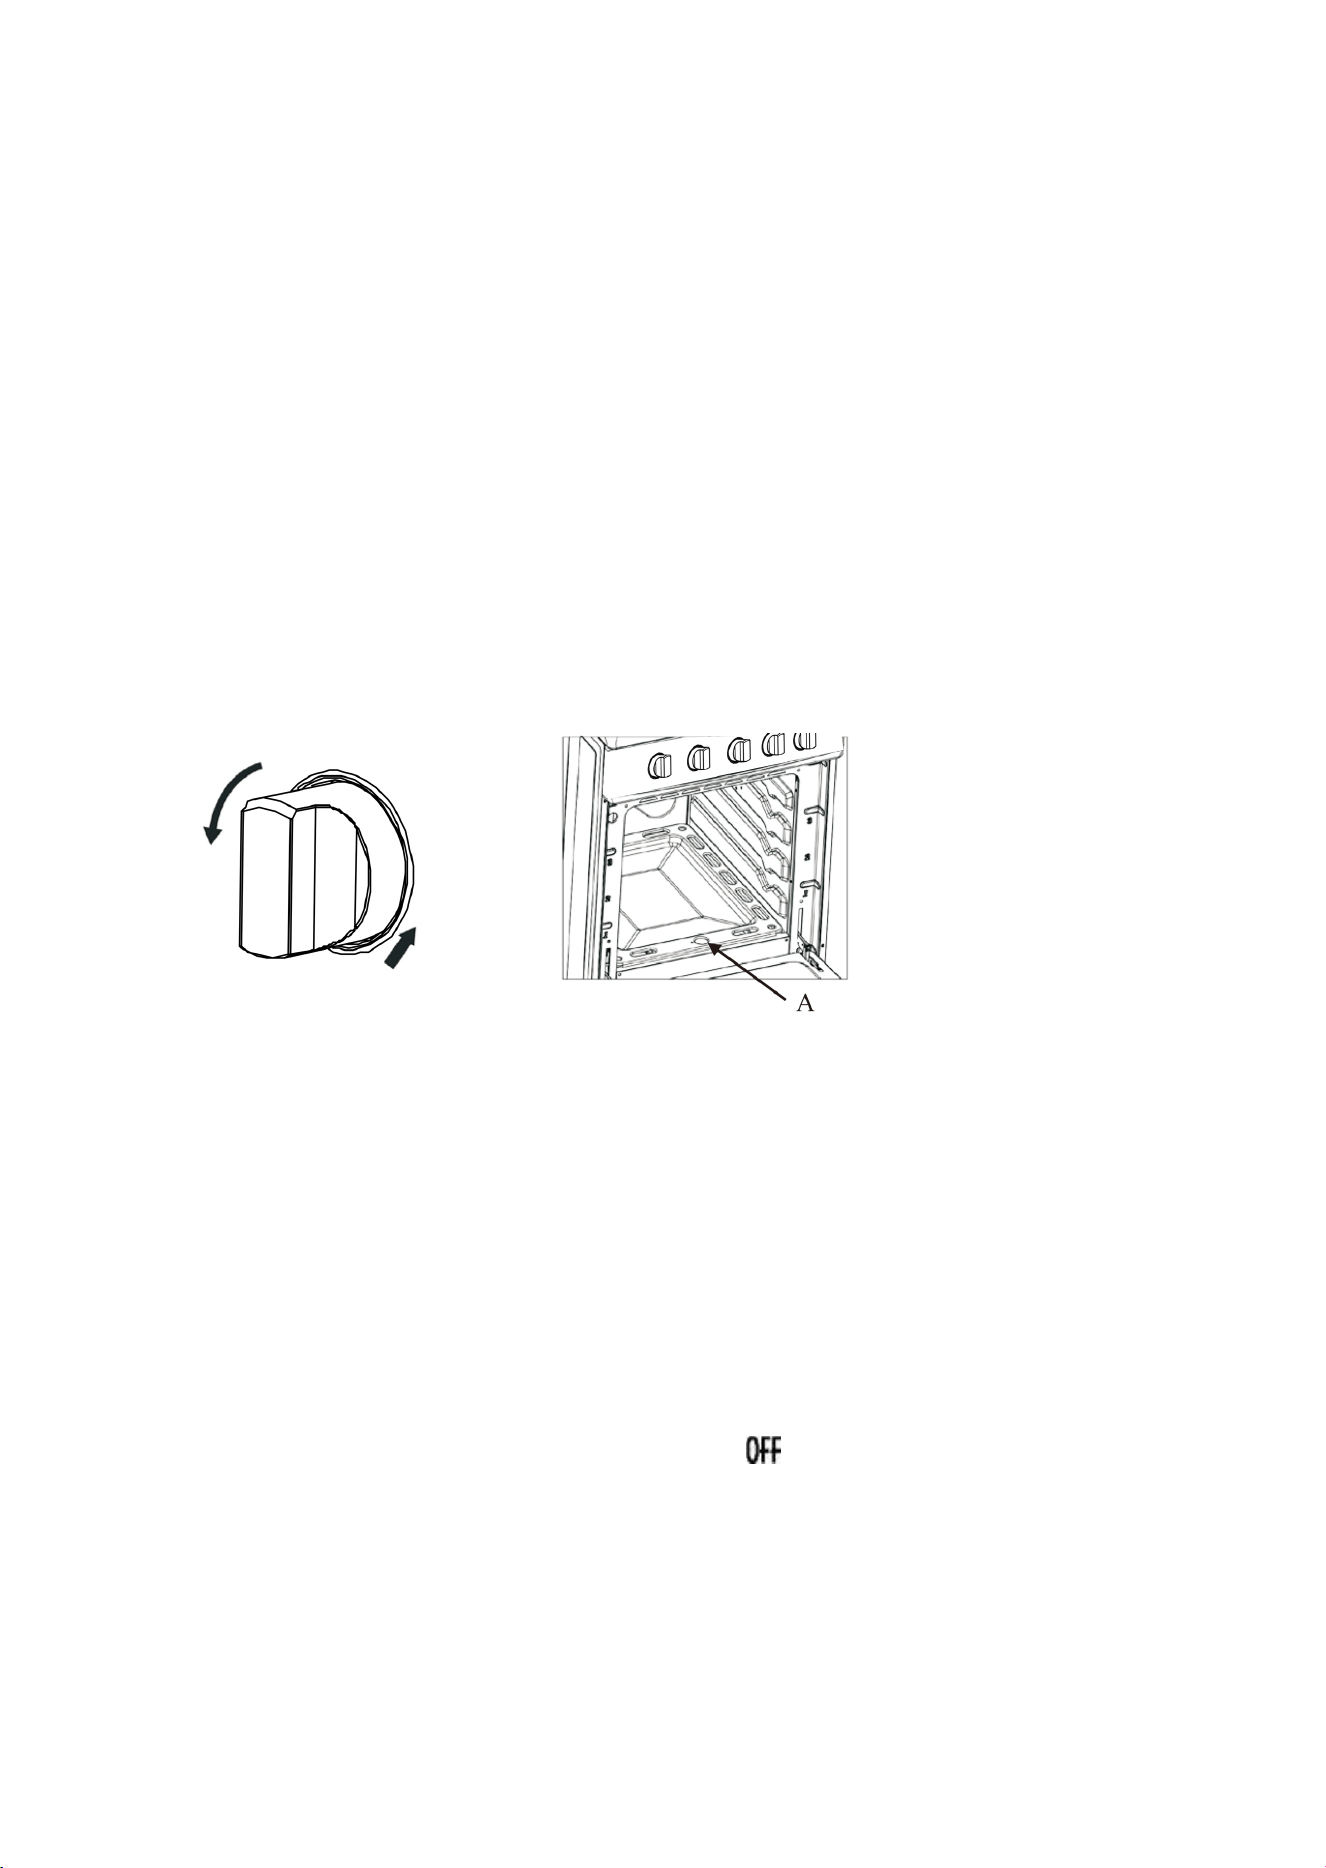
IG
NITION OF THE OVEN BURNER
The thermostat allows the automatic control of the temperature.
The gas delivery to the oven burner is controlled by a two way thermostatic tap (oven and broil
burners) with flame-failure device.
To light the oven burner operate as follows:
1) Open the oven door to its full extent.
Risk of explosion! The oven door must be open during this operation.
2) Lightly press and turn the thermostat knob counter-clockwise to max position or 500ºF
3) Press the knob inward and hold to activate the electronic ignition. Note that you will hear a
“clicking” noise. Hold the knob pressed inward until the oven burner is lit. Keep the button pressed
down for a minimum of 15 seconds before releasing it.
In case of power outage, you can manually light the burner by pressing the knob inward and
immediately approach a lighted match to the opening “A” (see the diagram above).
Never continue this operation for more than 15 seconds. If the burner has still not ignited, wait
for about 1 minute prior to repeating the ignition.
4) When using the range for the first time or after long period of non-usage, keep pressing the knob
inward for approximately 10 – 15 seconds after the burner has lit to ensure the gas valve has been
accurately primed.
5) Close the oven door slowly and adjust the burner accordingly to the desired temperature. If the
flame extinguishes for any reason, the safety valve will automatically shut off the gas supply to the
burner.
To re-light the burner, first turn the oven control knob to the
position, wait for at least 1 minute and
then repeat the lighting procedure.
Attention: the oven door becomes very hot during operation. Keep children away.
WARNING: When the oven temperature reaches the setting
temperature, the flame inside the oven will be small. Closing the door
at the minimum flame will cause the flame out accidentally. Please
make sure the small flame is going to be bigger before you close the
door (no more than 60s).

28
OVEN COOKING
Before introducing the food, preheat the oven to the desired temperature
For a correct preheating operation, it is advisable to remove the tray from the oven and introduce it
together with the food, when the oven has reached the desired temperature.
Check the cooking time and turn off the oven 5 minutes before the theoretical time to recuperate the
stored heat.
IGNITION OF THE BROIL BURNER
The broil burner generates the infra-red rays for broiling. To light the broil burner operate as follow:
To light the oven burner operate as follows:
1) Open the oven door to its full extent.
WARNING: Risk of explosion! The oven door must be open during this
operation.
2) Lightly press and turn the thermostat knob clockwise to the broil position.
3) Press the knob inward and hold to activate the electronic ignition. Note that you will hear a
“clicking” noise. Hold the knob pressed inward until the oven burner is lit. Once the oven burner is lit,
release the knob.
In case of power outage, you can manually light the burner by pressing the knob inward and
immediately approach a lighted match to the area “A” (see the diagram above).
Never continue this operation for more than 15 seconds. If the burner has still not ignited, wait
for about 1 minute prior to repeating the ignition.
4) When using the range for the first time or after long period of non-usage, keep pressing the knob
inward for approximately 10 – 15 seconds after the burner has lit to ensure the gas valve has been
accurately primed.
5) Slowly close the oven door. If the flame extinguishes for any reason, the safety valve will
automatically shut off the gas supply to the burner.
To re-light the burner, first turn the oven control knob to the
position, wait for at least 1 minute and
then repeat the lighting procedure.
Do always broil with oven door closed. Attention: the oven door becomes very hot during
operation. Keep children away.
A
OVEN LIGHT
The oven light is controlled by a push switch on the control panel.
The light can be used while cooking or cleaning the oven.
Check that power is disconnected from the electrical box before replacing the
light bulb. Allow the oven to cool completely, then unscrew the light cover and remove the light
bulb by unscrewing it from the socket. Replace with a 40-watt halogen bulb.
29
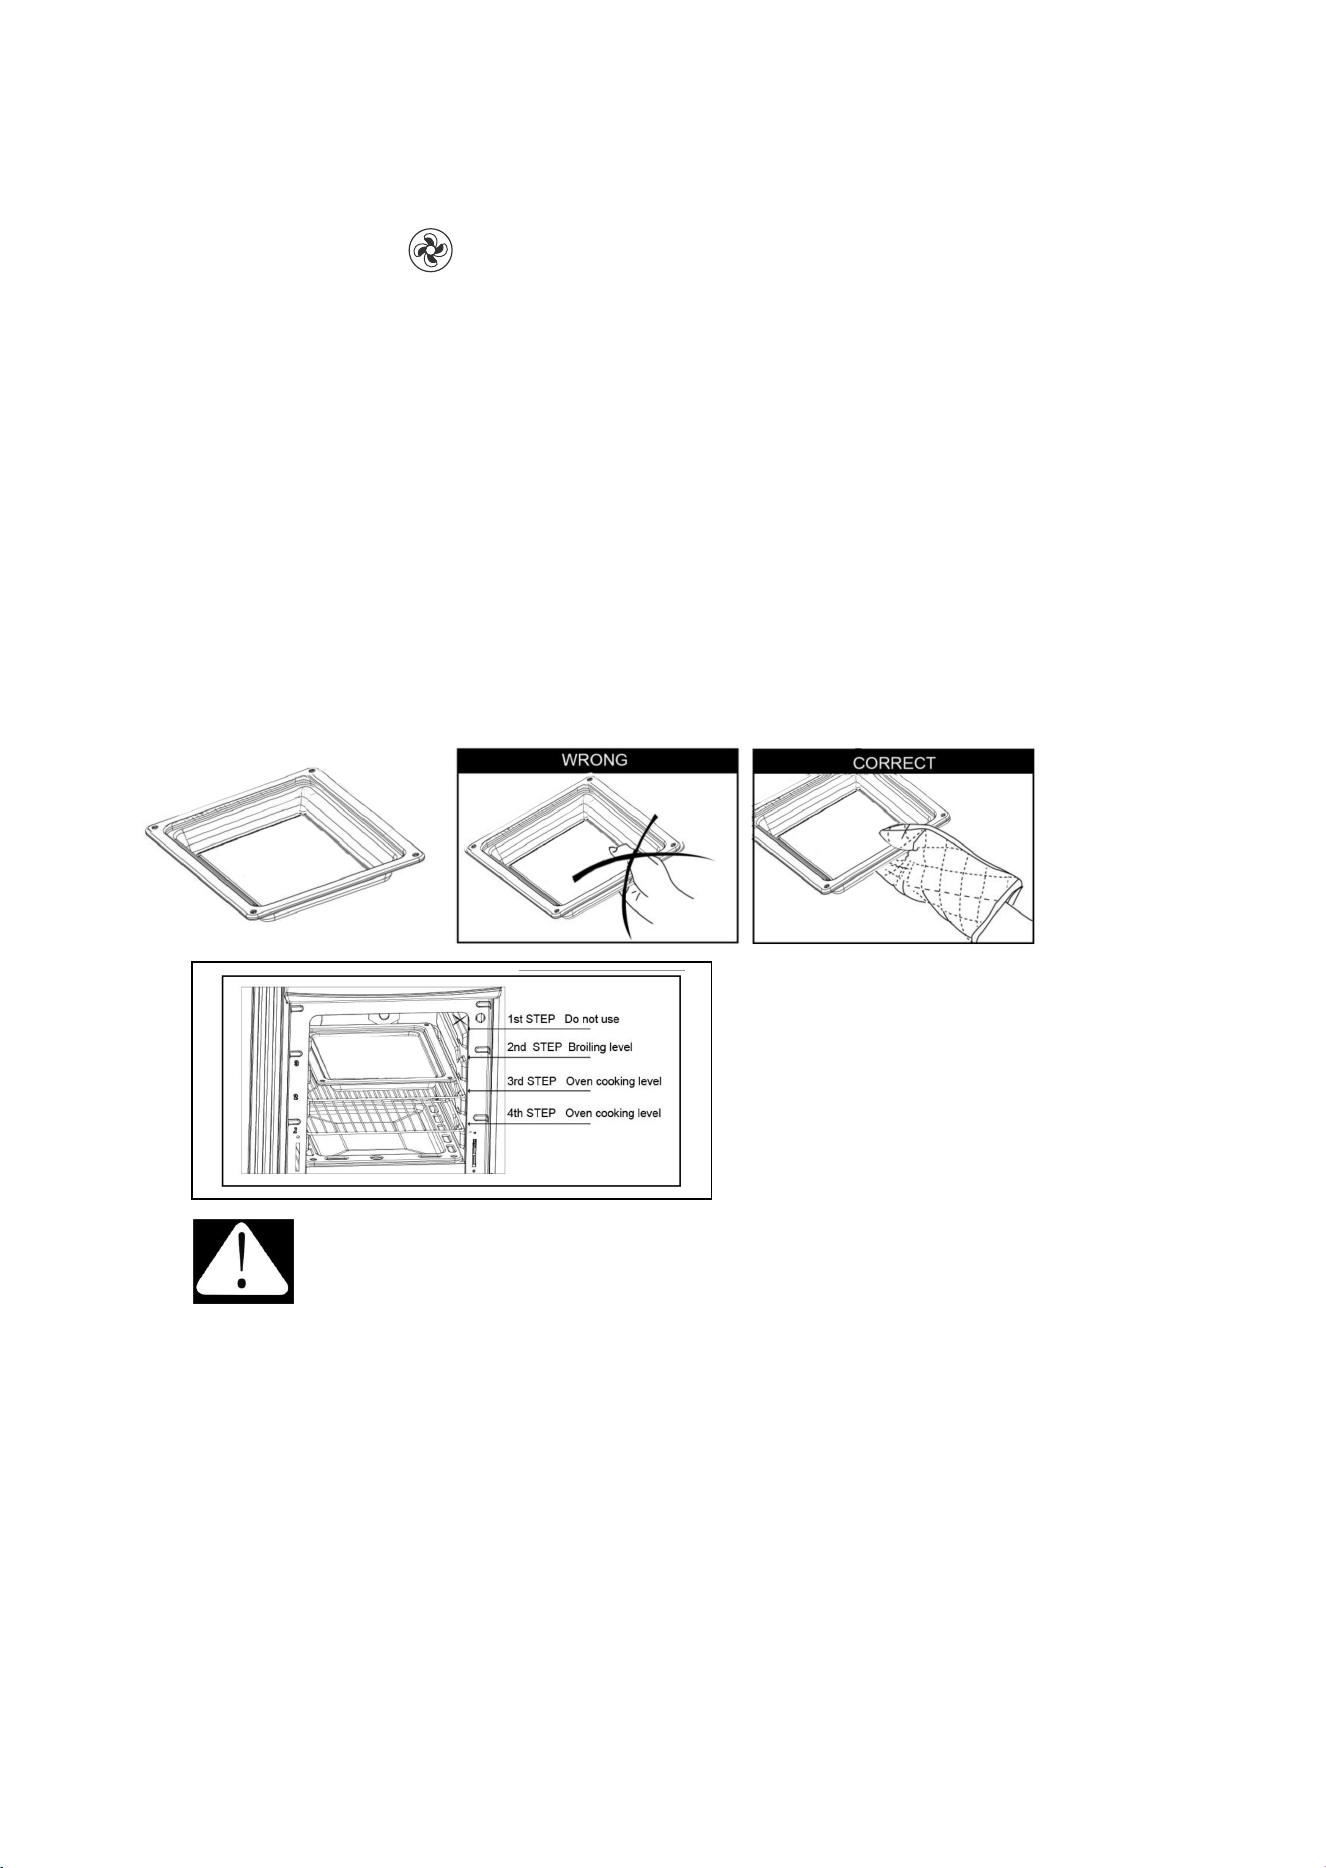
BROILING
Very important: the broil burner must always be used with the oven door closed.
Position the oven rack on the second level from the top
-Turn on the broil burner, as explained in the preceding paragraphs and let the broil burner preheat
for about 5 minutes with the door closed.
-Place the food to be cooked above the broiling pan.
-Introduce the broiling pan in the oven. The broiling pan should be placed above the shelf and it
should be centered with the broil burner.
WARNING!!
WARNING-VERY IMPORTANT NOTICE
Never obstruct the oven vent slots on the backsplash.
Do not broil without using the broiling pan.
Important: Use always suitable protective gloves when inserting / removing the broiling pan, shelves,
pans on other cooking utensils from the oven.
Attention: the range becomes very hot during operation
Attention: the oven door becomes very hot during operation
Keep Children away
Warning: The door is hot, make sure to use the handle
The appliance must be isolated from the gas supply piping system by closing its individual
manual shut-off valve during any pressure testing of the gas supply piping system at test
pressures equal to or less than 1/2 psi (3.5 kPa).
CONVECTION BAKE
Heat is transferred from the bake burners in the bottom of the oven cavity to the oven cavity itself.
The convection fan at the rear of the oven then circulates it. This convection process provides a
more even heat distribution throughout the oven cavity.
Using multiple racks is possible for large-batch baking. Convection cooking is faster, can be
done at
lower temperatures and provides more even temperatures than regular cooking.
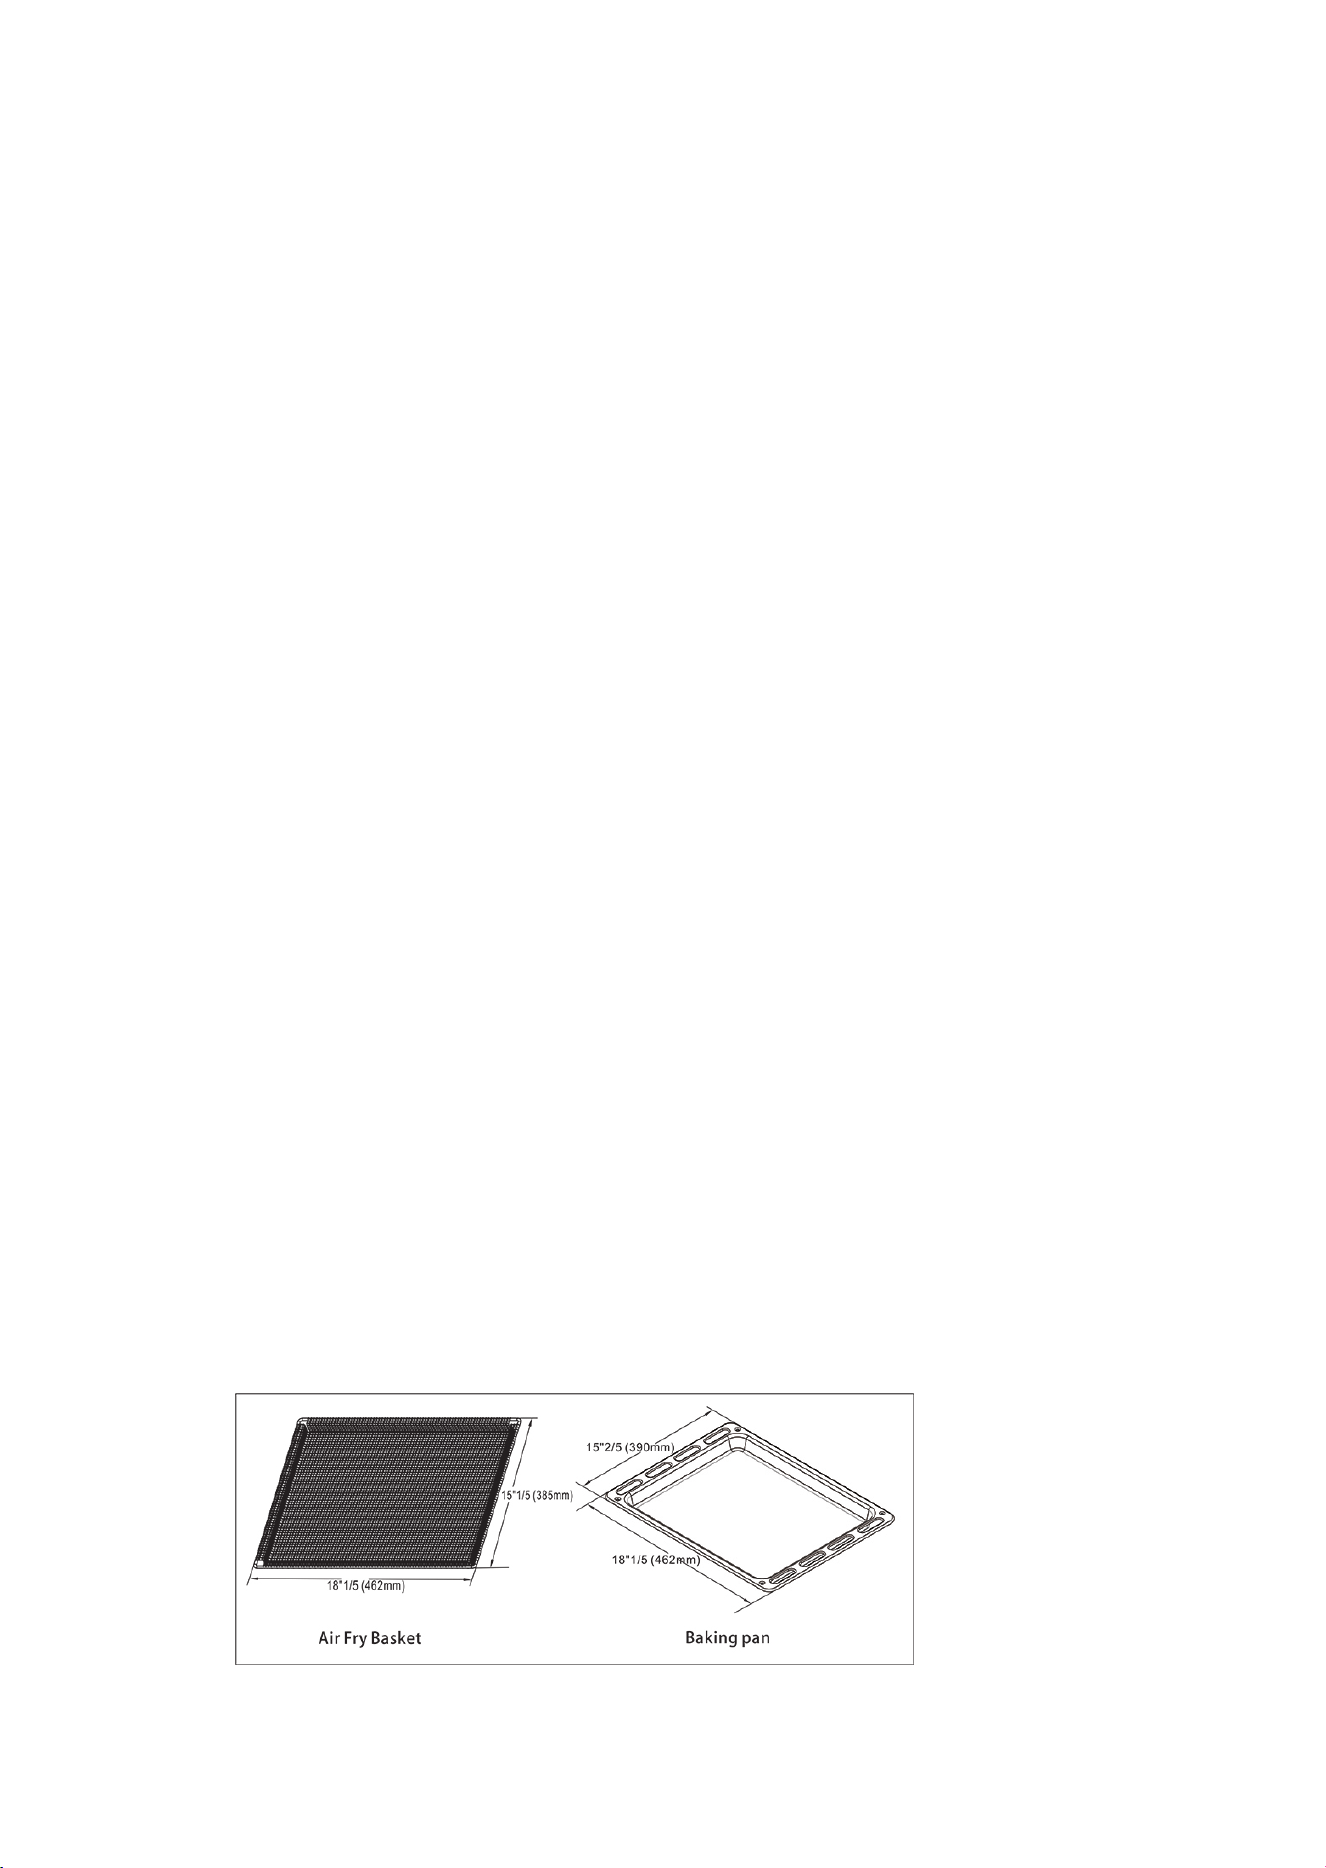
AIR FRYER (for FFSGS6272-24 FFSGS6290-24)
To cook your food to the perfect crispy-golden results, please follow the next steps:
Step 1: Move 1 oven rack to the lowest position to hold the baking pan.
Step 2: Place the baking pan on the bottom rack.
Step 3: Put your food onto the air fry basket and spread it evenly in a single layer.
Step 4: Insert the air fry rack in the middle position of the oven shelf, then close the door.
Step 5: Turn on the convection fan and set the oven temperature between 325℉ and 350℉,
and watch closely to the cooking food.
Tips:
1. Air Fry cooking requires little to no oil.
2. High-fat foods such as skin-on chicken wings, bacon or sausage can cause smoke
whenusing the air fry component. Please add parchment paper or aluminum foil to the
baking tray for easy cleaning purpose.
3. Make sure the baking pan is right underneath of the air fry basket, working as the drip
tray.
4. Check your food often, because air fry cooking requires less time than regular cooking.
5. Open a door or window to ensure the cooking area is well ventilated.
STEAM CLEAN: (for FFSGS6272-24 FFSGS6290-24)
Step 1: Put 1 cup (240mL) of distilled or filtered water into the baking pan.
Step 2: Heat the oven to 450℉ for 20-30 minutes.
Step 3: Once the steam clean has completed, turn off your oven.
Step 4: When it's cool, wipe grease and debris from your oven using a damp rag or sponge.
Concentrate on removing only debris and grease that comes off easily. The steam cleaning
process will loosen up the more stubborn, caked on grime.
Tips:
1.Using distilled or filtered water instead of water from your tap will keep your oven free of
water spots and mineral deposits.
2.Be sure to wait until your oven is completely cool before starting to clean it.
3.Make sure to clean any racks that are in the oven as well.
4.Do not leave the residual water in the oven for any length of time.
5.This step may get pretty messy, so be sure to put on some old clothes and keep a
garbage can nearby.
30
31
CARE & MAINTENANCE
GENERAL RECOMMENDATION
Important: Before any operation of cleaning and maintenance disconnect the appliance from
the electrical supply.
It is advisable to clean when the appliance is cold and especially for cleaning the enameled parts.、
Avoid leaving alkaline or acidic substances (lemon juice, vinegar, etc.) on the surfaces.
Avoid using cleaning products with a chlorine or acidic base.
The oven must always be cleaned after every use, using suitable products and keeping in mind that
its operation for 30 minutes on the highest temperature eliminates most grime reducing it to ashes.
ENAMELED PARTS
All the enameled parts must be cleaned with a sponge and soapy water only or other non-abrasive
products.
Dry preferably with a chamois leather.
If acid substances such as lemon juice, tomato conserve, vinegar etc. are left on the enamel for a
long time they will etch it, making it opaque.
STAINLESS STEEL ELEMENTS
Stainless steel parts must be rinsed with water and dried with a soft and clean cloth or with a chamois
leather.
For difficult dirt, use a specific non-abrasive product available commercially or a little hot vinegar.
Note: regular use could cause discoloring around the burners, because of the high flame
temperature.
INSIDE OF OVEN
This must be cleaned regularly. With the oven warm, wipe the inside walls with a cloth soaked in very
hot soapy water or another suitable product.
GAS VALVES
In the event of operating faults in the gas valves, shut the main gas supply and call the Service
Department.
32
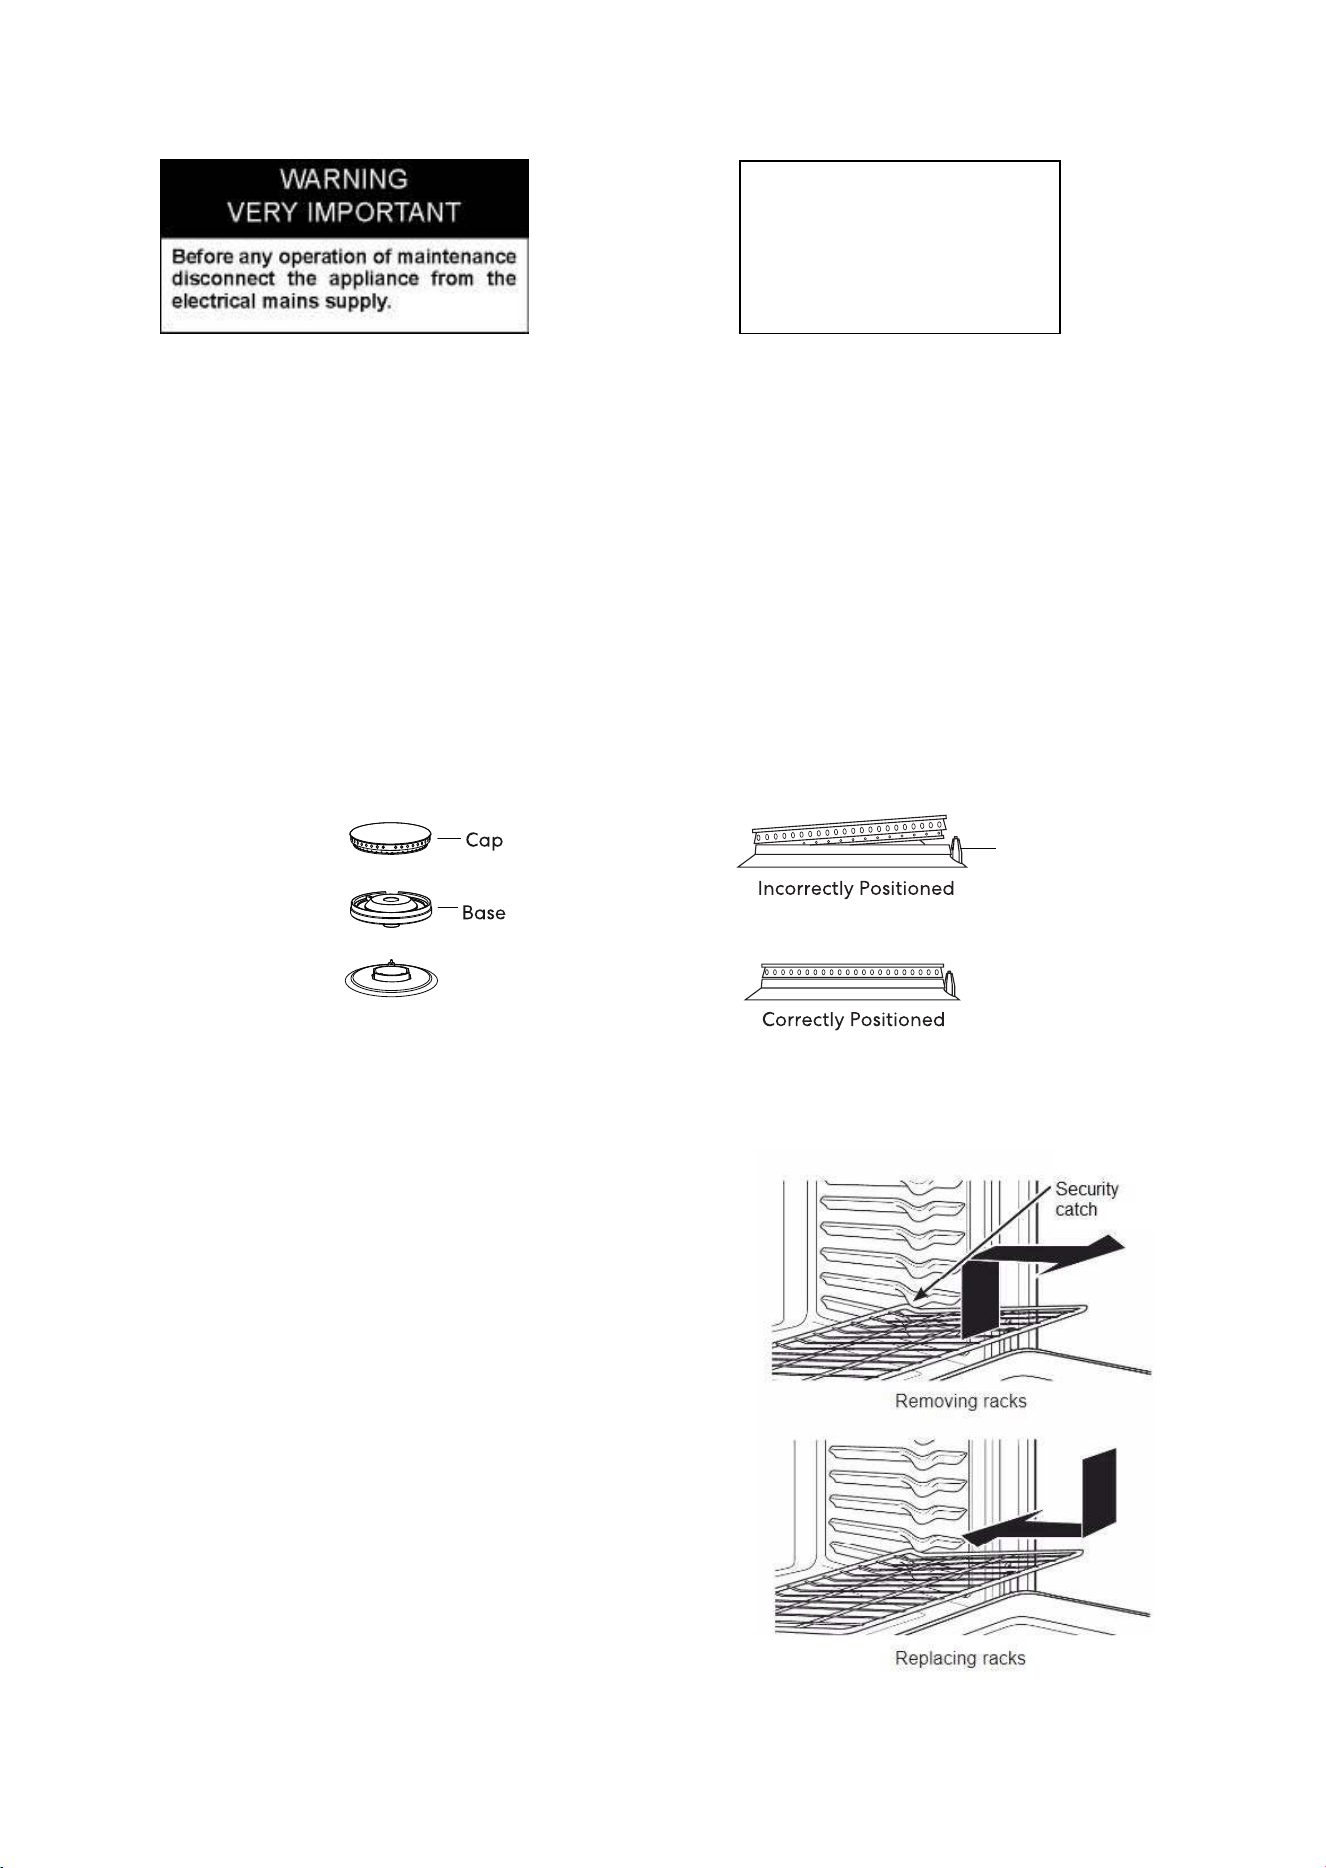
BURNERS AND GRIDS
✓ These parts can be removed and cleaned with appropriate products.
✓ After cleaning, the burners and their flame distributors must be well dried and correctly replaced.
✓ It is very important to check that the burner flame distributor and the cap has been correctly
positioned - failure to do so can cause serious problems.
✓ In appliances with electric ignition keep the electrode clean so that the sparks always strike.
✓ Note: To avoid damage to the electric ignition do not use it when the burners are not in
place.
CORRECT REPLACEMENT OF THE BURNERS
It is very important to check that the burner base and the cap have been correctly positioned.
Failure to do so can cause serious problems.
Check that the electrode is always clean to ensure trouble-free sparking.
The ignition plug must be cleaned very carefully.
Do not use steam jet cleaners
because the humidity could
infiltrate into the appliance
making it dangerous.
OVEN RACK INSTALLATION AND
REMOVAL
The oven racks are provided with a safety catch to
prevent accidental extraction.
They must be inserted as shown.
To pull them out remove the rack in the reverse order.
Electrode
3
3
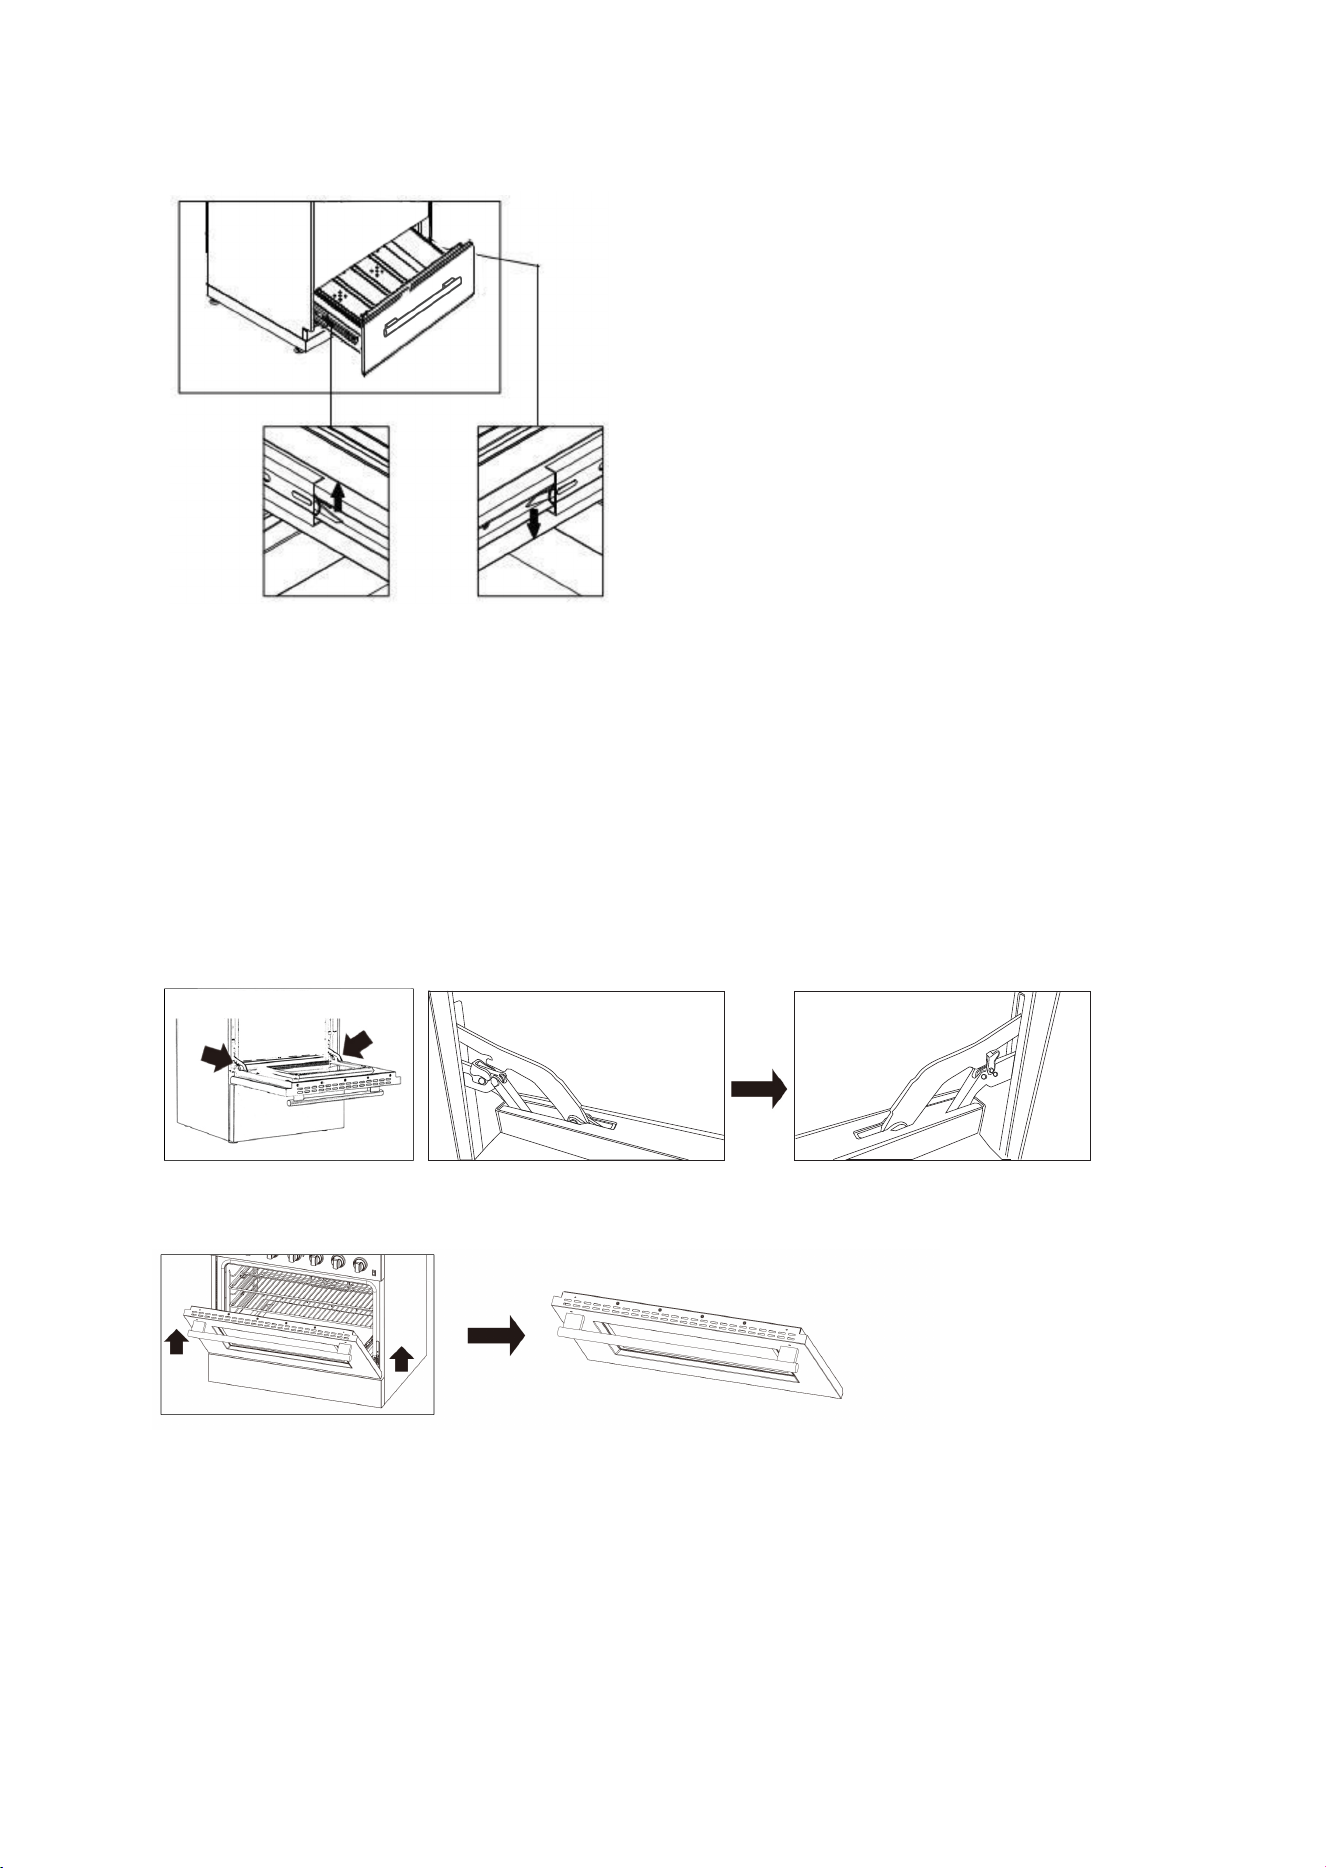
REMOVABLE STORAGE DRAWER
① Lift the left small hook upward, at the
same time, push the right small hook
downward.(see the picture )
②Pull the drawer out.
③To replace the drawer, align the
drawer with the rails and push inward.
REMOVING THE OVEN DOOR
To facilitate oven cleaning, it is possible to remove the door. Please follow the instructions carefully:
REMOVING THE OVEN DOOR
– The oven door can easily be removed as follows:
– Open the door to the full extends.
– Lift the left and right hooks on the hinge.
– Hold the door as shown in the figure.
– Gently close the door and lift the door with two hands when the hooks touch the door.
– Set the door on a soft flat surface.
– To replace the door, repeat the above steps in reverse order.
Step 1. Open the original door.
Step 2. Let the original door's hinge hooks touch the door.
Step 3. Pull the original door outside of the oven.
Do not store flammable material in the oven or in the bottom drawer.
REPLACING THE OVEN LIGHT
Let the oven cavity and broil burner cool down.
Switch off the electric supply.
Remove the protective cover.
Unscrew and replace the bulb with a new one suitable for high temperature (200°~ 500°F) having
the same specifications: 120V 60Hz, 15W, E14.
Replace the protective cover.
NOTE: Oven bulb replacement is not covered by your guarantee.
34
PROBLEMS WITH YOUR GAS RANGE?
You can solve many common appliance problems easily, saving you the cost of a possible service
call. Try the suggestions below to see if you can solve the problem before calling the servicer.
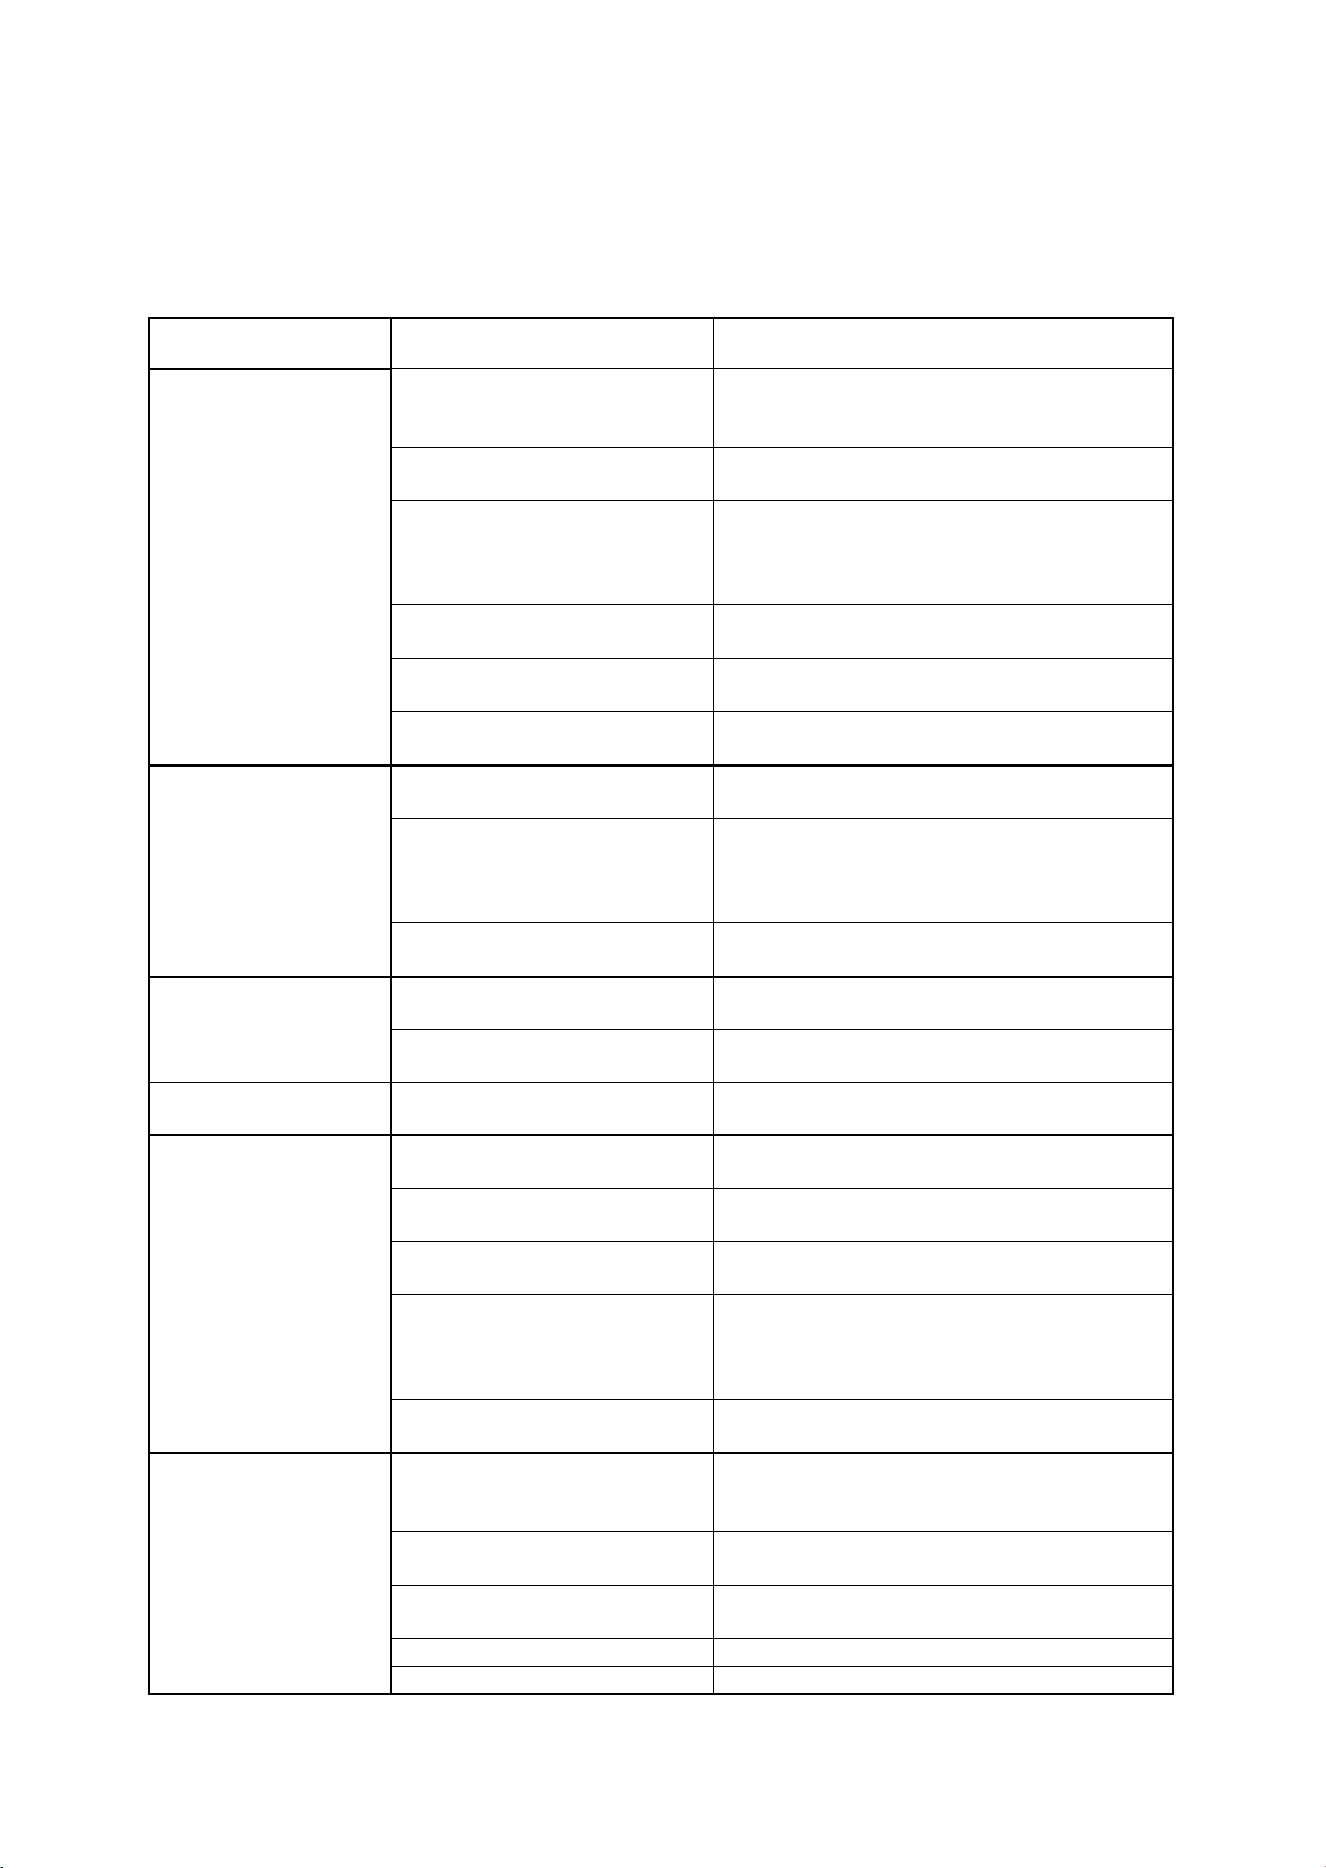
TROUBLESHOOTING GUIDE
FIND YOUR
PROBLEM HERE
POSSIBLE CAUSE
HOW TO FIX IT
Surface burners do
not light.
Surface control has not been
completely turned to the ON
position.
Push in and turn control to the ON position
until burner ignites, then turn control to
desired flame setting.
Burner ports are clogged.
Use a small gauge wire or needle to open
ports.
Burners not positioned
properly.
Verify that the burners are positioned
properly on the orifice hoods and the
burners are sitting flat on the burner support
with tabs engaged in slots.
Range not set for appropriate
gas input.
See range conversion section of installation
manual.
Pilot lights won’t light due to
power failure.
Light pilots manually.
Range power cord is
disconnected from the outlet.
Be sure power cord is plugged into
grounded outlet.
Flame burns halfway
round.
Burner ports are clogged.
Use a small gauge wire or needle to open
ports.
Moisture is present after
cleaning.
Lightly fan the flame and allow burner to
operate until flame is full. OR dry burners
thoroughly following instructions in range
“Cleaning” section.
Range is not set for
appropriate gas input.
See range conversion section of installation
manual.
Flame is orange.
Dust particles in main line.
Allow burner to operate for a few minutes
until flame turns blue.
Range is not set for
appropriate gas input.
See range conversion section of installation
manual.
Oven light does not
work.
Burned out or loose bulb
Tighten or replace oven light bulb.
Oven or broiler does
not heat.
Range is not set for
appropriate gas input.
See range conversion section of installation
manual.
Temperature control not set
properly.
Make sure temperature control is set at
desired temperature.
Pilot light will not light due to
power failure.
Light pilots manually.
House fuse has blown or
circuit breaker has tripped.
Check/reset circuit breaker and/or replace
fuse. Do not increase fuse capacity. If the
problem is a circuit overload, have it
corrected by a qualified electrician.
Range cord is disconnected
from outlet.
Be sure the power cord is plugged into a
grounded outlet.
Oven temperature is
inaccurate.
Oven capillary bulb not
positioned properly.
Verify that capillary bulb is snapped in clips
straight and not touching sides or coated
with oven cleaner or food.
Temperature control not set
properly.
Make sure the temperature control knob is
set at the desired temperature.
Improper use of foil.
Keep foil clear of holes in oven bottom and
off of oven sides.
Vent blocked.
Keep vent on backguard clear.
Range not set for appropriate
See range conversion section of installation
35
gas input.
manual.
Smoke or odor on
initial oven operation.
This is normal.
Range is not level.
Poor installation.
Place oven rack in center of oven. Place a
level on the rack. Adjust leveling legs.
Weak or unstable floor.
Be sure floor is level and can adequately
support range. Contact carpenter to correct
sagging or sloping floor.
Kitchen cabinet misalignment
may make range appear to be
unleveled.
Be sure cabinets are square and have
sufficient room for range clearance. Contact
cabinet maker to correct problem
Oven smokes
excessively.
Meat too close to broiler
burner.
Reposition the broiler pan to provide more
clearance between the meat and the broiler
burner
Meat not prepared properly.
Remove excess fat from meat.
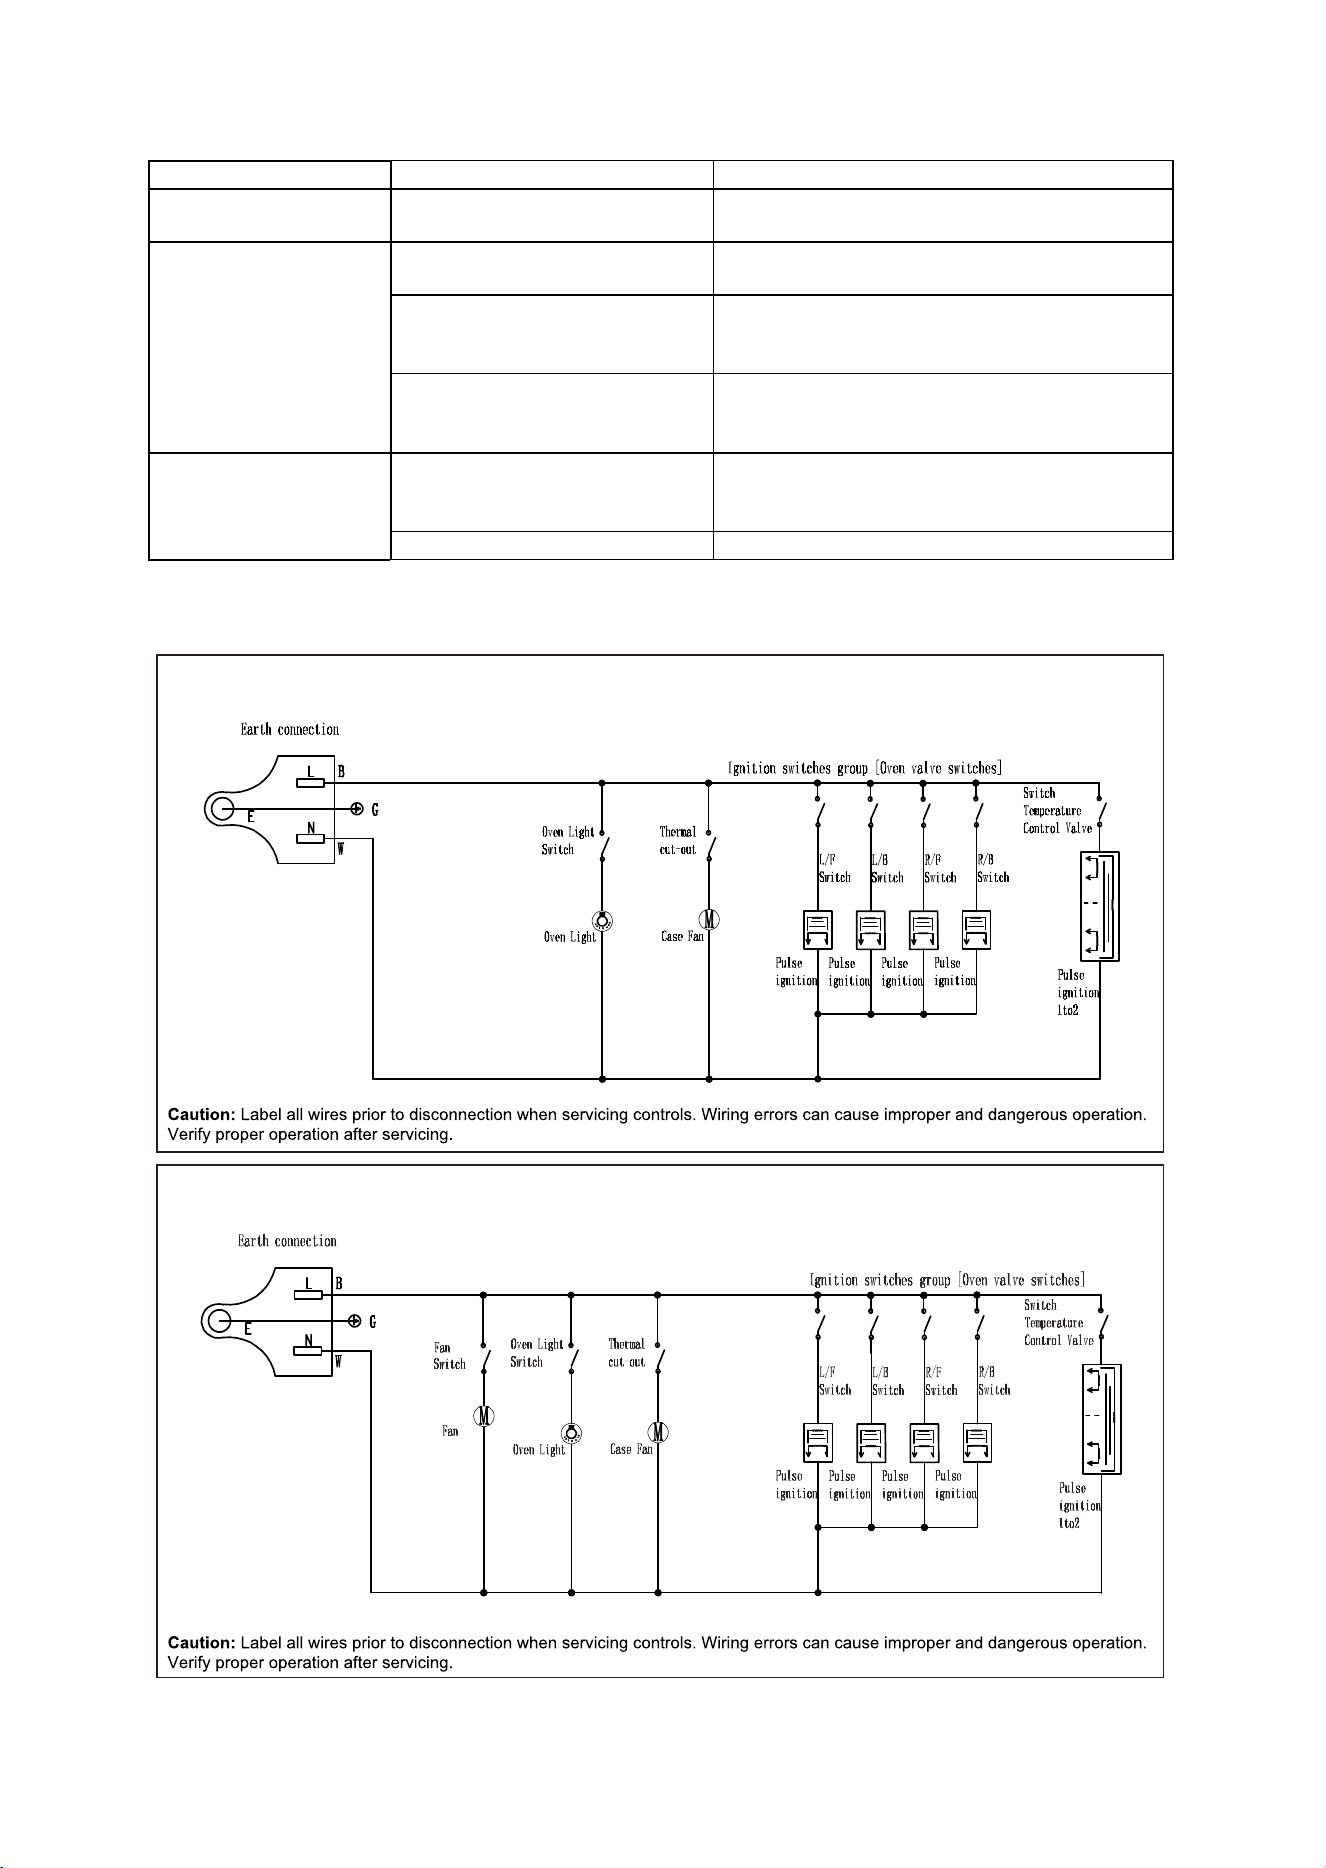
Wiring Diagram
FFSGS6265-20
FFSGS6272-24 FFSGS6290-24