Loading ...
Loading ...
Loading ...

6 INSTALLATION Of ThE APPLIANCE
Cabinet requ
irement
This model is designed to fit into a 900mm wide gap
between standard kitchen cabinets. The appliance
integrates with the kitchen cabinets by matching the
height, depth and kick panel. The cooker may also be
installed at the end of a line of benches or with a free
space either side. In addition, a slot-in type installation
is catered for allowing a continuous cabinetry kick
panel to be used.
WARNING
• The cooker must be installed and serviced only
by an authorised person.
• A Certificate of Compliance MUST be supplied to
be kept by the customer.
• The packing materials must be removed before you
install the cooker.
• The surrounding kitchen cabinets must be able
to withstand 85°C. Electrolux WILL NOT accept
responsibility for damage caused by installation
into kitchen cabinets which cannot withstand 85°C.
• The vents, openings and air spaces MUST NOT
be blocked.
• Two anti-tilt brackets are supplied and stored in the
base of the packaging
• The anti-tilt brackets and chain or front stops MUST
be installed to avoid accidental tipping.
• You MUST NOT lift or pull the cooker by the
door handle.
• The cooker MUST be checked every five years.
• If the supply cord is damaged,it must be replaced
by the manufacturer, its service agent or similarly
qualified persons in order to avoid a hazard.
• The appliance must not be installed behind a
decorative door in order to avoid overheating.
• Due to the weight (95-100kg) and size of the
cooker, 2 persons are required to install it.
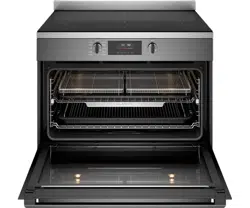
Dimensions
600mm minimum
vertical clearance
from combustible
surfaces
Induction hob 906mm
(adjustable 906-926mm)
600mm
895mm
60mm
Splashback
The splashback is secured to the back of the cooker.
REMOVE the splashback before installing the feet.
Undo this screw
to remove the
splashback.
Re-attach the
screw afterwards
INSTALLATION OF THE APPLIANCE
Loading ...
Loading ...
Loading ...