
Loading ...
Loading ...
Loading ...
Installation Procedure en-us
9
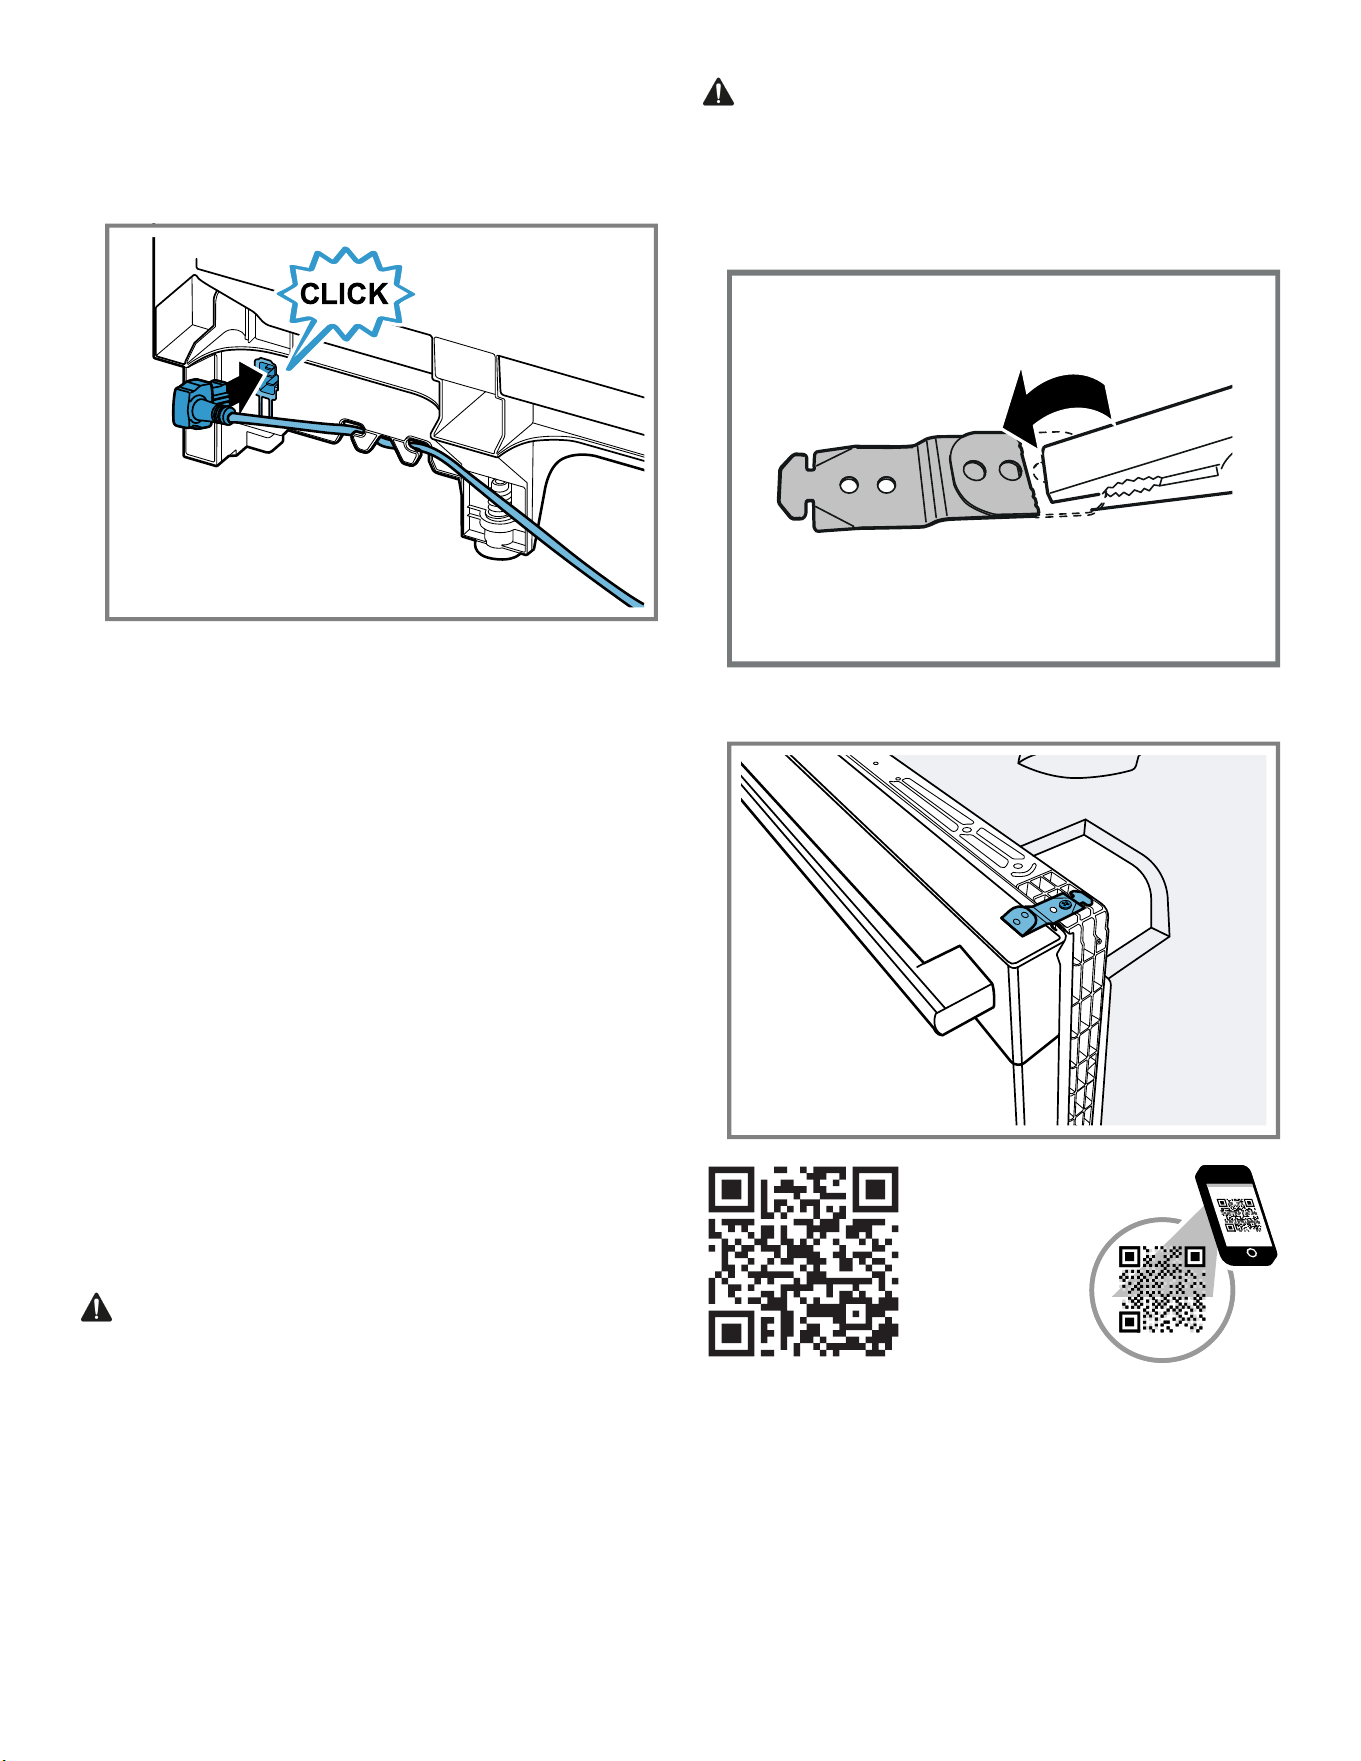
4.4 Attach Power Cord
▶ Plug the end of the supply cord into the back of the
dishwasher.
‒ Be sure to push it all the way in until fully seated.
The outlet for the power supply cord should be located
in a cabinet or wall adjacent to the dishwasher cabinet.
Do not plug dishwasher into the wall outlet until all the
steps of the installation are complete.
Notes
¡ Only use the included power cord. If cord is missing
order kit SMZPC002UC through Customer Service.
¡ If you require a permanent wiring connection, order kit
junction box accessory kit SMZPCJB1UC.
¡ If local electrical codes require clips to secure the power
cord wire to the dishwasher, use accessory kit
SMZEPCC1UC.
4.5 Mounting Brackets
Before installing the supplied mounting brackets, decide
which method of securing the dishwasher into its
enclosure will be used, top (wood or porous material) or
side (stone or solid surface). Once the mounting brackets
are installed on the dishwasher, removing them is difficult
and will damage the mounting brackets and the
dishwasher. If you have a Fully Integrated Panel, do not
attach mounting brackets until after attaching the panel to
the door.
WARNING
Avoid tip over hazard
▶ Do not use the dishwasher until it is completely
installed. When opening the door on an uninstalled
dishwasher, carefully open the door while supporting
the rear of the unit. Failure to follow this warning can
result in serious injury.
Top Mount
Top Mount is used for counter tops made of wood or other
materials that can be easily drilled.
CAUTION
Avoid sharp edges
▶ Do not break the mounting brackets; causes sharp
edges.
1. Grasp mounting bracket with pliers and fold bracket at
the perforation over onto itself.
2. Attach mounting brackets to the frame with included
3/4" (19mm) screws.
Side Mount
Side Mount is used for counter tops made of marble,
granite, or other solid surface material that cannot be
easily drilled.
Loading ...
Loading ...
Loading ...