Loading ...
Loading ...
Loading ...
Dishwasher Connection en-us
13
2. Connect the dishwasher water supply line to the water
shut off valve.
‒ Install a shut off valve if one isn’t already in the
supply line.
‒ Make sure there are no sharp bends or kinks in the
water line that might restrict water flow.
3. Properly tighten all water connections.
4. After all connections are made, turn on the hot water
and check for leaks.
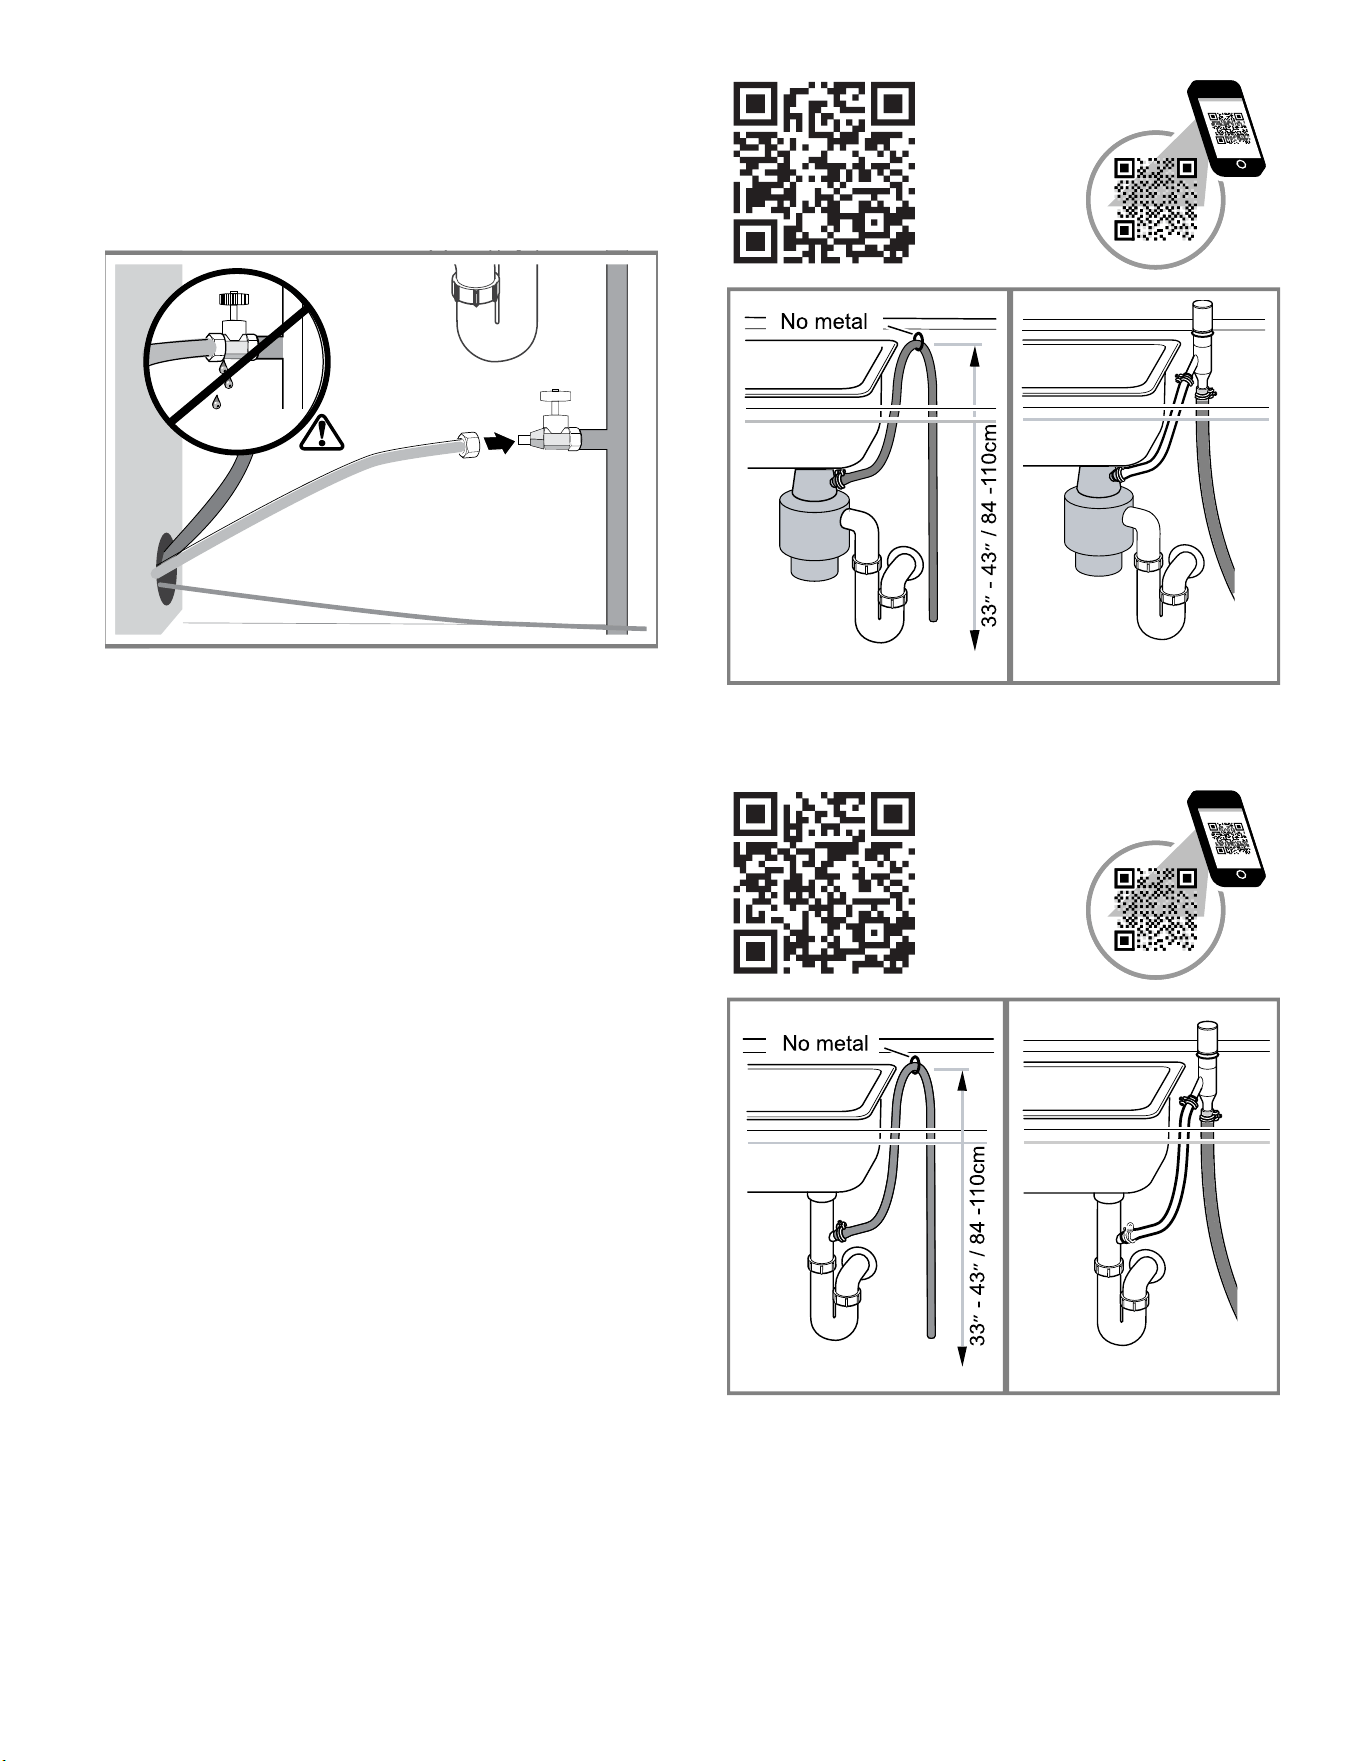
5.2 Installing the Drain Connection
The drain hose must be installed with either a high loop or
an air gap.
NOTICE:
Proper drain hose installation
▶ The dishwasher drain hose must be installed with a
portion of it at least 33” (84 cm) off the floor; otherwise
the dishwasher may not drain properly.
Remove garbage disposal plug
▶ If the dishwasher drain hose will be connected to a
garbage disposal connection, first remove the plug from
the disposal connection.
Note
Important notes for drain connection:
¡ If local ordinance require an air gap, install it according
to the manufacturer’s instructions.
¡ The drain hose length can be extended if necessary.
Use kit #SGZ1010UC. The maximum length of the drain
hose, including the hose leading to the air gap, is 150″
(380 cm).
1. Place hose clamp around end of drain hose BEFORE
connecting to the plumbing.
2. If you have a garbage disposal, connect the drain hose
to the garbage disposal with either a high loop or an air
gap.
3. If you do not have a garbage disposal, connect the
drain hose to the drain connection with either a high
loop or an air gap.
Loading ...
Loading ...
Loading ...