CCST3506022TLW
CCST3506022TLX
ES..................................................................Page 1
POR...............................................................Page 13
EN...................................................................Page 25
CCST3506022TLW
CCST3506022TLX
1

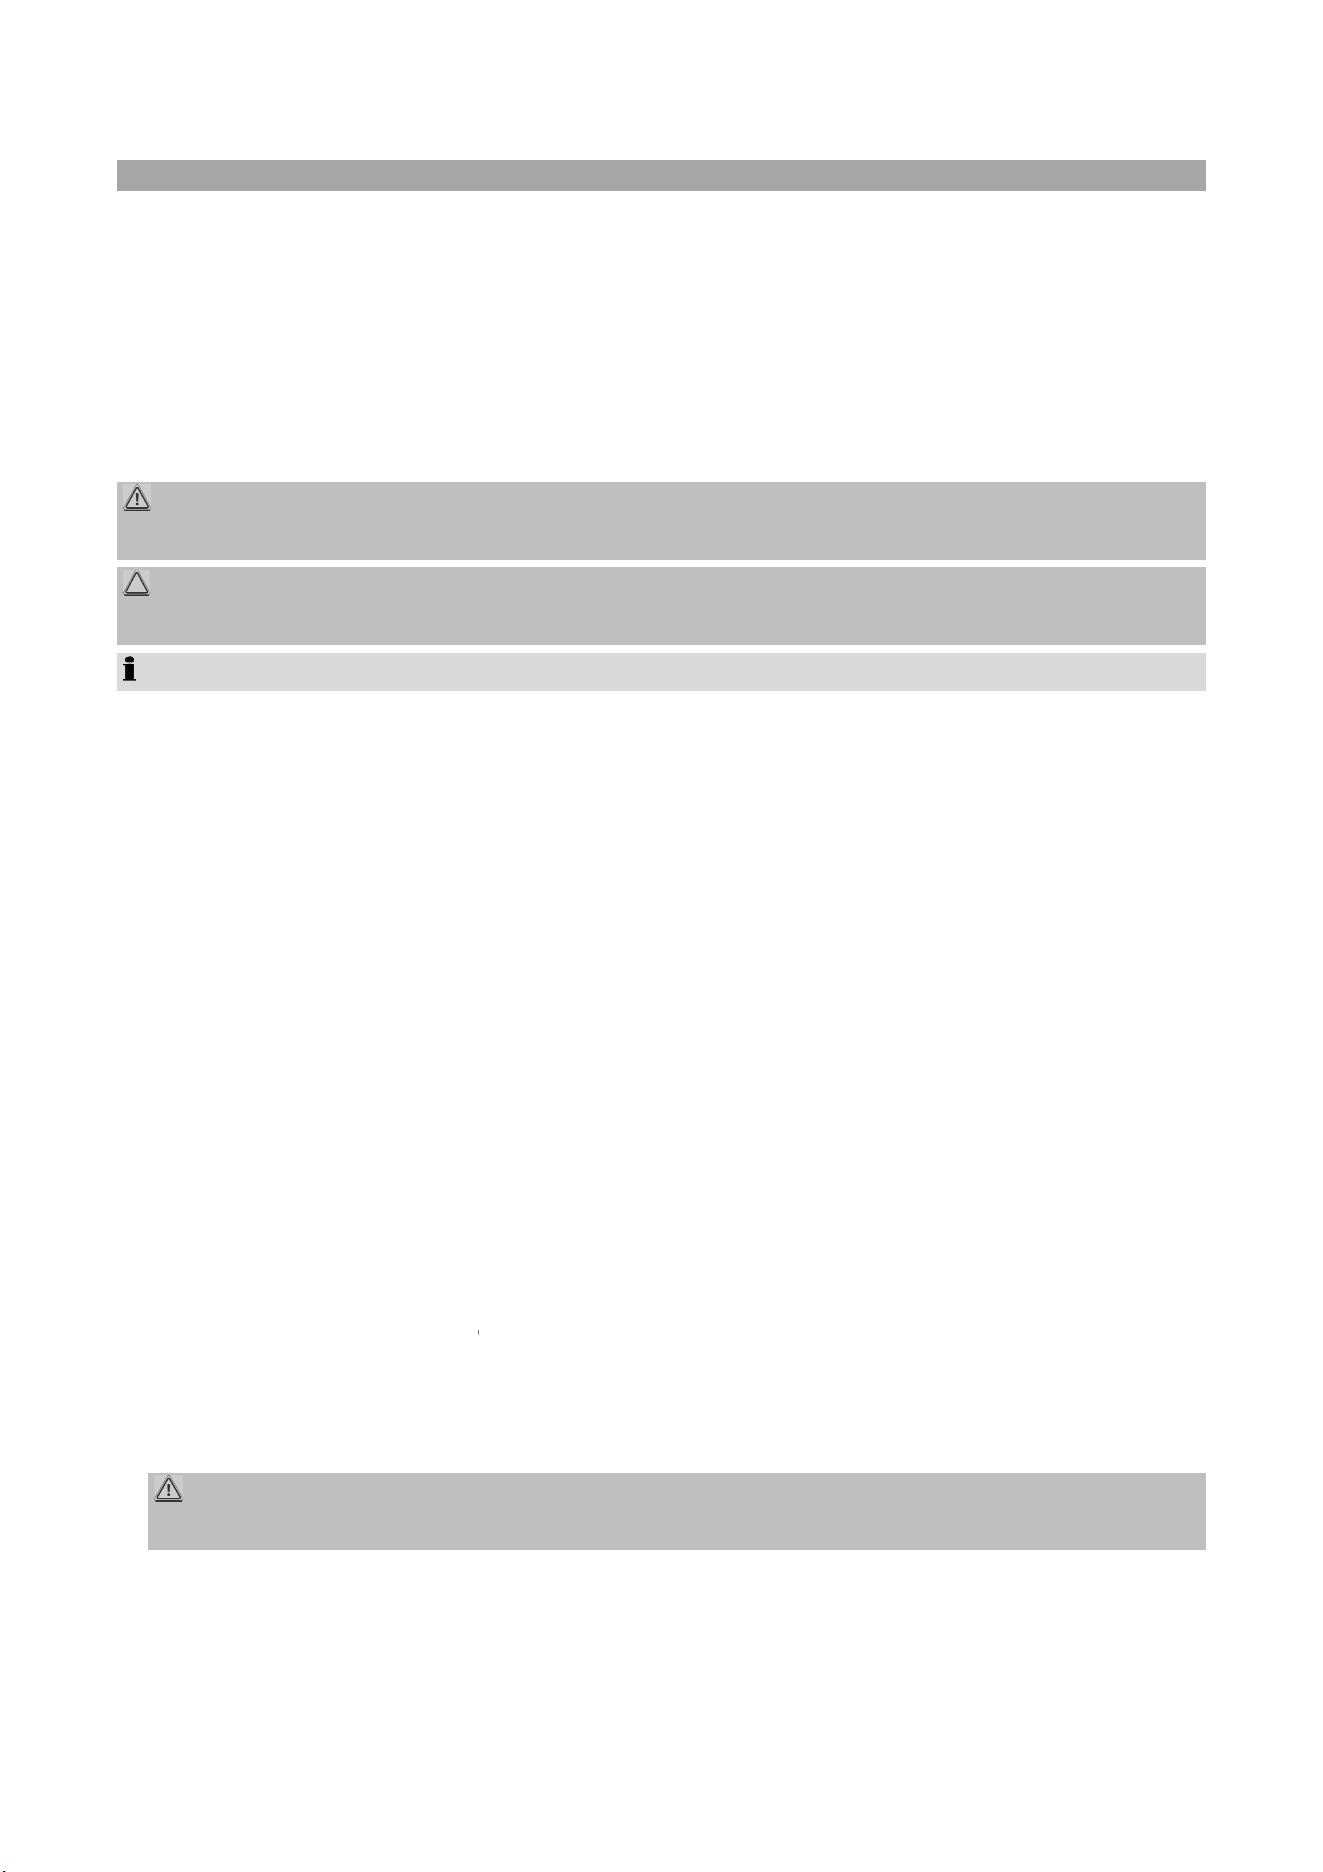
Especificaciones de la lámpara: LED, 1 x 1,5 W

CCST3506022TLW / CCST3506022TLX
6.3KGS
1x1,5
66,5

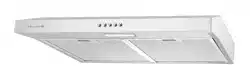
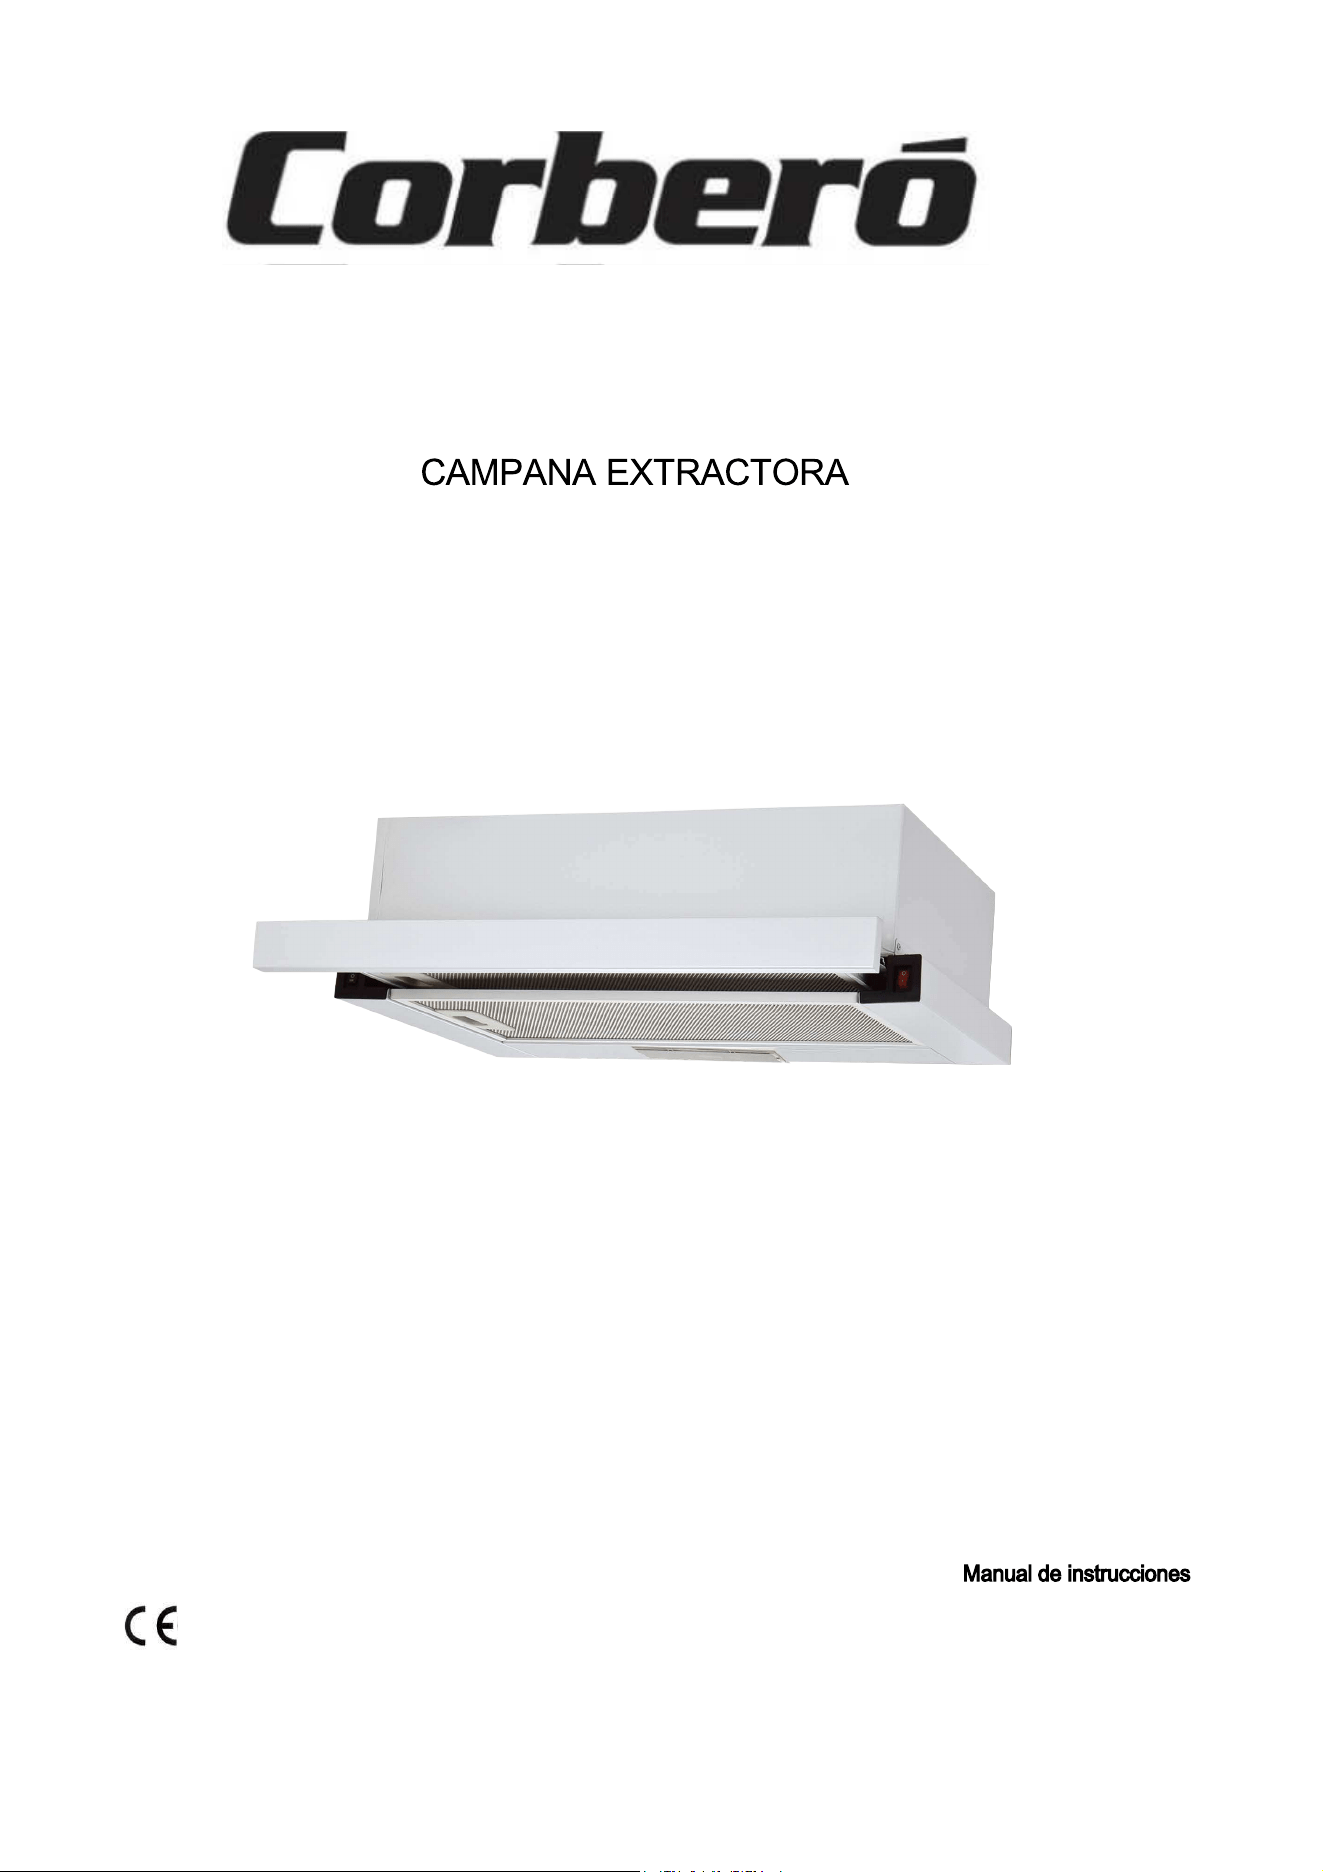
EXAUSTOR
CCST3506022TLW
CCST3506022TLX
Manual de Instruções
13
14
CUIDADO:
Este símbolo refere-se a possíveis perigos no aparelho ou outros objetos.
ATENÇÃO:
Este símbolo avisa sobre riscos de saúde e indica possíveis riscos de ferimentos.
PORTUGUÊS
Introdução
Obrigado por escolher o nosso produto. Esperamos que goste de usar o aparelho.
Símbolos utilizados neste manual de instruções
As informações importantes para a sua segurança estão devidamente assinaladas. É essencial cumprir
estas instruções para evitar acidentes e evitar danos no aparelho:
Informações gerais
Leia atentamente o manual de instruções antes de utilizar o aparelho e guarde as instruções e o recibo.
Se entregar o aparelho a outra pessoa, também deve entregar o manual de instruções.
•
Este aparelho foi concebido exclusivamente para uso privado e para a finalidade pretendida. Não se
destina a uso comercial.
•
Só deve ser utilizado conforme descrito no manual do utilizador. Não o utilize para qualquer outro
fim. Qualquer outro uso será considerado contrário ao uso pretendido e poderá causar danos
materiais ou danos pessoais.
•
O aparelho só pode ser utilizado quando estiver corretamente instalado.
•
Não usar ao ar livre. Manter afastado de fontes de calor, luz solar direta e humidade.
Não tocar com as mãos molhadas.
•
Não utilize o aparelho sem vigilância.
•
Quando não estiver em uso, por exemplo, para limpeza, manutenção do utilizador ou quando
houver uma falha, desligue o aparelho e, se possível, desligue a ficha (puxe pela própria ficha e
não pelo cabo) ou desligue o fusível.
•
O aparelho e, se possível, o cabo elétrico devem ser inspecionados regularmente para detetar
danos. Se for encontrado algum dano, o aparelho não deve ser utilizado.
•
Por razões de segurança, é proibido modificar ou adulterar o aparelho.
•
Para garantir a segurança das crianças, todos os elementos da embalagem devem ser mantidos fora
do seu alcance (sacos plásticos, caixas, peças de poliestireno, etc.).
ATENÇÃO:
Não permita que crianças pequenas brinquem com o saco plástico. Existe o perigo de asfixia!
NOTA: Destaca dicas e informações.

15
Informações especiais de segurança
•
Deve haver ventilação adequada na cozinha quando o exaustor é utilizado em conjunto com aparelhos a
gás ou outros aparelhos que queimem combustível.
•
Atenção: As superfícies acessíveis do exaustor podem atingir altas temperaturas quando utilizadas
em conjunto com aparelhos de cozinha.
•
Não utilize chamas abertas debaixo do exaustor. Frite alimentos apenas sob supervisão constante para
evitar qualquer risco de incêndio.
•
Ligue o fogão apenas quando houver tachos ou frigideiras no fogão. Existe o risco de incêndio! O filtro
pode danificar-se.
•
Monitorize constantemente o fogão enquanto fritar os alimentos, pois o sobreaquecimento do óleo
pode ser um risco de incêndio.
•
Não verifique o estado dos filtros enquanto o exaustor estiver em funcionamento.
•
NUNCA utilize o exaustor sem o filtro de alumínio anti gorduras.
•
Quando o exaustor e outros aparelhos elétricos estiverem em funcionamento ao mesmo tempo, a
pressão na divisão não deve exceder 4 Pa (4x10⁻⁵ bar).
•
Certifique-se de que cumpre os regulamentos relativos à evacuação de ar proveniente do exaustor.
•
Siga as instruções de instalação. (Consulte a secção "Instalação").
•
Este eletrodoméstico pode ser utilizado por crianças a partir dos 8 anos de idade ou por pessoas com
capacidades físicas, sensoriais ou mentais reduzidas ou com falta de experiência e conhecimento, se
lhes tiverem sido dadas instruções relativas ao uso do aparelho de uma forma segura e se
compreenderem os perigos envolvidos.
•
Deve garantir que as crianças não brinquem com o forno.
•
As crianças não devem ser autorizadas a limpar ou fazer a manutenção deste eletrodoméstico a menos
que tenham pelo menos 8 anos e sejam supervisionadas por um adulto.
•
O exaustor deve ser limpo regularmente. (Siga as instruções na secção "Limpeza e manutenção"). Há
risco de incêndio se a limpeza não for feita de acordo com as instruções.
•
Não tente reparar este aparelho sozinho. Para esse efeito, contacte sempre um técnico autorizado.
Se o cabo de alimentação estiver danificado, deve ser substituído pelo fabricante ou pelo seu serviço
técnico autorizado, a fim de evitar qualquer risco.
1.
Retire o aparelho da sua
embalagem.
Desembalar o aparelho
2.
Remover todo o material de embalagem, como sacos plásticos, material de enchimento, braçadeiras e
embalagens de papelão.
3.
Para evitar perigos, inspecione o aparelho para verificar se há danos no transporte.
4.
Se houver algum dano, não opere o aparelho. Contacte o seu distribuidor.
16
a
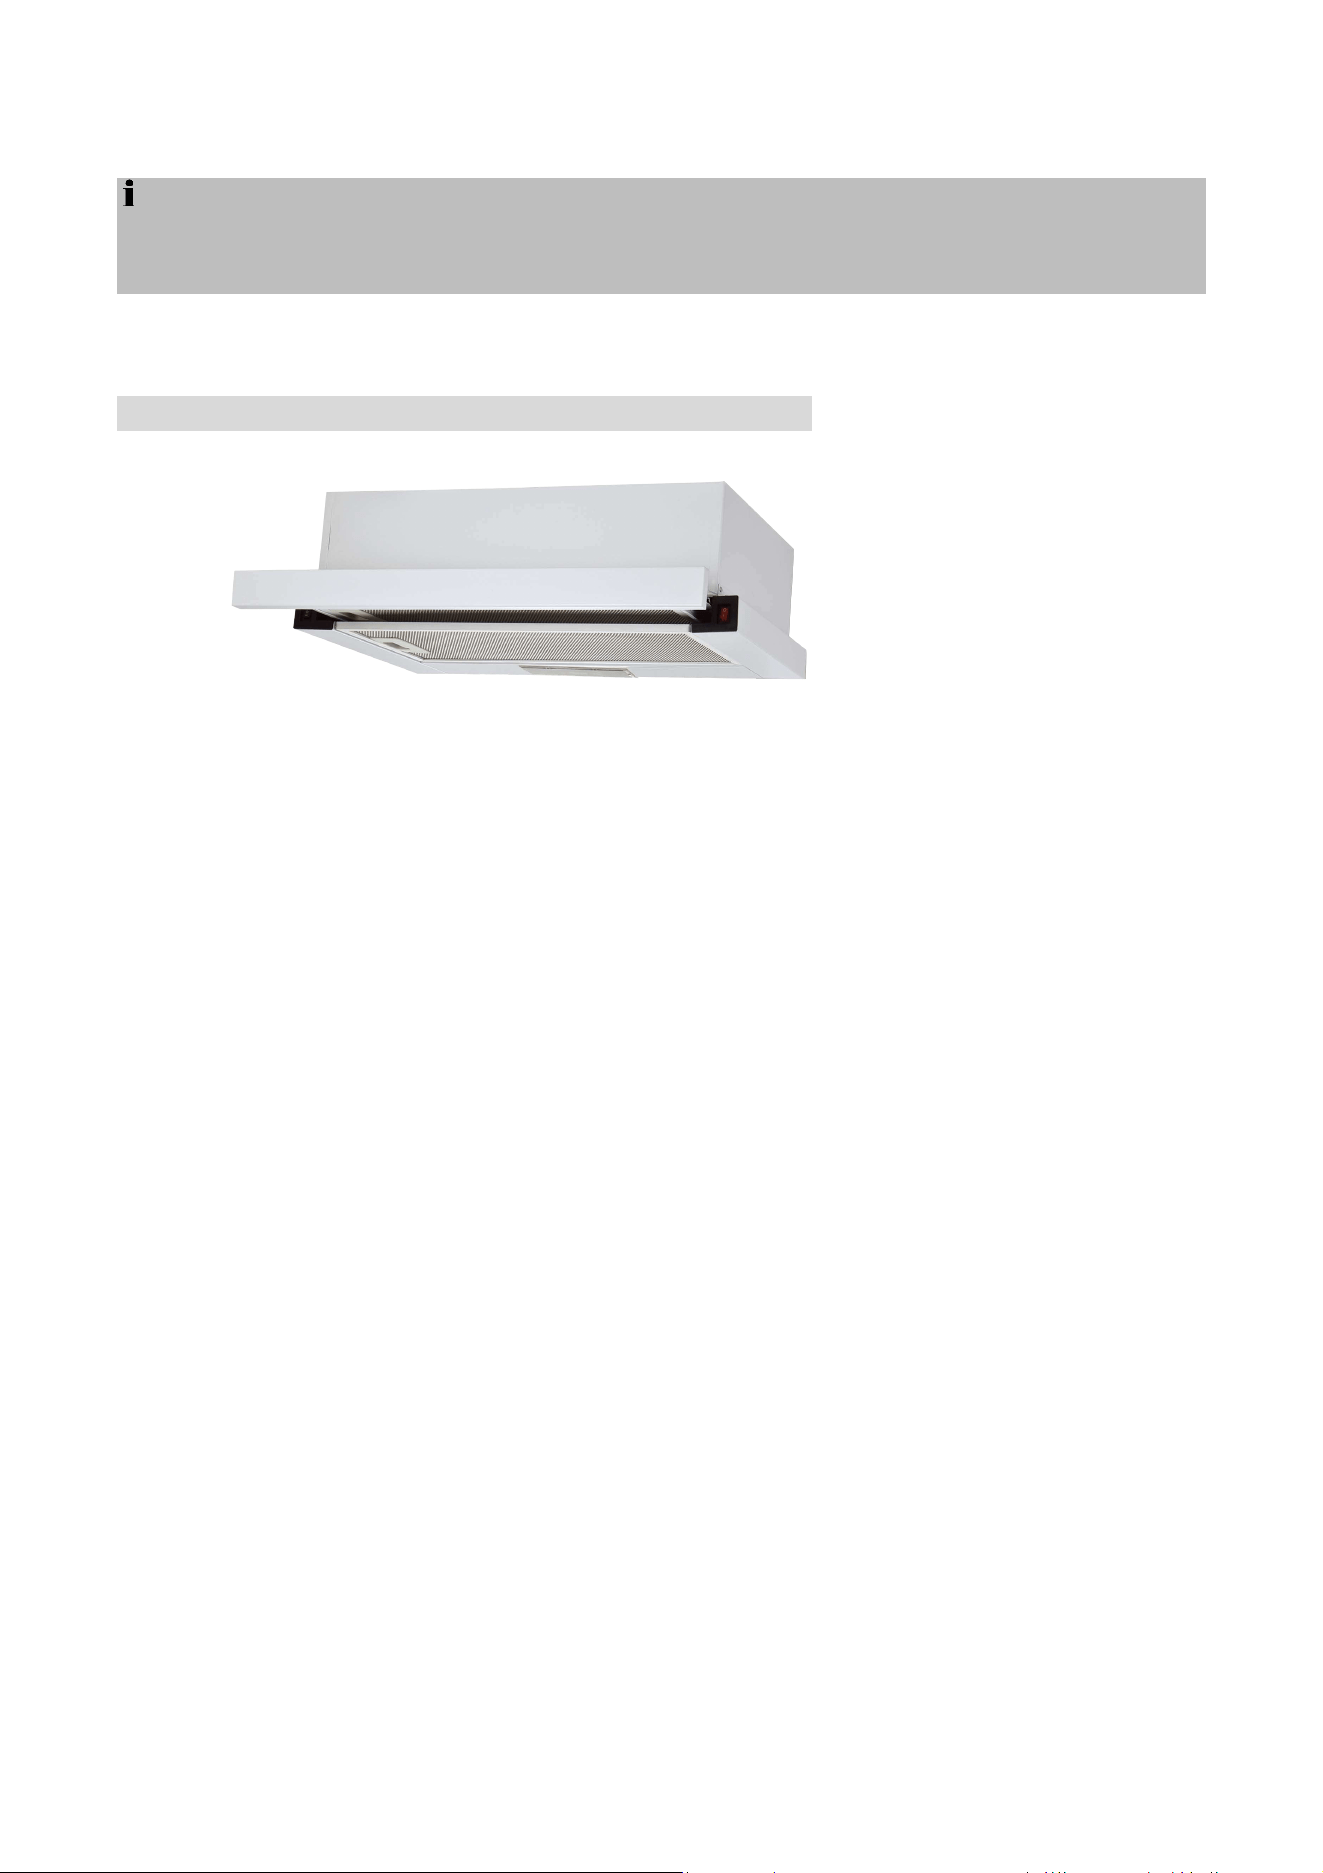
NOTA: Os dispositivos originais podem ser diferentes dos aqui
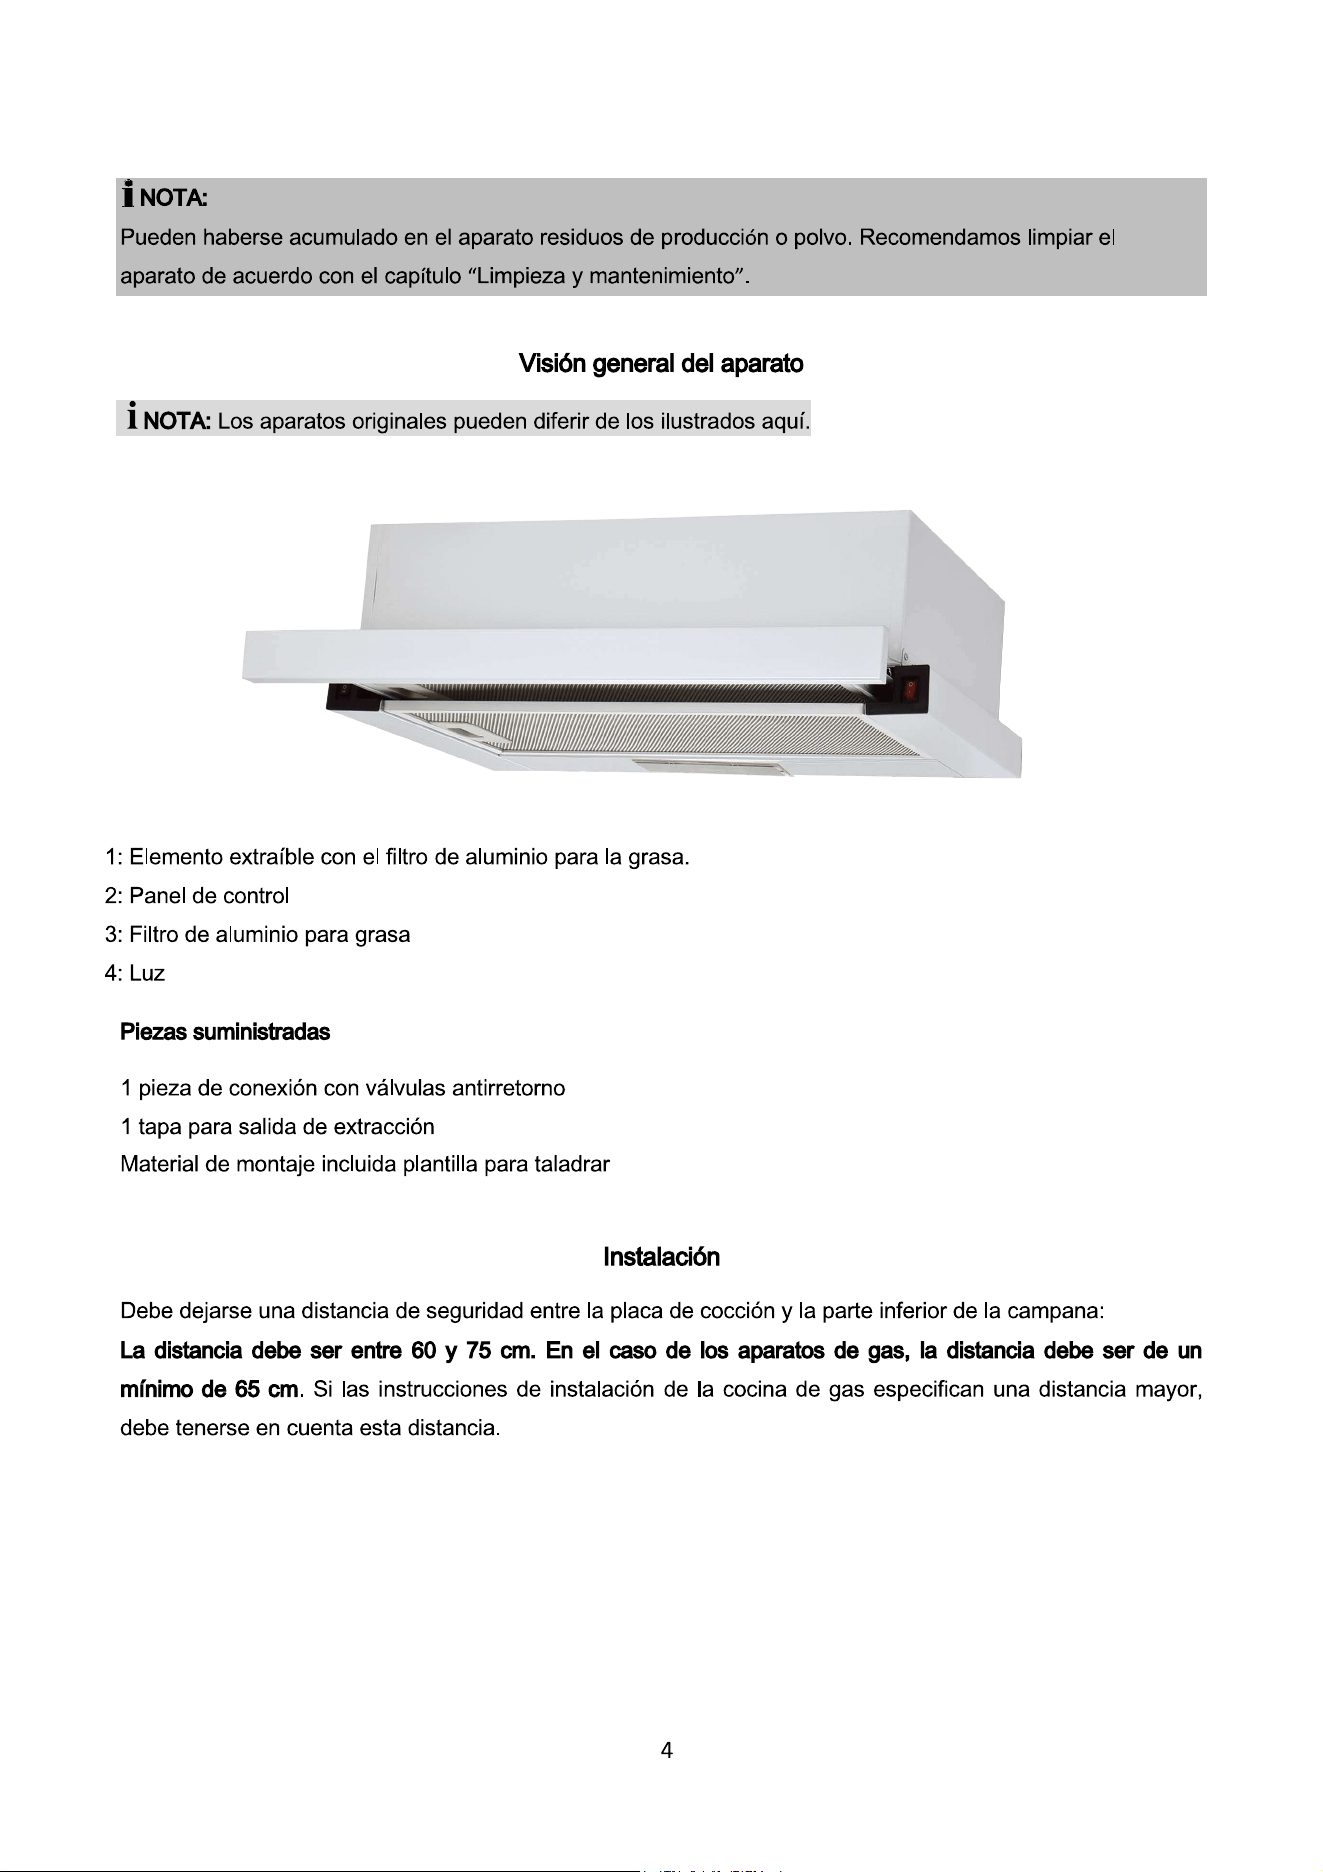
Visão geral do dispositivo
1: Elemento extraível com o filtro de alumínio para
gorduras. 2: Painel de Controlo
3: Filtro de alumínio para
gordura 4: Luz
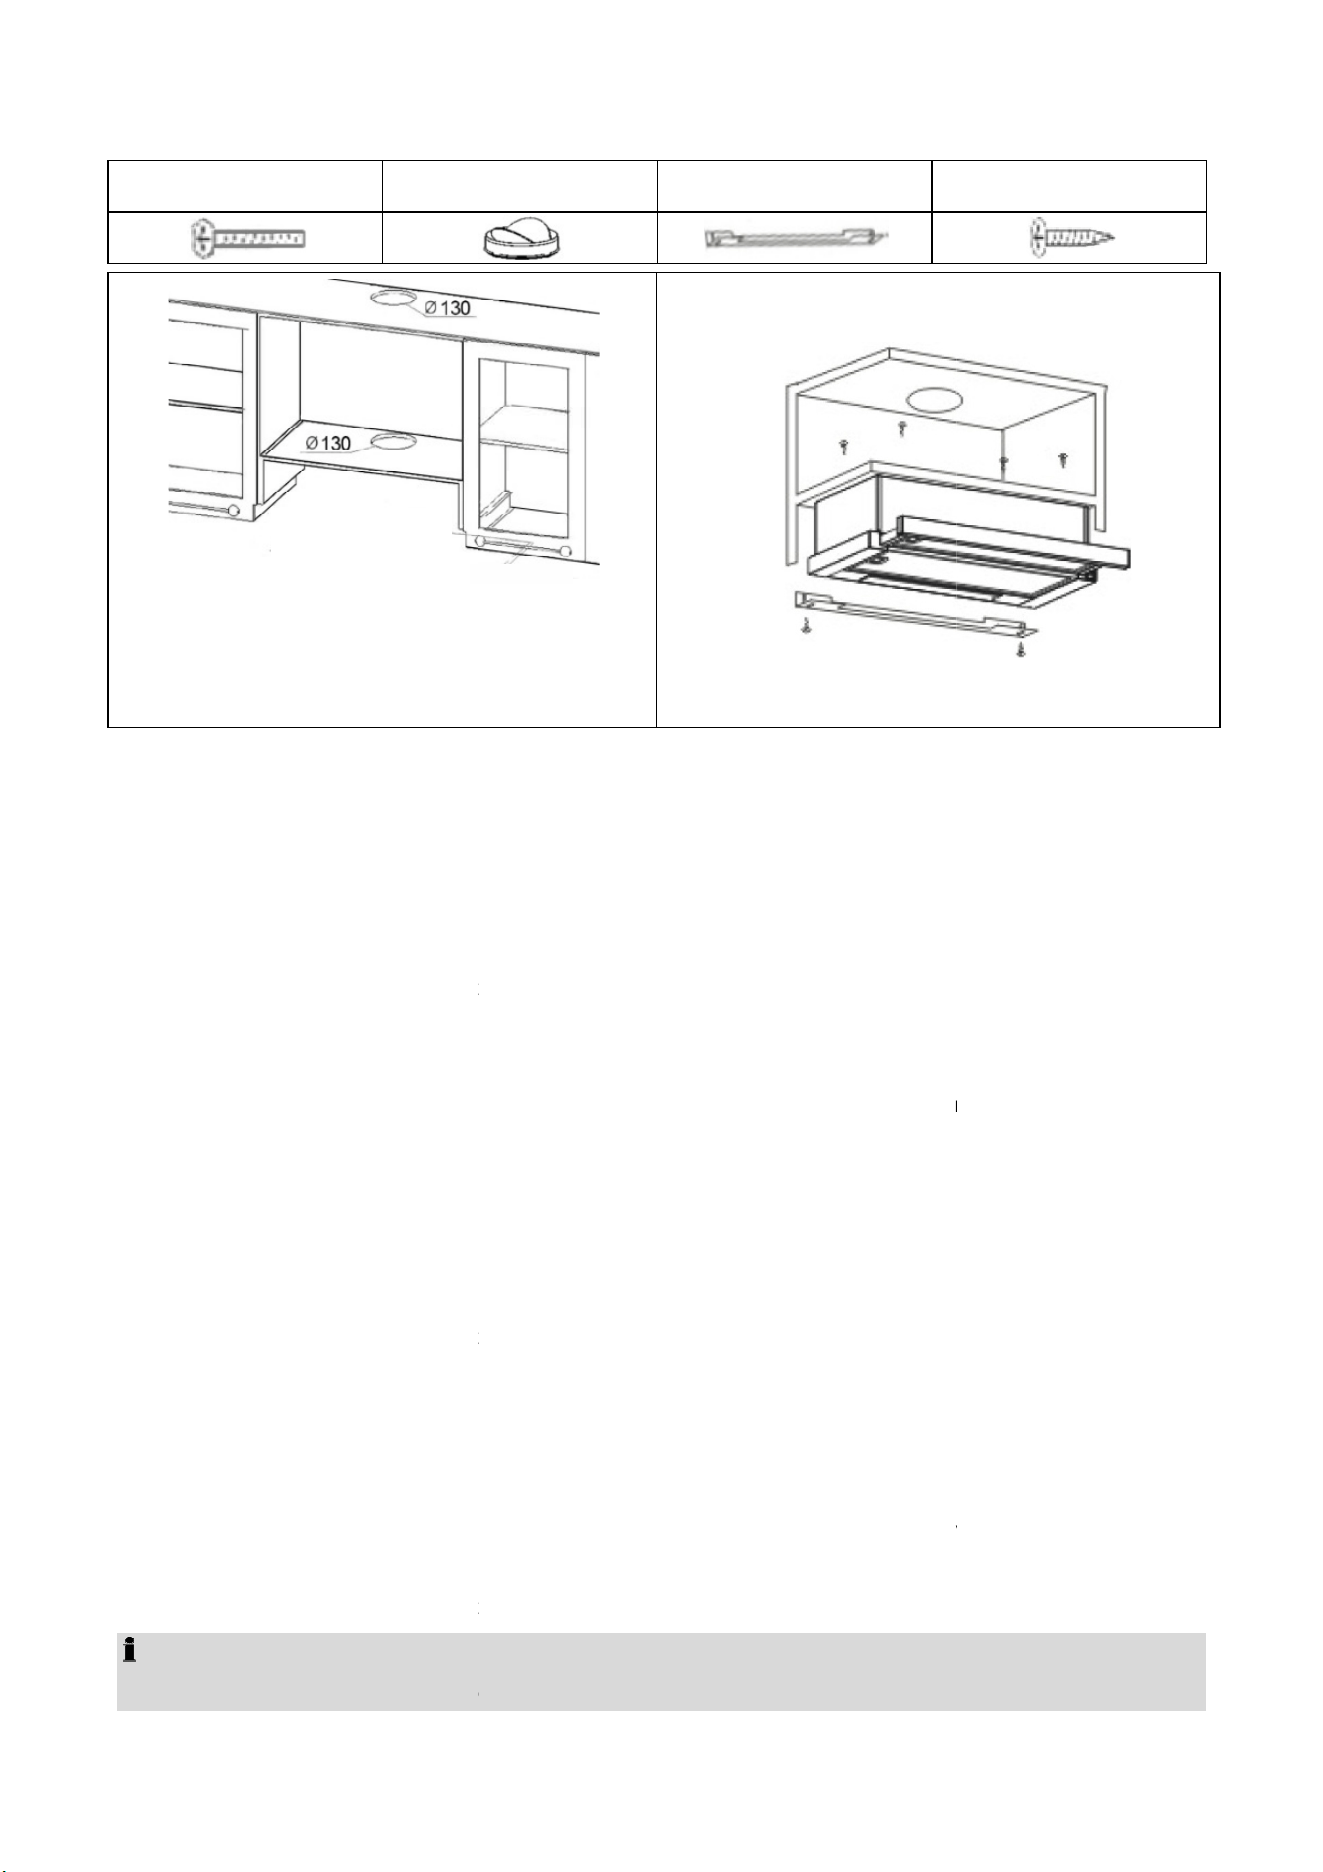
Peças fornecidas
1 peça de ligação com válvulas antirretorno
1 tampa para saída de extração
Material de montagem incl. molde para perfurar
Instalação
Deve ser deixada uma distância de segurança entre a placa e a parte inferior do exaustor:
A distância deve ser entre 60 e 75 cm. No caso de aparelhos a gás, a distância deve ser no mínimo
de 65 cm. Se as instruções de instalação do fogão a gás especificarem uma distância maior, esta
distância deve ser tida em conta.
NOTA:
Podem ter-se acumulado no aparelho resíduos de produção ou pó. Recomendamos a limpeza do
aparelho de acordo com o capítulo "Limpeza e manutenção".

17
ATENÇÃO:
•
O ar extraído não pode ser evacuado através de um tubo de escape utilizado para
o gás residual de aparelhos alimentados a gás ou outros aparelhos alimentados a
outros combustíveis.
•
Quando o ar de exaustão é ventilado, os regulamentos das autoridades locais
relevantes devem ser cumpridos.
ATENÇÃO:
•
Ao montar ou inserir o filtro extrator ou o filtro de carvão vegetal, o aparelho não deve estar ligado à
fonte de
alimentação.
•
Se os acessórios de montagem não forem utilizados, existe o risco de choque elétrico.
Seleção da saída de fumos
Pode usar o exaustor de duas formas:
Modo extrator
O exaustor tem uma saída de ar na parte superior para extrair odores de cozinha para o exterior.
•
Normalmente, o ar extraído é evacuado verticalmente. Se houver um recesso adequado acima da
sua cozinha, o ar de exaustão é evacuado através dos módulos de parede e através da base deste
recesso para o exterior.
•
Se a sua cozinha tiver uma conduta por baixo dos módulos de parede, a conduta de exaustão
pode ser instalada de modo a que o ar de exaustão possa ser descarregado horizontalmente
através da parede.
Modo de recirculação
Se não tiver uma abertura de exaustão direta para o exterior, o exaustor também pode ser operado em
modo de recirculação (ou seja, sem uma abertura de exaustão para o exterior, o ar filtrado é devolvido à
sala). Neste caso, deve ser utilizado um filtro de carvão ativado como descrito em "Instalação do filtro de
carvão ativado para modo de circulação".
O filtro de carvão ativado não é fornecido.
Montagem
18
NOTA: Recomendações para a instalação
•
Durante a instalação, peça a outra pessoa para o ajudar.
•
Use luvas de proteção para evitar ferimentos causados por arestas afiadas.
•
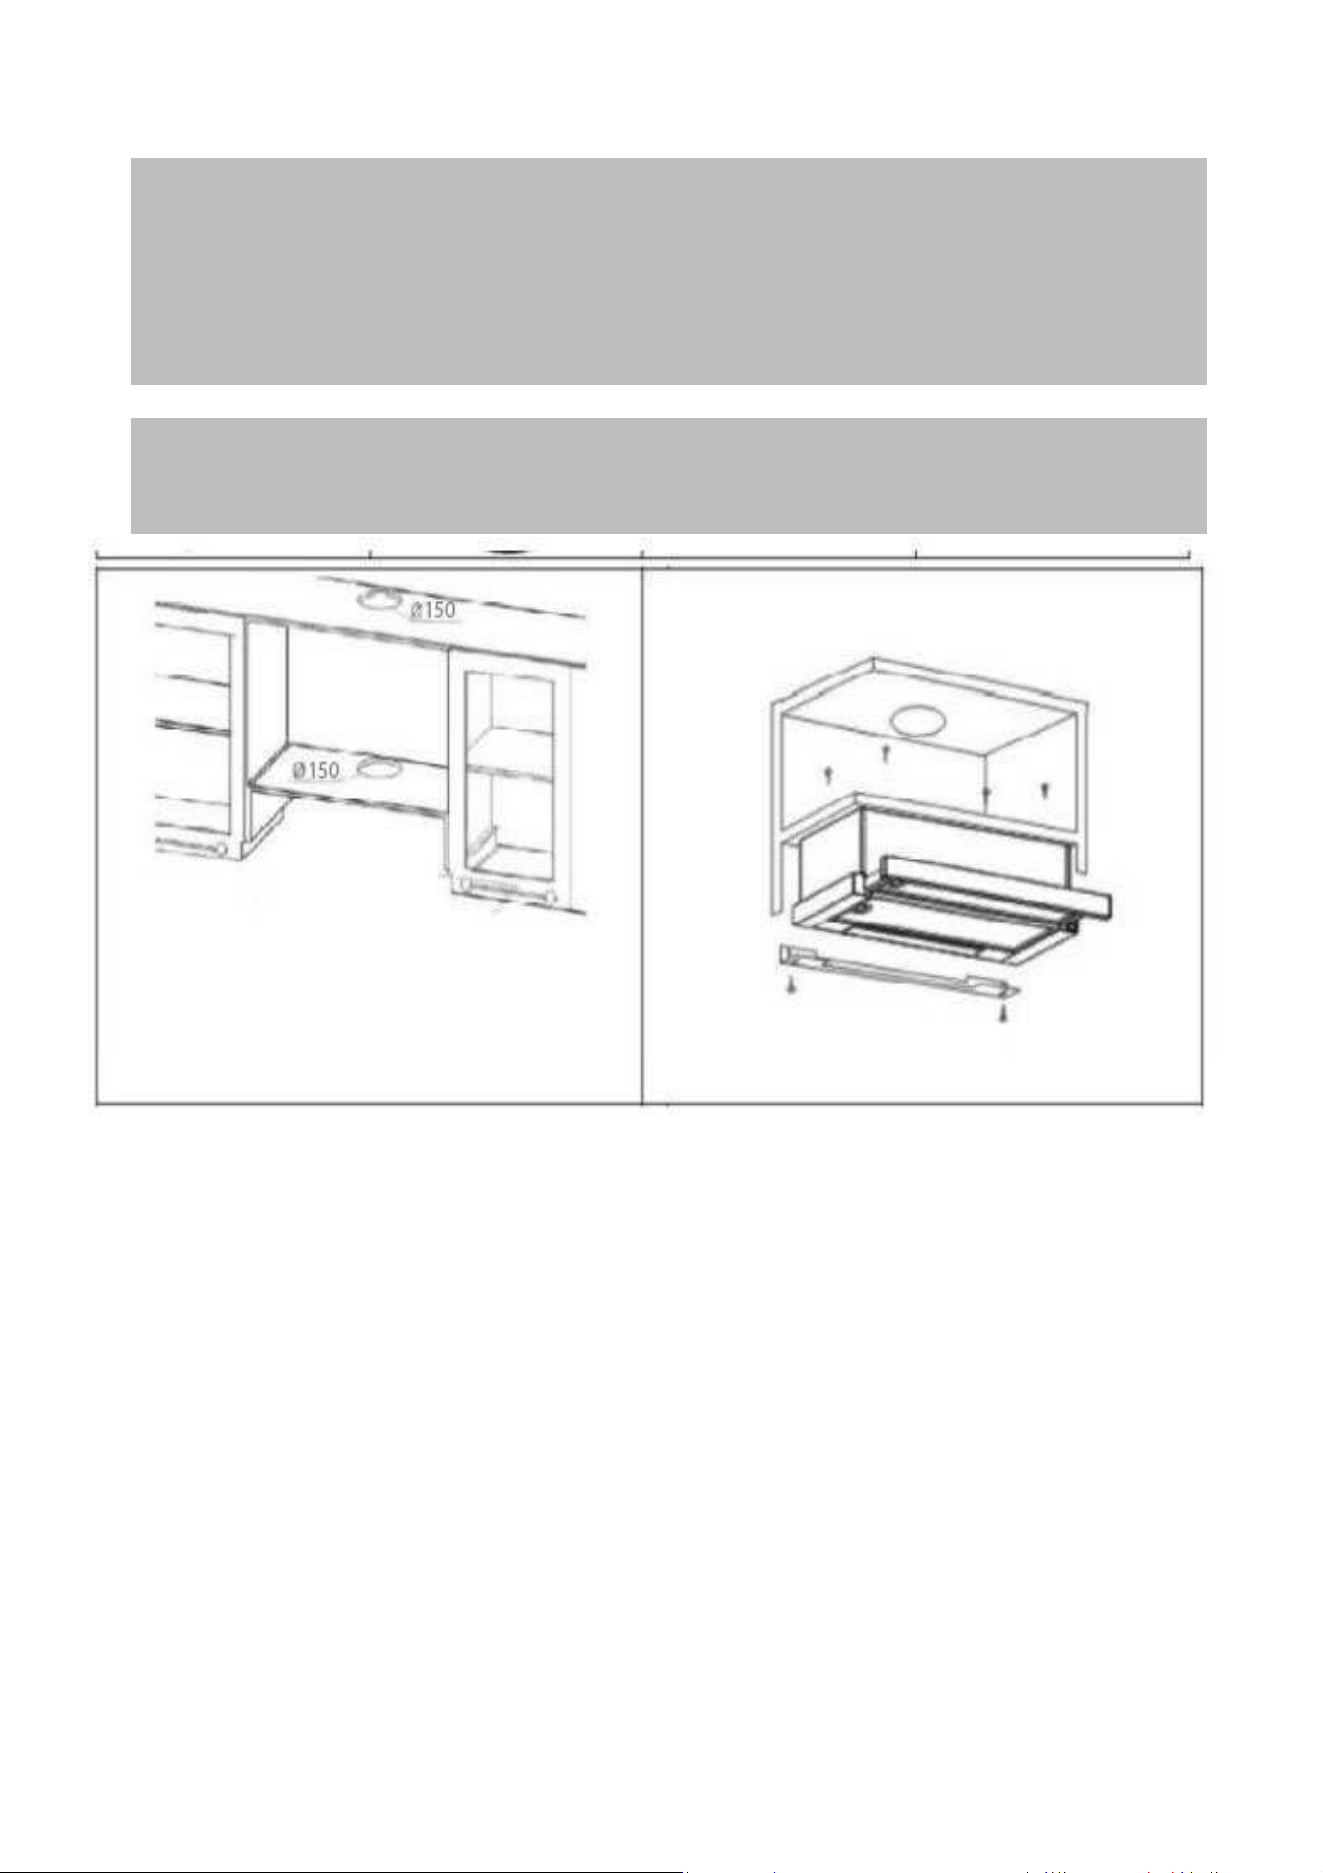
O exaustor é montado na parede ou sob um módulo de parede adequado. Determine a posição do
exaustor centrado sobre o fogão, respeitando as distâncias de segurança especificadas.
•
Retire a rede do filtro e o filtro de alumínio para gorduras.
•
Mantenha a tampa na posição especificada no armário e marque os pontos de perfuração a partir
do interior do módulo, correspondente aos quatro furos dos parafusos. Verifique-os com um nível
de bolha.
•
Para o modo extrator também é necessário criar uma abertura de aprox. Ø 130 mm na base do módulo.
•
Se o cabo de alimentação elétrica for alimentado através do módulo, também deve ser feito um furo
para o passar.
•
Faça quatro furos de montagem de Ø 4 mm através da base do módulo.
•
Aparafusar a unidade com os parafusos (1) e as anilhas sob o módulo de parede.
•
Insira a peça de ligação com as válvulas antirretorno(2) à conduta de exaustão desde a parte superior.
Assegure-se de que os ganchos de montagem do conector estão bem travados.
•
Para o modo extrator, deve ser montado um tubo flexível extrator (não fornecido) com um diâmetro
interior de Ø 120 mm e ligado ao exterior através de uma abertura de extração.
CUIDADO:
•
Antes da instalação, verifique se a parede ou módulo tem capacidade de carga suficiente para
suportar o exaustor.
•
Ao fazer furos na parede, deve sempre certificar-se de que não há fios elétricos ou outros
objetos que podem ser danificados.
•
Verifique se as aberturas de ventilação estão desobstruídas.

19
p
a
NOTA:
O filtro de carvão vegetal absorve odores e deve ser substituído pelo menos a cada seis
meses, independentemente do uso.
•
Para preencher o espaço entre a parede e o aparelho, fixar a fita espaçadora (3) no lado estreito ou
largo, dependendo do espaço. Montar a tira distanciadora com os parafusos (4) nos orifícios
fornecidos na unidade.
•
Volte a colocar o filtro de alumínio para gorduras.
Instalação do filtro de carbono ativado para o modo de recirculação
•
Retire o filtro de alumínio para gorduras.
•
Coloque o filtro de carvão vegetal sobre a entrada de ar da conduta de extração. Verifique se os pinos
de montagem da conduta de extração encaixam nas ranhuras de montagem do filtro de carvão vegetal. Rode
o respetivo filtro no sentido dos ponteiros do relógio até que ele encaixe com um “clique".
•
Volte a colocar o filtro de alumínio para gorduras.
Ligação elétrica
•
Assegure-se de que a sua fonte de alimentação está de acordo com as especificações do aparelho.
As especificações estão indicadas na placa de características.
•
Ligue o cabo de alimentação a uma tomada de parede devidamente instalada e com ligação à
terra.
Operação/ funcionamento
Exaustor
O diâmetro do fundo dos tachos e frigideiras deve ser ajustado ao tamanho da zona de cozedura. Use
tachos e panelas com fundos planos, pois fundos irregulares aumentam o consumo de energia.
Verifique se existe uma fonte de ar suficiente para que o exaustor funcione.
Ajuste a potência do ventilador à evolução da geração de vapor durante o processo de cozedura. Para
um ótimo desempenho do exaustor, instale-o de acordo com as instruções de instalação. Mantenha a
distância entre a borda superior da cozinha e a borda inferior do exaustor. Limpe o filtro
regularmente.
Verifique regularmente o filtro de carvão ativado e substitua-o, se necessário.
Desligue o exaustor após o uso.
ATENÇÃO:
•
A ligação à rede elétrica deve estar em conformidade com as regras e regulamentos locais.
•
Uma ligação incorreta pode causar eletrocussão!
•
Não modifique a ficha do aparelho. Se a ficha não encaixar corretamente na tomada, tenha a
tomada correta instalada por um técnico de assistência autorizado.
•
A acessibilidade à tomada deve ser assegurada para que o dispositivo possa ser desligado da
alimentação em caso de emergência.
20
Se o seu exaustor tiver um temporizador para desligar, ative esta função. Apague a luz
depois de cozinhar.
Recomendamos o uso de produtos de limpeza biológicos.
Exaustor
Informações sobre desmontagem segura para manutenção
Remova o filtro e as lâmpadas como descrito no manual.
Não estão previstas outras medidas para a desmontagem para manutenção.
Se desejar trocar componentes defeituosos, por favor contacte o nosso serviço de apoio ao
cliente.
Pilhas não incluídas.
Informação de desmontagem para reciclagem, recuperação e eliminação do aparelho em fim de vida
Verifique se o aparelho está desligado da alimentação antes de retirar quaisquer filtros do exaustor.
Primeiro remova a chaminé.
Ao desmontar a tampa, não se esqueça de desapertar primeiro os parafusos inferiores e depois os
superiores. Para a reciclagem e recuperação dos recursos do aparelho, leve as lâmpadas e os vários
filtros para:
-
um ponto de recolha das autoridades públicas para eliminação de resíduos
-
uma empresa especializada na eliminação
-
um revendedor local de eletrodomésticos que removerá voluntariamente os eletrodomésticos antigos
O exaustor é operado por interruptores. A iluminação e os ajustes do ventilador são ligados e
desligados com os respetivos interruptores. Puxe o elemento removível para que os interruptores
possam ser acionados.
I
Ventilador na velocidade
mínima ou Ventilador desligado
II
Ventilador na velocidade máxima
ou Iluminação desligada
Iluminação ligada
O ventilador começa a funcionar quando puxa o elemento removível e pára quando empurra o elemento de
volta para dentro.
1 Nível de potencia I:
O motor começa a funcionar a baixa velocidade. Esta configuração é adequada para cozinhar com pouco
calor ou para pratos que produzem pouco ou nenhum vapor para circular o ar em torno do fogão.
Nível de potência II:
O motor funciona a uma velocidade alta. Esta configuração é adequada para uma cozedura normal.

21
e
e
CUIDADO:
•
Não utilize escovas de arame ou outros itens afiados e abrasivos.
•
Não utilize produtos de limpeza ácidos ou abrasivos.
ATENÇÃO:
•
Antes dos trabalhos de limpeza ou manutenção, o aparelho deve ser sempre desligado e a ficha da
alimentação deve ser desligada ou o fusível deve ser desligado.
•
Deixe o aparelho arrefecer antes de o limpar.
•
Não utilize produtos de limpeza a vapor para limpar o aparelho, pois a humidade pode entrar nos
componentes elétricos. Risco de eletrocussão! O vapor quente pode danificar as peças de plástico. O
aparelho deve estar seco antes de ser usado novamente.
ATENÇÃO: Risco de incêndio!
Os resíduos de gordura no filtro de alumínio podem inflamar-se se expostos a altas
temperaturas. Portanto, é importante que o filtro para gorduras seja
limpo/ substituído regularmente.
Limpeza e manutenção
O aparelho e o seu funcionamento serão mantidos em perfeito estado se o exaustor e o filtro forem
limpos regularmente. O exaustor e os acessórios também devem ser limpos regularmente por
razões higiénicas.
•
Para limpar a superfície da tampa, utilize um detergente suave e um pano macio para evitar riscá-la.
•
O aparelho pode ser usado novamente depois de tudo ter secado devidamente.
•
Se utilizar o exaustor em modo de recirculação, deve substituir regularmente o filtro de carvão
ativado (ver "Substituir o filtro de carvão ativado").
Limpeza do filtro de alumínio para gorduras
A gordura e os fumos são depositados no filtro e podem acumular-se se não forem limpos regularmente.
Recomendamos que limpe o filtro de gordura mensalmente:
•
Remova o filtro de alumínio para gorduras deslizando o trinco para trás no encaixe, empurre
suavemente o filtro e puxe-o para a frente.
•
Lave o filtro de gorduras numa solução de água quente e detergente neutro. Mergulhe o filtro na
solução.
•
Depois limpe com uma escova macia, enxague bem com água morna e deixe secar.
•
O filtro de gorduras também pode ser lavado na máquina de lavar louça (até 60 °C). Na máquina de lavar
louça pode ocorrer uma ligeira descoloração. Isto não afeta a função do filtro para gorduras.
NOTA:
Se for produzido muito vapor, o ventilador deve ser deixado a funcionar durante alguns minutos após
terminar de cozinhar. Deixe o ventilador ligado apenas se for absolutamente necessário, caso
contrário é consumida energia desnecessária.
Quando o elemento amovível for aberto novamente, o exaustor ligar-se-á novamente com
a mesma configuração em que estava a funcionar quando o elemento amovível foi fechado.

22
ATENÇÃO:
Deixe a lâmpada arrefecer antes de a substituir. Existe o risco de queimaduras!
Substituição do filtro de carvão ativado
O filtro de carvão ativado absorve odores e deve ser substituído pelo menos a cada seis meses,
dependendo do uso.
Encomende o filtro de carvão vegetal no seu revendedor ou loja de acessórios.
Para encomendar, utilize o número de referência indicado nos "Dados técnicos".
•
Ver "Instalação do filtro de carvão ativado para o modo de recirculação".
•
Retire o filtro de carvão velho girando-o no sentido contrário ao dos ponteiros do relógio.
Substituição da lâmpada
•
Use as lâmpadas corretas: 1 x 1,5 W
•
Retire o filtro de alumínio para gorduras.
•
Retire as lâmpadas fundidas e insira as novas.
•
Instale novamente o filtro de alumínio para gorduras.
Reparações
Reparações incorretas ou mal executadas podem colocar o utilizador em perigo.
As reparações dos eletrodomésticos só devem ser efetuadas por um especialista autorizado. Um
cabo de alimentação danificado só deve ser substituído por um eletricista qualificado.
23
NOTA: Se um
técnico
autorizado
problema persistir depois de seguir os
passos acima
contacte o seu revendedor ou um
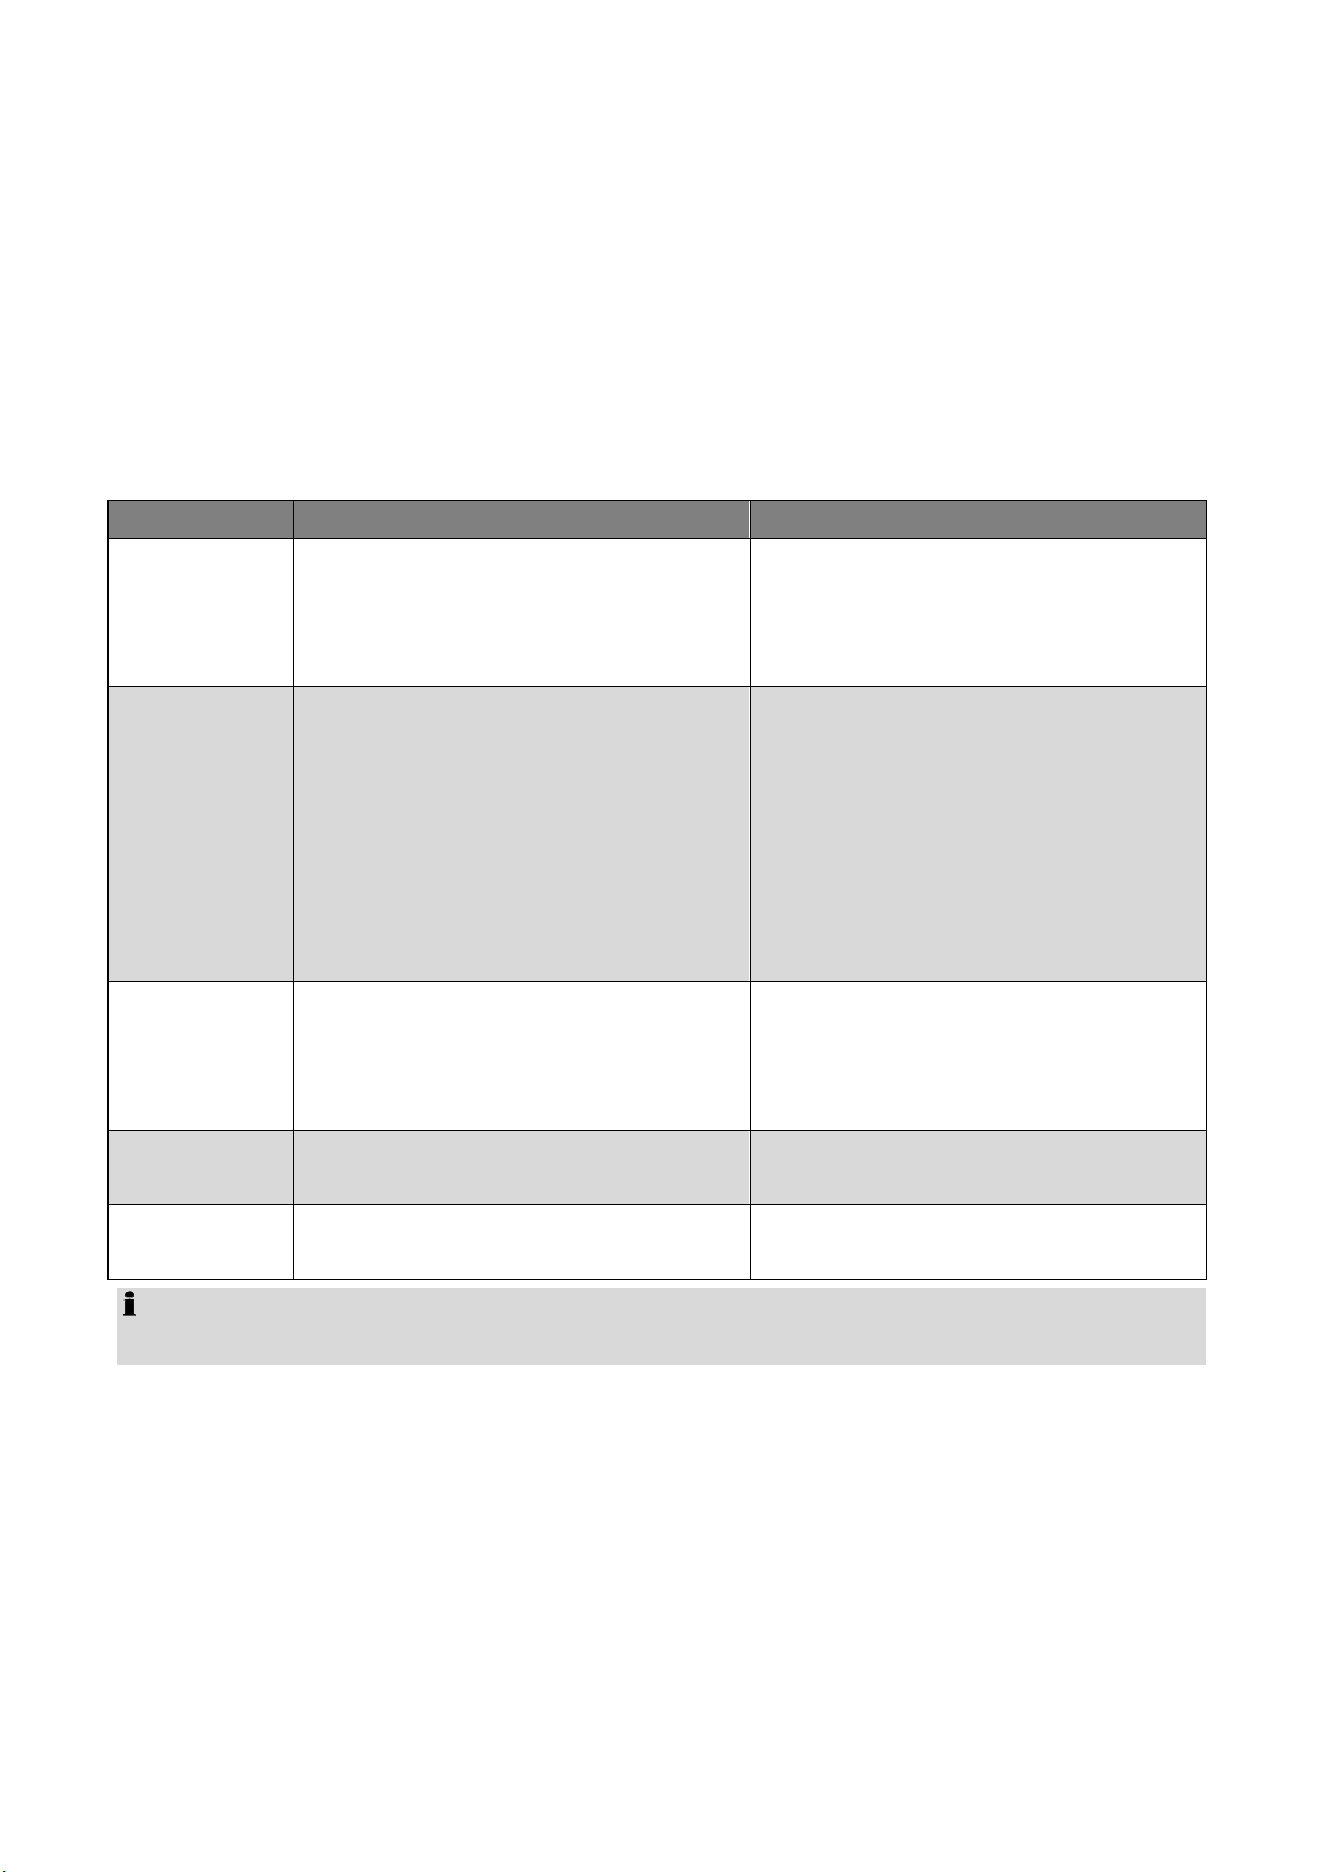
Resolução de problemas
Antes de contactar um especialista autorizado
Problema
Causa Possível
Solução
O aparelho
não funciona
ou não
funciona
corretamente
-
O aparelho está ligado à rede
elétrica?
-
Já ajustou o nível de potência?
-
Ligue a ficha corretamente à
tomada. Verifique o fusível.
-
Verifique o ajuste.
O aparelho
não funciona
bem
-
O nível de potência foi ajustado
corretamente?
-
O filtro para gorduras está sujo?
-
O filtro de carbono é necessário para
a (correta) recirculação instalada?
-
A saída de ar está livre para o modo
extrator?
-
Verifique o ajuste. A cozinha não está
devidamente ventilada.
-
Limpe o filtro de gorduras
(consulte "Limpar o filtro de
alumínio para gorduras").
-
Verifique o filtro de carvão vegetal
(consulte "Substituição do filtro de
carvão ativado").
-
Verifique a saída de ar.
A luz
não
funciona
A lâmpada está defeituosa, mal
instalada, não está bem posicionada
no seu suporte.
Verifique a lâmpada (consultar
"Substituir a lâmpada").
Pingos de
óleo no
aparelho
O filtro de gorduras está sujo.
Limpe o filtro de gorduras.
O dispositivo
deixou de
funcionar
O dispositivo sobreaqueceu e ativou
a proteção interna de
sobreaquecimento.
Desligue a energia e espere um pouco
antes de a voltar a ligar.
Siga as instruções de segurança e as
distâncias de segurança especificadas para
os utensílios de cozinha.
NOTA: Se um problema persistir depois de seguir os passos acima, contacte o seu distribuidor ou um
técnico autorizado.

24
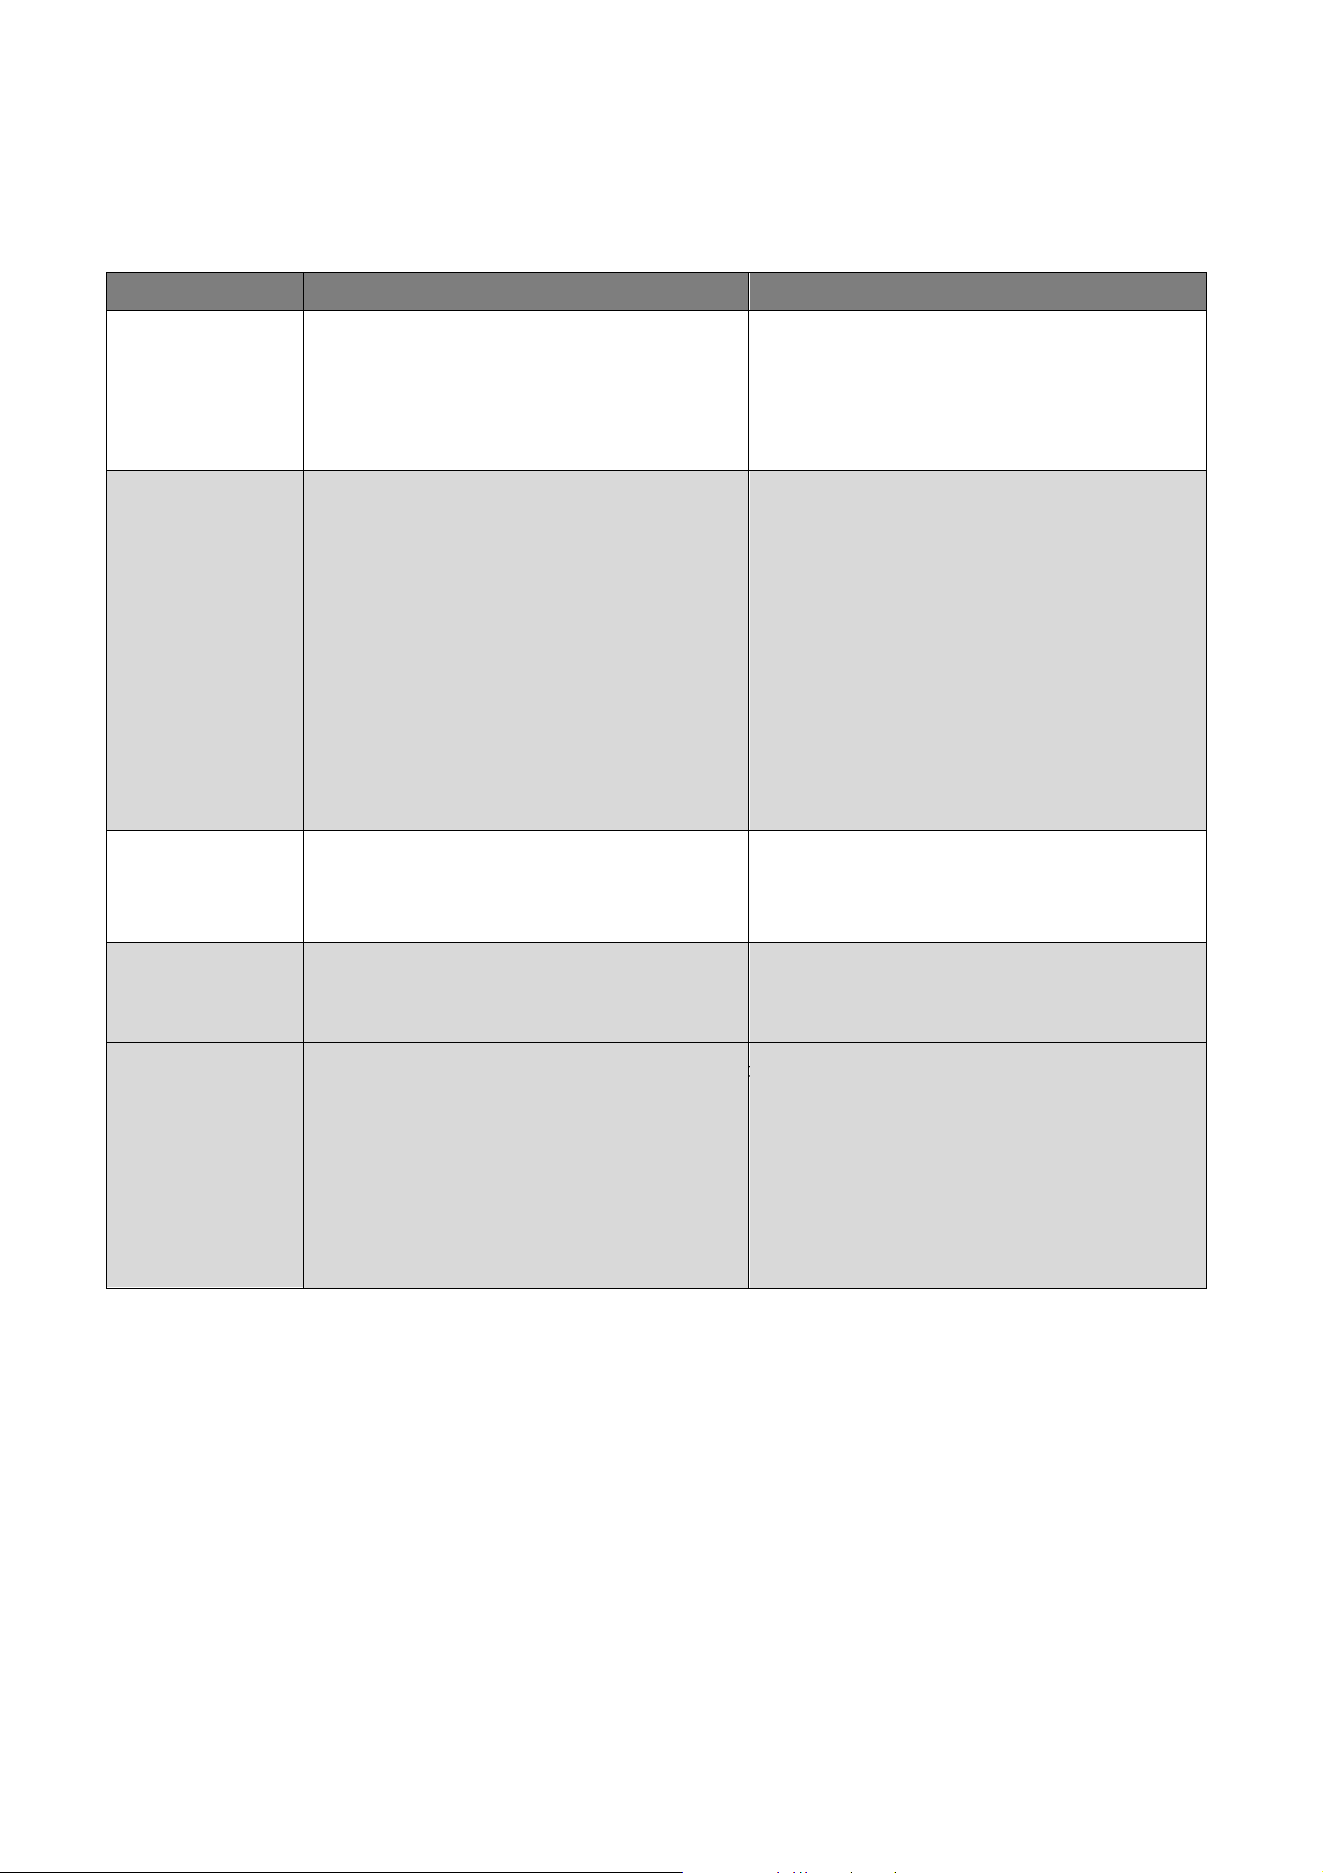
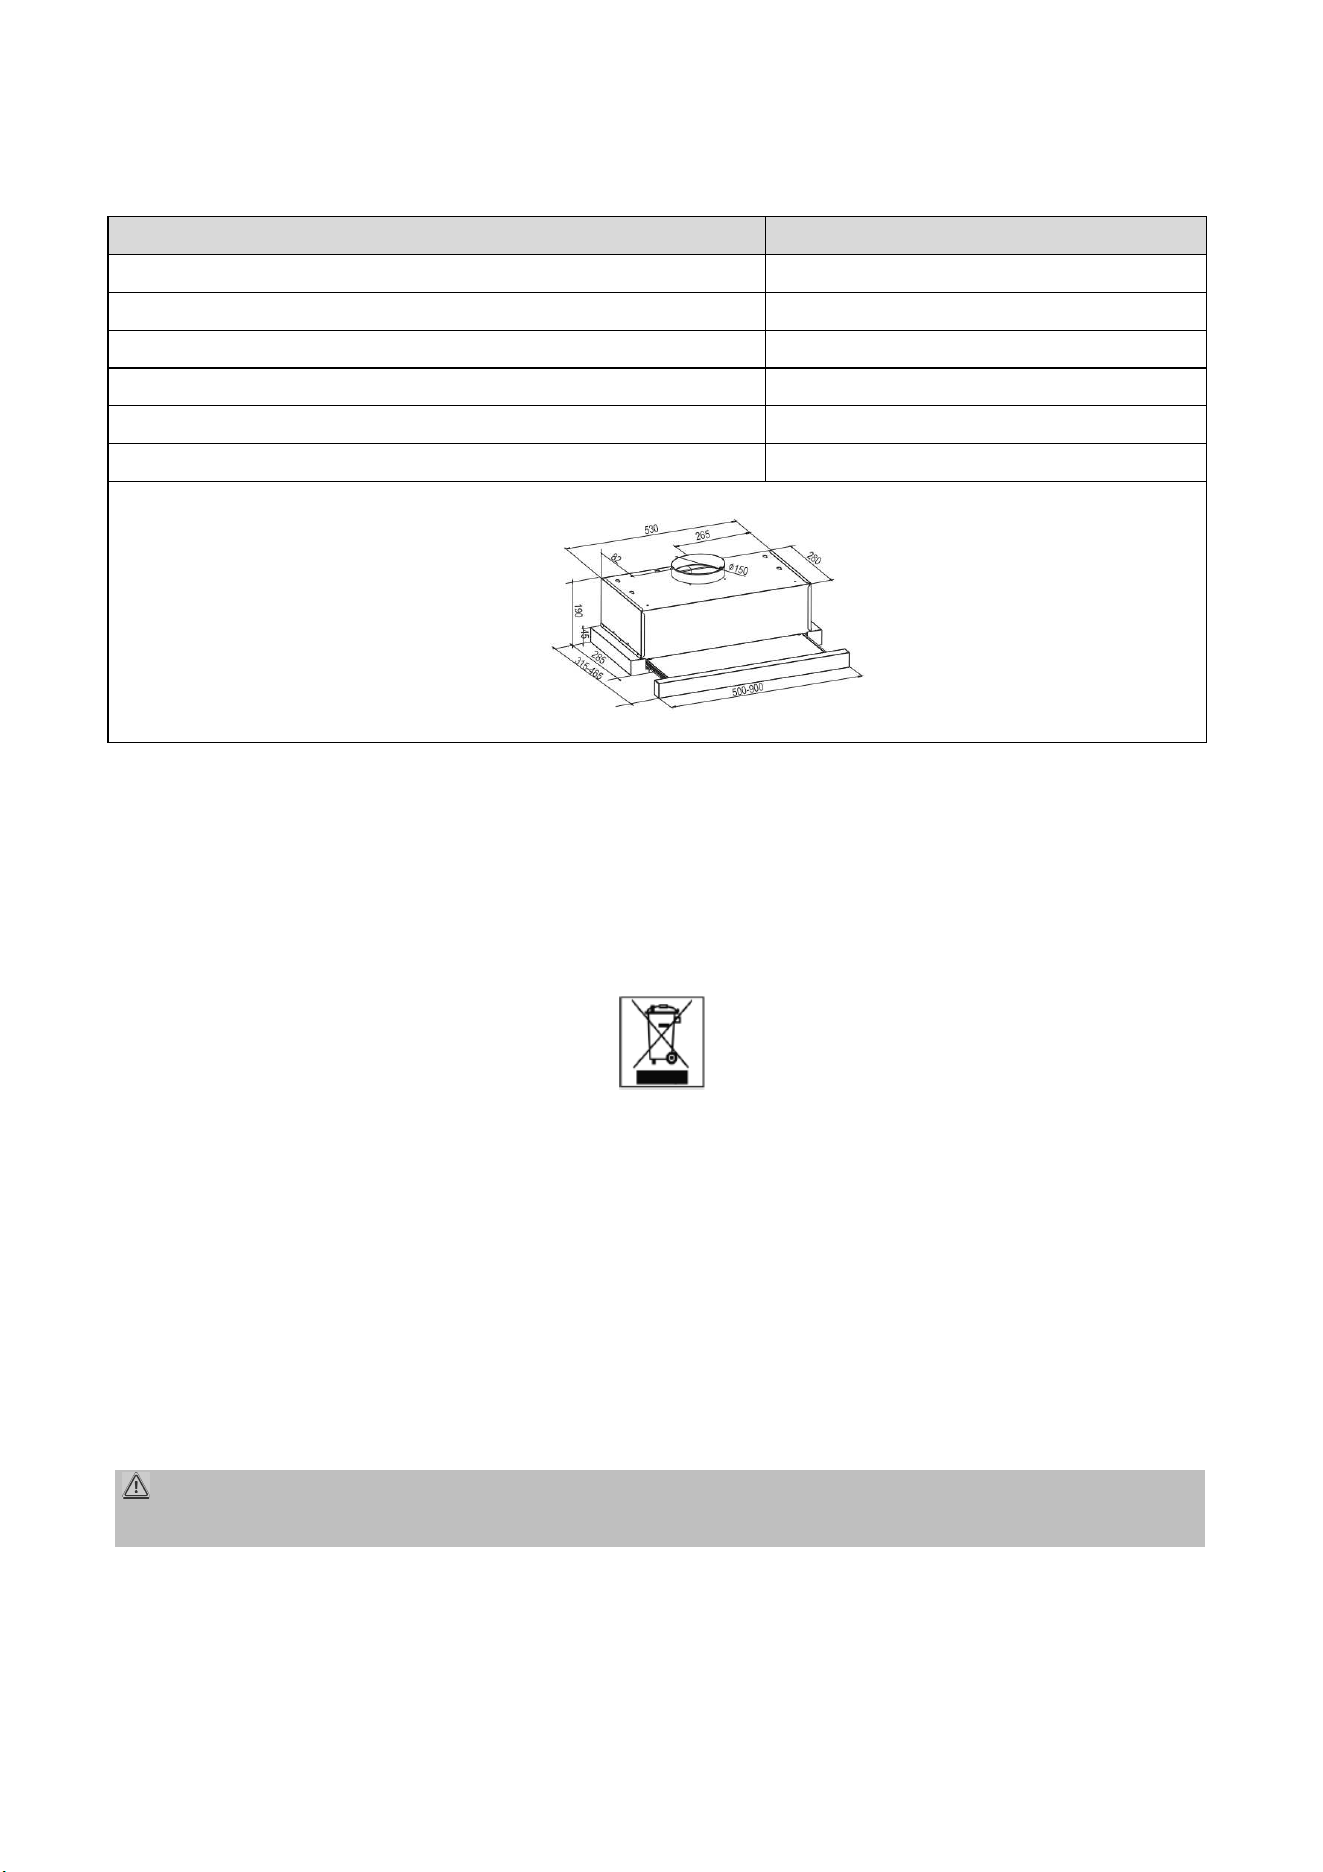
Dados técnicos
Modelo
CCST3506022TLW / CCST3506022TLX
Chaminé
60 cm largura
Voltagem
220-240 V ~ 50 Hz
Iluminação (halogéneo)
1 x 1,5 W
Potência nominal
66,5 W
Classe de proteção
II
Peso líquido
Aproximadamente. 6,3 kg
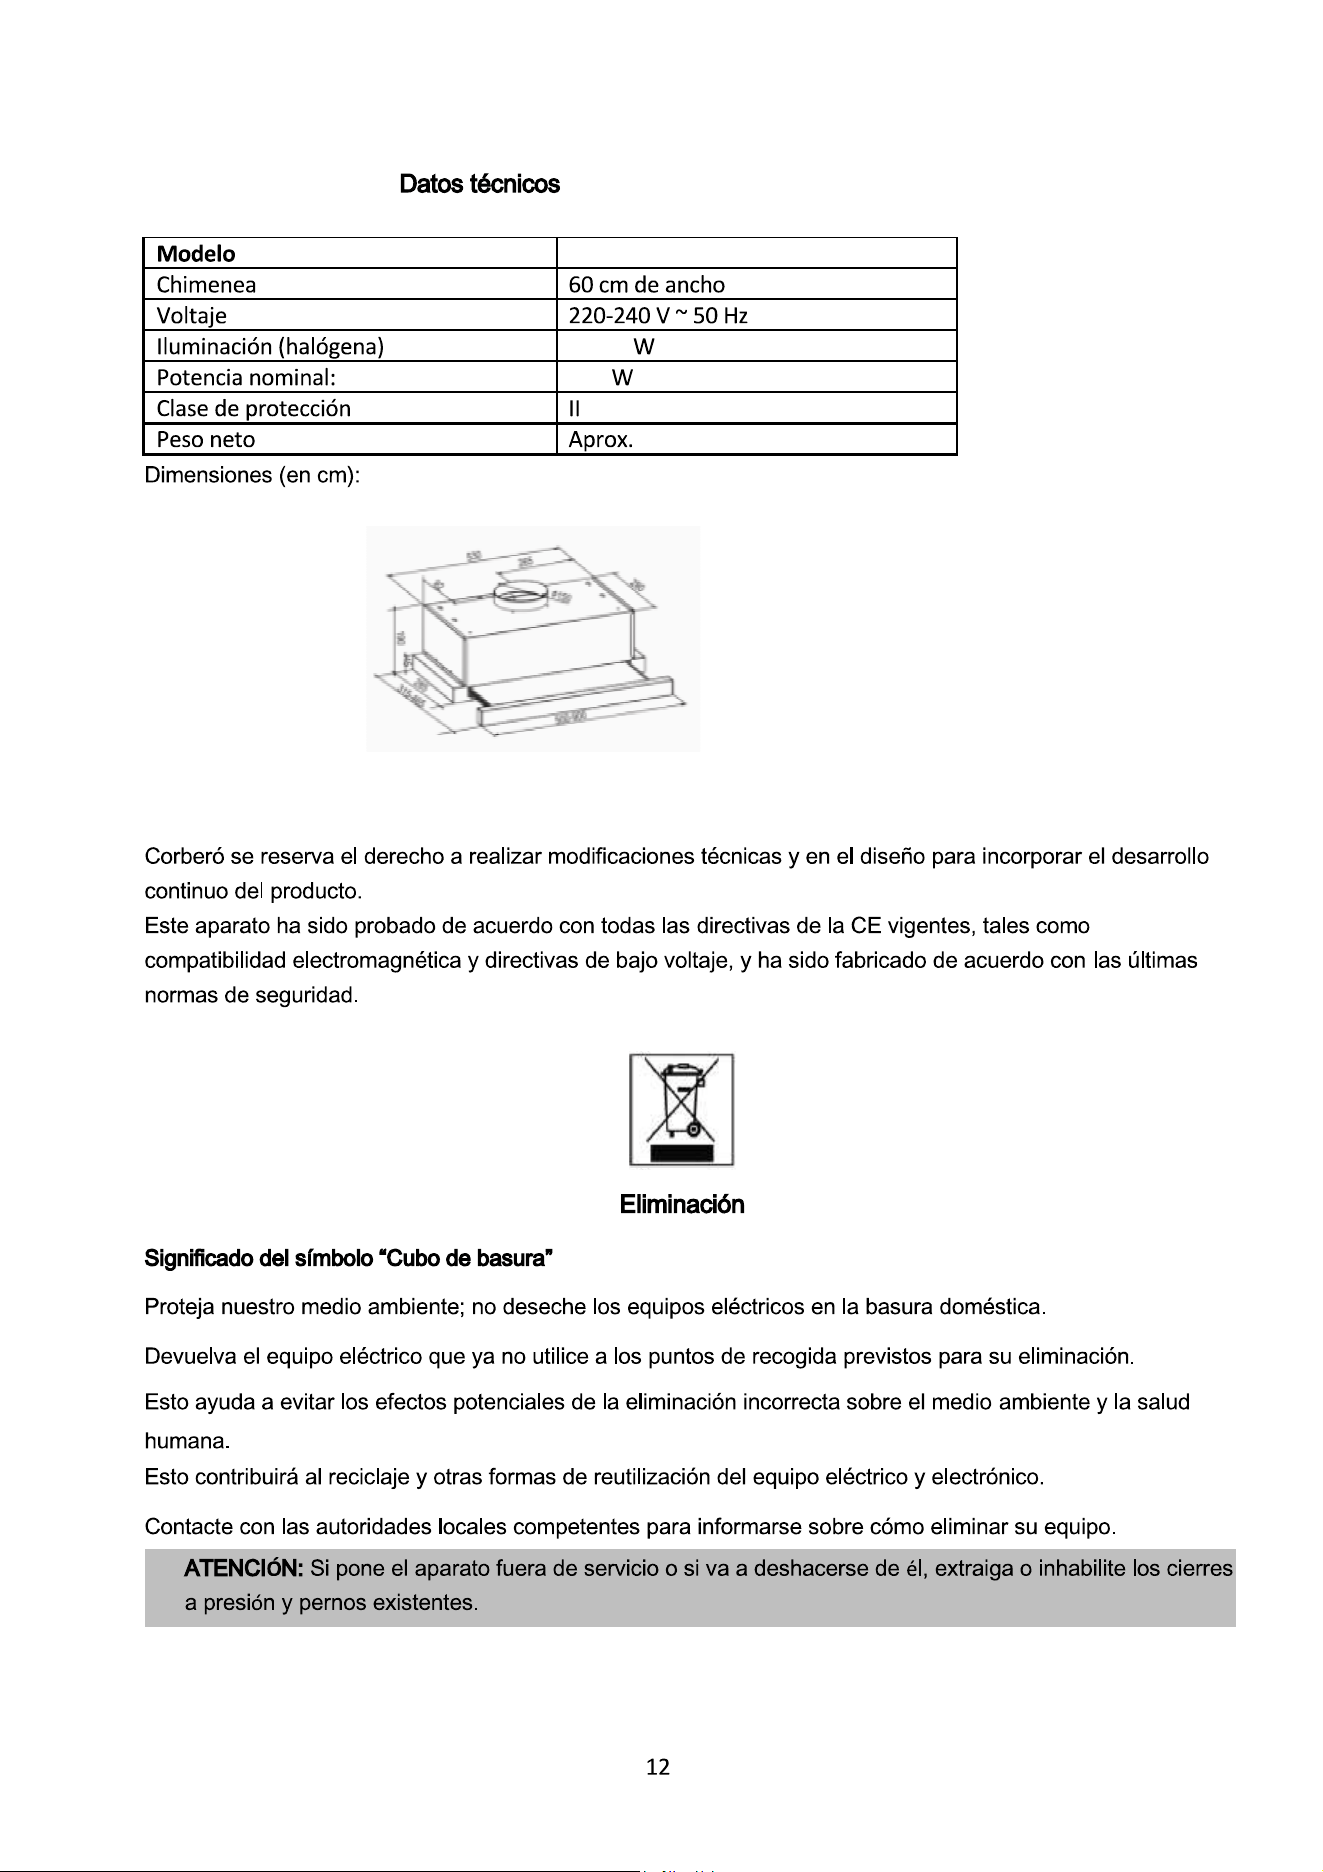
Dimensões (em cm):
Corbero reserva-se o direito de fazer alterações técnicas e de design para incorporar o desenvolvimento
contínuo
do produto.
Este dispositivo foi testado de acordo com todas as diretivas CE atuais, tais como diretivas de
compatibilidade eletromagnética e baixa tensão, e foi fabricado de acordo com as mais recentes
normas de segurança.
Significado do símbolo "Caixote do
lixo"
Eliminação
Proteja o nosso meio ambiente; não deite fora equipamentos elétricos no lixo doméstico.
Devolva o equipamento elétrico que já não esteja a ser utilizado aos pontos de recolha designados para
eliminação.
Isto ajuda a evitar os potenciais efeitos ambientais e sanitários da eliminação inadequada.
Isto irá contribuir para a reciclagem e outras formas de reutilização de equipamentos elétricos e eletrónicos.
Contacte as autoridades locais competentes para obter informações sobre como eliminar o seu equipamento.
ATENÇÃO: Se o aparelho tiver de ser retirado de serviço ou eliminado, remova ou desative os fechos
e parafusos existentes.
H
HH
HOUSEHOLD
OUSEHOLDOUSEHOLD
OUSEHOLD-
--
-
B
BB
BUILT
UILTUILT
UILT-
--
-IN
IN IN
IN C
CC
COOKER
OOKER OOKER
OOKER H
HH
HOOD
OODOOD
OOD
Instruction Manual
CCST3506022TLW
CCST3506022TLX
25
Thank you for choosing
our product. We hope you will enjoy using the appliance.
Symbols in these Instructions for Use
Symbols in these Instructions for UseSymbols in these Instructions for Use
Symbols in these Instructions for Use
Important information for your safety is specially marked. It is essential to comply with these instructions in
order to avoid accidents and prevent damage to
WAR
WARWAR
WARNING
NINGNING
NING:
::
:
This warns you of dangers t
o your health and indicates possible injury risks.
CAUTION
CAUTIONCAUTION
CAUTION:
::
:
This refers to possible hazards t
o the machine or other objects.
NOTE
NOTENOTE
NOTE:
::
:
This highlights tips and information.
Read the
operating instructions carefully before putting the appliance into operation and keep the instructions
and the receipt. If you give this
appliance
•
The appliance is designed exclusively for p
fit for commercial use.
•
The appliance is only to be used as described in the user manual. Do not use the appliance for any
purpose. Any other use is not intended and can result in damag
• Operate the appliance only
properly installed.
properly installed.properly installed.
properly installed.
•
Do not use it outdoors. Keep it away from sources of heat, direct sunlight and humidity.
appliance with wet hands.
• Do not
not not
not
operate the machine without supervision.
•
When not in use, for cleaning, user maintenance works or with disruption, switch off the appliance and
possibly
disconnect the plug (pull the plug itself, not the lead) or turn off the fuse.
• The appliance and if possibly
the mains lead have to be checke
is found the appliance
must not be used.
•
For safety reasons, alterations or modifications of the
•
In order to ensure your children’s safety, please keep all packaging (plastic bags, boxes,
out of their reach.
WARNING:
WARNING:WARNING:
WARNING:
Do not allow small children to play with the foil. There is a
26
Introduction
IntroductionIntroduction
Introduction
our product. We hope you will enjoy using the appliance.
Symbols in these Instructions for Use
Symbols in these Instructions for UseSymbols in these Instructions for Use
Symbols in these Instructions for Use
Important information for your safety is specially marked. It is essential to comply with these instructions in
order to avoid accidents and prevent damage to
the machine:
o your health and indicates possible injury risks.
o the machine or other objects.
This highlights tips and information.
General Notes
General NotesGeneral Notes
General Notes
operating instructions carefully before putting the appliance into operation and keep the instructions
appliance
to other people, please also pass on the operating instructions.
The appliance is designed exclusively for p
rivate use and for the envisaged purpose. This appliance is not
The appliance is only to be used as described in the user manual. Do not use the appliance for any
purpose. Any other use is not intended and can result in damag
es or personal injuries.
properly installed.
properly installed.properly installed.
properly installed.
Do not use it outdoors. Keep it away from sources of heat, direct sunlight and humidity.
operate the machine without supervision.
When not in use, for cleaning, user maintenance works or with disruption, switch off the appliance and
disconnect the plug (pull the plug itself, not the lead) or turn off the fuse.
the mains lead have to be checke
d regularly for signs of damage. If damage
must not be used.
For safety reasons, alterations or modifications of the
appliance are prohibited.
In order to ensure your children’s safety, please keep all packaging (plastic bags, boxes,
Do not allow small children to play with the foil. There is a
danger of suffocation!
danger of suffocation!danger of suffocation!
danger of suffocation!
Important information for your safety is specially marked. It is essential to comply with these instructions in
operating instructions carefully before putting the appliance into operation and keep the instructions
to other people, please also pass on the operating instructions.
rivate use and for the envisaged purpose. This appliance is not
The appliance is only to be used as described in the user manual. Do not use the appliance for any
other
es or personal injuries.
Do not use it outdoors. Keep it away from sources of heat, direct sunlight and humidity.
Do not use the
When not in use, for cleaning, user maintenance works or with disruption, switch off the appliance and
if
d regularly for signs of damage. If damage
In order to ensure your children’s safety, please keep all packaging (plastic bags, boxes,
polystyrene etc.)

27
Special safety Information for this U
Special safety Information for this USpecial safety Information for this U
Special safety Information for this Unit
nitnit
nit
• Provision shall be made for adequate ventilation in the room when the cooker
hood is operated simultaneously with appliances that burn gas or other fuels.
• Attention!
Attention!Attention!
Attention! Accessible parts of the appliance may become hot when used with
cooking utensils.
• Do not flambé under the cooker hood! You can fry under the hood due to fire haz-
ard only under constant observation.
• Open the gas supply at gas stoves only when cookware is on the stove. Risk of
Risk ofRisk of
Risk of
fire!
fire!fire!
fire! The filter can be damaged.
• Food during frying should be constantly supervised. By overheated oil can arise a
fire hazard
fire hazardfire hazard
fire hazard.
• Do not check the filter condition while the hood is in operation.
• NEVER use the appliance without fixed aluminum grease filter.
• If the cooker hood and other devices which are powered b other forms of energy
as electricity, served together, the pressure in the room should not exceed 4 Pa
(4x10
-5
bar).
• Regulations concerning the discharge of air have to be fulfilled.
• Follow the installation instructions. Note the instructions that we give you in the
chapter “Installation”.
• This appliance can be used by
children
childrenchildren
children aged from 8 years and above and persons
with reduced physical, sensory or mental capabilities or lack of experience and
knowledge if they have been given supervision or instruction concerning use of
use ofuse of
use of
the appliance
the appliancethe appliance
the appliance in a safe way and understand the hazards involved.
• Children
ChildrenChildren
Children shall not play with the appliance.
• Cleaning and user maintenance
user maintenanceuser maintenance
user maintenance shall not be made by children
childrenchildren
children unless they are
older 8 years and supervised.
• The appliance must be cleaned regularly. Follow the instructions that we give you
in the chapter “Cleaning and Maintenance”. There is a risk of fire
risk of firerisk of fire
risk of fire if cleaning is not
carried out according to these instructions.

•
Do not try to repair the appliance on your own. Always contact an authorized
technician. To avoid the exposure to danger, always have fault
only by the manufacturer, by our customer service or by qualified person and with
a cable of the same type.
1.
Remove the appliance from its packaging.
2.
Remove all packaging material, such as foils, filler, cable
3.
To prevent hazards, check the appliance for any transport damage.
4.
In case of damage, do not put the
NOTE
NOTENOTE
NOTE:
::
:
Production residue or dust may have collected on the
cording to chapter “Cleaning
and Maintenance
NOTE
NOTENOTE
NOTE:
::
: The
original appliance may differ from the appliance pictured here.
Supplied parts
Supplied partsSupplied parts
Supplied parts
1 x connecting piece with non-
return valves
Assembly material incl. drill template
There must be a safety distance between the hotplate of the
extractor hood:
The distance must be between 60
The distance must be between 60The distance must be between 60
The distance must be between 60
–
––
–
installation instructions for the gas cooker spe
eration.
28
Do not try to repair the appliance on your own. Always contact an authorized
technician. To avoid the exposure to danger, always have fault
y cable be replaced
only by the manufacturer, by our customer service or by qualified person and with
Unpacking the Appliance
Unpacking the ApplianceUnpacking the Appliance
Unpacking the Appliance
Remove the appliance from its packaging.
Remove all packaging material, such as foils, filler, cable
holder and cardboard packaging.
To prevent hazards, check the appliance for any transport damage.
In case of damage, do not put the
appliance
into operation. Contact your distributor.
Production residue or dust may have collected on the
appliance. We recommend cleaning the appliance a
and Maintenance
”.
Overview of the Appliance
Overview of the ApplianceOverview of the Appliance
Overview of the Appliance
original appliance may differ from the appliance pictured here.
return valves
1 x spacer strip
Assembly material incl. drill template
Installation
InstallationInstallation
Installation
There must be a safety distance between the hotplate of the
cook
ing pot on the hob and the
–
––
–
75
7575
75
cm. For gas appliances, the distance must be at least 65 cm.
cm. For gas appliances, the distance must be at least 65 cm.cm. For gas appliances, the distance must be at least 65 cm.
cm. For gas appliances, the distance must be at least 65 cm.
installation instructions for the gas cooker spe
c
ify a greater distance, this distance mu
1
Pull
min
2
Control
3
Aluminum grease filter
4
Lighting
Do not try to repair the appliance on your own. Always contact an authorized
y cable be replaced
only by the manufacturer, by our customer service or by qualified person and with
holder and cardboard packaging.
into operation. Contact your distributor.
appliance. We recommend cleaning the appliance a
c-
ing pot on the hob and the
bottom part of the
cm. For gas appliances, the distance must be at least 65 cm.
cm. For gas appliances, the distance must be at least 65 cm. cm. For gas appliances, the distance must be at least 65 cm.
cm. For gas appliances, the distance must be at least 65 cm.
If the
ify a greater distance, this distance mu
st be taken into consid-
Pull
-out device with alu-
min
um grease filter
Control
panel
Aluminum grease filter
Lighting
Selecting the fume outlet
Selecting the fume outletSelecting the fume outlet
Selecting the fume outlet
You can operate
the extractor hood in two
Extraction mode
Extraction modeExtraction mode
Extraction mode
WARNING:
WARNING:WARNING:
WARNING:
•
The extracted air may not be vented into a flue which is used for the waste gas
from appliances which are powered by gas
•
When venting the extracted air, comply with the regulations of the relevant local
authorities.
The hood has an upper air outlet to vent
•
The extracted air is normally vented vertically. If there is a
tracted air is vented through the wall units and the loft floor to the roof ridge.
• If
there is a conduit in your kitchen under the wall units, the extraction duct can be routed so that the e
tracted air can be
vented horizontally through the wall.
Recirculation mode
Recirculation modeRecirculation mode
Recirculation mode
If you do not have a direct
extraction vent to the
without an extraction vent to the out
side; the
vated carbon filter as de
scribed under
used.
The activated carbon filter is not
. o order, use the
Assembly
AssemblyAssembly
Assembly
WARNING:
WARNING:WARNING:
WARNING:
• When assembling or inserting
the
connected to the mains.
•
Failure to use the mounting fixtures may lead to a
CAUTION
CAUTIONCAUTION
CAUTION:
::
:
• Before mounting, check that the
wall
•
When drilling the holes in the wall always make sure that no existing electrical cables or other objects are
damaged.
•
Make sure that the vents are clear of obstacles and are not covered.
NOTE
NOTENOTE
NOTE:
::
:
Recomm
RecommRecomm
Recomm
endations for preparation work
endations for preparation workendations for preparation work
endations for preparation work
• When installing, ask another
person
•
Wear protective gloves to prevent injuries from any sharp edges.
29
the extractor hood in two
modes:
The extracted air may not be vented into a flue which is used for the waste gas
from appliances which are powered by gas
or other fuels.
When venting the extracted air, comply with the regulations of the relevant local
The hood has an upper air outlet to vent
cooking odours to the outside.
The extracted air is normally vented vertically. If there is a
suitable loft space above your kitch
tracted air is vented through the wall units and the loft floor to the roof ridge.
there is a conduit in your kitchen under the wall units, the extraction duct can be routed so that the e
vented horizontally through the wall.
extraction vent to the
out
side; the hood can also work in
side; the
filtered air is released back into the
room). In this case, an
scribed under
“Installing the activated carbon
filter for recirculation mode”
s
r
.
“Technical
the
extraction filter as well as the carbon filter,
the
Failure to use the mounting fixtures may lead to a
risk of electric shock
risk of electric shockrisk of electric shock
risk of electric shock.
wall
has sufficient load capacity to bear the
extractor
When drilling the holes in the wall always make sure that no existing electrical cables or other objects are
Make sure that the vents are clear of obstacles and are not covered.
endations for preparation work
endations for preparation workendations for preparation work
endations for preparation work
person
to assist.
Wear protective gloves to prevent injuries from any sharp edges.
The extracted air may not be vented into a flue which is used for the waste gas
When venting the extracted air, comply with the regulations of the relevant local
suitable loft space above your kitch
en, the ex-
there is a conduit in your kitchen under the wall units, the extraction duct can be routed so that the e
x-
side; the hood can also work in
recirculation mode (i.e.
room). In this case, an
acti-
filter for recirculation mode”
must be
bon filter from yo
suplied
ber found unde
the
appliance must not be
extractor
hood.
When drilling the holes in the wall always make sure that no existing electrical cables or other objects are
1
•
The hood is mounted below a suitable wall unit. Determine the position of the extractor hood centrally
above the hob in
conformance with the specified safety distances.
• Pull the pull-out device and re
move
• Hold the hood to the specified
cabinet
sponding to the six screw holes.
Check
• For extraction mode, you must
also
• If the mains cable is fed through
the
• Drill six mounting holes of
Ø 4 mm
• Screw in the appli
ance with the screws (1)
• Insert the connecting piece with
non
the mounting hooks on the
connecting piece
• For extraction mode, a flexible
extraction
fitted and connected to the
outside
• To fill the gap between the wall
and
depending on the gap. Mount the
• Reinstall the aluminum grease
filter.
I
II
Installing the activated carbo
nstalling the activated carbonstalling the activated carbo
nstalling the activated carbo
n filter for recirculation mode
n filter for recirculation moden filter for recirculation mode
n filter for recirculation mode
• Pull the pull-out device and r
emove the aluminum grease filter.
•
Place the carbon filter onto the air intake of the extraction duct. Make sure that the mounting pins on the
extraction duct engage the mounting slots of the carbon filter. Turn the respective filter clockwise u
clicks into place.
• Reinstall the alumin
um grease filter
NOTE
NOTENOTE
NOTE:
::
:
The activated carbon filter absorbs
odours
30
2 3
The hood is mounted below a suitable wall unit. Determine the position of the extractor hood centrally
conformance with the specified safety distances.
move
the aluminum grease filter.
cabinet
position and draw the drilling points from
the
Check
them with a spirit level.
also
create a feed through of approx. Ø 130 mm in
the
unit, a feed through also must be provided.
Ø 4 mm
through the base of the unit.
ance with the screws (1)
and washers under the wall unit.
non
-return valves (2) onto the extraction duct
from
connecting piece
latch into place.
extraction
hose (not supplied) with an inner
diameter
outside
by an extraction vent.
and
the appliance, attach the spacer strip
(3) on t
strip using the screws (4) in the holes provided
on
filter.
n filter for recirculation mode
n filter for recirculation moden filter for recirculation mode
n filter for recirculation mode
emove the aluminum grease filter.
Place the carbon filter onto the air intake of the extraction duct. Make sure that the mounting pins on the
extraction duct engage the mounting slots of the carbon filter. Turn the respective filter clockwise u
um grease filter
.
odours
and must be replaced at least every six
months
4
The hood is mounted below a suitable wall unit. Determine the position of the extractor hood centrally
the
inside of the unit corre-
the base of the unit.
from
above. Make sure that
diameter
of Ø 120 mm must be
(3) on t
he narrow or wide side,
on
the appliance.
Place the carbon filter onto the air intake of the extraction duct. Make sure that the mounting pins on the
extraction duct engage the mounting slots of the carbon filter. Turn the respective filter clockwise u
ntil it
months
regardless of use.

Electrical connection
Electrical connectionElectrical connection
Electrical connection
WARNING:
WARNING:WARNING:
WARNING:
•
The installation to the mains supply
•
Improper connection may cause to an
• Do not modify the appliance
plug
an authorized specialist.
• The accessi
bility of the power plug must be ensured in order to disconnect the
supply in case of an emergency.
•
Ensure that your mains power corresponds with the specifications of the appliance. The specifications are
printed on the rating label.
•
Connect the mains cable to a properly installed and earthed wall outlet.
tal effect of cooking
tal effect of cookingtal effect of cooking
tal effect of cooking
I, No. 2)
I, No. 2)I, No. 2)
I, No. 2)
Cooker hood
Cooker hood Cooker hood
Cooker hood
The diameter of the pot and pan floors
Use pans and pots with flat floors, uneven floors increase the energy consumption.
Ensure that there is sufficient supply air for the operation of the cooker hood.
Adjust the fan step intensity of the da
To product the optimal effect of the cooker hood, install it according to the installation instructions. Keep the
distance between the upper edge of the cooker and the lower edge of the cooker hood.
Clean the filter regularly.
Controll the active carbon filter regularly and renew it as required.
Switch off the cooker hood after use.
If your cooker hood has a switch-
off delay, activate this function.
Switch off the lighting after the cooking process.
We recommend the use
of biological cleaners.
isassembly
isassemblyisassembly
isassembly
I, No. 2)
I, No. 2)I, No. 2)
I, No. 2)
Cooker hood
Cooker hoodCooker hood
Cooker hood
Information for non-
destructive disassembly for maintenance purposes
Please remove the filter and lamps as described in
Further steps of disassembly for maintenance are not provided
If you would like to exchange defective components, please contact our customer service.
Accumulators are not included.
31
The installation to the mains supply
must conform to the local standards and regulations.
Improper connection may cause to an
electric shoc
electric shocelectric shoc
electric shock!
k!k!
k!
plug
. If the plug does not fit properly to the outlet, let install a proper outlet by
bility of the power plug must be ensured in order to disconnect the
appliance
Ensure that your mains power corresponds with the specifications of the appliance. The specifications are
Connect the mains cable to a properly installed and earthed wall outlet.
Startup / Operation
Startup / OperationStartup / Operation
Startup / Operation
Information to reduce the environm
Information to reduce the environmInformation to reduce the environm
Information to reduce the environm
(acc. VO (EU) No. 66/2014 appendi
(acc. VO (EU) No. 66/2014 appendi(acc. VO (EU) No. 66/2014 appendi
(acc. VO (EU) No. 66/2014 appendi
The diameter of the pot and pan floors
should be according to the size of the cooking zone.
Use pans and pots with flat floors, uneven floors increase the energy consumption.
Ensure that there is sufficient supply air for the operation of the cooker hood.
Adjust the fan step intensity of the da
mp evolution of the cooking process.
To product the optimal effect of the cooker hood, install it according to the installation instructions. Keep the
distance between the upper edge of the cooker and the lower edge of the cooker hood.
Controll the active carbon filter regularly and renew it as required.
Switch off the cooker hood after use.
off delay, activate this function.
Switch off the lighting after the cooking process.
of biological cleaners.
Information to professional users fo
Information to professional users foInformation to professional users fo
Information to professional users fo
(acc. VO (EU) No. 66/2014 appendi
(acc. VO (EU) No. 66/2014 appendi(acc. VO (EU) No. 66/2014 appendi
(acc. VO (EU) No. 66/2014 appendi
destructive disassembly for maintenance purposes
Please remove the filter and lamps as described in
the manual.
Further steps of disassembly for maintenance are not provided
If you would like to exchange defective components, please contact our customer service.
must conform to the local standards and regulations.
. If the plug does not fit properly to the outlet, let install a proper outlet by
appliance
from the power
Ensure that your mains power corresponds with the specifications of the appliance. The specifications are
should be according to the size of the cooking zone.
To product the optimal effect of the cooker hood, install it according to the installation instructions. Keep the
distance between the upper edge of the cooker and the lower edge of the cooker hood.
If you would like to exchange defective components, please contact our customer service.

Information for disassembly in terms of recycling, recovery a
Check that the unit is disconnected from the power supply before removing all filter from the hood.
First remove the chimney.
When disassembling the hood, be sure that you first loosen the lower and then
For the recycling and recovery of resources give the appliance, the lamps and the various filter to:
-
a communal collection point of public waste disposal authorities
-
a dedicated disposal company, offering a return system
- a
resident electric trader, who voluntary withdraws electrical appliances
The extractor hood is operated via
two
and off with the
corresponding switches. Pull the pull
I
II
I
Lowest fan setting
O
OO
O
Fan off
II
IIII
II
Highest fan setting
The motor starts when you pull the pull
I
II
I
Power level:
Power level:Power level:
Power level:
The motor begins to run at
low speed.
produce no or little steam, in order
to
II
IIII
II
Power level:
Power level:Power level:
Power level:
The motor runs at highest
speed. This setting is suitable for normal
NOTE
NOTENOTE
NOTE:
::
:
• I
f a lot of vapour is produced, the fan should be left running for a few minutes after cooking. Only leave the
fan running if absolutely necessary, since otherwise unnecessary energy is consumed.
• If the pull-out device is closed,
the
closed when the device is
opened
The appliance and the operation
there
well as the filter. The ex
tractor hood and
WARNING:
WARNING:WARNING:
WARNING:
•
Before cleaning or maintenance work, the device should always turn off and
switch off the fuse.
WARNING:
WARNING:WARNING:
WARNING:
• Allow the unit to cool down be
fore
• Do not uses steam cleaners for
electric shock!
electric shock!electric shock!
electric shock!
Hot steam could dam
tion.
32
Information for disassembly in terms of recycling, recovery a
nd disposal at the end of the life of the appliance
Check that the unit is disconnected from the power supply before removing all filter from the hood.
When disassembling the hood, be sure that you first loosen the lower and then
the upper screws.
For the recycling and recovery of resources give the appliance, the lamps and the various filter to:
a communal collection point of public waste disposal authorities
a dedicated disposal company, offering a return system
resident electric trader, who voluntary withdraws electrical appliances
two
rocker switches. The lighting and the fan
settings
corresponding switches. Pull the pull
-out device to be
able to operate the switches.
O
OO
O
Lighting off
Lighting on
The motor starts when you pull the pull
-
out device and stops when you push the device back in.
low speed.
This setting is suitable for cooking on a low
flame
to
circulate the air around the kitchen.
speed. This setting is suitable for normal
cooking.
f a lot of vapour is produced, the fan should be left running for a few minutes after cooking. Only leave the
fan running if absolutely necessary, since otherwise unnecessary energy is consumed.
the
extractor hood switches back on with the
same
opened
again.
Cleaning and Maintenance
Cleaning and MaintenanceCleaning and Maintenance
Cleaning and Maintenance
there
of are best maintained by regular clean
ing of your
tractor hood and
accessories should also be cleaned regularly for hygiene reasons.
Before cleaning or maintenance work, the device should always turn off and
dis
connect
fore
cleaning.
cleaning the device; moisture could enter
electrical
Hot steam could dam
age the plastic parts. The device must be dry before restarting oper
nd disposal at the end of the life of the appliance
Check that the unit is disconnected from the power supply before removing all filter from the hood.
the upper screws.
For the recycling and recovery of resources give the appliance, the lamps and the various filter to:
settings
must be switched on
able to operate the switches.
out device and stops when you push the device back in.
flame
and for dishes which
f a lot of vapour is produced, the fan should be left running for a few minutes after cooking. Only leave the
fan running if absolutely necessary, since otherwise unnecessary energy is consumed.
same
setting at which it was
ing of your
extractor hood as
accessories should also be cleaned regularly for hygiene reasons.
connect
the mains plug or
electrical
components. Risk of
Risk of Risk of
Risk of
age the plastic parts. The device must be dry before restarting oper
a-

CAUTION
CAUTIONCAUTION
CAUTION:
::
:
•
Do not use a wire brush or other sharp, abrasive items.
•
Do not use any acidic or abrasive
• To clean the surface of the
housing, use a mild
•
The appliance can be used again after
• If you use your ex
tractor hood in recirculation mode, you must
(see “Replacing the activated car
bon
Cleaning the alumin
Cleaning the aluminCleaning the alumin
Cleaning the aluminum grease filter
um grease filterum grease filter
um grease filter
WARNING: Risk of fire!
WARNING: Risk of fire!WARNING: Risk of fire!
WARNING: Risk of fire!
Grease
residues in the alumin
peratures. It is therefore important that the grease filter is regularly cleaned / r
placed.
Grease and vapours collect in the
filter
clean the grease filter monthly:
• Remove the aluminum grease
filter
tly and pull out towards the front.
• Rinse the grease filter in a
solution
• Then clean with a soft brush,
rinse
• Alternatively, the grease filter
can
occur in the dishwasher. This
does
Replacing the activated carbon filter
Replacing the activated carbon filterReplacing the activated carbon filter
Replacing the activated carbon filter
The activated carbon filter absorbs
odours
Order the carbon filter from your
dealer
reference number found under
“Technical
• See “Installing the activated
carbon
• Remove the old carbon filter by
turning the filter anti
Replacing the lighting
Replacing the lightingReplacing the lighting
Replacing the lighting
WARNING:
WARNING:WARNING:
WARNING:
Allow the lamps to cool before re
placing
Halogen lamps (Type E14
Halogen lamps (Type E14Halogen lamps (Type E14
Halogen lamps (Type E14
• Pull the pull-
out device and remove the aluminum grease
•
Remove the faulty bulbs and screw in new bulbs.
•
Reinstall the aluminum grease filter.
33
Do not use a wire brush or other sharp, abrasive items.
Do not use any acidic or abrasive
cleaners.
housing, use a mild
detergent and a soft cloth to pre
vent scratching.
The appliance can be used again after
everything has dried properly.
tractor hood in recirculation mode, you must
replace the acti
vated
bon
filter”).
residues in the alumin
um grease filter may ignite on exposure to high te
peratures. It is therefore important that the grease filter is regularly cleaned / r
filter
and may accumulate if not regularly
cleaned. We
filter
by sliding back the lock in the handle re
cess,
solution
of hot water and neutral detergent. Soak the
filter
rinse
thoroughly with hot water and leave to dry.
can
also be cleaned in the dishwasher (up to
60°C).
does
not affect the function of the grease filter.
odours
and must be replaced at least every six
months,
dealer
nn.de
nn.denn.de
nn.de
“Technical
Data”.
carbon
filter for recirculation mode”.
turning the filter anti
-clockwise.
placing
the lighting. Risk of burns!
Risk of burns!Risk of burns!
Risk of burns!
2 x 28
2 x 282 x 28
• Use the correct lighting:
1x1,5 W LED light
2 x 28
out device and remove the aluminum grease
filter.
Remove the faulty bulbs and screw in new bulbs.
Reinstall the aluminum grease filter.
vent scratching.
vated
carbon filter regularly
um grease filter may ignite on exposure to high te
m-
peratures. It is therefore important that the grease filter is regularly cleaned / r
e-
cleaned. We
recommend that you
cess,
push the filter down gen-
filter
in the solution.
60°C).
Slight discoloration may
months,
depending on use.
www.bo
www.bomwww.bo
www.bom
To order, use the
A wrong or improperly per
formed repair brings danger to the user.
Repairs to electrical appliances must only be carried out by an authorized
must be changed only by a qualified electrician.
Before you contact an authorized specialist
Before you contact an authorized specialistBefore you contact an authorized specialist
Before you contact an authorized specialist
Problem
ProblemProblem
Problem
Possible cause
Possible causePossible cause
Possible cause
The appliance is
not working or
does not work
properly
-
Is the unit not connected
-
Have you set the power level?
The appliance
does not run
efficiently
-
Have you set the correct power level?
- Are
the grease filter dirty?
- Is
the carbon filter needed for recirculation
(correctly) installed?
-
Is the air outlet required for extraction mode
clear?
The appliance
has stopped
operating
The appliance has overheated and has tri
gered the internal overheating protection.
The lighting does
not work
The lighting is faulty, was incorrectly installed,
lamp not secure in the fitting.
Oil dripping from
the appliance
The grease filter are
NOTE:
NOTE:NOTE:
NOTE:
If a problem still persists
after following the steps abo
34
Repairs
RepairsRepairs
Repairs
formed repair brings danger to the user.
Repairs to electrical appliances must only be carried out by an authorized
specialist. A damaged power cord
must be changed only by a qualified electrician.
Troubleshooting
TroubleshootingTroubleshooting
Troubleshooting
Before you contact an authorized specialist
Before you contact an authorized specialistBefore you contact an authorized specialist
Before you contact an authorized specialist
Solution
SolutionSolution
Solution
Is the unit not connected
to mains power?
Have you set the power level?
-
Insert the plug properly in the contact soc
et. Check the fuse.
- Check the setting.
Have you set the correct power level?
the grease filter dirty?
the carbon filter needed for recirculation
(correctly) installed?
Is the air outlet required for extraction mode
-
Check the setting. The kitchen is not prope
ly ventilated.
-
Clean the grease filter (see “Cleaning the
aluminum grease filter”).
- Check
the carbon filter (see “Replacing the
activated carbon filter”).
-
Check the air outlet.
The appliance has overheated and has tri
g-
gered the internal overheating protection.
Switch off the appliance and wait a while b
fore
you switch it back on. Follow the safety
instructions as well as
distances for the
cooking
The lighting is faulty, was incorrectly installed,
lamp not secure in the fitting.
Check the lighting
(see “Replacing the ligh
ing”).
The grease filter are
dirty.
Clean the grease filter
after following the steps abo
ve, contact your trader or an authorized technician.
specialist. A damaged power cord
Insert the plug properly in the contact soc
k-
Check the setting. The kitchen is not prope
r-
Clean the grease filter (see “Cleaning the
aluminum grease filter”).
the carbon filter (see “Replacing the
activated carbon filter”).
Check the air outlet.
Switch off the appliance and wait a while b
e-
you switch it back on. Follow the safety
instructions as well as
the specified safety
cooking
utensils.
(see “Replacing the ligh
t-
Clean the grease filter
.
ve, contact your trader or an authorized technician.
35
Technical Data
Technical DataTechnical Data
Technical Data
Model
ModelModel
Model
Wall flue 60 cm wide
Power supply 220-240 V~, 50 Hz
Lighting, halogen
1 x 1,5 W
Power rating
66,5 W
Protection class II
Net weight
approx. 6,3 kg
Overview of dimensions,
figures in mm
The right to make technical and design modifications in the course of continuous product development re-
mains reserved.
M
MM
Me
ee
ea
aa
an
nn
ni
ii
in
nn
ng
gg
g
o
oo
of
ff
f
t
tt
th
hh
he
ee
e
“
““
“D
DD
Du
uu
us
ss
st
tt
tb
bb
bi
ii
in
nn
n”
””
”
S
SS
Sy
yy
ym
mm
mb
bb
bo
oo
ol
ll
l
Please return any electrical equipmeennt that you will no longer use to the collection pooiinnts
disposal.
erning
patibility and low voltage directives, aand has been constructed in accordance with
D
DD
Di
ii
is
ss
sp
pp
po
oo
os
ss
sa
aa
al
ll
l
This appliance has been tested accoorrding to all relevant current CE guidelines, such aas electromagnetic com-
thee latest safety regulations.
Protect our environment; do not disppoose of electrical equipment in the domestic wastee.
provided for their
This helps avoid the potential effectss of incorrect disposal on the environment and huumman health.
This will contribute to the recycling aannd other forms of reutilization of electrical and eleecctronic equipment.
Information conc where the eqquuipment can be disposed of can be obtained fromm your local authority.
W
W
W
W
A
A
A
A
R
R
R
R
N
N
N
N
I
I
I
I
N
N
N
N
G
G
G
G
:
:
:
:
Remove or disable any existing snapp and bolt locks, if you take the appliance out of oopperation or dispose it.
CCST3506022TLW /CCST3506022TLX

CERTIFICADO DE GARANTÍA
Imprescindible la presentación de la factura de compra acompañada del presente certificado de garantía.
Riesgos cubiertos.
Este aparato está garantizado contra cualquier defecto de funcionamiento, siempre que se destine a uso doméstico,
procediéndose a su reparación dentro del plazo de garantía y sólo por la red de SAT autorizados.
Nuestros electrodomésticos Corberó cuentan con la garantía legal del fabricante que cubre cualquier avería o defecto durante36
meses, desde su fecha factura de 1 de enero del 2022. En caso de que fuera necesario, nosotros nos ocupamos de cualquier posible
incidencia siempre que se deba a un componente defectuoso o fallo de fabricación.
Excepciones de garantía.
• Que la fecha del certificado no coincida con la fecha de venta de la factura original.
• Averías producidas por golpe, por caída o cualquier otra causa de fuerza mayor.
• Si el apa
rato ha sido manipulado por personal no autorizado.
• Las averías producidas o derivadas como consecuencia de un uso inadecuado, por defectos de instalación,
por introducir modificaciones en el aparato que alteren su funcionamiento.
• Puestas en marcha, mantenimiento, limpiezas, componentes sujetos a desgaste, lámparas, piezas estéticas,
oxidaciones, plásticos, gomas, carcasas y cristales.
“ESTAS EXCEPCIONES ANULAN LA GARANTÍA, SIENDO LA REPARACIÓN CON CARGO AL CLIENTE”
Periodo amparado en aparatos según ley de garantias en la venta de bienes de consumo Ley vigente es “RD 7/2021”
Horario de atención Lunes a Viernes de 9h00 a 19h00. Teléfono de contacto_ 911 08 08 08 Mail de contacto_ [email protected] web_ www.corbero.es
Dirección de Servicio técnico oficial_Vidal i Ribes 8-10 08950 Esplugues de Llobregat Barcelona
Sevicio Técnico Oficial: 911 08 08 08
Los hornos microondas (a excepción de los integrables) y los hornos sobremesa en el caso de cualquier incidencia de
funcionamiento, deben de llevarse al servicio técnico más próximo por parte del cliente. No se recojen ni reparan en el
domicilio.
•
Garantía termos eléctricos. Garantía de 3 años incluyendo los costes de desplazamiento y mano de obra que
correspondan de la reparación del producto, teniendo que tener un mantenimiento una vez cada 12 meses.
Especialmente si Ud. ha instalado un aparato a gas, tenga presente como titular de la instalación, la obligatoriedad de
realizar una revisión completa de los equipos, (según Real Decreto 238 / 2013, del 5 Abril. RITE. IT3, M. Lo termos
eléctricos y calderas que incluyen depósitos acumuladores de agua caliente, para que se aplique la prestación de la
Garantía, es obligatorio que el ánodo de magnesio esté operativo y que realice la función de protección
adecuadamente. Para ello es recomendable que el ánodo se revise bianualmente por el Servicio Oficial y sea renovado
cuando fuera necesario. Periodicidad que deberá ser anual en aquellas zonas con aguas críticas (contenido de CaCO3
superiores a 200mg/L, es decir a partir de 20ºfH de dureza). Depósitos sin el correcto estado del ánodo de protección, no
tienen la cobertura de la garantía. Independientemente del tipo de depósito o producto, todas las válvulas de
sobrepresión de calefacción o a.c.s., deberán ser canalizadas para evitar daños en Ia vivienda por descargas de agua. La
garantía del producto no asume los daños causados por Ia no canalización del agua derramada por esta válvula.
•
CERTIFICATE OF GUARANTEE
The presentation of the purchase invoice accompanied by this guarantee certificate is essential.
Covered Risks.
This appliance is guaranteed against any malfunction, provided that it is intended for domestic use, proceeding to its repair within
the warranty period and only by the authorized SAT network.
Our Corberó appliances have the manufacturer's legal warranty that covers any breakdown or defect for 36 months, from the
invoice date of January 1, 2022. If necessary, we take care of any possible incident whenever it is due to a defective component or
manufacturing fault. Warranty Exceptions
Warranty Exceptions
•
That the date of the certificate does not coincide with the date of sale of the original invoice.
•
Faults produced by blow, by fall or any other cause of force majeure.
•
If the device has been manipulated by unauthorized personnel.
•
Faults produced or derived as a consequence of improper use, installation defects, or modifications to the device that
alter its operation.
•
Start-up, maintenance, cleaning, components subject to wear, lamps, aesthetic parts,
oxidation, plastics, rubbers, housings and crystals.
“THESE EXCEPTIONS VOID THE WARRANTY, THE REPAIR BEING CHARGED TO THE CUSTOMER”
Period covered in devices according to the law of guarantees in the sale of consumer goods Current law is “RD 7/2021”
Hours of operation Monday to Friday from9h00 a 19h00. Telephone contact_ 911 08 08 08 Contact email_ [email protected] web_ www.corbero.es
Official Technical Service Address_Vidal i Ribes 8-10 08950 Esplugues de Llobregat Barcelona
Official Technical Service: 911 08 08 08
Microwave ovens (with the exception of built-in ones) and tabletop ovens in the event of any incident of
operation, they must be taken to the nearest technical service by the customer. They are not collected or repaired at
home.
•
Electric thermos guarantee. 3-year warranty including travel and labor costs that correspond to the repair of the
product, having to have maintenance once every 12 months. Especially if you have installed a gas appliance, keep in
mind as the owner of the installation, the obligation to carry out a complete review of the equipment, (according to
Royal Decree 238 / 2013, of April 5. RITE. IT3, M. Lo thermos electrical and boilers that include hot water storage tanks,
for the benefit of the Guarantee to apply, it is mandatory that the magnesium anode is operational and that it performs
the protection function adequately.For this, it is recommended that the anode be checked biannually by the Official
Service and is renewed when necessary Periodicity that must be annual in those areas with critical waters (CaCO3
content greater than 200mg/L, that is, from 20ºfH of hardness) Deposits without the correct state of the protection
anode are not covered by the warranty Regardless of the type of tank or product, all heating or DHW overpressure
valves must be channeled to avoid damage and n the house due to water discharges. The product warranty does not
cover damages caused by not channeling the water spilled by this valve.
•

CERTIFICADO DE GARANTIA
A apresentação da factura de compra acompanhada deste certificado de garantia é indispensável.
Riscos cobertos.
Este aparelho está garantido contra qualquer avaria, desde que se destine ao uso doméstico, reparando-o dentro do período de
garantia e apenas pela rede SAT autorizada.
Nossos eletrodomésticos Corberó têm garantia legal do fabricante que cobre qualquer avaria ou defeito por 36 meses, a partir da
data da fatura de 1º de janeiro de 2022. Se necessário, cuidamos de qualquer eventual incidente desde que seja devido a um
componente ou fabricação defeituoso falta.
Exceções de garantia.
•
Que a data do certificado não coincida com a data de venda da fatura original.
•
Avarias causadas por pancadas, quedas ou qualquer outra causa de força maior.
•
Se o dispositivo foi adulterado por pessoal não autorizado.
•
Avarias produzidas ou derivadas como resultado de uso indevido, defeitos de instalação, fazendo alterações no
dispositivo que alteram seu funcionamento.
•
Comissionamento, manutenção, limpeza, componentes sujeitos a desgaste, lâmpadas, peças estéticas,
oxidação, plásticos, borrachas, invólucros e vidros.
“ESTAS EXCEÇÕES ANULAM A GARANTIA, SENDO A REPARAÇÃO POR CONTA DO CLIENTE.” Período
abrangido em dispositivos de acordo com a lei de garantias na venda de bens de consumo A lei atual é "Decreto-Lei n.º 84/2021"
Horário de atendimento de segunda a sexta das 9h às 19h. Telefone de contato_ 351 961 789 806 Email de contato_ [email protected]
web_ www.corbero.es Serviço Técnico Oficial Endereço_Vidal i Ribes 8-10 08950 Esplugues de Llobregat Barcelona
Serviço Técnico Oficial: 351 961 789 806
Fornos de microondas (exceto os embutidos) e fornos de mesa em caso de qualquer incidência de
operação, devem ser levados ao serviço técnico mais próximo pelo cliente. Eles não são recolhidos ou reparados em
casa.
•
Garantia térmica elétrica. Garantia de 3 anos incluindo despesas de deslocação e mão-de-obra que correspondam à
reparação do produto, devendo ter manutenção a cada 12 meses. Especialmente se instalou um aparelho a gás, tenha
em atenção como proprietário da instalação, a obrigação de realizar uma revisão completa do equipamento, (de acordo
com o Decreto-Lei n.º 84/2021. Lo thermos eléctricos e caldeiras que incluam acumuladores de água quente, para o
benefício da Garantia a aplicar, é obrigatório que o ânodo de magnésio esteja operacional e que desempenhe a função
de protecção de forma adequada. ser verificado a cada dois anos no Serviço Oficial e renovado quando necessário
Periodicidade que deve ser anual nas áreas com águas críticas (teor de CaCO3 superior a 200mg/L,
ou seja, a partir de 20ºfH de dureza) Depósitos sem o estado correto do ânodo de proteção não estão cobertos pela
garantia Independentemente do tipo de tanque ou produto, todas as válvulas de aquecimento ou de sobrepressão de
água quente sanitária devem ser canalizadas para evitar danos e na casa devido a descargas de água. A garantia do
produto não cobre danos causados pela não canalização da água derramada por esta válvula.
•