
Vibration Sensor
Quick Start Guide
Introduction
Specification
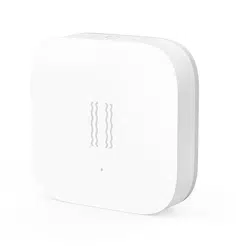
Third Reality Zigbee Vibration Sensor can be used to detect the vibra-
tion and movement of objects, it is designed for indoor use only. It
can be integrated into Amazon Alexa, SmartThings, Hubitat, Home
Assistant and Third Reality App etc. through Zigbee protocol, it can
be used to create routines like alerts of window breaks and washing
machines/dryers monitoring etc.
Operating Temp
Power Supply
Dimensions
Protocol
32 to 104 F(0 to 40 ℃) Indoor Use Only
2 × AAA Batteries
2.19" × 2.20" × 0.48"
( 5.56cm×5.59cm ×1.23cm)
Zigbee 3.0
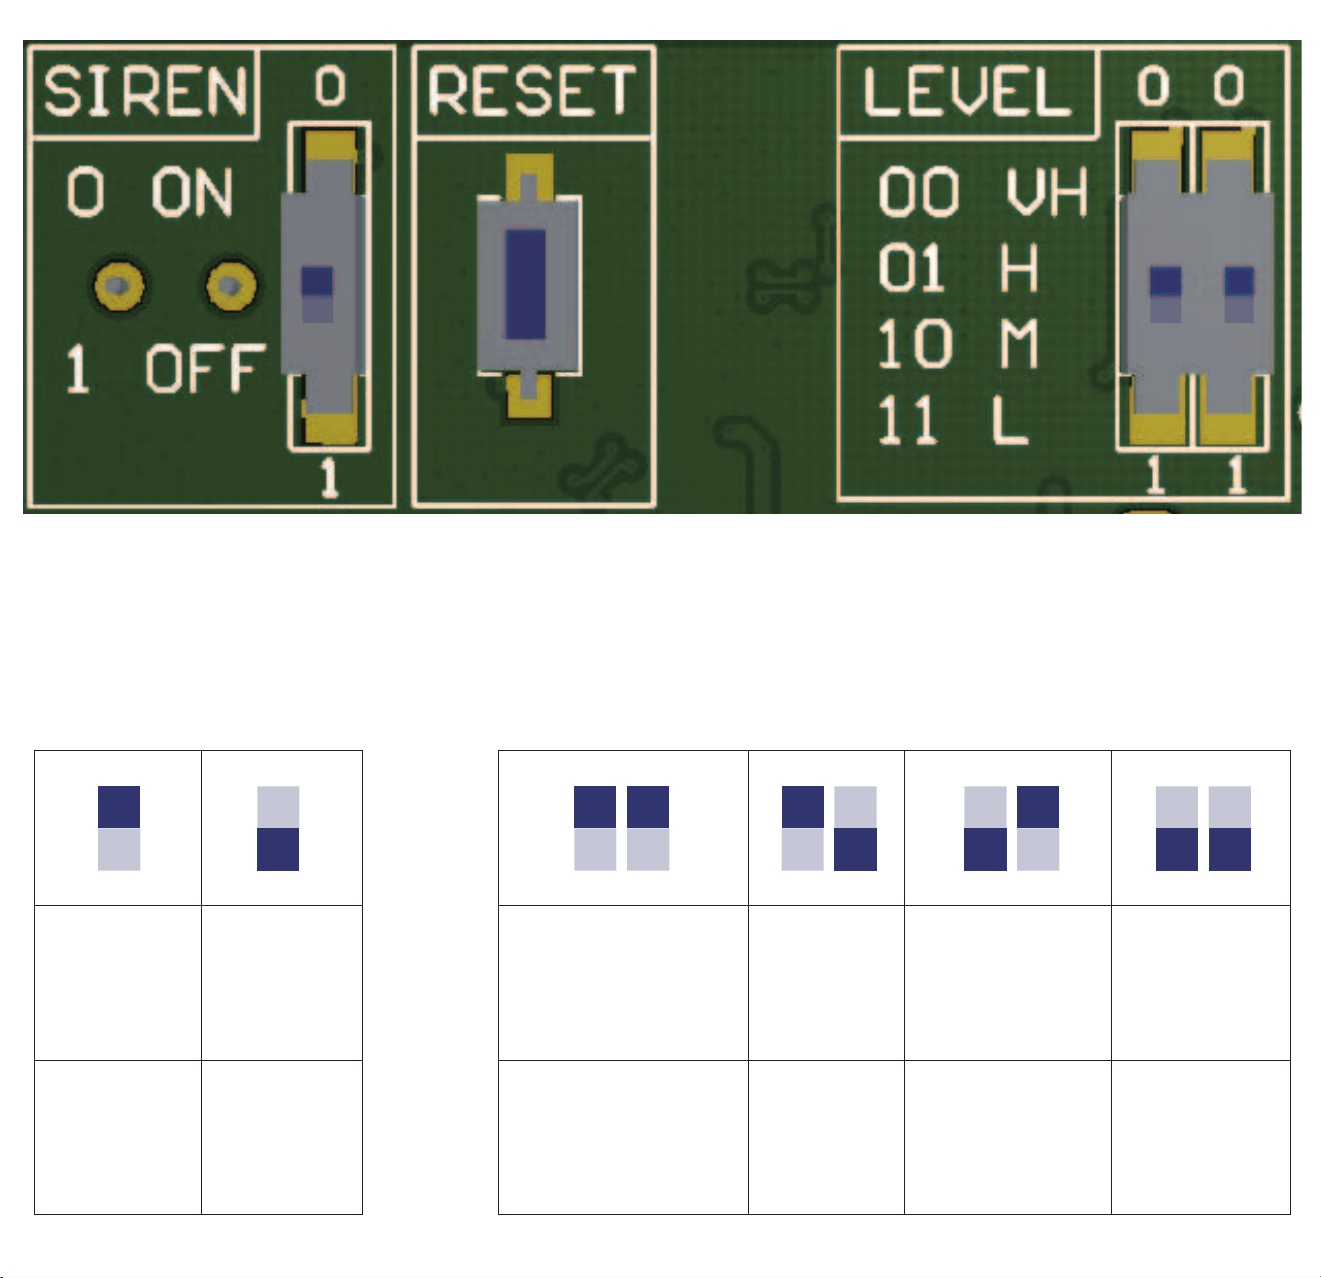
Senitivity Setting:Siren Setting:
0
ONOFF
1
00
Very HighHighMediumLow
110110
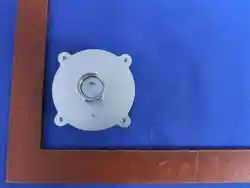
Simply place the Vibration Sensor on top of the object to be moni-
tored, or use double-sided tape to stick it anywhere as desired.
Setup
Remove the plastic insulator to power the Vibration Sensor.
When the sensor is powered up for the first time, it enters pairing
mode automatically, and it exits pairing mode if not paired within
3 minutes, to put it into pairing mode again by pressing the reset
button for 5 seconds.
Follow the instructions of Zigbee hubs to pair the sensor.
Turn on/off the beeping alarm with the single toggle switch, and
set the sensitivity(4 levels) with the dual toggle switches.
1.
2.
3.
Installation
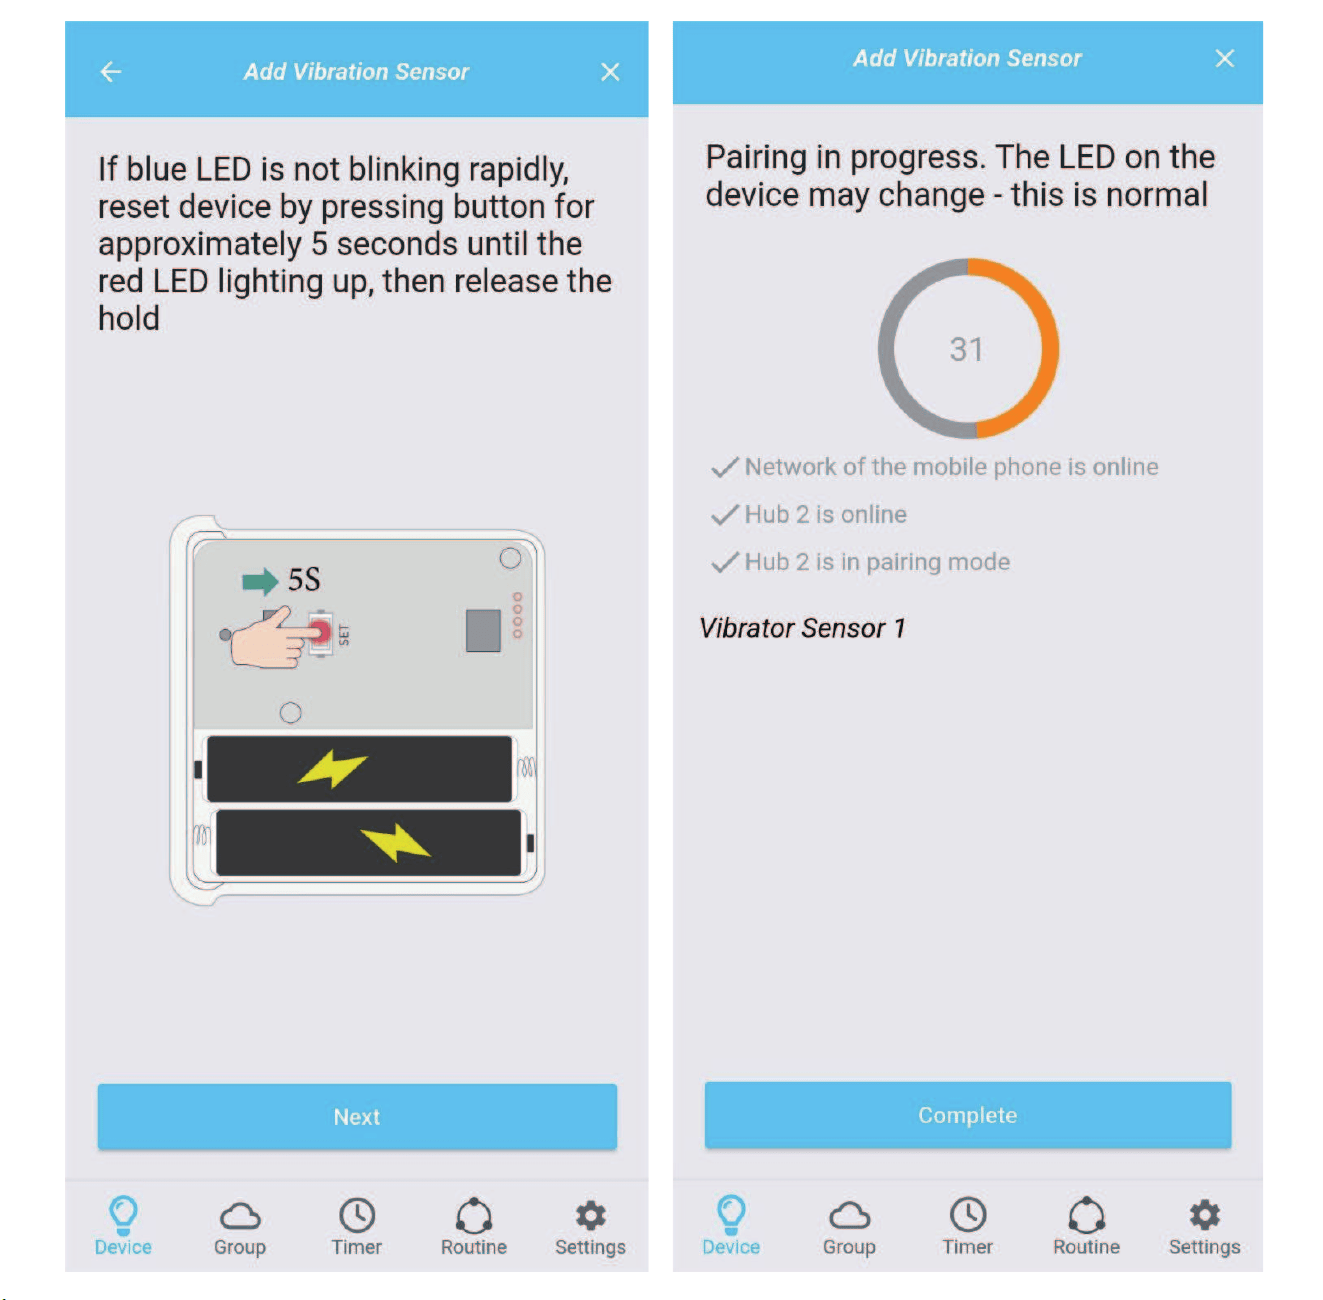
Before pairing, set the Vibration Sensor into pairing mode by press-
ing the reset button for 5 seconds until the LED indicator turns into
fast blue blinking.
Hub: Third Reality Hub Gen2 /Gen2 Plus
App: Third Reality
Pairing with Different Hubs
Pairing with Third Reality
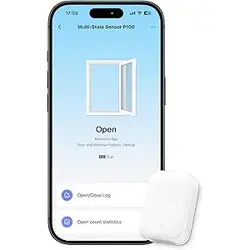
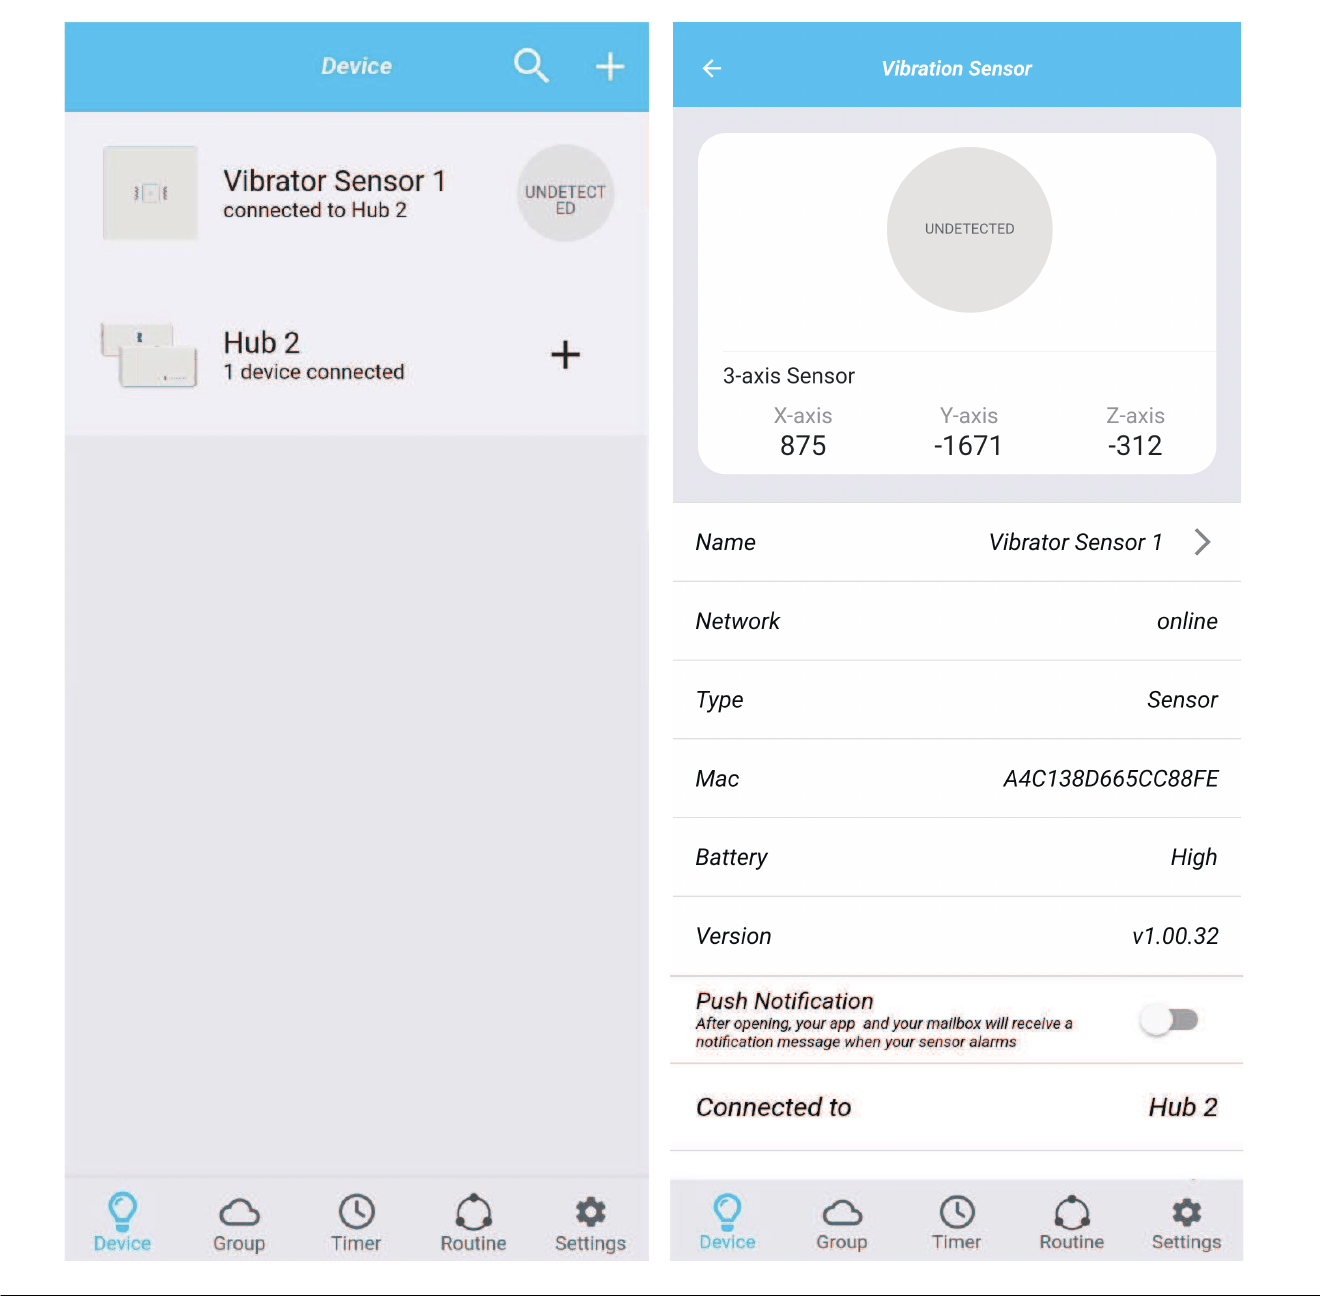
Tab "+" in Third Reality App, follow the on-screen instructions to
add device, it will be added within seconds.
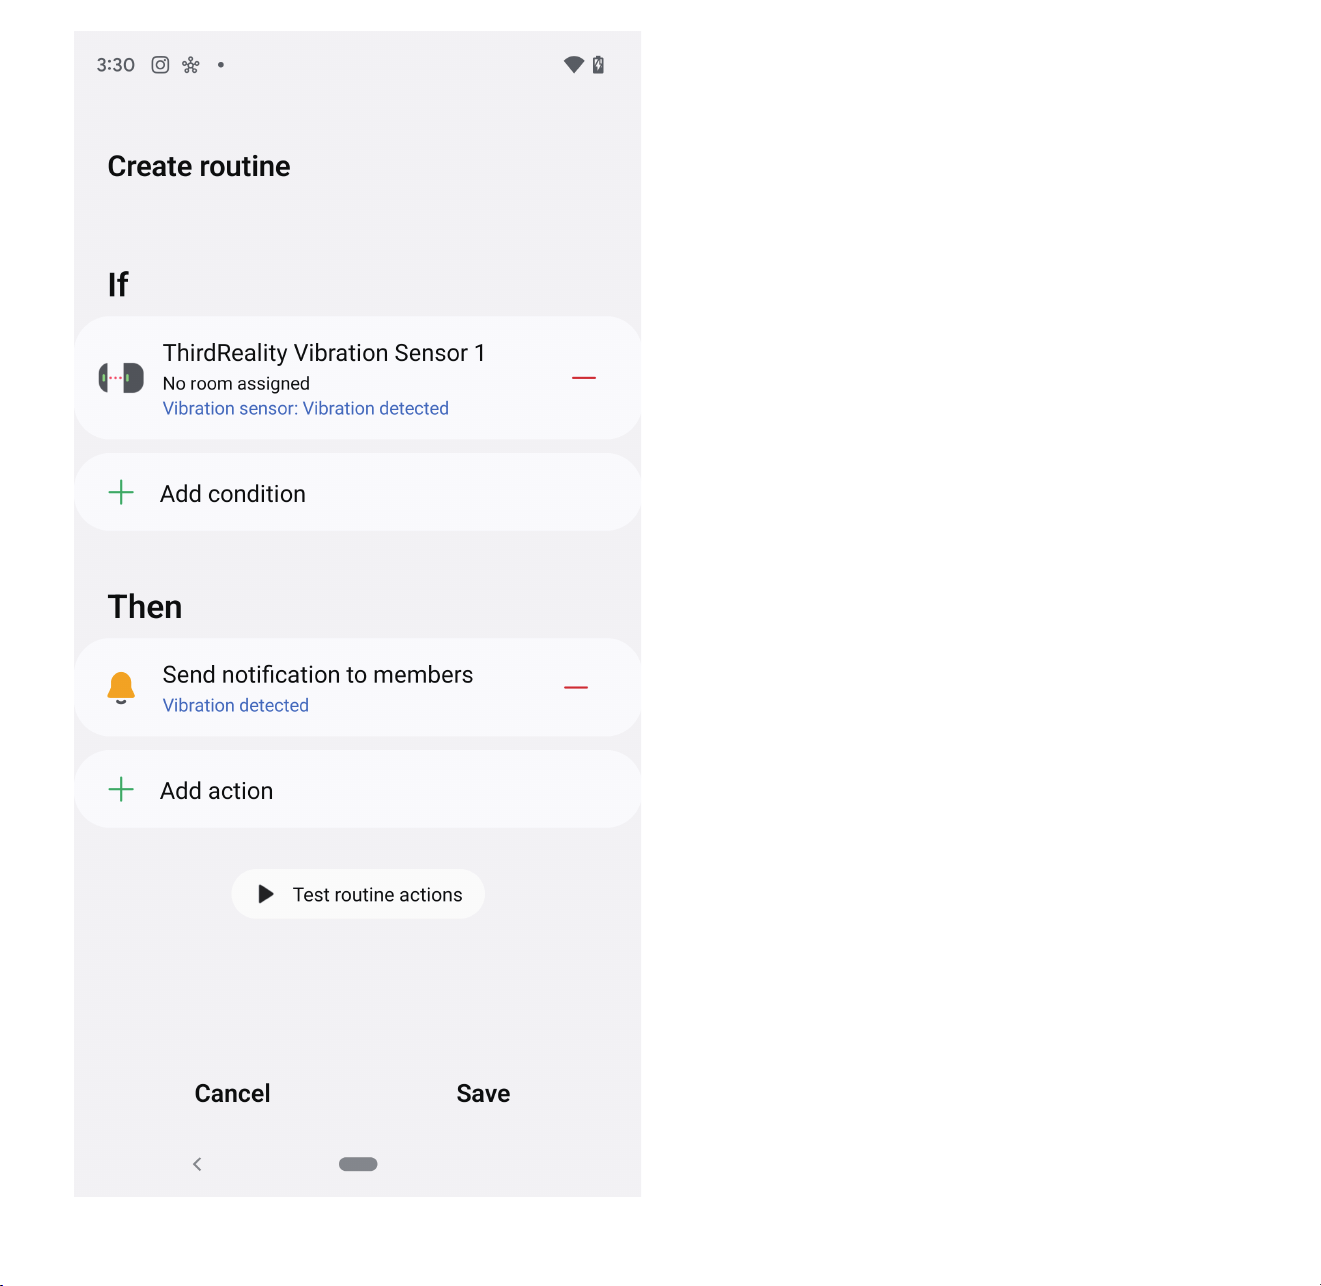
Create routines to control other connected devices.
1.
2.
Pairing steps:
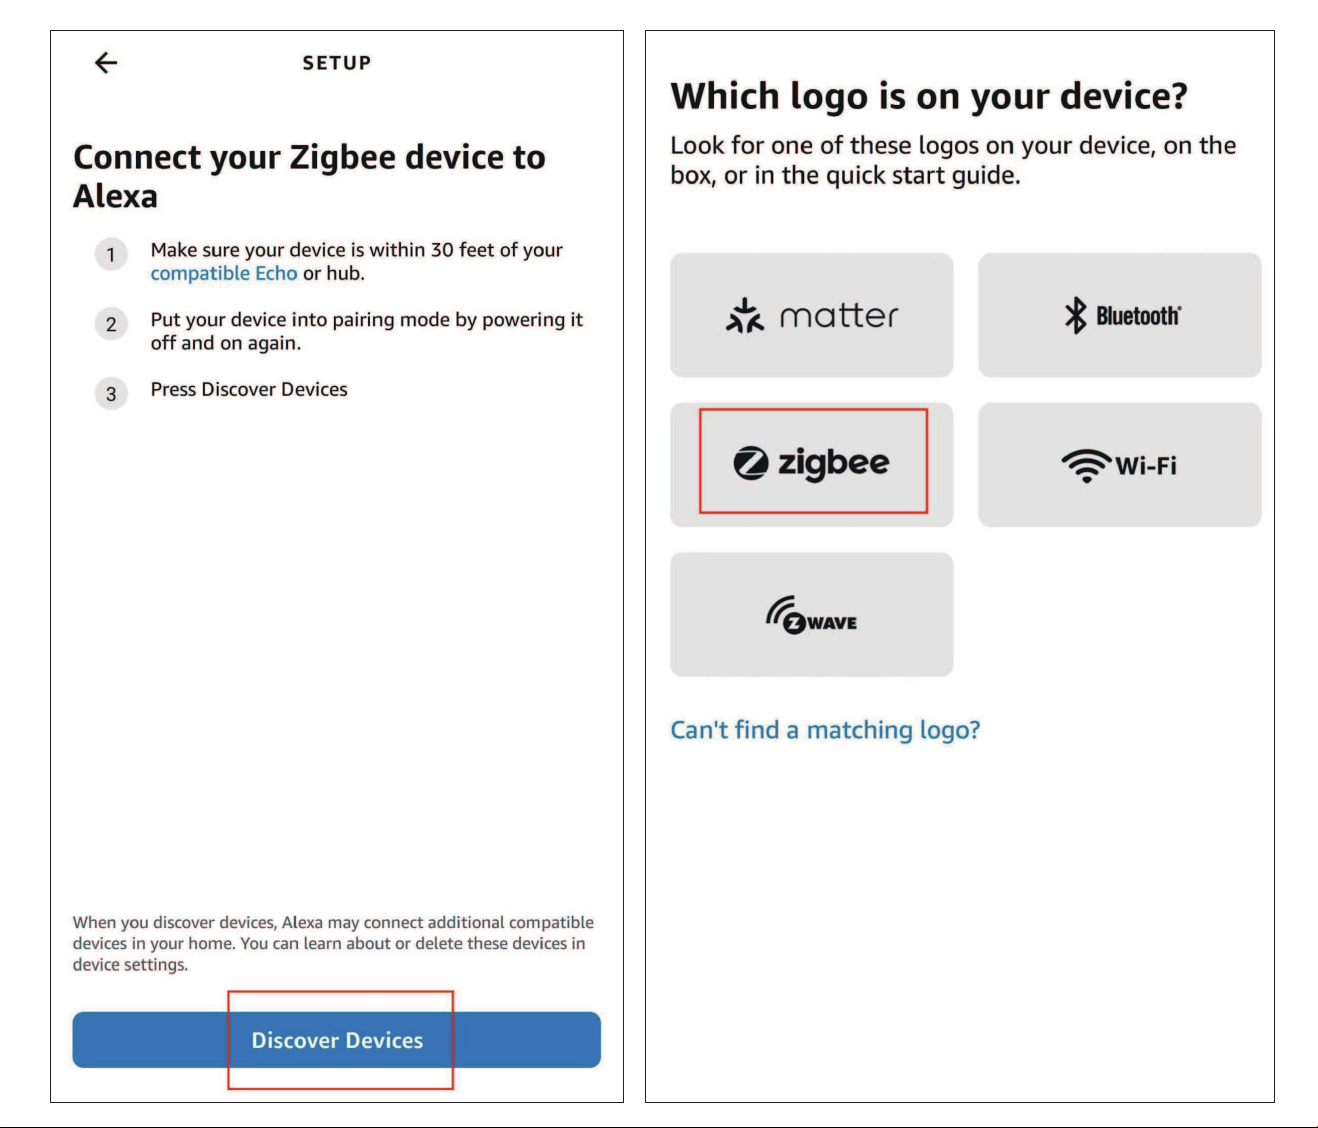
App: Amazon Alexa
Pairing with Echo devices with built-in ZigBee hubs such As Echo V4,
Echo Plus V1 & V2, Echo Studio and Eero 6 & 6 pro.
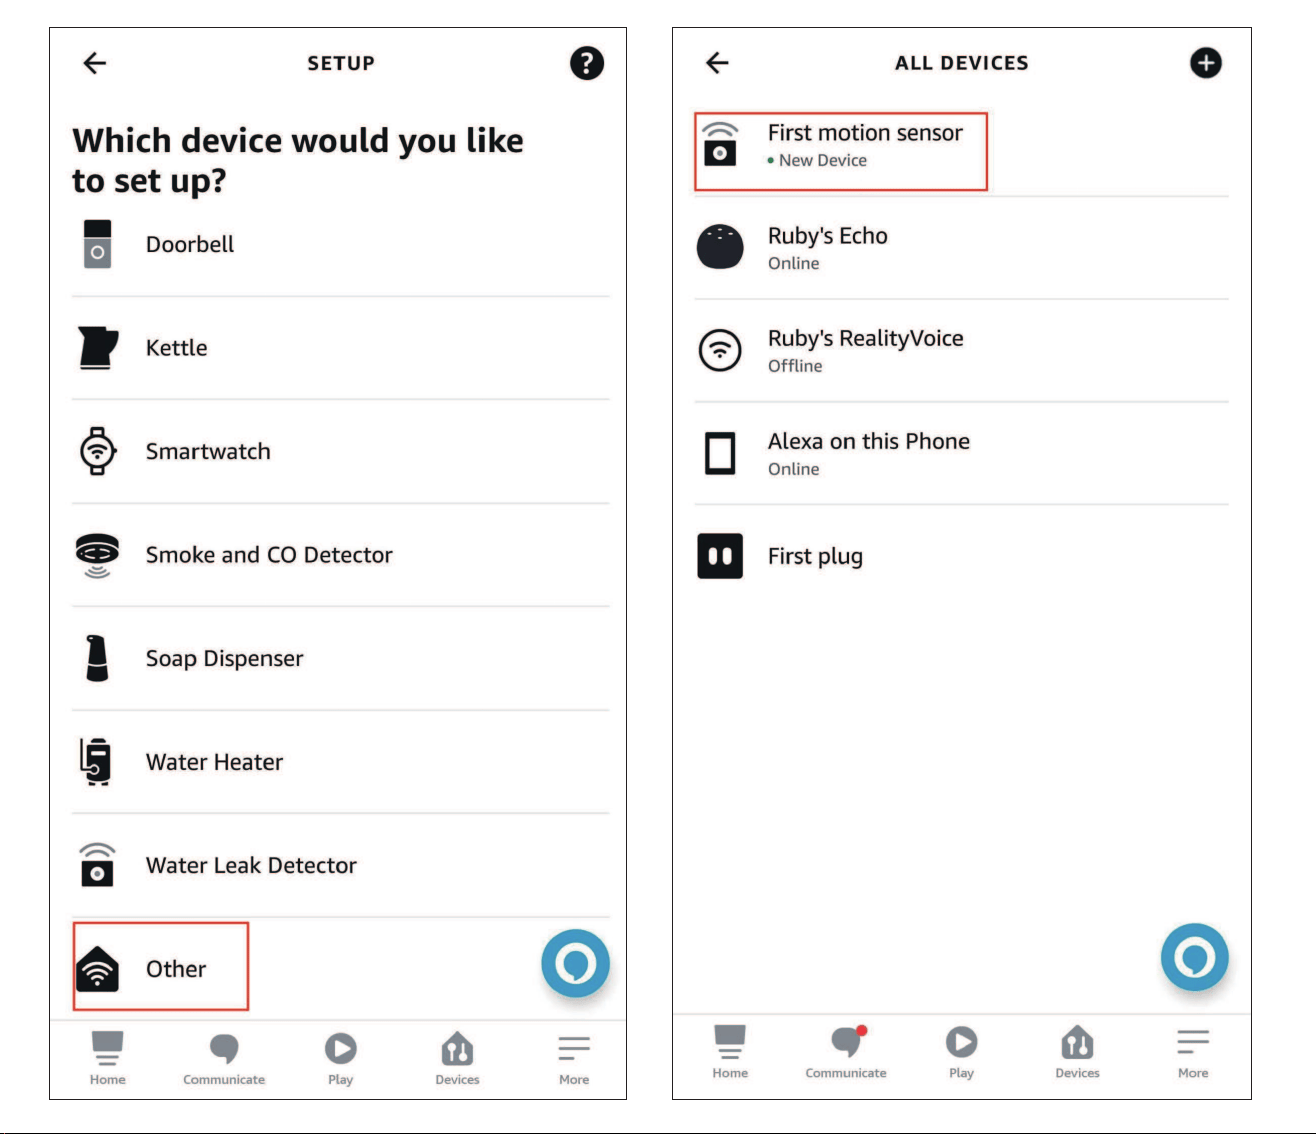
Tab "+" in the Alexa App, choose "Zigbee" and "others" to add
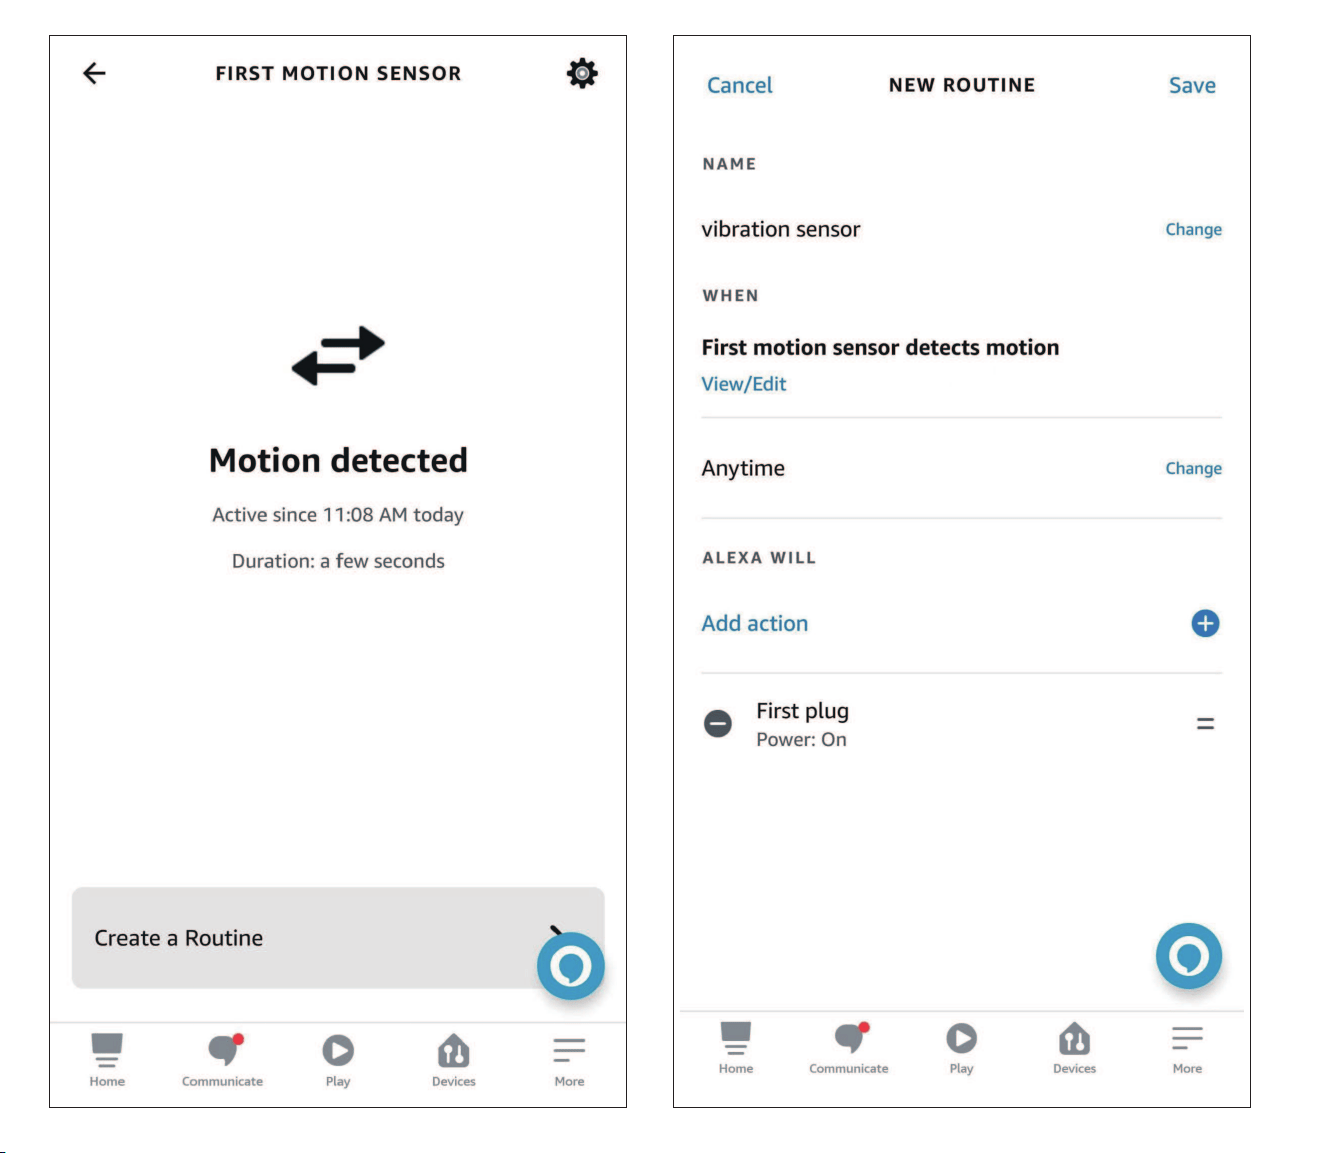
device, the vibration sensor will be added as a "motion sensor".
Create routines to control other connected devices.
1.
2.
Pairing steps:
Pairing With Amazon Echo
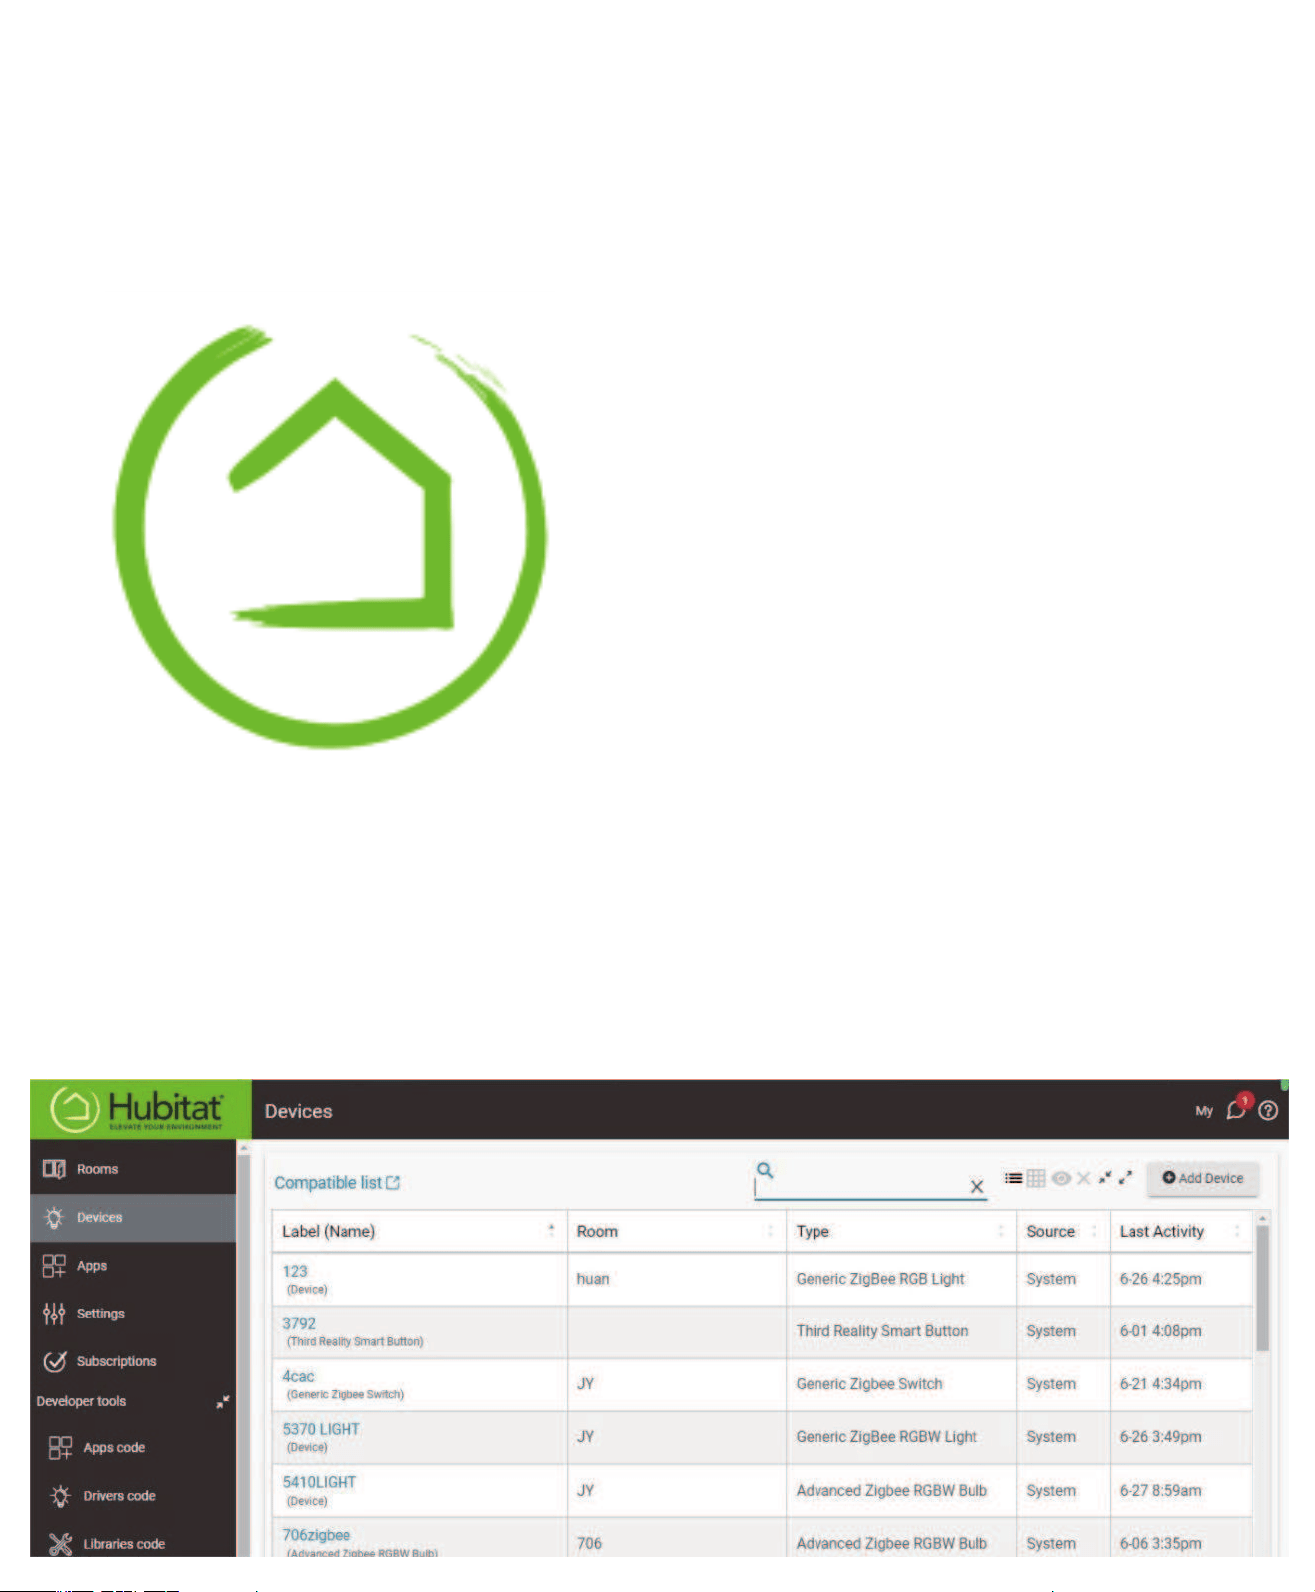
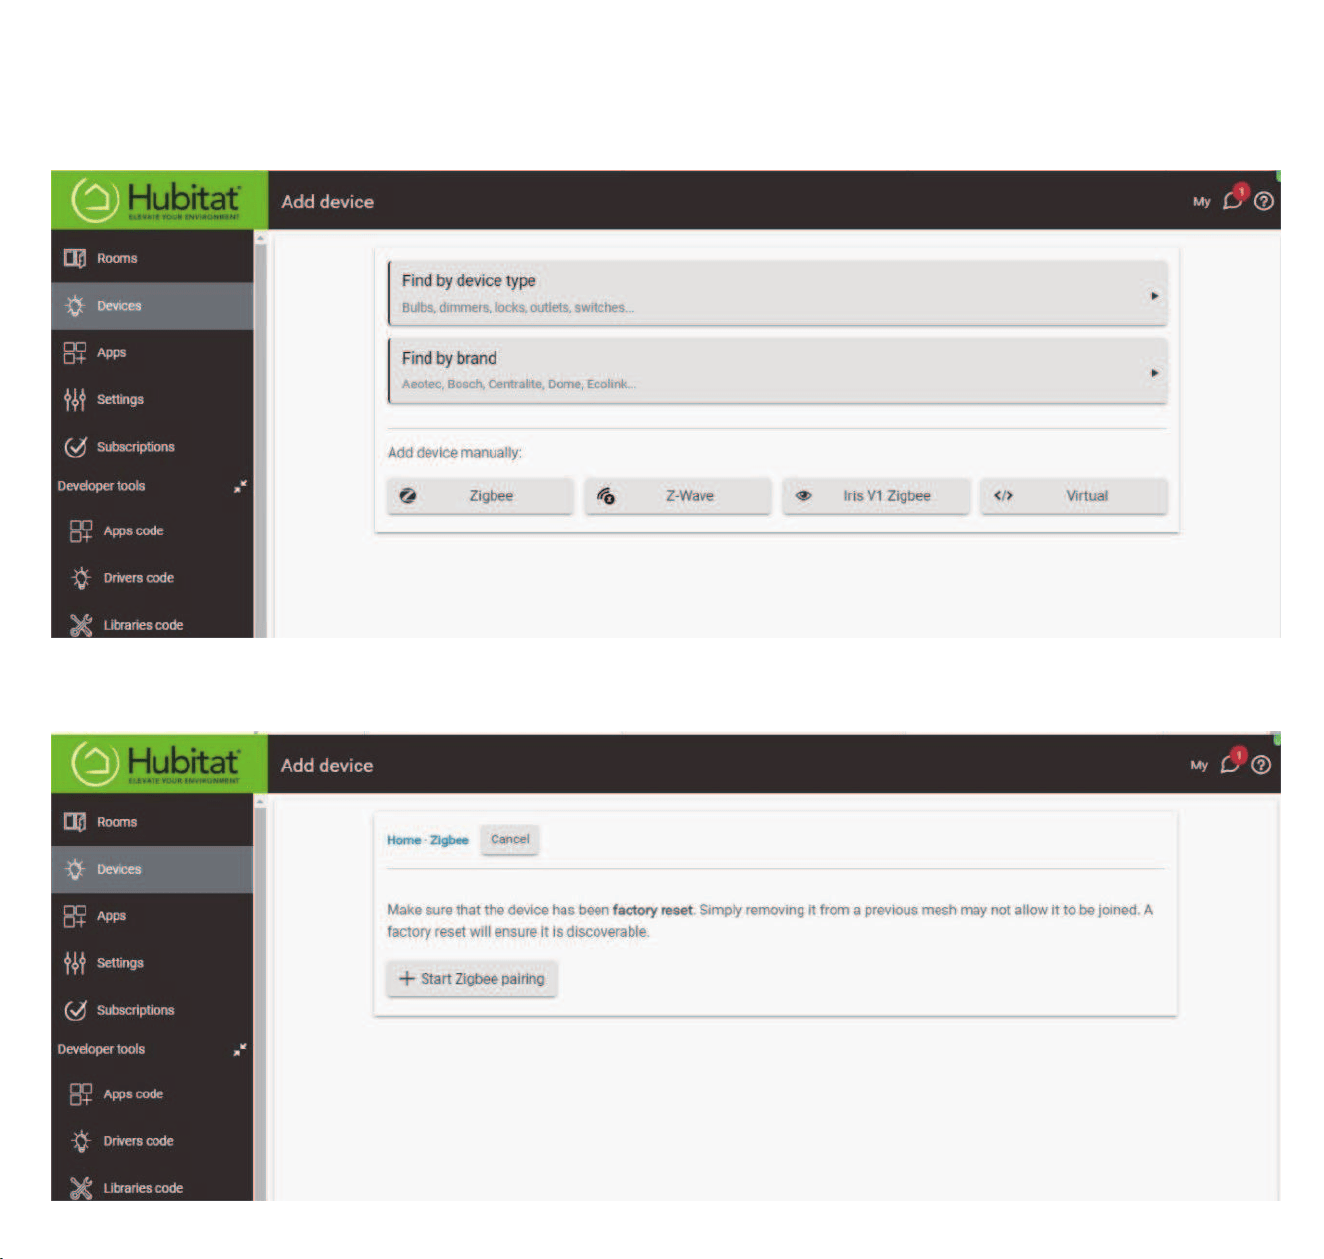
Tab "Add Device" in Hubitat Devices page.1.
Pairing steps:
Website: http://find.hubitat.com/
Pairing With Hubitat
Choose "Zigbee", then "Start Zigbee Pairing".2.
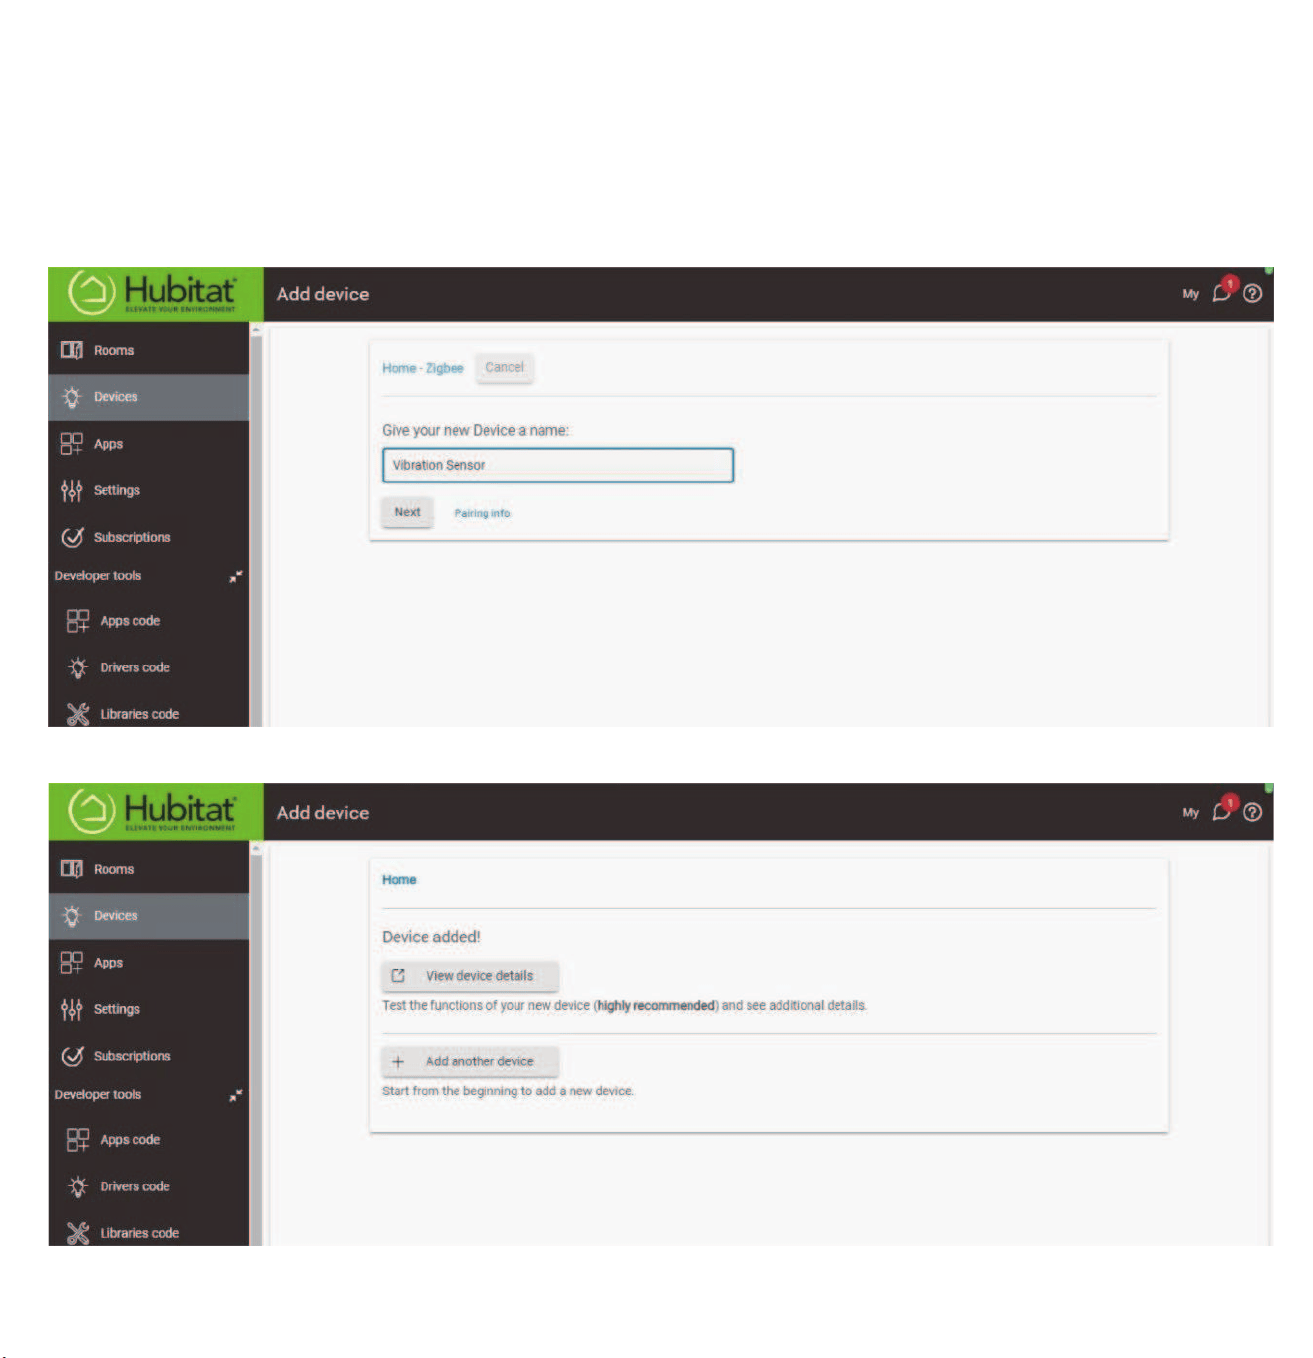
Create a device name for the vibration sensor, then click "Next" to
add device.
3.
Change Type from "Device" to "Generic Zigbee Motion Sensor"
and "Save Device", you can see the status of the sensor "ac-
tive/inactive", and battery level.
4.
Pairing steps:
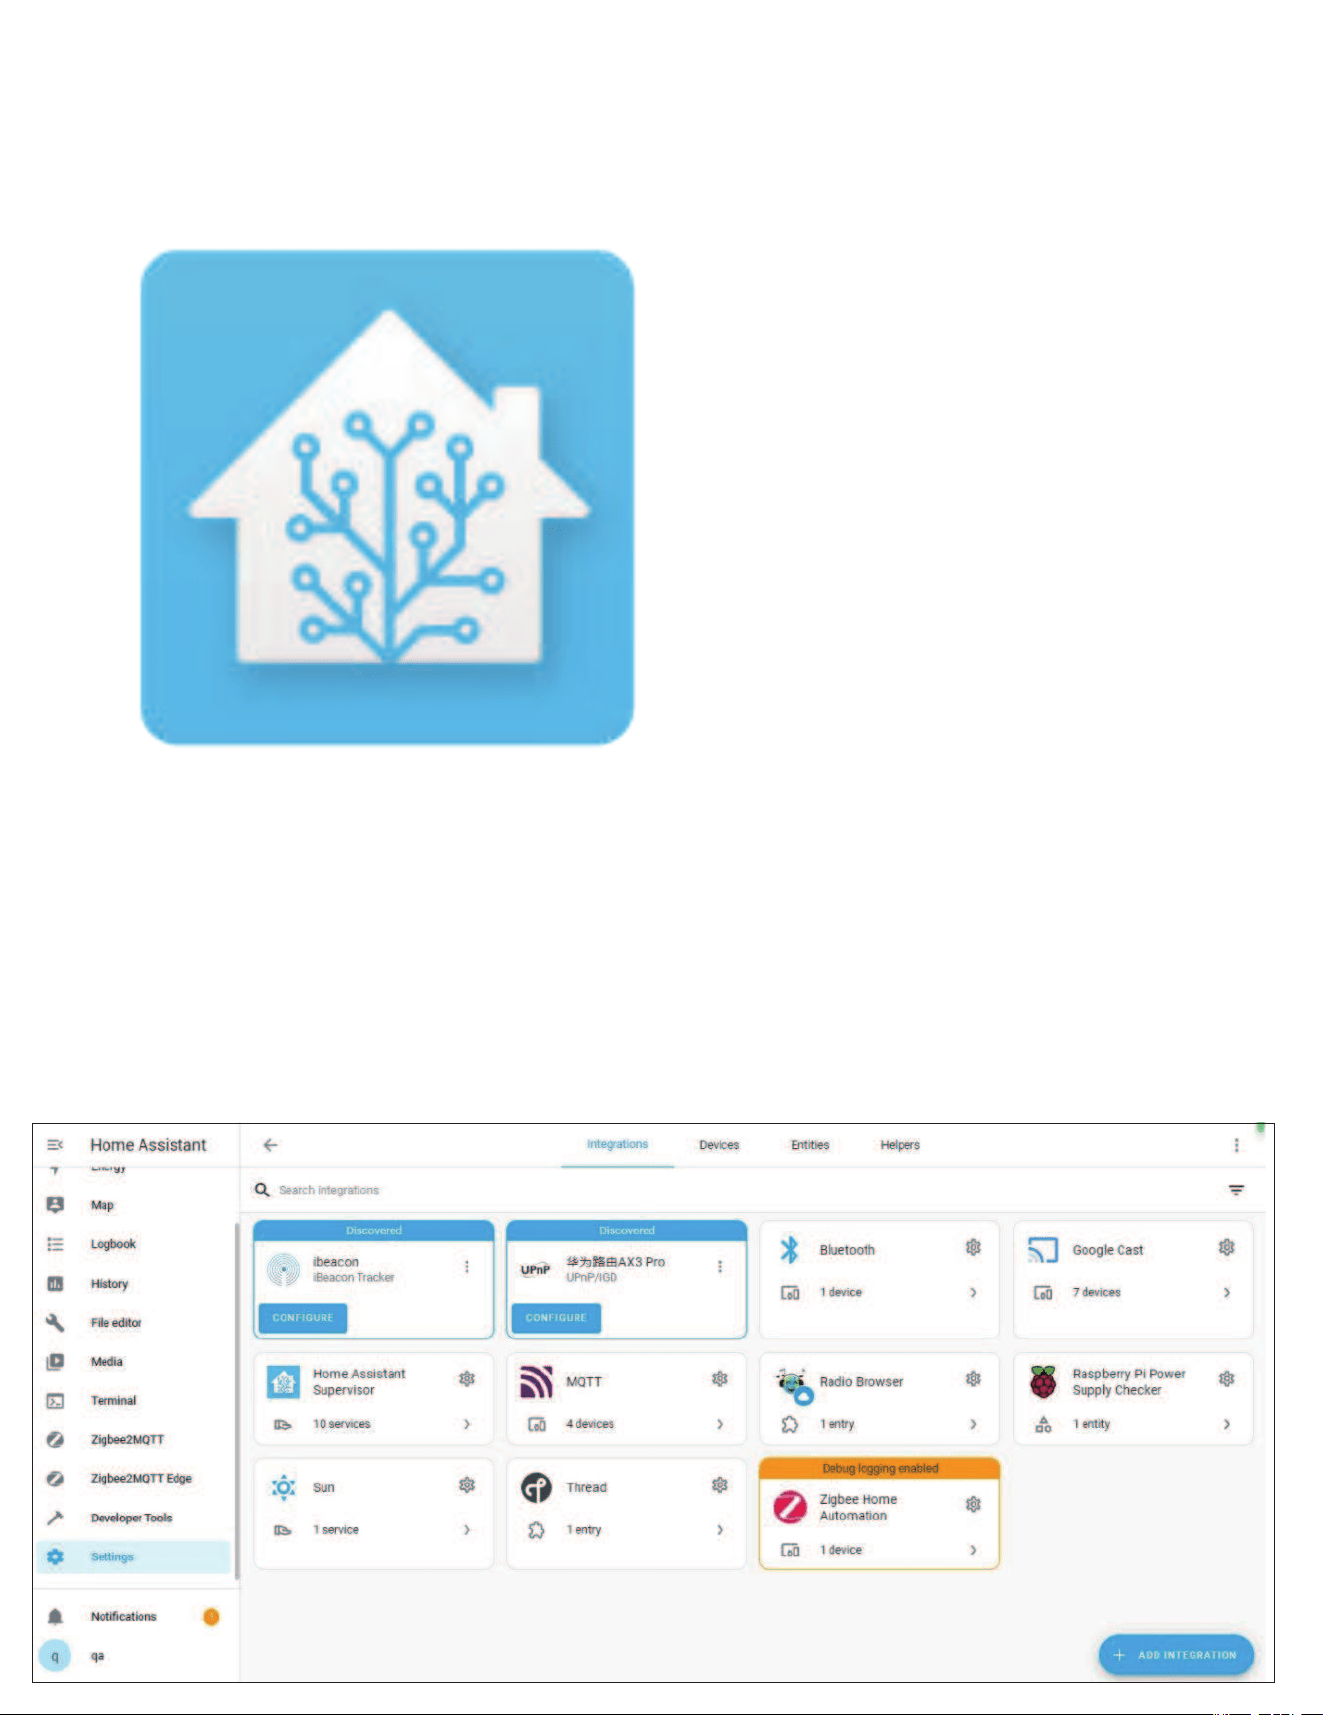
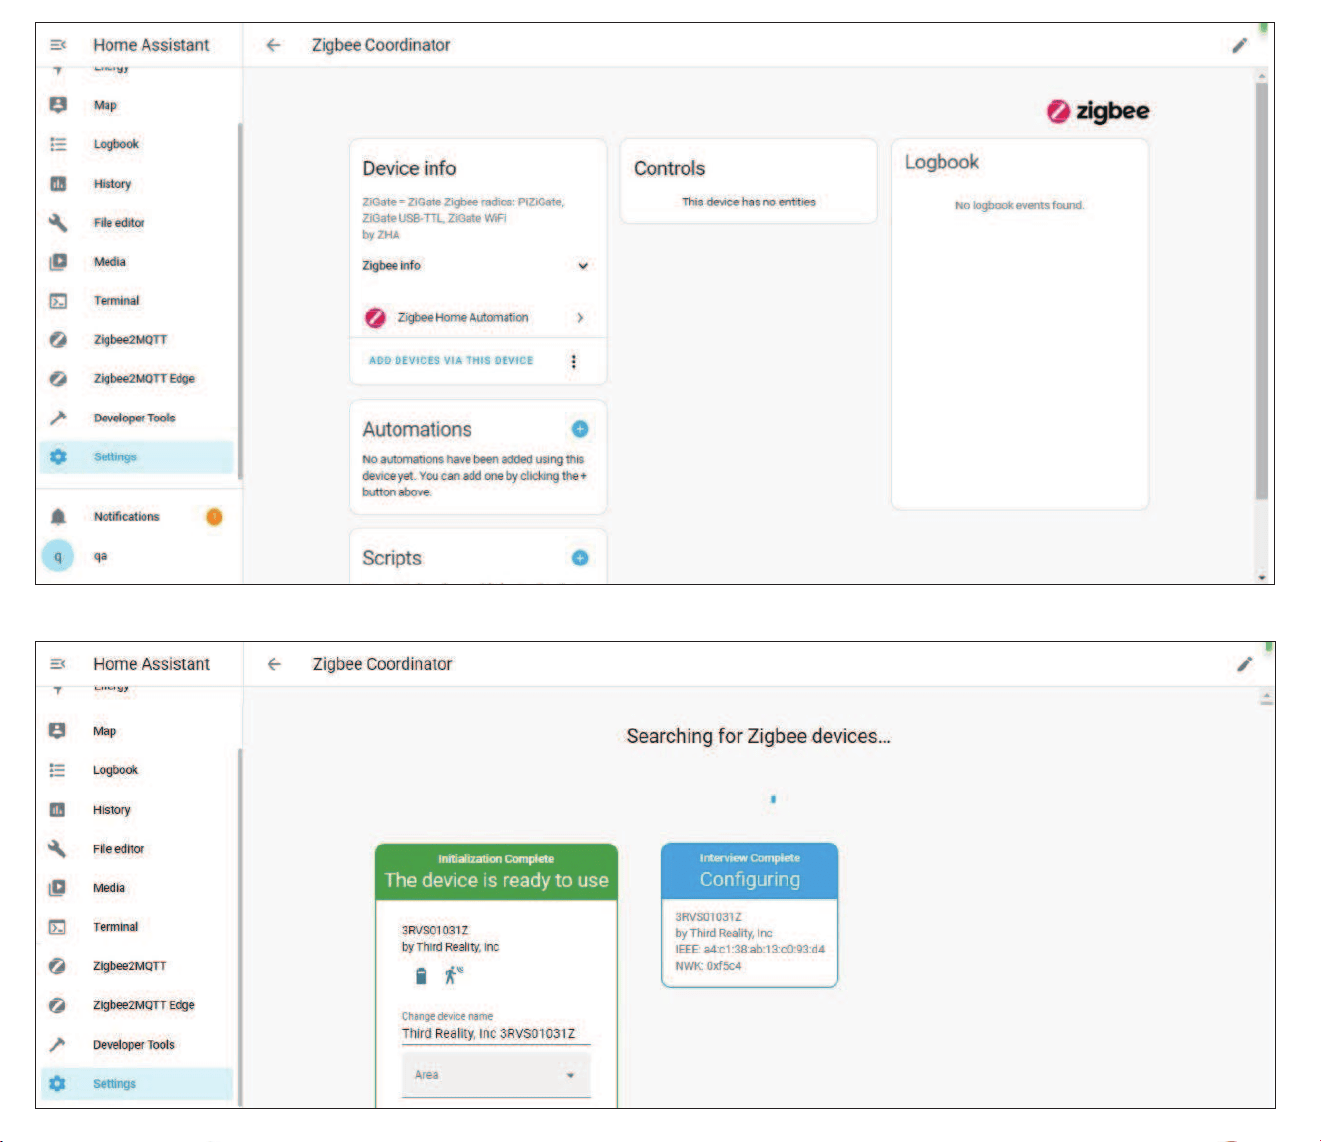
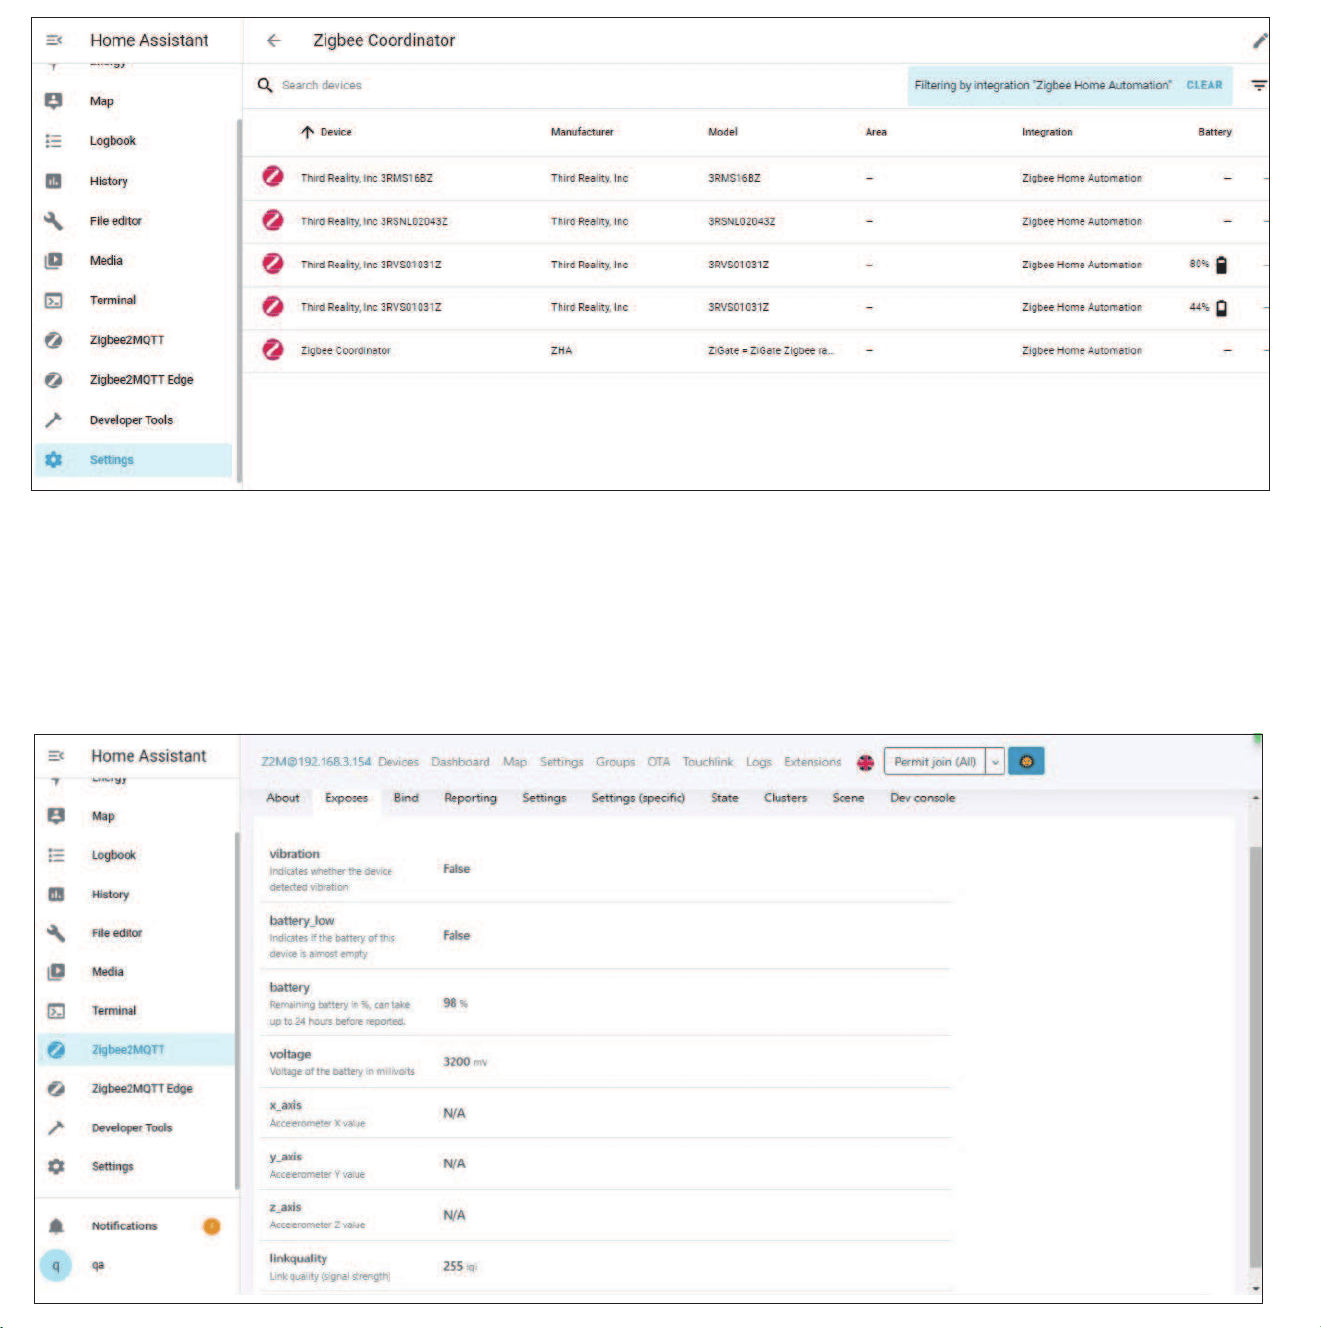
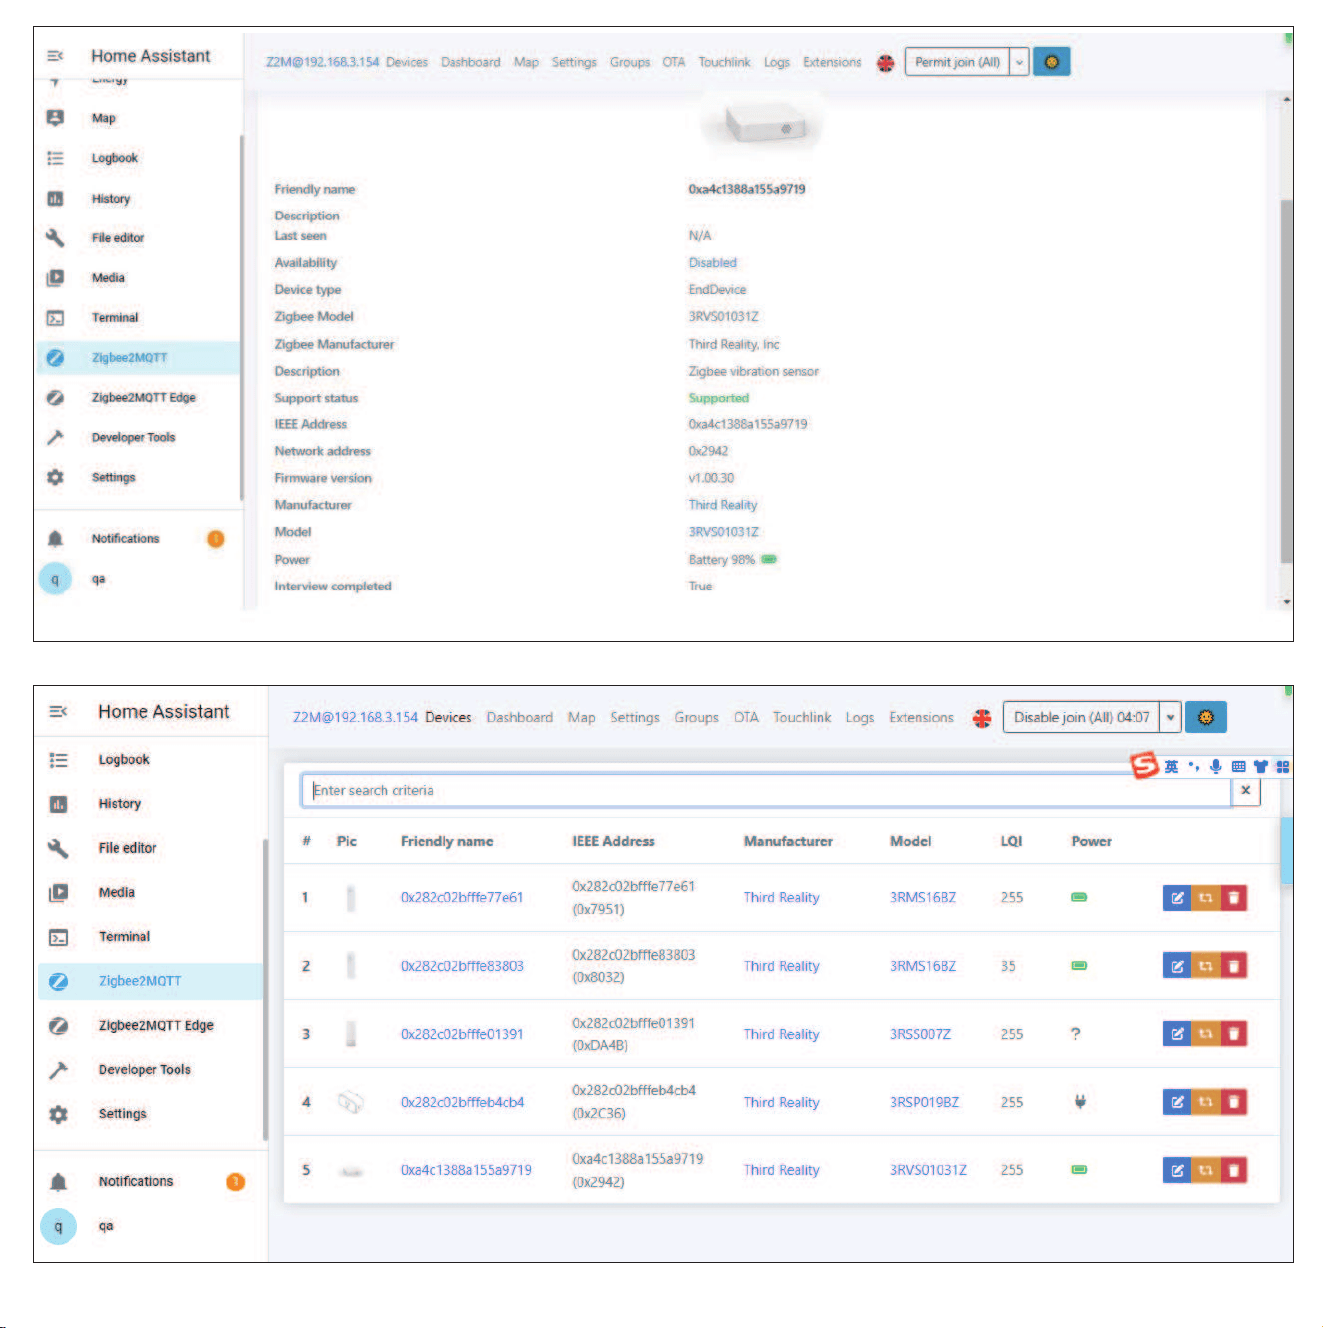
Pairing With Home Assistant
Zigbee Home Automation
17
Zigbee2MQTT

Vibration Sensor
Quick Start Guide
Introduction
Specification
Third Reality Zigbee Vibration Sensor can be used to detect the vibra-
tion and movement of objects, it is designed for indoor use only. It
can be integrated into Amazon Alexa, SmartThings, Hubitat, Home
Assistant and Third Reality App etc. through Zigbee protocol, it can
be used to create routines like alerts of window breaks and washing
machines/dryers monitoring etc.
Operating Temp
Power Supply
Dimensions
Protocol
32 to 104 F(0 to 40 ℃) Indoor Use Only
2 × AAA Batteries
2.19" × 2.20" × 0.48"
( 5.56cm×5.59cm ×1.23cm)
Zigbee 3.0
Senitivity Setting:Siren Setting:
0
ONOFF
1
00
Very HighHighMediumLow
110110
Simply place the Vibration Sensor on top of the object to be moni-
tored, or use double-sided tape to stick it anywhere as desired.
Setup
Remove the plastic insulator to power the Vibration Sensor.
When the sensor is powered up for the first time, it enters pairing
mode automatically, and it exits pairing mode if not paired within
3 minutes, to put it into pairing mode again by pressing the reset
button for 5 seconds.
Follow the instructions of Zigbee hubs to pair the sensor.
Turn on/off the beeping alarm with the single toggle switch, and
set the sensitivity(4 levels) with the dual toggle switches.
1.
2.
3.
Installation
Before pairing, set the Vibration Sensor into pairing mode by press-
ing the reset button for 5 seconds until the LED indicator turns into
fast blue blinking.
Hub: Third Reality Hub Gen2 /Gen2 Plus
App: Third Reality
Pairing with Different Hubs
Pairing with Third Reality
Tab "+" in Third Reality App, follow the on-screen instructions to
add device, it will be added within seconds.
Create routines to control other connected devices.
1.
2.
Pairing steps:
App: Amazon Alexa
Pairing with Echo devices with built-in ZigBee hubs such As Echo V4,
Echo Plus V1 & V2, Echo Studio and Eero 6 & 6 pro.
Tab "+" in the Alexa App, choose "Zigbee" and "others" to add
device, the vibration sensor will be added as a "motion sensor".
Create routines to control other connected devices.
1.
2.
Pairing steps:
Pairing With Amazon Echo
Tab "Add Device" in Hubitat Devices page.1.
Pairing steps:
Website: http://find.hubitat.com/
Pairing With Hubitat
Choose "Zigbee", then "Start Zigbee Pairing".2.
Create a device name for the vibration sensor, then click "Next" to
add device.
3.
Change Type from "Device" to "Generic Zigbee Motion Sensor"
and "Save Device", you can see the status of the sensor "ac-
tive/inactive", and battery level.
4.
Pairing steps:
Pairing With Home Assistant
Zigbee Home Automation
17
Zigbee2MQTT

Before pairing, check for updates to make sure the SmartThings
Hub firmware is up to date.
Install the batteries. Press and hold the reset button for 5 seconds
to factory reset the sensor, the LED light will turn red and flash,
indicating entering Zigbee pairing mode. It will exit Zigbee pair-
ing mode after 3 min if not paired.
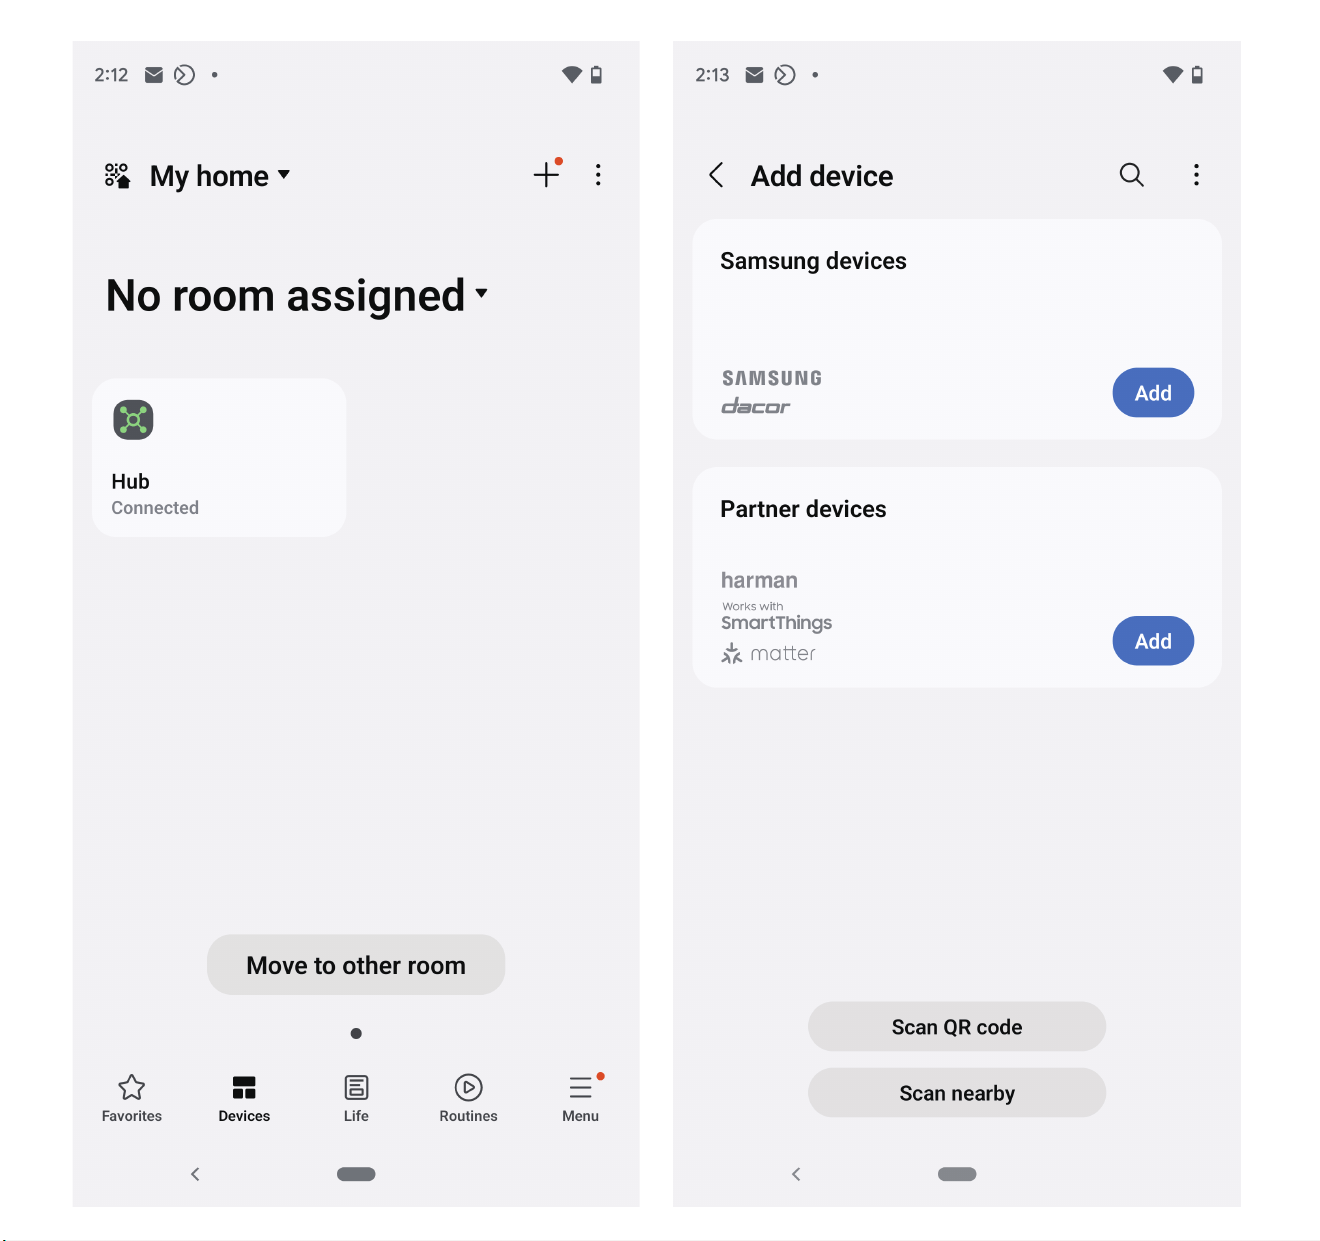
Open the SmartThings App, tap "+" on the upper right corner to
"Add device" and then tap "Scan for nearby devices".
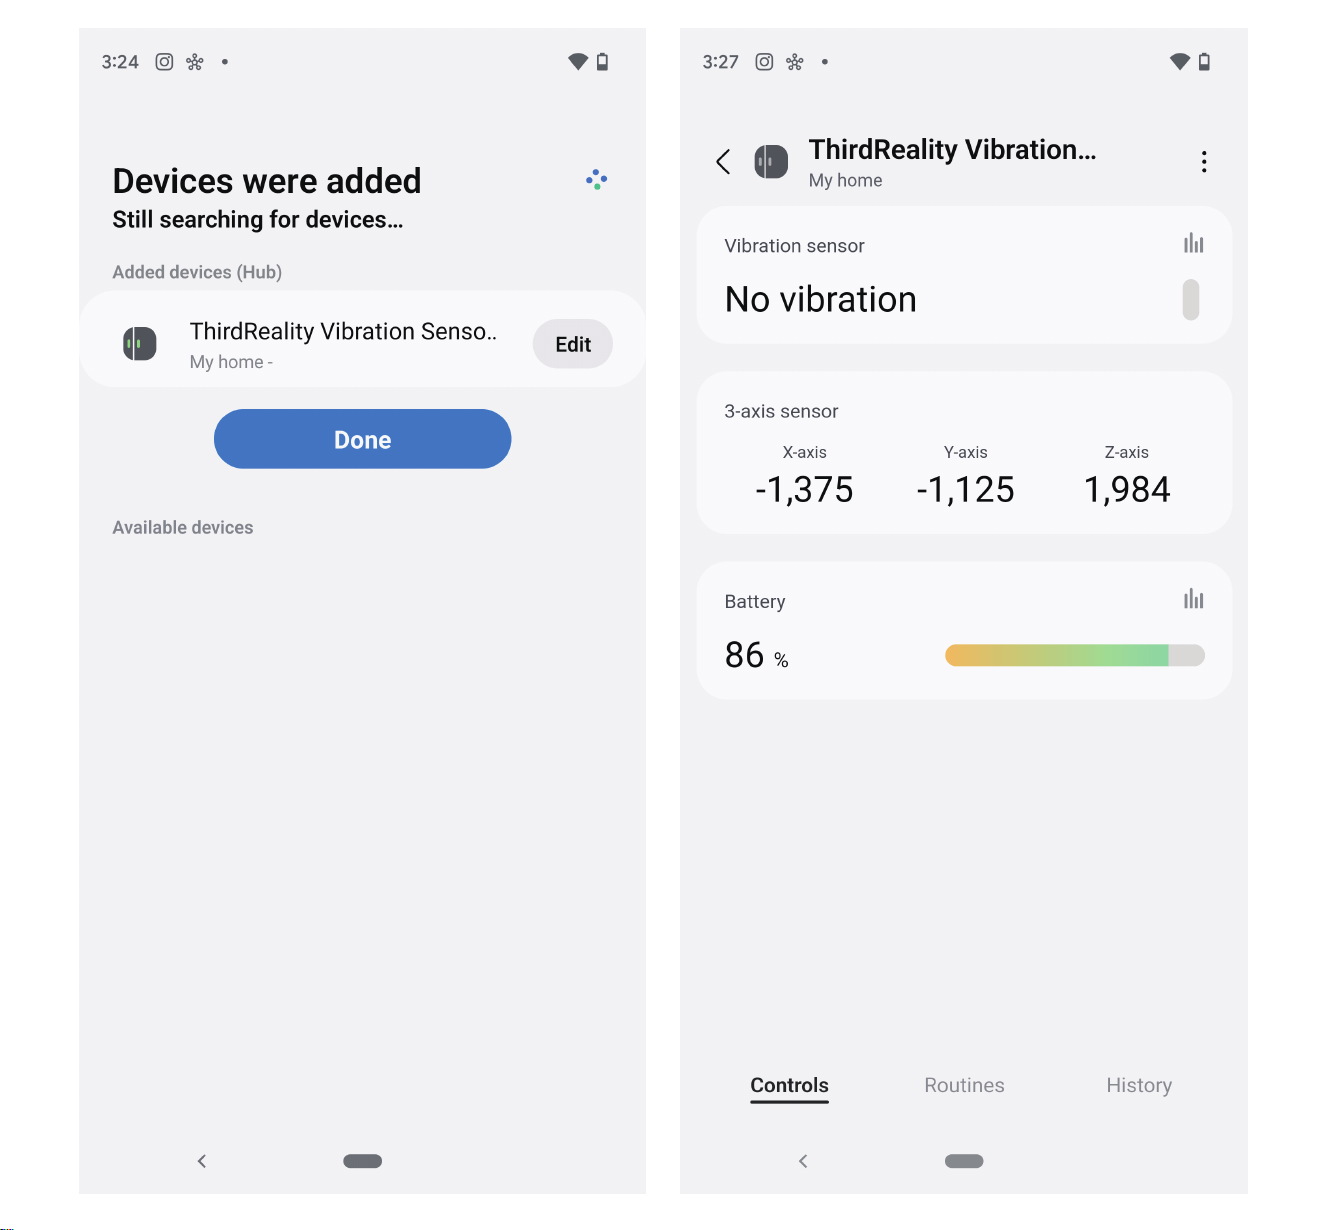
The Vibration Sensor will be paired with the SmartThings hub.
Create routines to control connected devices.
1.
2.
3.
4.
5.
Pairing steps:
App: SmartThings App
SmartThings Hub 2nd Gen(2015) and 3rd Gen(2018), Aeotec Smart
Home Hub.
Pairing With SmartThings
FCC regulatory conformance
This device complies with part 15 of the FCC rules. Operation is
subject to the following two conditions: (1) this device may not
cause harmful interference, and (2) this device must accept any
interference received, including interference that may
cause undesired operation.
Changes or modifications not expressly approved by the party
responsible for compliance could void the user’s authority to
operate the equipment.
NOTE: This equipment has been tested and found to comply
with the limits for a Class B digital device, pursuant to part 15 of
the FCC Rules. These limits are designed to provide reasonable
protection against harmful interference in a residential installa-
tion. This equipment generates uses and can radiate radio fre-
quency energy and, if not installed and used in accordance with
the instructions, may cause harmful interference to radio com-
munications. However, there is no guarantee that interference
will not occur in a particular installation. If this equipment does
cause harmful interference to radio or television reception,
which can be determined by turning the equipment off and on,
the user is encouraged to try to correct the interference by one
or more of the following measures:
RF Exposure
‐Reorient or relocate the receiving antenna.
‐Increase the separation between the equipment and receiver.
‐Connect the equipment into an outlet on a circuit different
from that to which the receiver is connected.
‐Consult the dealer or an experienced radio/TV technician for
help important announcement.
NOTE: The manufacturer is not responsible for any radio or TV
interference caused by unauthorized modifications to this
equipment. Such modifications could void the user’s authority
to operate the equipment.
This equipment complies with FCC radiation exposure limits set
forth for an uncontrolled environment.
This transmitter must not be co-located or operating in con-
junction with any other antenna or transmitter.
Limited Warranty
For limited warranty, please visit www.3reality.com/device-
support
For customer support, please contact us at info@3reality.com
or visit www.3reality.com
For help and troubleshooting related to Amazon Alexa, visit the
Alexa app.
Before pairing, check for updates to make sure the SmartThings
Hub firmware is up to date.
Install the batteries. Press and hold the reset button for 5 seconds
to factory reset the sensor, the LED light will turn red and flash,
indicating entering Zigbee pairing mode. It will exit Zigbee pair-
ing mode after 3 min if not paired.
Open the SmartThings App, tap "+" on the upper right corner to
"Add device" and then tap "Scan for nearby devices".
The Vibration Sensor will be paired with the SmartThings hub.
Create routines to control connected devices.
1.
2.
3.
4.
5.
Pairing steps:
App: SmartThings App
SmartThings Hub 2nd Gen(2015) and 3rd Gen(2018), Aeotec Smart
Home Hub.
Pairing With SmartThings
FCC regulatory conformance
This device complies with part 15 of the FCC rules. Operation is
subject to the following two conditions: (1) this device may not
cause harmful interference, and (2) this device must accept any
interference received, including interference that may
cause undesired operation.
Changes or modifications not expressly approved by the party
responsible for compliance could void the user’s authority to
operate the equipment.
NOTE: This equipment has been tested and found to comply
with the limits for a Class B digital device, pursuant to part 15 of
the FCC Rules. These limits are designed to provide reasonable
protection against harmful interference in a residential installa-
tion. This equipment generates uses and can radiate radio fre-
quency energy and, if not installed and used in accordance with
the instructions, may cause harmful interference to radio com-
munications. However, there is no guarantee that interference
will not occur in a particular installation. If this equipment does
cause harmful interference to radio or television reception,
which can be determined by turning the equipment off and on,
the user is encouraged to try to correct the interference by one
or more of the following measures:
RF Exposure
‐Reorient or relocate the receiving antenna.
‐Increase the separation between the equipment and receiver.
‐Connect the equipment into an outlet on a circuit different
from that to which the receiver is connected.
‐Consult the dealer or an experienced radio/TV technician for
help important announcement.
NOTE: The manufacturer is not responsible for any radio or TV
interference caused by unauthorized modifications to this
equipment. Such modifications could void the user’s authority
to operate the equipment.
This equipment complies with FCC radiation exposure limits set
forth for an uncontrolled environment.
This transmitter must not be co-located or operating in con-
junction with any other antenna or transmitter.
Limited Warranty
For limited warranty, please visit www.3reality.com/device-
support
For customer support, please contact us at info@3reality.com
or visit www.3reality.com
For help and troubleshooting related to Amazon Alexa, visit the
Alexa app.