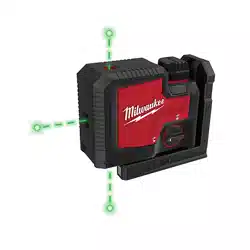
Loading ...
Loading ...
Loading ...

6
180
A
d
B
8. The distance between points I and III on wall A is
the height deviation (d) of the tool. This distance
should not exceed 1/8" (max.) at 33' (1/2" at 132').
For the Measuring distance of 2 x 66' = 132', the maxi-
mum allowable deviation (d) is: 132' x ±1/8" ÷ 33' = ±1/2".
Vertical Leveling Accuracy
A free measuring distance of approximately 16.5'
between oor and ceiling on a rm surface is required
for this check.
1. Draw a straight line on the ceiling to use as a
reference line.
2. Securely mount the tool within 1' of the oor.
3. Turn the tool to
ON.
4. Position the tool so that the bottom plumb point
can be seen on the oor and the center of the top
plumb point is located on the reference line on the
ceiling. Allow the tool to self-level.
5. Mark the center of the top plumb point with the refer-
ence line on the ceiling (point I). Also, mark the cen-
ter of the bottom plumb point on the oor (point II).
16.5'
6. Rotate the tool 180°. Align the center point of the
laser beam directly onto the oor point II.
7. Position the tool to align the center of the top plumb
point onto the reference line on the ceiling. It may
be necessary to rotate the tool slightly to align.
Allow the tool to self-level.
8. Mark the center of the top plumb point on the
reference line on the ceiling (point III).
d
9. The distance between points I and III on the ceiling
is the deviation (d) of the tool. This distance should
not exceed 1/8" (max.) at 33'.
For the Measuring distance of 2 x 16.5' = 33', the
maximum allowable deviation (d) is: 33' x ±1/8"
÷ 33' = ±1/8".
MAINTENANCE
WARNING
To reduce the risk of injury, always
remove the battery before perform-
ing any maintenance. Never disassemble the tool.
Maintain Laser Level
Maintain tools. If damaged, have the tool repaired
before use. Accidents may be caused by poorly
maintained tools.
WARNING
To reduce the risk of personal in-
jury and damage, never immerse
your tool in liquid or allow a liquid to ow inside
them.
Cleaning
Clean dust and debris from any vents. Keep tool
clean, dry and free of oil or grease. Use only mild
soap and a damp cloth to clean, since certain clean-
ing agents and solvents are harmful to plastics
and other insulated parts. Some of these include
gasoline, turpentine, lacquer thinner, paint thin-
ner, chlorinated cleaning solvents, ammonia and
household detergents containing ammonia. Never
use ammable or combustible solvents around tools.
Cleaning the Lenses
Blow o loose particles with clean compressed air.
Carefully wipe the surface with a cotton swab moist-
ened with water.
Repairs
For repairs, return the tool, battery pack and charger
to the nearest authorized service center.
ACCESSORIES
WARNING
Use tools only with specifically
designated accessories. Use of
any other accessories may create risk of injury.
SERVICE - UNITED STATES
1-800-SAWDUST (1.800.729.3878)
Monday-Friday, 7:00 AM - 6:30 PM CST
or visit www.milwaukeetool.com
Contact Corporate After Sales Service Technical Support
with technical, service/repair, or warranty questions.
Email: [email protected]
Become a Heavy Duty Club Member at
www.milwaukeetool.com to receive important
notications regarding your tool purchases.
SERVICE - CANADA
Milwaukee Tool (Canada) Ltd
1.800.268.4015
Monday-Friday, 7:00 AM - 4:30 PM CST
or visit www.milwaukeetool.ca
Loading ...
Loading ...
Loading ...