Loading ...
Loading ...
Loading ...
15
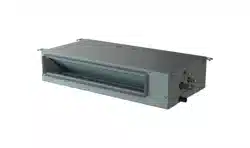
(2) As shown in Fig. 4.3, screw up the nuts with 2 spanners.
Installation and Maintenance
The pipe goes through the hole with the end sealed.
CAUTION
Do not put the pipes on the floor directly.
Fig. 4.3 Tightening torque for the nut
φ6.35mm
φ9.52mm
φ12.7mm
φ15.88mm
Tube size
20
40
60
80
Torque (N·m)
Protected with the tape or plug.
(3) After finishing connecting the refrigerant pipes, keep
it warm with the insulation material.
Fig. 4.4 Piping insulation procedure
Clamp(field supplied)
Insulation(field supplied)
Refrigerant pipe
(field supplied)
Side of the
indoor unit
Insulation
(field supplied)
Insulation
(field supplied)
Insulation
(field supplied)
●
●
Correct
Incorrect
×
5. Drain piping
Install the drain piping
Make sure the drain works properly .
Prepare polyvinyl chloride pipe with a 32mm outer
diameter.
The diameter of drain pipe connection hole should
be same as that of the drain pipe.
Keep the drain pipe short and sloping down wards at
a gradient of at least 1/100 to prevent air pockets from
forming.
Water accumulating in the drain piping can cause
the drain to clog.
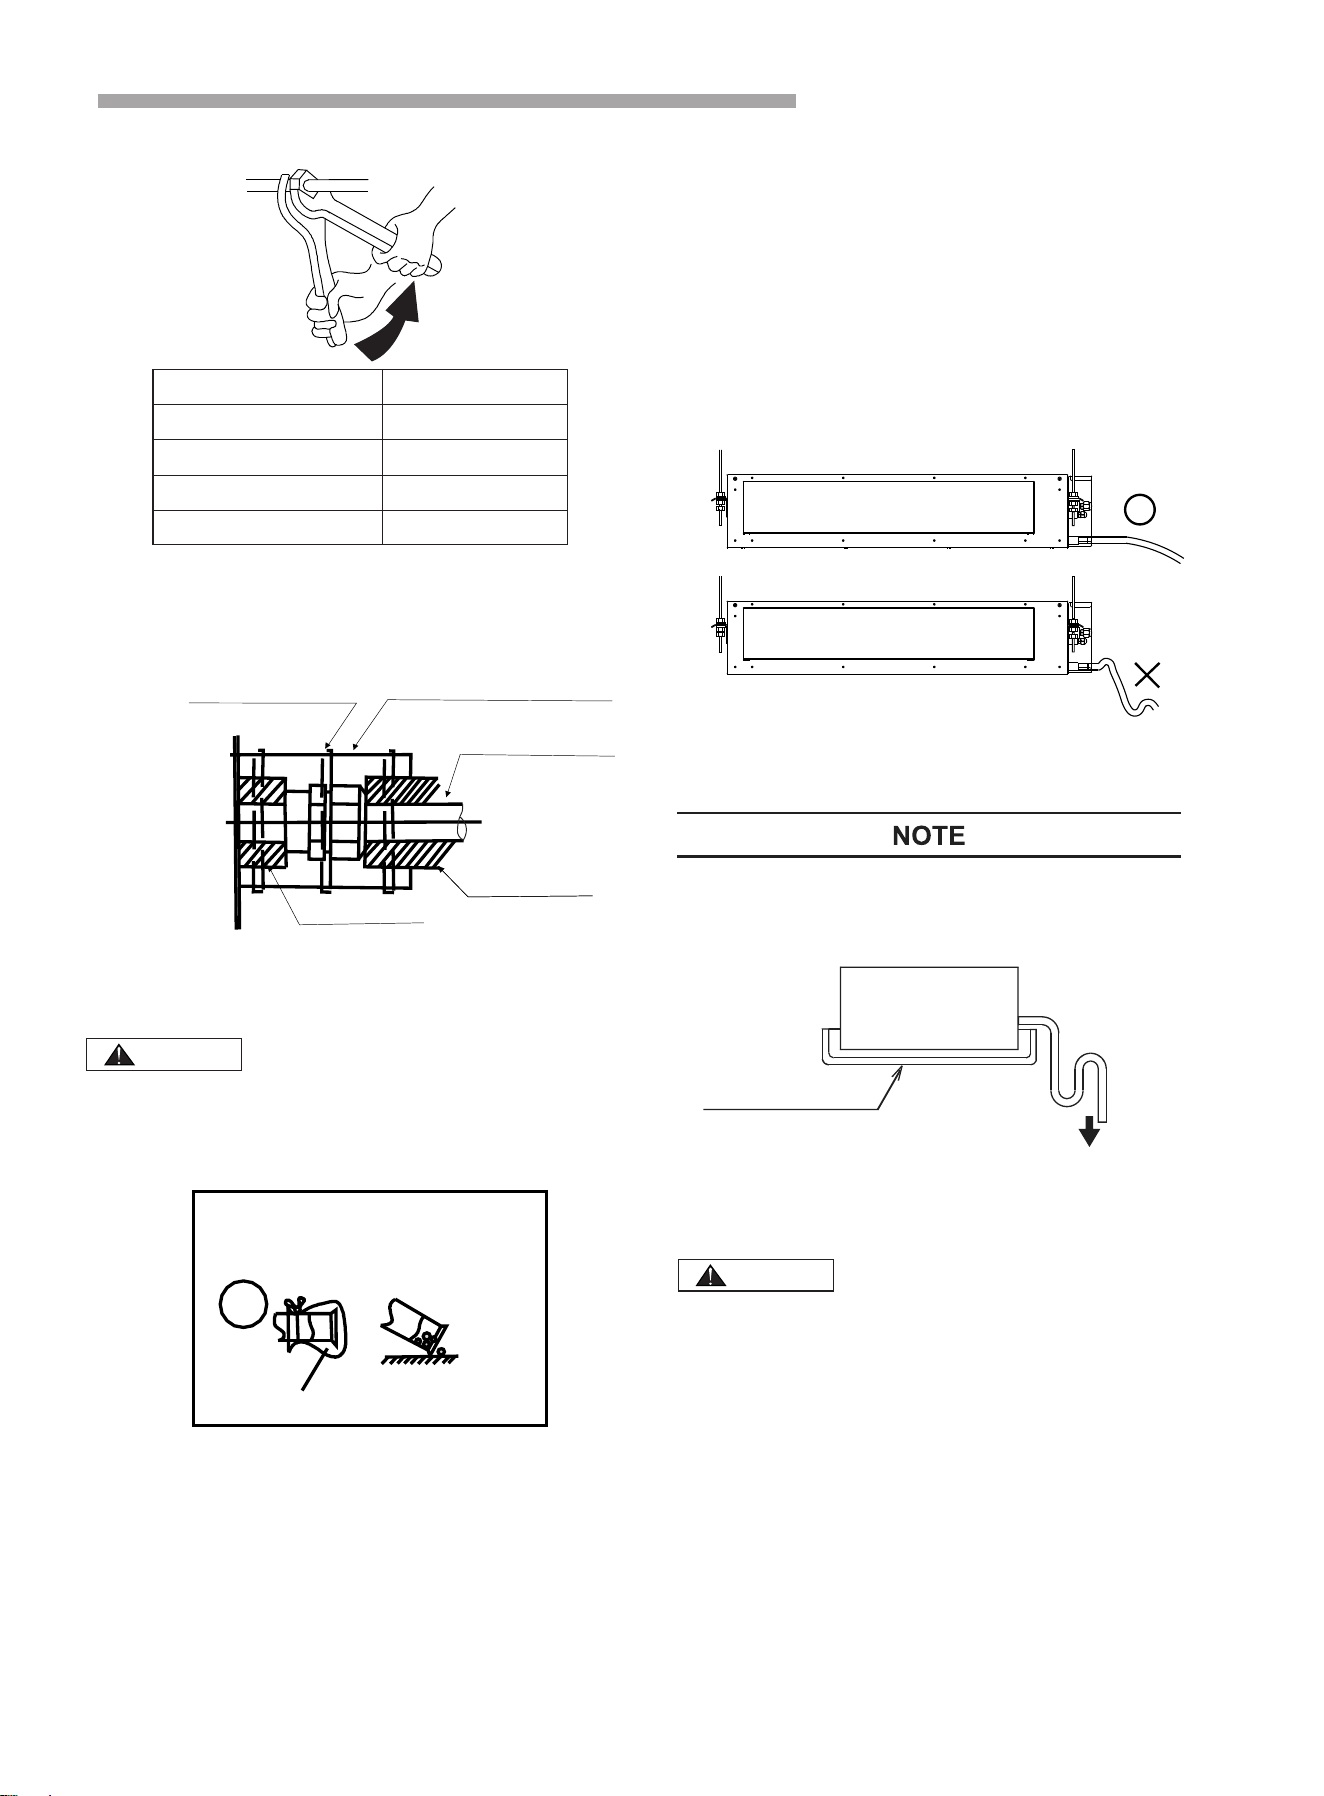
CAUTION
When the relative humidity of inlet or ambient air
exceeds 80%,apply an (field-supplied) auxiliary
drain pan beneath the indoor unit as shown below.
Indoor Unit
To the Atmosphere
(Field-Supplied)
Auxiliary Drain Pan
●
●
●
●
●
●
●
To keep the drain tube from sagging, space hanging
wires every 1 to 1.5 m.
Use the drain hose and the clamp. Insert the drain
hose fully into the drain socket and firmly tighten the
drain hose and warm-keeping material with the clamp.
The two areas below should be insulated because
condensation may happen there causing water leakage.
Loading ...
Loading ...
Loading ...