
SPECIFICATIONS
1.Hardware
CPU: Hisilicon3561C_V200
Image sensor: Panasonic CMOS sensor.
Lens: 6-glass, 152° Wide Angle, F1.8 .
Wi-Fi: 2.4GHz, 802.11b/g/n.
G-sensor: three-axis accelerometer.
2.Technical
Video information: 1920
1080 (16:9), @30fps, *.mp4.
Audio information: 8KHz, 2 channels, AAC.
Photo information: 1920
1080, *.JPG.
Storage: Class 10 TF card, up to 64GB.
Working temperature:
Working voltage & current: DC 5V & 1A.
Video processing: 3D denoising, image enhancement, LDC
correction, etc.
: When the mobile device is connected to the
, click it to preview the
real-time video.
Playback:
Click the video icon in the
BOYO HD Dashcam APP
and select the videos you would like to view.
7.Update
The dash cam has an OTA updating system, you will receive
the latest firmware
the app. Click
the “Send Firmware and Upgrade” in the camera
settings to complete the firmware update.
8.Other settings
Enter the settings page to modify the general settings.
You can change the G-sensor sensitivity, mic
,
volume
etc.
9.Reset
Press the reset button for a few seconds to reset
, the default Wi-Fi password is 12345678.
11. Disclaimer
This device is NOT intended to be used for illegal purposes
and shall not be used in any form as evidence for claiming
purposes. Some countries prohibit drivers from mounting
anything on the windshield, or restrict mounting to specific
areas of the windshield. It is the owner’s responsibility to
mount the device in compliance with local laws. Errors may
occur depending on the surrounding environment and the
voltage of the
. not liable/responsible for
nonrecorded event, missing files, etc.
Do not operate the device while driving. Using this device
does not change the requirement for a driver to take full
responsibility for his or her behavior. This responsibility
includes observing all traffic rules and regulations in order
to avoid accidents, personal injury or property damage.
Settings--- WLAN--- Select “BOYO HD Dashcam”---Enter
password “12345678”--- Join --- BOYO HD Dashcam APP
--- Success.
4.Take a photo or a short video
hand across the dash cam gesture area to take
a photo. Switch to “Photography with Video” option in the
dash cam settings to record a 10s short video (5s before
and 5s after the action of your photo). You can download
the photos and videos to your mobile device in the Album
Page.
5.GPS
The GPS module is the USB power cable
the position and speed of
vehicle records the track of each .
Notes: For fast
positioning, the GPS must
be
ted as far the dash cam sure
the 3M tape
toward the sky
10. Battery Protection Module (Optional)
When dash cam enter 24H parking mode, the video
will change to 1fps/sec to save SD card storage and
battery power drain; If there are any
external impact
G-sensor
30fps/sec
2.1 Mount the dash cam on the inside surface of
the windshield. The area near the rear-view
mirror is suggested.
2.2 Connect the USB power cable
dash
cam and
car charger, route the cable
ed above.
2.3 When the vehicle starts up, the dash cam will
boot up automatically and voice “hello”.
3.Connect the dash cam to a mobile device
Suggested
GPS
2.Mounting the dash cam
As shown below
OPERATION
1.Insert TF card
Card Slot
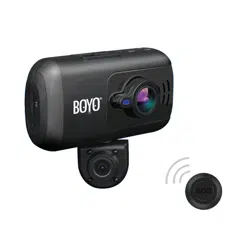
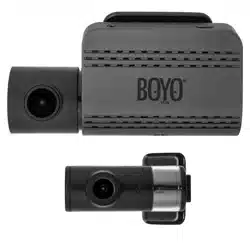
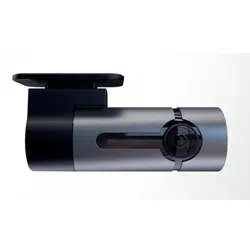
PRODUCT AND FUNCTIONS
LED
Red: Flashing when recording;
Green: Mobile phone connected;
PACKAGE CONTENTS
Dash am and
Mounting Bracket ×1
Dual USB Charger×1
3M VHB Mounting Tape×2
- 2 - - 3 - - 4 - - 8 - - 9 -- 5 - - 6 - - 7 -
GPS Module
16 GB TF Card x 1
/Power Cable x1
:
supports up to 64GB TF card. A Class 10
TF card is required.
The function of
is to detect low
voltage
. For example when dash cam
24H parking mode and
10 15
days, the dash cam
record and
battery power in
he make the
necess
ry o
.
6.
, playback and download
m
16GB