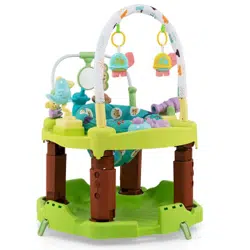

TM10012
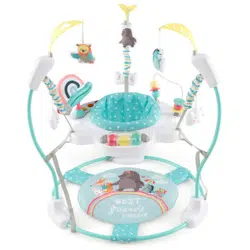
Baby Activity Center
THIS INSTRUCTION BOOKLET CONTAINS IMPORTANT SAFETY INFORMATION. PLEASE READ AND KEEP FOR FUTURE REFERENCE.
USA office: Fontana GBR office: Ipswich AUS office: Truganina
If you're having difficulty, our friendly
customer team is always here to help.
AUS:cs.au@costway.com
GBR:cs.uk@costway.com
Attention: To prevent possible injury by entanglement, remove this toy
when the child starts trying to get up on its hands and knees in a
crawling position.
Danger! Keep all small parts and packaging materials for this product
away from babies and children, otherwise they may pose a choking
hazard.
The product must be installed and used under the supervision of an
adult.
Read through each step carefully and follow the proper order.
Remove all packaging, separate and count all parts and hardware
before installation.
Please ensure that all parts are correctly installed, incorrect installation
can lead to a danger.
We recommend that, where possible, all items are assembled near the
area in which they will be placed in use, to avoid moving the product
unnecessarily once assembled.
Ensure a secure surface during installation, and place the product
always on a flat, steady and stable surface.
Before You Start
Please read all instructions carefully and keep it for future reference.
General Warnings
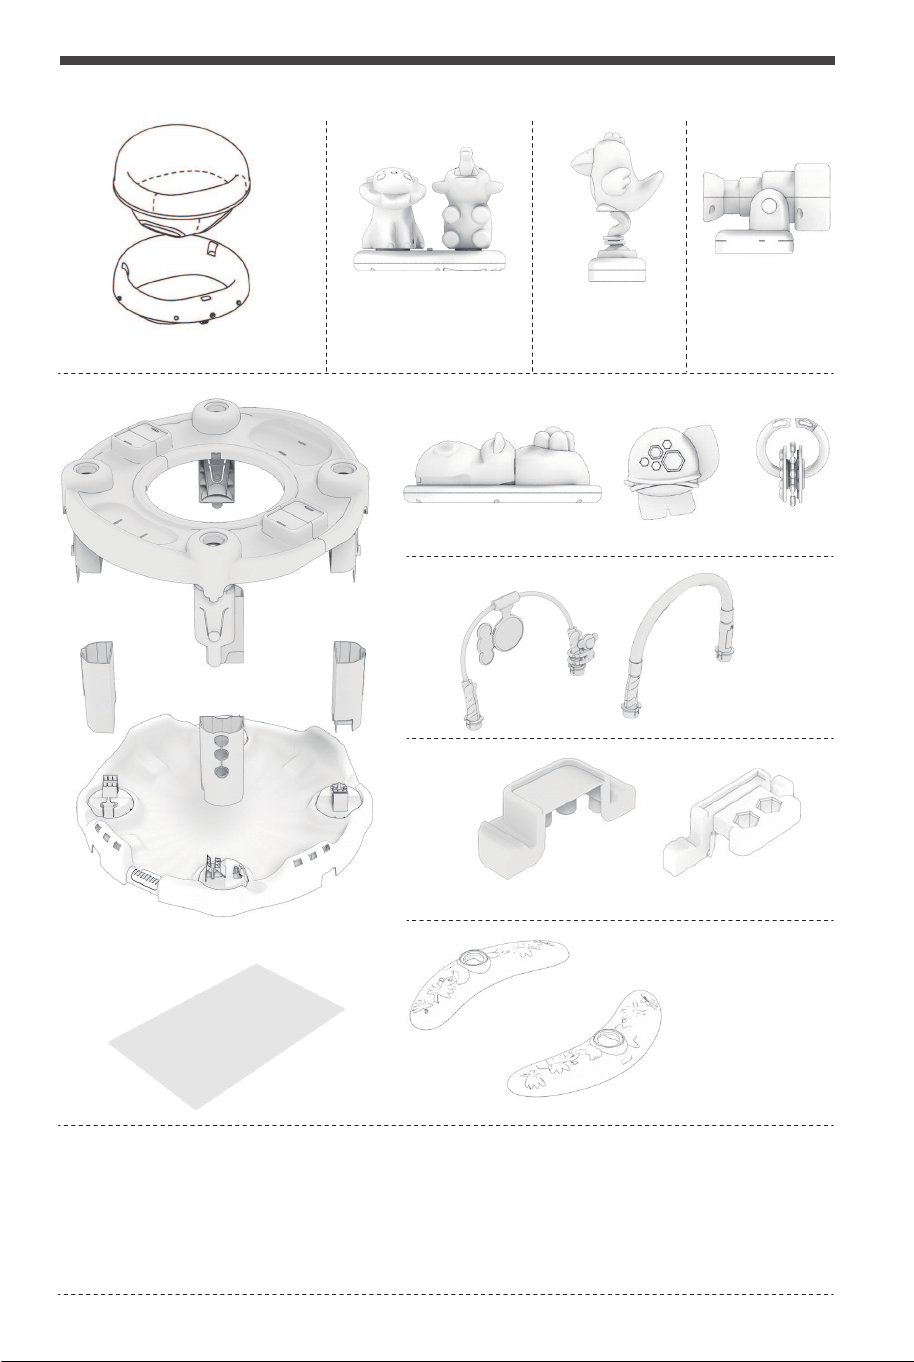
Seat with cover
Music box Bird
Telescope
Tabletop
Legs (4)
Platform
Cloth cushion
PARTS LIST
Hippo
Security plug-in
This product should be assembled by adults. The toys must be used under the
direct supervision of adults. Do not play in wet areas.
This manual contains important information. It must be reserved. Throw away
other packaging materials such as adhesive tapes, plastic sheets, film bags, ties
and labels in time to ensure the safety of children. Please read the instructions
carefully before use.
Support frame
Flower
Game fence
WARNING
02 03
Attention: To prevent possible injury by entanglement, remove this toy
when the child starts trying to get up on its hands and knees in a
crawling position.
Danger! Keep all small parts and packaging materials for this product
away from babies and children, otherwise they may pose a choking
hazard.
The product must be installed and used under the supervision of an
adult.
Read through each step carefully and follow the proper order.
Remove all packaging, separate and count all parts and hardware
before installation.
Please ensure that all parts are correctly installed, incorrect installation
can lead to a danger.
We recommend that, where possible, all items are assembled near the
area in which they will be placed in use, to avoid moving the product
unnecessarily once assembled.
Ensure a secure surface during installation, and place the product
always on a flat, steady and stable surface.
Before You Start
Please read all instructions carefully and keep it for future reference.
General Warnings
Seat with cover
Music box Bird
Telescope
Tabletop
Legs (4)
Platform
Cloth cushion
PARTS LIST
Hippo
Security plug-in
This product should be assembled by adults. The toys must be used under the
direct supervision of adults. Do not play in wet areas.
This manual contains important information. It must be reserved. Throw away
other packaging materials such as adhesive tapes, plastic sheets, film bags, ties
and labels in time to ensure the safety of children. Please read the instructions
carefully before use.
Support frame
Flower
Game fence
WARNING
02 03
Do not use with children over 55lbs (25kg), or over 30 inches (76cm). For use only with infant who
can hold up their head unaided. Discontinue use when child begins to walk unassisted or can get
out of seat on his own.
CAUTION
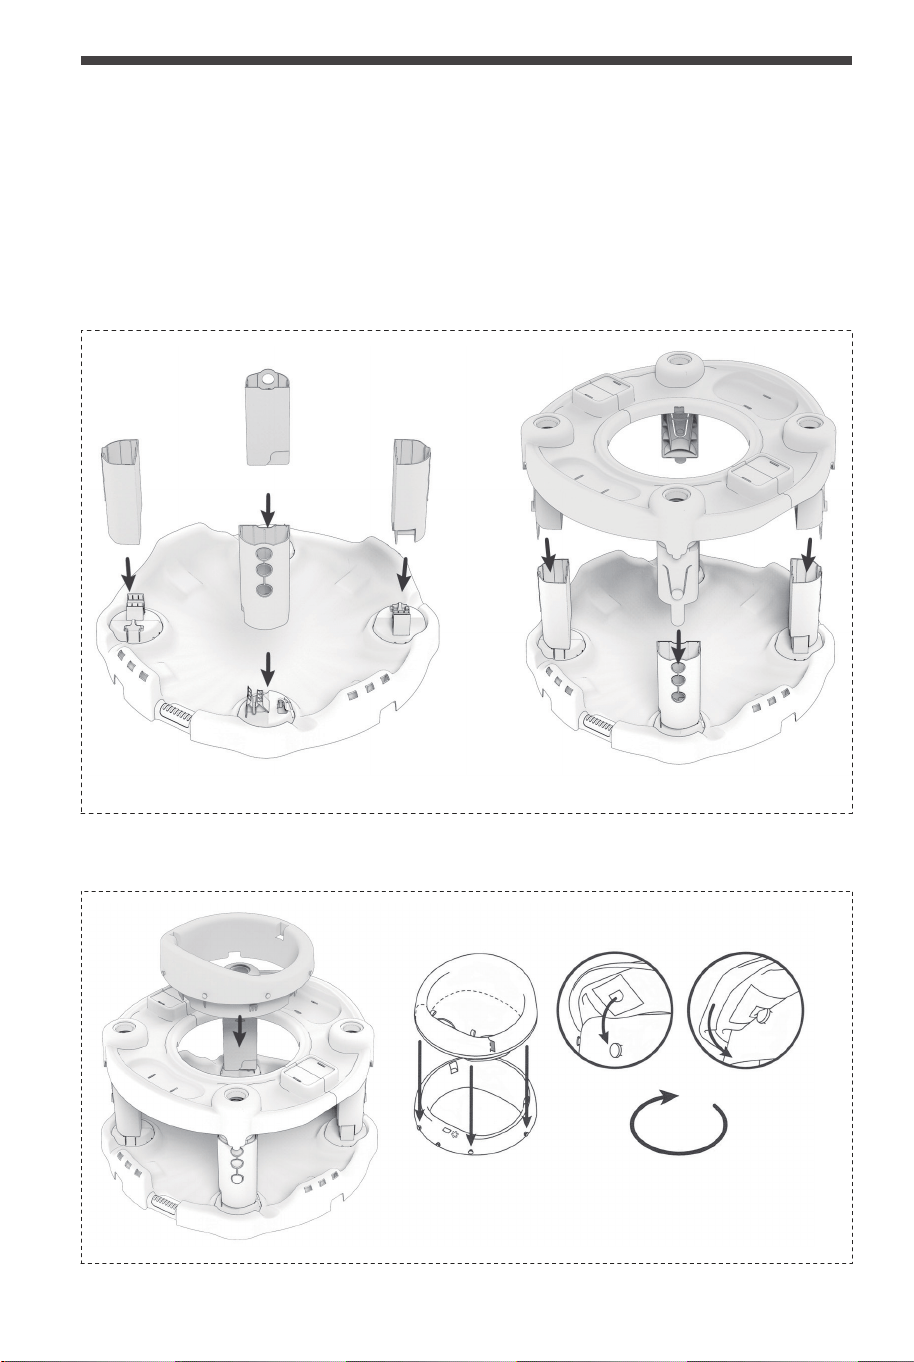
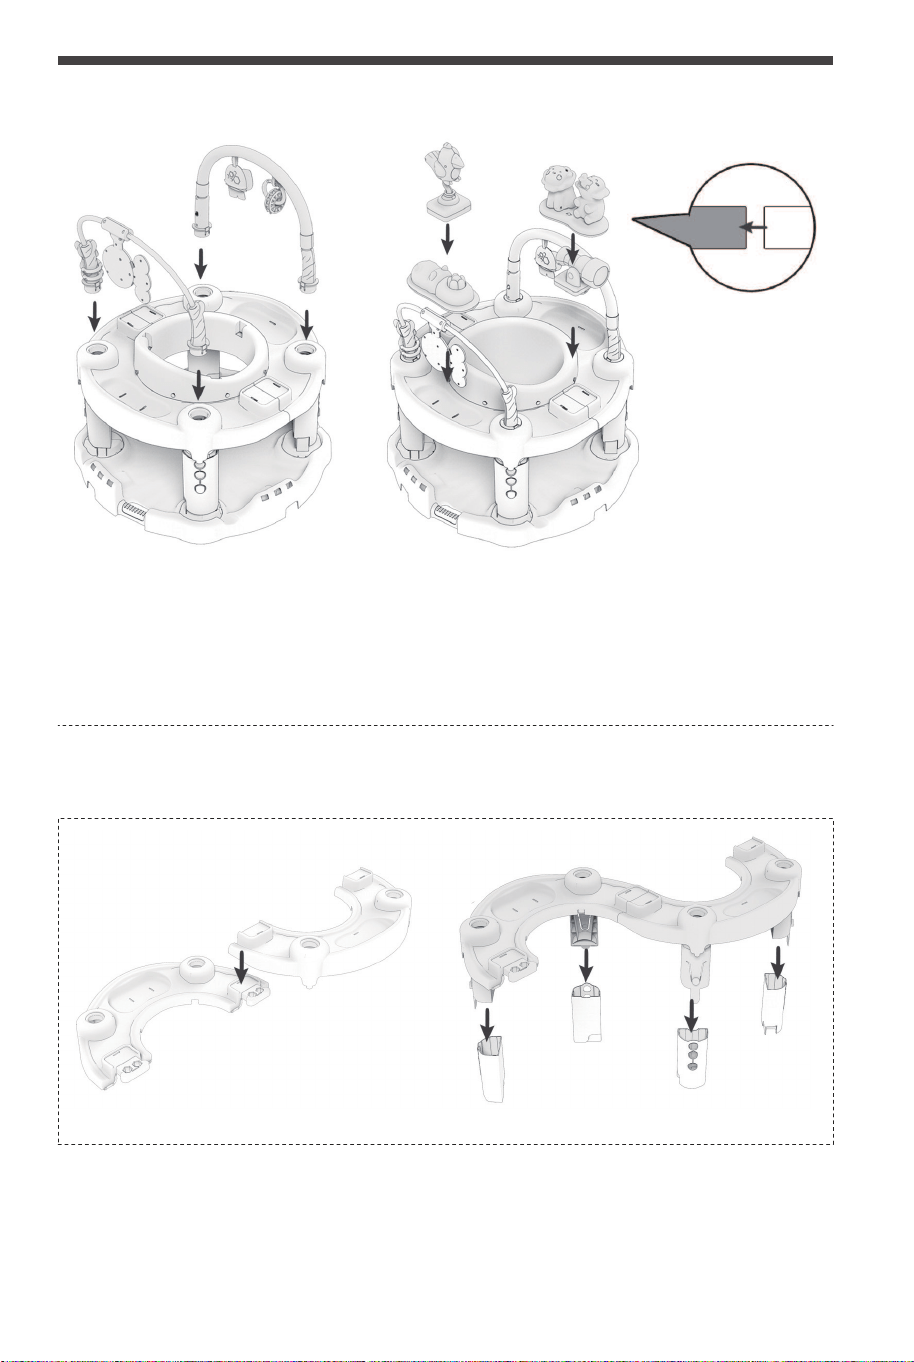
ASSEMBLY STEPS
MODE ONE:SEAT LEG AND PLATFORM ASSEMBLY
SEAT AND CLOTH CUSHION ASSEMBLY
1 2
Seat Spins
360°
MODE TWO:SEAT LEG AND PLATFORM ASSEMBLY
Note: when installing 4 desktop toys, it is necessary to put two cloth strips into the two holes in the
corresponding toy groove of the game desktop, and turn over the back to connect and stick the
two cloth strips tightly with each other (the cloth strip comes with Velcro, without using any
adhesive tools).
INSTALLING TOYS
1 2
04 05
Do not use with children over 55lbs (25kg), or over 30 inches (76cm). For use only with infant who
can hold up their head unaided. Discontinue use when child begins to walk unassisted or can get
out of seat on his own.
CAUTION
ASSEMBLY STEPS
MODE ONE:SEAT LEG AND PLATFORM ASSEMBLY
SEAT AND CLOTH CUSHION ASSEMBLY
1 2
Seat Spins
360°
MODE TWO:SEAT LEG AND PLATFORM ASSEMBLY
Note: when installing 4 desktop toys, it is necessary to put two cloth strips into the two holes in the
corresponding toy groove of the game desktop, and turn over the back to connect and stick the
two cloth strips tightly with each other (the cloth strip comes with Velcro, without using any
adhesive tools).
INSTALLING TOYS
1 2
04 05
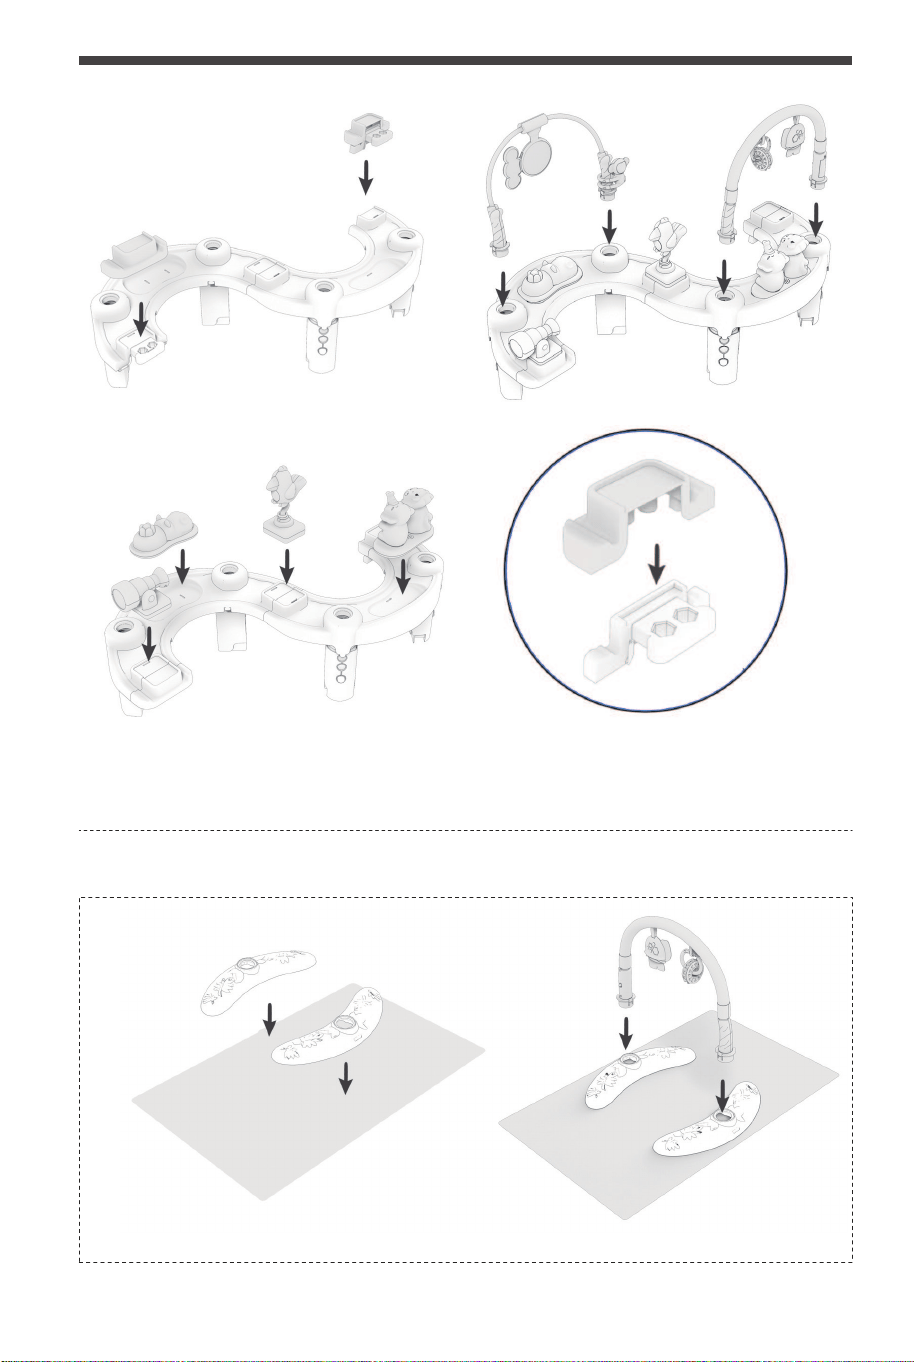
Warm tip: if this form is not used, the two edge accessories can be spliced and stored.
MODE THREE:FITNESS RACK INSTALLATION
INSTALLING TOYS
1 2
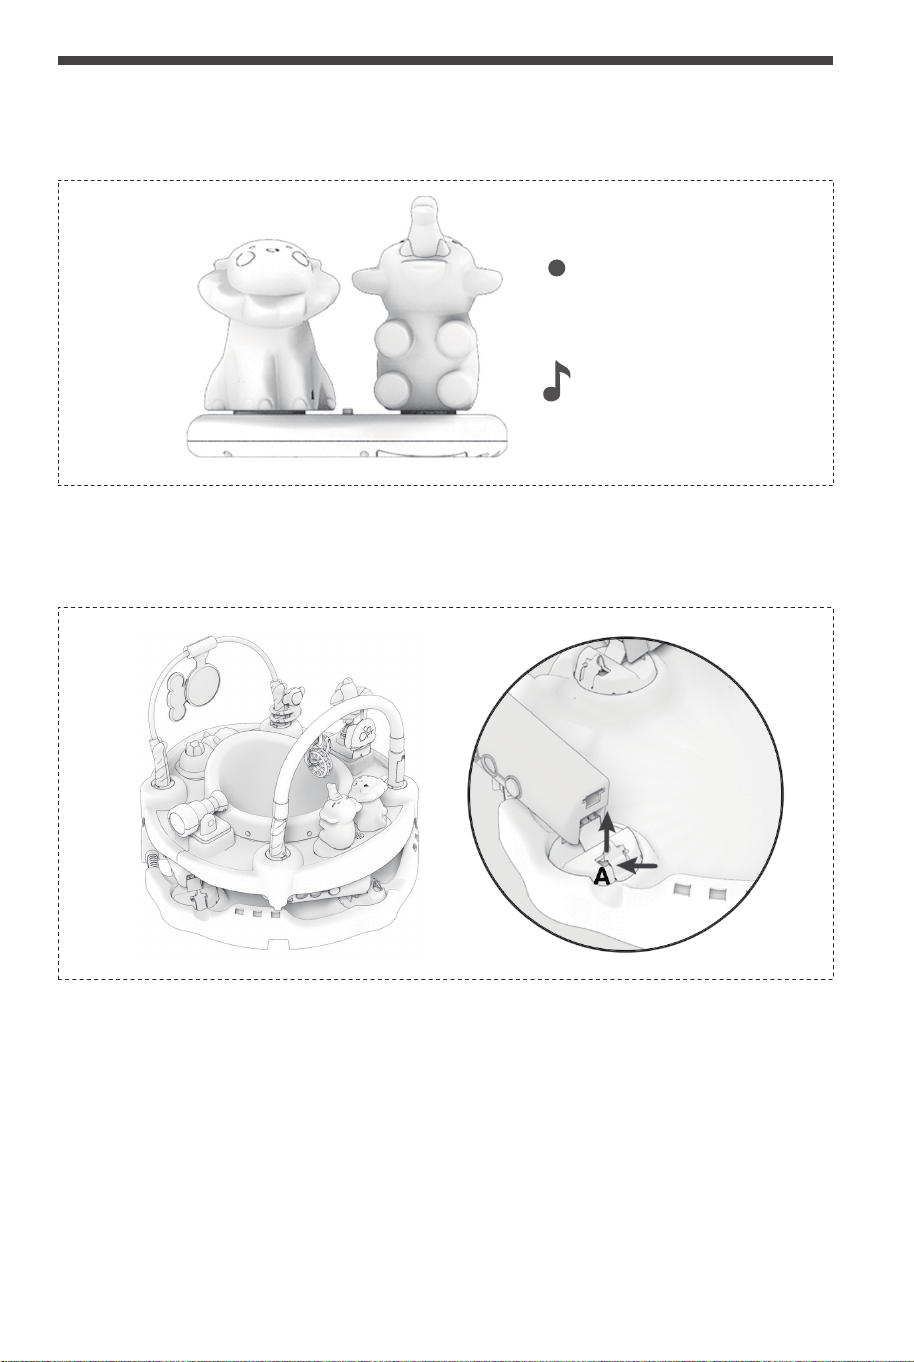
MUSIC BOX PERFORMANCE
Power Switch
Music Mode
REQUIRES 2 AAA BATTERIES(NOT INCLUDED)
DEMONSTRATION AND INSTALLATION OF FOLDING FUNCTION
As shown in the figure, press the point A at the bottom of the chair foot to break it apart, repeat the
above actions, then shrink and fold the four chair feet to the left side in turn.
06 07
Warm tip: if this form is not used, the two edge accessories can be spliced and stored.
MODE THREE:FITNESS RACK INSTALLATION
INSTALLING TOYS
1 2
MUSIC BOX PERFORMANCE
Power Switch
Music Mode
REQUIRES 2 AAA BATTERIES(NOT INCLUDED)
DEMONSTRATION AND INSTALLATION OF FOLDING FUNCTION
As shown in the figure, press the point A at the bottom of the chair foot to break it apart, repeat the
above actions, then shrink and fold the four chair feet to the left side in turn.
06 07
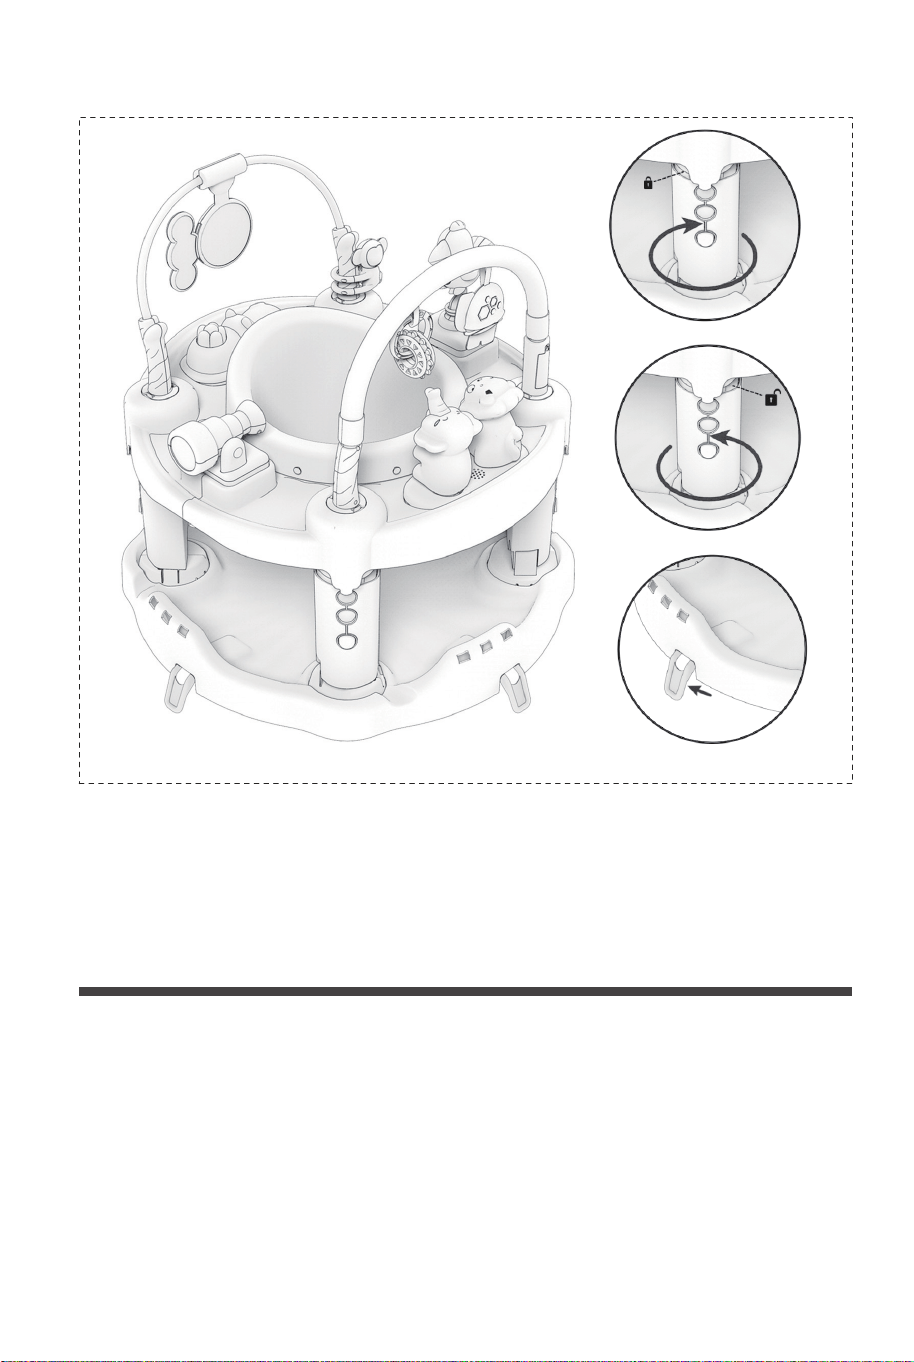
1
2
3
FUNCTION DEMONSTRATION AND INSTALLATION OF
JUMPING CHAIR
1. As shown in Figure 1 and Figure 2, turning the four legs of the seat in the arrow
direction (lock pattern) can lock the bouncing function of the four legs, and switch it
to the solid-state game chair. Similarly, turning the four legs of the seat in the arrow
direction (unlock pattern) can unlock the bouncing function of the four legs, and
switch it to the bouncing chair.
2. As shown in Figure 3, turn the four fixing brackets at the bottom of the seat
outward to switch to the solid-state game chair form. Similarly, shrink the four fixing
brackets at the bottom of the seat inward to switch to the rocking chair form.
1. Please read these instructions and keep it for reference.
The safety of the child may be endangered if the operation instructions are not used.
2. Prevent children from falling or sliding out of the seat causing serious injury or
death.
3. It is your responsibility to protect the safety of children. Therefore, please do not
leave the children alone on the chair of the table.
4. Please check whether the surface of the ground and the surface of the table are
flat before the table is installed.
5. Before use, please check that the table is firmly installed.
6. Cleaning method: gently wipe with a wet cloth, air dry after wiping.
7. Please do not use parts or replacement parts approved by non manufacturers.
WARNING
In case a return is required, the item must be returned in original
box. Without this your return will not be accepted.
DO NOT discard the box / original packaging.
Take a photo of the box markings.
Take a photo of the damaged part (if applicable).
Send us an email with the images requested.
A photo of the markings (text) on the side of the box is required in
case a part is needed for replacement. This helps our staff identify
your product number to ensure you receive the correct parts.
A photo of the damage is always required to file a claim and get
your replacement or refund processed quickly. Please make sure
you have the box even if it is damaged.
Email us directly from marketplace where your item was purchased
with the attached images and a description of your claim.
Return / Damage Claim Instructions
08 09

TM10012
Baby Activity Center
THIS INSTRUCTION BOOKLET CONTAINS IMPORTANT SAFETY INFORMATION. PLEASE READ AND KEEP FOR FUTURE REFERENCE.
USA office: Fontana GBR office: Ipswich AUS office: Truganina
If you're having difficulty, our friendly
customer team is always here to help.
AUS:cs.au@costway.com
GBR:cs.uk@costway.com