
Loading ...
Loading ...
Loading ...
5weber.com
OPERATION
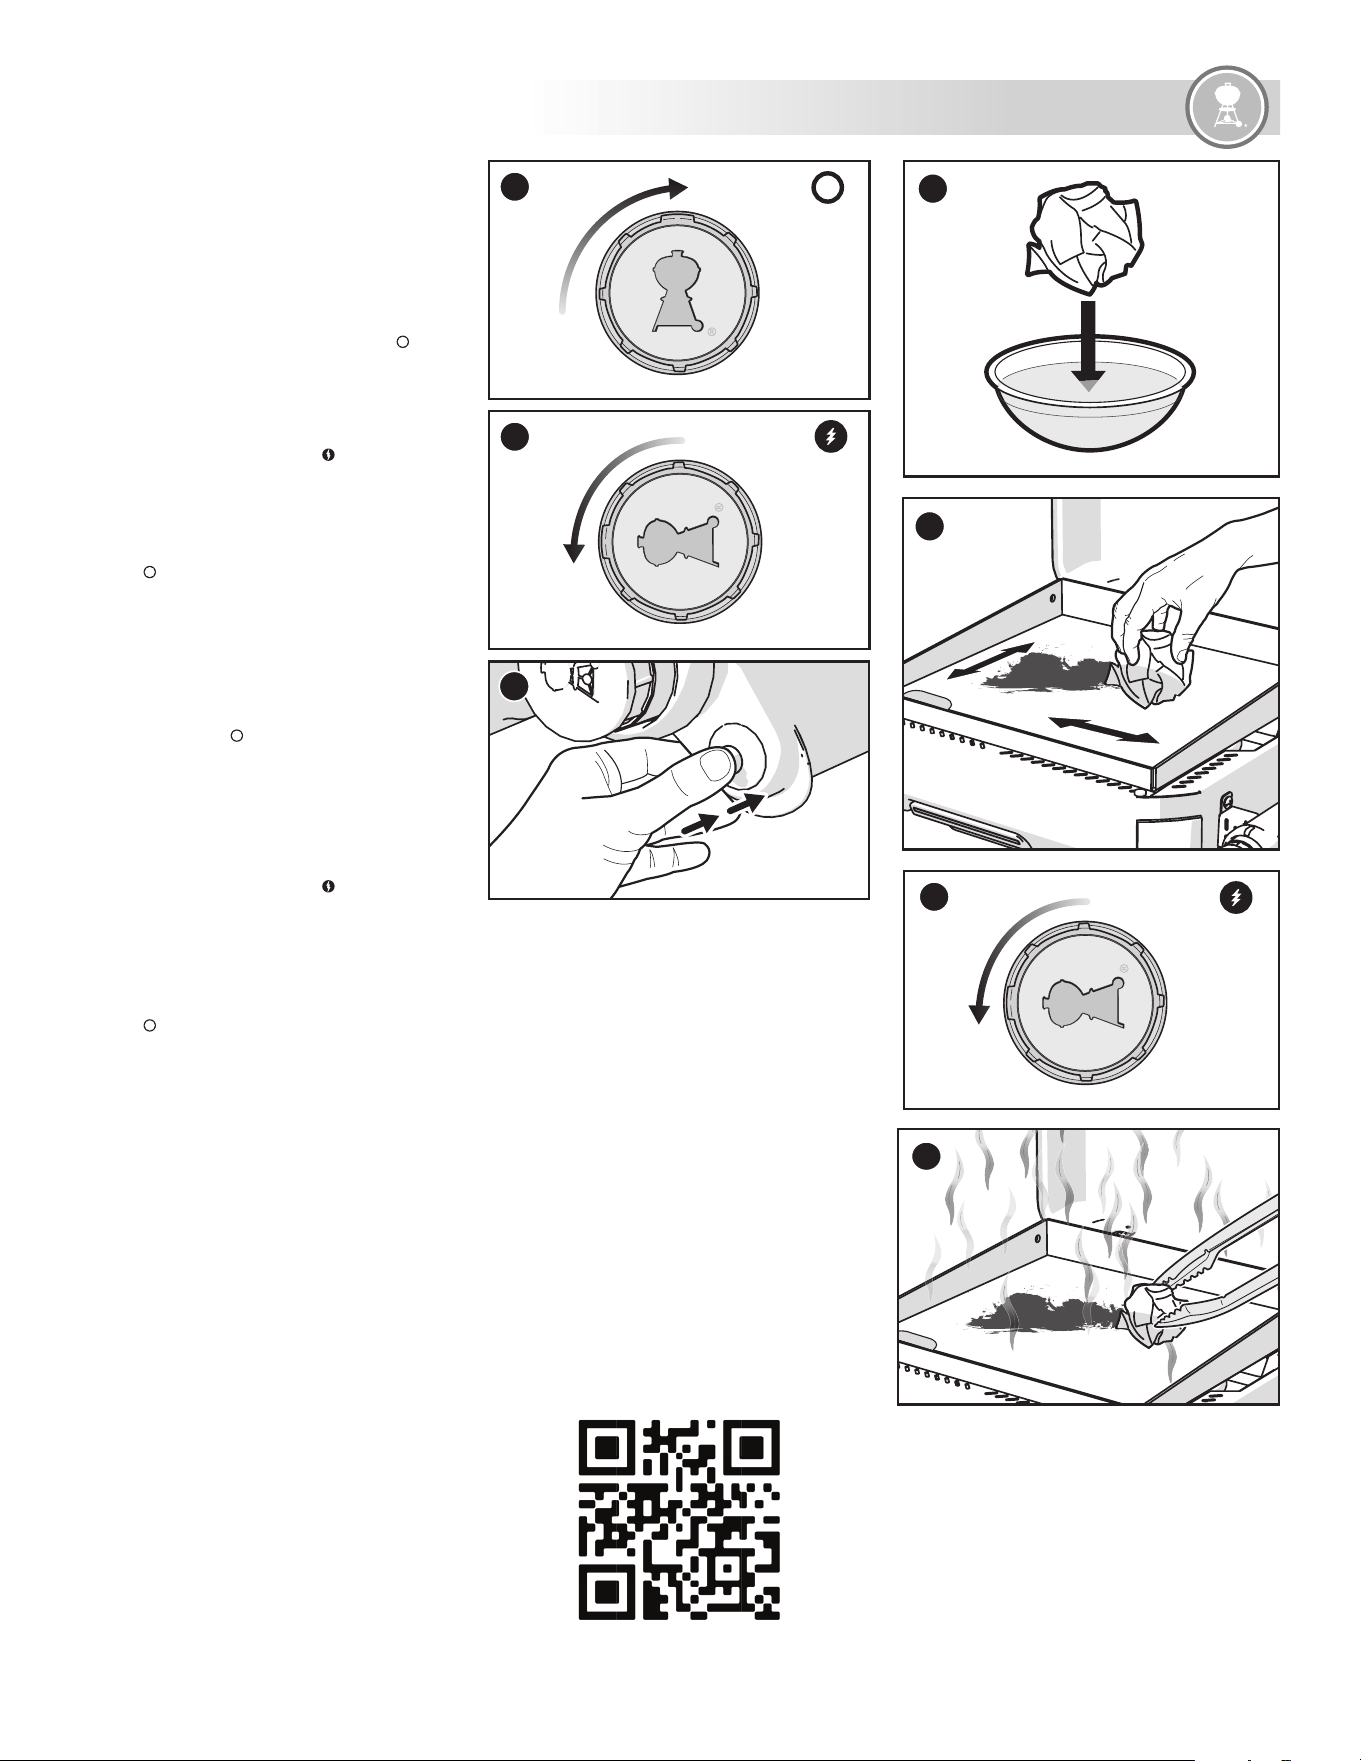
A
B
C
Igniting the Griddle
Using the Ignition System to Ignite the Grill
The ignition system ignites the burner with a spark from
the igniter electrode. You generate the energy for the spark
by pushing the igniter button. You will hear the igniter click.
After preheating on high is complete, you may adjust the
burner control knob to your desired setting for grilling.
1) Open the protective hard cover.
2) Check that the burner control knob is in the o
position. Check by pushing in and turning knob clockwise
(A).
3) Confirm that the cylinder is properly installed. Refer to
“Installing the LP Cylinder.”
4) Push the burner control knob in and turn it
counterclockwise to the start/high
position (B).
5) Push the red igniter button several times, so it clicks
each time (C).
6) Check that the burner is lit by looking through the space
in between the cooking surface and the frame.
7) If the burner does not ignite, turn burner control knob to
the o
position and wait five minutes to allow the gas
to clear before attempting to light the burner again.
Should the burner fail to ignite using the ignition system,
refer to the TROUBLESHOOTING section. Thereyou will
find instructions on igniting the grill with a match to help
determine the exact problem.
To Extinguish Burners
1) Push the burner control knob in and then turn clockwise
all the way to the o position.
For 22 inch Models Only:
For 22 inch models, there are two burner tubes inside the
cookbox. In order to successfully ignite your grill you must
light each burner independently.
1) Open the protective hard cover.
2) Push one burner control knob in and turn it
counterclockwise to the start/high
position.
3) Push the red igniter button several times, so it clicks
each time until the first burner tube ignites.
4) Repeat steps 1-3 with the second burner control knob.
5) Check that the burners are lit by looking through the
space in between the cooking surface and the frame.
6) If the burner does not ignite, turn burner control knob to
the o
position and wait five minutes to allow the gas
to clear before attempting to light the burner again.
Should the burner fail to ignite using the ignition system,
refer to the TROUBLESHOOTING section. Thereyou will
find instructions on igniting the grill with a match to help
determine the exact problem.
Before You Cook
Season the Cooking Surface
This process takes time, so give yourself a few hours to
complete it before you cook.
Tools Needed: Tongs, lint-free paper towels or cotton cloth,
neutral cooking oil.
Before your first cook, you will need to season your griddle.
Seasoning creates a stick-resistant, protective coating so you
can make delicious eggs, pancakes, burgers, and fajitas for
years to come. A seasoned griddle is darkened in appearance
from edge to edge. To achieve this, season your griddle at
least 3 times before use. Here's how:
1. Open the protective hard cover.
2. The griddle has been coated with a food-grade oil for
protection. This oil is not to be used for seasoning.
CAUTION: Do not burn o the oil.
3. With the griddle in place on the grill, handwash the
griddle, rinse, and thoroughly dry.
NOTE: The griddle must be COMPLETELY dry before
continuing the seasoning process.
NOTE: This will be the ONLY TIME you use soapy water on
your griddle.
4. Pour ¼ cup of a neutral oil (i.e. canola oil, vegetable oil,
grapeseed oil) into a bowl.
5. Dip a paper towel or cotton cloth into the bowl (D),
squeezing o the excess oil. Wipe the griddle from side
to side, top to bottom as evenly as possible (E).
D
E
F
G
6. Be sure to get the interior and exterior sides of the
griddle as well. Wipe away any excess oil with a clean
paper towel or cotton cloth if necessary.
7. Light the burner(s) and preheat your griddle on the
high temperature setting (F). The surface will begin
to smoke and darken (approximately 10 minutes). If
any oil begins to bead on the surface, use grill mitts,
tongs, and paper towel to wipe the excess oil from
the griddle (G).
NOTE: By the end of the seasoning process, a well-seasoned
griddle will be dark from edge to edge.
8. The surface will darken and begin to smoke. When the
surface stops smoking (additional 20 minutes), turn
o the grill.
m IMPORTANT: Allow the griddle to cool completely, approx.
30 minutes.
9. The griddle now has 1 coat of seasoning. Repeat steps
4-7, two more times in order to build the seasoning.
Scan this QR code for more
information on seasoning your
griddle:
Loading ...
Loading ...
Loading ...