Loading ...
BEFORE STARTING (Continued)
ÃÃ CHECK THE FOLLOWING:
A. BE SURE EQUIPMENT IS IN NEUTRAL GEAR WITH
CLUTCHES, BELTS, CHAINS AND SAFETY SWITCHES
DISENGAGED. (FOLLOW EQUIPMENT MANUFACTUR-
ER’S INSTRUCTIONS.) THIS SHOULD PLACE ANY SAFE-
TY SWITCHES IN SAFE STARTING POSITION.
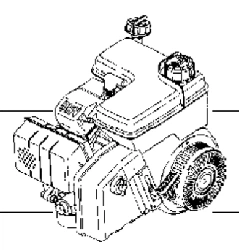
B. Be sure spark plug wire is attached to spark plug (see Figure
1).
C. Be sure any ignition switch and/or control lever on engine or
equipment is in “ON”, “RUN” or “START” position.
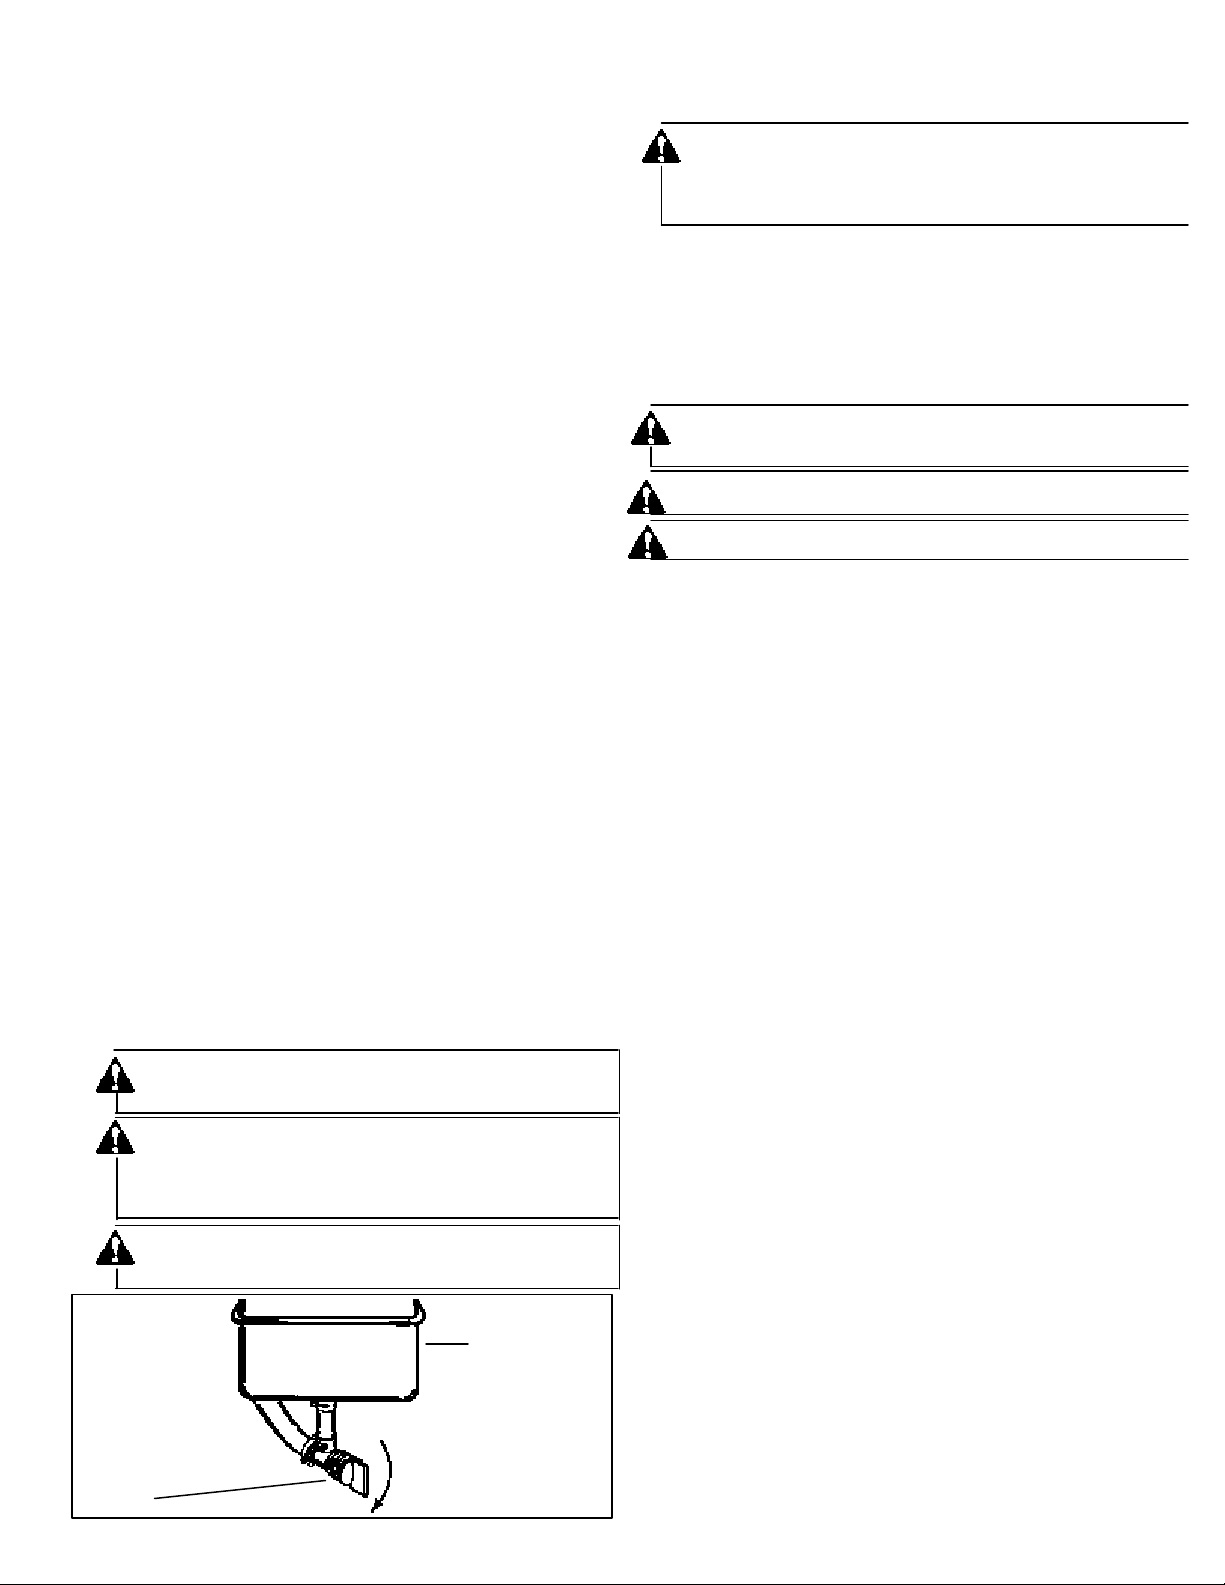
D. Be sure fuel valve (if so equipped see Figure 2) is open.
STARTING
NEVER RUN ENGINE INDOORS OR IN ENCLOSED, POORLY
VENTILATED AREAS. ENGINE EXHAUST CONTAINS CARBON
MONOXIDE, AN ODORLESS AND DEADLY GAS.
KEEP HANDS, FEET, HAIR AND LOOSE CLOTHING AWAY
FROM ANY MOVING PARTS ON ENGINE AND EQUIPMENT.
WARNING TEMPERATURE OF MUFFLER AND NEARBY
AREAS MAY EXCEED 150
0
F (65
0
C). AVOID THESE AREAS.
À RECOIL STARTER (with primer):
A. Move equipment control (see manufacturer's instructions) or
engine control to "START".
B. Push primer two (2) or three (3) times (see Figure 3). Wait
about two (2) seconds between each push. In cold weather
(50
0
F/10
0
C or below) push five (5) times.
NOTE: PRIMER MAY BE NEEDED TO RESTART A WARM
ENGINE AFTER A SHORT SHUTDOWN.
C. Grasp starter handle (see Figure 1) and pull rope out, slowly,
until it pulls slightly harder. Let rope rewind slowly. Then pull
rope with a rapid full arm stroke. Let rope return to starter
slowly.
NOTE: If engine fails to start after three (3) pulls, push
primer two (2) times and pull starter rope again.
Á RECOIL STARTER (with choke):
A. Move choke lever to “FULL CHOKE POSITION.”
NOTE: IF RESTARTING A WARM ENGINE AFTER A
SHORT SHUTDOWN, MOVE CHOKE LEVER TO
“NO CHOKE POSITION.”
B. Move equipment control (see manufacturer’s instructions) or
engine control to “START”.
C. Grasp starter handle (see Figure 1) and pull rope out, slowly,
until it pulls harder. Let rope rewind slowly. Then pull rope
with a rapid full arm stroke. Let rope return to starter slowly.
D. When engine starts, move choke lever to “1/2 CHOKE” until
engine runs smoothly and then to “NO CHOKE POSITION.”
If engine falters, move choke lever to “1/2 CHOKE” until
engine runs smoothly and then to “NO CHOKE POSITION.”
NOTE: If engine fails to start after three (3) pulls, move
choke lever to “NO CHOKE POSITION” and pull
starter rope again.
NOTE: If engine fires, but does not continue to run, move
choke lever to “FULL CHOKE” and repeat
instructions B, C and D until engine starts.
BEFORE STARTING
ÀÀ READ ALL INSTRUCTIONS PROVIDED WITH THE EQUIPMENT
ON WHICH THIS ENGINE IS USED.
ÁÁ FILL OIL SUMP OR CHECK OIL LEVEL:
IMPORTANT: To avoid engine damage never run engine unless:
- Oil level is between “FULL” and “ADD” marks on dipstick (if so
equipped).
- Oil level is to overflow point in oil fill hole on engine without a
dipstick.
- Oil fill plug is tightened securely into oil fill tube or hole.
CHECK OIL LEVEL OFTEN DURING ENGINE BREAK-IN.
A. ENGINE WITHOUT DIPSTICK:
1. POSITION EQUIPMENT SO ENGINE IS LEVEL.
2. Clean area around oil fill plug (see Figure 1).
3. Remove oil fill plug.
4. If oil level is not up to overflow point in oil fill hole, add
recommended oil. POUR SLOWLY.
5. Install oil fill plug, tighten securely.
B. ENGINE WITH DIPSTICK:
1. POSITION EQUIPMENT SO ENGINE IS LEVEL.
2. Clean area around oil fill plug (see Figure 1).
3. Remove oil fill plug and dipstick.
4. Wipe dipstick clean, insert it into oil fill hole and tighten
securely, remove dipstick. If oil is not up to “FULL” mark
on dipstick, add recommended oil. POUR SLOWLY.
Wipe dipstick clean each time oil level is checked.
IMPORTANT: DO NOT FILL ABOVE “FULL” MARK ON
DIPSTICK.
5. Install oil fill plug and dipstick, tighten securely.
See “MAINTENANCE” section for further oil instructions.
ÂÂ FILL FUEL TANK:
A. Clean area around fuel fill cap, remove cap.
B. Add “UNLEADED” regular gasoline, slowly, to fuel tank. Use
a funnel to help avoid spillage.
IMPORTANT: NEVER MIX OIL WITH GASOLINE
C. Install fuel fill cap and wipe up any spilled gasoline.
NEVER FILL FUEL TANK INDOORS. NEVER FILL FUEL
TANK WHEN ENGINE IS RUNNING OR HOT. DO NOT
SMOKE WHEN FILLING FUEL TANK.
NEVER FILL FUEL TANK COMPLETELY. FILL TANK TO 1/
2'’ BELOW BOTTOM OF FILLER NECK TO PROVIDE
SPACE FOR FUEL EXPANSION. WIPE ANY FUEL
SPILLAGE FROM ENGINE AND EQUIPMENT BEFORE
STARTING ENGINE.
ANY LIQUEFIED PETROLEUM (LPG) OR NATURAL GAS
FUEL SYSTEM MUST BE LEAKPROOF AND MEET ALL
APPLICABLE CODES AND REGULATIONS.
Page 2 181-1032-14Figure 2
FUEL TANK
TURN CLOCKWISE
TO "OFF" POSITION
FUEL VALVE
"OPEN" POSITION
SHOWN
Loading ...
Loading ...
Loading ...