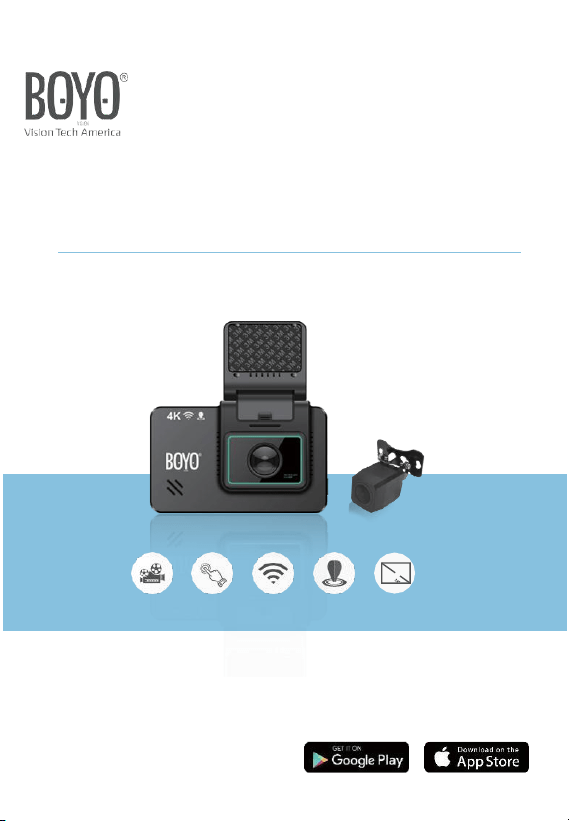
Dual lens TOUCH
WIFI
GPS
3.0INCH
Please read and follow all instructions and
features before use. Save for future reference.
FHD
HD
VTR419GW
Ultra HD 4K Dash Camera
User Guide

1
Caution
Using a Dashcam may be subject to local and state laws. Please
consult your local and state laws before use.
Subject to interference. For best performance, install the Dashcam
away from radio interference emitting devices.
Change default settings before use. For example, change date and
time to your local time.
Avoid direct sun light and hot temperature in an unventilated space.
Operating environmental temperature range is -22°F ~ 158°F.
Battery Warning
Use the charger and USB adaptor only provided in the package.
Using any other charger or USB adaptor may damage the battery
and cause failure of the battery.
DO NOT open, expose, or remove the internal battery.
DO NOT attempt to replace the internal battery.
DO NOT dispose of Dashcam in fire. Dispose Dashcam according
to your local electronics and batteries disposal regulations.
2
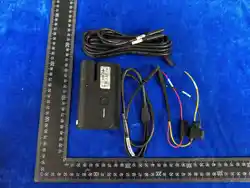
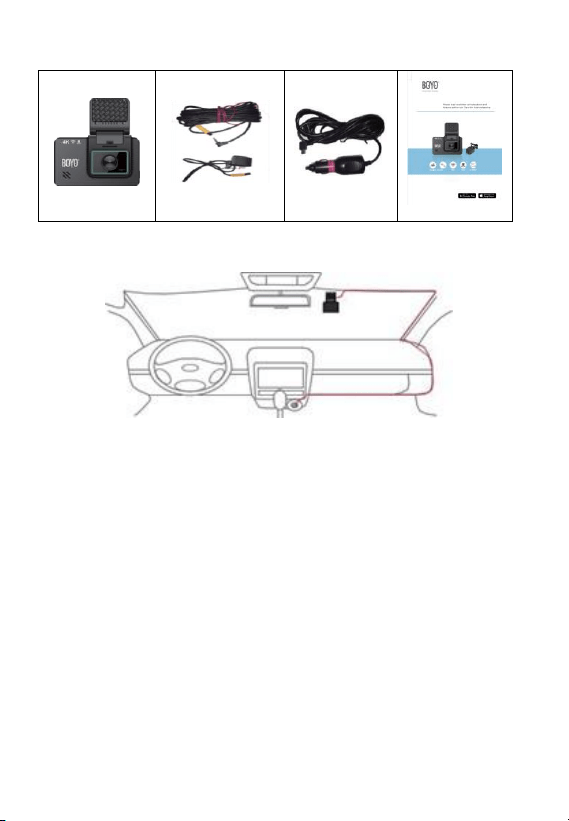
Box Contents
Dashcam
Rear view Camera
12V Adapter
User manual
Installation Notes
1. Installation location: Install your Dashcam near the rear-view mirror
at the top center of the windshield for wide front view of the vehicle.
2. Unobstructed view: Make sure that Dashcam lens is positioned
behind the windshield a wiper area to see through the windshield
on rainy and snowy days.

3
3. For image clarity. Do not touch the lens with your fingers and
check the lens regularly for dust gathering. It may leave
fingerprints on the lens and will result in blurred videos or photos.
If photos or videos are blurred, please clean the lens gently with
a microfiber cloth.
4. Clean install: Wires should run behind the panels and be tied.
Visible and loose wires look unprofessional and may be hazardous.
When in doubt, request a professional installation.
4
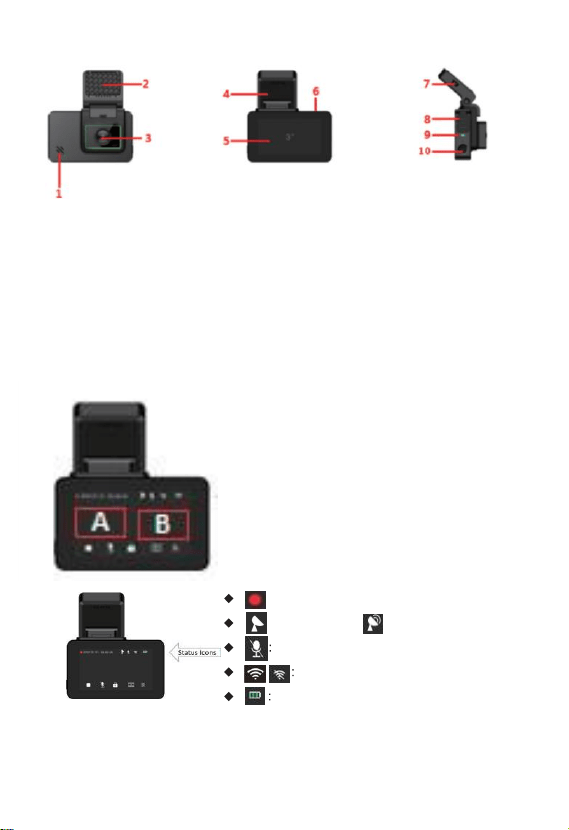
1. Product overview
1- Speaker 2- 3M sticker 3- Lens 4- GPS
5- Touch screen 6- Port for rear cam 7- USB power
8- USB / MicroSD / Reset 9- Indicator light
10- Power button2. OperationsVTR419GW is equipped with
FULL TOUCH SCREEN.
To switch between front and
rear-view camera, touch middle-
right region (B) of the screen.To
bring up the main menu, touch
middle-left region (A) of the
screen. To take a photo, slide
the screen from left to right.
Status Icons: not clickable
Red Dot: Recording
GPS no signal GPS signal connected
Audio recording enabled or disabled
Wi-Fi enable or disabled
Battery status
5
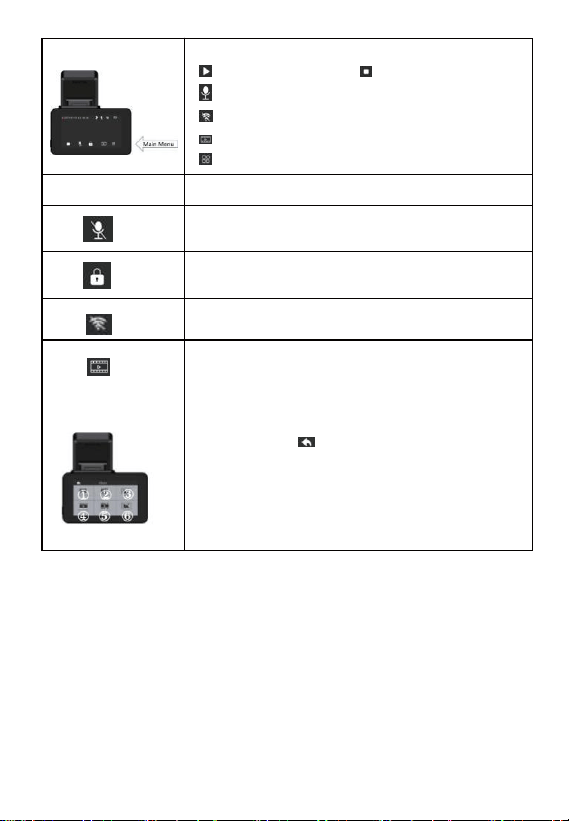
2.1. Main menu
touch the main menu to enter sup-menu
:
Start recording : stop recording
: Microphone on/off
: Enable/Disable Wi-Fi
: Playback recorded video
: Setting menu.
2.2.
Stop Recording / Start Recording
2.3.
Audio On/Off
2.4.
Emergency Recording 10 seconds of video will
recorded
2.5.
Enable / Disable Wi-Fi connection (Live Mode)
2.6
.
Recorded Video Playback (Recording is stopped) ①:
front camera videos.②: front camera emergency
videos. ③: front camera photos.④: back camera
videos.⑤: back camera emergency videos. ⑥: back
camera photos. : back to recording interface

6
2.7 VTR419GW Settings
Setting
Options
Resolution:
Record settings for Front Camera only
Rear View Camera records 1920x1080@30fps
4KP25, 2KP30
Video Encode:Video compression algorithm.
H.264, H.265
Screen Saver:Turn screen off after 1 or 3 minutes
of no usage
Off, 1Min, 3Min
Antiflicker Mode:Video image may flicker due to
lighting source
50Hz, 60Hz
Impact sensitivityImpact sensitivity – start
recording on impact
Off, Low, Middle, High
Parking Mode:Impact sensitivity – start recording
on impact when parked.
Off, Low, Middle, High
Date Format:Date / time display format
YY-MM-DD, DD-MM-YY,
MM-DD-YY
Audio Recording
On, Off
Volume:Speaker volume
Mute, Low, Middle, High
Loop recording:Save video in 1Min, 3Min or 3Min
clips. Loop recording will over-write the oldest file
first when memory is full.
Off, 1Min, 3Min, 3Min
Set TimeSet to local time – display/stored with
video
Set to local date and time.
License plate settingVehicle license plate – stored
Enter vehicle license plate

7
with video
number
Time Zone Setting:Local time zone – stored with
video
Set to local time zone.
Language:
English, Chinese, French,
Japanese, Spanish, Dutch
Format SD
Erase SD content
Flips video image:Flips video image – horizontally
& recorded for rear camera
Off, On
GPS Info:GPS reading – stored with video
Reset System:Reset to factory default settings
Motion detection sensitivity:Motion detection is
used to pause recording when no Motion is
detected in front of the camera, and to start
recording when motion is detected again.
Off, Low, Middle, High
AboutShowing firmware version number
8
3. Mobile App: RoadCam/Roadcams Purpose of a
Mobile App is to allow a user to
view live,
review recorded video or photo, or
download selected video or photo
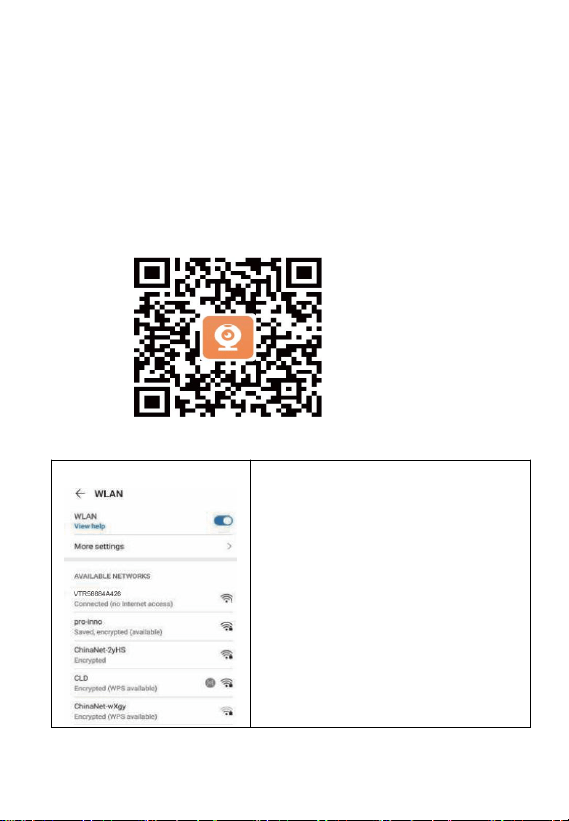
3.1 Download RoadCam/Roadcams
RoadCam/Roadcams is available from Apple app store or Google
play store. Or use the following QR code to download.
3.2 Connecting RoadCam/Roadcams to Dashcam
1. Verify that VTR419GW has the
Wi-Fi enabled
2. From your mobile device, go to
Wi-Fi connection
3. Select Network SSID which starts
with “VTR” (e.g. VTR419GW)
4. Enter password “12345678”
(default) or the changed password
3.3 Start an app
9
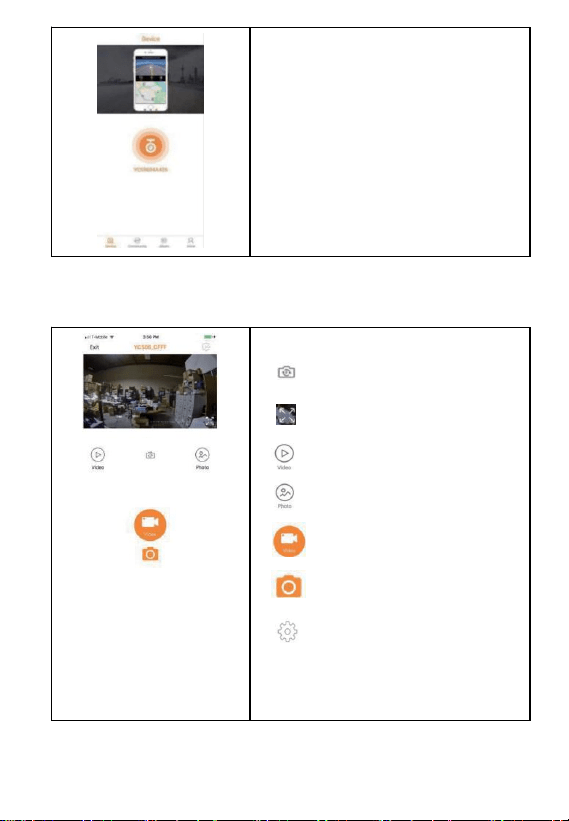
Main ScreenTo connect to Dashcam: Click
the camera button with Wi-Fi ID
Community: To connect to your Dashcam
community to share driving footage.
Album:
A list of videos / photos downloaded
Mine: Roadcam/Roadcams ID
3.4 Live view screen
Switch between front and
rear camera
Full Screen mode
Playback recorded video
Review photos
Video mode
Photo modePhoto mode is
used to capture the still
image using your Car DVR
VTR419GW Device Settings
exit
Disconnect from Dashcam
3.5 Playback
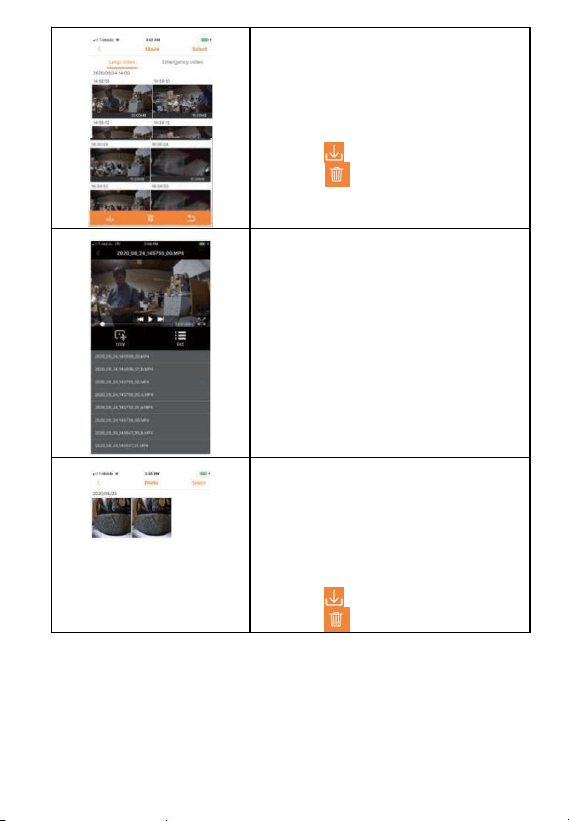
10
Recorded Videos
To playback – click on a video To
download or delete –
click “select”
click one or more videos
click todownload
click to delete
Video Playback
Click from the video clip list to playback
Photos
To playback – click on a video To
download or delete –
click “select”
click one or more videos
click todownload
click to delete
11
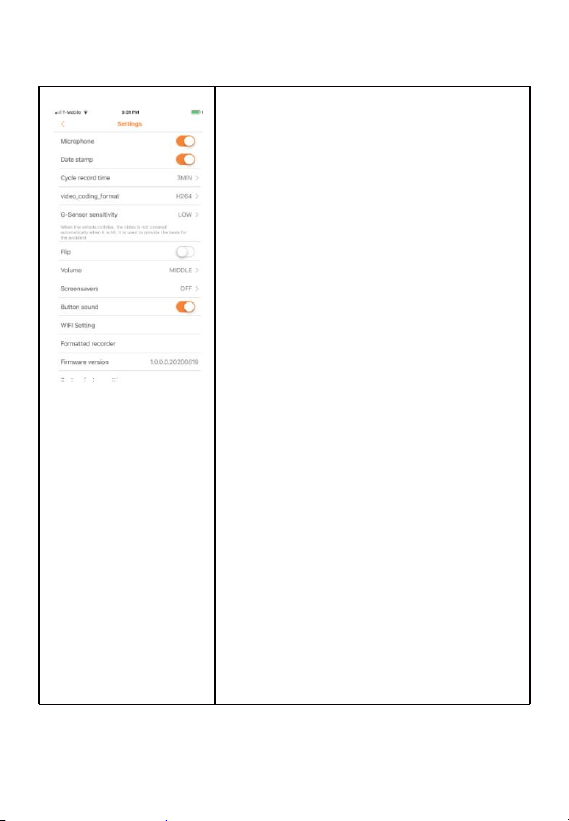
3.6 VTR419GW Settings
MicrophoneTurn on / off the audio
recording
Date stamp
Turn on / off the date stamp overlay
Cycle record time
Recording file duration
Video encoding format
Video compression
G-Sensor sensitivityImpact sensor
sensitivity – set to high if emergency
recording to occur and low impact
Video H-FlipOn if video images to record
left and right f lipped (rear view)
Screen saver
Off, 1Min, 3Min
Button sound
On / Off
Wi-Fi setting
Change Wi-Fi password
Format microSD
Erase recordings
12
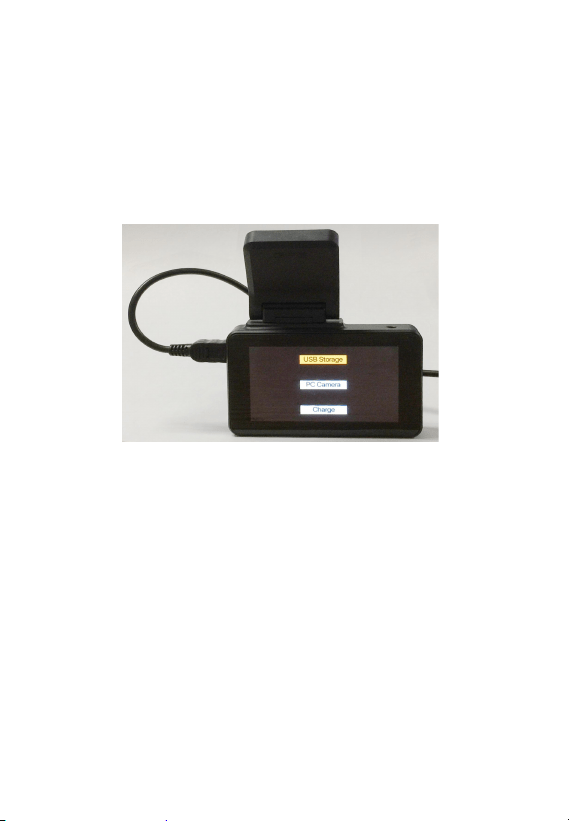
4.USB Connection
A USB Connection to a PC is provided for
● direct memory access for video and photo download,
● use VTR419GW as a UVC Camera
● charging VTR419GW
These require USB 3.0. See 1. Product Overview item #8 for USB
port location.
When USB is connected to PC, the screen appears
Touch to select a feature:
USB Storage works like other mobile devices. A drive folder will
open, and a user can download or delete videos and photos.
PC Camera works as a UVC camera. A camera app can be used
to record or take a picture and store in the PC storage.
Charge is selected for charging VTR419GW.
4. GXPlayer: Video playback with GPS positioning
VTR419GW is equipped with GPS sensor and records each video
frame with a proper GPS location. This feature allows playback video
along with the location of the record video on Google map.GXPlayer is
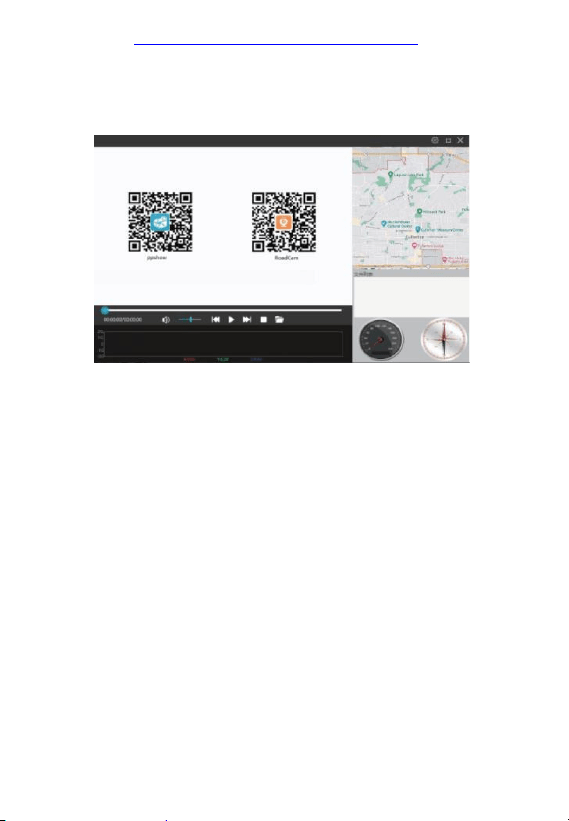
14
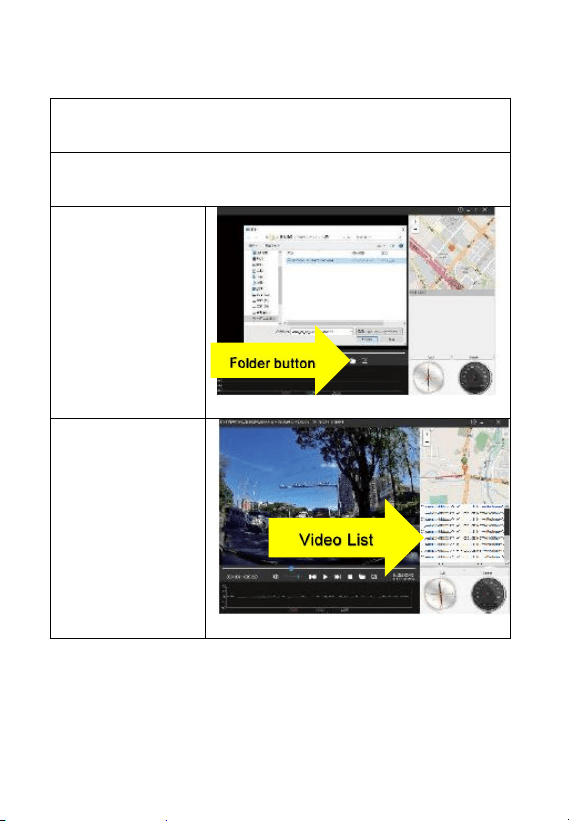
To playback video with GPS location
Step1. Insert microSD from Dashcam into PC
Step2. Start GXPlayer
Step 3. Load Videos-
Click folder button-
Select Folder
Step 4. Play video-
Click video from video
list