Loading ...
Loading ...
Loading ...
22 49-3000087 Rev 4
Installation Instructions
EXHAUSTING THE DRYER (cont.)
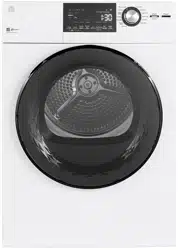
SECURE DUCT TO DRYER BASE
• Install the adhesive backed bracket from the kit by
removing its paper strip, aligning it directly in front of
the duct tab and and pressing it firmly onto the dryer
base. Secure the bracket to the duct tab by driving
the screw removed earlier through the bracket and
into the tab.
Adhere
to base
Attach bracket
to tab with
screw
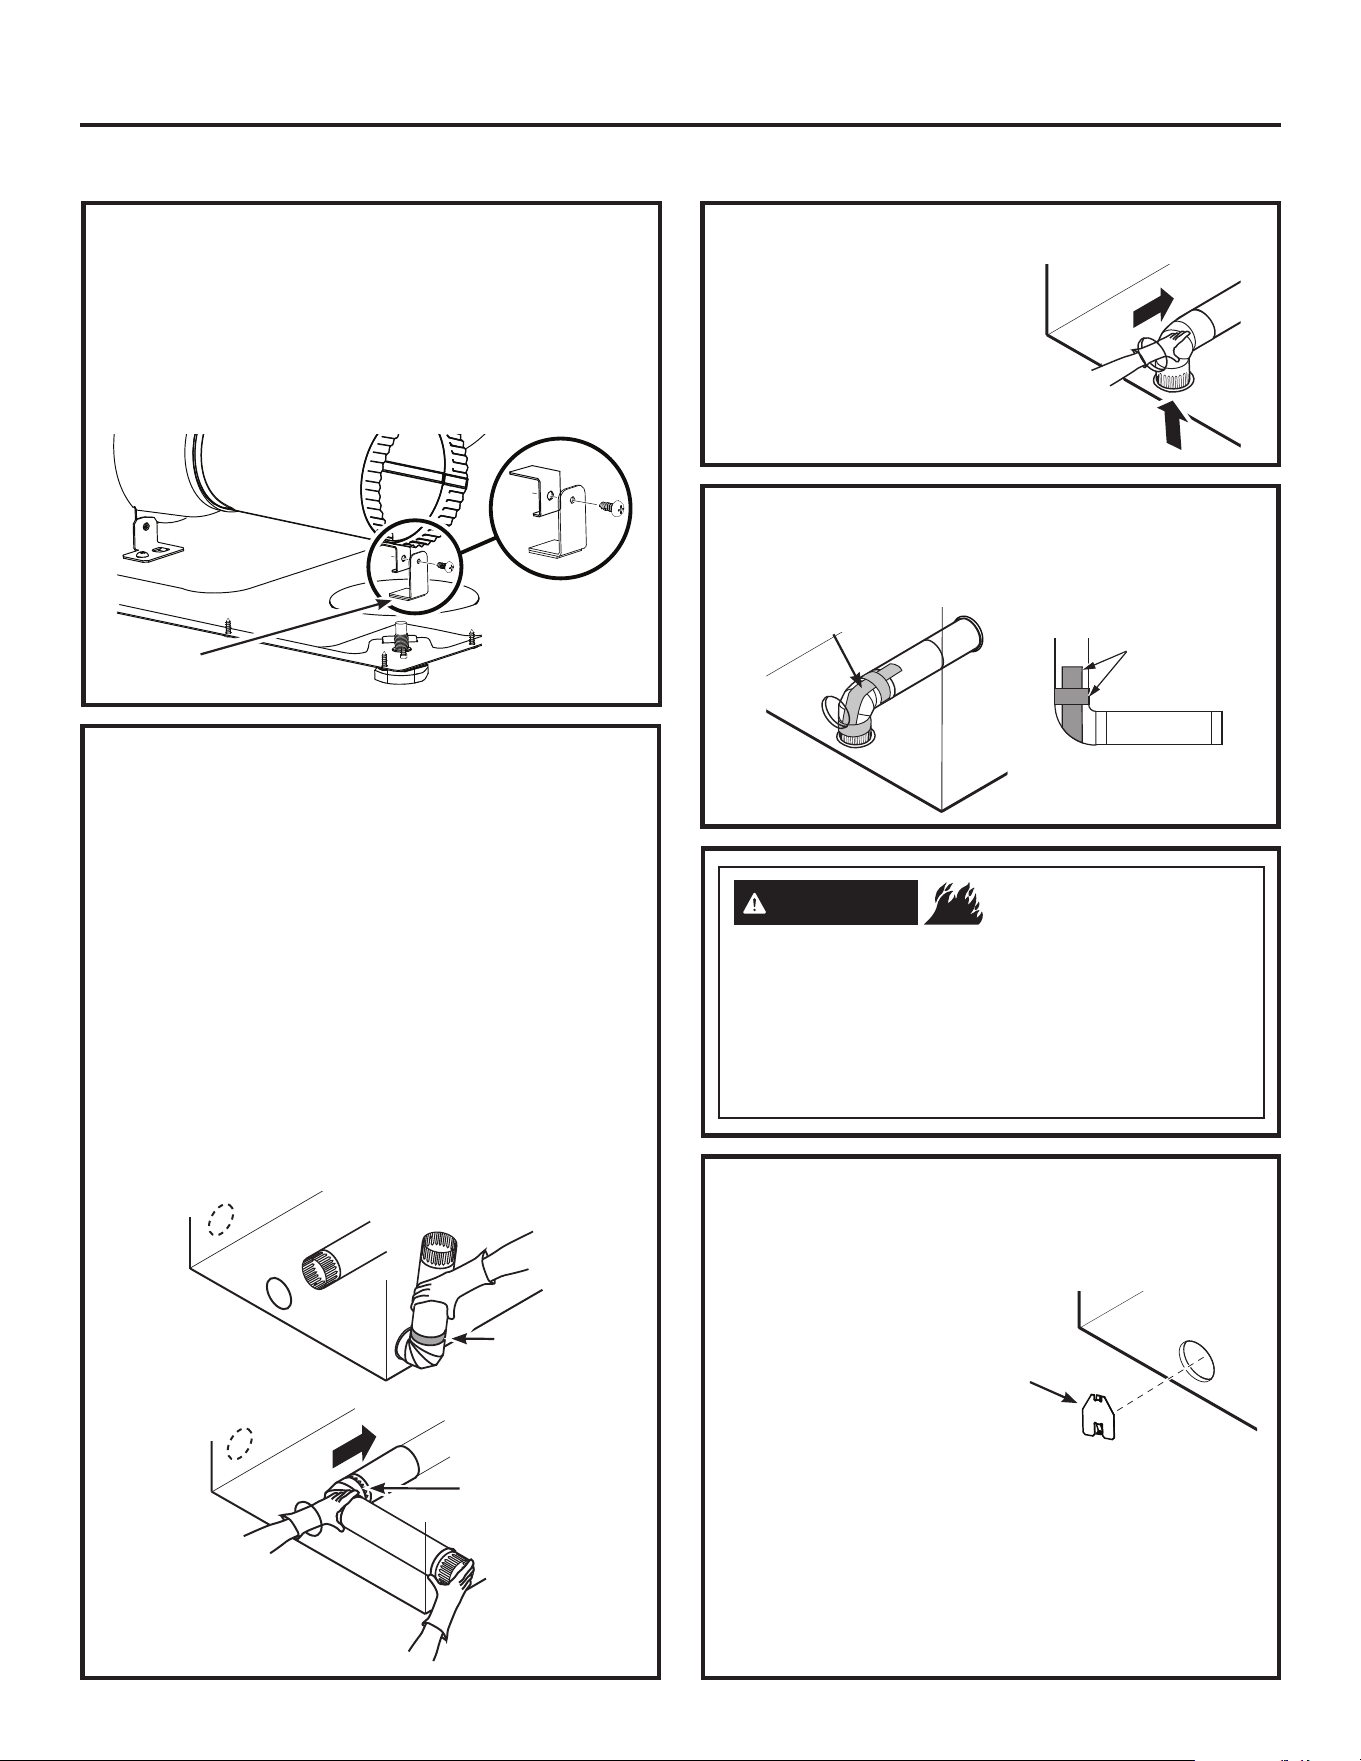
SIDE VENTING OPTION
• Right Side Venting: Preassemble the 4” adjustable
elbow to the 9-1/2” long duct from the kit. Wrap
aluminum foil tape around the joint.
• Left Side Venting: Preassemble the 4” adjustable
elbow to the 15-1/2” long duct from the kit. Wrap
aluminum foil tape around the joint. NOTE: Make
sure the duct is routed above the electrical wiring
harness going from the motor to the rear side of the
dryer in the left venting area.
• Insert the duct assembly, elbow first, through the
chosen side opening and connect the adjustable
elbow to the dryer internal duct (portion “A”).
Duct can be connected through either the right
or left side knockout as previously chosen
Aluminum
foil tape
Right
Left
Right
Connect
Left
BOTTOM VENTING OPTION
• Bottom Venting:
Connect the 4” adjustable
elbow directly to the dryer
internal duct (portion “A”).
SEAL ALL DUCT JOINTS
• Using the openings in the rear panel, wrap aluminum
foil tape around all internal duct joints and the elbow.
Aluminum foil tape
DUCT
TAP E
Aluminum
foil tape
Replace the rear heater cover.
Close the back opening with exhaust cover
plate.
Failure to do so may result in fire or electrical
shock.
- Fire Hazard
WARNING
INSTALL EXHAUST COVER
PLATE AND COMPLETE
EXHAUST SYSTEM
• Add the exhaust
cover plate to the
duct opening on
rear panel.
Exhaust
cover
plate
NEVER LEAVE THE BACK OPENING WITHOUT
THE PLATE
• Connect standard metal elbows and ducts to complete
the exhaust system.
• Place dryer in final location.
• Secure the dryer duct to the house venting by adding
foil tape or clamp duct.
Loading ...
Loading ...
Loading ...