
UNDER VEHICLE ENGINE/GEARBOX SUPPORT
MODEL NO: VS0110
Thank you for purchasing a Sealey product. Manufactured to a high standard, this product will, if used according to these
instructions, and properly maintained, give you years of trouble free performance.
IMPORTANT: PLEASE READ THESE INSTRUCTIONS CAREFULLY. NOTE THE SAFE OPERATIONAL REQUIREMENTS, WARNINGS & CAUTIONS. USE
THE PRODUCT CORRECTLY AND WITH CARE FOR THE PURPOSE FOR WHICH IT IS INTENDED. FAILURE TO DO SO MAY CAUSE DAMAGE AND/OR
PERSONAL INJURY AND WILL INVALIDATE THE WARRANTY. KEEP THESE INSTRUCTIONS SAFE FOR FUTURE USE.
1. SAFETY
Ensure that the engine support is in good working order. Take action for immediate repair or replacement of damaged parts.
Use genuine parts only. The use of unauthorised parts may be dangerous and will invalidate the warranty.
Locate the vehicle in a suitable, well lit work area.
Keep work area clean and tidy and free from unrelated materials.
Ensure the vehicle handbrake is engaged and the engine/motor is switched off.
Ensure all non-essential persons keep a safe distance whilst the engine support is in use.
DO NOT use the engine support if damaged.
DO NOT allow untrained persons to operate the engine/gearbox support.
DO NOT use the support for purposes other than that for which it is designed.
DO NOT exceed the rated capacity of the engine support.
WARNING: Ensure that the vehicle structure being used to anchor the support is in sound condition.
When not in use, store engine support in a safe, dry, childproof area.
IMPORTANT: These instructions are provided as a guide only. Always refer to the vehicle manufacturer’s service instructions, or a proprietary
manual to establish the current procedure and data.
WARNING: The warnings, cautions and instructions in this manual cannot cover all possible conditions and situations that may occur.
It must be understood that common sense and caution are factors which cannot be built into this product but must be applied by the
operator.
2. INTRODUCTION
Designed to support the engine or gearbox when mountings or gearbox are being removed. Ideal when replacing clutches or timing belts.
Removes the need for using a transmission jack or engine support beam. Fully adjustable, making the unit suitable for most transverse and
in-line configurations. Fitted by suspending underneath the vehicle using support hooks which counter-balances against the underside of the
vehicle.
3. SPECIFICATION
Capacity: ...................................................................... 300kg
Minimum/Maximum Length: ................................ 645/965mm
Nett Weight: .............................................................. 10.21kg
Width: .........................................................................560mm
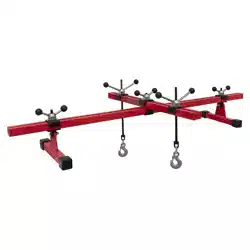
4. ASSEMBLY AND OPERATION
4.1. Assemble as shown on reverse side of page.
4.2. With the vehicle elevated on a lift, lay the assembled support on the oor beneath to set it to approximate size.
4.3. To alter the arm length, pull the support arm stop (g.1.19) to release the arm and extend. Lock at the required length with the
lock knob (g.1.8).
4.4. Wind the support pad down to allow clearance when fitting (fig.1.12)..
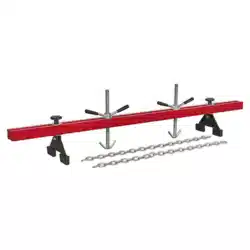
4.5. The hooks and stops (fig.2.16, 17, 18) are designed to hook over or through the main crossmember. Adjust set tube location
(fig.1.15) to the correct position and lock in place using the lock knobs (fig.1.8 ).
4.6. Offer up to the vehicle and locate by swinging the hooks over the crossmember to suspend the support (fig.2).
4.7. Take care not to trap any pipes or wiring.
4.8. Tighten the hook tensioner knobs (fig.1.13) to bring the support up to the chassis, making sure that the hooks are firmly located and
not likely to slip.
4.9. Swing the articulated arms (fig.1.4) to bring the reaction rods (fig.1.2) to a suitable point on the floorpan and screw them into light
contact. Take care that the area of floorpan selected is in sound condition.
4.10. Raise the support pad (fig.1.12) carefully under the gearbox/engine using a spanner on the hex domed nut (fig.1.9).
4.11. When the required support has been achieved, securely lock the support pad in postion using the upper and lower lock nuts fig.1.10).
4.12. When the task is nished, remove the unit in the reverse of the installation procedure. Make sure that it is removed before lowering.
VS0110 Issue 2 (4) 13/03/24
Original Language Version
© Jack Sealey Limited
Refer to
instructions
Wear eye
protection
Wear protective
gloves
Wear ear
protection
Wear safety
footwear
Wear protective
clothing
5. MAINTENANCE
5.1. To ensure reliable operation, clean the unit regularly with a damp, clean cloth and
warm water. DO NOT use solvents or detergents as these may permanently
damage the item. Replace any missing parts only with originals (see parts list for
item numbers)
5.2. Conrm all components are in situ and working correctly.
5.3. STORAGE
5.3.1. Before storing the unit in its original packaging, conrm all components are in
situe and working correctly. Ensure unit is clean and dry.
Original Language Version
© Jack Sealey Limited
VS0110 Issue 2 (4) 13/03/24
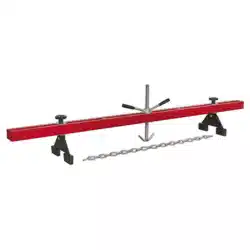
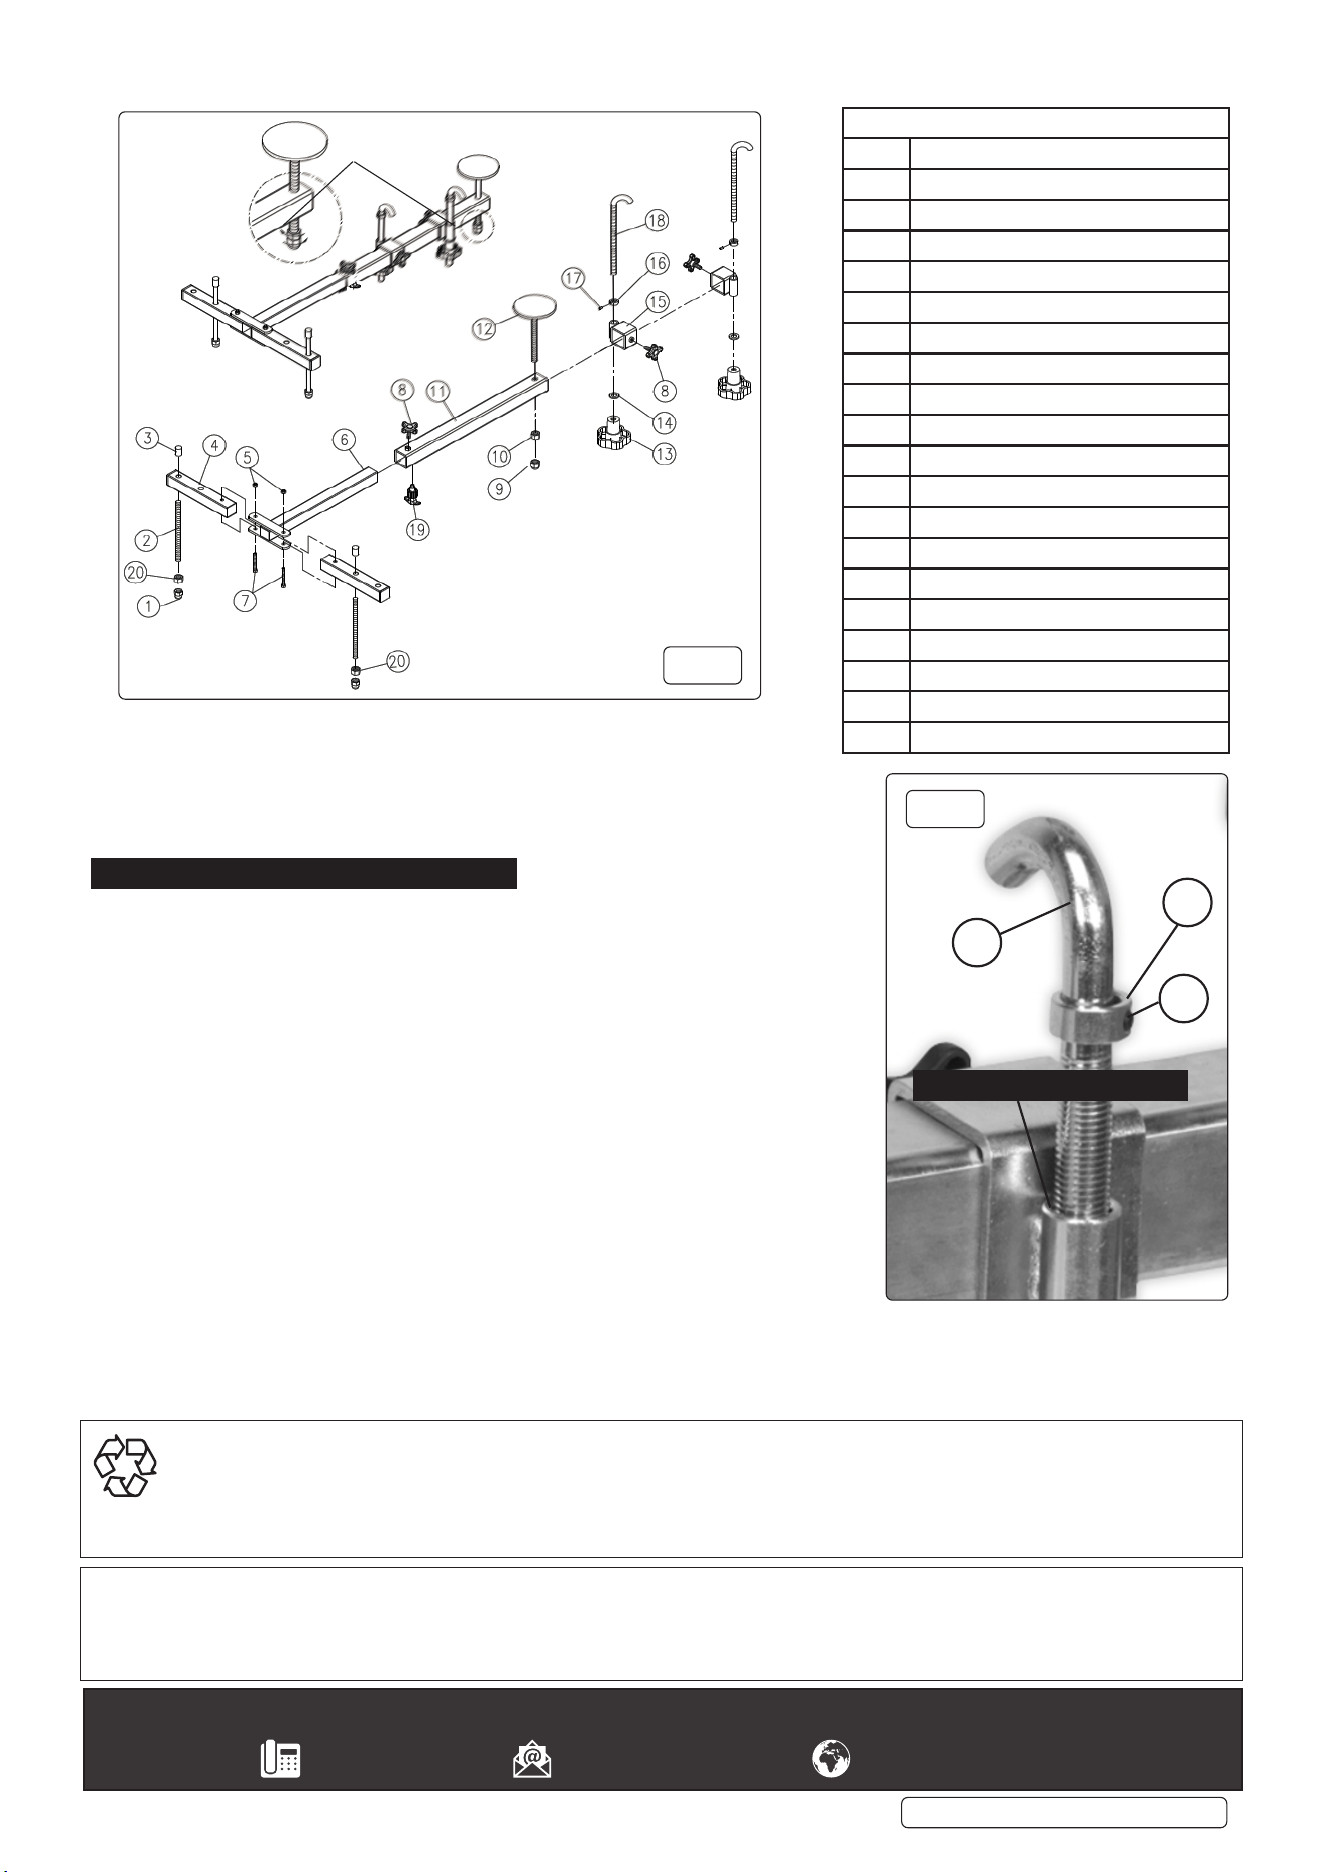
Key to Figure 1
1 STEEL NUT M14 DOMED (SINGLE)
2 BOLT
3 COVER
4 SHORT TUBE
5 LOCK NUT 3/8”
6 T TUBE
7 SET SCREW M10 X 75MM
8 KNOB (SMALL)
9 STEEL NUT M16 DOMED (SINGLE)
10 NUT M16
11 LONG TUBE
12 TRAY
13 KNOB (LARGE)
14 WASHER M16
15 SET TUBE
16 NUT
17 SET SCREW
18 J BOLT
19 LOCK PIN
20 NUT M14
Lock nuts
16
18
17
Note orientation of mounting tube
.
fig.2
fig.1
Sealey Group, Kempson Way, Suffolk Business Park, Bury St Edmunds, Suffolk. IP32 7AR
01284 757500 sales@sealey.co.uk www.sealey.co.uk
ENVIRONMENT PROTECTION
Recycle unwanted materials instead of disposing of them as waste. All tools, accessories and packaging should be sorted, taken to
a recycling centre and disposed of in a manner which is compatible with the environment. When the product becomes completely
unserviceable and requires disposal, drain any fluids (if applicable) into approved containers and dispose of the product and fluids
according to local regulations.
Note: It is our policy to continually improve products and as such we reserve the right to alter data, specifications and component parts without prior
notice.
Important: No Liability is accepted for incorrect use of this product.
Warranty: Guarantee is 12 months from purchase date, proof of which is required for any claim.