Loading ...
Loading ...
Loading ...

20 21
ENEN
The following table lists possible causes and solutions in terms of dierent light status. For more support,
please refer to the section "FAQ" in this manual.
Status Indicator
Light Status Possible Cause Solution
O
No power supply Check and ensure that the power supply for the base is normal.
The robot in the DND period
The robot with full charge in sleep mode
/
White The robot not on the base /
Breathing White The robot is charging /
Blinking Orange Error
Check whether a dust collection bag is installed. If not, install one.
Check whether the dust collection bag is installed in place.
Check whether the upper cover is closed. If not, close the upper cover tightly.
Check whether the bag is full. If so, replace it.
Remove debris around the dust intake of the robot and base.
Unplug the power cord of base, and check whether there are any foreign objects
that block the air duct cover. If any, clean them.
Check whether the dust bin of robot is installed.
For other errors, contact qualied technicians or after-sales service.
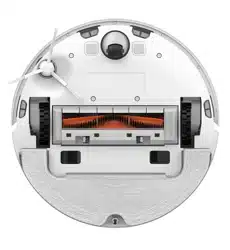
Clean the Air Duct
Robot Restarting
Battery
Routine Maintenance
If the air duct is blocked, please clean it according to the following steps.
If the robot stops responding or cannot be turned o, press and hold down
the button for 10 seconds to forcefully turn it o. Then press and hold the
button for 3 seconds to turn the robot on.
The robot contains a high-performance lithium-ion battery pack. Please
ensure that it remains well-charged for daily use to maintain optimal
battery performance. If the robot is not used for an extended period of
time, turn it o and put it away. To prevent damage from over-discharging,
the robot should be recharged at least once every three months.
1. Unscrew mounting screws on the air duct cover and remove the cover plate.
2. Check whether the air duct is blocked by foreign objects. If any, clean them.
3. Reinstall the air duct cover as shown in the diagram.
Loading ...
Loading ...
Loading ...